












![Deep Dive into Solana Errors [Solana Tutorial] - May 24th '23](https://i.ytimg.com/vi_webp/VXuIJOvtWCE/maxresdefault.webp)

![Solana Development with SolAndy [Solana Tutorial] - Nov 26th '25](https://i.ytimg.com/vi/ZccV6gdTJtk/maxresdefault.jpg)





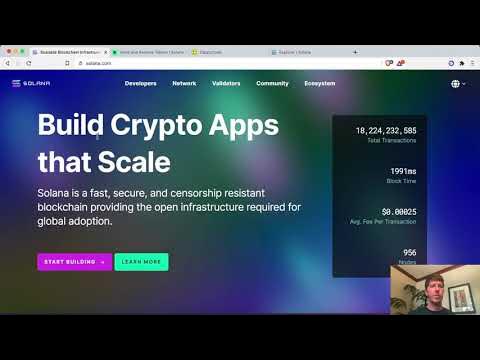

To set up a Solana development environment, first install all necessary tools using 'npx mutro install' or manually via Solana's documentation, then run a local test validator using 'solana-test-validator' to emulate the blockchain locally. Configure your Solana CLI to connect to the local validator by setting the RPC URL to 'localhost', create a wallet address using 'solana-keygen new' and fund it with 'solana airdrop 2' to enable program deployment. Finally, use the Anchor framework to create, build, test, and deploy your first Solana program by running 'anchor init', 'anchor build', 'anchor test', and 'anchor deploy' commands.
How to Set Up a Solana Development Environment: A Beginner Tutorial
Added:Basic Command Line Interface (CLI) navigation and terminal operations, including environment variable configuration.
Fundamental concepts of blockchain technology, such as wallets, public/private key cryptography, transactions, and smart contracts.
Elementary programming concepts, ideally with some exposure to Rust or another systems-level language (understanding compiler errors and basic syntax).
Familiarity with package management tools (like npm/yarn for JavaScript/TypeScript, or Cargo for Rust).
Deep dive into the Solana Programming Model, specifically the unique 'Accounts' architecture, Program Derived Addresses (PDAs), and account rent.
Advanced Anchor Framework development, including instruction validation, system accounts, and custom program errors.
Client-side integration using Solana Web3.js and the Anchor TypeScript SDK to connect decentralized frontends (dApps) to deployed programs.
Writing comprehensive integration and unit tests for Solana programs using Rust-native testing or Mocha/Chai in JavaScript.
Deploying smart contracts to the Solana Devnet and Testnet environments, including managing gas (SOL/lamports) and secure keypair management.
10.2K views374likes12:50Original Release: 2025-06-09
Hi everyone. In this video, we're going to go over everything you need to get started building on Salana. So, that's going to include setting up your Salana environment on your computer, running a local network on your computer, and building and deploying a Salana program.
So, let's get started. First, we want to make sure everything is installed on our computer. We're going to open up our terminal, and there is a tool that we have to help make the installation process a lot easier. So if you run in your terminal npx mutro install, it's going to install everything you need for Salana development. And you can see I have everything already installed, but it's verifying that it it is installed on my computer. If it wasn't installed, it's going to install for me. Um, if you would rather manually install everything to know exactly what's going on your computer, you can just go to the installation page on salana.com/doccks.
And this is going to go through everything that you need to have installed on your computer for Salana development. Um, if you are running WSL and you run into any issues with the Mujo commands, I would recommend going to these docs. You can see there are a few additional dependencies needed when you're running WSL. And that's all explained within the documentation here.
Um, now that we have everything installed, let's get to building. So, what we're going to do is in our terminal, we're going to run a local validator that's going to emulate the Salana blockchain to allow for us to run tests locally on our computer. Um, so this is just an example of one of the ways to test on Salana. On Salana, there are multiple clusters. So, one cluster you have is our mainet beta, which is the mainet production code for Salana.
You have testnet, which is where most of the network testing runs. You have DevNet, which is where most of the program testing runs. So, if you're building a program and you want to test, um, you can deploy on DevNet and have other people interact with your program as well. Another way to test is locally on your computer. If you test locally, it allows you to just customize some configuration a lot easier um, and have unlimited air drops and have just a lot of different composibility. So that's what we're going to test out here is setting up your local environment and testing against it. So you can do that with just one CLI command. So Salana test validator. If you run that in your CLI, it's going to spin up a validator locally that you can then connect to um with your local RPC URL. So you can see here it created a new test validator. Um this is your JSON RPC URL. if you want to connect to it um from any front end or from any commands. And then here you can see that the validator is running and processing slots. So we're going to keep this open and we're going to open another tab in our terminal to run everything else. So now that we have our local environment running, we want to make sure that our Salana config is set to our local environment. So you can check your Salana config by running Salana configit. And that's going to show where everything is connected in your config.
If you wanted to change this at any point, you can always run certain commands to update your configuration.
So for example, if I wanted to test against DevNet instead of local net, I'm going to run Salana config set specify the URL and I'm going to put DevNet. And now you can see that my RPC URL has been updated to the DevNet URL for Salana. Now since we're testing everything locally in this example, I'm going to re-update it back to my local host. So if I run Salana config set URL and then I write localhost here, it's going to change the RPC URL back to our local host. So now that that is updated, we now know that our Salana CLI is running with the RPC connection to our local validator that is also running in this tab right here. Okay, so now that that's set up, we're going to need a wallet address that is making the transaction to deploy our program on chain. So you can check to see if you have a wallet address. If this is your very first time installing the Salana CLI, I don't think you will have one.
But if you've used it already, you can run Salana address and see if a public key is returned. If it is, then that's the public key for your local key pair on your CLI. If it's not, then you need to create one. So, you can run Salana key genen new in your terminal and it will generate a key pair for you. I'm not going to run that cuz I already have one. Um but after you run that verify it and run Salana address and make sure that there is a key pair for your CLI.
Now that key pair we want to have it funded um to be able to deploy a program on chain. So you can run salana airdrop 2 and now it's requesting an airdrop of two soul to my local keeper. So now I have funds on my local key pair and now I can use that to deploy a program on chain. So we need a program. Um so the next thing we're going to do is generate a workspace to be able to create a Salana program. There's several frameworks for developing on Salana. And I'll have some videos that explain them and when to use what and and what's going to fit your use case the best. But when you are new to Salana development, I always recommend Ankor. It simplifies a lot of things for you. So, we're going to create a workspace with the anchor framework. And you can do that by running anchor in it. And we're going to name it as test hello world. Okay. So now it's generating a workspace with everything I need to build a Salana program using the anchor framework. So I'm going to cd into that workspace. So test hello world and then we're going to open up the code and take a look at it. So this is what's generated when you run the CLI command anchor init with the name of a project and it has your cargo toml which has all of your cargo dependencies. You have an anchor toml specifying that you're using the anchor framework. You have your package json. You have some tests written. So this actually generates a basic hello world template.
Um so if you go into programs then the name of your project source libs it's going to have this hello world program already generated for you. So we're going to deploy this and well we're going to build it and then we're going to deploy it and test it. Um so I'm not going to get into the code super in depth. I'll have another video on building your first ankor program, but this is just focusing on the entire network and deploying things. So, just a highle overview of what this code is.
You have your declare ID with a bunch of random numbers and letters. And what this is, it's a 32 byte um hash for a public key. And that is going to be your program ID of the program that you deploy on chain. Now, here you have the program macro. This is part of the anchor framework and it's essentially saying all of the functions that exist within this macro are going to be instructions for the program that I'm creating. So here you have one instruction called initialize. And what initialize does is it prints out greetings from and then your program ID which is the public key um that is defined right here. And then down here you have an account strct tlddr.
Everything is an account on Salana. Um I'll have some videos explaining the Salana account model and and why you need to understand that and how that applies to development later. But let's focus on building and deploying our program. So we have a hello world program already created with the anchor init template. I'm going to go into my terminal and I'm going to run ankor builds and that's just going to build my Rust code. Um Rust code takes a long time to compile if you're new to the world of Rust. So, this is going to take a second. We're going to speed it up.
Um, and then come back. Okay, now our program has been built. So, before we deploy, we always want to make sure we test our code. Um, with the framework, we already have a test generated. So, I'm just going to run ankor test, and that is going to run the test in our test folder. So you can see it found a test script and here it's saying that my RPC port is already in use. That's because the test within an ankor workspace is going to start up a Solana test validator for you. Um so I'm going to go back to Oops. I'm going to go back to my terminal and I'm just going to pause my Salana test validator for a second so I can run this test.
Okay. And now the test is running. And you can see that the test has passed. So now that that's good to go, I'm going to go back to my terminal and then rerun the Salana test validator. You can see when you rerun the Salana test validator, it's going to say the ledger already exists. It's using where you left off. You can see I stopped here at slot 965 and then it started right back up at that slot. If you do want to reset anything, you can run Salana test validator with the reset flag at the end and it's going to reset your test ledger. But if you don't, it's just going to pick up where it left leaves off.
Now, let's go back to our code and I'm going to run ankor deploy. And I want to specify what cluster I'm deploying to. So here I'm deploying to my local net that's already running. So I'm going to put provider.cluster and then local net and then you can see it is deploying my program and the deployment was successful and here's a signature of that deployment. So the last thing we're going to do is just check to see that this was actually deployed on chain. So how can we do that? Well, we can go to our block explorer. So if we type in Soulscan, which is one of the block explorers that exists on Solana, we want to update the connection to a custom RPC. So if I go back to my terminal and I find this JSON RPC URL, this is what I want to connect my block explorer to. So I'll go to a custom RPC, paste that in, and connect. And now my block explorer is reading from my local validator that's running. And now I'll go back to I'll go back to my code and take this signature of the transaction and paste it into the block explorer so I can verify the transaction. Um so here you have the transaction details. You can see that this transaction was placed a minute ago. It was at block 178. And that seems about accurate because if you look back at my terminal, we're on slot around 1,200 now.
Okay. So, you can see that we created a new account and we deployed. Um, so everything was successfully deployed onto my local cluster. And there there we go. So, just a recap of what we've done in this video. We have set up our Salana environment with everything you need to build on Salana. We learned how to create a local cluster on our computer and understand the difference between all of the clusters that are ran with Salana and then we have built an anchor program and tested it and then deployed it to our local test validator that's running. Um, so yeah, that is a quick crash course on how to get started on Salana. If you have any questions, let me know in the comments. And then I'm going to link some other videos that I'd recommend checking out after you've had this introduction.
Up Next

9:31
Solana CLI Setup for Rust Development: An Introductory Guide
@CodingCrypto
49.7K views•2022-04-09

52:00
Hybrid Key Establishment in Production: Post-Quantum Cryptography
@durumcrustulum
14.7K views•2025-08-27
64:25
Operational Security Essentials: A Guide for Hacktivists (OPSEC)
@hitbsecconf
157.4K views•2012-11-26

11:49
Understanding Ethereum: A Comprehensive Beginner's Overview
@99Bitcoins
3.1M views•2018-06-26
Related Study Plans & Knowledge Roadmaps
Structured learning paths in Blockchain & Crypto
blockchain-and-crypto
MPC Wallets: TSS, DKG & Secure Custody
01Foundations of Cryptography & Digital Signatures
02Secret Sharing & Introduction to MPC
03Distributed Key Generation (DKG)
+ 2 more learning modules
24h5 modules
Explore Roadmap
blockchain-and-crypto
ERC-4626: Yield Aggregators & Leverage
01Blockchain, Ethereum, and Solidity Foundations
02DeFi Primitives: Lending, Pools, and Yield Farming
03Mastering the ERC-4626 Tokenized Vault Standard
+ 3 more learning modules
35h6 modules
Explore Roadmap
blockchain-and-crypto
DePIN: IoT Registries, Proofs & Rewards
01Foundations of Blockchain & IoT
02Introduction to DePIN and the Flywheel Effect
03Designing IoT Device Registries & Secure Identity
+ 3 more learning modules
30h6 modules
Explore Roadmap
blockchain-and-crypto
Building EigenLayer AVS: Operators & Contracts
01Blockchain, Ethereum, and Smart Contract Basics
02Proof of Stake and Ethereum Staking
03Introduction to EigenLayer and Restaking
+ 3 more learning modules
24h6 modules
Explore Roadmap