
![console.log([1, 2, 3].at(-1)) transpiles to 44k](https://i.ytimg.com/vi/odhjF1obcUo/maxresdefault.jpg)








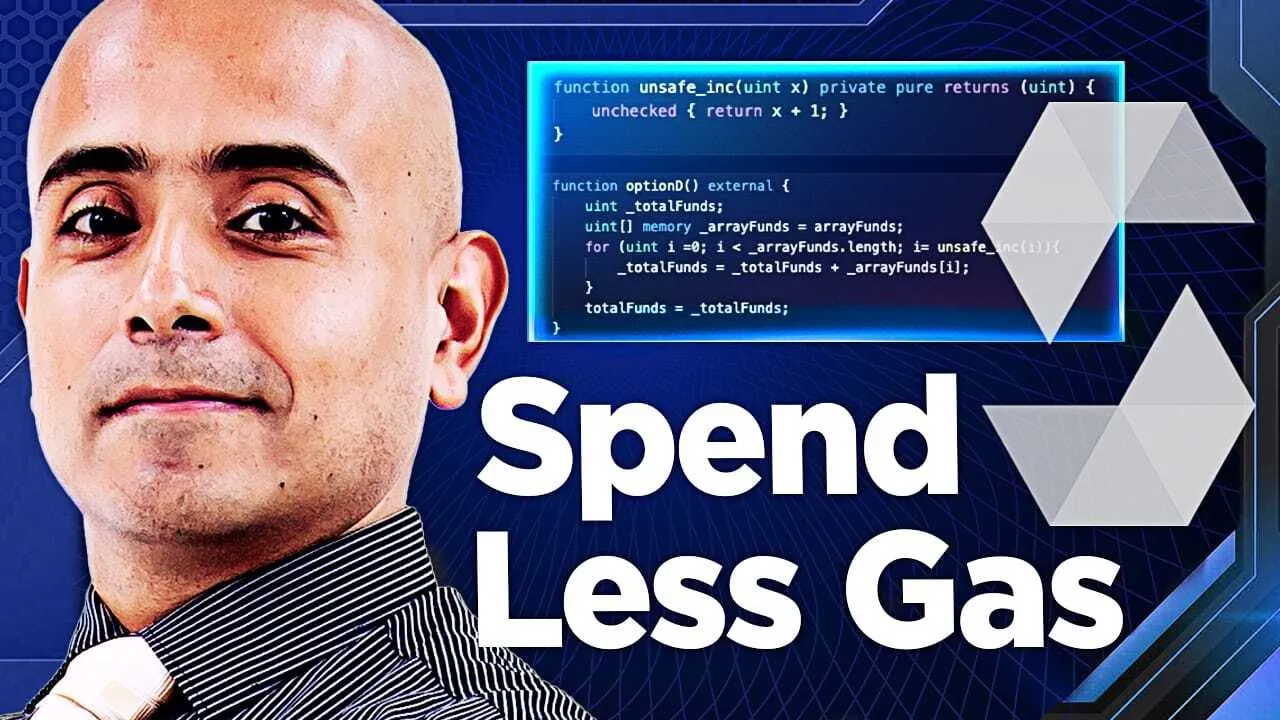








A decentralized application (DApp) consists of two main components: a smart contract written in Solidity that handles business logic on the blockchain, and a front-end built with React.js that interacts with the smart contract using ethers.js library. The smart contract stores transaction data (like user names, messages, and timestamps) in a dynamic array structure, while the React front-end manages user interface, connects to Metamask wallet for authentication, and calls smart contract functions to perform transactions. The complete DApp is deployed on a test network (like Goerli) using Hardhat for smart contract deployment and Netlify for hosting the React application.
Full-Stack Dapp Development: Solidity, Ether.js, Hardhat, React
Added:Proficiency in JavaScript and modern ES6+ syntax, as it is the foundation for React and Hardhat scripting.
Fundamental understanding of blockchain concepts, including public/private keys, gas fees, transactions, and smart contracts.
Basic knowledge of React.js, specifically component lifecycle, hooks (useState, useEffect), and state management.
Familiarity with Node.js, NPM/Yarn package managers, and using the Command Line Interface (CLI).
Smart contract auditing and security best practices to prevent vulnerabilities like reentrancy attacks.
Advanced gas optimization techniques in Solidity to minimize transaction fees on the mainnet.
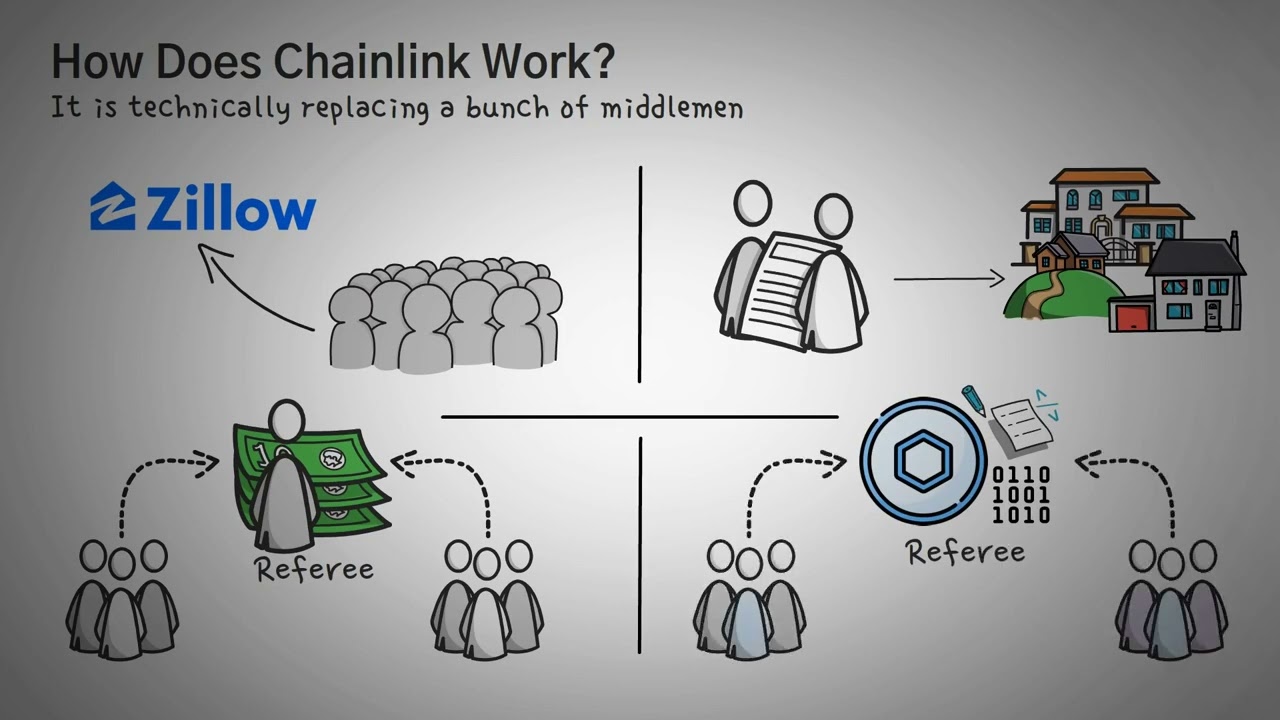
Integrating decentralized oracle networks, such as Chainlink, to bring off-chain data into your smart contracts safely.
Deploying and optimizing decentralized applications on Layer 2 scaling solutions like Arbitrum, Optimism, or Polygon.
Implementing decentralized file storage solutions like IPFS or Arweave for hosting dApp frontends and metadata.
50.8K views1Klikes1:17:40Original Release: 2023-03-28
hi everyone welcome back to code eater in today's video we are going to see how we can create our own decentralized application from scratch so in this video you are going to learn the step-by-step process of creating your own decentralized application and not only that I will be also providing you with a template that you can copy paste and create your own decentralized application so this video will be a different kind of video because this video is not about react.js or css because I have seen so many YouTube tutorials which are only talking about you you know CSS and the react.js part but in this video we will be seeing the actual fundamental basis of decentralized application so let's start now let us look the website the decentralized application that we are going to create in this tutorial so this will be a very simple decentralized application but in this decentralized application we are going to understand each and every important concept which is required in order to create your own decentralized application and the best part of this decentralized application is that it is deployed on netlify.app so that you can also copy this particular URL and I will provide the link of this URL in the description and you can go to this particular URL and access my decentralized application and we are also going to see that in this particular tutorial okay now in order to access this by chai you know by decentralized application first of all the user need this metamask wallet once he will enter his or a metamask wallet you will see a list of all the transactions that are done previously will be shown here okay so you can see that all these transactions that are done okay and we see the connected account so the connected account means the account that is connected you know this account zero four eight seven this account is connected to our decentralized application and these are all the transactions that are that had actually happened in the past so we have the time uh this is by the this transaction was done by the name of siddish and my name is this is the date at which this particular transaction actually occur this is the you know uh the message the user want to send and then we have the address World address of the user and in the same way let's say I want to do another kind of transaction I will simply go let's say Tiara okay and then I will just write message as a good job or something like that okay and I will pay to the owner so once I will pay to the owner I have to again access my metamask wallet and I have to confirm for this transaction now I need to wait because this transaction is done on go early test Network and it will take some time to get confirmed and here our transaction is successful okay so the transaction is successful we will click on OK and our page got reloaded and now we have the new transaction by the name of Kiara and it was done at 257 PM means according to Indian Standard Time and this is good job and this is the address that I have okay so this is the cool decentralized application that we are going to create and just one thing in the upcoming tutorial part you might see a different layout of the website which will be in yellow color or something like that just don't worry because I have changed uh changed the CSS part a little bit and I will be providing the CSS part and everything in the description of this video so you will be having the GitHub link so that you can directly access the CSS part so the website UI might be look different but the concept will never be changed so just keep on watching it and at the end I will be sharing the CSS and everything for this website now before starting with our DC analyze application code it is very important to understand how our decentralized application work or what is a decentralized application if you do not know about it so our decentralized application consists of two parts first one is front end and another part is our smart Contra for our decentralized application project I am going to use react.js to code this particular front-end and solidity to create this particular smart contract now one important point to notice here is that this front end actually belongs to a real world part right and this smart contract belongs to our blockchain world part so these are two different worlds right these are two different words how they are going to communicate with each other because this is something belonging to a real world this is something belonging to a blockchain world so we need a medium right we need a bridge so that these two different Technologies can communicate with each other and for that for that what we are going to use is we are going to use ether.js lab library to this ether.js Library will actually help these two different world worlds in order to connect with each other and this way we are going to create our decentralized application you can clearly see it is a very simple process right first of all we are going to create our smart contract then we are going to create our front-end code and then we are going to use our ether.js code in order to communicate these two different world so let us understand how we are going to create our smart contract what algorithm that we are going to use in our smart contract and it will be a very pretty it will be a very simple straightforward algorithm where a user will visit our website and let's say he wants to buy some coffee or chai he will provide me like he will send some money to this particular website and after the transaction is successful then some person from this particular company will provide the chai or coffee to this personal particular customer and not only will like this person will not only be sending some money or prepare currency actually he will be also sending some messages and this message can be anything let's say just have a you have a nice day or a please like it can be anything right it can be a feedback or it can be a message whatever this person actually wants so this is a very simple smart contract if you will see and the reason for taking this simple smart contract is that I want to demonstrate you how actually a decentralized application works okay in our upcoming projects in future definitely I will be creating more complicated projects right but for now as a beginner I think this project will be more than sufficient in order to understand the functionality of a decent ice application now before we start creating the smart contract part let me show you some it arrives that we are going to create for our smart contract I want to just uh like I want to illustrate you all those data types so that you can easily grasp the smart contract so the first data type that we are going to create is of struct type and this is struck is a memo means in this memo struct we are going to have the name of this memo the message that you want to send at which particular time this memo has been you know created and from which address this memo has been generated so this memo as you can clearly see will have all the messages name message timestamp and from which will look something like this in our uh in the memory of our smart contract okay so we will have the name we will have the message timestamp and from in the another data type that we are going to create will be an Dynamic array okay it will be a dynamic array and we have talked about all these things right in detail in the solidity tutorials if you haven't watched that tutorial please watch that tutorial it is available on YouTube Okay so this memo this memos variable will actually help us in accessing the different memo that are present inside this Dynamic right in this Dynamic array and this Dynamic array will be actually pointing to these different structures so at let's say at memo 0 we have this particular structure at memos4 we have this particular structure definitely all these will be filled but as you can clearly see that I do not have space here to illustrate that but you can clearly see right that this memo array will consist of all these different structures so that we have the information regarding all the memos that we are receiving so if someone is doing some transaction we are actually storing that transaction inside this memos array okay so now it's time to go to our WebEx ID and let us code this particular smart contract so at first we will create our smart contract in our remix ID so that we can check and everything and then we will paste this smart contract to our decentralized application and I will tell you the whole process so just don't worry about it so first of all I am on my remix ID and then I will create one file by the name of let's say chai dot solve okay and inside this I will simply copy paste these two lines and simply paste it now well just zoom in a little bit I will write my contract the contract name is chai okay now inside this as we have seen we will create our struct demo and this will be having the name having messenger messages actually or message actually right message then the timestamp and then the address press prompt and then what we will have is to have the memo array and we have seen this as well right for now what I can do is for now let me make this public so that I can show you how this is okay instead of that let me make this like this one you will understand one then we will create one Constructor and inside this Constructor what we will do is we will uh we will set the owner of our smartphone so let me create one owner and this owner will be payable in nature reason is very simple because this owner is going to receive funds right so if we want to make some address to receive fund we need to make that address payable so if you want to you know if you have an address and you want to transfer or receive some ether in that case you need to make that particular variable address variable a payable address variable so we will set the variable and we will do message or sender as you will do a message.sender you will see an error right and the error is that you cannot directly basically assign a normal address to this payable address because this owner is a PayPal address right so what I will do is I will simply Typecast it to a paybill address okay and then I will create a function in order to buy the child right so we have seen that a customer will come okay it should not be fine right it should be my mind is somewhere else so yeah so what I'm trying to say here is that if a customer is coming to your website you want to give this functionality that they can buy try from you right and not only they can buy a chai from you but they can also send some messages to you let's say string name so this will be the person name and instead of memory let's have call data right because we are not going to change anything inside the name so and then we will have the message and then we will make this function a public function and let me make this table or instead of it public we can have external right we are not going to call this function within the contracts will be finally it's externalized and this will be a people function because this function will be helping us in order to receive ether right from this let me have one require statement or value should be greater than zero so if someone is sending some ether to us we will make sure that they are sending some amount of money to us right and definitely it's totally up to you if you think okay I want this particular amount of money then you can have a functionality like ms.well msg.value should be equal to you know 0.1 ether or 0.01 ether it should be up to you I'm just having message.value greater than 0 so that anyone who wants to buy some chai I'm going to provide him this it should be the money should be greater than zero right it's totally up to yoga uh otherwise you will throw an error that please pray at least more than or we can have please pay more than zero meter right okay and then if this will work out if the message dot value is greater than 0 in that case we will simply transfer the money to the owner right owner of this contract will have the message dot that's nice and then we can push this particular information this particular data right to the array right to this memos array which will actually consist of this memo type data so what I will do is I will simply do push and then I will have my memo this structure right and then inside this we will have the name message and thanks Tom log dot times I've actually talk Dot timestamp and we will have the message dot sender right so this name will be the person whatever this person will pass to this particular function the message will be passed by the person in the block dot timestamp will be the current block time right and we have talked about all these things guys if you haven't seen my solid tutorial please do watch it okay I've talked about all these basic things in great detail there so block dot einstamp is simply the current block time right this is the current block time at which this particular function will be the part of a block and then we have this message dot sender means the person who is actually calling this person right so I will show you that as well so that address will be inside this message.cinder and that will be fed to this from address okay and this way we have completed our buy chai function and in order to fetch the transaction I can have this get memos function okay you returns and memo so it will return the array right the area that we have pushed the information and it will simply written that now let us check this okay and that's why I have created this smart contract inside the stream mix ID you can easily check this out we can do is we can do is simply deploy this we have this chai instance so now we have these two functions and this person will be the owner of our smart contract okay let us do that let's have this particular address let's say this for particular address is sending let's say some one here okay in order to buy chai It's a costly chai I must say and let's say the person name is for example urgent and the message is you are a good top keeper something like that and you will do this transaction and this transaction as you can clearly see it is successful we will simply get memos and we have all the information paid by Arjun so if this so we have Arjun the name of the person because we have fetch have input the name right and the message you are a good shopkeeper and the current block timestamp which is actually in Unix timestamp which we will convert into uh you know human base times time right and then we will have this message or sender a person who has actually called This by Chi function and as you can see this is the person who has called this Pi Chi function right this by Chi function and then if you will see have all the information do not have anything else and in this way we have completed our smart let me show you one more thing one more example let's say some person is sending some 500 way is calling this by chai by the name of let's say current bar like you are good something like that transact get memos and we have all the information relating to this particular transaction as well so current Ur code and all the information is given inside this Mouse array the first part of our decentralized application is complete right so we have this whole smart contract we have to Simply copy and paste this to our Visual Studio code okay so I am in my visual studio code and it's a very simple installation process if you want to install Visual Studio code just simply go to visual studio code and you can simply install it it's a very simple process and then simply I will create one folder here I will go on open folder [Music] I have my child app I will have created this chat app and I will select folder yes I trust the author so now I have my chat app now I will open my terminal by either going to either like doing Control Plus tactics it will open my terminal or you can also go for this terminal option given in the video code now inside this I will simply first of all install hard hat and install odd hat okay and now since my installation is done I will do npx art hat okay once I will do that you see a lot of options just click on this first option only me just print press enter on it create a JavaScript project then enter enter and okay wonderful so now you have your hard hat okay project inside this means add a tool inside it actually and then install these extra dependencies that are provided here copy this down okay and in future the installation means you might see a different version so either go for that version don't get confused or you can directly install this version that I am using it's totally up to you if you have some error then definitely I will suggest you to install these particular version only and then I will install these dependencies okay so this is done if you are seeing some error then I will suggest you to just go to your system administrator path okay just right click your command prompt with the system administration and then you can directly go run as a system as Trader so that you can install these dependencies if you are seeing any error okay otherwise it's totally good so now inside this we have this contract but we do not require this we have already created our own smart contract this one right paste this contract let me change it to try dot solve and in the scripts folder we have this deploy.js you need to make some changes to it as well into first of all all this remove all these things okay this part and then we remove this cooler part as okay yes so we will have like this and instead of log definitely we are actually because we are not having a log we will have a chai variable and definitely it's these are just variables okay so you can have lock as well that's totally up to you and instead of lock we will have the chai okay contract Yes actually this part try and then like this we will remove all this because we are not passing anything to the Constructor right we have a Constructor but we are not passing anything this okay so not have anything here and instead of this right I'm telling you what we are trying to do here is and we will simply okay so the first line is actually fetching the artifacts from your smart contract so once you deploy your once you compile your smart contract you have this ABI and byte code right so you are fetching those information and then from that you are creating the instance of your smart contract and then you are deploying your smart and have explained again all these things in my Hardware tutorial if you haven't watched that please do what okay so let me explain here as well fetching artifacts fetching or I will say fetching byte code and ABI okay and then we are actually creating an instance okay creating an instance of our smart contract now instance is something or you can say an object of your smart contract so that you can talk to your smart okay you do not need to go in depth of these okay this is these are just configuration files I'm just explaining you if you want to learn more about it but if you want to learn more about it you can go to the hard hat documentation as well but these are the things you just need to know this much only okay for now and from this line you are actually deploying deploying smart contract okay and in this line we are simply fetching means once we will deploy our smart contract we are actually fetching the smart contract address okay and you will see this in action as well so don't worry about it for now right don't worry now uh what we will do is we will delete this folder we do not require this okay let us quickly deploy this smart contract on the hard hat local node okay so that we can check whether it is working fine or not I will show you some parts of this npx hard hat compile first of all let me show you how this works so it is downloading the compiler okay so compilation is successful and you will see that as soon as compilation is successful right we have the artifacts and we are actually fetching these artifacts here okay so that we can deploy the smartphone you will go to the contracts part so we have the artifacts folder then we in the contracts folder we have the star.soul and inside this you have this chai dot Json and this is actually consisting of your byte code and your and your API so this is your byte code which is going to get deployed on the smart on the blockchain actually and this is your API write this one abl okay now let us deploy this okay let us deploy this now let us write npx card hat run Scripts okay so inside the scripts folder I am going to deploy.g let's check and you can clearly see and it's it is actually getting deployed on the local blockchain of this R dat only okay so you will not be seeing any blockchain but it is actually running okay behind the back or I will say at the back something like that okay so we have this smart contract address and our deployment script is working perfectly fine let me clear this for now and now what I will do is I will to npm 8 YT white at latest okay so this will actually help us in installation of our react.js because earlier we were using Create react app right but if you will go to the react.js documentation they have removed it from there so this is something new like you can use white also in order to install your react nothing will be changed if you know react yes everything will work like that only so do not get confused okay I do only node react and you are using some white no I'm not using some white white will actually help us in using react shares okay so you have so many options and I am going to select react from I will just press enter and the JavaScript only and you will see that you have your react folder so this is our via White Project right whiter project and I want to change name line for now okay then we'll simply do CD find yes and then we will simply follow the step and install and then npm run the install so it will install all the packages available in the package dot Json and this is the procedure that you have to follow every time you are creating your decentralized application so in the first part you need to install either truffle or hard hat in our case we have installed hard at we have created some everything from for our smart contract and in the next part you need to install your front-end code like front-end technology since I'm using react.js I have I have my react code inside my client folder right so inside my client folder I have my react code and above and below you can see the smart contract code or I will say the hard hat code okay you have to follow this procedure each and every time you want to create your decentralized application just clear this all for now now let us check this whether it is running or not so I will do npm run Dev okay so now it has started on this particular localhost and at this particular Port I will simply follow link so here you can see that my localhost at localhost 5173 I have my react.js code running okay now it's time to create the code for our react application we will go to the client folder and inside our client folder we will go to the source folder and inside this we will go to app.jsx and in this we will remove each and everything that is given here because we are going to do everything from scratch so yes we do not need to have all these this as well and I think this is good now as a first step we will create the template of our decentralized application as I said right we will be creating a template so that we can you know we can we you can use that template each and every time we are creating our decentralized application so in the first step we will do we will be doing that okay and for that what we will do is we will have whose effect okay and I hope you know a little bit of reactions because we are going to use that and then what we are going to do is first of all we will create one user state in this we will have the state set State and then we will use the use State and inside this use State we are going to initialize this this state variable okay we are going to initialize this with an object and this object will consist of three things first of all it will consist of the provider okay that will be null initially then we will have the signer this will be also null initially and then we will have the contract instance that we will be creating okay and that will be also null initially okay then what we will have is okay what we will have is we will have a user okay so we will have our use effect I am using this use effect because I want that whenever my react application is running okay whenever my decentralized application is actually running I want that it automatically fetch my contract instance I do not have to click any button in order to create an instance okay and for that I'm using use effect here and inside this use effect I will create one function by the name of let's say template okay because we are actually creating a template right which we are going to use every each and every time right again and again whenever we have to create our decentralizer so this will be our template and inside this template we will have certain information and for that let me make this async because it will have a lot of promises will have a lot of await and inside this now we will have certain things first of all we will have the contract address which we will paste it afterwards but for now let me have it empty only okay or I can do something just for now so so the first part of our template will be the contract address the second part will be the Avi okay so the contract ABR okay and we'll have it afterwards now inside this what we will do is we will write the code in order to connect to our metamask wallet what we will do is we will deploy this smart contract okay we will deploy this is smart contract on the good Elite Test Network okay on the or I will say on the fake blockchain right ethereum because it is a test net we are going to use fake ethers right so we will deploy this smart contract on our go really blockchain or Godly test net okay and since we are going to deploy this smart contract on a go really blockchain we need to communicate to this smart contract right which is deployed on the go really blockchain and for that we are going to use metamask so that we can create our transactions right with the help of metamask because whenever we are going to do anything that is going to change the state of our blockchain we need to pay some amount of money right and we have discussed this like I have discussed it in the solid tutorial as well and not only that our metamask will also provide us the functionality to connect to the gorilla test Network because our meta mass at the end of the day consists of this infura API which actually help us in connecting to the blockchain because our computer for now this computer that I am using it is not capable enough to talk to the blockchain right because this is not connected to the power to the blockchain so matter mask will help us in these two different ways okay so here we will have the metamask part metamask part okay and why we are using metamask let me write that down as well for you yeah using metamask in order to do two transactions on gorilly test net okay and second thing is metamask consists of inferior API and I will show you that as well when we will deploy our smart contract which actually help us in connecting to the blockchain you would say okay so we will be able to connect to the blockchain which is actually the different world now in order to fetch this metamask wallet okay I will do const ethereum okay so this metamask wallet actually inject this ethereum object inside our window so what we will do is we will fetch it from the window okay okay so we have this particular account right so this account will be inside our account variable that we have and let me show you the inferior part as well we will go to settings network go really test Network so in this you will see we have this RPC URL and this RPC URL consists of just fewer right and that's that's what I said that this will be actually helping us in talking to the blockchain so it is like we are connected to the blockchain which is on a different network okay now in this account we will have this ethereum so this is something related to your metamask request and the help of this method you will see what it will show you the quest account so this will actually automatically open your metamask wallet whenever a user will visit your website let me save this okay and I will show you this uh dependency list for now let me call this template function right all this let me see it will work like save this let me go back so we need to log out from our metamask wallet so that we can check the function okay so now let me refresh the browser so as soon as I will refresh my browser you can see that my metamask account gets open and this is because of this ethereum.request method okay this ethereum request account methods that is actually provided by metamask wallet okay close this for now now what I will do is I will have my provider so this was your First Step so this was actually your first step right we can write it as first step fetching the address and the API in the Second Step something for the metamask and definitely not only metamask let's say if you want to connect to ganache or let's say anything else you can have that functionality here okay so that's thing and now we will have the provider now this provider is something which will actually help us in connecting with the blockchain and for that we are going to use the ethers Library it's actually provided by the hard hat only providers okay and in this web3 provider and in this we will have the ethereum okay it's object now the second step we will have the sign up and why do we have a signer I told you this in the ether.js tutorial hope you have watched that if you're not if you have not let me tell you in brief that sign it is something which will actually help us in doing transaction that are going to change the state of the blockchain this provider is something which will actually which is actually helpful in reading the blockchain okay so this will be used when you want to just read the blockchain and if let's say I want to write on the blockchain right or there will be certain times where I want to do something which are which is going to change the state of the blockchain and for that I need provider I will get the provider so not provided actually sign up and this will actually help us in writing okay and once you have this signer and this provider now we have everything ready right so what we will do is we will have we will create the instance so an important point to note here is that when you have to create your instance you require three things so new Keepers dot contract so this is a syntax with the help of which you can create your instance and inside this instance you pass three things first one is the contract address which we will pass means I have already created we need to just have the address and another thing that you will require is the contract API okay and then we will have the sign up okay now let us understand this why do we need to have a contract address in order to create your instance see whenever you are whenever you are going to talk to your smart contract right which is deployed on the blockchain so you need to tell okay this is the place where my smart contract is deployed so I want to go to that place okay so now you have reached to that place now once you have reached to that place to that contract address you need this contract API why do you need this contract API you are going to need this contract ABI because once you have reached this place you want to talk to your smart contract and as we have discussed in the salty tutorial that in order to talk to your smart contract you need this ABI so that API can help you in talking to your smart control and that's why we need this contract ABI so if you want if any third-party application wants to talk to your smart contract you need that particular person or that particular party will require the contract ABI and that's why we have this contract API and then we have the signer so that we can do all sort of transaction on this contract so these are the three mandatory things that you require whenever you are creating an instance of your smart contract and this instance as a whole will actually help you in talking to the blockchain okay so that's the thing and let's let's create one more uh basically use State and that will be account one set account whose State and initially we can have not connected something like that and once our account is connected we can set the account here right so once we have our metamask account have that particular account sit here and then once we have the instance of our smart contract we can set the state and inside this state we will have the provider will have the signer and then we will have the contract this is what we have created right over so we have created this right okay so this is done what we can do is one more thing is that we can have a try and catch block because sometimes there will be times when a person will not have a metamask wallet right so in situation like these what you can do is you can create a try and catch so that I can so that you can catch that particular error I can have a try block I can put this part only because we will have error in this part most of the time or let's have let's have all these now okay and we will have a catch so that we can catch the whatever error we have we can catch DOT log or what we can do so console.log we can have an alert message okay so this is your template right guys but definitely it is not totally Complete because we do require the contract address and we do require the contract ABI so that we can complete the functionality of this particular term for now it is an incomplete thing okay definitely but I have mentioned all the important steps that you need to create your template first your contract address then ABI then your mouse or any other blockchain that you want to talk to and then simply set your provider signer and all those this is the basic functionality that you have to follow whenever you are creating your size application now it's time to deploy our smart contract and in order to deploy our smart contract we will again go back to the hard hat folder so we can close it for now okay so this is our smart contract and we want to deploy it on go early test Network so in order to deploy it on go early test Network I will paste the following script and you can copy this script I will provide the link in the description GitHub Link in the description and you can copy this particular script now once you will do that you will see that here we have two different fields first one is go really URL okay and the another one is this private key okay so this go real URL you are going to fetch it from infuria or from Alchemy so you can go for either infura or you can go for either Alchemy and I will show you don't worry about it and this private key you will get this private key from your metamask account so I am on Alchemy I'm going to use alchemy you can also choose inferior okay and uh for what I will do here is I will just copy this down not actually copy this down okay so I am on Alchemy and in order to access Alchemy in order to use alchemy just type alchem in your Google and just sign up to Alchemy you will have this kind of dashboard and just create on this create app option okay and then write the name let's say this is my coffee dab for example this is my coffee Tab and in the description running website okay and then instead of main net I will choose correlate test Network and then I will create my app so once I will do that I will have my key here okay so you can see that I have this API key this link and this link so I will copy this API key and yes to keep this API key safe okay because if you will you know by chance if you will reveal this API key to anyone then and you if you are having some amount of money you know connected to your Alchemy then your money will be detected so keep this URL private API keep travel I'm accessing it in front of you because this is just a demonstration tutorial I will delete it afterwards so do not do not reveal this API key okay and then we will go back and now what I will do is I will install one more thing by the name of dot e and V and once it will be installed what I will do is I will create one more file by the name of dot e and V okay and we are doing this so that we can keep our private key and the URL safe okay so first of all I have this go really URL right so I will just paste my API key first of all take my go really URL variable okay just take this one and paste it here and equal in the same way now we require our private key and we will get our private key from metamask so I will go to metamask and I will open it and I will simply copy this not actually copy this I will just go to Account Details and I will export my private key and I will type my password so that I can have my private key will come from it so now this is my private key again this is something which you have to keep private you do not need to share this because this is something very important so again I will paste my private key here I have to go back to the configuration I will copy this variable paste this here okay so I'm simply accessing these two variables right inside my hard-hat configuration okay from this dot EnV so I'm accessing all both of these two variables save it okay so now we are ready to deploy our smart contract on go really test Network so this will actually help us in accessing the go really test Network and this will actually help us in accessing our my metamask account in my case right so I will simply now deploy this smart contract so let me clear this and write npx add hat run dash dash Network then go really okay I'm accessing this particular thing and then simply Scripts slash deploy dot Js I'm actually deploying my smart contract on the gurally Network so I will just press enter if everything will be correct it will get deployed okay so there is some issue check okay I made one mistake here I think okay instead of URL I have provided this API key that was my mistake let me go back and let me have my https this URL okay so let me paste this here now now it is good now let me try once more and let's run this so it will take some time because it is getting deployed on blockchain right on a Google test Network so it will take some time and once it will deploy it we will have the contract address and we will get this contract address because of the deployment script that we have written this deployed contract address let's see okay good so this is our smart contract address let me copy this down and let me paste the address here so that we can check it search for it and this is our transaction so this is done 34 seconds ago so we have successfully deployed the smart contract on the gorilla test Network so we will be requiring this smart contract address again and again so what I will do is I will paste it here you can also paste it so that you do not forget it and just copy this down just go back to your uh blind then go to the source then go to the app.jsx and then simply paste the address here so now we have the contract address and one more thing that we will require is this API right so what we will do is let me create one more folder here by the name of a by the name of contract okay or we can also name it as contract Json okay let me write it as contract Json and what I will do is I will simply go to the artifacts and I will simply copy this file from here to this contract.json okay so what I will do now I will simply import this file inside my app.js by import ABI from current directory and the directory name is contract Json or Json and then chai dot Json so I'm simply fetching the child.json that I have created inside this Ctrl Json okay and you will have this artifacts whenever you are going to compile your smart contract or whenever you are going to migrate review smart contract in all the cases you will have this artifact so just copy dot copy this Joy dot Json and just paste it here or there is one more method I will show you okay and if I do not forget just you have to remind me but how do you how you're gonna remind me right so what you can do else is or let it be for now okay let it be for now just copy paste it for now so that we can do this and I will tell you that method okay in that method what you can do is you can have a script inside your hard hat configuration which will actually tell where your chat.json will be from but we can do that in this manner also so let's do it for now in this way and what we will do is in this ABA part we will simply have the ABI dot ABI we are simply fetching the chat.json API from this particular chat.json and now we will simply save this so now we have everything ready right in order to create the instance of our smart contract let's see this as well pull this up let me clear this let me run this once let me again run this em run Dev okay there is some issue okay I think I mean not in my client folder let me go to my client folder and then let me run this npm run Dev so let me open this okay we have some issue here let me check what is the issue it is saying that reference error ethers is not defined so just import actually I haven't imported ethers so let me import it there's from first okay now this is good go back and check it so now you will see that we do not have any error right so our metamask is already open okay I think it's not open type and password Here Let me refresh okay now this is so now we have our decentralized application template is ready so we can check this template uh by going to console DOT log contract okay let's see whether our instance is ready or not again go back and this is our instance you can clearly see so this instance is having our contract address this is having our function this is having our another function I think these both of these are the same functions means the thing is that we have everything that we require in order to interact with this instance of our smart contract okay so this is good this is good so remember this thing okay remember this template and do not get confused like in the second part I told you right that we are we can use metamask in order to connect to the blockchain we can do that there is no issue in that when if we had deployed our smart contract using remix ID in that case we would be using metamask okay because remember we will connect our MX ID to metamask and then better mass will actually help us in in deploying to the blockchain in this case we have used hard hat in order to deploy our smart contract on the go release test Network and now we have the address so we are just using that particular address you can also go to your remix ID you can use metamask in order to deploy your smart actually not metamask is not actually deploying your smart contract remix ID is actually deploying your smart contract but metamask will actually provide you with that infuri key but in our case since we have used hard hat that's why I have provided the API key you know in this hard hat configuration part okay so that's why okay so now our first step is ready now it's time to create some components so that we can do all of our work that we require in our decentralized application so now it's time to create our component and in order to create components we will go to our client folder to our source folder and in this we will create one folder by the name of components and inside this we will create two files one by the name of Y Dot jsx and another by the name of memos dot A6 now Inside by dot jsx you will have by okay by and inside this turn nothing and then we will simply export default now we will do the same with the memos.jsx and in this you will have memos and here we will have memos okay so this is done let us check whether it is working or Not by importing these two components in the app.jsx so we will do import and inside this we will have memos from memos.jsx and then import PI from buy.jsx right now what we will do is we will simply use those components here by having Buy and then by having the memos okay okay so let's do one thing let's write something I and in the same way I memos let me save this let me save this let me run this okay I have to CD client and then run this so if you will see in your screen that we have this High buys and high memos so all our components are working now in order to use these components what I need to do is I need to pass this state that we have set once we have the provider the signer and contract and you will understand why we have done this why we have set all these things in an object we will simply do state so we will pass this as a prop State okay and in the same way we are going to pass this state in this way okay and for now let me comment this out because currently we are going to work on this by component and I do not want that this component interferes in that so that's why I have commented this out but once we will complete this by component then we will work on the memo dot jsx component okay and one thing what we can do more is since in the decentralized application that I have shown you right we have this connected account functionality so let us have that particular functionality in this how we can have that we have to Simply write here uh I will improve the CSS let me first of all write it down connected account and inside this we will simply have this account okay the account that we have set here okay this metamask account so we will have this account okay let me do this let me check this okay so it is saying not connected and we will improve the CSS part don't worry about it for now I'm just working on the logical part so let me go to metamask and let me now refresh it so now you can clearly see that we have this connected account and the connected account is the metamask account that we have here right if I will change this account so let's say if I will go to some different account let's say to this account so we okay not this we are already on this so I am on different account right so I will refresh it so you can see that we are on different account now uh one thing the one problematic thing that I am finding here is that whenever I am changing the metamask account right the screen is not getting reload right we need to reload this button again and again and I don't think so it's a very good type of functionality so what I will do is I will simply have one more method okay so this method name is window.etherium dot on and it is for accounts changed okay so accounts accounts changed and it will actually call a Anonymous function and in this we will have window dot location Dot reload okay and save this let me go back now let me try to change the account so let's say I am the on this account okay uh let's say on this account okay I think I haven't saved the changes okay no I think I missed this on thing right so now it will work so let's say I will connect so you can see that as soon as I will change the account we will have a different account means the account that we are actually connected to so this is something you know this will be very useful whenever we are changing our account address uh it will actually reflect it in our browser as well and one thing more that I have done is I have imported the CSS file the change CSS file so I have some you know CSS applied in our decentralized application and you can copy paste this thing because I'm not going in depth of CSS in this particular project because this project is all about blockchain right so you can simply copy paste the code okay this code and you will have the CSS part so I haven't changed the logical part anything here okay the logic is still the same I have only added the CSS part which you can actually got from my GitHub link which I will share in the description of this video you will find this image that is attached to this you know to this particular project you can directly have this from that okay so I have inserted the CSS so that it looks some good okay otherwise it was not looking that much good and definitely we will work on the CSS part later in the later part of the video okay so yes so we have the connected account and we have this I buy we can remove this Hi-Fi for now because now we are going to make changes to our buy.jsx component and to have the CSS part just like this just copy the app.css part from this and index.css part from this okay you will have a structure in which will look something like this if you are doing with me okay now let us go to our buyer.jsx so first of all what we will do is we will have this particular prop that is passed by app.jsx that is the state one okay so we will have the state here and now this by dot JS component is all about buying the chai right so I will create one function by the name of by Chi function and this will be an async function okay so it will be an async function now we will write the logical part in this by Chi function but before that let me create a simple form here okay so let me create a simple form for you and why do we need this form we need this form so that we can have the different inputs from the user and then we will have those inputs as a you know as a as an argument to our bioch I function you will understand that and for that what I will do is I will simply create some input for now so input like this and I will just copy paste this for now and then I will have a button okay so I will have a button and this button is all about pay so with the help of this button we will be able to pay and once this button will be clicked so this form will be submitted right and since this form will be submitted so what we will do is we will simply have on submit event okay which will make sure that when this particular form is submitted by clicking on this pay button we will call this by Chi function okay we will call this Pi Chi function and in the input part we will have some ID like name okay so we will have name we will have an ID of by the name of message okay and then we will have okay we do not require this one right we have the name and the message and we can simply call the pi Chi function so let us see how it will look it does not look good I know don't worry as I said we will improve the CSS I'm not having the CSS part in this particular code because I do not want you to get confused okay that's why I want to it to be a simple okay I want it to be as simple as much simple it could be so that you are not getting confused with a lot of CSS and others you know react components and all those stuff I just want to make the logical part clear to you so that you can create your own decentralized application whenever you want now in this what we will do is we will simply fetch these two inputs why so that I can call my let me go to my chart.solve and I can call my by chai function and in this by chat function we require two things right we require the name and the message so we will fetch the name and the message from these two inputs and how we can do that we can simply write name and we will simply use the document object dot query selector and in this we will have the name right so that's why I provided this ID name so this will consist of the input of the name okay and in the same way we will have another thing that is the message okay sold message document dot query selector and in this we will have the message now these two things will actually fetch this two inputs right so it will actually fetch the input tag let me show you that okay so let me show you that so what who is name and the message and let me save this so let us go back let me open my console okay I will change this class to class name don't worry about it for now let me write something some random things and this pay so oh there is some issue here right as soon as I have clicked on this pay button my form got submitted and I do not have anything on my screen or I have anything on my console so there is some issue right actually the issue is with this form that we are using with react so react and form are those things which do not go and in hand together so we need to have some uh you know we need to use a kind of a trick so that this type of thing does not happen what we will do is we will pass event and in this event with the help of this event we will make this page default so even dot prevent default so this will actually make sure that whenever we are submitting the form our page does not get reloaded so let me show you this so let me refresh this let me type some random things pay so now you can clearly see that we our page does not get reload but definitely we do have some issue here right the issue is that in the first part we have the input name tag right which is good but in this we are seeing null so we have made some mistake I think okay I by mistake I haven't written this hash part okay now it is good let us check now a b so now you can see that we have these input tags but we do not require these input tags right what we require is the matter that is inside this inputta so what we will do is we will simply go and we will write dot value and in this also we will write dot value so that I can fetch these two different values so let me write another values pay so now you can see that I am fetching these two values right so now what I will do is I will pass these two values in this by Chi function now here comes the interesting part since I want to call this by function I require one important library and that library is ether.js library because our react.js code is not capable enough to talk to this smart contract code right and when I'm saying this is smart contract code I'm not talking about this Smartphone right right because our smart contract is already deployed on the go early test Network I'm just demonstrating this particular smart contract to show you that otherwise our smart contract is is already deployed to the gorilla test network if you are going to make any changes to this particular smart contract it will not be a concern for this particular decentralized application because it is connected to this particular contract which is deployed on this particular address okay so for illustration purpose I am talking about this functions of this smart contract so since I want to call this by Chi function right this by Chi function and in order to do that I need to talk to this smart contract and for that what I need is I need ether.js library but before that in order to talk to the smart contract I also need the smart contract instance right without that how I am able to talk to the smart contract if I do not know anything about the smart contract how I am going to talk to that so what I will do is I will simply use this state thing right that we have passed so I will I have my instance by restructuring the contract thing okay the contract instance from the state so now we have the contract instance with us and now what I will do is I will have my transaction okay and this transaction I will be using a weight because we are going to make call to the blockchain and that will require some amount of time so I'm saying that okay wait till I have done this transaction so that's how I wait so wait for this particular line since this until this line is get completed I'm going to use my contract instance okay and how I have created this instance I have created this instance if you will see using web3 dot not web3.js actually ether.js library right so now I will simply use this instance and I will call the buy chai function and inside this by Chaya function we require if you will see three things why three things first the name message and one more thing that is the amount right that's why we have this message dot value so first of all I will have the name okay I will have my message okay that's good and the third thing that I need to pass is the amount now now I'm how I'm going to pass this amount I'm going to pass this amount by having by passing actually an object and that object is value like that object will consist of the value that I want to pass now instead of directly passing the object inside this what I will do is I will create one more field by the name of amount and I will have an object inside this and this object will have a key as value okay so the key should be valued the key must be valued and what I will do is inside this I will have the amount of ether that I want to send now the value that we are going to send to our smart contract will be in way because we will not be able to send uh ether value okay if you are thinking that I want to send let's say 0.001 ether okay let's say you want to send this amount of money or cryptocurrency ether right so if you want to send 0.01 ether in that case you need to convert this 0.01 ether into way okay because our smart contract does not accept cryptocurrency in form of ether so what we will do is we will simply use the ethers Library ethers utils dot parse either which will actually convert our 0.01 ether into away actually to a big number object which will be of form of way okay uh to this amount and then we will simply transfer this amount here okay so by this we will be able to send this 0.01 ether to this particular contract or let I do not have that amount of money so let's say I want to send 0.01 and if you are thinking okay if I want to send some Dynamic value then what I have to do then simply create one more input here and then have an amount value inside this and you can do that as well what I mean to say is you can do something like this by Simply Having a mount field okay like this and you can send the money with by using this thing as well right so what you need to do is again you need to create a variable or let me just copy paste this paste you should have your amount here and in this you can have your amount right so now you have your amount value and you can directly use this amount value by converting it to uh you know into V and then you can directly send it here so it's up to you if you want to do that but for now I'm going to use this particular static method okay and what we can do is we can also wait for this transaction so what I will do is I will simply do an await transaction dot weight so once the transaction will be successful we can actually print the result that transaction is successful okay so now we have this by chai component totally ready let us check this by going to this back okay I think I have one more field let me remove this for now okay okay so now let me refresh this let me you know let's say my name is and the message that I want to send very nice for example and I will simply click on this pay okay there is some error right ether's error so just quickly import ethers inside this import ethers from eaters okay so now this is the refresh again my name is let's see very nice coffee or chai whatever you want to call it and then click on pay again we have an error it is c l u must be a string okay it should be our string right we cannot directly have a numerical value here we need to pass as a string so this is The Ether value and there's a string ether value will get converted to way value let's go back a lot of mistakes footage again your eyes are awesome pay okay I do not have that amount of money it is same wow that's so great yeah I do actually do not have that amount of money let me connect it to this particular account let's try now it's good that you are seeing all the mistakes right okay let's see that yeah for now you can clearly see that so I have the sufficient amount of money that is 0.001 at 0.001 at and I will simply click on confirm now let's wait if the transaction will be successful we will see a result that transaction is successful in the console and as well as we will get a notification by metamask and again this transaction is being done on go ready so it will take some amount of time and in this page you can clearly see in this console actually the transaction is successful and if we will go to metamask we will go to the transaction tab we unblock Explorer so this is our contract okay not this one this is from address and this is the owner address right let me check so zero four eight seven and this is the okay no yeah this is I think this is the contract address because it is showing us contract symbol so what is what actually it means is that this address had some had actually sent some money to this particular address which is a contract address and from this contract address this money is actually being sent to this address okay this is the same address right which has actually deployed the contract it's okay uh that doesn't matter so let's go back so our buy chai function is totally working fine let me add some CSS to it so that it looks a little bit good okay so now I have added the CSS as well let me go back let me check okay so it is looking a little bit good don't worry we will improve it as I said as we will progress to the course and now we have a little bit more good structure I will say now let's go back and now it's time for the memos dot jsx right so this is our by chai smart uh not smart contract actually this is our buy chai component and which is actually totally ready so now it's time to work on our memos component right so I will go to memos.com jsx and inside this I will remove this definitely now I will simply have my state error as well because we need to talk to our contract right and inside this what I'm going to do is I'm going to create one state by the name of State memos it will be a you state initially an empty array and then I will create one reduce effect and inside this huge effect and the reason for creating this use effect is because I want that my memos uh you know got get rendered whenever we have some new memos like I want my memos to be rendered on screen as soon as my decentralized application is running okay so that's why I'm having this in use effect and then what I will do is I will have my memos message function and it will be an async function now since we want to talk to our smart contract what I will do is I will simply have my contract in my state means I will simply fetch my contract from my state and then what I will do is I will simply fetch my memos and how can I fetch my memos I can fetch my memos by going to the instance and then by go to the function of my smart contract by the name of Kit memo so you have created this function right get memos and it will return us with an array so let us see this let us see this first of all before setting the state and everything and uh inside this we will have my contract okay so let's let me call this as well and before calling this what I will make sure is that we do have the contract instance ready and when we have the contract instance ready then only we are going to call this memo message function okay now let's Okay one more thing let me have to use State here as well state okay now let me move back Let me refresh it so now you can see that we have our array and inside this array we have the first payment that we have done right by the name after this though this is the from and this is the message and this is my name right so this is the address from which we have done the you know this particular transaction this is the name of the person and this is my message and let's try to do this once more let me have some random name like let's say gene or in this message we can have perfect and we will simply click on pay our metamask account is opening simply let us confirm now let's wait once the transaction will get confirmed we will have more than one array inside this square brackets right let's see that okay so the transaction is successful Let me refresh this and we have two arrays so first array is all about me such and the second array is about Jane and the message is perfect and this is the address of Jane and everything is given here so this is how we will fetch the memos of our smart contract but our work is not there what we will do is we will simply set the memos okay by having my set memos and now it's time to display these memos on our browser right and how can I do that in order to do that what I will simply do is I will simply use memos dot map function okay inside this we will have our memo and what we will do is or without the CSS okay I'm doing this without the CSS and anything I will simply have the different fields of my memo so first of all we will have the memo Dot name right so we have the name let me go to the contract so that we can check so we have the name we have the message so let me copy paste paste and then so this is the message and then we have the timestamp I think right timestamp and the form field so we have the timestamp and then we have the prompt and yes we need to do one more thing to have all these thing in a div okay this and we will simply return this okay so let's check this how it is looking for now okay there is some issue okay the error is because of this time stamp part because this time stamp is actually an object okay it is treating this timestamp a big number object so let me convert this okay let me convert this to a normal time okay by this particular syntax new date memo dot timestamp into 1000 and and then converting it to a local string let me save this let me go back so now you will see that our error is gone and if you will see this we have the transaction you guys are awesome this is the time so this is at this point of like at 11 45 PM I have done this particular transaction and this is the address this is Gene perfect then the time and then again we have the address of chain now let us improve the CSS of this okay so now I have pasted copy pasted the CSS let me go back so now it is looking a little bit good right from before compared to before so we have the name we have the names we have the time we have you guys are awesome we have the address we are perfect and by this we have actually completed our decentralized application the only thing is to check once more the bus while driving some name let's say Arena and the message wow and then let's pay for it and definitely I will improve the CSS just don't worry about it let's confirm let's wait for our transaction to get confirmed so the transaction is successful let me reload this so now we have the third transaction with the message and everything right so I have updated the CSS part of our website now it is looking good right earlier it was not looking that good I know so I have updated the UI part and now you can see that let's say if I want to do any kind of transaction by the name of shites again nice and then pay to my metamask is opened I will enter my password okay so it is asking for the payment I will confirm let's wait let me go to the console to check okay the transaction is successful and Let me refresh this okay so now here you can see that we have the we have another transaction that I have done today at 2 44 PM okay according to IST Indian Standard Time nice and this is my address uh one thing that we can do is instead of having you know the transaction during the buy process let me go to the buyer.jsx so during this instead of console.log we can do an alert right that okay the transaction is transaction is successful and one more thing that we can do is that we can reload here okay so that window once there is a transaction window dot location we will reload the page let's see how it will work let's go back Let me refresh this okay so let me try once more let's say Karen is doing the transaction uh good and then simply pay let me pay this so if the transaction will be successful we will be seeing an alert box yes so we have this alert box seeing that transaction is successful Infinity you can have a model also but as I said uh the focus of this tutorial was not to go into the CSS and react.js part but only to go to the you know to understand the fundamentals of decentralized application I will click on OK so as soon as I have clicked on okay you can see that the page got refreshed and now we have the transaction of current right the good and the address of current so this is good now it's time to deploy our react.js code on netlify so that anyone can use our decentralized application right and how we can do that we can do that by first of all let me close this now inside the client server means so not server actually in the client folder what I will do is I will run npm return and then build okay just press enter and this will actually give you a build folder so inside your client folder okay I think in white we have this dist folder this the IST so we will use this this folder in order to upload it on netlify so now we are on app.netify.com so in this on this only we are going to upload our react.js code and for that we will go to add new site button okay and just it is a very simple signup process just sign up to it and you can easily access the dashboard just click on this add new site then click on this deploy manually so now you will have this option just go to your folder okay so my folder name was chat app right and the vs Visual Studio code I will go to this client folder and inside this I will select this DISD and I will upload so I will upload let's wait for it to get upload and once this will be done we will be having a running decentralized application whatever so this is done once the build is complete means once it is uploaded on netify you will have this particular link okay just click on this link and we will definitely change the link so you will see that as soon as I have clicked on this particular link and you can also you know access my website using this particular link you have to Simply go to metamask then go to you know next select now whosoever will be going to this particular website will be able to access this website okay so let me refresh and yes we have the whole data of our website right so the reach and everything of this website will be visible to any person who have this metamask wallet and he can access the data available on this website now it's time to change the site name right let us go to the setup Uh custom domain and in this I will have let's say this time no let's say coffee dab okay because I have already created a chat app so coffee Buy let me check okay it is an invalid domain name okay I think let's let me go go back okay I think I was on a wrong option because it is actually it was actually asking for a real domain but I do not need to go there I have to Simply go to this options field okay edit site name and in this I will provide uh coffee buy coffee let's say buy coffee and then just I will save it okay it is already existing so let's say by Cold eater coffee but it really a very long name right it will be very difficult to remember so let's have a coffee or let's have chai or eater something like this anything save it okay so now we have our decentralized application running on chai code eater.netify dot app and I will share the link in the description of this video so that you can also access this website but the only thing that is required to access this website is that you should have you must have actually metamask wallet otherwise you will not be able to access this website okay so connect refresh and this is done oh it's so great right this is great so I hope you enjoyed this video and you enjoyed the Journey of creating our own decentralized application we have seen how to create our own decentralized application in a step-by-step manner right we first uploaded the smart contract means first we we first designed our smart contract the business logic of our smart contract then we deploy it on the test Network and now after that we created our react.js code and then with the help of ether.js we interacted with our smart contract and we have seen each and everything in great depth and in a step-by-step manner so I hope you enjoyed this particular course and if you have please do click on that like button and if you are new to this Channel Please Subscribe this channel because I am regularly going to upload new blockchain courses on this channel so meet you soon in the next video till then take care bye bye and if you have any doubts or queries you can ask me on Instagram or LinkedIn or also in the comment section of this video thank you so much guys meet you soon in the next video
Up Next

1:18
Smart Contracts Explained: How They Work on Blockchain
@SH3LLH4CK3R
832 views•2023-04-19

52:00
Hybrid Key Establishment in Production: Post-Quantum Cryptography
@durumcrustulum
14.7K views•2025-08-27
10:46
Constant Product AMM Explained: Uniswap's Core Mechanism Explained
@codeeaterweb3971
322 views•2023-11-08

11:49
Understanding Ethereum: A Comprehensive Beginner's Overview
@99Bitcoins
3.1M views•2018-06-26
Related Study Plans & Knowledge Roadmaps
Structured learning paths in Blockchain & Crypto
blockchain-and-crypto
MPC Wallets: TSS, DKG & Secure Custody
01Foundations of Cryptography & Digital Signatures
02Secret Sharing & Introduction to MPC
03Distributed Key Generation (DKG)
+ 2 more learning modules
24h5 modules
Explore Roadmap
blockchain-and-crypto
ERC-4626: Yield Aggregators & Leverage
01Blockchain, Ethereum, and Solidity Foundations
02DeFi Primitives: Lending, Pools, and Yield Farming
03Mastering the ERC-4626 Tokenized Vault Standard
+ 3 more learning modules
35h6 modules
Explore Roadmap
blockchain-and-crypto
DePIN: IoT Registries, Proofs & Rewards
01Foundations of Blockchain & IoT
02Introduction to DePIN and the Flywheel Effect
03Designing IoT Device Registries & Secure Identity
+ 3 more learning modules
30h6 modules
Explore Roadmap
blockchain-and-crypto
Building EigenLayer AVS: Operators & Contracts
01Blockchain, Ethereum, and Smart Contract Basics
02Proof of Stake and Ethereum Staking
03Introduction to EigenLayer and Restaking
+ 3 more learning modules
24h6 modules
Explore Roadmap