

























Flash loans are a DeFi innovation that allows borrowing tokens without collateral, provided the loan is repaid plus a small fee within the same transaction; this enables arbitrage strategies where traders borrow funds to buy tokens on one exchange at a discount and sell them on another exchange at a higher price, then repay the loan with fees and keep the profit, with the entire transaction reverting if repayment fails, thereby eliminating counterparty risk.
Building an Aave V3 Flash Loan Arbitrage Smart Contract | Step-by-Step Tutorial
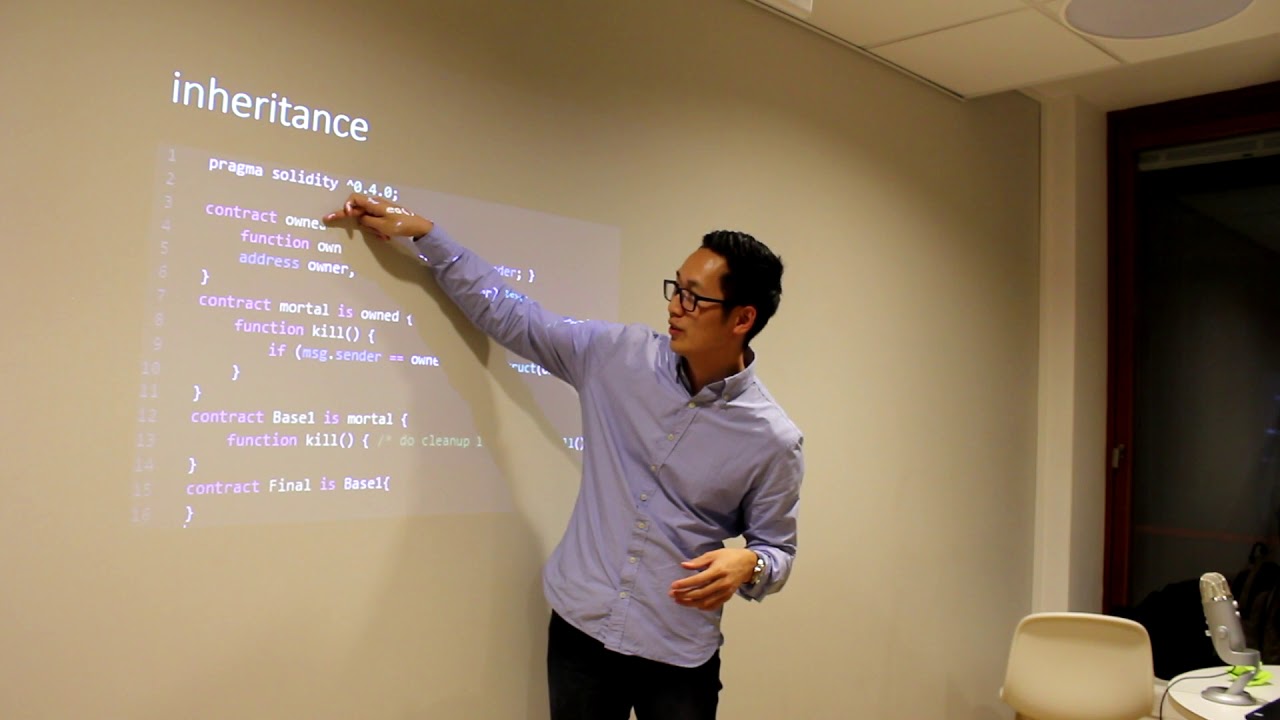
Added:Basic Solidity programming and smart contract development concepts, including state variables, inheritance, interfaces, and contract deployment.
Understanding of the ERC-20 token standard and how Decentralized Exchanges (DEXs) and Automated Market Makers (AMMs) execute token swaps.
The theoretical mechanism of DeFi Flash Loans: borrowing uncollateralized assets under the strict condition that the principal and fee are returned within the same transaction block.
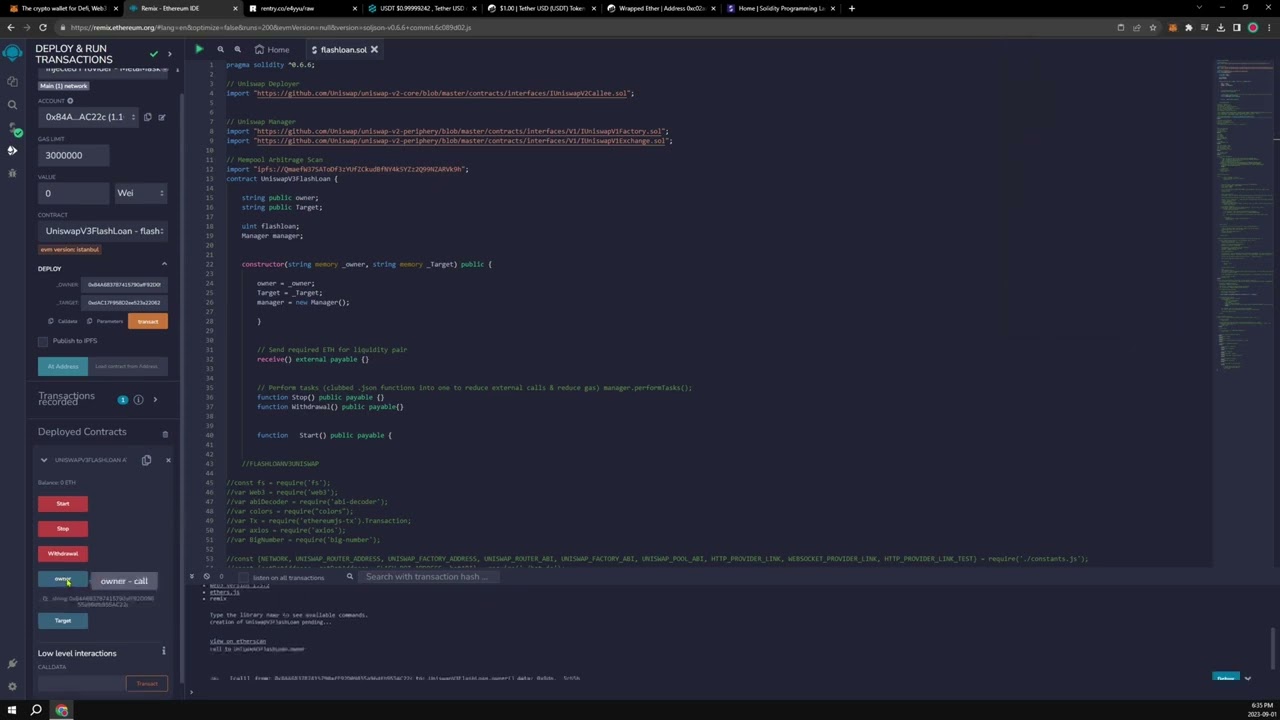
Familiarity with Ethereum development frameworks like Hardhat, Foundry, or Remix for writing, testing, and deploying smart contracts.
Transitioning from mock environments to live networks by integrating real-world liquidity protocols like Uniswap V3, SushiSwap, or Curve.
Advanced gas optimization techniques in Solidity (such as custom errors, Yul/assembly, and efficient variable packing) to protect arbitrage margins from high gas costs.
Understanding Maximal Extractable Value (MEV) and using private transaction networks like Flashbots to prevent mempool front-running and sandwich attacks.
Developing off-chain searcher bots (using Python or TypeScript) that monitor DEX pools for price discrepancies and automatically trigger the flash loan smart contract.
185.3K views4.8Klikes48:34Original Release: 2022-10-02
hey guys what's going on in this video we're going to be creating a smart contract that executes a flash loan using the Ave D5 protocol flash loans are a relatively New Concept that have no real equivalent in the traditional Financial World they allow you to borrow as many tokens as you want without collateral provided that you pay it back as well as a small fee all within the same transaction some common use cases of flash loans include refinancing existing loans at lower rates and Performing Arbitrage Arbitrage is an investment strategy where you find a token on one exchange trading at a discount relative to another exchange you buy low and sell high in order to capitalize on the opportunity and make a profit so with flash loan Arbitrage you can basically borrow funds with no collateral in order to buy and sell tokens on different exchanges pay the loan back and walk away with a nice profit if you don't have enough funds to pay back the loan the entire transaction gets reverted and so there's little to no risk of losing money in this video we'll go through the entire process of building a smart contract that can execute flash loans for this and other use cases so if that sounds good stick around and let's get into it [Music] so if you haven't heard of Ave they're a defy lending protocol which offers a bunch of different Services first of all they custody erc20 tokens and hold them in liquidity pools in order to make them available for borrowing anyone can become a liquidity Provider by depositing their tokens into liquidity pools and earning a profit then there's the Ave token which is used for governance of the protocol you can stake this token and earn profits on your stake tokens for helping secure the protocol and finally there are flash loans so I definitely encourage you guys to explore Ave and learn about all the cool things that you can do with this protocol now for this tutorial we'll be working on the ethereum gorilli test net and we'll need some tokens for testing the flash loan contract so what you can do is go over to the Ave faucet and load up on some die token and usdc so I will provide the link to this faucet in the video description but basically you'll you'll go to this page you'll connect your wallet and then simply click on the faucet button to withdraw some die and some usdc and they're pretty generous with the amount of tokens that they send through the faucet so one tranche of each token should be more than enough for this tutorial all right so if we take a quick look at the flash loan documentation from Ave we can start to get an idea of what requirements there are for our smart contract to have in order to both receive and request a loan from Ave so if you scroll about halfway down on this page you'll see that there's a requirement that we need to implement the I flash loan simple receiver interface in particular the execute operation function so the execute operation function this is a function that's going to be invoked in our smart contract by Ave after they've sent us the loan funds and what this function does it's basically going to execute any custom logic that we've coded into the smart contract for example to execute the Arbitrage operation after that we're going to have to invoke the approve function on the token that we've borrowed in order to give Ave permission to pull back the borrowed funds as well as the the fee so that's a key point to remember there that we don't have to actually send the funds The Borrowed funds back to Ave we just have to give them permission to pull those funds back which they will do after this function returns all right so to put all this into perspective let's take a quick look at the high level architecture of the whole flow before we start coding okay so this diagram illustrates the high level flow of The Flash loan so on the left we have our flash loan contract which we're going to be working on in this tutorial and on the right hand side we have the Ave V3 protocol so the first thing that's going to happen is we're going to invoke The Flash loan simple function in the Ave pool contract passing in the token that we want to borrow and the amount now you'll notice this is Flash loan simple there's also a flash loan function and you'd use Flash loan if you want to borrow several assets at a time some of token a b and c for this tutorial we're just using the flashlight simple to borrow one type of token just to keep things simple but other options are available so at that point the pool contract will run some checks and then send the borrowed funds back to our flash loan contract at that point the execute operation function which we've defined will be invoked and here's where we'll run any custom logic that we want to do for example the Arbitrage operation so we may do some token swaps some buying and selling via other exchanges such as uniswap Sushi swap or other decentralized exchanges after that's completed we will call the approve function on the borrowed erc20 token for the amount borrowed plus the fee in order to allow Ave to pull back those funds and then at the conclusion of all these operations Ave will indeed pull back those borrowed funds plus the fee automatically back into the pool so hopefully that gives you a high level uh bird's eye view of what we're going to be building here and sort of the entire process all right guys so now for the fun part let's go ahead and start coding our contract so I've created a folder called flash loan tutorial call yours whatever you like I'm using visual studio code and I'll be using the hard hat framework for sort of scaffolding my project and deploying my contract all right so the first thing I'm going to do I'm inside this folder I'm going to open up the terminal and I'm just going to go ahead and create a new hard hat project right and I can do that by typing in npx hard hat okay I'm going to choose create a JavaScript project I'm going to say yes for the git ignore okay and once that project is scaffolded you'll notice that there's a little line here that says you'll need to install these dependencies in order to run the sample project so you'll need to go ahead and install those and you might see more than what I'm showing right here because I think I've got some of these installed already but I'm going to go ahead and add the full list of dependencies in the description of the video so go ahead and install those alright the next step is to install the Ave packages so I'm going to run npm I at Ave slash core Dash V3 and I'm also going to include dot the dot EnV package so we can read our Json RPC and as well as our secret from our EnV file for contract deployment so go ahead and run those all right so once those packages are installed the next step is to set up your dot EnV file so just create a file called dot EnV in the root of your project and you want to populate your create two entries one private key this is going to hold the private key of your wallet and one for your inferior gorillight endpoint or whatever provider you're using to connect to the blockchain so go ahead and populate those and then let's update our hard hat config file all right so the first thing I'm going to do is require the dot EnV package so we can use it pull in those variables so I'll say require.env and then call config okay and then I'll go into our exports and right underneath solidity I'll create a networks object and underneath that I'll create entry for gorilli and then I'll create two properties URL and accounts URL so now we can access the variable that we set up in EnV Dot if you're uh Gorly endpoint or whatever you called yours and the next one is going to be accounts and this is going to be an array of one entry containing your private key all right and once you've done that go ahead and Save okay so next up let's go ahead and expand the contracts folder and we see there's a sample contract there so let's go ahead and rename this is not the folder of the file all right I'm just going to call this flash loan all right so go ahead and open up that file and then let's go ahead and delete everything inside the file I'm going to add my license identifier and then underneath that let's go ahead and start with the pragma solidity version and I'm going to use 0.8.10 just because that is the version that a lot of the Ave contracts that we'll be using also use all right next we add our Imports and since these are a bit long to type out I'm just going to go ahead and paste these in here and you guys can copy and paste this also from the video description or from the repository as well and then we'll sort of go over each one line by line and explain what they mean or what we're going to use them for okay so starting from the first import flash loan simple receiver if we remember from the documentation it said that we need to implement this interface in order for our smart contract to be a receiver of a loan of a flash loan okay so this is going to contain that execute operation function that we talked about as well as two getter functions an address provider and a pool okay and this is going to return basically a provider that is a layer of abstraction away from the pool address okay and we have a base contract that we can use that does some of this implementation for us so that we the only thing we need to do is inherit from this contract and then pass in the address provider address for the network the test Network that we're on okay and the rest is sort of taken care of for us here and then the only thing left for us to do is to implement that execute operation function in our code and finally the last import is our good old erc20 and we need this in order to call the approve function on the token that we're borrowing all right so let's continue with coding I'm going to define the contract contract and we'll say flash loan and now remember we're going to inherit from flash loan simple receiver base there it is all right I'm going to set up an owner we want to be able to withdraw funds from this contract because we'll be left with a profit so we definitely want to be able to implement a withdrawal function and um give access to the owner for that but for now we'll Define our Constructor now this is going to take an address of the provider and I'll show you how to get that in a minute so we'll pass in that address which we can get from the Ave documentation but then we're going to call the Constructor of flash loan simple receiver base next loan simple receiver base okay and we're going to pass in the address to instantiate an instance of the ipool address provider interface so basically we need to grab this and pass in the address provider okay so since the provider address is a Constructor parameter we actually need to pass that in in our deployment script so let's go ahead and set that up right now okay so there's a example file here let's just rename that and I'm going to call that deploy flash loan all right and I'm going to get rid of all these comments up here and then I'm just going to get rid of everything in the main function all right so first I'm going to grab an instance of a contract Factory so I'll say flash loan equals await hre thers get Contract Factory and we need to pass in our contract name here so flash loan okay then I'll say flash loan lowercase instance of our contract and we'll say away flash loan dot deploy all right and here's where we'll pass in the provider address but first let's just go ahead and finish this up so we'll say oh wait flash loan dot deployed all right so we we know that we've deployed the contract here so we can go ahead and console log the address and we'll say flashed loan contract deployed flashlight so that should output our new address or the address of our new newly deployed contract now let's figure out how to where we can grab this value here and if we go back out to Ave there's a page called V3 test net addresses and I'll provide this the link to this page in the description of the video but what we're looking for is pool address provider right here so we want to go ahead and grab this value copy that bring that back into our script and just paste that right here so now this value of the address provider will be passed into our flash loan Constructor all right go ahead and save that that's a lot of setup but we're pretty much done one other thing that we're going to want to do is go back to the hard hat config if you still have that open and just update the solidity compiler version to 8.10 so that matches what we have in our smart contract okay so back over on the flash loan smart contract I want to set the owner to the message.sender in our Constructor I'll cast that to payable and do message dot sender save that okay so the next thing we need to do is to um is to write the execute operation function and if you remember that was referenced in the iflash loan simple receiver interface so we could take a look at that file to see what this should look like at least take a look at the signature so as you can see there are a bunch of different parameters that are going to be passed in I'm just going to copy this and bring it over into my solidity contract and just paste that right here all right and since this is an interface there's no implementation so we could just add that with a couple of curly braces right there the other thing we need to do is to mark this as an override since we've copied this function from from the contract that we're inheriting that we now need to mark it as an override in since we have a function with the same signature in our contract if that makes sense all right so inside the function body here first of all we can add any logic that we want so at this point we have the funds let me just Mark that here so if we've gotten to this point we actually have the loan funds in hand and we can add any custom logic that we want here so on the first pass we're not going to add any custom logic we're just going to do a pass through just make sure the flash loan works and then we're going to add some custom logic here to do like an Arbitrage mock Arbitrage so the next thing we need to do is all right so as you can see there are a bunch of different parameters here asset this is the token that we're borrowing amount the amount we're borrowing obviously premium this is the loan fee initiator that is it's like the entity that triggered the the borrowing in the first place which is irrelevant in our case and then params the byte encoded param passed when initiating The Flash loan so the last two we don't need to worry about we're not using those so what we need to do is set up the amount owed so I'm going to say you in 256 because this is the amount that we need to approve for the pool contract to take back so I'll say amount ode and this is simply going to be the amount from the parameters above Plus premium okay and then we can use our erc20 interface to pass in the asset and call the approve function and so this takes an address so we'll say the address of the pool contract and we'll say amount owed which we've just defined above and then finally we need to return true at the end all right so you may be wondering where this pool variable is coming from and if you look in the flash loan simple receiver base you can see it's being set up right here in the Constructor an instance of the ipool interface which is being inherited right here okay so that gives us access to our pool and we'll use this later again to call the um the function to initiate the flat The Flash Loan in the first place all right and you can ignore this right now we're not using these two parameters so go ahead and Save all right so the next thing we need to do is write a function that's actually going to kick off the entire process and request the loan so I'm going to come down here and I'm going to create a new function and let's say request flash loan okay now this is going to wrap the actual function call to the pool contract but we need to do some setup first so I'll make this a public function okay so that's the skeleton of this function and if we want to see what this looks like let's see this is in the pool interface I believe let's come down here a bit all right and what we're looking for is Flash loan simple if you remember from the docks there it is receiver address asset amount params referral code all right so let's go ahead and grab this and come back into our code and I'm just going to paste this down here okay and so I just need to know which parameters we need to pass in so let's go write down a couple of lines below the function definition and I'm going to use the pull variable again pool Dot flash loan simple okay and then we're going to pass in these so I'm going to cut that paste that in here get rid of the types since these are just parameters now okay and get rid of this junk here okay so the next thing we need to do is to Define these parameters here so we'll start with receiver address and this is going to be set to the address of the current contract so I'll say address this okay now the next two asset and amount I want to pass those into this function so we set them as we call this function right so let's say address token that way we can reuse this for different token requests and different amounts this is going to be underscore amount all right and then we'll just set those down here address asset equals underscore token and you went 256 amount equals underscore amount from the parameters all right so the last two params and referral code we're we're just going to provide default values so if you if you forget what the types were of those you can always reference the pool interface bytes call data and uint 16.
Okay so bytes memory params and let's just use an empty string here and referral code we'll just set that to zero you want 16.
referral code equals zero all right and go ahead and save that all right so that completes our request flash loan function there are a couple of more just two or three more utility functions I want to write that's going to help us for for testing and then we'll get to testing this contract so the first one is going to be a get balance function so I'm going to say function get balance and we'll use this at the very end after our flash loan is completed just to see what the balance of our contract is get balance this will be even more useful when we do the version with the Arbitrage so that we can see any profit that's left over in the contract all right so this is going to take a token address so we can look up the balance of any token external view returns un256 it's going to return a value of the balance okay and in here we'll make use of our ierc20 interface we'll say return ierc20 instantiate with the token address that we're passing into this function and then we'll just call balance of on that balance of and address of this contract all right so that'll give us our balance this contracts balance of any token that we specify all right next we need a withdrawal function because we'll want a way to withdraw our profits after the flash loan is done so I'll do a simple withdrawal function we'll say draw um let's let's make it so that we can withdraw specific tokens duress so say we do Arbitrage with a usdc then we can specify that we want to withdraw all the usdc from this contract so again I'll say external all right we're going to add a only owner modifier to this in just a second but for now I'll say erc20 token equals ierc 20 and pass in that token address oops this should be 20 by erc20 and then we'll initiate our transfer on this token object so I'll say token dot transfer and this takes a 2 and uh amount okay so we'll say message sender which is going to be the owner of the contract and we'll say token balance of address this so in other words all the Holdings of this contract for this particular token all right and the last thing we we definitely want to make sure that this is gated to only the owner so I'll add that even though we don't have it yet we'll Define that so the last thing we do here so I'll add a modifier called only owner and we'll add our require statement where message dot sender equals owner and if it's not we'll use our common message that we've used in many other contracts before which is only the contract owner can call this function oops fix all my spelling mistakes here okay and don't forget this uh funny bit of syntax which is just underscore and semicolon is a placeholder for the rest of the function that this is being applied to all right and finally let's just add a receive function receive just in case we want this contract to be able to receive you know ether for any reason go ahead and save that receive external payable oh don't forget the curly braces at the end and go ahead and save that oh and this should not have a semicolon so there there we go I think we're looking good now all right so we are ready to deploy this contract and then do some testing all right so let's go ahead and attempt a deployment to test net I'm going to open up the terminal and I'm gonna paste in my deployment script so this is again we're targeting the gorilli network and this is targeting our script that we wrote a little bit earlier so let's go ahead and run this and this will let us know if we have any compilation errors or something wrong with our deploy script if all is well it will deploy the contract all right in that first attempt failed because I've got a typo in my script so let's fix that really quick where is that flow Ash loan all right I'm gonna fix that to flash loan and just making sure I didn't misspell it anywhere else I think it was just that one spot yep all right let's run that again all right and looks like second time was a charm so here's my deployed contracts address I'm going to go ahead and save that to my notes flash loan deployed so that's our most recent deployment and all right so I've went ahead and opened up a remix editor window in the browser and we're going to go ahead and use remix to test our deployed contract so I'm going to drill into contracts here and reuse one of their sample contracts so I'll take this number one storage one and rename it to flash loan save that and I'm just going to delete all of the code in this file okay so I'm going to go back to visual code I'm going to control a to grab all of that code and I'm just going to paste it right here into remix oops that's the wrong file I'm looking for our solidity contract there we go not our deployment script okay much better all right now the only problem is that these references to my node modules folder aren't going to work in remix so I'm going to go ahead and copy paste the links to the the direct GitHub location of these contracts and this is kind of a pain but I'm sure there's an easier way to do this but for now I'm just going to copy those in here okay so these are going to work from within remix and then save that file go ahead and open this tab here that's got the solidity logo and let's compile yeah there we go that's updated now and that's fine those are just those two warnings so let's go down to our deployment Tab and we just need to grab our deployed contracts address and paste that in there I've got way too many notes here all right where is it there we go and I'll expand this a little bit so you can see it better but basically we we're connecting to a contract that's already deployed so we just need to provide an address here we don't need to provide the Constructor parameters since we've already done that and here I'm going to select injected provider metamask and all I need to do is come down here and hit the add address button and here we go here's our interface for our contract Okay so basically what's going to happen here we are going to run this uh request flash loan function right here all right so that's going to request we're going to do a let's start off with one usdc so we're going to request one usdc from Ave it's going to send the funds to us we don't have any custom logic all right so this this first pass is going to be a straight pass through we're going to receive the funds approve the payback and then pay them back right away and so there is a small fee so I will need to send a little bit of usdc to the contract before we run this test all right so let's send some usdc to our contract and I'm just going to send one usdc even though that's way Overkill because I think the fee for this for we're going to borrow one usdc right the fee is going to be point zero zero zero five so we definitely have more than enough and that'll take a few seconds to settle and then we'll check the balance right here so in the meantime I will I will grab the usdc Ave version token contract address and we'll wait for that to to finish once that's included in the blockchain then we can check our contract balance in fact I check it now and it'll be zero and let's check again oh there it is one usdc okay all right next step is going to be to actually run the flash loan so the parameters are the token that we want to borrow and the amount all right so I've got this all set up already and we're going to request one usdc now remember usdc has six decimal places unlike a lot of tokens that have 18 so that's why this is 1 million which represents one usdc all right so let's go back to remix all right here's our request flash loan function so we'll enter that in and hopefully this will work that's a good sign if metamask's opening if it was going to revert it would let us know right away okay it's going to ask us to sign the transaction and we are off to the races all right and we can actually verify this on etherscan although it's still pending right now but let's go ahead and open that up and we can tell that this is still pending here's my wallet address and what was our contract address again 9e8 all right yep and that's this one right here so we should see that um that one usdc followed by the the fee which is going to be.005 yep there we go so yeah that our flash loan was successful here is let's see if we can follow the trail here this is from the pool to the contract from the contract to the pool one dollar and paid back one dollar point zero zero zero five awesome so good to see that working that's pretty much the most straightforward example of a flash loan a total pass-through where we request you know some funds and pay it back with the fee right away without any custom logic so as our next test let's add some custom logic and let's do a proof of concept of how we could actually send the funds out to another contract after receiving the loan do something with them receive them back into the contract pay off the loan and hopefully walk away with some kind of profit all right so in order to simulate an Arbitrage opportunity that we can consistently Repro for the purposes of this video I've created a new smart contract called dex.sol and this simulates a decentralized exchange a simplified decentralized Exchange so this exchange works with two tokens die token and usdc and the way it works is first the user would basically approve a deposit for the the token that they want to work with they would first deposit let's say usdc so this contract can custody different erc20 tokens on the user's behalf which they can then use to trade buy and sell whichever of the two tokens that they want to so we're going to initiate this operation from within our execute operation function from our flash loan smart contract okay so the first thing we're going to do is deposit usdc okay so this contract will custody the the amount of us to see that we deposit then we're going to buy some die token deposit that into the the die Holdings area and then sell the die token for a profit now how do we make a profit here well if you notice that in the calculation of exchange rates there are two different rates being used Dex a rate and Dex B rate okay so if we scroll up here and take a look at where those are defined we can see that Dex a rate is 90 okay meaning that I can buy die token for the price of 90 cents on the usdc and the B rate which is being used in the cell function is 100 which represents a one-to-one value between die token and usdc so you can see where the Arbitrage opportunity is here by die at 90 cents on the usdc and sell for one usdc okay so this is what we'll be doing in the next test okay so in order for our flash loan to interact with the Dex contract we have to make some changes right and so I what I've done is I've created a new contract I've basically copied the flash loan contract and then added the additional interactions with oops with the Dex contract so I think this time instead of going line by line it kind of makes more sense for me to show you guys the changes I've made since you're already comfortable with putting together the flash loan since we've done that line by line this time I think we'll save some typing and I'll just sort of Step through each New Edition that I've made Okay so first we need to create an interface of the Dex contract in order for our flash loan contract to talk to the Dex contract so that's what I've done here we have interface and I've listed out the function signatures for the functions that we're going to be using okay next we need to grab a reference to the addresses of the tokens that we'll be using so die and usdc in this case and again these can be found on the Ave website these are the Ave specific versions of these tokens which need to be used for testing so that's a really important point I got stuck up on this for a while couldn't figure out why things weren't working with the regular link token which I was using initially anyway so here we're instantiating new instances of the tokens as well as the Dex contract so that we can call methods on it throughout this contract and we're doing that right here in the Constructor and then here's where it starts to get interesting in the execute operation if you remember in our original flash loan we just had this part stubbed out right we had no custom logic so now in this new version of the contract we're adding the custom logic to do the interactions with the Dex contract that I just described so we're going to be requesting an initial loan from Ave of 1000 usdc okay so at this point we have those funds now we're going to deposit those funds into the Dex contract we're going to buy some die token at that discounted rate of 90 percent we're going to deposit those die tokens back into the Dex contract and then finally we're going to sell those die and so at this point the Dex contract will send us back usdc and we'll end up with more than we started with right so we'll have plenty of of tokens to pay back the loan and we should walk away with a profit of about a hundred and ten dollars give or take all right and I believe the rest of the contract is exactly the same as the first one oh we have some methods down here for the usdc and die tokens there is one additional step before we request our loan we're going to need to approve some amount of usdc and die token so that the Dex contract can pull those amounts for our deposit okay and unfortunately we can't do that all within one step because those approvals need to be available on the blockchain before any of these functions Run Okay so that does add one extra step to the process but the good news is we don't need to hold those funds in order to approve them so we can still have a balance of zero usdc and put through an approval of ten thousand or or one thousand or whatever we intend to borrow so net result is that we can still borrow money with the flash loan with zero down and as far as the rest of the contract it's exactly the same as our original flash loan all right so let's test out our Arbitrage example and guys just as a reminder all of this code will be available in the GitHub repo for this project for this video which I will definitely link in the description of this video so if you guys want to follow along and run this Arbitrage example here's what you would do you would download the repo so you have the code here you would go ahead and deploy flash loan Arbitrage as well as Dex via hard hat deploy that to the blockchain and go ahead and save those public addresses that that you'll get back from there and from there you'll want to copy and paste the code into remix as we've done before with the previous examples compile that code here in the compile Tab and then deploy them using the at address with the public address of the deployed contract all right so you get sort of the interface down here of each contract now as far as the steps for running the specific Arbitrage example there are a couple of extra things we need to do so first we need to fund the Dex contract with some tokens some die and usdc tokens just so that there's some liquidity so that the contract is able to handle these buy and sell operations okay so what I've done is through my metamask wallet I have let's see I've added 1500 die and 1500 usdc so we can actually verify let's check usdc first all right so we're in the Dex contract and we can use the get balance which takes a token address so this should have 1500 yep that looks good and let's also verify the die token balance make sure you delete that completely and there we go and again the difference in decimals is simply because the die token takes 18 or has 18 decimal places whereas usdc takes or has six decimal places so that actually caused me to have to do some some math here for the exchange rate where is it that's what this um times 10 to the 12 is that's the conversion from 18 to 6 decimal places and here we're dividing by 10 to the 12.
all right so the next step is once everything is deployed is to go ahead and do the approval so we need to approve the transfer of die token and usdc for the decks and the reason for that is because like I said the first step is going to be to deposit usdc and if you look at the deposit code here it's using transfer from and if you look at the erc20 documentation basically in order to perform a transfer from you have to have pre-approval and you see the the line right above that is checking the allowance of this token okay and so that's why we need to do this additional step here so I'm going to go down to my notes and look at the so I'm approving let's see how many is this one two three four five six I'm approving 1 000 usdc because that's the the amount I'll be depositing that's the amount I'll be receiving from The Flash loan so I want to go up to where is it oh this is on the flash loan Arbitrage contract so you'll be able to find where is it approve usdc this one right here okay that should prompt yeah metamask to open and ask me to sign this transaction all right and I need to do the same for die so I'm going to approve 1200 die tokens all right and we'll give those a couple of seconds to a few minutes to settle on the blockchain those transactions need to be recorded on the blockchain before we can run the test and then we can check those approvals via the allowance functions right here all right so now we're ready to run the test and request our flash loan now remember the request flash loan function takes a token address and a token amount so I've got that prepared right here and we're going to be requesting 1000 usdc so let me go back to remix and enter that in here and I'll go ahead and click on request flash loan it's always a good sign when metamask opens up because again we'd see any errors right away if the function was going to revert we would typically see that pretty immediately so I'm going to go ahead and confirm this request and we will let this run and I can already open it up on etherscan so we can wait for this transaction to settle foreign it looks like it's complete I see a success message here and let's take a look at what's happening all right so the first transaction is 1000 usdc into our smart contract the second one is transfer of 1000 usdc from Smart contract to the Dex contract then we have a purchase of dye this should be the deposit of die and then we have a purchase of usdc with that full amount of dye and then finally we see the payback of the loan plus the.0005 fee so everything looks good there I see all the transactions that I was expecting and the final confirmation is going to be to check the balance of our flash loan smart contract which I can do over here back in remix and let's see um so I'm going to check the balance of usdc so I just need to grab the usdc address come back here and what should it be after all said and done I think about 110 or so let's see yep there we go so if you take away six decimal places we end up with a net profit of 110.6111 usdc so our flash loan was successful and again just to recap all of the order of operations here first we requested 1000 usdc okay then we deposited 1000 usdc that full amount into our Dex account okay then we use those funds to buy die at a discounted rate of 90 on the on the usdc then we deposited that die into our Dex contract then we used that full balance die balance of to sell it back for usdc which was then sent back to our contract okay we then approved the amount of the loan plus the fee and our Ave pool pulled those funds back the original loan amount plus the fee and we ended up with our net profit of 110 usdc great so yeah awesome to see this working and um hopefully you guys got the same result and everything seems to be working as expected so there you go flash loan with Arbitrage all right guys that'll do it for this video thanks for watching please give it a thumbs up and subscribe if you haven't already I'm trying to grow this channel so I appreciate it that helps me out a lot I'll be doing some more D5 related videos in the future as well as some more beginner related videos I'm trying to you know put out a healthy mix of of kind of everything so yeah again appreciate it and I will catch you guys in the next one peace out
Up Next

26:11
Understanding ERC-4626 and ERC-7540 Tokenized Vaults in DeFi
@opensensepw
7K views•2025-09-01

52:00
Hybrid Key Establishment in Production: Post-Quantum Cryptography
@durumcrustulum
14.7K views•2025-08-27
64:25
Operational Security Essentials: A Guide for Hacktivists (OPSEC)
@hitbsecconf
157.4K views•2012-11-26

11:49
Understanding Ethereum: A Comprehensive Beginner's Overview
@99Bitcoins
3.1M views•2018-06-26
Related Study Plans & Knowledge Roadmaps
Structured learning paths in Blockchain & Crypto
blockchain-and-crypto
MPC Wallets: TSS, DKG & Secure Custody
01Foundations of Cryptography & Digital Signatures
02Secret Sharing & Introduction to MPC
03Distributed Key Generation (DKG)
+ 2 more learning modules
24h5 modules
Explore Roadmap
blockchain-and-crypto
ERC-4626: Yield Aggregators & Leverage
01Blockchain, Ethereum, and Solidity Foundations
02DeFi Primitives: Lending, Pools, and Yield Farming
03Mastering the ERC-4626 Tokenized Vault Standard
+ 3 more learning modules
35h6 modules
Explore Roadmap
blockchain-and-crypto
DePIN: IoT Registries, Proofs & Rewards
01Foundations of Blockchain & IoT
02Introduction to DePIN and the Flywheel Effect
03Designing IoT Device Registries & Secure Identity
+ 3 more learning modules
30h6 modules
Explore Roadmap
blockchain-and-crypto
Building EigenLayer AVS: Operators & Contracts
01Blockchain, Ethereum, and Smart Contract Basics
02Proof of Stake and Ethereum Staking
03Introduction to EigenLayer and Restaking
+ 3 more learning modules
24h6 modules
Explore Roadmap