























Remix IDE is a free, browser-based integrated development environment (IDE) for smart contract development on Ethereum and other EVM-compatible blockchains, offering features like code editing, compilation, debugging, deployment, and testing in one platform, with support for Solidity, Vyper, and other languages, along with AI-assisted coding, template-based project creation, local file system integration via remixd, and deployment to various blockchain environments including local VMs, testnets, and mainnets.
Remix IDE Full Guide: Ethereum Smart Contract Development
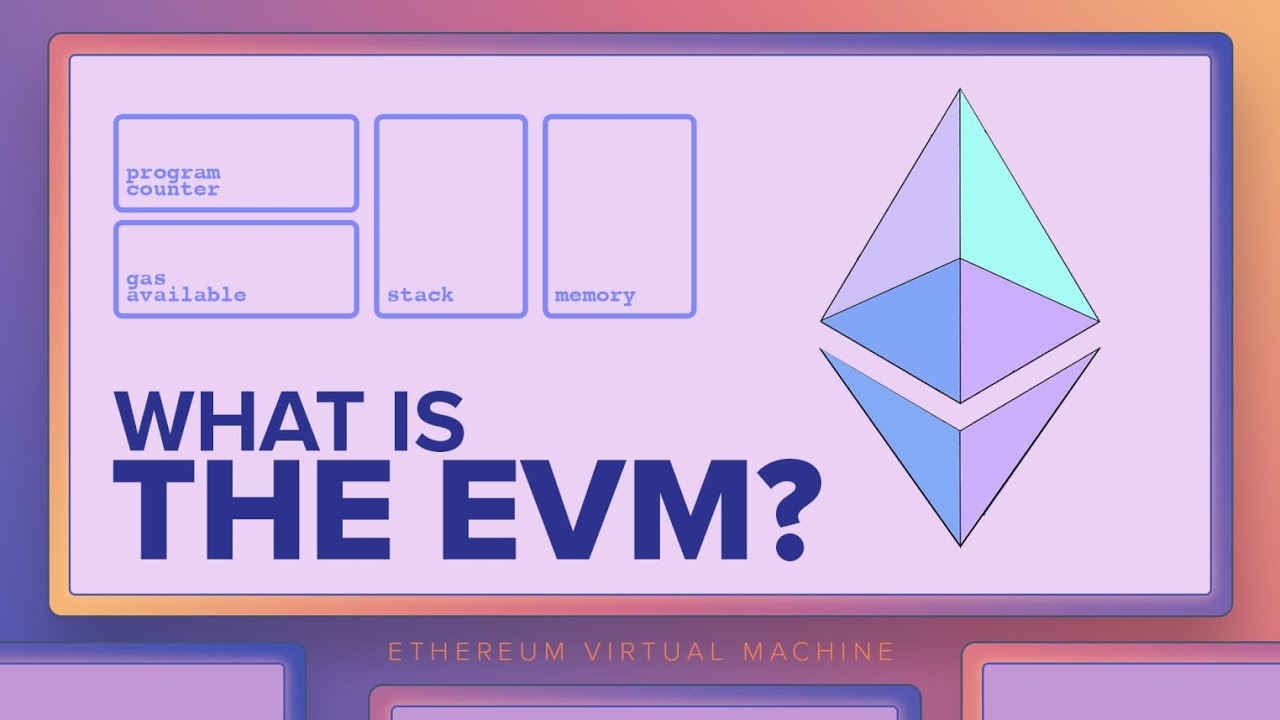
Added:Fundamental understanding of blockchain technology, specifically how the Ethereum Virtual Machine (EVM), gas fees, and transactions operate.
Basic familiarity with the Solidity programming language, including variables, functions, and smart contract structure.
Concept of cryptographic wallets (such as MetaMask) and how they interact with decentralized applications and testnets.
Advanced local development workflows using command-line frameworks like Hardhat and Foundry for robust testing and scripting.
Smart contract security best practices and vulnerability analysis tools (e.g., Slither, Mythril) to audit code before mainnet deployment.
Connecting smart contracts to frontend user interfaces using libraries such as Ethers.js or Viem and React frameworks.
Deploying and optimizing smart contracts on Ethereum Layer 2 scaling solutions (e.g., Arbitrum, Optimism, Polygon).
5.1K views92likes1:21:42Original Release: 2025-04-15
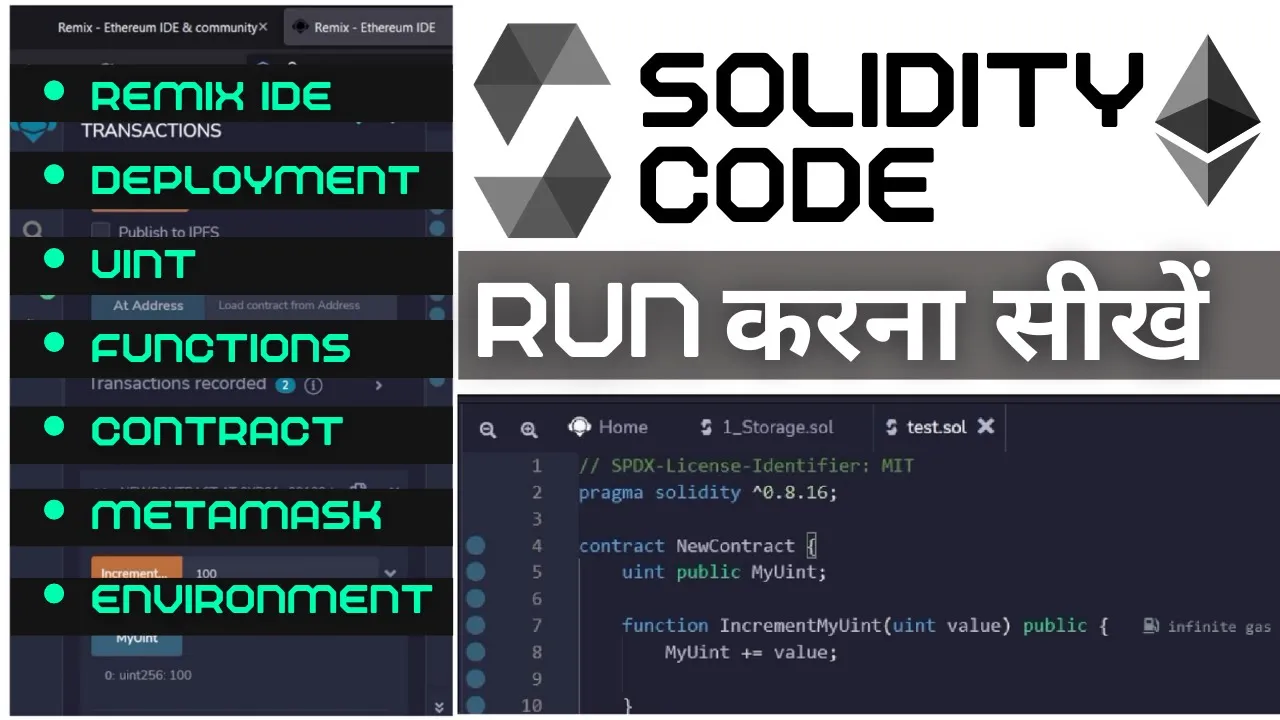
are you ready to become a super productive solidity developer in this video you will learn how to use the remix IDE like a pro remix is a free and accessible online IDE for smart contract development it supports solidity but also other languages like Viper and you can use remix not only for Learning and prototyping but also for coding production smart contracts in this course we will cover all the features of remix starting with the basics and then progressing to Advanced features such as coding AI in remix working with hotot fundry in remix working with your local file system in remix debugging in remix using git workflows in remix and much more this course is sponsored by the remix IDE an ethereum ecosystem public good let's get started in this video I will introduce the interface of remix let's start with a high level overview of the UI on the left side we have the icon panel next to the icon panel you have the side panel which changes depending on the icon selected remix is a tool composed of many modules or plugins most are made by the remix team but some are made by others the default plugins are present when remix loads the essential default plugins are the file explorer the solidity compiler deploy and run the plug-in manager and the settings panel on the top part you have the main panel with open tabs in the main panel you can see the active file but when you load remix for the first time you will see the homepage in a tab in the main panel and Below you have the terminal the terminal can show you the result of your interactions with the blockchain and you you can also use the terminal to issue some comments you can adjust the size of the text in the code editor with these two buttons and for all side panel plugins except the file explorer if you click on this icon it's going to move the whole sidebar to the other side at the bottom of remix is the status bar and AI assistant next let's explore in more details the Home tab the Home tab is what will be open by default when you first open remix after you open a file you can get back to the Home tab by clicking here in the home tab you can change the language of remix with this drop down here you can see the recent announcements of the remix team in the feature section including a new main panel plugin that is a list of curated videos below you can see a list of feature plugins here you can search the documentation of remix here you can quickly start a new project by using some templates here you can open a recent workspace and here you can have a few menu to create a new file or open existing ones next I'm going to explain the template Explorer a template is a ball plate to quickly start a new project you have templates for s20 s721 and many other use cases there are even templates that just contain scripts and no smart contracts to access the template Explorer first go to the file explorer and click the hamburger menu then create a workspace and on the right you will see the template explore you can filter templates by category you can search templates by name and you can scroll down to see the list of templates for each template you can either use them in brand new project by clicking here or you can use them in your current project by clicking here if you want to start from scratch you can choose the blank template if you want to start with some basic 3T files and scripts pick the basic template if you scroll down you will see a list of s20 templates you have a basic s20 template and you also have more customized rc20 with minable function burnable and different combinations and you can keep exploring there are many other templates available after you have loaded a solidity contract and then compile it in the solidity compiler you will want to deploy it to a blockchain in the deploy and run plugin at the top of deploy and run is the environment where you choose the provider providers are how you connect to the blockchain there are many blockchains you can connect to like main net test net or local development blockchain and there are also many ways to connect to these blockchains like metamask wallet or blockchain API so let's explore the different options for that let's go to deploy and run click on the environment drop down and you will see a list of providers if you want to configure the list click on this button this is the list of all the available providers the providers that appear in the drop down have a check mark to add or remove a provider just click on it for example if you add a CIA provider when you open the environment drop down again you will see it more about deploy and run in another video next I'm going to show you how to see the tutorials of remix go to the plugin manager search for learn e activate the plugin and you will see a new menu in remix click on it and you will see a list of all the tutorials for each tutorial you can expand it to see the full description to follow a tutorial click on this icon you will see the list of lessons for this tutorial to open a lesson click here and now you just have to follow the instructions you can also access a selection of video tutorials for this go to the plug-in manager and search for remix guides activate it and you should see a new tab open and if you go to this tab you will see a list of video tutorials in this video I will show you a basic workflow when you use remix we will cover writing a smart contract compiling a smart contract grabbing the AI and deploying a smart contract first let's cover how to write write a smart contract in remix projects are organized in workspaces if you open the file explorer you will find the default workspace that has a few example contracts and scripts if you just want to do a quick task you can use this workspace to create a new workspace click on this icon you can either create a blank workspace or start from a template let's choose the template option this is the template Explorer where you can see a list of templates to choose from let's choose the Bas basic template now you can see the templates folders and files the smart contracts are in the contracts folder and if you open this folder you will see a couple of example smart contracts like the storage smart contract this is a basic smart contract to store and retrieve a value we will use this one for this tutorial next we are going to compile the smart contract click on the compiler tab this will take you to the compiler menu make sure you have selected the proper solidity version then click on the compile button you can also trigger the compilation with a keyboard shortcut or by clicking on this button the compilation was successful as you can see with this icon now let's introduce some errors let's compile again and now you can see the error icon if you scroll down you will see the error message let's fix our error and now if we compile again the compilation is successful beside errors it's also possible to have warnings warnings are improvements that are suggested but not compulsory let's go to our code and we are going to introduce a non-critical error now back to our compiler menu let's make sure we don't hide warnings let's compile again and now if we scroll down we will see the warning message last thing about compilation if you scroll up you will see an option to activate autoc compile with this feature your smart contract will be compiled automatically after every change no need to recompile manually This is highly recommended it will make your life easier next I will show you how to grab the ABI the ABI allows you to interact with your smart contract from outside the blockchain for example if you use a web stre Library like esjs or web3js you will need the ABI of your smart contracts technically the ABI is a Json document that describes the interface of your smart contract and it's created by the solidity compiler every time you compile your smart contract to get the AI click on the compile button then click on the ABI button it will copy the ABI to your clipboard and after you can paste it anywhere you want like in your code editor next I will show you how to deploy your smart contract to deploy a smart contract go to the deploy and Run tab before deployment you need to choose the environment the remix VM is a local development blockchain this blockchain runs only on your laptop in your web browser this is ideal for testing and development the top option is the latest version of ethereum in most cases this is what you want if you need to Target older versions of ethereum you can choose one of the other options for remix VM once you have picked the environment it's time to deploy to deploy you have to click on the deploy button after you should see your smart contract if you scroll down you can see the address of the smart contract and you can also see different buttons for each external function for example let's call the store function to update the value of our variable and after let's call the retrieve function to read the updated value I just demonstrated how to deploy to a local development blockchain but it's also possible to deploy to a public network such as menet or a public test net I'm going to show you you how to do this there are different ways to do this with remix but one of the fastest way is to use a browser wallet like metamask I have already installed metamask on metamask I have already configured sepolia which is a public test net for ethereum I've also already selected the sepolia network and finally I already selected an address with some test net ether you can get some testnet ether for free by using a faet with this I'm ready to to deploy on sepolia with metamask back in remix in the environment I select the metamask option if this is the first time you use metamask R remix you will have to allow remix to access metamask then click on deploy this time the deployment will be a bit longer because you Deploy on a public network and you need to wait for the transaction to be mined and after that you will see your deploy smart contract here in this video I will show you how to use the code editor of remix so we are going to start with a high level overview the code editor of remix is based on the Monaco editor also used in vs code so if you already use vs code it will probably look familiar the code editor provide syntax highlighting for solidity the language for smart contracts but it also supports JavaScript and typescript which is very useful for test and scripts each file is saved in a separate tab if there are too many tabs you can scroll horizontally to see the hidden tabs the code is automatically saved every 5 Seconds this is saved in your local browser but there is also an option to work with the local file system more on this in another video and finally you can adjust the zoom level with these two buttons next I will focus on compilation errors and warnings to compile a solidity file click on this button make sure that the correct file is selected as this will only compile the active file you can also trigger the compilation with a keyboard shortcut if you are working on a JavaScript or typescript file when you click the play button it will run the code and not compile it if there is a compilation error you will see a red syntax highlighting the file will become red in the tab as well as in the file explorer to see the arrow Miss mess overover on the red syntax highlighting it's also possible to have warnings which are noncritical issues you can ignore warnings but it's recommended to address them when you have a warning you will see a yellow syntax highlighting and like for errors you can hover on the warning syntax highlighting to see the warning message triggering the compilation manually is a bit tus but you can also set up automatic compilation by going in the compiler menu with autoc compile compilation will be triggered automatically whenever you change the code or when you select another file while we are in the compile menu it's useful to know that you can also see the errors and warnings in the menu if you import a file that has an error your main file is not going to compile finally if you hover on an error on the file trip you will see the arror message next I'm going to demonstrate the autocomplete feature when you start to type Ty some Code remix will try to guess what you want to type and will'll show you some suggestion you can navigate the suggestions with the arot keys and to accept one of them just press enter if you have errors the autocomplete might not work fully so in this case make sure to fix the errors first before using the autocomplete next I will explain quick fixes quick fixes are suggestions made by remix to fix small mistakes such as missing license wrong visibility or wrong data location for example here we are missing the license statement to apply the Quick Fix first you click on the line number and you will see a blue dot and you pick the suggestion you want next I'm going to explain import statements when you code in solidity you often need to import code from other files with remix you can import code coming from three sources local files npm packages and GitHub repo first let's cover how to import a local file here we have two smart contracts and I want to import this smart contract into this one all I have to do is to use an import statement and reference the other file next let's see how to import some third party code through GitHub let's say we want to import s20 from open zipin all we have to do is copy the GitHub URL including the pass to the file that we want to import and back in remix we P the URL in our import statement and now we can use the imported code the other way to import third party code is to reference their npm package if they published it taking our example of open zipling they do have an npm package so in remix we can reference the npm package then the pass to the file that we want to import and normally this will miror the file structure structure that you have in GitHub please note that if you don't specify a version number remix will import the latest version by default that's why it's recommended to include the version number for an npm import it will look like this and for a GitHub input it will look like this last note about importing external code beside npm packages and GitHub the import statement will accept any https URL that serves a solidity file next I will explain gas estimates in remix when you write your smart contract you want to make sure that your code spend as little gas as possible remix shows you how much gas a function spend every time you make a change to the code you can see how it impact the gas cost this also work for the Constructor but this time you have two estimates first there is the estimation creation cost which is the total cost of creating the smart contract in including the cost of executing the constructure and after there is the code deposit cost which show you how much it cost to store the code of the smart contract on the blockchain the bigger your code the bigger this cost will be just to be clear this gas estimate is a subcomponent of this other gas estimate next let's talk of definitions and references let's say that you want to use a function but you don't remember the function signature instead of doing a manual search to find function definition you can just right click on jump to definition and you will navigate to the function definition this also work with any definition such as variables modifiers or smart contracts if you hover on a definition this time you will see the comments attached to this definition if they exist another interesting feature is references let's say you want to know when a function is used you select the function you click on go to references and it will show you a list of all the places where this function is used as well as where it's defined if you want to jump to one of these references you just have to click on it one click will give you a peck at the code and a double click will navigate to the reference like for goto definitions go to references works with any definition such as variables modifiers or smart contracts all right that's it for this video in this video I'm going to introduce remix desktop remix desktop is the desktop version of the remix IDE contrary to the web version of remix the desktop version runs on your operating system directly and not in your browser those two versions are mostly the same but there are a few differences like offline mode access to the local file system and the building terminal let's go over this before using remix desktop you need to download it you will find the download link in the description down below as you can see remix desktop is very similar to the online version you have the menu bar on the left the contextual menu the terminal and the main part where you will see the code but still there are a few different features so let's go over them first let's cover offline mode with offline mode you can work when you are not connected to the internet this can be very useful if you are in a place with low or no connectivity at all such as an apple a coffee shop or during an internet outage before going offline you need to make sure that you have downloaded the stud compilers that you need for that you need to go to the compiler menu and open the drop- down the green icons show you the compiler versions that you have already downloaded to download a version that you don't have have you just have to click on it reopen the drop down and you will see a green icon once the download is finished when you are online you will see a green icon here and when you are offline this will turn into a red icon and when you are offline you can keep using remix with the compiler versions that are already downloaded next I'm going to show you how to work with the local file system on the online version of remix your Sol files are saved in browser storage the browser storage is not a good place for long-term storage at any time it might be deleted because of a browser reset or even by you who accidentally clear your browser cash for serious projects it's better to use other options such as your local file system or pushing to a local repository the online version of remix can work with your local file system but you need to use a plugin however remix desktop can work with your local file system natively no need to configure anything let me show you how click on the file explorer menu then click on the open folder button then you select the project folder and click on open by the way it's also possible to create a new folder from here then let's create a new stud file let's put some code in it now let's open the terminal on our machine we can confirm that the file was saved locally and we you can also see that the code was saved next I'm going to show you how you can quickly put strap in new project with templates when you create a new project you have to select which template to use if you don't want any you just pick blank but you can also select one of the templates like ic20 you will have to name the workspace then pick a folder or create a new one contrary to the online version of remix with remix desktop when you load a template it's saved on your local file system and now you can start working on your project it's also possible to clone a git project you just have to give it a URL and it will save it locally in a folder of your choice next I'm going to show you how to work with several instances of remix when you work on several codebase at the same time it's more convenient to have separate instances of remix like in VSS code turns out it's possible to do this in remix desktop you just have to go to the file menu then click on new window or open folder in new window next I'm going to show you how to use the building terminal to open the terminal in remix you just have to click here since we already have a project open the terminal is already in the same folder this is the same terminal that you use outside of remix and you can use any command for example let's see the files inside our folder you can also use commands specific to a Smart contract framework like hotot or fundry it's also possible to create other instances of the terminal you can switch between the different instances you can delete instances and finally you can use different shells like bash zsh Etc next I'm going to cover how you can use a vs code and remix at the same time even though remix desktop is a great tool for smart contract development vs code is also very popular so which one should you choose remix desktop or vs code you can use both at the same time for example you can use vs code to write your code and use remix for debugging and testing since remix desktop can access your local file system everything will be in sync so for example here we have the same file open in both windows if I make a change in vs code this is reflected in remix and if I make a change in remix this is reflected in vs code next we are going to discuss smart contract deployment to deploy your smart contract you have to go to the deploy menu like for the online version of remix you have access to a local development blockchain this is a great option if you are just testing your contract however contrary to the online version of remix you don't have access to browser wallets like metamask this make it a bit harder to deploy to menet or to public test net but don't worry there is still a solution you click on wallet connect then you click on connect and you will have have the option to connect to a few mobile wallets including metamask for example if you want to use metamask you select metamask then you install metam mask on your mobile you scan this QR code from your metamask on mobile and after that you will be able to send a transaction another option for deployment is to connect to a node directly such as infura or a local chain like hotot or envil and for that you have other options in the environment drop down in this video I will explain how to use the AI tools of remix these tools are very powerful and they will boost your productivity and since these tools are already embedded in remix there is no need to open a separate browser tab everything is at the same place very convenient so make sure to watch this video what I will show you is based on remix AI an AI technology developed by the remix team remix AI has many use cases such as explaining an existing code base or generating code and we are going to cover everything in this video first I'm going to show you how to use remix AI to explain a whole smart contract so for the example this is a token contract with a charity fee that is going to donate some money for each transfer to use remix AI we will click on the robot icon and in the console below you will see an explanation of what this contract does so let's see what we have here here so we have the structure of smart contract the variables The Constructor the functions and a summary here so let's see if this is accurate so in summary this contract is a custom s20 token with a charity fee feature uh yes that's correct then transfer allows the owner to transfer specify amount to another address and it's similar for transfer from and here the AI understood that both function apply a charity fee and donate it to the charity address so it looks pretty good to me next I'm going to show you how to use remix AI to explain a part of the code sometime we don't need to understand the whole contract but we just want to zoom in on a specific part for this example I picked the router contract of Unis swap V2 which is a popular decentralized exchange and I want to understand this function which is used to make a token swap so first you select the portion of the code that you want to understand then you right click and you select explain this code and after remix AI will give you an explanation down below so let's see this in detail so here it gives us a general introduction this 3T function is part of the UNIS rouer and is used to swap tokens in a specific pass and after we will have more detail so here we have a description of the different arguments and after we have a description of what the function does step by step for example here it says calculate the amount of each token in the pass that will be received as a result of the swap using the get amounts ad function the result is store in the amount array and we can verify this and here we can see that this is the case we call the get amance ad function and we store everything in the amount array so this is a very accurate explanation of what the code actually does next I'm going to show you how to better understand compilation errors with remix AI so let's go back to the previous code example where we want to create a token I'm trying to overwrite a function from open zipling but there is a compilation error and I don't understand the error in this case you can go to the compilation menu scroll down and in the arrow message you click here to get more explanation it's going to send to remix AI the compilation error as well as the code of the contract and with this context remix AI will be able to explain in more details what is going on and it's also going to show you how to fix the error so let's copy paste the solution now let's compile again and this time it's working next I'm going to show you how to use remix AI to better understand solidity in the console you can ask any questions about solidity by prefixing it with Sol GPT then your question for example how can we override functions in solidity and now we have some explanation with some code example pretty neat next I'm I'm going to show you how to use remix AI for code generation for those of you who have already used GitHub copilot this is very similar when you want to use this feature first you need to activate it here then you create a comment with three forward slashes then you describe the code that you want to create for example let's ask remix AI to redo the transfer function you press enter Then remix AI will make a suggestion then you review the suggest question and if you accept it you press Tab and now the code is saved into your file and you can see that the code generated is pretty close to what I did myself so it's pretty good the last feature I want to show you is code suggestion for this feature to work you need to activate remix AI co-pilot let's say we need to restrict the access to certain functions in our token we start to create a modifier for that then inside we press the space face key to activate the code suggestion remix AI will make a suggestion based on the code of your contract so in our case it's almost correct except that it thinks that the charity address is the admin what we really want is a separate admin address so we need to help remix AI by creating an admin address now let's try to use the code suggestion again and this time this is what we want and we can accept the suggest by pressing the Tab Key in this video I will introduce quick dab quick dab is a tool to automatically create a frontend UI for smart contracts this can be very useful if you are doing a creek demo during a hackathon let's say we want to build a front end for this smart contract the first step is to deploy the smart contract we will deploy it on a public test net because quick dab requires a public network let's open mam mask and pick the sepolia network I already have some sepolia ether in my wallet let's go back to remix and we are going to open the deployment tab in the environment dropdown let's select the injected provider this will deploy the smart contract by using metamask next we start the deployment we validate the transaction with metamask once the transaction is mined we will see this box appearing here and in this box we will see this icon that's the link to Quick dab keep in mind that quick dab is only accessible if you deploy to a public network if you use a local network you will not see this icon next we are going to configure quick dab for that let's click on this icon this will open the quick dab configuration panel on the top you can configure the logo title and description of the front end on the bottom you can configure the UI you will see one box generated for each public or external function you also have a drag and drop visual editor if you want to rearrange the position of the boxes you can remove columns by clicking on the X icon and you can also remove a box if you don't want it quick dab host the front end on a platform called search. sh you will have to input your login and password for this service if you don't have an account on search. this will create a new account for you using the email and the password you provided search Dosh is a free service so don't be afraid to create an account then you can configure the subdomain for the frontend then you can share this on social media if you already verify the contract on ether scan take this box this will add a link to the source code on remix then with this option you can disable the terminal by default quick dab will show a readonly terminal to give give some feedback to users and you can also choose different themes finally you can click on deploy and after you will see this success message as well as a link to the front end now anyone can access this URL to interact with your smart contract so let's click on this link to see how it looks like first it's asking us to connect our wallet to the DAP we have to accept on the right we can choose the wallet we want to use on the top right we can see the address of the smart contract on the bottom right we can see a link to the source code of the smart contract on remix you will only be able to see the source code if you already verify the contract with ether scan on the left we can see the UI to interact with the contract for example let's try to read the data variable it works and now let's try to modify this value we will have to confirm this transaction with metamask we wait for the transaction to be mined and we have this information in the terminal next let's check the new value of the data variable and we can see that it worked so in just a few minutes you deployed a front end for your smart contract and you can share it with anyone pretty it in this video I will show you how to connect remix to your local file system with the the remix demon remixd with this feature you will be able to use the powerful features of remix while saving files on your computer let's dive in in remix your work can be stalled in three locations in the browser that's the default that's good for quick prototyping or learning but you shouldn't use this for long-term storage because browser storage can be corrupted additionally it's possible to push files to a GitHub repo finally it's also possible to store files locally on your laptop with remixd remixd creates a bridge between your local computer files and remix any change that you make in remix will be reflected on your hard drive and vice versa to get started you need to install remixd remixd is a demon process that runs on your computer it's distributed as an npm package so first you need to install nodejs once nodejs is installed open your terminal and install remixd with this command if you already have remixd make sure you have the latest version by uninstalling and reinstalling it now that remixd is installed let's connect it to a local directory navigate to the folder of your computer that you want to share with remix for example we are going to use this folder where I already have a smart contract once you are in your project folder run the following command the command starts the remix D service and connects the current folder with remix only this folder will be shared and it will only be readable and writable from remix.to remix in the web browser in the file explorer hamburger menu select the option connect to local file system since the remix D service is already running on your laptop the remix IDE will prompt you to connect to your local file system click okay to allow the connection you'll see your local files appear in the remix file explorer once you connected any change that you make in remix will be reflected in your local file system for example let's make some change in the smart contract now let's check out the file in our local file system and we can see that the change has been reflected before we go further it's important to note that remixd will make your local files in a specific folder accessible to remix as long as the connection is active for security reasons keep remixd open only when you're actively working with remix also avoid sharing sensitive files that don't relate to your smart contracts in the folder you connect to remix now let's compile and deploy a contract stalled on our local directory this is exactly the same procedure as with files that are only in remix first you go to the compile Tab and you click on compile then you go to the deploy Tab and you click on deploy and that's it when you're done it's a good practice to disconnect remix simply go back to your t Minal and press contrl C to stop the remix D server this will end the connection to your local file system and that's it we've covered everything you need to know about using remixd to link your local file with remix this tool makes it easier to work on larger projects stored locally while taking advantage of remix powerful smart contract features in this video I will show you how to use the remix debugger for this demo we will use this smart contract it has three integer variables and two functions that update these variables let's compile this contract we go to the compile Tab and we click on this button next we are going to the deploy tab we deploy the smart contract and we execute the full function in the terminal next to each transaction you can see a debug button this is how you can trigger the debugger so let's debug the transaction where we executed the F function it's going to open the debugger panel on the left here you can see the current function being executed and here you can see the up code being executed this slider allows you to navigate through the transaction execution for example if I move the slider you can see that the up code changed next to some up codes there are some line numbers these correspond to the line number of the solidity code some up codes don't have line numbers that's because the stud compiler creates some BT plate code this is related to the internal of the evm and we are not going to delve into this topic but just be aware that when you are debugging most likely you will be interested in the upcodes with line numbers next to them you can also use these buttons to navigate the transaction there are two types of buttons the step into buttons that step into inner functions if you happen to call one and a step over buttons that will skip over function calls and will only stay in the current function for example if we use the step into button we will start in Fu then we will step into bar then go back to Fu but if we rewind and we use the step over buttons it will just stay in the F function and Skip bar for the next demo we will use this other smart contract it has a single integer variable and a function to decrement this variable let's compile this contract next we are going to the deploy tab we deploy the contract we execute the decrement function and when I get the value of the counter variable I'm very surprised to find that it's a huge number instead of minus one so let's use the debugger to find out what happened in the terminal let's click on the debug button for this transaction where we call the decrement function in the debugger we can inspect the local variables like new counter and you can also inspect the state variables like counter at the beginning new counter is equal to zero but after this part is executed it changed to a very large number and if you keep going at some point counter is going to be updated to this very large number the up code executed to update counter is SS store if you scroll down you will see the arguments given to SS store this is the stack where SS store will take its argument from the first stack slot tells s say to which storage slot to update counter is the first variable of the contract so its storage slot is zero the next stack slot tells SS store which value to set the storage slot to and here you can see that this is a very large value it's the largest value that can be represented in a uint what happened here is an underflow at this line we try to substract minus one from zero but uint cannot be negative as a result solidity wrapped around the range and return the largest number that can be represented by a uint for the last demo I will demonstrate break points break points allow you to directly go to a specific point in the execution this is very useful if you have a complex function but you are only interested in a specific part this is the Smart contract for this demo we have some integer variables and a function that update the value of these variables let's compile this cont contract then let's deploy it let's execute the full function and let's start the debugger and we're going to put a breako at this line now let's click on this button and it's going to skip to this breakpoint and you can also go back to a previous breakpoint with this other button before we finish this video I want to show you the rest of the UI of the debugger if you scroll down you can see the memory here you can see the call data which tells you which function was called in the transaction and with which argument and here you can see the global variables like blog.
timestamp now you know how to use the remix debugger in this video I will show you how to use remix with hot hot and fundry the first step is to connect remix to our local file system this is a hotot project on our local file system let's start remixd in this folder next in remix let's open the hamburger menu and click on connect to local file system now we can see our project in remix next let's compile the project first let's open the smart contract to compile then let's go to the compile menu we will use the compile with hot option this option will use the configuration file of hot hot where you can specify the compiler version let's do the compilation and in your local file system you can see that the compilation artifacts were created next we are going to deploy to a hot hot network via remix first let's start a hot hot network with this command next in remix let's go to the deploy tab in the environment drop down let's select the hot hot provider this will connect to a hotot network the addresses that you see here are the addresses provided by the hotot network let's click on deploy and now if you look in your hotot terminal you will see the deployment transaction next I will show you how to compile in hot hot and then deploy from remix for that let's start from scratch first we clear the deploy smart contract then in the file explorer we delete the compilation artifacts of remix after let's go to our terminal and we are going to compile with hotot now let's go back in remix let's go to the deploy Tab and here we see the compile by hot label above the control we click on deploy and we see our contract below next I will show you how to use console log in the code editor let's import the console log library from H hat let's print this variable and let's recompile the contract next let's redeploy the contract we go to the deploy tab we choose the remix VM we click on deploy we execute the function where the console log is executed and we can see the output in the remix terminal it's also possible to use fund Reis remix the workflow is exactly the same there is just a small difference in the compilation in the solidity compiler in the advance configuration you will have to select the use configuration file option remix will add a remapping key to this file copy over your remappings from Foundry if any now you know how to use hot hot and fundry with remix in this video I will show you how to import dependencies in remix first I will show you how to import a dependency hosted on GitHub let's say you want to import the erc20 contract from the open zipling library in remix you can reference the GitHub URL after the import statement and now you can reference the imported symbols it's recommended to import a specific version otherwise you will get the latest version of the master Branch to import a specific version in the import URL replace master by the version that you want next I will show you how to import a dependency hosted on npm let's take the example of the erc20 contract from open zipin in remix you can reference the npm URL after the import statement and now you can reference all the imported symbols and once again it's recommended to import a specific version now you know how to import dependencies in remix in this video I will show you how to use learn e learn e is a plugin for interactive tutorials you can use it to learn smart contract programming and also to learn how to use remix to use learn e you have to activate its plug-in go to the plug-in menu search for learn e and click on activate if this is the first time you use learn e you may see a model window asking you permission to write a file click yes and also remember this Choice when you go to the Lear e pluging you will see this menu if you click here learn e will switch to the other side of the screen if you do this learn e will reinitialize and so if you are in the middle of a tutorial you'll lose your place here you can see the list of courses you have courses for beginners intermediate and advanced levels you have one course for learning how to use remix and the rest of the courses are about smart contract programming and blockchain first let's try out this Sol course if you click here you will see a longer description for the course and if you click here it will start the course this is the list of lessons let's click on this one on the top left you have the menu bar to go back to the home menu click here to see the list of lessons click here to nav navigate between lessons click here or here on the left you have the lesson and challenge description and on the right you have the code of the current lesson at the bottom of the left panel you have a button to check your answer and another to see the answer if you are stuck let's solve this challenge let's check the answer and this is correct next let's check out the nft course we go to the homepage we click on nft course this course will go through the solity code of an nft contract and then show you how to deploy a contract that has a graphic digital asset attached to it and we start with this lesson in this lesson there is a quiz you have to write the answer number in the solidity file on the right for example let's try then let's check the answer I have two errors and if I want to see the answer I click here next let's check out the nft auction course we go to the homepage we click on nft auction course and we start with this lesson this tutorial goes over the stud code of an nft auction contract and then it shows how to interact with it and here you will see another type of assignment you have to do a series of task and when you are done you click on next but unlike the other courses I show you before there is no feedback mechanism the great thing about having a tutorial inside of remix is that you can work on a lesson but then Veer off to try using remix other tools on the example files like the debugger or solidity static analyzers to learn even more with these tutorials your understanding of solidity should improve through practical application now you know how to use learn e in remix there are many other courses available and I encourage you to explore them in this video I will explain the remix VM and foring first I will show you how to save the the state of the blockchain for this tutorial we will use this simple smart contract let's go to the deploy tab let's open the environment dropdown let's click on customize and we are going to add an older version of ethereum called Shang high now we select this version let's deploy this contract and let's modify the state of the contract for example let's call the store function with 10 so now the value of the number variable is equal to 10 if you go back to the file explorer you will notice that we now have a folder called do states this folder stores the state of each local blockchain where you have a deployment for example we can see a folder with the Shanghai VM and a Json file that store the state of this blockchain if you want to puras this state or share it with other people you can push this workspace to an external repo later you can pull this repo and you will be able to work from the state that you saved for more information on how to save a workspace to a repo or load a workpace from a repo check out our video on G in remix next I'm going to show you how to fog the remix VM this is useful if you want to easily switch between different blockchain states using the remix VM let's go to the deploy Tab and just above the environment drop down you will find an icon to fog the chain currently selected currently the remix vs is selected so if we click here it will create a FK of the remix VM any state change that we do for this blockchain will be isolated from the original remix VM and it's also possible to reset the state of the blockchain if you click here once you have created this Fork it will appear in the list of environments and if you want to remove the fork from this list you can click on customize this list then click here and it's also possible to delete this environment next I'm going to show you how to Fork menet on remix forking menet is very useful if you want to test your contract against production data or in other words the state of main net we are going to deploy the smart contract to our main net fork in this smart contract we first Define a pointer to the usdc smart contract then we Define a function where we return the usdc balance of an address let's deploy this contract on a local main Network for this let's go to the deploy tab let's open the environment drop down we click on customize and let's enable the main name Fork so that we can select it in the drop down now we can see it in the drop down let's select this option now let's deploy the contract to our fork and then let's execute the usdc balance function this is the address of the top holder of usdc at the time of recording this video Let's execute the function and we see the ual balance of this address on menet this is working now you know all about the remix VM and forking in this video I will show you how to run scripts in remix scripts allow you to code deployments and interactions with smart contracts main advantages of using scripts is to have a repeatable process that is both safer and faster this is a especially useful for complex deployments to demonstrate script we will use this smart contract available in the default workspace this is a simple smart contract with an integer variable a function to update the variable and a function to read the variable in the default workspace there are also some example scripts let's check out this one scripts are written in JavaScript or typescript and saved with the extension JS or TS script script needs to be wrapped in an asynchronous self-executing function scripts can use the web3 or ethers libraries this script uses a utility function defined in another file this utility function allows to deploy smart contracts in this line we deploy the storage smart contract and in this line we console log its address to run a script there are four options you can click on the play button you can rightclick on the script file and click on run you can execute the script in the terminal with this statement make sure that the script is the active Tab and finally you can also use the compile and run button in the compiler menu this will let you set the state of the contract right after compiling which can be a big time saer for this to work you will need to add a comment in your smart contract where you specify which script to run so let's do a demo in the terminal you can see the script execu ution including the console log of the contract address and now if we go to the deploy tab we can see that the contract was indeed deployed and we can expand this box and interact with our contract as if we deployed it manually next let's create a custom script first let's create a new Javascript file in the scripts folder next let's create an asynchronous self-invoking function next we need to deploy smart contract for this we will use the deploy function defined in this Library this is a library that is provided by remix then we can call the deploy function with the name of the contract and store the contract object in a variable then we can execute the store function we first send a transaction then we wait for it to be mined and finally we can execute the retrieve function which will return the updated value of the variable we just chck change and we console lock the result our script is ready and next we will execute it in the terminal we can see that the updated value of our variable is 10 as expected so next I would like to demonstrate a slightly more advanc script so let's add another function to our smart contract we Define a new variable a new set of function and a new getter function and now let's go back to our script and let's add some code to set the value of the second variable and let's also console Lo the result and this time to execute the script we will hit the compile and run button so first let's go to the smart contract and let's update this command to reference our script then we go to the compile tab we click on compile and run and we can see the script execution in the terminal you can see how convenient it is no need to click on all the buttons of the function to set the state you just have to run the script as a side note be aware that instead of creating a script from scratched you can also customize some of the example scripts provided by remix in this video I will show you how to use git in remix git functionality is mainly in the git plugin but some features are integrated in the file explorer pushing your work to a remote repo in remix is important so that you are not totally dependent on a browser storage to save your work for this tutorial we will clone this GitHub repo it has a single file a simple storage smart contract this smart contract has an integer variable a function to update it and a function to read it back in remix we are going to clone this repo by clicking on the hamburger menu then clone then then we input the URL of the repo and now you can see the repo in remix it has created a new workpace and next to the name of the workspace you can see the git logo that indicates that it's a git repo next let's make a change we are going to make this variable public and remove this function next let's go to the git pluging and let's open the GitHub setup menu log to GitHub and after you should see these new menus let's open The Source control menu and you can see the list of files that were changed since the last commit you can add all modified files to the staging tree with this button or you can add files individually let's inspect the changes we click on the file name and on the right you can see a g div once you are happy with the changes it's time to add your file to the staging area so let's add the smart contract file next let's type A commit message page let's click on Commit and finally let's push to the remote repo to push you can click on this button now if you want to see a list of commits you can open this other menu we can see the initial commit and the commit we just pushed next I will show you how to do some more operations for more control on Push Pull operations you can open this menu you can select the local and remote branch and you can even do a falce push if you need to do some operation with branch es you can open this menu you can create a new Branch pull remote branches and you can also switch between different branches by clicking here Branch management can also be done at the bottom of the file explorer for example let's create a new branch and now let's switch Branch finally if you need to add other remotes you can use this menu at any time you can see the active Branch here in the status bar now you know how to use git in remix in this video I will show you the different ways to open files in remix first I will show you how to clone a GitHub repo go to the file explorer click on the hamburger menu click on the Clone button enter the URL of the repository to clone click okay and it's going to open the whole repo in a new workspace it's also possible to import a whole GitHub folder by adding this parameter in the remix URL followed by the URL of a GitHub folder it will also create a new workspace but this one will be temporary next I will show you how to import files from any website this will work for any website as long as it's on https for example let's import the file of the erc20 contract of open Zeppelin on the GitHub page you click on row then you copy the URL back in remix you click on the import file with hgps icon you past the URL and now you can see the file open in remix it's also possible to load a file from any https website with the URL you have to add this parameter at the end of the remix URL followed by the URL of the file next I will show you how to open a g gist in the Home tab click on this button and enter the gist ID or the URL to the gist it will open the file in a new workspace next I will show you how to open a verified contract smart contracts often interact with other smart contracts that's why it's useful to open files of production smart contracts that are deployed to public chains in remix you can open the verify smart contracts from ether scan and other blockchain EXP explorers go to the plug-in menu search for the contract verification plugin activate it go to the verification plugin tab go to the lookup menu select the chain of the contract input the address of the contract click on lookup remix will show you the corresponding verify contracts found in major blockchain explorers note that for ether scan you will need to configure your API Keys first in the settings tab of the contract verification plugin then click on this button to open the source code in remix next I'm going to show you how to open a contract from cookbook. deev cookbook. deev is a collection of popular smart contracts such as defi protocols or libraries you can open Smart contracts of cookbook in remix first go to the plug-in menu search for The cookbook plug-in and activate it next go to the cookbook plug-in search for a smart contract and click on it it will open a new tab with the source code of this contract there are many other ways of opening files in remix such as using a workspace template this is already explained in the intro to remix video remixd which allow you to open a file or folder stored on your computer hard drive and this is already explained in the remixd video okay so now you know all the different ways to open files in remix in this video I will show you how to deploy smart contracts and interact with them we are going to deploy this smart contract this is just an example smart contract we just care about the function interfaces first we need to compile the smart contract so let's go to the compile Tab and hit the compile button next we need to run the deployment we go to the deploy Tab and for this example I will select the local development blockchain of remix but you can also select public networks we click on deploy then we scroll down and we will see the deployed contract to interact with the smart contract you need to expand this box for each public or external function you will see a corresponding button the orange buttons are for the non-vw functions where you can send a transaction and modify the state of the blockchain the red buttons are for the payable functions where you can send ether and the blue buttons are the view and pure functions where you just read data from the blockchain so let's do a quick Demo First let's execute the non view function we need to provide an array of integer we use a comma to separate the arguments and we wrap everything in square brackets as a side note this notation will also work for topples and structs we click on this button to execute the transaction and after you can see the transaction receipt in the console next let's execute the payable function we have a lot of arguments and it's not really convenient to cram everything in a small input that's why it's better to expand the input field with this drop down we put all the arguments next we need to specify how much ether we want to send let's scroll up and here you can see the value filled for ether transfers let's change the unit to Ether and let's send one ether next we scroll down and we execute the function now our transaction is complete next let's execute this view function and we see the return string just below next I will show you how to use the lowlevel interaction feature lowlevel interactions allow you to create the data field of the transaction manually and also to interact with the fallback or receive function of a smart contract for example let's call the receive function by sending some ether to the smart contract we will leave the data field empty if you want to send some data in your transaction you will need to build your data argument yourself and paste here then click on transact next we specify how much ether to send for that we scroll up to the value field and we input The Ether value here before sending this transaction be aware that you have to respect the rules about fullback and receive functions if you don't remix will give you a warning next we scroll down to the lowlevel transaction button and we click on it and that's it our transaction was sent next I will show you how to interact with the smart contract that is already deployed for this example we will interact with this smart contract deployed on sepolia you will need the ABI or the source code with the same compiler settings let's copy the AI from ether scan back in remix let's create a new file with the extension ABI and we paste the ABI inside make sure this file is the active tab in the editor next we need the address of the contract and we can get it from ether scan back in remix we go to the deploy tab we find the at address input and we paste the address inside next let's make sure we are connected to the correct blockchain our smart contract is on seoa and we will connect to seoa using metamask so in metamask I already selected the seipo network in remix in the environment dropdown we need to select metamask you should see the chain ID just below the environment select box then click the add address button and the contract will appear in the deployed contract section and now if you expand this box you can interact with the smart contract as I showed you before remember that you need to have the ABI or the compile contract to be in the active file in the editor to use this feature next I'm going to show you the pinning feature pinning let you access a contract without having to remember its address or locate its API in the deploy contract section just click on the pin and the next time you connect to that Network and use the same workspace the pin contract will be present this works for all networks including the remix VM in this video I will show you how to use a ccom in remix for this demo we will use a template project provided by remix go to the hamburger menu click on create using template search for circum and we will use this project this is our circum circuit it's a simple circuit that makes sure that a variable is the product of two other variables when you download a circum template it it automatically activates the circum plug-in alternatively you can also activate the plugin yourself in the plug-in manager let's go to the circum plugging you can choose the compilation Target you can activate autoc compile and you can also compile manually so let's click on compile the next step is to run the setup first you have to choose the proving scheme then you have to choose the PTW choose the lowest number of constraints that will work with your circuit if you choose a PW that is too small for your circuit the setup will fail similarly if you choose a PW that is too large for your circuit the setup will also fail if you take the options export the verifier solidity contract and the verification key a pop-up toaster will show the location of these files then click on run the setup if everything went okay you will see a green check mark here then you need to compute the witness you provide the inputs here then click on comp compute you should see a green check mark here if it went well and finally click on generate proof the proof will be generated and if you've exported the verifier Cod data it will be put in a Json file and a popup toaster will show its location in the terminal you can see the confirmation that the proof was successfully generated once the proof has been generated you can submit it to the verifier contract for that you will need to compile and deploy this solidity smart contract then you will need to execute the verify proof function with the content of verifier call data. Json as an argument as a first side note if you scroll up to the top of the plugin there is an optional Advance configuration where you can choose the prime numbers to use as a second side note it's also possible to run circum operations with scripts instead of the GUI and you can check out the scripts folder of the circum templates for some script examples now you know how to use circum in remix in this video I will show you how to use proxy smart contracts in remix one of the most popular standard for proxy smart contracts is U ups for this demo we will use a u UPS template provided by remix in the hamburger menu of the file explorer we go to create using template then we search for U UPS templates we are going to select the first one which is an upgradable erc20 token this is the code of our upgradable token next let's deploy our contract we go to the deploy tab below the deploy button you have additional check boxes remix detected that this is an upgradable contract and offers us some extra options we select deploy with proxy and we'll have to provide the argument for the initialize function then we click on deploy we approve the two dialogues this will send two transactions the deployment of the token the deployment of the proxy in this demo we use the remix VM and the transactions appear to be instantaneous but if you did this on a public blockchain you would need to wait for each transaction to be mined before approving the next one below you can see two contracts first we have token contract then we have our proxy contract to interact with our token contract you have to use the interface of the proxy for example let's read the name of the token and this is correct next let's upgrade the token we are going to create a new implementation let's go back to the file explorer let's create a new file this is our new implementation we have one extra function to return the version of the token now let's go back to the deploy tab let's clear the deploy contracts here this is just at the UI level it doesn't do anything to the state of the blockchain next we will do the upgrade we will select the upgrade with proxy option we need to input the address of the proxy we click on deploy we approve the two dialogues this will send two transactions the deployment of the new token and the configuration of the proxy where we update the address of the token below we can see the the new token we can see the new version function and if we click on it we get the expected output as a side note be aware that it's possible to verify proxy smart contracts with the verification plug-in please refer to the video about contract verification now you know how to use upgradable Smart contracts in remix in this video I will show you how to use Smart contract languages other than solidity in remix first let's focus on viper we are going to create a Viper Smart contract let's go to the file explorer and let's create a file with the VY extension this is the extension for Viper files then I'm going to put my Viper code in the code editor next it's time to compile the smart contract to compile a Viper Smart contract you can click on the play button or you can use the control+ S short cut by default the Viper compiler will remotely compile the contracts it's also possible to compile Viper locally but you will need to connect remix to a folder on your file system with remix D and you will also need to have a Docker container that runs the ape framework to learn how to use remixd please watch the other video on this topic the compilation will activate the Viper plug-in if it wasn't already activated this is the Viper plug-in you can also trigger the compilation with this button if you see this green check mark it means the compilation was successful now let's introduce an error and let's compile again and you will see the error below click the error card to get to the corresponding line in the editor let's fix our error let's compile again next let's go to the deploy tab we select the right contract we click on deploy then you can see the deploy contract below and you can interact with it by using buttons it's the same workflow as for a solidity smart contract as a side note in the Viper compiler if you click here you will download some examples of Viper Smart contracts in remix remix will get this repo and create a new workspace in the file explorer called Viper it's a fairly large repo so it can take some time to load beside Viper it's also possible to use other smart contract languages such as rust by using the arbitrum stylus plug-in Koo by using the stocket plugin and there are plugins for other chains that run solidity but need a specialized compiler for example you can take a look at the ZK sync plugin and it's also possible to deploy to non evm chin like near by using the plug-in code by well done for each of them the process is the same search for the relevant plugin activate it create your smart contract with the proper file extension and compile with the plugging of the language now you know how to use Smart contract languages other than solidity in remix in this video I will show you how to do static analysis with remix for this example we are going to use this smart contract which contains a few issues the first step is to activate the static analysis plugin go to the plugin menu search for static analysis and activate the plugin the next step is to compile the smart contract go to the compile tab click on compile or use the shortcut contrl s then start the static analysis with this button alternatively you can also start the static analysis in the static analysis plugin after you click on this button you will see this screen you can select which tools to use for this analysis this is the builting static analysis tool of remix this is a solity linter and this is another static analysis tool please note that to activate sther you need to First Connect remix to the local file system by using remixd please refer to the video on remix D for how to do that slither takes a bit longer to return the results than the remix analysis or Soul hint once you have configured this analysis click on this button and you will see below the result sorted by category warnings are in orange and errors are in red if you click on one of the error cards it will highlight the targeted code in the editor now you know how to do static analysis with remix in this video I will show you how to verify a deployed smart contract on E scan directly from remix for this demonstration we will verify a smart contract on the seoa test Network the same procedure can be used for any other network this is the Smart contract we will verify it's already deployed on the sepolia testet before going to the next step make sure that your smart contract is already deployed on a public network otherwise you won't be able to verify it next we will need to activate the contract verification plugin go to the plug-in manager by clicking on the icon on the left side bar this is where you'll find all the available plugins for remix in the plug-in manager type verification into the search bar you should see the contract verification plug-in appear in the result click activate to add it to your plugins now the contract verification plug-in is active and ready to use you'll find it in the left sidebar with this icon let's open the verific ification plugin there are four types in this plugin verify receip lookup and settings the plugin can verify with scify ether scan block scat and R scan choose the chain of the contract you want to verify for this tutorial we're using sepolia so select sepolia from the network options to verify with ether scan you'll need to input your ether scan API key in the plug-in setting tab for that create a free account on ether scan and copy your API key next you'll need to provide some basic details about the contract enter the contract address which you can find in the deployment detail if you did the deployment from remix after choose the contract name that you used in remix next pick the verification tools you want to use you can pick one or several now you're ready to verify just click on verify Under the Hood remix will verify your contract with the verification apis of the selected Services next in the receipts menu you will be able to check that the verification was successful for each verification attempt you will see an entry expand this entry and if the verification was successful you will see a check mark here if it didn't work make sure that you didn't forget to deploy the smart contract first also make sure that the address and the contract names are correct and try again next you can check the cont contract page on ether scan click on this icon and it will take you to the contract page of ether scan you can see the code of the smart contract which shows that it was successfully verified if you scroll up you will see the read and the right tabs which allow you to interact with your smart contracts back in remix go to the lookout Tab and for this simple example I'll past the address of the contract we just verified the lookup will check the services for the verif ification status it gives you the option to open the contract in remix now you know how to verify your smart contract from remix that's it for this video
Up Next

13:23
Judith Butler on Gender Theory and Performativity
@bigthink
2M views•2023-06-08

12:54
Triumph of Orthodoxy Icon: Byzantine Art & History Explained
@BenCallan
2.1K views•2024-08-06

9:49
FastAPI vs Flask vs Django: Choosing the Right Python Web Framework
@TechWithTim
302.5K views•2024-05-26

1:42
Game of Thrones Opening Credits: A Cinematic Analysis
@gameofthrones
46.3M views•2011-04-18
Related Study Plans & Knowledge Roadmaps
Structured learning paths in General & Interdisciplinary Studies
general-studies
Elevator Engineering: History, Physics & Cities
01From Hoists to Safety Brakes: The Dawn of Vertical Lift
02Hydraulic vs. Traction: The Engineering Physics of Elevators
03Modern Speed, Safety, and Algorithms
+ 2 more learning modules
12h5 modules
Explore Roadmap
general-studies
Rubber: Material Science, History & Geopolitics
01Origins of Natural Rubber & Mesoamerican History
02The Chemistry of Natural Rubber & Vulcanization
03The Geopolitics of the Rubber Boom & Colonization
+ 2 more learning modules
12h5 modules
Explore Roadmap
general-studies
Containerization: Evolution, Logistics & Trade
01Ancient Trade & Bulk Cargo: Amphorae to Barrels
02The Industrial Revolution & Cardboard Packaging
03The Containerization Revolution: Malcom McLean
+ 2 more learning modules
12h5 modules
Explore Roadmap
general-studies
Textile Tech: Evolution, Labor & Global Impact
01Pre-Industrial Textiles: Handloom & Cottage Industry
02Mechanization: The Spinning Jenny to the Power Loom
03The Factory System & Global Labor Transformation
+ 2 more learning modules
10h5 modules
Explore Roadmap