

![¿Cómo funcionan las Promises y Async/Await en JavaScript? [2022]](https://i.ytimg.com/vi_webp/rKK1q7nFt7M/maxresdefault.webp)












This video teaches how to connect web3 applications to Metamask and other blockchain wallets using six different approaches: raw HTML/JavaScript with Ethers.js, Next.js with Ethers, Web3React, Moralis, Web3Modal, and useDapp. The core concept is that browser extensions like Metamask automatically inject themselves into the window object (window.ethereum), providing a connection to the blockchain node. Developers can leverage these injected providers to enable users to connect their wallets, sign transactions, and interact with smart contracts without needing backend infrastructure.
How to Connect Smart Contracts to Metamask: 6 Frontend Methods
Added:Fundamental understanding of JavaScript (ES6+) and asynchronous programming concepts such as Promises and async/await.
Basic knowledge of blockchain technology, decentralized applications (dApps), and the role of Web3 wallets like MetaMask as providers.
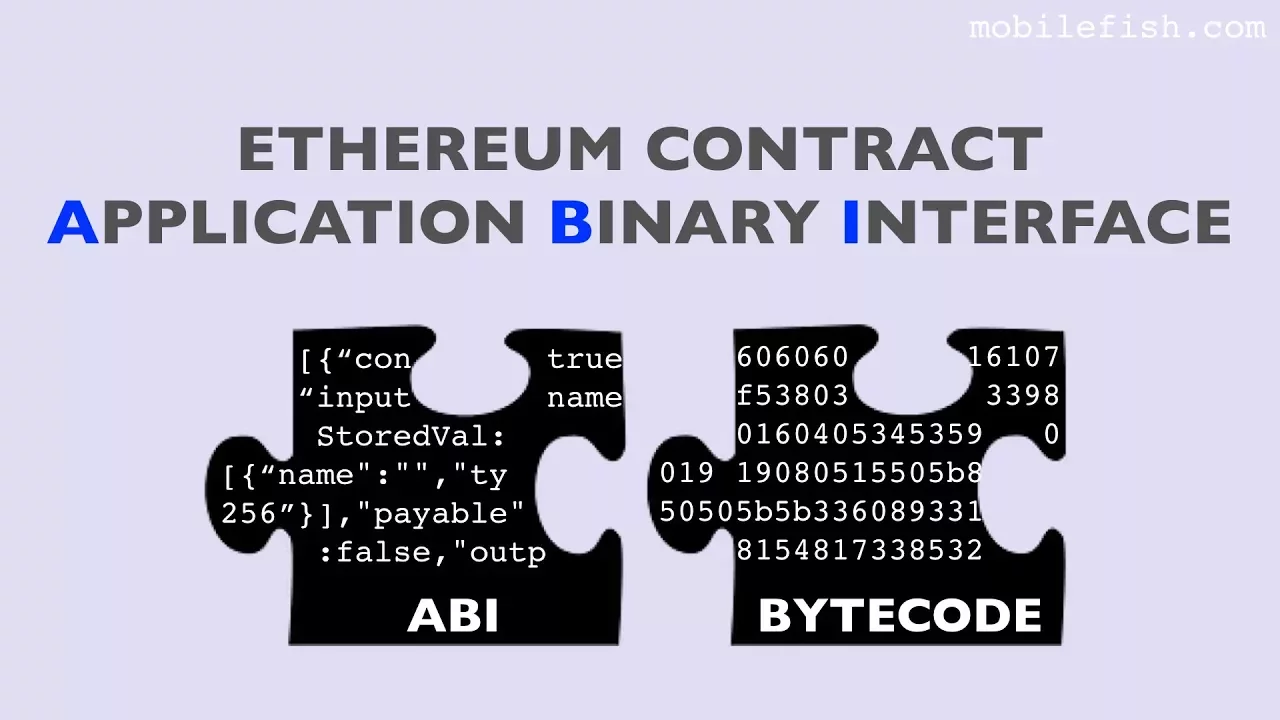
Familiarity with Ethereum smart contracts, including how they are compiled, deployed, and what an Application Binary Interface (ABI) represents.
Mastering specialized React hooks and libraries for Web3 state management, such as Wagmi, RainbowKit, or thirdweb.
Implementing advanced transaction management, including real-time gas estimation, event listening, and handling user rejection or transaction failures.
Developing multi-chain and multi-wallet support using protocols like WalletConnect to accommodate users on different networks (e.g., Polygon, Arbitrum).
Applying Web3 frontend security protocols, such as securing RPC endpoints, validating smart contract interactions, and protecting users against phishing attacks.
82.8K views2Klikes1:10:39Original Release: 2022-02-11
so you just built your amazing web3 solidity blockchain application and then you tell your non-developer friends all they need to do to interact with it is to use the back-end scripts or command line that you provide for them obviously this isn't feasible now after making our smart contracts somebody needs to build a front end on top of these so that non-developers and the general can interact with our applications as a full stack developer in the web3 space one of the first things you're going to run into is how to connect your website or application to a metamask wallet or any of the other billion wallets that are out there and in this video we're going to give you the superpowers to show you exactly what's going on in the front end when working with web3 then we'll go through six different ways that you can connect your front ends to your smart contract applications many of them using next.js and react and then at the end of this video we'll reveal what you all voted for for our 100 000 subscriber milestone let's get froggy now please please please if you're watching this and you're following along and you're testing please use a different meta mask or a different browser wallet than the ones that you have actual money in it what i like to do is i'll create a different profile in my browser whether it's chrome brave firefox etc with a totally different meta mask when developing you should really only use a metamask specifically for developing don't use the same one that you have real money in with great awesome all right so here we are with a website or a front end on top of some smart contracts that we've deployed it doesn't really matter what it is right now this is typically the interface that you'll see boil down to a really really minimalistic level typically you'll see something like connect function right and metamask or some other wallet connector thing will pop up we'll hit next we'll connect here might even say something like connected and we can also execute functions we can interact with our smart contracts we can confirm etc right this is something you might see something like avi right i'll hit connect on the ave application it'll say hey how would you like to connect i'll choose metamask i gotta change my metamask to mainnet but you get the picture right this is a simple example of what that would look like so what is actually going on in the browser when we connect what is actually going on and what do we actually need to do we're going to right click hit inspect and on the right side we're going to see our debugger here now if we go over to sources on the top of our browser you'll see a few things if you look down over here right we'll see this url right which right now is going to be my localhost and we'll also see metamask and phantom and a whole bunch of other stuff these other things that we see here are going to be what's injected from our browser extensions the reason we see this metamask thing here is because i've met a mask installed right the reason i see phantom here is because i have the phantom app installed metamask of course being an evm wallet and phantom being a solana based wallet now what happens when we have these extensions installed is they automatically get injected into a window object in javascript and in fact we scroll down to here in the console again you can find console you can click it here you click anything up there and we type in window we'll see we have this big window object with all this stuff right this window object represents this our window basically right now if we scroll all the way to the bottom and we do window.ethereum we also see an object here now this window.ethereum object only exists if you have a meta mask or metamask like browser or if you want to look at some other web3 wallet you do window dot solana so lana right and we see this window.solana now let's look at a browser that doesn't have metamask or phantom installed what do you think is going to happen in the window now let's go ahead right click hit inspect we'll go to the console now let's see what's going on in here if we go to sources we first off we don't see that metamask or that solana source here and if we go to console we still see window if i let me zoom in a little we still see window here but if i do window.ethereum we get nothing or if i do window.solana we also get nothing so in order for our browsers to know that there's a meta mask or that there's a phantom those extensions automatically add these to our window objects and that's something that we can check for in our javascript the reason these wallets are so important is built into them underneath the hood they have a blockchain node connected to them and in order to interact with the blockchain we always need a node and you might have seen urls from alchemy or infera because you need them to interact with the blockchain alchemy and infuria are examples of third-party blockchains that you can interact with and basically rent right but you need them to create a provider or a node to send your transactions to so you can do it in javascript like something like this is the alchemy documentation where you you take that alchemy url you stick it into some object and use that to send your transaction this is a way that you could do it in the back end but on the front end what you normally want to use is you just want to use the user's meta mask or their solana or their wallet as the main wallet now there are a ton of other different types of wallets to connect like ledger mew coinbase wallet connect etc and there are different ways to set those up but they all do the same thing where they expose some url they expose some node under the hood they give us that url they give us that provider the way metamask does it is with window.ethereum boom this is now our url this is now our connection in fact if you go up to your meta mask hit the little three dots expand view hit add network and then just hit the net x so we can get to networks you can see all of these blockchains that i have in here all have an rpc url this is the http rpc url connection of the blockchain node that's running i happen to have one running locally right now all of these also have a node rpc url and you can actually see them right in your metamask right this is connected to infira these are all connected to infira these are it's all the exact same thing metamask just has a really nice way of taking that url sticking it in the browser for us in this window.ethereum or window.solana you know or whatever so this is the main thing that we need to know we need we always need a connection with the blockchain and these browser wallets are an easy way to do that make sense great let's take this knowledge now and let's apply it all right now i'm in my visual studio code you can go to any code editor that you want though i do have a link in the description to setting up your vs code if you've never worked with it before so let's create a quick readme.md and we'll talk about what we're going to be going over so first we're going to go over doing everything in html javascript everything in html slash javascript now because nobody builds a front end in just html and javascript anymore we're going to work with some next js and react frameworks next js is an incredibly powerful framework based on react and i think it's a lot easier than just pure react so that's why we're going to be working with it next gs is built on top of react though so all your react knowledge still supplies but i promise you you're going to like it a lot more so then we're going to do next.js you know like i said slash react and raw ethers ethers is one of the most popular javascript libraries for working with blockchain for sending transactions for executing functions etc then after that we're going to get more advanced and we're going to use some more advanced tooling for the web3 space we use next.js and this package called web3 react then next js and package called react morales then next js and a package called web3 modal and then xjs and a package called used app so we have a lot of stuff to do here there's a lot of different ways to work with our front ends and we're going to work with all of these so let's get it now everything that i'm going to go over i have a repository for it and the link for this is in the description called full stack web3 metamask connectors each one of these links out to the an individual github project right with all the requirements the quick start you know everything you need to be successful if you want to follow along if you want to copy paste the code so all the code is going to be in my github link in the description so first up html javascript so i'm just going to go ahead and create a new file and call it index.html as most of us know html is how websites are rendered they're rendered using this html thing so we're going to start creating a real basic html file here if you type in exclamation mark in vs code and just click that first thing you'll get kind of some real basic stuff here and we're just going to simplify this a bit by deleting those we'll call this javascript test and uh in our body we'll just write hi now if you want i have an extension called go live that you can look up or excuse me called live server that you can run and actually if you hit go live what will happen is you'll start a live server right to your files and we see high right here if you aren't using vs code that's totally okay we have a solution for you too you can install this package called http server with npx or yarn again links to install yarn and npm and all that stuff are in the description but what you can do once you globally install it you can install by doing yarn at http server or npm install you know whatever you want to use and then you can run yarn or mpx http server and it'll spin up a server for you and it'll do the exact same thing so if you're using vs code though i highly recommend using this as it's a lot more friendly but you can use that too and now you'll see we we've dumped a whole bunch of different stuff in here like node modules package.json yarn.lock but really we're just focusing on this index.html here all right great now to write some javascript in this html we can just do a script tag like this now we can write javascript in here so we can do like something like console.log hi and back on our front ends oh let's go ahead and refresh we'll inspect go to the console and we see hi printed out here right so we can do all of our our javascript stuff in here so what we want to do is we want to check to see if that that window.ethereum exists right and if it does exist we're going to send a request to it so let's go ahead and do that so we're going to do if actually we're going to say type of let me turn get a copilot off window dot ethereum does not equal undefined then let's just say console.log we see meta mask right so we're saying if type of of window without ethereum isn't undefined right if this is defined we're just going to do console.log we see metamask and now we do refresh and we do indeed we see metamask great so now that we we know that we can see metamask what do we do well we want to send that request right if we look right now we click on our meta mask we are indeed not connected now it used to be window.web3 it's recently been updated to window.ethereum so you might see some older stuffs talk about window.web3 we're going to call this etherequest accounts it used to be ethereum.enabled so you might see that in some older stuff as well so let's go back in here what we can then do is we can do ethereum dot request method f request accounts oh and it looks like it was a little ambitious over here too so i'm going to go ahead and cancel it but if we inspect this right do a little refresh here we can see metamask is popping up because we're calling this method here so immediately when this browser loads we see if window.ethereum exists great we're going to call each request accounts and this is how we connect boom that's simple now we probably don't want it to pop up right away because uh if any time i disconnect right if i disconnect here it'll very annoyingly re-ask me every time i refresh so and it'll throw a bunch of errors when i cancel so what we're going to want to do is we're going to want to wrap this into a button right we're going to want to wrap that into a button so instead of all this maybe we're going to do button we'll give it an id of connect button we'll say on click equals connect and we'll call it the connect button right right now there's no connect function so i'll call it and it'll freak out but we can see if you zoom in a bunch we now have a button that says connect yay what we can do is back in our script tag you can do function connect async function connect and then we'll just pop this in here great so now we have a connect function now if we go to our front end we do a little refresh it's not going to annoyingly ask us all the time we hit connect and boom it does indeed pop up so i'm going to cancel them awesome so now that's how we just connect to this and that's it though right this is as simple this is as small as it gets you just slap this into your browser and boom you now have a way to connect to the blockchain however this is in everything right we want to also be able to execute we want to be able to send transactions so how do we do that well we need to create another function and this should actually be a weight but you know you get the picture so we need to create another async function called execute a sync function execute now that we have a provider and we have some accounts to work with we can actually start executing some functions now we could go ahead and re-build the wheel and we could go and do everything raw and do everything ourselves but we're engineers we don't want to do that so what we typically do is we'll use something like the ethers.js package to help us send these transactions you can use ether.js you might have also seen web3.js these are both javascript packages that have all this functionality for sending transactions so we're going to want to use that instead now because we're going to want to use a package we need to first install it so i'm going to do yarn add ethers so we've gone ahead and installed ethers here and we can't actually import packages right in the browser so we're going to go ahead and create a new file called index.js and we're going to write all of our regular javascript in here we're going to turn it into browser compatible javascript and that's what we're going to use in the index so if that's confusing don't worry just bear with me hopefully it'll make sense in a minute so we're going to delete all this stuff that you see in script and over in our index.js we're going to paste that back in here so we have our connect function we have an execute function first thing we're going to want to do at the bottom is we're going to do mod module exports equals connect and export or excuse me x eq see cute so we're exporting these functions so that when we do browserify our javascript here it'll work for the front end and great so this is going to be our connecting function let's create some execution function so first we're going to grab that ethers package so we're going to say const ethers equals require ethers and that's how we get ethers in here now that we have ethers we can go ahead and execute some function now whenever you execute a function i say this a million times there's a couple things you need you need an address you need the contract abi or basically the blueprint to interact with a contract you need the function of course and then you need a node connection we have a node connection that's going to be our meta mask we don't have a function we don't have an address and we don't have a contract avi yet so let's go ahead and make one so i have another package on my github called hard hat simple storage that will deploy a really minimalistic contract called simple storage that looks just like this with some minimalistic functions and it comes with hard hat which is a local fake blockchain that we can use and this way we can test out doing transactions and executions without actually having to do it on a test net or on a main net you can also use ganache if you're familiar with that but basically we just want to get some smart contract and some blockchain so that we can do stuff so in a second terminal and we're gonna have two terminals here we'll do git clone that package there we're going to cd into hard hat simple storage and first we're going to hit yarn to install the dependencies and you'll see what we're doing in just a second once we have all the dependencies installed we can go ahead and run yarn hard hat node and this is going to do a couple of things if we scroll up on this first it's going to deploy that simple storage contract that we just saw at this address on a fake blockchain that we just spun up so first it's going to spin up a fake blockchain running in this terminal in this little terminal here deploying simple server deployed simple storage at this address here and it's going to give us a whole bunch of fake accounts next we're going to want to do is you're going to want to grab this endpoint here start http websocket json rpc server here this is now our blockchain node so we'll go to our front end we'll go to our meta mask and we'll hit add network we'll add the network name i'll call it hard hat localhost you'll paste that in you'll get the charity of 31337 currency symbol eth and no block explorer and hit save i already have mine added which is why i get this error here but once you do add it you'll get a new network called hardhat localhost next what you'll do you come to your accounts you'll hit import accounts stay on private key and you'll grab one of these private keys that metamask automatically gives to you i've already done it which is why you see my account eight here with seemingly infinite ethereum but it's not actually infinite you know it's it's fake money so what we want to do now is we want to grab this address right because we're going to need an address so great we have that address now so we'll say const contract address equals boom and we'll close this for now great and now we have an address we'll need an abi we can actually find the abi if we go into our hard hat simple storage folder go to deployments simple storage dot json and we just grab this abi bit here so we can literally go like this copy the whole thing and paste it and say cost abi equals this bad larry and we'll delete that boom constant abi is this whole big thing this is the blueprint to interact with the contract and you need this to call functions great we have the api and finally we need the function that we want to call so if we look at our simple storage contract quickly there's one function that anybody can call called store and we just pass it our a favorite number right we pass it a favorite number so this is what we're going to call this is the function that we're going to call so we also have a function yay address contract api function and a node connection okay cool so here's the contract address here's the abi all the way down here i know it's a it's a very long abi now what do we do well this is where we stick our meta mask into easter this is where we stick our provider we stick that metamask into ethers so we can say const provider equals new ethers.providers.web3 provider and the provider is going to be window.ethereum right remember how i talked about how this meta mask is going to be our provider we're using this as like our rpc url right we could also just as easily stick something like this in right but we want to connect to the user's meta mask right we want to connect to whatever network they're working with and whatever network they're on we don't always want to force them to our local blockchain so great so we have a provider now we need a signer what's a signer well anytime somebody executes a transaction somebody needs to sign it somebody needs to execute it somebody needs to be like hey i'm the one who executed it and we can get that from our metamask we can get that from our provider so we just do provider dot get signer and this is going to get the connected account into our ethers here so great we have a provider we have a signer now we put those all together into what's called a contract in ethers so we'll say const contract this is that simple storage contract we're going to do equals new ethers.contract and we pass it the contract address the abi and the signer what this means is we're saying we're going to be interacting with this contract address using this abi and any function called is going to be called by the signer right so it's whoever whoever connects here is going to be the signer so whoever's connected is going to be the one who's going to call these transactions next we're going to do await contract.store 42.
so this is where we call that store function on our simplestorage.sol contract and then that's it right and what we should see when we call storm we should see in our terminal with our hardhat blockchain running we should see a transaction come through right once we call that execute function so this is the real minimalistic way to go about and do this now if you go to my github you'll see the code is a little bit different right i've added some quality of life stuff like some try catches and some document.getelementby and changing the text once we click buttons and stuff but it's going to be basically the same right so you will probably want to do some try catches when you're doing these in prod though but at the same time you're not going to be doing html javascript like this in prod you're going to be using you know next.js or something anyways now that we have our javascript basically done what do we do now well we're going to need to add it to our index.html so what we can do is we can do script source equals index.js and we can also do text equals excuse me type equals text slash javascript and then additionally we're going to add a execute button and this one's going to call our execute function and we'll say xe cute great now you notice something we're able to connect fine right go ahead and connect great but if we try to execute we'll get cannot access ethers before initialization right and it even gives us like where it's like what are you talking about what is this ether's thing and again this is because this requires stuff doesn't work in the browser so we need to browserify our javascript we need to take this javascript that we wrote we need to transpile it into a way that the frontend can actually understand so we're going to add another package to help us do that this thing called browserify to do exactly this and so we can install like this or we can just do yarn ab browser if i like that and now we can transpile our index.js into browserified index.js so we'll do is we'll run yarn rouserify index.js dash dash stand alone we'll call it bundle and we'll set the output file to dot slash dist slash bundle dot js so now we have a dist folder which usually stands for like distribution and we have this bundle.js now that we have we've created our standalone we've created our bundle.js back in our index file we'll change this to dist slash bundle dot js and then we'll do bundle dot connect and bundle dot execute our javascript our html will look just like this now if we go back to the front end do a little refresh make this look a little nicer and you'll notice if you're already connected right now we didn't do any fancy stuff to make it say connected so it just won't do anything but once we're connected we can verify by looking right here we'll go ahead and hit execute and we'll see metamask pop up again remember we'll need to be on the account that has the money in it and we'll go ahead and hit confirm if you get this error here it's because of all the finagling that we're doing uh just come up to your meta mask hit your account make sure you're on the account with all the the fake ethernet go to settings go to advanced scroll down to reset account reset great now go ahead and refresh make sure we're connected we'll hit execute now confirm and we won't see any errors but if we go back to our terminal and we go back to our where our hard hat node is running we'll see a new transaction has gone through each send raw transaction contract call and this is all the stuff that it's doing and if we go back to our metamask we'll be able to see that transaction have gone through obviously there's not going to be a block explorer because it's a local blockchain but that's really it and that is the most minimalistic way to connect your front ends to your smart contracts all right we've got our first one done yay and remember all of these have a github repo so if you get confused if you get lost come over to github repo if something doesn't work make an issue etc and if you're having issues getting blocked or really with anything be sure to watch my defeat any coding bug video it's going to help you debug literally anything and get help the fastest but anyways now that we've got this first one done let's go ahead and move on to our next one why well because nobody's actually going to use just html to build their applications they're going to be something like next js react angular svelte etc we're going to be doing next js for all of the following demos but we're going to show a number of different ways we can go ahead and approach this each with their own trade-offs and we're going to explain the trade-offs of course so the first one we're going to do is we're just going to do a raw ethers next.js application and again all of this is on my github links are in the description let's come to our vs code go ahead and we'll close everything out i'm going to create a new file called next js ethers cd into next.js ethers and we're going to open this up into a different vs code window here of course you can also hit file open which will pull the drop down and open up the file like so great and the way we're going to get started is we're going to make a basic next.js application the way we do that is with yarn create next app put a little period here saying we want to be in this directory and with this we'll have a very basic next.js project here in fact if we just run yarndev right now we'll get this which pops up into this welcome to nexjs application that's running right from our vs code so let's go ahead and smart contract web3ify this so we go into our pages let's go to index.js yeah now let me give you a quick walkthrough of what's going on with next.js okay so this dot next has a whole bunch of framework stuff and we basically always ignore this node modules is going to of course be all of our dependencies pages is really cool any page you make in here any file you make in here is going to be a new page this app.js is kind of the entry point for everything and the index point is going to be the home page right so all of these pages basically route through this app.js so just ignore this one as well and index is our home page public is just going to be like some public images and stuff um styles is going to be some styles this is like your css this is how to format stuff makes up nice this is a linter we're going to ignore this this is for github stuff this is uh we're going to ignore this for today but this is a next config this is your basic packet.json for packages and dependencies readme and yarn.log for dependencies as well we are going to focus solely on pages we're not going to go anywhere else we're just going to stay right inside inside here we're going to delete card.js we'll go to index.js and we're going to delete everything below this first div i'm going to go all the way down to the last div save it and then we're just going to put hello patrick or hello frogs of course it can't find car now but now we see hello frogs we'll even zoom in a lot hello frogs cool so let's go ahead and front end defy this right so first we're going to need to connect to metamask and then we're going to need to execute a function great so let's create a little function so we'll do async function connect in here we're working with next.js we have to do this if typeof window.theorem does not equal defined in the component bit because next.js has done some stuff to make it so that window doesn't exist right next to it doesn't know about window but that's fine there are some ways that we can actually get around it and one of those is going to be putting it into the component and again we're going to say if type of window.ethereum ethereum does not equal undefined then we're going to go ahead and try i'm going to do a try catch here we're going to run await ethereum.request and this is where we pass this method in again right eat request counts this time we want our button to only exist if we're not connected right we or we want it to say something different so i'm going to add in here something called a use state so we're going to say const is connected set is connected equals use state false i'm going to import this we're going to import use state from [Music] react and i know it's failing down here because we need to do catch e so in a try catch we need to have the catch part so anyways this use state is going to do it's going to give us this is connected variable and this setter set is connected and you might be thinking okay well why don't we just do const or excuse me let is connected you know equals false what's the difference between doing this and doing this weird use state thing well the difference is that use state helps us keep state between renders so we're not going to go too deep into front end stuff here but that's basically why so we're going to use this is connected set as connected and so once we connect here we're gonna do set is connected to true and then we're also going to use this connection to get a provider so we're gonna do const provider set provider equals use state and we'll just leave it blank and we have set is connected and now we're going to say let connected provider equals new ethers.providers dot web3 provider of window.ethereum then we're going to do set signer to connect to provider dot get signer and i think it even even popped ethers in for us right here which is great we're actually going to kill this yarn add ethers just to make sure we have it react gets installed by default with nexjs so we don't have to install that there great let's start it back up with yarndev and cool and then we'll just do um if type of window.theme you know is undefined we're just gonna do else set is connected to false cool let's go to our front end do a little refresh uh nothing happened here why because we need to create our button that's going to call this connect function so let's do let's wrap this parentheses and in here we'll do a button we'll say on click on click equals this is where the syntax is going to be a little bit different we're going to say on click equals a function and that function is gonna be connect and this button is gonna say oops don't need that there this button is gonna say connect great hit refresh we have this connect button now are we currently connected we are let's disconnect now let's connect minimas pops up perfect now something that you'll typically want to do is you'll want to do something like you only want to show this button if you're connected so maybe you'll do something like is uh we'll put some javascript in here is connected and if yes so this is called a tertiary operator it's the same as doing like if is connected you know do this otherwise do something else but it's just kind of nicer for this jsx stuff so we're saying if it's connected let's do something if not we'll do something else so if we are connected we'll just have the say connected and if we're not connected we'll copy this whole thing stick it right here save and we'll do and again mine auto formats that's why it keeps doing that so if we're not connected we'll show our connect button we'll go back over here and now when we hit connect it says hello frogs connected right so if we refresh yeah we'd have to save the state but get the picture cool showing that we're connected awesome so we have our connect button let's now create our execute button so do async function execute this can be really similar to what we did before and in fact we can just copy paste it in here right so i just copy pasted it with some editions type of window.ethereum is undefined um we have a contract address we have our our massive api we removed the part about the providers and the signers because now our signer is up here and we gotta change this to set signer designer instead of set provider sorry click it center okay great and then we have a try catch for a weight.contract.store42 and console.log error so and we can add some more stuff here to make it you know the way that i have it currently set up in here in my github i have it a little bit fancier you know if we scroll down to my github where it says please install metamask if you don't metamask it doesn't show the execute button unless you're connected actually no yeah let's go ahead and add that in too but we're going to make ours a little bit easier so we have this is connected bit and if we're connected we're going to add another button excuse me if we're connected we're going to say connected we're also going to add another button uh where we call on click we're going to call a function execute and we're going to call xe execute but we gotta have this being a little react fragment boom so this is called the react fragment here we have a little button here awesome go back to our front end connect we see we're connected we can call execute of course we're going to get an error because right now our hard hat instance isn't running i'm going to go ahead right now since i have a transaction here i'm going to go ahead and just reset this account because it's hardhat's going to get confused advanced reset account yes that's fine so again we're gonna pop open a new terminal we're gonna go back to that hardhead simple storage and again we're gonna run yarn hard hat node this is going to start up our local blockchain and again we have all the private keys simple storage has been deployed to the same contract address the abi is going to be the same great so let's scroll at the bottom now if we refresh we'll do connect we'll do execute contract address is not defined so let's let's fix that oh i should do const contract address now let's try it connect execute got a different error console metamask is having trouble connecting to the network ah let's just disconnect and reconnect so do refresh connect scroll down to the account connect great looks like we're connected now we'll hit execute metamask pops up and confirm if we scroll down we see that transaction has indeed gone through and again since we're doing more basic stuff here you'll run into a whole bunch of issues like i just ran into right which is good you'll get to learn more about what working with these local chains looks like and what it's about right so the issues that i ran into right there was that i my metamask was connected to the local blockchain and then i stopped the blockchain and then i restarted it and then i restopped it and so i got a little confused right and so you'll probably run into the same things and you'll get really good at working with it all right boom two two down all right let's go that's how we can connect and send transactions with just ethers and just next.js now what you're going to run into though is that as you switch pages right as you switch around this state that you created like is connected the signer and stuff you're going to probably want this signer in other pages but there's got to be an easier way right we don't want to have to do all this this work right we had to do a lot of work we had to code a lot we had to do a lot of stuff there's got to be an easier way to do this stuff than what we're doing right here and there is there's a ton of packages to make our lives a lot easier and one of the ones we're going to be the first one we're going to talk about is web 3 react now this is one of the big players this is being used by protocols like unit swap and you can even see if we go to the unit swap github we go to interface they're using web through react uh ave dot app.avi.com they're using this web through react as well so this is like a really really powerful framework that we're gonna be using so let's go ahead and do this so we'll cd down one we'll leave this running we'll leave our hard hat node running because we're going to still be using it for futures and that way we don't have to reset our account but let's create a new directory called next.js web 3 react we'll cd into next.js web3 react and we'll open up a new folder with just this one you just move this over to the side really and just have it running in the side or you could start it up in in your own new terminal again you know whatever really whatever you want to do here it's what you want to do but okay so we're in a new folder and we're gonna be doing the exact same thing and let's do this so same thing go to index we're gonna delete everything between the divs here and we're going to add this web3 react package so we'll do yarn add at web3 react slash core we'll do yarn add ethers as well this web3 react it also comes with this thing called context which is really really powerful and if you go to their documentation again link in the description or web3 react provider these are ways to wrap all of your code in this provider that way all your apps know about the state of the providers and if you're connected to metamask and et cetera and actually all of the applications we're going to work with have this this wrapper so that all the applications know about you know metamask and stuff so we're going to remove everything in here and if we want we can even do yarn dev it will say hi frogs in here go to our front end oops localhost 3000 and we'll see hi frogs i'm cool so now what we're going to want to do is we're going to want to wrap this component in this web3 react provider and again this is going to add context and it's going to help make it easier for our application to remember the state of whether or not we're connected to metamask between each page right so the way we're going to do this we're going to import web3 react provider from at web3 react core and we're also going to import web3 provider from at ethers projects providers so we're going to have to add this as well so we'll do yarn add add ethers project slash provider and this is just a minimalist version of ethers right so this is this is a way to get just the providers into here without all of ethers being imported and you'll see why in a second the reason we need it is because this web3 provider needs this get library function it needs a get library function in order to exist right so we can just go ahead and create const get library and this is going to be a function that takes a provider as a parameter and this is some syntactic sugar it's the same as saying you know um function get library you know it's basically the same as doing this but javascript is a bunch of crazy different things to do and all we're going to do is say return new web3 provider provider and this is how you can actually define how to get different providers with this with this web through react since we're just keeping it real simple this is how we're going to do it so it has a field called library we're renaming it to provider and it has an active thing so we can check to see if we're actively connected or not which is really helpful right and we can use this hook across all of our different pages to always know if we're connected or not right and that's what the value of wrapping it like this does if we didn't wrap it like this we would have to reconnect on every single page which would obviously be awful this way we connect once and we're good to go so let's add those functions again right now when we do our async function connect instead of doing it with window.ethereum or whatever what we can do is we can just say try await activate with some provider and then you know catch e console.log e so activate is another one that we're going to grab from this web3 react it comes with this little act this wonderful activate function and we have to tell it what we want it to activate so web3 react comes with a whole bunch of built-in connectors so metamask is one of the main ones however there's a whole lot more and if you go to connectors you can see there's one for ethereum formatting frame injecting this is going to be like your metamask ledger magic network portis there are all these different type of wallets that have different kinds of connection pieces right if you want your application to support all these all you have to do is import them and support them so we're going to work just with the injected but if you wanted to work with more you would just import more and when await activate you just choose whichever one like the user pressed so we're just going to do import injected connector connect door from at web3 react slash injected connector and then what we're going to do is in here we're just going to say const injected equals new injected connector so now we have injected this is what we're going to want to use we're going to say hey we want to use the injected provider we're going to connect to the injected provider but if we wanted to connect to someone else we could easily just read the docs for somebody else so i'm going to kind of speed through this part down here because we've done this a couple times now so great we ever connect the button and we have execute button so if we scroll down so i kind of sped through this but now we're just using this active thing which comes from this use web3 connect and we have our we're saying if we're active show connected and show the execute button if we're not connected show the connect button great so now we just need to do async function execute so now we're just say if active i'm going to do say consigner equals what we can get the signer right from this provider variable now so we can just say provider dot get signer which is really helpful we'll say const contract address this is going to be the same and typically what i like to do actually is i'll add that avi to a different folder called constants so that doesn't muddy stuff up so you just do module.exports equals abi this big thing like this and then we can just do import api from [Music] constants api like that now we have the abi and we can once again do some wonderful ether stuff here const contract equals blah blah blah the whole nine yards same thing we've done before and boom we now do connect how do i execute oh from ethers we'll import ethers do a refresh connect connect it execute confirm all right cool two down what's next now what if we wanted even more functionality so doing all this stuff with blockchains is really important because of decentrality et cetera et cetera but you'll notice a lot of applications like open c like ether scan still have some centralized component right i can go to an nft i can like that nft metamask will pop up but it's just assigned something right it's not to actually send a transaction well what's up with that that signature actually gets stored in the open c centralized database and hap but authenticated with my metamask and these functionalities are incredibly important and can make these applications really feature rich but they don't require making and sending a transaction and that's what we want so we're going to need eventually to have some type of firebase for crypto some type of centralized database to make even more feature richness and this is where morales actually is comes into play so morales has a react package as well that has all these hooks that has all these functionality it has this context provider and additionally has the option for us to opt into having a server that runs all of our applications as well if we want it so that's we're going to do right here there's going to be a bunch of stuff we know we're going to need so we're going to add our constant slash abi thing in here again we're going to go to pages we're going to do the same thing we're going to delete everything in here goodbye all right cool now what now there's an incredible site called ethereum boilerplate which has this repo with a ton of this stuff already built in that you can go check out and i definitely recommend you checking it out and deconstructing what's in here to build for your own application but the way we're going to go ahead and install this we're going to do yarn add morales and react morales so we're going to import or alice provider from react morales then here we do morales provider and here are some of the amazingness this platform comes into play since it's an open source application a whole bunch of docs and everything we can also just go right to the github as this initialize function so if we want to we can connect it to a server that's connected right with morale so we don't have to worry about hosting databases all this stuff is built in with morales and it's really powerful or we can just say hey we don't really want to work with your server but your react hooks are dope so we'll take those and that's what we're going to do but having the functionality to go ahead and turn a server on later makes it really really easy to when you've reached that point say hey i'm ready to deploy i'm ready to add all this amazing functionality i'm ready to host this on a server it's really easy just to flip your provider uh to being this so we're gonna go ahead and grab this i'm gonna say browse fighter initialize on mount is false so this is basically saying hey we don't want a server but again we could do that later if we wanted to and then we're going to close that provider say return this whole thing boom cool and then we'll go to index.js we'll say hi again and we'll do yarndev we have hi and we have a little semicolon in here because we added a little extra semicolon in here whoops and right now it has this this uh this warning bug you can just ignore this for now or you can yarn ad magic sdk and yarn ad at wallet connect slash web food product web3 provider get rid of that if you want now in our index similar to web3act we have some hooks we can use with morales so we'll do import use morales comma use web3 contract from react morales and we can do const enable web3 is web3 enabled equals use morales and i bet you know where this is going now i'm just going to copy this the button setup from the web3 react because we've done it a couple times but instead of active we can just use this is web3 enabled and now for our connect we're not we don't even need to write a connect function we can just do enable web3 boom let's pop into our front end do a little refresh make sure we'll go ahead and disconnect here our hard hat local blockchain is indeed running go ahead and hit connect and boom we didn't even have to write a connect function with the morales hooks now xq isn't going to do anything of course because we haven't defined our execute function so let's go ahead and do that so morales also has some hooks for executing smart contract functions and it's with the hook called use web3 contract which i've already included in here use web3 contract so we can do const run contract function and there's a whole bunch of other stuff that comes with it like is fetching is loading data error etc but we can say run contract function equals use web3 contract and we'll just put the parameters in here of what we want to do so we'll do abi which will be abi we'll go ahead and again import that so we'll do import abi from constant abi so we'll say abi is abi contract address it's going to be again that same contract address or whatever contract address you're using function name it's going to be store and the params so our params were favorite number and we're storing 42 and that's it now we don't even need to create an execute function we can just do connected on click run contract function and if we flip back to the front go and do a little refresh connect execute and boom even easier easily the easiest way that we've done so far two go ahead and connect and get set up here now this is a setup i'm going to highly recommend people look into it and look into using because it just makes life so much easier i've used these i've used morales for a number of projects it's absolutely fantastic now moving on what's next well you know we could look into ethereum boilerplate and and kind of same as the web3 react they it has all these plugins for different injectors right which is cool wouldn't it be great if those plug-ins those injectors kind of just came out of the box and that's what web3 modal is so guess what we're doing it again cd down down make dir next js web3 modal now this is used by this project scaffold eth which is created by austin griffith who you should absolutely know about in this space because he is absolutely phenomenal this is another thing along with ethereum boilerplate to reverse engineer and figure out how to do your react stuff right if you come in here if you come to the source components it's a wonderful wonderful application for both learning about front ends and and web3 and all this stuff but also reverse engineering for your project so ethereum border plate scaffolding two projects you absolutely absolutely want to pay attention to and scaffold eath uses this thing called web3 model so we're going to do yarn create next app you know the drill i'm going to paste those constants in here and great we're gonna fly through this one even faster we're gonna go to pages index delete everything great now the package that we're gonna add is web3 modal this is a package that once you hit connect it'll automatically prompt you with these buttons instead of you having to actually code these buttons in yourself so we can do is we do import web3 model from web3 model we'll do let web3 model and this web through modal what it needs is a list of the providers that you want to give it and it comes default with metamask so we don't need to tell it about metamask but we do need to say const provider options equals some list of provider options so we need to tell it what provider options that we want to do now wallet connect is easily one of the most popular ones so we'll say all right cool we want you to support wallet connect so how do you support wall connect well we got to give it the package which is going to be this wallet connect provider that we need to add so we'll do yarn add at wallet connect slash web3 provider and then once we install that we can do import wallet connect provider from at wallet connect slash web3 hyphen provider package wallet connect provider and then we'll do options and this is all you can you can see this all in in the web3 modal documentation we'll give it an rpc option and then we put in a chain so uh i don't think the local chains work very well so we'll do 42 and then in here you would put like you know alchemy dot io slash blah blah right so you go to alchemy get a url i'm going to expose one as a dot env variable so if i do.ev.locom i can add in here a next public rpc url and then in the front here i can do process dot env dot next public rpc url and this so since i'm doing 42 this has to be a coven rpc url but you get the picture now that we have a new web through model we can go ahead down here async function connect and we can do all the normal stuff like the if and the try catch but i'm just going to do it like this uh const web 3d model provider equals web3 await web3model.connect now this is going to be the same as like request metamask accounts etc so i can do do web3 model goes new web3 model cache provider it's going to be false don't set this to true otherwise you'll be really confused as to why it stopped showing up but if you want to catch the provider you can make that true and then provider options which is required and what we put up here this needs to be wallet connect not wall connect let's do a refresh on the front end and if you run into some issues you might want to go to inspect application storage and clear site data because sometimes it'll cache the provider and you actually don't want that so now we'll hit connect and we'll get this wonderful little mold down which will pop up let people choose how they want to connect we'll use metamask and boom just the normal stuff and great now you can do your whole ethers thing again which i'm not going to show how to do but once you connect you can just do something like boom provider is this web3 modal provider boom all right so we only have one more and i'm just gonna show you all real quick without actually going through it because it's real similar to what we've already been doing so i'm not actually going to code this one but this last one is going to be used app which has another one of these bells and whistles it's got all these react hooks it has provider it has context you can check out the documentation here and here's basically what we're doing wrapping things with this dap provider and we have this multi-call thing if you're unfamiliar with multi-call go check out my video on multi-call and same as morales and web3 react we have these hooks called use ethers activate browser wallet similar to activate or enable web3 and then we have similar mouse we also have this thing called use contract function where we can have this contract called store we use this contract function and we get this function called send which we scroll down we do on click send 42 and it works the exact same way as we've seen so with that being said we've gone through six different ways to connect your front ends to metamask or any other wallet we've done it with pure html javascript we've done it with pure nexjs and ethers then we've moved on to web through react which is used by protocols like uniswap and ave and then we moved on to having even more hooks and more functionality more feature richness using morales then we've been given the optionality of having this built-in plug-in if we don't want to code all the different connectors ourselves of the web3 model and then finally we've also used used app as well which is another great hooks alternative that you can use as well so that is six ways to connect your applications thank you and talk to you soon at 1k subs we did vrf pizza at 10k subs we did nft tattoo at a hundred thousand subs we're doing another 16 hour free code cam video surprise for us getting to 100k subs you guys want to just be more educational content i mean i i guess that works but i'm already i'm already working on another 16 hour video you you're gonna get that i swear i'm working on it i swear so let's look at second place christmas reveal at 100 000 subs and also another 16 hour videos [Music] you
Up Next
77:40
Full-Stack Dapp Development: Solidity, Ether.js, Hardhat, React
@codeeaterweb3971
50.8K views•2023-03-28

52:00
Hybrid Key Establishment in Production: Post-Quantum Cryptography
@durumcrustulum
14.7K views•2025-08-27
64:25
Operational Security Essentials: A Guide for Hacktivists (OPSEC)
@hitbsecconf
157.4K views•2012-11-26

11:49
Understanding Ethereum: A Comprehensive Beginner's Overview
@99Bitcoins
3.1M views•2018-06-26
Related Study Plans & Knowledge Roadmaps
Structured learning paths in Blockchain & Crypto
blockchain-and-crypto
MPC Wallets: TSS, DKG & Secure Custody
01Foundations of Cryptography & Digital Signatures
02Secret Sharing & Introduction to MPC
03Distributed Key Generation (DKG)
+ 2 more learning modules
24h5 modules
Explore Roadmap
blockchain-and-crypto
ERC-4626: Yield Aggregators & Leverage
01Blockchain, Ethereum, and Solidity Foundations
02DeFi Primitives: Lending, Pools, and Yield Farming
03Mastering the ERC-4626 Tokenized Vault Standard
+ 3 more learning modules
35h6 modules
Explore Roadmap
blockchain-and-crypto
DePIN: IoT Registries, Proofs & Rewards
01Foundations of Blockchain & IoT
02Introduction to DePIN and the Flywheel Effect
03Designing IoT Device Registries & Secure Identity
+ 3 more learning modules
30h6 modules
Explore Roadmap
blockchain-and-crypto
Building EigenLayer AVS: Operators & Contracts
01Blockchain, Ethereum, and Smart Contract Basics
02Proof of Stake and Ethereum Staking
03Introduction to EigenLayer and Restaking
+ 3 more learning modules
24h6 modules
Explore Roadmap