

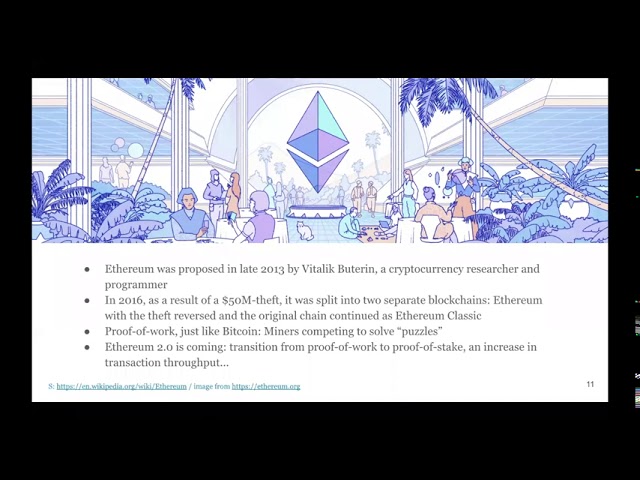
![Introduction to Blockchain and Ethereum - Blockchain for Developers [Lecture 1]](https://i.ytimg.com/vi/Sac1Ah8UAL4/maxresdefault.jpg)

























A smart contract is a self-executing program deployed on the Ethereum blockchain that cannot be modified after deployment, and Solidity is the most popular programming language for writing smart contracts, which requires compilation into bytecode and uses a typed language structure with visibility specifiers (public, internal, private) to control function accessibility, along with state mutability keywords (pure, view) to indicate whether a function modifies or only reads blockchain state.
Solidity Smart Contract Tutorial: Building 5 Ethereum Contracts from Scratch
Added:Basic programming fundamentals: Familiarity with core coding concepts such as variables, functions, loops, data types, and basic object-oriented programming.
Introduction to Blockchain and Ethereum: Understanding the decentralized nature of blockchain, how Ethereum operates, and the concept of the Ethereum Virtual Machine (EVM).
Smart Contract concept: Conceptual understanding of what self-executing digital agreements are, why they are immutable, and the role of 'gas' in executing transactions.
Web3 Wallet basics: A general understanding of how crypto wallets (like MetaMask) function, public/private keys, and how transactions are signed on a network.
Advanced Solidity paradigms: Learning about contract inheritance, interfaces, abstract contracts, custom errors, and gas optimization strategies.
Smart Contract security and common vulnerabilities: Studying critical security concepts like reentrancy attacks, access control patterns, and using tools like Slither or Mythril to audit code.
Local Development environments: Transitioning from browser-based Remix to professional local development frameworks such as Hardhat or Foundry to compile, deploy, and write automated tests.
DApp Integration (Web3 Frontend): Connecting deployed smart contracts to a web frontend using libraries like Ethers.js or Viem coupled with frameworks like React.
Token Standards and OpenZeppelin: Developing and deploying industry-standard tokens such as ERC-20 (fungible) and ERC-721/ERC-1155 (NFTs) utilizing audited library templates.
93.9K views1.9Klikes1:21:28Original Release: 2019-01-28
Welcome to smart contract 30, a huge series I've done on solidity smart contract to teach you Solidity and Ethereum by building 30 smart contracts.
That's the largest series that you will find on smart contract on YouTube and probably anywhere on the internet. So I really hope that you're going to appreciate it. In this series we are going to build different smart contracts starting from very simple to progressively more and more difficult.
At some point we'll do some smart contracts like the DAO for example and other very exciting smart contract. So at the end of the series you will feel very confident and comfortable that you can create your own smart contract and when I say smart contract I don't mean super simple smart contract but I mean really advanced smart contracts. So that's really going to bring you a lot. It's going to go through all the different features of the solidity programming language. It's using Solidity 5.0 so which is at the time of the recording the latest version of Solidity. There are many other tutorials that teach you some older version of Solidity so you gotta be careful and in this on YouTube I will give you for free the first five episodes, so if you want to continue the series then you can create a paid account on "EatTheBlocks Pro" which is 10 USD a month at the time of this recording. It's going to increase in the next few months, but if you don't want to pay this yet then what you can do is you can create a free account on "EatTheBlocks Pro" and you will have the benefit of having access to the source code of the smart contract. So you will be able to follow the video with the video here and the smart contract just below. So it would be really easy to follow. It's free so don't hesitate to create an account.
And if at any time you have any question then you can ask it in the comments of the video. So if I have enough time I will answer you but don't forget that if you become a pro member of "EatTheBlocks Pro" then you also have access to a private telegram chat group where me and others students are connected all the time and so you get really very quick help. We are going to use an online IDE which is called Remix. So that's an IDE for Solidity you don't have to install anything on your computer, it's very easy.
You just have to go online and you can use it directly. So basically there is almost no setup. You can just like get started like this. Don't worry if you are not already, uhh, you don't know much about Ethereum, then we can start this series.
It's not meant for people who already have a lot of knowledge. That's it for the intro, let's get started!
Hey hey and welcome for the first day of smart contract 30. In this video I will give you a brief introduction to smart contracts, Solidity and Remix. We will create our first smart contract and deploy it on the ethereum blockchain.
There are several ethereum blockchain and the one we'll use is just a local blockchain not connected to the real blockchain where we have real ether. So we will not have to spend any real ether, the currency of Ethereum. Instead we will use some sort of fake ether. We will use Remix, an online IDE for solidity smart contract so there won't be any setup necessary. So first let me explain what is a smart contract. So a smart contract is a small program that can run on the Ethereum blockchain. So usually a smart contract is a couple of 100 line of code.
So it's not like huge program that you can find in JavaScript or other programming language. A smart contract once it's deployed to the ethereum blockchain it cannot be changed, so which means you can't change its code. You can change the data of a smart contract but only the code of the smart contract can do that. Once you deploy a smart contract also you don't need to do any sort of admin. The ethereum blockchain takes care of running your smart contract. Also contrary to programs that you deploy on a centralized server, with a smart contract it actually costs money to deploy a smart contract and you pay this with ether.
Finally with a smart contract you can do financial transfers as long as the financial assets that you transfer are native to the blockchain. So you can transfer ether for example, or ERC 20 tokens. There are a couple of languages to write smart contracts but the most popular by far is Solidity. Solidity looks like JavaScript but the similarity is only very superficial. Actually the language is quite different and much more primitive than JavaScript. One of the main difference between Solidity and JavaScript is that with Solidity you need to compile the program.
So with JavaScript you just write the JavaScript code and you can run it right away in the browser on with NodeJS. With Solidity you can't do this. First you need to compile Solidity into what we call a bytecode, and this is this bytecode which is a series of elementary instructions that you can send to the Ethereum blockchain and that will effectively be your smart contract on the blockchain. Another big difference between Solidity and JavaScript is that Solidity is a typed language which means you need to specify the type of all your variables and when you compile your smart contract into bytecode the Solidity compiler will check the type of your variable and will make sure that everything makes sense. So for example if you declare a variable of a certain type at a certain place and that you try to transform this variable into another type at another place, maybe that the compiler will complain. In this course I will progressively introduce you the different features of solidity as we make progress with a different project that we will do together. Next I need to introduce you Remix. So Remix is what you see now on your screen. As a developer 2 tasks that you need to do very often while developing smart contracts is first deploying smart contract to the blockchain and second interacting with your smart contract, which means calling functions of your smart contract. If you had to do this absolutely manually on your own you will need to piece together many different tools and as a total newbie it can be really overwhelming and even as a more experienced smart contract developer it's not something that you would typically do. Instead you want to use some sort of more high-level tool that help you with the whole development process. Remix does this for us. So Remix is a solidity IDE. IDE stands for integrated development environment and you probably already.....and you might have already worked with some IDEs such as Eclipse for example for Java development or Visual Studio for C++ development on Windows. So IDE sounds like it's a complex piece of software but actually in the case of Remix don't be impressed by this because the Remix IDE is much more simple than other IDEs that I've just mentioned. So one of the main difference between Remix and these other IDEs is that with Remix it's an online IDE which means you don't have to install anything. It's a.. it's available in your browser, you just need to visit this URL. So let's see what are the different parts of this IDE. So on the left side here you have the file explorer well you can do some file manipulation like creating your file, renaming your file, or deleting files. Here in the main part of your IDE it's where you're going to actually write the Solidity code of your smart contract. So probably that you're going to spend the most time here. Then on your right here you have different tabs. So "compile", "run", etc.. So the two most important tabs are "compile" where you can configure some options on how you want to configure your... how you want to compile your smart contract, and second you have the "run" tab where you can deploy and interact with your smart contract. So that's probably where you're going to spend the most time after the code editor here and you can also have a look to other tabs if you're curious, but we're not going to see most of them at the moment. There is a tab that most people ignore but actually it is quite interesting especially for beginners. It's the "support" tab here at the far right hand side. So if you click on it, you can click on this button "start chatting" and it will connect you with the gitter chat of the remix IDE. If you have any question regarding Remix you can ask your question here and the community will answer you. Please note that this is not a chat strictly about Solidity so if you have questions about Solidity you can visit another gitter channel which is just for Solidity. this one is more like for the features of the Remix IDE. So now let's start to create our simple smart contract. So we're going to create a new file, so click here and here we're going to type the name of our file, so we'll call it "SimpleSmartContract" with camelcase like this and the extension for Solidity file is ".sol". And you click on ok.. and we're going to close the other file like this. It's basically an example of smart contract provided by Remix but we're not going to use it. Ok so now we're going to start to write our first smart contract. So the first thing that you need to write in your smart contract is an indication to tell the compiler which version of solidity is acceptable to compile this smart contract. So you start this by using the keyword "pragma", then a space, then "solidity"......and then we can use the caret ("^") character and then we're going to type "0.5.0". So, this means: compile this smart contract only if you the compiler you are between the version 0.5 0 to the version 0.5.9 or 0.5.999 etc... but not if you are for example 0.6.0 or 0.4.x something because this figure that you see here in the middle if it changes it means that there are some breaking changes so these versions are not entirely compatible. For example if you start to write your smart contract when the latest version of the Solidity compiler is 0.5.0 then it's going to be compiled with this version of the compiler but in two weeks let's say that now your compiler is 0.5.2 and it sees this pragma statement it will still compile the smart contract but the compiler version will be slightly different so you need to be aware of this when you write your pragmas statement. Next we're going to use the contract keyword. So the contract keyword actually defines a smart contract. So you type "contract" and then you're going to type the name of your smart contract. So in our case we're going to call it "SimpleSmartContract". And you notice that I used the camel case which is a standard practice with Solidity smart contract. And then I'm going to open and close curly braces to define my smart contract. Because it's our first smart contract we're not going to write anything in the body of the smart contract but in the next videos where all the action will take place is between these two brackets here. So in a single Solidity file you can actually have several smart contracts. So if we wanted we could write another smart contract like this: contract "SimpleSmartContract2" etc etc... But we are not going to do this. We're just going to define a single smart contract. You don't need to do anything to save the file. Remix is on autosave all the time. Now that we have finished to write our smart contract the next thing to do is to deploy it on the Ethereum blockchain. But before we do this we need to compile it to a bytecode that the Ethereum blockchain can understand. So let's go to the compile tab, and let's see what we have here. So we have a button here: "start to compile" So if you click on "start to compile" here it will compile the smart contract and you will see here a green box appearing. It's a little bit annoying to have to click on the "start to compile" button every time you make a change to your smart contract. So instead we're going to activate the auto-compile feature and Remix will recompile our smart contract every time we make a change. It's a much better workflow. Now that our contract is compiled we can actually deploy it to the blockchain, so let's go to the "run" tab And let's see what we have here. So at the top of this tab we have this section here where we basically configure the parameters of our deployment. So I'm not going to explain in details these parameters in this video because in the next videos of this course we're going to see them in detail but just quickly make sure that here for the "environment" you have "JavaScript VM" selected and then for the other parameters you can just leave them to their default value it should be fine. In the next panel here you define which smart contract you want to deploy. So as I told you before in a single file you can have several smart contracts. And also we have other files with other smart contracts so Remix needs to know which smart contract you want to deploy so we just have one here "SimpleSmartContract", so it's it's already selected and if we want to deploy it we click here on the "deploy" red button so let's click on it and just after we do this we see something appearing here in the deploy contracts panel so that our "SimpleSmartContract" that has been deployed. So we call this thing here a "smart contract instance" and we can actually deploy several instances of the same smart contract. So here if I click on deploy again then here I have another instance. And let's expand one of these instance and yeah so we don't see anything here but when we will have function in next videos we will see some buttons that will appear here and that will allow us to interact with our smart contract. One thing to note here is that each smart contract instance has its own address on the blockchain so here we can see like the address of this instance and here we can see the address of this other instance. So each of these smart contract can have data and if we change the data of this smart contract instance it's not going to have any impact on the data of this smart contract instance and vice versa. So smart contract instances are independent from each other. That's it for this video. For the next video we're going to create a "hello world" smart contract which will be slightly more advanced than this one. In this smart contract we will have a function and we will be able to call this function from outside the smart contract and we will learn how to do this with Remix.
Hey hey and welcome for this new episode of the smart contract 30 series and today we are going to create a "hello world" smart contract. So "hello world" is a very common kind of tutorial when you are starting something and in general you have to echo a string and that's how a lot of tutorials introduce you to new programming language. And so we're going to do the same thing with a smart contract. The first thing we will do is to create a new file for our smart contract, and we call this "HelloWorld", and remember from the last episode that the extension for a smart contract is "sol"... okay.. And you might also remember that the first thing we need to do is to specify the version of solidity that we want to use. And for this we use the pragma syntax. "pragma" space "solidity" then we use the caret ("^") character and then we're going to use the version 0.5.0 then we define our smart contract with the "contract" keyword and this time it's going to be called "HelloWorld" with a camel case so upper case for H and upper case for W. And inside here we're going to define the actual code of our smart contract. So if you compare with a programming language like JavaScript actually you might consider that contract is a little bit like an object in JavaScript and like for object in JavaScript we can also have functions. And the way we define functions is with the "function" keyword and in this video we are going to create our first function. So let's do it! "function" here and then we type the name of the function... so so far it's very similar to what we do with JavaScript and then we open the curly braces and then we type inside the code of our function. And for our function we're going to do something extremely simple.
We're going to return a static string "HelloWorld" just like that. And we end every statement in Solidity with a semicolon.
So again, very similar to what we have with JavaScript. I have activated auto-compilation and it will make Remix give me all the error and warning messages of the Solidity compiler and as we can see we have two red cross here. So here if we hover on the red cross then we can see the error and here we have another error.
You can also see it here and the first error is a syntax error "no visibility..." and after it's cut off, but "no visibility specifier specified...". So what's a "visibility specifier"? So in Solidity functions can be internal to the smart contract which means for example if I have another function here that I will call "foo" then this function can be called by the function "hello" and so I could say like "foo()" for example or I can also call "hello" or "foo" from outside the smart contract and we will see just after how to do that. In the case of "hello()" actually we want this function to be callable from outside the smart contract and for this we need to specify the "public" visibility keyword. Next we have another error. And basically this error is because we haven't specified what is the return type of this function. So in Solidity unlike in JavaScript you need to specify exactly what is the return type of a function.
And for this you use the "returns" keyword. "returns" with a S here so be careful it's something that tricks a lot of beginner here you have to use "S" but when you actually return something in the function the "return" statement is without an "S". So make sure to pay attention if you have to put "S" or not. And here we need to specify what is the type of the variable.
Because as I mentioned during the last video Solidity is a typed language, which means you need to specify the type of each variable. So I'm not going to give you a list of all the types in Solidity because it's a little bit boring but I'm going to introduce new types as we go through the series of smart contract 30. So the type of this string "hello world" is very simply "string" So we have string in JavaScript and we also have string in Solidity, very similar. Next we have another error of the Solidity compiler. So it basically complains that I haven't specified any data location. So data location is not something that I'm going to teach you in this video, we're going to see this in an other video but basically very quickly in Solidity variables can be saved in different data location, data more or less temporary. So in JavaScript you don't have this problem because everything is temporary.
When you start your nodeJS or your Javascript process then all the data live in memory and when the Javascript process stop then everything dies. Well in Solidity it's a little bit different because you can save some variables to the blockchain.
But very briefly here actually we're not looking to save anything in the blockchain this is just something temporary that will return from this function and so we will use the keyword "memory", which means this is just a temporary variable, we don't want to save it anywhere. And finally we got rid of all the errors but we still have a warning. So if you hover on a warning then we see it says "function state mutability can be restricted to pure.." Okay so this is something important. So in Solidity function can actually modify something on the blockchain or just return (read) data. So in this case for the "HelloWorld" smart contract I want something extremely simple. I don't want to modify the blockchain at all. So we will use the "pure" keyword. It basically says this is a read-only function, don't do any modification on the blockchain and just return this string to me that's it. We have finished our hello world smart contract and it's time to deploy it and interact with it. So let's go to the "run" tab and in the "run" tab we are going to deploy our smart contract. So here in the deployment panel I already have the hello world compiled bad byte code that have been selected for me so I don't need to change this and here I'm going to click on the deploy button so it apply and then I can see my deploy smart contract appearing here so remember we call this a contract instance and if I click deploy here several time then I have other deployed contracts we just care about one contract instance so we can just delete the extra contract instance and let's expand this contract instance and this time we see a button appearing hello hmm what a coincidence is the same name as our function here what is this button so it's very simple remix will analyze your contract and we'll create a button for each function so you can interact with your smart contract after it's been deployed in our case the hello function doesn't take any argument so we just have a button but when we will have argument in the next videos we will see also an input field here all right so let's just click on hello and what are we expecting we expect him very simply to see hello world so let's see if this work yeah here we can see the return value of the function and we can see the expected string so that's great in this video we have built a smart contract slightly more complex than the last one we created well that wasn't very difficult because the last contract we created was the most simple one you can do with nothing inside in this math contract at least we have a function so we start to see that how a smart contract can be useful and we were able to create a simple function that returned a static string and we were able to call this function from outside the smart contract and read this value you also learn some solidity syntax such as the pure keyword the public keyword had to specify the return type and I briefly touched on the data allocation of variable but we will go over this again in future videos now I know that at this stage you probably still have a lot of questions for example I haven't talked at all about this panel here and this is very important but I don't want to overwhelm you with too much information so I'm going to distilled you all this info in the next video don't worry at the end you will understand everything let's continue our journey hey hey and welcome to the day 3 of smart contracts 30 in this video we are going to create a simple storage smart contract that is able to store modify and read a string value I'm going to introduce you the concept of transaction which allow to call a function and actually modify the data on the blockchain contrary to the previous videos where we just read data from the blockchain but it didn't modify anything so create a new file that we will call simple storage dot so the extension for solidity smart contract and then let's specify the version of solidity with the pragma statement so pragma solidity and then we use the correct character and then 0.5 dot 0 ok so now let's actually create our smart contract with the contract keyword contract simple storage and we open the curly braces and we are ready to actually start to cut the smart contract the first thing we will do inside is to define a variable so this variable will have the type string so we just type a string then this is a variable that will be accessible from outside so we'll use the public key word because variable like functions they can you can specify their public visibility and then the name of the variable so we'll just call this data and we terminate the statement by a semicolon we haven't specified the memory location of this variable but we don't need to because this is a variable declare outside of any function and when you do this it automatically give it the storage memory location which means that it will be actually saved on the blockchain so this is not a temporary variable this is something that you will be able to read in other smart contract execution in the future when you declare a variable it's possible to give it an initial value so let's do it and we'll just say my data okay and now let's deploy this smart contract so we'll go to the run tab and here we're not going to change anything and so let's delete this it's like an old contract instance that we don't need anymore and let's click on the deploy button okay so now it's been deployed and if we expand our simple storage contract then we see a button called data hmm that's curious because if we remember the last episode I mentioned that remix will create a button for all the function of our smart contract but we don't have any function it's called data however when we specify that this data has the public visibility actually solidity will automatically create a getter function of the same name of the variable and you can call this function like if it was a function that you created yourself so let's just click on data to see what happened and we can see my data so the static string that we used to instantiate the data variable it's not very flexible to set an initial value to the data variable and then not be able to change it later in the life of the smart contract so we want to create a function that we can change the value of the data variable anytime we want so let's go back to the code editor and actually I'm going to delete this initial instantiation because we don't really care about this and so we're going to create a setter function so we use the function keyword and we're going to call this function set then this function set is going to take a parameter so we need to specify the type of this parameter because it's exactly the same logic as when you declare a variable in solidity you always need to specify its type so string then we need to specify the memory location so that's memory because that's a temporary variable and then we need to specify the name of this variable so you might be tempted to just write it like this data but if you do this you go into shadow the data that is declared here and you will not be able to access it inside the set function so we can't reuse this name instead we're going to prefix the data by underscore that's something very common that you will see in solidity smart contract okay and then we're going to specify that this function is publicly accessible so we can use the public key word and then we open the curly braces and very simply we are going to assign underscore data to data so let's see all right so as you can see it's possible to access storage variable define here inside function so you just have to reuse their name and to assign it's very simple exactly like in JavaScript all right so let's see if this works so let's go to the run tab and we're going to redeploy this smart contract so the general workflow when you're working with a smart contract is you write a smart contract then every time you make a change you need to compile it and redeploy it so if you try to interact with an old instance of the smart contract that was deployed before the last code change then it will not work you always have to make sure that you communicate with the latest version of the smart contract so here in a deploy contract panel we can see in all instance on the smart contract and we can just delete it because we don't need it so let's delete it and then let's redeploy your smart contract so we click on the deploy button and we have a new instance of the smart contract with the latest code this time so let's expand it and we can see the data get a function and also the setter function so there is a big difference between these two function as you can see the set button is red and here the data button is blue so why is this is this just remix that just likes to be fancy and and show you different colors not really there is a specific reason for that it's because they did a function just read data from the blockchain but the setter function modify data from the blockchain and will actually send what we call a transaction which is something that I will explain just after so just first let's do a demonstration of a transaction so here we have an input field because the setter function accept an argument and you can also see the type of the input that you need to provide so you need to wrap your string by double quote so here I'm gonna start with a double quote and I'm gonna tie for example some some get bearish like smart contract 30 is awesome okay and then I'm gonna close the double quote and I'm gonna click on set okay so apparently nothing happened but actually something did happen so now if I click on the data button I should see the updated value for the data variable so let's click on data scroll down and I see smart contract 30 is awesome yeah it works let's not explain what is a transaction so the term transaction does not mean that there is necessarily some money transfer that happen it can happen but it doesn't have to a transaction in aetherium means that we send a data package that can potentially modify the state of the blockchain so let's open up the console of remix to get more information so here I'm going to increase the size of the remix console here so we can still a bit more clearly and here we have the output of what happened on the blockchain so we see for example that here we had a call so that's when we click on the data button so we just call a function of the smut comes back but we did not modify anything so that's not a transaction and if we scroll up then we can see that we have another output which is transact to simple storage pending that's a transaction so we can expand here by clicking on the down arrow and we'll have more information about the transaction so here first we have a status oh yeah so by the way this whole thing that you see it's what we call a transaction received so after you send a transaction to the network that's something that you will get back that's a JSON object that's going to describe what happened to the transaction so here we have the status and it's said that transaction has been mine so which means it's been added by the blockchain by an entity that we call a minor and then we have something which is called the transaction hash so you can consider that it's like an ID for the transaction so with this transaction hash you can go to what we call block Explorer that we're going to cover in other videos and it was a block Explorer basically you can inspect what happened in a transaction then we have a from field so a transaction is sent from an address so I haven't talked much of what is an address basically it identified data on the blockchain so anybody can create as many address as he or she wants and then each address will have some data associated to it so where does this address come from it comes from here if we go to this panel here in a run tab then we can see like here we have this level it's called count so account and address they are synonymous so like don't be confused if some time I say count and some other time I said address is the same thing so our transaction was sent from this address here that was created for us by remix then we have the to field so you send a transaction to an address and in our case the address that we sent it to was the address of our smart contract so if you see the beginning of this address 0 X 5 e 7 then you can see that it matches with the address of our deployed smart contract here 0 5 0 x 5e 7 etc etc then we have a gas field a transaction cost execution cost so I'm not going to cover what is the gas we're going to see this in a future video but it's basically a some sort of cost that you need to pay to the blockchain for executing your transaction what is important to remember is that a transaction costs money it's not free whereas when you just do a call when you just read data from the blockchain it's totally free so I hope that now you understand that a transaction and a call are two different things that's it for this video in the next video I'm going to explain you how to specify in solidity whether a function has to be called as a transaction or just as a call in the last video we saw how to create a transaction with solidity and remix however in the video before the last one we created a function that was a call not a transaction so in solidity how can we make the difference between a function that will be executed as a call versus a function that will be executed as a transaction we're going to see this in this video by the way this is the code of the spot contract of the last video so if you don't have it you can go to the public get up of it the blocks and grab it so let's create another function that will be a getter for our data variable so let's create a new function called get and this function doesn't take any argument this function will use the keyword view so view it's a little bit similar to pure that we so during the first video of this course so with pure you can read a static value that you hard-code in a function but if you want to actually read the storage of the smart contract then you need to use the view keyword so that's what we are going to do and then we need to specify that this is a public function and finally we need to specify the return type of this function so we use the returns key world with s remember it's a little bit different that the written statement inside the body of the function and then we specify the type of the return variable so that sets a string and the memory location it's memory because that's a temporary variable okay and then we open the curly braces and very simply we just return data okay so let's check that everything works well so we go to the run tab and we're going to delete the contract instance that we created before so let's delete it here and let's redeploy our smart contract so click on deploy let's expand the contract instance and let's set the data variable to some dummy value hello for example and don't forget to wrap it between double brackets between double quotes cuz otherwise it will not work and you click on set and so let's expand the remix console to see the output of the blockchain okay so here we can see a message I say transact to simple storage so here we created a transaction because we modified the data of the blockchain and now if we execute the getter function let's click on get so what do we get we get hello and in the remix console then we can see that this time it was a call so function is executed as a transaction and get is executed as a call and the reason why is because in a get function we have the view keyword which indicate that it's a read-only function but in the set function we don't have any any keyword that indicates that it's read-only function so in absence of indication then solidity will consider that this function needs to be executed inside a transaction before we finish this video I also wanted to add an explanation in this video about what is this environment drop-down that we have here in the run tab of Linux so if you click on this drop-down you'll get different options a JavaScript VMs tree or web free provider and basically this drop down allow you to choose which blockchain you want to deploy your smart contract to so when we talk of the ethereum blockchain actually there are different Network there is a what we call the main net which is the real ethereal network with either the currency native to aetherium so when you deploy a smart contract on in this network basically you are dealing with real money so it's the equivalent of production as you would have with web application however II when you are developing a smart contract of course you don't want to deploy to production you want to deploy to ad environment and so the equivalent of a development environment for a theory on blockchain is a local a theory on blockchain called ganache so ganache is something that is really abstracted by you by remix so you don't have to deal with this but basically if you want to choose this development environment we need to take JavaScript VM and behind the hood remix will run this local ethereum blockchain and you will not have anything to do all the ether that is in this local a theory on blockchain is totally virtual so it's fine if you lose any ether you can just reload remix and new if there will be created you also have to know that this local Asteria on blockchain is not connected at all with other computers it's only local to your computer and you are totally isolated from the outside environment also this local if theory on blockchain automatically create ten different accounts that you can see here and basically each of these accounts are pre funded with 100 fake ether so this allow you to do to transfer the this fake ether to deploy spot contract without having to mine any either so that's very convenient if you want to develop smart contract as for the gas limit and the value field we'll see this in other videos in the next video we'll continue this smart contract and make it a little bit more sophisticated with arrays hey hey in this video we will continue the storage smart contract that we've been developing for the past two videos so far we've been storing a single string variable in our storage smart contract but it's not very realistic because in general we want to store lists of data and not just a single string fortunately solidity has arrays and they are quite similar to what we have in JavaScript in this video we're going to change our storage smart contracts so that it store an array instead of just a string we will also create a different function to manipulate this array there will be one function to add element to this array another function to read individual elements from this array another function to read all the elements of the array and finally a function to return the length of the array let's get started so let's create a new file we'll call this advanced storage dot saw and then we need to define our pragma statement pragma so Li DT and then caret 0.5 dot 0 as usual then we define a smart contract contract advanced storage okay next we are going to define our array so so far we've been using string types but it's not the only variable type that is available to solidity we can also represent integers with a u int type and the way we specify an array of another type is with the square bracket like this so this means this variable will be an array of integer then we specify the visibility of the variable public and then we're going to call these IDs so it's going to be an array that represent ideas next let's define a function to add new element to display so I'll use the function keyboard and we'll call this function and this function is going to take an integer argument so it's going to be you int and we'll call this argument ID then this function will have a public visibility and we don't specify the view of pure keyword because we want this function to be executed in a transaction because we will actually modify the storage of the blockchain next we define the body of the function and here we will reference our array with ideas and then in order to append a new element at the end of the array we can use the push method available on the array type and we terminate the statement by a semicolon so as you can see is exactly the same as in JavaScript easy next let's add another function to get a single element from this array so we will call this function get and then it will take an argument which is the index of the ID in the array so this index will also be an ID and we will call this position and then we will specify the view keyword because it's a read-only function then it's a public function and we specified the return type so returns a integer and then we open the curly braces and inside function very simply we just return ideas and to access a specific element of an array in solidity you need to use the bracket syntax and inside bracket we specify the position and we terminate with a semicolon next let's define a function to return the entire array instead of just a specific element so we will call this function get all it will not take any argument we'll reuse the view keyword because also a read-only function and then you will have a public visibility and for its return types this time it will not be just a single integer but it will be an array of integer and we also have to specify the memory location so you might be wondering why in this function we had to specify the memory location but in the function just before we didn't need to it's because for a simple type like integer it's okay not to specify the memory location but for complex type like array you have to specify the memory location then we open the curly braces and we define the body of our function and we very simply return the entire array just like that and the last function we will define will tell us what is the size of the array so we'll call this function length and it will not take any argument it will be a view function public and it will return an integer and in order to get the length of the IDs array exactly like in JavaScript there is a length property for the right type and then we terminate with a semicolon let's not test that everything is working so I go to the run tab and I clean up the deploy contract panel because it's like all contract instance that I don't need anymore and then I make sure that we have the advanced storage contract selected here in the drop-down and then let's click on deploy okay and let's expand this and first we need to populate our array so here for the first position let's add 10 and in this case you will notice that I'm not wrapping this with double quotes because this is an integer not a string so double quotes are not necessary so I click on add ok and that's add another element 20 okay so now let's try that at the first position I see 10 so I click on get and I see 10 yes correct now let's try that at the second position of the array I get 20 yes I get 20 also I forgot to mention just before but as you've just noticed now the arrays are index starting from 0 exactly like in JavaScript so just a very standard notation here and then we need to test that the get old function is working properly so we are expecting an array of 10 and 20 let's see what we have yes we have an array of 10 and 20 and finally how but the length function you should return to let's click on land and yes we have to everything is working in its contract before we finish this video I would like to give you a short explanation on what is gas here in this panel I've already explained what is the environment field and what is the account field but Ivan explained the two following field so I'll start by explaining the gas limit in this video when you send a transaction to the etherium network you have to pay gas gas is an abstract unit that measure the computational difficulty of executing the transaction if a transaction does a lot of computation the gas cost will be higher and if the transaction does less computation the gasca's will be less when you send a transaction you specify what is the maximum amount of gas that you are willing to spend to execute this transaction by default remix puts a very large value here which is 3 million but we don't need this high of a value if you go to the remix console and you analyze the log of the transaction to add a new element to the array then you can see what is the actual gas cost of this transaction so let's scroll up until we find the log for the transaction that we executed to create a new element to at the end of the array and let's expand this to see the transaction received and we'll scroll down and we're going to see if field which says transaction costs so it means that we've actually consumed forty seven thousand six gasps to execute this transaction okay so let's try to re add an element at the end of the array but this time with just the exact number of gas that we need and see if we still work so here we're going to add this time thirty so let's click on add and then let's scroll down in a console to see if the transaction executed and yes like we have a green check here so everything worked well okay and now we are going to do the same transaction but this time with not enough gas so here instead of six will specify five so that's one unit of gas less than what we need and this time let's try again to add an element at the end of the array we click on add and then we get another message in the log here and this time it's different we have an error message error VM error out of gas so when you see this error message it means that your transaction didn't have enough gas and when this happened the atheneum virtual machine decided to cancel the transaction and any state change are canceled however when this happened all the gas that you sent to the transaction is actually consumed in other word it's wasted so you need to be careful about this gas limit parameter because if you don't adjust it well then you will just waste money basically so then the question is how do you know what is the proper value for the gas limit well when you developing you can set a very high value and then by analyzing the transaction with it you will know exactly how much gas you transaction consumed and then you just have to set the gas limit to this value I'm sure you still have a lot of questions about this mysterious gas unit I will give more details about gas in the rest of this course but for the moment we'll just stick to this explanation in this video we're going to create a crude smart contract crude means create read update and delete crude applications are very common on the web and in smart contract we also often need to do these four operations beside this I will also introduce you a struct which is a solidity syntax to represent custom types so let's create a new file file smart contract we'll call this file crude dot soul and then we'll write our pragma statement pragma soli DT and then the caret character 0 dot v dot 0 and then we use the contract keyword then the name of the smart contract is crude with an uppercase C then we open the curly braces and finally we can start to code our smart contract so the first thing we are going to do is to create our struct so as I mentioned strut a lot to create custom types so you already have some native type 2 solidity like string or integer but sometime you also have to have a custom representation of your data so let's see how it works so first we use this truck keyword then we use the name of the struct so and usually we name struck with an upper case so we'll do user with an upper case U and then we open curly braces and then inside this struct we're going to specify the field of this struct so first we will have an ID and this ID will be an integer so you int ID and then I terminate the statement with a semicolon and then there will be another field which will be a string so we specify string and we call it name alright we have our user struct as a comparison with JavaScript it's very similar to an object that has no method but only data also keep in mind that this is just a type declaration it doesn't actually create any instance of the struct next we will create an array of this user struct so if it is we can reuse the type definition that we've just created so here we type user and then to specify that it's an array of user we use a square bracket and then we're going to specify the visibility of this so it's public and finally the name of this array and it's going to be users with a lowercase u any semi column as we will create new user we will increment the ID field we need to keep track of what is the next ID to create the next user so for this we create a integer variable that is public and that is called next ID next let's create a function to create a new user so we'll define a function called create and this function is going to take one argument which will be the name of the new user so it's going to be a string and then we specify the memory location and in the name of this argument and then it's going to be a public function because we can call it from outside the smart contract and then we open the curly braces okay so in order to create a new instance of a struct you can use this syntax so the type of the strut and then you open parenthesis and then you pass the parameter in the same order as they are defined in the struct type so first we need the ID and how do we do for the ID because this is not an argument of the create function well just above we've defined a next ID variable that hold the value for the next user to be created so at the beginning it will be initialized to zero so next ID and then we use a comma to specify the next value and the next value will be the name that was sent to the create function and then we terminate this by a semicolon alright but if we do this it's not going to store the instance anywhere so we want to put the instance in the user's array that you find just above so let's do this so we reference the users array and then as you remember from the previous video array have a function called push to up any new element at the end and the in this push function we're going to pass this user instance that we just created and it okay if we just finish the function like this no because the next time that we're going to call this function the next ID will be exactly the same but it will be a different user so we will override the same user it's not good so we want to increment next ID for next time we call the create function so next ID plus plus like this by the way there is another way to instantiate a new struck which is by using this notation with curly bracket and in this notation basically you define the key and then the value like this name name and if you do this actually can specify the key and value in any order contrary to if you just use the parentheses and the parameters have to be in the right order personally I like this simple syntax for struct run not too big but if you struck start we have too many fields then you might want to use the other notation that I've just shown you next we are going to create a function to read a specific instance of user so we call this function read and as an argument it's going to take the ID of the user to read so this is a new int and we call this ID and then this is a view function because this is read-only this is not a transaction then this is a public function and finally in the function signature you need to specify the return type so first it's going to return the ID of the user which is return and second is going to return the name of the user and the name is a string and string is a complex type so we need to specify the memory location like this and we open the curly braces in your previous video when we return something from a read-only function we only return a single value but in this function rewritten to value it's because in solidity contrary to JavaScript a function can return several value just have to use a comma to add new value to be returned so how are we going to find the correct user instance we're going to loop through the users array and for each pass we're going to test if the current instance has the correct ID so first how can we iterate through the user array so in solidity like in JavaScript we have the four syntax so it's exactly like in JavaScript so first you define the value that will be iterated so in our case we define an integer that will be initialized to zero and then you define the stopping condition so in our case when I reaches the length of the array then we need to stop so users land and finally we need to increment I for each pass for each pass we need to test if this is the correct user so in solidity like in JavaScript we have if statements so let's make use of this so if users and then we access the user instance with the bracket notation and we pass it the I integer and then we're going to have a user instance and to access the field of a struct instance we use the dot notation so dot ID and then we're going to compare this to the ID that we got as a parameter of this function and for this we use the double equal and then if that's the case then we'll have to return this truck instance so we use the return keyword and so we access the struck again so user I and the first value that we have to return is the ID so dot ID and second we need to access the name so dot name and then we terminate the statement by semicolon all right let's take a pause here and we'll continue in the next video so let's continue the crude smart contract that we started in the last video so in this video we're going to add the update and delete function for the smart contract so let's first start with update so here let's create its function so updates going to take two parameter the first parameter of update will be the ID of the user to update so it's going to be an integer and then we need to pass the value that we want to update here it's going to be string and then as you remember for string you need to specify the memory type so here we type memory finally you type the name of the argument and then it's a public function it doesn't return anything and you open the curly braces and inside we're going to have a similar logic as in read where we loop through the user array and when we find the correct user instance then we update it so let's copy-paste what we have above and and we're going to change what happened when we find the correct struck instance so what we're going to do is to access the name field and we're going to assign it to the name parameter that we received in the function and that's how you update a struct in solidity oops I did a mistake here it's not ideate I and finally we need to create the delete function so let's do this function delete and it's going to receive an ID as a parameter so that's the ID of the user to delete and here that's a public function and in solidity if you want to delete an entry of an array you can use the delete keyword and here users and we referenced the correct drug with the ID we receive as a parameter mm-hmm I can see that solidity is not happy with what I wrote what's the problem oh I get it speakers I used the delayed special keyword to call my function but it's not a lot because this is a reserved keyword so instead let's call it destroy yeah and now solidity is happy okay so now we have finished to write the smart contract so let's make sure that it actually works so let's go to the run tab and let's deploy our smart contract and then we open the contract instance and then let's create a couple of users so first we'll have Joe and then we will have ten and then we'll have Jenny okay and now let's try to read these users so if we go to the read function input here let's try to read the first user and we see Joe yeah okay let's try to read the second user we see done yeah and now Jenny yeah very good okay so now let's try to update one of our user so to update one of our user we need to input the ID and then a comma and then the name that we want to update to so we want to update Joe so that's going to be the first user and then the new name of Joe will be Alice okay so update and now if I read the slot of Joe what do I have I have Alice okay it's working and now the last function we need to test is destroy so let's try to destroy Jenny so Jenny is ID - okay so destroy and now if we read Jenny what happened okay so we see an empty string so it's been destroyed so in case you wonder why we still see an empty string and not nothing at all it's because in the red function we first try to access the element of an array but this element does not exist and then we try to access a field of this non existing existing struct so solidity will initialize the field of any non existing struct to the default value of its type and for string it's the empty string let's take a quick pause here and we'll continue in the next video let's continue our crude smart contract in the last video we finish to implement all the functionality but if we have a closer look at our smart contract we will realize that we have a cement code duplication so in this video we will do some refactoring to make our code a little bit better here in the read function we are looping through the user array until we find the correct entry and in the update function we do the exact same thing so this can be extracted to its own function so below the destroy function let's create another function which we will call fine and we will pass an ID to this function and this function will return the position of the user struct in the users array this is a view function that because it does not modify the blockchain and then we will need to specify the visibility of the function so contrary to other function this is not a public function because we don't want to be able to call it from outside smart contract but this is a function that will just be called from inside the spot contract and the way we specify this in solidity is with the internal keyword and finally we need to specify the return type so we are going to return an integer that will be the position of the user struct in the array then we open the curly braces and we're going to copy/paste the logic to find the correct struct if we find the corrects tract and we're just going to return the position like this alright let's make use of this function so let's go to read and here we don't need this anymore and instead let's define the position of the user struct in the array and then we're going to call our find function so in solidity a function can call another and you just need to specify the name of the function very easy and then we pass the ID that we need to find and then we can keep the written statement because here and here we reference the karez drugs thanks to the eye that we get from the find function and then we access the ID and name field so all is correct and we can get rid of this and let's also refactor the update function with the same logic so let's go find from the update function and let's get rid of the loop and all we have to do is just to update the correct struct and to reference it we use the I variable again and before we wrap up this video we also need to make a change to a destroy so in the past video in the destroy function I simplified everything by basically indexing the user struck directly using the ID value but the problem is like the ID value is something that belongs to the user struct and it doesn't need to be equal to the position of the user struct in the users array so let's change our destroy function and we'll use the same exact logic as in read and update so first we find the position of user in the array and then we delete the correct user like this alright so in this video we made our code a little bit better by extracting command function into his same function however in solidity there is also another variable to take into consideration it's a gas cost so sometime when you reflect or code like this in solidity you can end up with a transaction that will require more gas so as an exercise try to compare the gas consumption of the read update and destroy function after refactor and compare it with before the refactor and in production code you always want to take the solution that give you the least conception of gas not necessarily the one that give you the most Streamlight code which is very counterintuitive when you come from a traditional programming background our smart contract is almost finished but we still have a couple of problem and we're going to fix this in the next video in this video we are going to finish the crude smart contract our crude smart contract has a little problem if you try to read update or destroy a user that does not exist the smart contract will not complain however we should have a feedback that tells us that there is a problem and that this user does not exist this we're going to use a built-in function of solidity which is called revert and since in all our read update and destroy function we make use of the find function then we're going to go to this function to use this revert keyword it's going to work like this first we'll try to find the user with this ID and if we find it the function will return here but if we don't find the execution will continue and we'll be able to call our revert function here so when we call revert so in solidity when you call the Rivard function it's a little bit like when you throw an error in JavaScript the execution of the program stop and you'll see a message that tell you that something went wrong also if we were in a transaction any state change to the blockchain is canceled and finally all the gas that would use up to the revolt code will be consumed when you call the Rivard function you can pass a string argument to indicate what is the reason for the error so let's specify that it's because the user does not exist and when we trigger this function we should see this error message somewhere so let's go to the run tab and we're going to deploy a smart contract and make sure that it works as intended mmm I have a problem with my smart contract here because I'm missing a semicolon okay it's fixed so back to the run tab and let's deploy our smart contract and let's expand the contract instance and let's create a couple of users so Joe then okay so we have two users so if we try to read the first one then we able to read it you try to read the second one then we also have to read it and how about if we try to read a user that does not exist and here in the remix console then we can see that there was a problem VM error revert the transaction has been reverted to the initial state reason provided by the contract user does not exist great it works as expected we still have a last problem to fix with our smart contract so to demonstrate what's the problem I'm going to delete the first user so here I put a click on destroy okay so i've destroyed the first user and now if i try to read the first user what do we see we don't see any error in the remix console and here we see an empty string mm-hmm we were expecting the rebirth statement here to be triggered but it wasn't the case so what happened here so in solidity when you try to access a struct that does not exist you can still read its field and its field will be initialized to the default value of each type so here in affine function when we try to retrieve the user with the ID of zero and here when we iterate through the user array so first we try to find the first user and it doesn't exist and then we try to read its ID and we're still able to real to read its ID because it's going to be initialized to zero and so when we compare this with the ID that we pass as argument that it matches and this function returned the first user that that does not exist and then this non existing user here as a empty string and so that's what we see here so obviously that's not correct so we want to avoid the situation here where we basically this comparison is true see and to avoid this then let's scroll up and we just need to make a tiny changes so here we have our variable next ID which will be used every time we want to create a new user and so we want to avoid having a user with an ID of zero so here we can initialize our next ID to one and so we will never have any user with an ID of zero so now let's okay so let's delete the old smart contract and let's really ploy the smart contract we're going to make sure that everything works fine so we recreate some users Joe and Dan now let's try to read our first user so this time the ID is one it's not zero so yes we can read Joe and we can also read dan ok and so now let's delete Dan so user ID of one and now what happen if we try to read Dan and this time we have an error here in the remix console which the reason user does not exist so it works we have fixed our problem so you can be proud of what you've learned so far and you start to reach a level where you know quite a few syntax and types of solidity you can do all the basic operation around data create read update and delete that's very good congratulations for reaching this stage that's the end of the first part of smart contract 30 if you want to continue with the 25 remaining videos of smart contract 30 and really push your knowledge to the next level then go to the website of into blocks Pro and take the monthly subscription so all Access subscription here and for 10 bucks amounts then you'll get access to all the videos of into blocks Pro if you have question please ask me in the comments thanks for watching and see you in my other videos
Up Next
72:01
Public Key Cryptography and Digital Signatures Explained | IT Security Lecture
@StevenGordonAU
2.1K views•2013-11-28

52:00
Hybrid Key Establishment in Production: Post-Quantum Cryptography
@durumcrustulum
14.7K views•2025-08-27
21:22
Solidity Timelock Contract Tutorial: Delaying Transactions Securely
@EatTheBlocks
6.7K views•2022-08-02

11:49
Understanding Ethereum: A Comprehensive Beginner's Overview
@99Bitcoins
3.1M views•2018-06-26
Related Study Plans & Knowledge Roadmaps
Structured learning paths in Blockchain & Crypto
blockchain-and-crypto
MPC Wallets: TSS, DKG & Secure Custody
01Foundations of Cryptography & Digital Signatures
02Secret Sharing & Introduction to MPC
03Distributed Key Generation (DKG)
+ 2 more learning modules
24h5 modules
Explore Roadmap
blockchain-and-crypto
ERC-4626: Yield Aggregators & Leverage
01Blockchain, Ethereum, and Solidity Foundations
02DeFi Primitives: Lending, Pools, and Yield Farming
03Mastering the ERC-4626 Tokenized Vault Standard
+ 3 more learning modules
35h6 modules
Explore Roadmap
blockchain-and-crypto
DePIN: IoT Registries, Proofs & Rewards
01Foundations of Blockchain & IoT
02Introduction to DePIN and the Flywheel Effect
03Designing IoT Device Registries & Secure Identity
+ 3 more learning modules
30h6 modules
Explore Roadmap
blockchain-and-crypto
Building EigenLayer AVS: Operators & Contracts
01Blockchain, Ethereum, and Smart Contract Basics
02Proof of Stake and Ethereum Staking
03Introduction to EigenLayer and Restaking
+ 3 more learning modules
24h6 modules
Explore Roadmap