



















![[Session] Securing MCP in an Agentic World with Arjun Sambamoorthy from Cisco](https://i.ytimg.com/vi/W9y_a2ZOatI/maxresdefault.jpg)
Retrieval-Augmented Generation (RAG) is an AI system architecture that combines retrieval from external knowledge sources with large language model generation to produce accurate, context-aware responses. Unlike traditional prompt engineering or fine-tuning, RAG dynamically retrieves the most relevant information at query time using semantic search and vector databases, making it ideal for handling dynamic factual information where policies frequently change. The RAG pipeline involves three core stages: (1) document retrieval using semantic search with embedding models, (2) context augmentation by combining retrieved information with user queries, and (3) response generation by the LLM. Effective RAG implementation requires proper document chunking strategies, vector database indexing (such as HNSW), and caching mechanisms to optimize performance in production environments.
RAG and MCP Fundamentals: A Hands-On Crash Course for Integrations
Added:This practical crash course teaches you to build integrated AI systems rather than standalone tools. You will first master retrieval augmented generation or RAG to connect models to your own data for accurate contextaware answers. Next, you will learn the model context protocol MCP to coordinate communication and actions across multiple software components. By the end, you will know how to use Rag for knowledge and MCP for system level coordination to create sophisticated multi-part applications.
Everyone's talking about Rag. If you feel left out, this is the only video you need to watch to catch up. In this video, we'll learn Rag in a super simplified manner with visualizations that will make it easy for anyone to understand. No background knowledge in AI or AI models or coding or programming required. We'll start with the simplest explanation of rag there is. Then we'll look into when to and when not to rag.
We'll then look into what is rag. We'll then understand some of the prerequisites such as vector search versus semantic search, embedding models, vector DB, chunking using a simple use case and finally bring all of that together into rack architecture.
We'll then look into caching, monitoring and error handling techniques and close with exploring a brief setup of deploying rack in production. But that's not all. This is not just a theory course. We have hands-on labs after each lecture that will help you practice what you learned. Our labs open up instantly right in the browser. So there is no need to spend time setting up an environment. These labs are staged with challenges that will help you think and learn by doing and it comes absolutely free with this course. I'll let you know how to go about the labs when we hit our first lab session. For now, let's start with the first topic. Let's start with the simplest explanation of rag. Say you were to ask Chad GBT what's the reimbursement policy for home office setup. You already know when you ask this question that Chad GBT is going to give an incorrect answer because it doesn't have access to our policy document that's private to our company.
So an LLM like GPT would hallucinate and provide an incorrect or generic answer that's common to most companies. The problem here is that it doesn't have the necessary context of what you're asking about. So what do you do? You look up your internal policy document and get the section of the policy that describes home office setup by yourself. Then you add that to your prompt and tell Chad GBT to refer to this policy. Now with this additional information, Chad GBT is able to generate more accurate responses.
And that is the simplest explanation of rack that stands for retrieval augmented generation. The part where you look up your internal policy documents and retrieve the relevant information is known as retrieval. The part where you improve or augment your prompt with the retrieved information is known as augmenting. And the part where LLM generates a response based on the augmented prompt is known as generation.
And that is something you've done unknowingly many times. Now, of course, that is a very simplified explanation of rack. And when we talk about rag systems, that is not what we typically refer to. So, let's see what that is next. Now, you don't want your users to have to locate and retrieve relevant information by themselves. Instead, you want your users to simply ask the question, what's the reimbursement policy of home office setup? And our system that's based on rag should be able to do the lookup and retrieval of relevant information, improve or augment the user's prompt and get an LLM to generate the right response. Now, how exactly do we retrieve relevant information? How do we augment and how do we generate? And that's what we're going to discuss throughout the rest of this video. Now, one of the common mistakes people make is to consider rag as the solution for everything. Rack is not the solution to all problems. At the end of the day, we're all trying to get AI to generate better responses and there are different ways to do that. We can prompt better. That's called prompt engineering. We can fine-tune models.
And then there's rag. When to use what?
Let's take a simple use case to understand these better. So back to our use case. We've started to notice a lot of people copy pasting company policies into chat GBT to get answers. So we decided to build an internal chatbot that can answer people's questions. We call it the policy copilot. It is a system that users can simply ask a question such as what's the reimbursement policy and our chatbot system should be able to locate the necessary information from the internal policy documents and then generate accurate responses and send that back to the user. Now we also want to add some restrictions and limitations. We don't want the chatbot to answer everything.
Some questions should be off limits like performance review appeals or salary discussions and when those topics come up we want to direct users to HR directly instead of giving them answers in the chat. We also want our chatbot to have a specific voice and style. So our CEO has this warm Scottish accent and a particular way of speaking that makes people feel certain way. We want our policy co-pilot to sound just like that, authoritative and distinctly Scottish.
So when the users ask what's the reimbursement policy for home office setup, it responds. When the users ask how many sick days do I get per year, it says when the user asks, can I work from home permanently? It says and when the users ask when are performance reviews conducted, it responds.
As you can see, it's not just the Scottish accent. There's this, what should I say, refreshing candle that tells it like it is. Let's look at how to solve each of these areas. The restrictions and security requires us to define how the chatbot responds, what it must reveal and what it must not. So, these are strict instructions provided to the LLM to control its behavior based on users request such as never to reveal personal employee information or confidential details. If someone asks about sensitive topics, politely redirect them to HR. Prompt engineering best practices are a good solution to this. Think of it as the rule book that keeps our chatbot safe and professional.
Next, we'll look at how to solve the problem of voice, style, and language.
Now, we know if we ask Chaz to respond to me in a Scottish accent, it would.
But the accent is not simply what we are going after here. We want to speak like our Scottish CEO. Next, we look at how to solve the problem of voice, style, and language. Now, we know if we asked ChadBt to simply respond to me in a Scottish accent, it would. But the accent, as we saw earlier, is not simply what we are going after here. We wanted to speak like our Scottish CEO, use words he usually uses, the tone, the language. So, we take all of his past speeches, he's given, emails written by him, blog post, videos created, and fine-tune a new model that can respond in the same language. and tone. A good solution for this is fine-tuning.
Fine-tuning is the process where you provide a model hundreds of sample questions and sample answers and have it respond to you in that way all the time.
Now, you might be wondering, why can't fine-tuning solve this information problem? Why can't we train a model with all of the questions a user might ask and answers it can generate? The problems are the policies can change constantly and when they do you need to retrain the model every time and trainings are not easy. They're expensive and slow. Retraining takes time and computational resources. Users can't verify where the answers came from. So there's no citations possible.
The larger the training data, the lower the accuracy. And then there's knowledge cutoff. The model only knows what was in the training data. Fine-tuning is great for stable unchanging patterns like communication style, but terrible for dynamic factual information. And finally, the best solution to get the most accurate responses is rag. Rag works because it retrieves information dynamically at query time, not at training time, because the whole point of rag is retrieving the most relevant information for the user's query real time. Next, we'll look at rag in more detail. Let's now look at what rag is in the first place. So far, we've decided that we're going to build our policy copilot system where employees can ask question and it retrieves the relevant information, augments prompts, and generates a response. We'll now see how each of these work. Let's look at retrieval first. Retrieval is a process of retrieving relevant information. But how do you do that? There may be hundreds of policy documents. How do you find which one is the right one that has context related to the user's question?
And what do you search for within these files? First, we identify a few keywords from the user's question. In this case, we've identified reimbursement and home office to be the relevant keywords. One of the simplest ways is to use a GP command to search for specific terms in these files, such as reimbursement or home office, and hope that one of these files will have these terms.
Alternatively, if these files were stored in a database, you could run a query against it like this. Now, these would only return content that exactly matches the keywords we are looking for.
And the chances of getting accurate information every time is low. This approach of searching the documents with the exact words is known as keyword search and it is a very popular technique that's used by many of the search platforms. To explain it simply, this approach goes through all the documents, identifies keywords and ranks them based on their frequency. In this case, it counts the occurrences of reimbursement in all documents and records them. So, we have three occurrences in the first document, none in the middle two, but another three in the third one. It then does the same for home office. And we see that it's only present in the home office setup document. Combining these two columns is now able to identify the document that has the maximum occurrences of these two keywords and thus able to rightly select the document that has these keywords.
Now that was a super simplified explanation. Keyword search is a science in itself and has a lot of complex calculations that go in and there are multiple proven approaches available.
Two of the most popular techniques used are known as TF and BM25. We won't go into the specifics of how these work.
We'll just see how to work with them.
Let's see each of these in action.
First, we import the TF vectorzer from the scikitlearn open-source Python library. Think of the scikit library as a toolbox with pre-built algorithms that you can use without having to write them from scratch. We then define three sample documents. The documents are simple sentences for now. You could read the contents of a file in. We then create the TF analyzer and we'll call that analyzer. The word scores can then be calculated by running the fit transform method. We then print the results on screen. The word scores show a bi-dimensional array with the importance of each word in each sentence. The word office appears in all sentences, so they get a score of 0.4.
The first sentence identifies words equipment and policy and gives them a score of 0.7 and 0.5. The second sentence identifies the words furniture and guidelines. And the third identifies the words travel and policy. Now that the vectors are created, we run a query.
We use the analyzer.t transansform to query the word furniture. What it does is it returns an array that returns a score that compares the query word furniture to each document. And in this case, it returns a score of one just for the second. And in this case, it returns a score of one indicating that the second document is the right document.
And in this case, it returns a score of one indicating that the second document is the right one. Now let's see the same with the BM25 techniques. We use the rank BM25 library which is a popular library that implements the BM25 algorithm. We then create what is known as the BM25 index and then get the word scores. In this case, we can see some differences. The word office gets a score of zero because the BM25 algorithm is a bit more strict in assigning scores and because this word is present in all documents, it doesn't see it to be very relevant. It then continues to assign a score for the most important and unique words in sentences like equipment in the first sentence, furniture and guidelines in the second, and travel in the third.
And as before, we run a query, but this time using the get scores method and print the array. We can see it's again identified the second document to be the relevant document here the right way.
Well, it's time to gain some hands-on practice on what we just learned.
Follow the link in the description below to gain free access to the labs associated with this course. Create a free account and click on enroll to start the labs. On the left side of the screen, you will see the list of labs.
Only start the lab when I ask you to.
We'll do only one lab at a time. Let's start with the first lab. Click on start to launch the lab. Give it a few seconds to load. Once loaded, familiarize yourself with the lab environment. On the left hand side, you have a questions portal that gives you the task to do. On the right hand side, you have a VS code editor and terminal to the system.
Remember that this lab gives you access to a real Linux system. Click on okay to proceed to the first task. The first task requires you to explore the document collection. Open the TechCorp documents in the VS Code editor. On the right, we see there is a TechCorp docs folder. Expand it to reveal the subfolders. The ask is to count how many documents are in the employee handbook.
This is what I call a warm-up question that will help you explore and familiarize yourself with the lab. The real tasks are coming up. In this case, it's three. So, I select three as the answer. Then proceed to the next task.
This is about performing a basic GP search as we discussed in the lecture.
We'll run a GRE command to search for anything related to holiday in the folder and store the results in a file named extracted content. To open the terminal, click anywhere in the panel below and select terminal. This creates a new file with the results. Click check to check your work and continue to the next task. The next task is to set up a Python virtual environment and install dependencies. I'll let you do that yourself. We'll move to the next task now. Here we explore the TF script. Here we first import the TF vectorzer from the scikit learn library. We then transform the dogs. Then we compare using cosine similarities. So cosine is one approach of comparing two vectors to identify similarities. And then we finally print the results. We now execute the script and then we view the results. And for now we'll just click check to proceed to the next step. We then move to the next step. Here the question is to analyze the score printed and identify the score of the top results. So the ask is to search for pet policy docs and identify the score for the top result. Here we see the top result is rightly identified as the pet policy.mmd file with a score of 0.4676 whereas the other files have a score less than 0.1. So the answer to this question is 0.4676.
The next task is to review and execute the BM25 script. Open the BM25 search.py pi file and inspect it. You'll see that we import the rank BM25 uh package. We then create an index and then for each query called the BM25.get scores method and from the results we get the top three results and we go through each result and print that. Finally, there is a hybrid approach that combines TF and BM25 techniques using a weighted approach. I'll let you explore that by yourself. Let's get back to the next topic. We just looked at vector search.
Let's now understand semantic search.
Now, one of the challenge with keyword search is that if the exact keyword isn't there, the search fails. For example, instead of reimbursement, if we say allowance, it tries to find the exact word allowance. And instead of home office, if the user asks work from home, it's unable to find that anywhere.
These combination of keywords aren't found in the documents and thus the document is not found. In our example code, say we say desk instead of furniture is not going to be able to find any matches in scores and thus unable to find any matching document.
That's the limitation of keyword search and that's where we need semantic search. Semantic search searches documents based on the meaning of words and thus have higher chances of locating the right documents based on the inputs.
And that's what we will look at next. So what exactly is semantic search? Think of it as search that understands meaning, not just words. When you search for allowance, semantic search can find documents about allowance or reimbursements or anything that has similar meaning even if those exact words aren't used. Similarly, if you search for home office or work from home, it can find documents that has anything to do with remote work. The magic happens through something called embeddings. We convert both your search query and all the documents into mathematical vectors. Think of them as coordinates in a highdimensional space.
Documents with similar meanings end up close together in this space. So when you search, we find the closest matches based on the meaning, not just word overlap. We can measure how similar two pieces of text are by calculating the distance between their vectors. The closer the vectors, the more similar the meaning. So reimbursement and allowance would have vectors that are close together even though they're different words. We'll see this in more detail next. Let's now understand embedding models. So if you look at machine learning models, they can be categorized at a high level based on use case such as computer vision, NLPs or natural language processing, audio among many others. And within each category, you have a number of models available. This is as shown on hugging face, which is a popular platform where you can discover models, data sets, and applications. Our interest here is the sentence similarity within natural language processing and within sentence similarity. One of the popular models is sentence transformers all mini LM L6V2.
This model maps sentences and paragraphs to a 384dimensional dense vector space and can be used for clustering and semantic search. It is also a 22 million parameter model. Now what does that mean?
The parameter size reflects the brain power of the model. Think of parameters as the learned knowledge stored in the AI's memory. Each parameter is a number that the model learned during training to understand language patterns. 22 million parameters means this model has 22 million learned values that help it understand how words relate to each other, what sentences mean semantically, which concepts are similar or different.
Let's compare that to things we already know like GPT models. Let's compare this model to GPT 3.5 and GPD4 model that we use. The 22 million parameter size of our all mini LLM model is very small compared to the 175 billion parameters of GPD 3.5 and 1.8 trillion parameter size of GPD4. The size of the model is proportional to that too. The all mini model is 90 mgabytes in size. As such, it can be used locally in our laptops and the size of GPT 3.5 and 4 are 350GB and 3.6TB respectively and thus the use case differs. The all mini LM model is a perfect fit as an embedding model for our use case whereas the GBT models are used for text generation and reasoning.
So we just mentioned embeddings. What are they actually? as its simplest form.
An embedding model takes text and converts it into numbers that represent meaning. So sentence like dogs are allowed in the office is converted into an array of numbers known as vectors.
When you give the model a sentence like dogs are allowed in the office, it doesn't just look at the words. Instead, it thinks about what this sentence actually means. Is it about animals? Is it about workplace policies? Is it about permissions? The model then creates a list of numbers that captures all these different aspects of meanings.
Each number represents something that model learned about language. Maybe the first number captures how animal related the text is. The second number captures how workspace related it is and so on and it then plots that in a graph. So dogs get a number 0.5597 and is added to a section of the graph that represents animals and pets also fall into the same category. However, remote does not go there. Similarly, office falls into the workplace area. So our first sentence moves closer into the workplace section and so does the second sentence because it is also related to work. And the same applies to the last sentence as that's also related to the workplace. We then compute the distance between these points. The shorter the distance, the closer they match. So finally, if you look at these two sentences, you'll see that the first two are similar. That's a similarity search explained in the most simplest of forms.
And this explanation only works for a two-dimensional array. But in most cases, the dimensions are too many that we can't even imagine how it would look visually. In this case, the model we are using uses 384 dimensions. So, we don't even know how to imagine this or plot that on a graph. So, then how do we calculate similarities between them?
This is where the magic of mathematics comes in. Since we can't visualize 384 dimensions, we need a mathematical way to measure how close two points are in this highdimensional space. The solution is something called the dot product.
Think of it as a mathematical ruler that can measure distance in any number of dimensions, even ones we can't see. So, here's how it works in simple terms. For the sake of simplicity, I'll convert the vectors for each sentence into two-dimensional vectors of simple numbers. So, dogs are allowed in the office gets a vector value of 1, 5. The second sentence gets 2 and four and the third one gets six and one. The process involves multiplying the vectors, adding them, and then normalizing them. Let's look at the first two. We first multiply the values in the vectors. So, we multiply 1 * 2 to get 2 and 5 * 4 to get 20. We do the same for the other two pairs.
We multiply 1 5 with 6 and 1 to get 6 5.
And then we multiply 2A 4 with 6 and 1 to get 12A 4. We then add the multiplied numbers together. So 2 + 20 gives us 22.
And we get 30 and 16 for the others. And finally, these go through a normalization process to convert these numbers into anything between 0 and 1.
That also takes into consideration the total size of the vectors among other things. Finally, the pair with the value closest to one are similar and away from one are dissimilar. So that's a basic explanation of how sentences are compared for similarity.
Now, of course, you don't have to do all of that math by yourself. We have libraries that does that for you. Numpy is a powerful Python library for working with numbers and mathematical operations. We import numpy as np and then we call the np dot method and pass in the vectors for it to calculate the dotproduct between the two vectors. It returns a similarity score between zero and one.
So let's take a closer look at that. So first we install the required libraries such as the sentence transformers and numpy library. So the sentence transformers as we saw provides the sentence transformer class and the all mini lm model. The numpy provides the np function for calculating dotproducts between vectors. So here we can see the complete code in action. We first import the sentence transformers library and the numpy library. Then we load the all mini LM L6V2 model that we've been discussing. What it does is it downloads the model, loads the 22 million parameters into memory, prepares the model to convert text into embeddings.
We then define our three test sentences about dogs, pets, and remote work. And we then encode these sentences into embeddings using the embedding model.
And finally, we calculate the similarity between each pair of sentences using NumPai's dotproduct function. Now, let's see what happens when we run this code.
We print out the similarity scores between each pair of sentences. And the results are quite interesting. Looking at the results, dogs versus pets shows 73.3% similarity. That makes sense because both are talking about animals in the workplace. Dogs versus remote shows only 36.2% similarity. That makes sense, too, because one is about animals, the other is about work arrangements. Pets versus remote shows 33.8% similarity. Again, these are quite different topics. This demonstrates exactly what we've been talking about.
The model can understand semantic meaning, not just word matching. Even though dogs and pets are different words, the model recognizes they're both about animals in the workplace context.
And it correctly identifies that remote work policies are quite different from animal policies. And this is the foundation of how rack systems are built. They can find semantically similar content even when the exact words don't match. This is what makes rag so powerful compared to traditional keyboard search. So, so far we've been looking at sentence transformers and the all mini LM L6V2 model. But sentence transformers are just one example of embedding models. There are many other popular embedding models out there that you can choose from depending on your use case. Now, let me clarify an important distinction. The sentence transformers we've been using are local models. They run on your local machine.
They're completely free and they don't require an internet connection. But there are also remote or API models like OpenAI's embeddings that run on external servers where you pay use and need an internet connection. In this sample code, you can see how we use the OpenAI library and use the embeddings API endpoint to create a new embedding. The model is text embedding 3 small and it returns the embedding vector for it.
There's also this leaderboard of top embedding models posted by HuggingFace.
We can see some of the most popular ones here. Gemini topping the chart with Quen 3 and others that are following. Well, that's all for now. Head over to the labs and practice working with embedding models. Right, we're now going to look into the second lab. This is called embedding models. So, I'm just going to click on start lab to start the lab.
We'll give it a few minutes to load.
Okay, so in this lab, we're going to look at uh embedding models. We'll explore semantic search using embedded models which are the foundation of modern uh rag systems. So let's uh go to the first task. So the first task is about keyword uh search limitations. So first we navigate to the project. We create a new virtual environment and install the requirements.
I go to the terminal and we're going to uh set up the virtual environment.
So our project is within this uh folder called rack project. And here we have the virtual environment uh that's being set up.
Okay. Okay, we now run the um the next step once the once the virtual environment is set up the next step is to run the keyword limitation demo. If you go to the rag project, you'll see the keyword limitation uh demo script.
So, this is a simple script that searches for a word or keyword that does not exist in in the documents and proves that uh pure keyword- based uh search uh are less likely to yield the right results. For example, in this case, the query is distributed workforce policies and the none of the documents have something that's exactly like that, right? So, let's try running the script.
And if you look at the script, most of the scores are zero because um the keywords distributed workforce policies does not really exist in any of the scripts. So, the correct answer here is missing synonyms and context.
All right.
The next task is to install embedding dependencies. So we go to the rack project. So we're already in that project.
We source the uh virtual environment. We install the embedding packages. So I'm going to copy copy this command install it. So the packages are sentence transformers hacking phase hub and openai.
The next question is to run the local embedding scripts. So if you see the script name is semantic search demo. So let's look at the semantic search uh demo script. And if you look into this, we can see that the first step is loading the documents. And then we load the local embedding model which is the all mini LML l6v2. And then we generate embeddings by calling the method model.
And then we pass in the docs. And then we have the query which is the same query we used before which is distributed workflows policies. And then we generate embeddings for the query.
And then we calculate u the similarities using the np uh method. And then we print the results. So let's uh run the script. So we do uv run python semantic search demo.
Now as you can see in the same set of documents the script has now identified the relevant uh documents uh which has the meaning that's closer to the distributed workforce policies query that we are looking for. So if you see that for each document is uh given a rating and that means that it's able to identify the document that has the closest semantic results.
We'll go to the next question.
So the task is to uh look at the results and then say look at the semantic search results and what is the similarity score between remote work policy and distributed work policies. If you look at the first score say 0.3982 and that is the score for remote work policy.
The next question is a multiple choice question. So this basically confirms our learning. So the question is based on the comparison between semantic search and keyword search which is a TF IDF and BM25 that we saw earlier. Which approach better understands the meaning of queries? Of course we know that the semantic search understands uh the meaning of queries better and that's basically about uh this lab. In the next lab we'll explore um vector databases.
Let's now understand vector databases.
So far we saw how we could use the sentence transformer libraries and load simple sentences into it to create embeddings and then compare those embeddings to each other in a super simple way. However, we have a bigger task at hand. Our policy copilot system and it has hundreds or thousands of large policy documents. Let's say we have 500 policy documents each with multiple sections. When a user asks, "What's the reimbursement policy for home office setup? Our system needs to search through all of these documents to find the most relevant ones." Now, if we were to do this the naive way, comparing the query embedding with every single stored embedding, we'd have a big problem because with 500 documents, each with 384 dimensions, that's 192,000 calculations for every single query.
This is like searching through a phone book page by page. It works for a small phone book, but imagine trying to find a specific number in a phone book with millions of entries. You'd be there all day. That's where vector databases comes in. Think of them as having a smart librarian who knows exactly where to look. Vector databases can retrieve relevant results instantly. They efficiently use resources. They're scalable and they do that by using smart indexing algorithms. What does indexing mean? Earlier we saw how we represented documents or sentences on a vector graph and then compared their similarities.
But when there are thousands of such policies, it's going to be impossible to compare them. And that's where indexing comes in. Instead of checking every single vector, we pre-organize them into neighborhoods. In this case, the animal policies are grouped together. All health benefits are grouped together.
All remote work policies are grouped together. That way, when someone asks about bringing their dog to work, we don't search the entire space. we go directly to the animal policies neighborhood and only search there.
Let's look at the three most popular indexing algorithms used by vector databases. HNSW or hierarchical navigable small world is the most widely used algorithm. It creates a graph structure where each vector is connected to its most similar neighbors. So when searching, it starts from a random point and follows the connections to find the closest matches. It's fast and accurate, which is why most vector databases use it by default. IVF or inverted file and LSH or locally sensitive hashing are other examples of the same. Let's now look at some of the popular vector DB implementations. Chroma is perfect for learning because it's open- source and Python friendly. We can install it on your computer and start experimenting immediately. It's free, which makes it great for students and small projects.
Pine Cone is a managed service, meaning they handle all the infrastructure for you. You just send your data and queries and they take care of everything else.
It's used by big companies in production, but you pay per use. There are other great options too. VV8 with its GraphQL API is another example. But for learning, I recommend starting with Chroma. So the best approach is to start with Chroma for learning and experimentation and then move up to Pine Cone or similar services for production use case.
So first we install the required library such as the Chroma database. Then we import the Chroma DBA library. We connect to the client. We create a collection called policies. Chroma creates a new collection in memory. Sets up the default embedding model. The all mini LM embedding model. Prepares storage for vectors and metadata. We then add policy documents to the collection using the collection add command. So this converts text to 384dimensional vector that we spoke about earlier. Saves the vector in the collection, adds the vector to the hnsw index structure. The document is immediately searchable. To search, we run the collection.query method and pass the query string. Now let's talk about some important Chromb concepts. First, the default behavior of Chromadb is that it's not persistent. When you create a client with just chromadb.client, client, it stores everything in memory.
This means when your program stops, all your data is lost. This is fine for learning and experimentation but not for production. To make Chromb persistent, you need to use persistent client instead of client. You specify a path where you want to store the database files. This way, your data survives program restarts and you can build up your vector database over time. You can also change the embedding model that Chromma DB uses. By default, it uses the all mini LM model, but you might want to use a different model for better performance or to match what you used during training. You can use OpenAI's embedding models or even create a custom embedding function using any model you want. In this case, we pass in a new parameter called embedding function that passes in OpenAI's embedding function as a parameter along with the API key.
Let's head over to the labs and gain hands-on experience.
Okay, let's now look at the uh lab on vector DB. So I'm going to start the lab now. Okay. So the lab has uh what I'm going to do is I'm going I'm just going to go through a high level overview of the lab and I'll leave you to do most of it but I'll just explain how the lab functions. Right. So uh in this lab we're going to learn how to scale the semantic search with vector databases.
So let's get that going.
So the first task is to simply understand the uh concepts. So before we start building, let's uh understand what vector databases are. So we already discussed that in the video, but here's a quick uh description of what it is and what it can help us do. And there's a question on um what is the primary advantage of using a vector database over strong embedding models um in memory. So I'll uh let you answer that uh yourself. The next step is to navigate to the project directory which is right here. And then um we again activate the virtual environment and we install the embedding uh model package which is sentence transformers which we also did in the last lab. And then the next step is to install the vector database. In this case we're going to use chromadb. So um the task is to install the chromb package.
Again I'll just skip through that for now. Uh the next task is to initialize a chrom vector database. So um if you go here there's a script called init vector DB and if you look into the script we first import the chromb package. We also have the sentence transformers. Um we then uh create uh the chromb client using the chromadb.client method. And then we create a collection. We'll call it techp docs. And then uh we load the embedding model which is all mini lm6 model. And then we um test the model with a sample document.
So we have identified a test doc which is really just a sentence that's given here. Um we'll then add the test document to the collection using the collection add method and we'll print print the results and then uh we'll print the count of uh documents within the collection and that's basically it.
So that's a a quick uh beginner level uh script.
In the next one, there are a couple of questions that are being asked. So uh you can answer those questions based on the results of the script. The next one is uh called as store documents. So this is where we store actual documents within the chromob uh database. Again, this is another script that starts off and loads the model and client as we did before. uh but in this case we're reading the techp docs um documents using the techcorp docs method which we have in the utilities function. So that's what loads all the uh documents that are in the tech corp uh docs folder. So now we're loading actual documents and then we follow the same approach of adding those documents to the collection and then we verify the collection. So again just uh another uh layer to that uh script the basic script in this case we're just storing documents.
We'll continue to the next task. This is where we do perform uh a vector search against the documents. So um the script this time is vector search uh demo. So click on the vector search demo script and here we have uh some sample documents. Um there are sentences and then there's a query. Let's now understand chunking. Now that we understood how vector databases work, we have a new challenge. We've been working with simple sentences like dogs are allowed in the office on Fridays. But what happens when we have real policy documents? What if we have a 50page employee handbook that we want to add to our vector database? Let's think about this practically. We have an employee handbook, 50 pages of policy content, multiple sections per page, complex policies with detailed explanations.
What happens when we try to add this entire document to Chromob as a single entry? Well, it would work. Technically, Chromad would create an embedding for the entire document, but when someone asks what's the remote work policy, they'd get back with the entire 50page handbook. That's not very helpful.
This is what I call the precision problem. Without chunking, when someone asks what's the remote work policy, they get the entire 50page handbook. The user gets overwhelmed with irrelevant information. They have to search through everything to find what they actually need. But with chunking, we break that handbook into smaller focused pieces.
Now, when someone asks about remote work, they get back just the specific policy sections that are relevant. The user gets exactly what they asked for.
clear focused answers. Now, how do we actually break documents into chunks?
There are several strategies, but we'll focus on some of the simplest ones. With fixed size chunks, we simply take 500 characters per chunk. This is simple and reliable for most use cases. We just split the document into equals sized pieces, which makes it easy to understand and implement.
But there's a problem with this approach. What happens when we split right in the middle of a sentence? We might end up with dogs are allowed in one chunk and on Fridays in the other.
This breaks the meaning and makes it hard for the system to understand the complete information. That's where overlap comes in. We add a 50 character overlap between the chunks. So the end of one chunk overlaps with the beginning of the next. This way if we do split the sentence, the important context is preserved in both chunks.
Now there are other methods of chunking like sentencebased chunking. This is where every sentence is split into a separate chunk or paragraph based chunking where each paragraph becomes a single chunk. Chunking might sound simple but it's actually quite tricky.
The main challenge is finding the right balance. If chunks are too small, we lose context. So as we saw earlier if one chunk has docs are allowed and on the other chunk has on Fridays the user would get incomplete information. We'd have poor understanding because we're missing important details and the information would be fragmented.
On the other hand if chunks are too large we have poor precision. If we put an entire policy in one chunk we're back to the same problem we started with. The search would be inefficient because there's too much irrelevant content and the results would be overwhelming. So it's important to choose the right strategy based on your requirements.
Apart from the fixed size chunking, there are other methods like sentencebased chunking and paragraph that we saw, but even others like semantic chunking and agentic chunking that is for now out out of scopes of this video. Now let's build a simple chunking function. This function takes a document and splits it into overlapping chunks. The key features are it tries to break at sentence boundaries when possible. It maintains the overlap for context and it handles the end of the document properly. Now this is a simple chunking done by a Python library. Now let's see how chunking integrates with our vector database. The complete workflow is that we chunk our large policy document. Add each chunks to the vector database with a unique ID and then when we query we get back with the specific chunks that are most relevant.
This gives us the best of both worlds.
We can handle large documents, but we get precise, relevant answers. Instead of searching through entire documents, we're searching through focused chunks that contain exactly what the user is looking for. Let me share some key principles for effective chunking. For size guidelines, 200 to 500 characters is a good balance of context and position. With 50 to 100 characters overlap to maintain continuity, you might need to adjust based on your content. Technical documents might need different chunk sizes than general policies. For boundary rules, always try to split at sentences to maintain grammatical integrity. Avoid midword breaks to keep words intact and preserve paragraphs to maintain logical structure. Finally, always test the real queries to ensure your chunks actually answer questions. Verify that the overlap reserves meaning and monitor your search results to see if you need to adjust the chunk size. Remember, chunking is all about finding the right balance between context and precision.
It's not just about breaking documents into pieces. It's about breaking them in a way that makes sense for your users.
All right, let's look into the next lab on document chunking. Okay, in this lab, we're going to look at uh chunking techniques. So, we'll learn how to optimize rack performance by breaking documents into focused searchable chunks.
So, first we activate the virtual environment. So, this is something we have uh already done many times. All right. Uh so first we're going to look at this chunking problem demo script. So if you expand the rack project, there should be a script called as chunking problem demo script. The thing is uh this script demonstrates the core problem of searching a large documents in rack systems. It creates a sample employee handbook and shows how searching for specific information like u internet speed requirements returns the entire document instead of just the relevant section. So uh we'll see uh a large document stored as a single chunk search queries that should be uh that should find specific sections or results that return the entire document. So here you can see there's a sample document um that has multiple sections and uh we're adding that document to the uh collection chrom and then we're doing a query for internet speed requirements.
So let's run the script and see how it works.
So the script runs now and as you can see it returns the entire document. It's truncated here but uh the result shows the uh entire document. So that's the problem uh with this uh approach. So the answer to this is large documents return irrelevant uh results. Next uh we will look at some of the uh dependencies libraries and dependencies that we'll be using. So first um we have what is known as lang chain. So if you uh don't know what lang chain is, we have other videos that are on our platform. We have a future course that's coming up that will be for lang chain end to end. So do remember to subscribe to our channel to be notified when it comes out. So lang is a powerful framework for building rag applications. It provides recursive characters text splitter for smart uh document chunking and there's also the uh spacy which is an advanced natural language processing library and it provides uh it also provides a spacey text splitter for sentence aware chunking. So we'll use spacy for sentence um aware chunking and it uh these libraries take care of uh chunk sizes overlaps operators etc. And we'll install the lang chain and spacy dependencies. Okay, we'll go to the next question and we'll first look at basic chunking.
So if you open the basic uh chunking script, you'll see that it uses the lang chain uh text splitter um from which we have the recursive character text splitter uh library. So here we have a sample document and uh this is where we are doing the splitting. So as you can see we specify the chunk size 200, the chunk overlap is 50. So that's the uh 50 characters.
There's going to be overlap between each chunks. There are some of these se separators that are defined.
So we then do a splitter.split text to split the text into different chunks.
And then we have we just go through the chunks and print them.
So I'll let you do that yourself. We'll go to the next one.
And there's uh a bunch of questions uh that are asked that you can you have to read the script and understand and answer. So I'll let you do that uh by yourself.
The next one we'll look at is sentence chunking. So in sentence chunking again uh if you look at the script we're using spacy as a library. And then we have um a question that's based on the output of that script. And then finally we looked at chunked search. So this is a another script that performs a chunked vector search uh demo that kind of connects everything we've uh learned so far together. So first we chunk the documents and then we add these chunk documents to a collection uh and there's a comparison between chunked no chunking a collection with no chunking and collection with chunking and then uh we'll see the difference between the two. Again I'll let you u go through that by yourself and there's a question that's based on that. So, yep, that's u a quick lab on chunking and I'll see you in the video. Let's now bring it all together to build our rack system. Now that we understand all the individual components of racks, that's retrieval, augmentation, and generation. It's time to see how they all work together in a real system. We've been building our policy copilot system piece by piece.
But what does it look like when everything is connected and running in production? So, we know the basic flow.
User query goes to retrieval then augmentation then generation and finally response. But this is just the highle view. In a real system there are many more components working behind the scenes to make this happen smoothly, efficiently and reliably. Now everything we spoke about so far such as chunking, creating embeddings, storing it in vector DB, etc. are things that need to be done before the user starts asking questions because loading thousands of documents, chunking and storing them in DB and creating embeddings out of them and scoring them all of that takes a lot of time and so they go together before this stage called as a rag pipeline.
Let's take a closer look at that simple rag pipeline.
The rag pipeline gets the policy documents, chunks them into small pieces using a chunk size of 500 with an overlap of 50 characters, then converts them into embeddings using OpenAI's embedding models and then finally loads them into a vector DB.
Now, when a query comes in, we search the rag pipeline and it gives us the necessary chunks of document. We then augment that document along with the user's query and sends that to the LLM to generate a response. So that's a super simplistic rack pipeline. Let's head over to the labs and see this in action. Right? So this is the last lab in this course and this one is about building a complete rag pipeline. So uh we'll learn how document chunking integrates with vector search, how query processing connects to retrieval, how context augmentation feeds into response generation, and how the complete rag pipeline works end to end. So this basically combines everything from the first four labs that we've just done.
All right. So first we start with setting up the virtual environment. So the environment is already set up. You just need to activate it.
All right. So, first we start by looking at the complete rag demo script. So, we have a single script now that combines everything we've done so far.
And uh we'll start looking at it uh section by section. So, there's the first section that has the document loading and chunking. And there's the a function for that. We have some sample documents. And then we have a text splitter. And we have all the uh chunks that are created here. And then we have section two which is a vector database setup. Here you can see we set up a chromb vector database and store the document chunks there. And then we have the uh user query processing section.
This is where we actually process the user queries. And then we do the actual search. And finally we have the context augmentation. This is where we build augmented prompt with retrieved context for LLMs.
And so here you can see how uh a prompt is generated with the uh context in place which is the basically the policies that were retrieved and then you have the actual question the user's question itself and some additional uh prompt engineering and then finally we have the generate response function that generates a response using LLM and finally we have the complete rag pipeline that calls each of those functions. funs that we have written before and then there's the main function.
Well, I'll let you explore this uh lab by yourself. There's a lot of uh interesting questions and challenges throughout that will help you uh keep thinking. So, all the best. This section covers the essential production concerns. Caching to make systems fast, monitoring to know what's happening, and error handling to keep systems running when things go wrong. Let's start with a fundamental problem. Rag systems are slow. Every query involves multiple expensive operations. Generating embeddings, searching vector databases, calling LLM APIs. Without optimization, a single query can take nearly a second.
But here's the thing. Most queries are repeated or are very similar. People ask the same questions over and over. What's the reimbursement policy for home office setup? Gets asked dozens of times.
Caching solves this by storing the results of expensive operations and reusing them. Instead of taking 950 milliseconds, a cache response might then just take just 5 seconds. That's 190 times faster. The key insight is that we don't need to recomputee everything for every query. We can cache at multiple levels, the embeddings, the search results, or even the final answers. So there are four main types of caching that we can implement in rag systems. each solving a different performance bottleneck. Query cache is the simplest. We store complete question answer pairs. When someone asks what's the remote work policy, again, we return the exact same answer instantly. This works great for frequently asked questions. Embedding cache stores the computed vectors for text. This is useful because generating embeddings is expensive and we often process the same text multiple times like policy chunks that appear in multiple searches. Vector search cache stores the results of database queries. This helps when similar queries return the same results.
Remote work and working from home might return identical chunks. LLM response cache stores the generated answers. This is the most expensive operation to cache, but also the most valuable since LLM calls are typically the slowest part of the pipeline. The key is to cache at the right level, not too granular, not too broad, and with appropriate expiration times. Let's look at how to actually implement caching. Well, Reddis is a popular caching tool because it's fast, supports different data types, and has built-in expiration. The example shows a simple but effective caching strategy. We create a unique cache key by hashing the query and context together. This ensures that different queries can get different cache entries, but similar queries can share the same entry. We check the cache first. If we find a cache response, we return it immediately. If not, we generate the response using our normal rack pipeline, then store it in the cache with an expiration time. The TTL or time to live is crucial. We want to cache to we want to cache long enough to get performance benefits, but not so long that the data becomes stale. For policy documents and our might be appropriate for more dynamic content, we might use shorter times. You can't manage what you don't measure. In production, we need to monitor everything to understand how our rag system is performing and when problems occur. The best metrics are response time, how fast we answer questions, throughput, how many queries we handle per second, error rate, what percentage of requests fail, but rack systems have their own specific metrics we need to track. Retrieval quality measures how relevant the return chunks are to the user's question. Embedding performance tracks how long it takes to generate vectors. Chunking efficiencies monitors how well we're breaking up documents. We set alerting thresholds to know immediately when something goes wrong. So if response time exceeds 2 seconds, there's uh that's a performance issue. If error rate goes above 5%, then there's a system problem. So the key is to set realistic thresholds based on actual performance, not theoretical targets. So we want alerts that indicate real problems, not false alarms that cause alert fatigue. Now things will go wrong in production. Vector databases will go down. LLM services will be unavailable. Networks will have timeouts and we need to handle these failures gracefully. The goal is graceful degradation. The system should still work even if not at full capacity. So users should get some answer rather than an entire error message. So the example uh shows a cascading fallback strategy.
If the full rack pipeline fails, we try keyword search. If that fails, we return the retrieved chunks directly. If even that fails, we use simple text matching.
And as a last resort, we return a helpful error message. And we periodically test if the service is back by sending a few requests. And this is uh the halfopen state. So if those succeed, we close the circuit and resume normal operation. Let's now bring it all together to build our rag system. Now that we understand the core rack architecture, we need to talk about what happens when we put these systems into production. Real world rack systems face challenges that don't exist in our simple examples. Performance issues, failures, and the need to handle thousands of users. So this diagram shows a complete production rack system running on Kubernetes. And let me walk you through each layer. So we have a data layer, a rag pipeline layer, and the application layer, and a monitoring stack. So the data layer includes all our storage systems. So Chromad for vectors, Redd is for caching, PostgresQL for metadata. The rag pipeline layer contains the core rack functionality broken down into microservices. So query processing, chunking, embedding, generation, retrieval, augmentation and generation. And each service can scale independently based on demand. The application layer contains all the userfacing services. So there's the web UI, there's the mobile app back end if there's any the admin interface etc. These services handle users interactions and present the rack capabilities through different interfaces and then we have our complete monitoring stack.
Prometheus for metrics, graphfana for dashboards, jagger for tracing and the elk stack for logging. Now this layered architecture separates concerns clearly.
Applications handle user interactions.
The rag pipeline processes the core functionality and the data layer provides storage. This can handle thousands of concurrent users while maintaining high availability and performance. Well, that's a highle overview. We haven't spoken about a lot of advanced topics like multimodal rack, graph rag, hybrid search techniques, federated rack, reranking techniques, query expansion, context compression. To learn more about AI and other related technologies, check out our AI learning path on CodeCloud. Well, thank you so much for watching. Do subscribe to our channel for more videos like this. Until next time, goodbye. Model context protocol. What exactly is it and why is everyone talking about it? This is a crisp, nononsense, no BS hands-on introduction to model context protocol for the absolute beginners. So no prior knowledge required. We'll cover everything from the absolute basics.
We'll understand why MCPs are needed in the first place. What are MCPs? We'll look at the MCP architecture. Then we'll learn how to use an existing MCP server.
We'll then build an MCP server and an MCP client from scratch. And you'll also gain access to a hands-on lab environment exercises and resources that you can use to follow along this video with me. Now, we'll begin by looking at why do we need MCPS in the first place.
Let's start with something we already know. CH GBT. The way it works is when you send a message to GPT, which is the LLM, it responds back with its response in the form of a generated text or other forms like image or audio or video. But let's say we were building a flight GPT app and I say I would like to fly to North London. It should book a flight for me. Well, LLMs can only respond back with a generated text or other supported formats. it can't perform any action on its own. But what does uh taking an action mean here? By the way, we discussed this in more detail in our previous video about the introduction to AI agents and MCPs. So do check it out if you just want an overview of uh what MCPS are. However, I'll take a minute to summarize that here. Anyway, now in our application, when I say I would like to fly to North London, my application should be able to interact with these third party flight services such as whatever is listed here and then retrieve flight details uh from these sites and then also compare that against my preferences uh such as whether I prefer cheap or luxury flights or my seat preferences or meal preferences and based on all of that information make a decision for me and not stop until it's retrieved enough information to be able to make a decision and then book the flights for me and tell me the flight details. So, I'd like my AI to take action for me. So, we need something magical that can do that for us. And what is that? Well, those are called AI agents. And AI agents are able to interact with third party platforms or websites, gather information, and combine that with a memory that it has based on our previous conversations and then interact with an LLM, which is the real AI here, to make a decision for me.
And that magical thing is known as the AI agent. An AI agent can interact with thirdparty tools, have its own memory and interact with an LLM and go back and forth until it has uh completed the task that it is assigned to do. Now, in the previous video when I shared this, someone asked in the comments, yeah, so AI agent is a magical thing, but what exactly is it? So, let's spend a minute on AI agents here, but note that we have an entire video coming up on understanding AI agents in depth on our channel next week. So, do subscribe to be notified when the video is out. And by the way, if you have any questions uh on this one, please drop it in the comments below so I can answer them in my next video. So, all build workflows in the past, well, longunning automation scripts, for example, the good old VMware Realize Orchestrator, if you're from a VMware world or the Microsoft System Center orchestrator, uh if you're from the Microsoft world or a modern tools like Zapier or just good old-fashioned series of Python scripts just duct taped together. and you had all of these complex logics in place to make decisions and go into loops and connect with third party tools. Now, if you did all of that, then you already know how an AI agent works. Except in case of an AI agent, the agent relies on AI in the form of LLMs to make these decisions. The agent often interacts with AI to know what route to take as part of a conditional decision or how many times to iterate in a loop or what third party tools to interact with or how to process the user input or know when the script's uh goal is achieved so that it can exit. So yeah, an AI agent is just like your old automation script except now it can think. So how does that apply to our use case here? A typical AI agent workflow looks like this. The user sends a request to the AI agent. The AI agent interacts with the LLM to extract the right details from the user's input as different users might input details differently. In this case, the AI agent asks, "Here is a user's input. What does a user mean?"
The LLM responds back saying that the destination is London. The AI agent then requests the LLM for assistance in identifying which third party tools to interact with. There may be other third parties as well such as hotels or rental cars or other databases. The LLM helps the AI agent identify that the flights are the third parties to interact with.
The AI agent then interacts with the airlines and retrieves flight details.
The AI agent then asks the LLM what to do next and the LLM says fetch the preferences from the database. So the AI agent fetches the preferences from the database. These details are then sent to the LLM requesting it to make a decision. The LLM identifies the right flight to book and sends back the information to the AI agent. The AI agent then books the flight and sends the flight details to the user. As you can see, at various stages, the LLM interacts with the AI agent to process data and make a decision.
So, here is a super simplified version of an AI agent that's written in Python without using any framework or anything complex. It interacts with the user to get inputs. It then calls LLM to retrieve the specific details from the user's input such as origin, destination, and date of travel. It then fetches flight details from thirdparty websites. It then fetches user preferences from memory or database and then sends these details to the LLM to make a decision and finally books the flight by making a call to the third party site. Now, that's a super simplified version of the workflow. It's missing many additional LLM calls that the AI agent would make. the decision-making loops that the AI agent would go through if the right match is not available the first time, but that's for another time. We have frameworks like lang chain and langraph that can help make this workflow better. We'll discuss that in detail in the upcoming videos. Note that all code that's shown in this video are pseudo code only. So do not try to run it as e is refer to the actual code in the labs associated with this video. So coming back to this, we said that an agent can interact with third party platforms. this way. But how does an agent really interact with the third party platform? It does that through what are known as tools. A tool allows the agent to interact with another platform. Let's take a closer look at that. So here the agent has the ability to interact with these airlines using a tool for each one. But how does a tool interact with an airline? Going back to our pseudo code, if you look inside the fetch flight details function, you'll see a tool call for each airline and we pass in the query parameters to it such as the origin, destination, date, etc. And we make a tool call for each airline and append the results and return that.
Now, if you take a closer look at that call, you'll see that each call is different. The first one is API/flights.
The second one is flights list. The third is list flights. Also, their responses are different too. Each airline has its own standard when it comes to their APIs. There are hundreds of airline sites and there are millions of other third party sites. And if I want my application to interact with all of them, do I need to write all of these code? Now, we are in the AI world and I shouldn't have to do this. So, gone are those days when I would sit and write programs to connect to these different flight service providers myself. So, why can't AI just do that for me and only if there was some magical solution that existed? And so comes MCPs or model context protocols. Think of MCPS as a guide for the AIS to choose the right APIs and interact with the thirdparty platforms. MCPS provide agents the context they need to interact with thirdparty platforms. What does that mean? Let's dive deeper into MCPS and how agents can discover and use MCPs.
MCPS follow a client server architecture.
Now agents use the MCP client to interact with a server. So usually MCP clients are embedded with encoding agents in IDEs like cursor, windsurf, cloud code or cloud desktop. We could then get these agents to connect to a local database instance like MongoDB or browser tools. For example, here's a use case where we ask the AI agent about a recent problem with the UI of our application. The AI agent goes into a quest of going through the git history, checking backend and front-end code, and finally identifying the commit that caused the change. This does not use an MCP server though. While developing front-end web applications using the browser, MCP server provides the AI agent access to the browser console logs and HTML elements that can be used to troubleshoot front-end issues. And finally, a really cool use case is in data engineering. By providing MCP server readonly access to our data using the Stripe, BigQuery, and Data Studio MCP servers, we could now ask specific questions about missing data and transactions. And the AI agent can now dig in and identify root cause of such issues by combining information from these different sources. So who builds the MCB servers? If I was the owner of a business or an application and I want AI agents to interact with my app, I would build and maintain my own MCP servers.
You'll see a lot of vendors announcing the launch of MCP servers for their services. If you go to the model context protocol repository on GitHub, you'll see a list of official integrations. MCP servers can be built by anyone really as long as they know how the APIs work. So for companies that have not built official MCB servers, there are community members who have built their own versions. Of course, these need to be used at your own risk as there is no guarantee that they are tested or up to date with latest versions of the vendor's APIs. But what does it mean when I say anyone can build an MCP server? How is that possible? For that we need to understand what NCPs are and what the model context protocol specification is. So up next we'll discuss what is MCP, what the MCP architecture is and then proceed to using an MCP server and building our own MCP servers and clients. But before we proceed with the next step, let's head over to the lab and get familiarized with the lab environment.
We're now going to access the lab environment that's provided along with this video. Use the link in the description below to create a free account to access the labs. Start with the first lab.
This is the interface to our lab environment. On the left, you have a set of instructions. In this case, there are seven tasks for you to complete in this lab. And on the right, you have a VS Code server. You can access the terminal by clicking anywhere below and going to terminal. So, this is access to an actual system. it's hosted on our labs.
Now, uh in this lab, we're going to get started with Root Code AI assistant. So, Root Code AI assistant can be thought of as a cursor or Windsorf alternative uh which is a VS Code extension. So, if you click on the Kangaroo button here, you're going to be able to see a chat interface. Let's continue with the lab uh and uh configure this environment.
All right. So, here it says uh open a new terminal in VS Code on the right. So we've opened a new terminal and run this command to look into bash profile. So if you look into your bash profile, you're going to be able to see a set of keys that you can use during this lab session.
Here we're going to need the openi base and the openi key. So we're going to keep a note of this for now. Let's continue to the uh next step. Okay. So the goal here is to configure uh root code with this API keys. So, we're going to go into the API provider and select uh OpenAI compatible and then the base URL. The base URL can be found here. So, we're going to select this and paste it right here. And the API key, the API key is going to be the OpenAI API key. So, we're going to copy this and paste it here. The model is going to be what's given here. So, it's a Deepseek free model. So, we're going to put that in and click okay. Now we're going to go and click let's go. What this does is it sets up root code. Now we're just going to copy this prompt and paste to make sure that it's uh working.
And we can see that it's now starting to respond to us. This means that the API key setup is successful and root code is working. Let's click on okay to continue.
And you can now explore asking these questions to root code. I'll let you explore those by yourself. So head over to the labs and explore these by yourselves and once you're done come back and continue with this video. We'll now understand what MCPS are and what are its different components in a super simplified manner and then we'll see how it can be used. Now let's look at what an MCP server really is. MCP itself stands for model context protocol. Model refers to the AI itself, the LLMs, the large uh language models. The context refers to giving AI or the model context of a third party and uh protocol simply means a set of standards. So MCP itself is just a set of standards that define how AI applications can work with each other. If you go to modelcontext protocol.io and look under specification, you'll see what it means.
It defines a set of rules that needs to be followed by someone building an MCP server or a client such as the communication between the server and client must use a JSON RPC format. The connection must be stateful. The MCP server must offer any of the following features such as resources, prompts, and tools to the clients. And the clients must offer sampling roots and elicitation features to the servers.
Now, don't worry if you don't know any of these details yet. We'll discuss these in more details in a bit. For now, simply understand that anyone can build an MCP server as long as they adhere to these standards defined. And if a server is built following these standards, any client can use it. Now, we'll understand what MCPS are and what are its different components in a super simplified manner and then we'll see how it can be used.
Let us now look at MCP architecture. If I had to truly understand what an MCP server is and how to build it, I would first assume a state where no MCP servers exist, then I would know the why behind building the MCP server. So for a minute, let's assume that MCPS don't exist and I am building a client to interact with the server. Now what would I need? First, I would need to know what the server can do like what APIs do the server support, what capabilities it has. For this, I would usually refer to the API documentation of that server and figure out everything that the server supports.
Now, these are known as tools in the MCP world. The server must list all of its capabilities as a list of tools defined in a specific format. Each tool should have a description of what it does and an input and output schema.
Next, uh we may need certain data such as refund policies or guides to uh cities or FAQs. And these details may be needed to be passed through to the AI to support its decision-m. For example, if the user has a preference to book only flight providers that support a refund, then the information in these guides come in handy. Now, these are known as resources. The MCP specification has a clearly defined structure to define resources. The resources should have a URI that points to the resource, a name, title, and a description uh that defines what this resource does. The URI could be HTTPS that points to a resource on the web or a file that's uh located on the file system or a location of a git repository. Okay, so we now have tools and resources defined in our MCB server.
Now using these tools, the client or the AI agent that uses the uh client needs to call the LLM. Now you can leave it up to the AI agent or the developer building the AI agent to create the right prompt for the LLM. So whoever is building the EI agent uh might decide to send a prompt to the AI agent say find me a flight to London. However, as a developer of the MCP server, you know the better prompt is that you are a travel assistant and uh when the user asks about flights, you must call the search flights tool with the origin, destination and date and format all dates as the particular format that's given here and be helpful and concise.
So as you can see here there are specific instructions given along with a specific format of dates and these are known as prompts and that's the third type of entity that an MTP server can expose. So MCP specification defines a specific format to define a list of prompts. For example, in this case we have a list of uh prompts that defines a name for each prompt, a title, a description and a set of arguments that can be passed.
So those are the highlevel details that an MCP server needs to expose to its clients. Let us now see how to build an MCP server. There are SDKs available uh that make this easier. So we'll understand what MCPS are and what are its different components in a super simplified manner and then we'll see how it can be used.
So how does the server and client communicate with each other? It uses a JSON RPC protocol. But what exactly is JSON RPC?
So the JSON in JSON RPC stands for JSON which we already know and the RPC stands for remote procedure call and together JSON RPC defines how a client can call a procedure or a method remotely and pass parameters and receive a response. Now what that basically means is say there is a server that has a method such as add in it. A client should be able to invoke that method remotely and pass parameters to it. So the protocol defines clear guidelines on how data is sent and received. The client when making a request should send a JSON document that contains the JSON RPC version which must be set to 2.0, a method to call on the server side and a list of parameters to be passed through to the message along with an ID number which is a number. The server then responds sends a response back that has JSON RPC version specified which is 2.0 along with the result and ID and an optional error field with uh the error details if there is an error. Now note that JSON RPC is a simple protocol meant to be kept simple. As such it is stateless and does not define how data is transmitted between client and server. So that's up to us to decide. It could be HTTP websockets TCP UDP unique sockets message Q standard IO etc. So NCP supports HTTP and standard IO as the transport mechanisms for clientto-s server communication. Now here's an example of an implementation of JSON RPC in Python with a client and server. So the server uses the JSON RPC SDK for Python to define a simple add method and the client uses the JSON RPC client SDK to send a request to the server and receive a response. And this example uses an HTTP transport. Next, we'll see how to use an existing MCP server. Let's first look at how to use an existing MCP server and then we'll learn how to build our own. Kind of like learning how to drive a car first before learning how to engineer and build one. So, how is MCP meant to work? Now, in the past, you wrote code for interacting with uh an API server directly. But now with MCP server, you're no longer concerned about APIs. Instead, you make a call to MCP server and the MCP server handles interacting with the endpoint. Your tool can query the MCP server to know its capabilities and then make a tool call.
Now, where is this MCP server hosted?
Now, it can be hosted locally on your machine or remotely hosted by the vendor themselves.
Now, if it's hosted locally on a machine, this is where you run a local instance of MCP server and connect to it via standard IO or HTTP or there are remotely hosted MCP servers either by your organization to have a single MCP server accessible internally across the organization or uh say by a vendor themselves to allow AI agents to interact with them. In that case, you connect to it via HTTP.
Let's first look at how to configure an NCB server locally. If you're configuring your IDE like cursor or windsurf or tools like cloud code to MCP server, they come with an NCP configuration file such as the MCP.json file for cursor. It is a JSON file that has a highle object called MCP servers and that contains a list of MCP servers under it. In this case, we have the flight MCP. Provide the command and arguments to start the MCP server.
Environment variables can be passed through if necessary. And when this is configured, these IDEs start an instance of the MCP server in the standard IO mode. Standard IO is the simplest and fastest way for two local processes like cursor or cloud and your MCP server to talk to each other without needing HTTP or sockets. So, it's lightweight, isolated, and great for testing. uh dev environments like this once connected MCP server the agent lists the tools available and then you can uh chat with it to interact with the MCP server but let's say you decide to run your own instance of the server maybe to be shared by multiple IDEs locally then you may run your server first and then configure the MCP client to connect to it via HTTP by providing a URL like this in this case the MCP client connects to the MCP server via HTTP P and what happens when the MCP server is hosted remotely by the vendor. Now you can change the URL to point to the remote MCP server. Now when you do that though, you want to make sure you take care of authentication, authorization, data privacy, and trustworthiness of that server because now you're sending your data to an external server that's managed by a third party. So that's important to keep in mind. Now, continuing on, if you would like to connect your own AI agent or app that you're building, then you would use the Python SDK and build the interaction with the MTB server into your app. Now, here's a pseudo code. We'll look into uh this client code in a bit more detail um in a few minutes, but these are the different ways to connect to an existing MCP server. So, let's head over to the lab and practice using an MCP server. In this lab, we'll explore how to use and connect to an MCP server that already exists. So, let's begin. First, we have uh a multiple choice question. So, what are the transport modes supported in MCP? Um in this case, uh there are a few options, websocket and rest, HTTP and standard IO. And we know that the answer to this is HTTP and standard IO. So, I'm just going to select that and um go forward.
The next question is, what files are present in the flight booking server directory? These questions are there to help you explore and understand the uh codebase as it exists today. So if you go here you can see that there is a flight booking server directory already available and there are some files in it. So this is the server that's already exists. The answer to this is uh the third one is server.py and pipro.totl.
That's the correct answer.
So the first step is to explore the flight booking server. So we have uh found the flight booking server directory. Now let's explore what's inside the server. py file. So if you go here and if you select server.py file, you can see the code uh in the file. Now don't worry about understanding this code for now because we're going to look at this uh in a few minutes. For now, you just have to take a quick look uh at the code. So coming back to this uh we're just going to proceed.
Next step is to use uh root code. So root code is the uh chat extension that's available here. Um and this is already set up for you.
So, I'm just going to um click on okay and proceed.
All right. So, we're now going to test if root code is working properly. So, I'm just going to copy this prompt and paste it here and run it and we'll just see if it responds.
All right. As you can see that it's uh responding to my request. Um so, I'm just going to uh continue.
All right. So, in this step, the goal is to connect to the MCP server. So, we're going to go into root code uh plug-in and then go up to MCP servers at the top. And here you get to see uh edit project MCP. I'm just going to click on that.
And we can now copy and paste this MCP configuration file here. So, as you can see, the command is uv and the arguments are uh run python server.py. And what this does is it runs the command uv run python server. py. So, it's basically just going to run that uh python server file. Now I'll come here and I'll refresh uh um the MCP servers. And as you can see uh the MCP server is detected here. You can uh see that the status is green. And if you expand this, you'll get to see uh the tools and resources that are available inside this MCP server.
All right. So now uh we're going to activate and test it. So I'm going to click on done. And I have a prompt here that I can copy and paste.
So what we're trying to do here is we're asking root code to search for flights from LAX to JFK using the flight booking server. So it's now going to detect the flight booking uh MCP server.
And it's now going to ask me for approval. So I'm just going to click on approve.
And as you can see it's completed the task. This means that the MCP server is working as expected and click on okay.
So there are a few more questions. I'll let you uh go through this and uh figure that out by yourself.
We'll now see how to build an MCP server. So far, we've learned that MCP servers have three components: resources, tools, and prompts. Now, what would these be for our situation in our use case? So our MCP server must have resources such as list of airports and their details, flight statuses, capsu, weather in the target locations, booking information, gate information, policies and loyalty programs. These can be referred to when making decisions or taking actions. The tools are the actions we'd like the MCB server to perform such as search for flights, get flight details, create and edit bookings, check-in, uh select seats, add baggage, etc. And finally, we must define a set of prompts for finding the best flight, optimizing budget, handling disruption, etc. Once we are clear what we want to build, we can proceed to building the MCP server. The model context protocol site has some handy SDKs along with the specification. These can be used to simplify the development of the MCP servers. The SDKs can be found at modelcontextprotocol.io website under the SDK section. And let's start with a simple Python SDK. So the overall approach is to import the fast MCP library and initialize an MCP server from it. Uh we'll then uh define tools, resources and prompts which we will see uh in a minute. And finally run the server and specify a uh transport protocol either standard IO or HTTP. In this case it's set to standard IO and we can change to HTTP if required. Next we define resources. So resources as we discussed are defined as normal functions. In this case, we define a get airport uh info function that returns airport chords and we add a decorator at the top called mcp.resource and then that's what makes it a resource. We can then define other similar resources the same way. Next, we define tools. Tools are also functions that accept certain parameters from clients using which we search our internal database and return results. Adding a MCP tool uh decorator makes it an MCP tool. Next, we define prompts. Prompts are predefined prompts that can help the AI select the best flight based on conditions. This is best defined by the developers of the MCP server as they know best what is right way to prompt. This is also a function and at the top of the function, we add a decorator called MCP.prompt.
Now that we have coded the server, how do we run it? When creating the fast MCP server, there are different options such as creating a stateful server, which is the default behavior, or a stateless server by passing the stateless HTTP flag to true. And finally, while running the server, you may set transport to standard IO for standard IO or HTTP and specify a host and port. Or to be more specific, you may specify streamable HTTP that can stream the output. Well, let's head over to the lab and practice building an MCP server. Next, we'll see how to use the MCP inspector. So before building a client to then test uh with the server, we could simply use the MCP inspector to test the server that we have built. To start an MCP inspector, run the npx command with the model context protocol/ inspector language.
This starts a web server. Then go to the URL that's given in the output of the command. The MCP inspector is a web interface that looks like this. Here you provide a URL to the MCP server and then you can start uh listing prompts, tools, and resources using the navigation bar on the right. In this lab, we're going to explore developing an MCP server. So the lab starts with a number of multiple choice questions that helps you test your knowledge of the concepts you've learned so far. So this question, for example, asks what are the three main features exposed by an MCP server? Uh is it uh HTTP standard websocket? This we know is uh are the transport protocols um resources tools and prompts uh client server transport. We know that the answer to this is resources tools and prompts. So let's select that.
And there are a few other multiple choice questions that I will let you uh go through and answer by yourself. So I'm just going to skip those through for now.
The first hands-on task is to set up the Python project for the flight booking server. The instructions are given here.
So the first thing we need to do is open a terminal. So I'm just going to open a terminal here.
And uh make sure we are in the CD home uh lab directory. And the goal is to initialize the Python project using the UV init flight booking server command.
So I'm just going to run that. And as you can see the project has been initialized. And you can see the directory here. So there is a main. py and then there's a readme uh file which is just a template.
So we're now going to uh cd into the flight booking server directory and we're going to add the mcp cli using the uvad mcp command.
What this does is it installs everything that's needed for us to build the mcp server.
Now we're going to check our work.
As you can see, all the tasks have been completed. Let's go to the next step.
Now you'll see a server. py file staged here. So here you can see the first version of our server.py file. So we've already coded a little bit of it. For example, here you can see a function um called get airports. Uh this is imported from the mcp.server.fastmcp and the mcp uh server is initialized here. So the task here is to open the server.py py file in your project directory. Find the get airports function and add the correct MCP resource uh decorator above it. Here you can see the information that's needed uh to be put in while configuring the MCP resource. So here we're going to add using the atmc.resource and within the brackets we're going to specify uh the resource type and name as file and uh airports.
Now we can go and check our work.
All right. So that was successful. So the next question asks to um configure the MCP tool decorator the same way. So if you go here you can see that there are two additional functions added to the file. You have the search flights and create booking function. And for this you must add the MCP tool decorator. So I'm going to let you do that yourself. And if you find uh if you run into any difficulty, you can always go to the solutions tab here and find the solution to the task. We're going to skip this for now. The next one is creating prompts. As you can see, there are two functions added. Again, uh these are the prompts and you're supposed to add prompts there. We now have the MCP server developed, but we haven't configured it to work with the root code agent. For this to happen, you must uh follow the instructions given here. So once you have opened the root code agent, you must click on the MCP servers at the top. So this is basically the icon that's given here. So click on that and here you have edit global MCP uh and edit project level MCP. So in this case we want to edit the project MCB. So click on that and this opens up the local MCP.json file. Now we must copy the MCP.json file that's given here. And if you look into this here, uh this is the name of the MCP server. So it's called flight booking. And then here you have the command and arguments and the current working directory. So this working directory is the same directory as the one that you see here. And um this command is the command that is used to run the Python project. So it's basically uv run python server. py which runs this uh server. py file. And that's basically it. So if you go back to the uh file uh to the root code here uh click on uh project MCP make sure it's saved and then go here and click on refresh MCB servers and uh this is how you confirm that it's working. So you can see that it's now listed the flight uh booking project and you can also see a green uh circle here which indicates that uh it's working and inside and if you look inside you'll be able to see the tools as well as the resources that are available. So you can see the file uh airports file that's listed here. All right. So next uh we can simply click on done.
And now uh here is a test prompt that's available that you can paste in to see if as you can see R code wants to use a tool on the flight booking MCP server.
So it's asking our permission to use the MCP tool. So we're going to approve it.
It's now come back with the task. So he's identified two flights uh from LAX to JFK and their flight information. So this confirms that our MCP server is being used by root code. I will now let you explore the other prompts and uh play around with the MCP server. I'll see you back on the video.
Let us now look at how to build an MCP client. As discussed earlier, a lot of agents support MCP clients automatically. So ID tools like cursor and cloud code have a MCP.json configuration file that simply needs to be configured to point to the MCP servers. However, if you'd like to build your own AI agent, in that case, you might want to build the client from scratch. So we now have this sample server created with uh tools, resources, and prompts. This is a super simple version of the server. The next step is to build a client. So here's a super simple example of a client. So we use the same fast MCP client library. Uh we first connect to the server running on port 80 uh 80 on the HTTP uh protocol and uh we then list its available tools using the list tools command. We then call a specific tool such as the search flies tool and pass origin and destination and we can read a particular resource using the read resource method and get prompts using the get prompts method.
Now let's understand uh a little bit more detail about the client. So we had learned that on the server side we have features like resources, tools and prompts. Similarly on the client side we have a few features as well such as roots uh sampling and elicitation. It's important to understand what these are before we proceed. But before that uh we're going to look at something more important and that's called the uh context. So context allow the server to talk back to the client maybe for giving updates or sharing progress etc. So let's say the client initiates a booking process that may be a longunning task.
The server might want to send periodic updates to the client before the actual response is shared. So for this we use the context. So import context on your server. Then use the methods like info.
You can send information level messages to the client and you may call uh report progress to report uh progress updates to the client and you could use the debug uh message to send debug messages to the client. So we'll see a few more examples of these in the upcoming slide.
So now that we know what contexts are, let's start with uh the client level features such as roots. So what are roots? Think of roots as folders on the client machine that the MCP server is allowed to see or interact with. They are like shared folders. So you expose to the server from your local file system. But what do you want to provide access to file system to the server?
Some MCP tools like code llinters, compilers, file readers need access to real files, your project folders. Uh but for security, the server shouldn't have access to your entire machine. So the client says here are the safe folders or roots I'm willing to expose to the server. For this on the client side we define allowed roots and include that while creating client session. And on the server side we use the context.
session.list roots method to get the list of roots allowed. Next is sampling.
Now at times the server might want to interact with the LLM for specific reasons. For example, the server might want to send some resources to the LLM to summarize it. In such case, the server does not interact with the LLM directly. Why? Because the server may be used by different clients and u we want the client to have control over the model selection, token limits, etc. The server is purely the logic and tool definitions. The client takes charge of LLM interactions and the and different clients might choose to do that differently. The server should be just a lightweight and decoupled from the entire AI infrastructure. So how is that done? On the client side, we need to define a sampling handler function and pass that in while creating the client object. On the server side, we can now send a message to the client using the context session.create message method and pass the sampling message and then return the response back to the server.
Next is elicitation. At times, the server may want to interact with the end user to get more information to make a decision. For example, while making a decision to pick the best flight, the server may need to may need additional uh confirmation from the user to make sure the user is happy with the choice made. In that case, the server can send a message to the client to elicit a response from the end user. To implement this on the server side, we call the method context. With a message to the client, the client must have an elicitation call back handler defined and this is the handler that is responsible for fetching a response from the user. And while creating the client session, you must specify that elicitation callback handler. Well, let's head over to the lab and practice working with building an MCP client.
Well, that's all for this video. In the next video, we'll discuss AI agents in action and we'll build our own custom AI agent using Lang Graph. So do subscribe to this channel to get notified when the new video is
Up Next

Recommender Systems: Collaborative Filtering & Matrix Factorization
@machinelearningandai3274
20.5K views•2017-08-03

Secure Multiparty Computation (MPC): Foundations & Challenges
@SimonsInstitute
7.3K views•2015-05-28
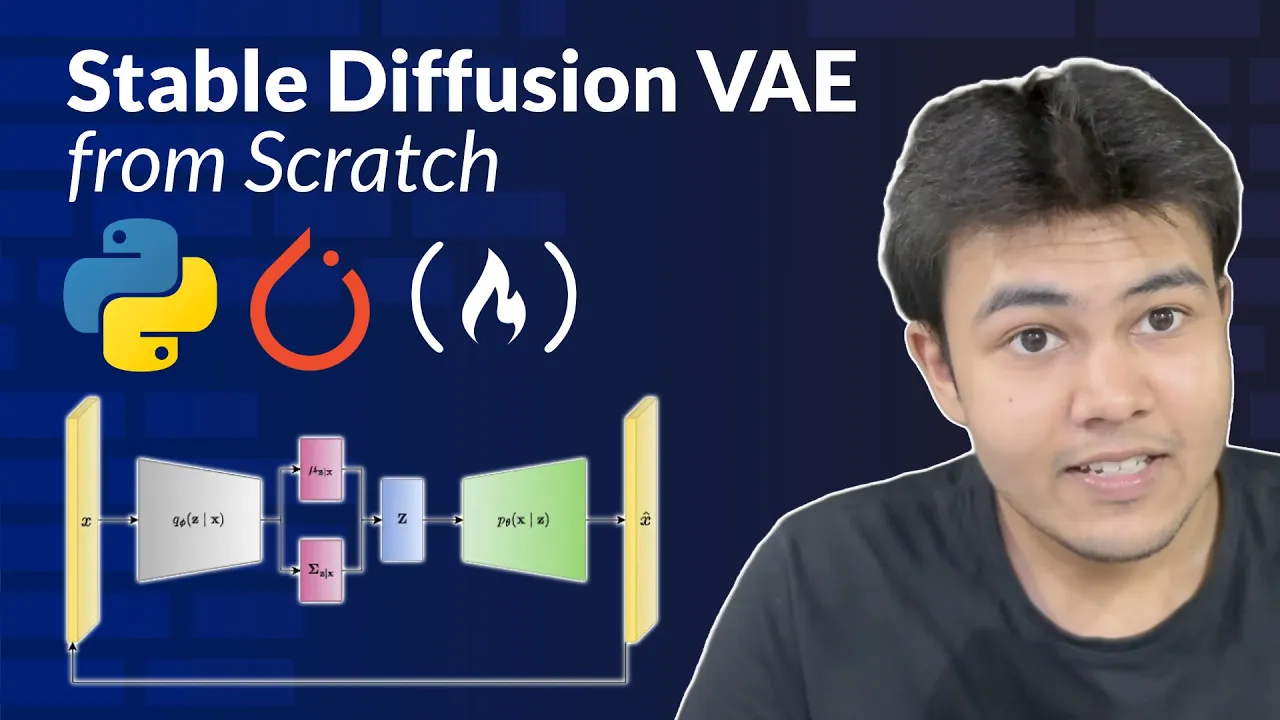
Implementing Stable Diffusion VAE in PyTorch: A Step-by-Step Guide (50 chars)
@freecodecamp
31.1K views•2024-12-04
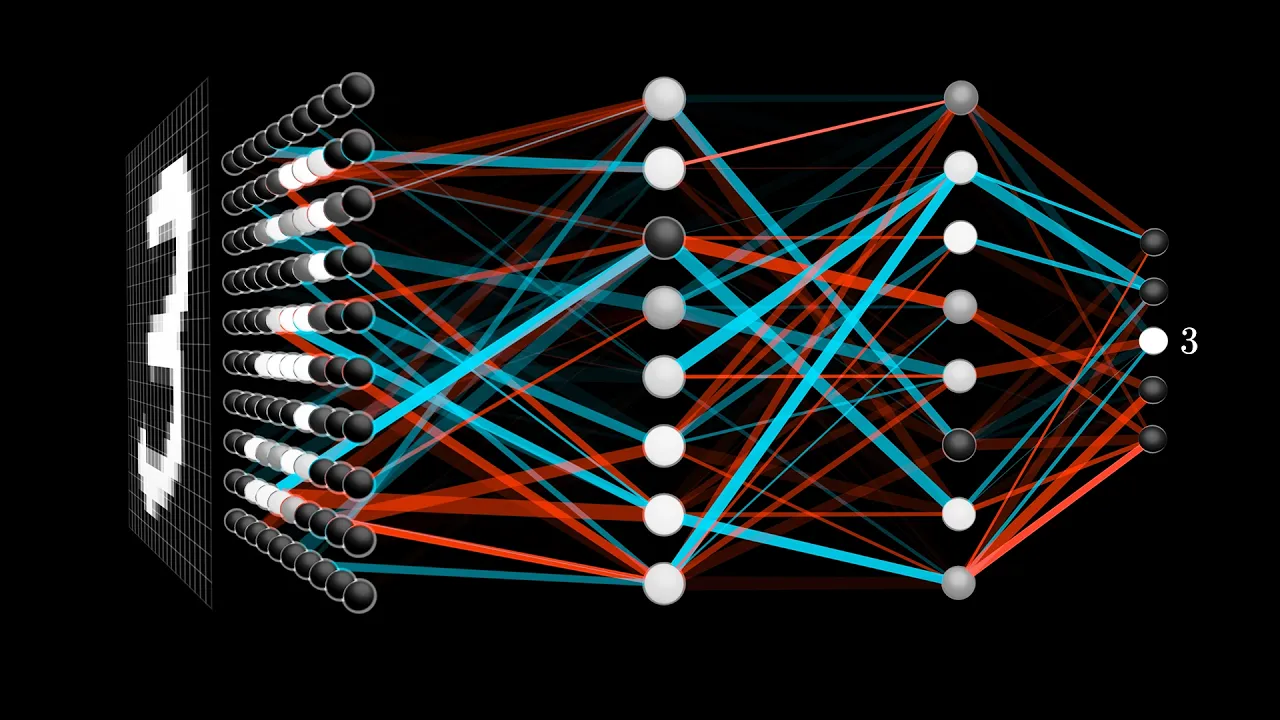
Neural Networks Explained: Math, Layers, and Learning Fundamentals
@3blue1brown
21.9M views•2017-10-05
Related Study Plans & Knowledge Roadmaps
Structured learning paths in Artificial Intelligence