











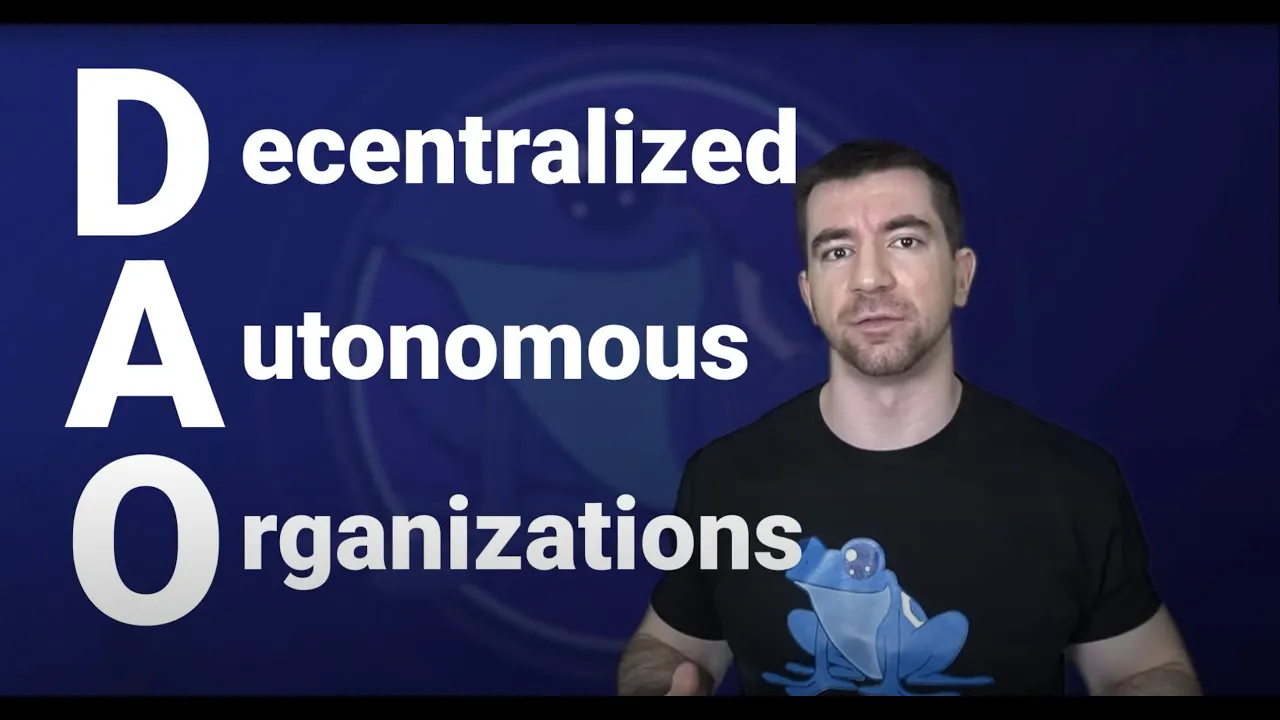







A DAO is an autonomous, decentralized organization where decisions are made collectively by members through voting, rather than by centralized authorities. This tutorial demonstrates building a complete DAO using Solidity smart contracts (ERC20 governance token, Governor contract, TimeLock controller, and governed contract), Python backend with Moralis APIs, and a React frontend. The voting process involves creating proposals, voting on them, and executing approved proposals through the TimeLock mechanism, which manages the timing and roles of governance actions.
Build a DAO From Scratch: React, Python, and Solidity
Added:Basic understanding of Ethereum, smart contracts, and Solidity syntax.
Proficiency in React.js, including state management, hooks, and component-based UI design.
Familiarity with Python for backend scripting or smart contract testing/deployment frameworks (such as Brownie or Web3.py).
Fundamental concepts of Decentralized Autonomous Organizations (DAOs), including governance tokens and voting mechanisms.
Basic knowledge of interacting with Web3 APIs and provider suites like Metamask and Moralis.
Advanced governance structures, such as Quadratic Voting, Conviction Voting, and multi-signature wallet integrations (e.g., Gnosis Safe).
Smart contract security auditing techniques to prevent governance-related exploits and flash loan attacks.
Implementing Layer-2 scaling solutions (like Arbitrum or Optimism) to optimize gas costs for DAO transactions and voting.
Off-chain voting protocols and decentralized storage solutions (such as Snapshot and IPFS) for hybrid governance.
Exploring legal wrappers and compliance frameworks for decentralized entities in different jurisdictions.
11K views208likes1:39:45Original Release: 2023-02-25
hey what's up YouTube Welcome to another Morales blueprint today we are going to build a fully functional decentralized autonomous organization from scratch at the end we are going to have this beautiful front end in which you can connect your meta mask get information straight forward from the Dow and the governance token and we are going to go through all the process of understanding the technicalities to allow we are going to see how to govern another contract how to get funding in order to be able to participate on the Dow how to create new proposals we are going to learn how to participate on the proposals through the voting process and of course know how to execute a proposal once the voting process has finished rate in meaningful changes on the government contract accomplish that we are going to build all the smart contracts from scratch one by one we are going to use Morales API endpoints to get information upload the blockchain and connect it to a backend built on Django and finally we are going to build a fully functional front-end with a lot of components and a lot of functionalities and I mean it a lot of functionalities but wait a second what is a Dao to begin with what is the philosophy behind Nadal and why those are changing the way we understand organizations as a whole [Music] what's up YouTube my name is vasili your web free instructor from Latin America Ecuador I've been wielding on the space since 2020 with cool crypto projects my free time I really enjoy singing and playing the guitar and if the time is good I like to go out and take some meditations but enough about me let's go back to the video and start building organizations are organizations which are autonomous and decentralized and yes I know that's not a good enough explanation so let's dive into it let's think about a traditional organization let's suppose a bank in the bank the people which makes the decisions of what happens inside the bank are just the people in charge it means the owners of the bank and let's say the CEO and the hyper responsibles of that bank that make the bank a centralized organization on which all the decisions are driven by the owners on a decentralizing approach people which owns an account on that bank will have the voting power to decide what happens next on that bank think about it as the same traditional approach people has let's say for example on the voting system on any Democratic country people have about empowered to decide which is going to be the next Governor or the next president so at the end a decentralized organization means that anyone which is member of that organization or a country can vote to decide what happens next but what about autonomous well in nadao autonomous means that the decisions can be made made without human interaction and that's my sound is strange but it's because our code driven it means we have Smart contracts on which we have the set of rules all the things we want to happen next and execution of the functions of that smart contract will happen automatically once the voting process has finished so you don't need an actual human to execute the proposal okay maybe you need the human to execute a transaction in order to execute the proposal but the logic inside the function you want to execute through the voting process is going to be executed automatically and no matter who executes that function the person will not be able to change the logic inside of it so summarizing a decentralized autonomous organization or adult is an organization on which data sessions are not made by the Civilized Authority let's say a CEO or the owner of a company but instead the decisions are made by all the members of the organization and we have several different approach to that the first and most common is to use a rc20 token or nft token to the site who can vote or who cannot if you want to be a part of a decentralized organization you just have to buy the tokens of that organization and once you have it into your wallet now you are a part of that organization and you can vote on the next proposal this approach is not perfect though because you can literally buy voting power because the more tokens you have the more bought in power you will have inside organization it means that wealthy people can just buy most of the tokens and make decisions decisions that might not be the best for the interest of the Dow and even worse the person who bought a lot of tokens can participate on about process then sell all their tokens and leave the dial with almost any consequence and you might be thinking why do we need that out like that at the first place well they have its use cases on certain scenarios you can think on the worst case scenario when people buy tokens to make wrong decisions but also it's also common that people which actually owns most of the tokens of an organization once that organization to succeed let's say you are a big investor on a company such as Apple Google or any traditional web 2 company you will want that company to succeed because you want to preserve your tokens so this approach is really correct or those type of organizations on which the decisions are really important and yes maybe you can have a lot more boarding power than other person but this would mean that the more voting power you have the more you want the organization to succeed and this type of approach is the one we are going to teach you on today's blueprint we are going to create a governance token to decide who can and who cannot vote a contract to be governed it means the contract we want to execute a specific function and all the dial based on another smart contract which is going to be the governance contract but I don't want to leave destination as it is because there are different approach about how to create a doubt there is another approach which was proposed by vitalik bootering and it's called Skin In the game which actually literally means you have to put your skin on the game because if things go wrong you are going to be penalized the way this works is that when a voting process has started you as the voter put your voting as collateral so at the end if the voting process finishes and your decision leads to a bad outcome for the organization well you will be punished and you will say goodbye to all your fonts or at least the ones you use for devoting this is also not perfect because things like good and evil goodness and Badness or what is fundamentally wrong for organization is something that is a still biased but our perceptions as human beings and is not going to be the same on any organization one of the most common approach to solve this is that you can just have a set of rules the potential users of your Dao are going to sign before joining and then you have all the rules on which you explicitly Define which is good and which is bad and finally we have a different approach which is my personal favorite which is called proof of personhood on which you have to actually demonstrate that you are a human in order to vote so if you have a Organization no matter if a person has 20 000 tokens and you have just one token you and that person will have the same boat in power because you are not measuring the both empowered on the amount of tokens you have but just from being part part of that but this is also the hardest to prove because we have two main problems here the first one is that there are a lot of bots and I can just create 100 wallet addresses with one token on each one of them and now I have 100 boats which is not fair so we need to approved to demonstrate that one what it is actually one person and the second problem is a little bit more philosophical but Aristotle is already set it on the Greek era you couldn't give the command of a vote to a person which has never sailed before you will prefer that the Specialists take command of the boat and the same happens here on this approach because maybe a person with just one boat will not have on their mind the best interest of the Dow will not even understand what are the consequences of their boat and maybe just vote for fun and people which is actually interested on the succeed of datao which actually understands how the dial Works inside well they are going to have the exact same boat in power that's why if you're creating your own Dao as we are doing today please be sure to choose the correct approach depending on your use case now there are two different voting systems own chain voting and of chain body we are going to focus all our attention today on on chain buffing and the reason is because of chain button is not that worth it nowadays yes yes you might say okay if we are working on the blockchain and we know all the advantages of the blockchain so just immutability such as security and etc etc why do we ever want to have auction voting well the reason was simple years before the gas cost to make a simple transaction they said on the terrible minute were really really really expensive and maybe if each boat on your organization costs let's say 50 or 100 and you need let's say 100 votes well you will spending fifty thousand to one hundred dollars just on the voting process so one of the solutions people came with is to use something like ipfs register all the bolts on ipfs and then just create one single transaction which is going to be stored on the blockchain but of course this is a tricky solution because if you don't have a decentralized Oracle to verify they both actually exist well you will end up with another centralized organization which lives on the blockchain but is still centralized but currently planetarium changing from proof of world to prove a mistake the gas costs are now really really cheap and we now also have a lot more blockchains on which each transaction goes like 0.0005 cents so you don't need to worry anymore about how expensive the voting process would be and now just to finish the explanation let's talk about the last two important topics first of all why Taos are important well first of all because you are giving back the power to people if you have a decentralized autonomous Organization no matter the approach you take is going to be more transparent because all the boats are going to be stored the blockchain and as the blockchain is public you will know that there is not going to be any kind of manipulation of the voting and also you are given the opportunity to the people to actually make decisions of what happens on the organizations they have decided to participate on and also I must say that they decentralized autonomous organizations has a big disadvantage and it's because they cannot evolve this means that maybe today your organization has some kind of needs and you need to make certain types of decision AKA execute as a specific function on a smart contract but maybe one to three years from now the needs and the philosophy of your organization will change and you will need to execute different functions to make different things and as the blockchain is immutable once you have deployed the code to the blockchain you will not be able to change it ever importantly there is an approach using upgradeable smart contracts to solve that but that will make the dough really really more complicated however if you want to know what upgradable contracts are and you want another blueprint talking exclusively about upgradable smart contracts please let us know and we will work on a video on that matter just before we start coding remember something we trust the smart contracts we trust the blockchain and we trust that the functions are going to execute it by the code but remember the code is made by humans which means that is not going to be perfect and if you don't want to have a serious problem in your organization always remember to make an Excel stiff audit to your smart contracts before deploying to a live net with that said we are ready to start creating our doubt so take a cup of coffee make yourself comfortable and get ready your Visual Studio code because we finally reached decoding part let's get started with smart contracts please check out the link on the description on which you are going to find the attempt that we are going to use for this project including the backend the template from the front end and of course the smart contrast which for now are empty for this project we are using brownie as our python development framework for as many contracts but remember that you can use any other framework you want maybe you want to deploy this on remix or using hard hat at the end the smart controls are going to be the same so we can continue if you haven't used brownie before ever don't worry because we are going to just cover the really basics of the framework so you can adapt this to any other framework you would like to so the first content we are going to code is the contract which is going to be governed it means the contract which is going to execute the functions we want this is an example we are going to create a really simple contract called box stock sole let's start by setting up the license the solidity version and we are also going to import from open to make this contract be able to use only owner functions the GitHub python is really good and is trying to auto complete me the whole contract but let's just explain the basics of it first we are going to need a private variable called value as good practice let's add also a event when that value change then we need to have a function to store the value so function store it receives a new value which is going to be a public but only owner that's why we said that this is only owner and it's going to set up this value to the input parameter and lastly we just need a function to retrieve that value and you might be thinking why don't we use a complex smart contract well remember this is for showcasing purposes and remember the point here is for you to understand how data workflow works so for learning purposes let's keep it as simple as we can and that's it we have our first contract done then we need the governance token remember I told you people which has the ownership of a certain token it could be a rc20 or a nft contract will be able to vote on the Dow so we need to create that token we are going to keep using the open sampling standard for resume contracts so as always let's set up the license over here and generally we will use something like this just import the open sampling erc20 token standard but remember we want this to be used as the allowance to both or not on into a Dao so instead of importing this exact import let's import from extensions erc20 boosts these extensions will give or contract the capabilities to be used into a dial again let's set up the solidity version 0.8.7 unless declare the contract contract governance token is a rc20 boats let's save this and this is going to mark this as an error because we need to make some function implementation required by solidity some overwrites let's do that first let's declare an event called token transferred just to know when a new token is transferred and also some events to know when a token has been burned and when a token has been minted we are not going to use these events on this tutorial but it's a good practice to have them usually when you are creating a erc20 token you will like the new users to buoy the token from a market at the current token value but as this is an example we are going to let everyone to get some free tokens so first let's say you win 256 constant tokens per user and we are going to allow each user to get like 1000 tokens for free let's also set up the max supply for this so let's say uint256 constant total Supply is going to be equal to 1 million but remember we are using solidity on the year C20 tokis has 18 decimals so let's multiply this by 10 and Elevate this to 18. nice as I told you we want the users to be able to freely get tokens but let's allow these ones so for that we are going to have a mapping from an address to a Boolean and let's say public as claimed tokens and also for Simplicity let's create a write of addresses on which we are going to store all the holders remember if an address is a holder of this erc20 token it means the others will be able to vote on their system so here we are going to store all the addresses for the token holders we are going to read information of the holders directly from the blockchain using the front end and we are going to use Morales to get the balance of the wallet on this specific as smart contract and talking about Morales if you are working with a big nft collection or Marketplace step up your blockchain game with Morales Pro with twice the computing power and more requests you can handle even the most demanding projects plus enjoy unlimited Daily records on your streams with automatic retries for a seamless experience and with more replays and longer retention for your historical streams you'll never miss a bit don't settle for basic upgrade to Morales Pro today and take your projects to the next level with that we are now can create a Constructor so Constructor all in256 we are going to set a keep percentage the reason for that is when you are creating an newer C20 token is a common practice to mean the total supply to the message the sender it means the owner of the contract but we are going to just keep a certain amount of the token and return the rest to the contract in order for other users to freely be able to receive that token so first of all we need to declare the erc20 token over here this is going to be called Morales token the initials are going to be mrst mrst and remember and remember we are and remember and remember we are importing from this extension erc20 boats so we need to also add a permit so erc20 permit of the Morales token let's save this now let's open the Constructor and let's say uint256 keep amount is going to be equal to the total Supply in multiplication to the key percentage divided by the 100 let's mint to the measures.cender the total Supply and let's transfer back to the contract the total Supply less they keep amount so at the end we are going to Mint all the total supply to the measures the center it means the contract owner and then we are going to return to the contract again the total Supply but keeping the amount we want for the user and of course the contract Mentor is going to be a new folder let's add that user to the array of holders let's save this and with that we already have all we need in order to use this contract now let's create a function to allow the users to claim the tokens the function is going to be claim tokens it's going to be external function is going to require that the user which is claiming the funds is not already on the mapping claim tokens remember we created that one over here because once a user claimed the tokens is going to be added to this mapping so first we need to be sure that the user haven't required tokens before now we are going to add the user to that mapping then we are going to transfer from the contract to the message.sender the tokens per user we already know this is going to be just 1000 and we are going to use sunmat to transform this into rc20 token which you already know has 18 decimals and remember if a new user claims the tokens well is going to be added to the folders of this erc20 tokens so we need to add the user also to the holders array let's create now a getter on which we are just going to return the length of the holders because we want to know how many holders this contract has and then we need to add some overwrites required from solidity which I'm not going to get deep into because are like just standard stuff you can just check this out on the code repo because we are going to just copy and paste those such as what happened when we mint the token when we warn the token and what happens after the token has been transferred and by the way if you are wondering why we need to use the erc20 boards at the end is because this erc20 boats has this erc20 permit which is going to create a snapshot because we don't want a person to buy a ton of tokens and then dump after the Voting is over this drc20 permit is going to prevent that here on the after token transfer because we are going to check that erc20 boats so we are always know which person or which address has what amount of token ends on each block nice now I just added some comments here in order for you to check the code afterwards and that's it we already have the contract to be governed the governance token it means drc20 to know which wallet is going to be able to vote or not and now we need to create the actual Dao so now we have this Morales goberno.soul MP contract we can try to create all the contract byte ourselves and try to decide all the rules we are going to need in order for users to vote to know if a proposal is active or not but we want to use the latest contract standards right and open sample it provide those finally we can cheat on this yes we can go to the docs.opensampling.com contracts and use the wizard this wizard is the easiest way for us to generate a rc20 token a nft token with some parameters which are going to be added automatically but the one we want and the most is the one over here called governor this Governor is going to use the latest standards on the industry to create adao with all the functions we need let's explain it one by one so first of all we need to name the contract of course which is going to be Morales Governor the boat in delay is the time since the proposal is created and the voting starts all of these as are measured in Block not in actual time and here we are going to decide the voting period it means the time the user has to vote into a proposal it's common for adult to have long voting periods in order to let all the users to vote on a proposal but as we are using this as a tutorial let's change this to one hour which is going to be 300 blocks approximately remember this is estimating that one block is 12 seconds so this is going to be around one hour maybe a little bit more maybe a little bit less we are going to change this later to be lost to 10 minutes in order to be able to code this project The Proposal threshold is the minimum amount of both anacom must have in order to be able to vote here we can determine that maybe just the users with a lot of boats can vote on a proposal but we are going to leave this as zero to delete any one vote on a new proposal the question is about the file for a person it means which is the minimum amount on number of votes of the percentage of votes in order to decide if a proposal goes true or not the updatable settings this mean this contract is going to have the ocean for you to upload the boat in settings such as the delay the period The Proposal threshold and Etc Bravo compatible is if you are going to use a compound compatible contract here we are going to decide if we are using an rc20 token one rc721 token to go through the Boating system as we created at rc20 let's keep this one and then we need the timing controller the time controller is just to set up all the timing of the smart contract and the roles such as which is going to be able to execute the contract which is going to be able to propose a new proposal Etc then we have the upgrade ability section this is for the upgradable smart contracts that we talked about earlier but as I told you if we add this the contract is going to be more and more complex so we are not going to use this for now remember if you want a specialized video on upgradable Smart contracts please let us know and with all of that we have this big smart contract with all the functions we actually need to create a governor so let's copy this into the clipboard and paste it over here and as this is that we have a governor and you might be thinking okay this feels like cheating well it's like cheating because as simple as that we have a governor which has all the standards on the industry nowadays but don't worry I'm going to explain what is happening over here as you can see here this contract imports from a lot more of other contracts but at the end remember the basis of a Dao we can create a new proposal on which we are going to call which is going to be the function we want to execute on another contract we can execute the proposal if the voting was successfully we can cancel the proposal this cancel function only can be executed before devoting The Vape as we set up the bottom delay to one block we are not going to actually be able to cancel them proposal but the contract has it we have functions just to get to know which is the executor and things like that but at the end all what contract is is to give us the ability to propose both and execute a proposal into or down of course we have something like this called Governor settings on which we are going to set up the about in delay they both in Period and Etc also look at the Constructor on which we are setting up the token we are going to use as the governance token here we are going to send the erc20 token we just created and the time lock controller is the one I already told you which is going to set which is going to determine the timing for the voting process and also the rules for the Dow such as executor the voters etc etc and the governor's settings has here the voting delay the voting period And also the minimum amount of votes are an account needs to be able to vote but let's modify these settings in order for us to decide which are going to be these parameters when we deploy the contract so let's create a new uint called voting delay and another for the voting period and replace those over here but in delay and the voting period remember 300 blocks is around one hour also we set up the quantum percentage as four percent but maybe we will want to have more or less percentage in order to execute a proposal so let's also create a new uint to decide that Quantum percentage is going to be so let's put over here that current percentage and replace it over here so now we can decide all these parameters programmatically when we are deploying this contract also as we want to write some information about this Dao from the front end let's create a variable over here which we are going to use later on the video let's say uint256 public s proposal count unless set up that value at 0 when we deploy the contract again this contract has a lot of overrides required by solidity the same as we did on the governance talking we don't have to touch this at all because there are just a standard stuff for solidity I just want to add a function at the end to get their proposal count as we know now is going to start at zero so the last change I'm going to make here is to add one to the proposal count every time we generate a new proposal this is not needed for the doubt itself but is needed for us to be able to get this information from the front end when we are creating the web page and as easy as that we have a governance contract remember this governance tokens require a rc20 token we already have and now we need to create the time lock contract so let's do that I just added some comments over here for you in order to be able to understand when it's happening on each step and by the way if you feel I'm going too fast through how this Contour Works don't worry because I'm going to present you a little bit later on the video a diagram explaining how the word plug on the dial is but remember you can always but remember you can go on always to GitHub open sampling and check out extension for each one of those contracts so if you want to deeply understand what each contract does well you can check those out one by one so the allows the smart contract for us is going to be the time load let's set up the basics over here the license the version of solidity and also we are going to again use open sample in a standard time lock controller so let's say contract time lock is time lock control again we are going to have to make some implementations over here but let's check something this time lock controller is going to help us to set up the following first the mean delay which is the minimum time that needs to pass before a proposal can be executed the proposers remember I said that this contract is going to set up the roles like the proposers also the executors and also the admin this admin role must be renounced once the contract is deployed in order for the admin to be the actual dial and not a specific wallet address let's create over here the Constructor which is going to receive a uint25 5 6 of the mean delay and arrive of addresses which is going to determine who can make new proposals and a right of executors take accounts which be which are going to be able to use that execute function and also the address of the admin let's use the time lock controller Constructor and send over all those parameters and that's it this is all we need for this time lock controller this time lock controller is going to be the owner of the Box contract outsole and we use a Time log because we want to wait until a new board can be executed also the time lock controller give us the opportunity to get out if we don't like a proposal and look at this as this is that we have our complete Dao we have the contract to be governed the governance token the Dao itself using the latest Cutting Edge standards of the industry and also timeline which is going to manage that Dao and by the way if you want to know how the roles work well we have an admin role proposal role executor role and can sell your role these roles are really important because we are going to set up these roles when deploying the smart contract and as we already have these contracts let's deploy them shall we for deploying this contract I already have some utility scripts you are going to find on the template such as this helpful descripts python script on which we are going to have a way to just get information of the account encode the function data this is the function we are going to use to encode the function we want to execute on the government contract in this case we know that it's going to be this store function and also we have a way to send the build information to the front end because we are going to need as you have already my node they construct API and the contract address in order to interact to a contract with that said we can start using this on these deployed contracts dot by which is now empty first let's get started importing all we are going to need which is going to be demolition Governor the timelock the Box contract and the governance token also we are going to use Network and config from brownie we are going to also need that get account from the help of the scripts I just showed you and we are going to also use web3 so from web 3 import web3 remember that in order to use Brownie and web3 you must install those using Pip with PPS Stalker 3 and PB style eat brownie let's set up here the parameters we are going to use on the Constructor or the Dow starting by the quorum percentage we are going to keep this as 4 as a principaline originally does but remember you can use any number over here let's say the both in Period to just 50 blocks and remember this is because if 300 blocks equals to one hour it means that 50 blocks is around 10 minutes let's say the both in delay to one block and let's also create the variables from the time lock we are going to say that the mean delay is going to be five blocks the mean delay is going to be 5 seconds and remember we said that we want anyone to be able to execute and make proposals we are going to set up which we are going to use or set up those roles if we set up a Serial address it means the smart contract is going to understand that anyone can use that functions so let's create a main function the main it's going to pass by now and up here let's say Dev deploy contracts we are going to set the account as that get account function by the way that get account function is just going to take the cone based on the context if we are on a local environment or if we want to use an actual private key let's first start by deploying the governance token so governance token equals to governance still kindled deploy from account and remember or Constructor requires us to Define which is the percentage we want to keep after the contract is deployed so I'm going to say that I want to keep the five percent and also is a good practice to verify the contracts so we are going to let the autocomplete to work publisher config networks networks.chiective get verified it means that this is going to check here on this brownie config which I already set it up for you if the content must be verified or not as we are going to deploy this on the query Network I actually want this contract to be verified and that's it for the governance token let's delegate that governance talking to our account so governance token dot delegate to the account and we also need to know which is signed in this transaction which is going to be the same account now we can check the number of checkpoints so print f number of checkpoints going to be governance token dot numed of checkpoints of the account of course and if you are wondering what does it means that we are using this delegate function and also that num of checkpoints is because this extension well keeps the history of the checkpoints of each Account Support power but Power can be delegated either by calling the delegate function directly or by providing a signature so we are using the functions of the ERC 20boats.so in order to delegate that voting power and this is because by default token balance does not account for voting power this make transfers cheaper the downside is that it requires the users to delegate themselves in order to activate checkpoints and a half the Boating power track so basically even though we are going to have the 20 of the tokens at first we are not going to be able to actually vote on the bow so using this delegate to ourselves in this case to the account then we are going to be able to participate as a voter let's continue now let's deploy that time lock contract so governance time log is going to be equal to time lock Dot deploy and here we need to send those Constructor parameters starting with the mean delay as we don't want to have just a certain amount of executors and voters we are going to send two empty arise over here remember this is because the time log requires to send and a right update proposals and the executors and if we send over this empty arise well we are saying that we don't have any preference on which can or cannot propose or execute a proposal as always we need to sign this using from account and I want also to verify this contract if we are deploying this into the go early Network so let's just make a print statement over here and say F governance time log is deployed on this address now as we have the governance token and the governance time log we can deploy the actual dial which as you already know requires those contracts as import parameters over here so let's say Governor going to be equal to Morales Governor dot deploy and we need to set that information first of all the governance token dot address the governance timelock.address the Quorum percentage day voting period and they both in delay that again we set up as four percent for the current percentage the voting period is going to be around 10 minutes and the voting delay is going to be just one again let's sign these using our account and let's verify this if we are on a live Network now once we have deployed these contracts we need to set up the roles the roles we already talked about over here which you know is going to be the proposal the secure the concealer role and Etc so let's say propose share role is going to be equal to the governance time lock dot proposal Row for the same goes for the executor role and the same goes for the admin role so now we can say governance time lock dot Grand row and we are going to give the proposal role to the governor because we want the governor to be able to propose we are going to sign this using or always trusted from account now we need the executor role but instead of just letting the contract to be the executor let's use here that Edo address we set up earlier because as I told you we are going to let anyone to execute that proposals and let's set the admin role in this case is going to be the account the count which is deployed in this is going to be the admin of this and remember this admin role is not the admin role of the governance itself but is the admin role of the time log contract and as I told you in order to make this more democratic this admin role should be renowned afterwards and now finally we need to deploy the contract to be governed in this case we know is this box contract is a really simple smart contract so we don't have to do anything besides just maybe adding that very fine functionality and let's create a transaction on which we are going to save box dot transfer ownership because remember we want the owner of this contract not to be the user but actually the time log so transfer ownership and the owner is going to be the time log we are going to get the tile mark on the index minus one it means it's going to take the last implementation of the dialog from account and let's put a tx.week over here and here instead of just passing this actually use that deployed contrast function so yeah at the end this is all we need to deploy the contracts we are deploying the governance token with its Constructor parameters the governance technolog set up in the mean delay the roles the governor which needs both of those contracts and also the other input parameters for the Constructor then we use the time lock to set up the roles for the proposer executor and also the admin remember ideally this admin roles should be renowned afterwards and then we deploy the Box contract and we transfer the ownership to the time lock and as you already know this time log is the contract which is actually managing the whole down let's check if this works properly so let's go to the terminal and say Browning run Scripts deploy contracts but for now let's just Deploy on the local network okay everything works properly it means that we know that we can deploy all the contracts and also give all the roles we need to understand better how this works let's check out these diagrams first of all we need to deploy the governance token and the timelock because they are both requirements of the governance contract this governance contract is going to be the one who handles the proposals the voting and the execution of the Dao the voting process is going to be related to a governing contract in our case the Box contract here are the functions we want to execute and the ones we are going to discuss through them both in process once this governing contract is deployed the ownership is transferred to the timelock because the timelock is the one responsible to set up the roles and at the end the time lock is the one which is going to control the governance contract so the basic worth logo about in process is going to be like this first of all we need to deploy the contracts set up the rules transfer the ownership of the contract we need to generate a new proposal we are going to go through the voting process which is going to depend on the voting period if the voting process does not succeed well the voting process is going to end and that proposal is going to be discard but if the protein process succeeds well that proposal is going to be Q the reason BQ The Proposal is because we might have more than one proposal and after we queue The Proposal we can execute it the execution means we are going to execute the function of the governing contract so now we have this cool script to deploy all the contracts you may be wondering how do we know these words how do we know that the voting process you just describe it actually worse well I'm going to leave you another script called deployed an execute on which we are going to go through all that process I'm not going to enter to detail how this stream works because we are going to go through all the process of the Boating system when we coat the front end however if you just want to know if this script works for all the workflow you can just run it using brownie run scripts deploy and execute and this is going to have a lot of transactions over here and as you can see here we have a lot of transactions over here and the reason is remember we have about winning period so we are just using this script to simulate a lot of blocks has been passed until the whole process has finished and as you can see at the end over here the Box contract is started with a value of 0 which is the default for you into five six and after all the voting process the value has changed into 150. it means the proposal went through correctly and the voting system works again don't worry if you don't understand how this script actually work because we are going through all the voting process when we are creating the front end so to finish this section of the tutorial let's just deploy that contract into an actual Network so let's use brownie running scripts deploy contracts and let's use the network go early now as we are deploying this into a live Network don't forget you have to add your keys into your Dot and file over here you need to provide your inferior project ID this is because Browning works by default with infuria you need to provide your private key your eater scan token this is two verify automatically contracts again if you don't have one you just can go to either scan dot IO read your account and under API Keys you can generate new API keys to verify your contracts so once you have all of this set it up we can now run this deploy contracts script let's hit on enter and as we are running this into a live Network well let's just wait until all of this finishes once the process is finished you will have a map on which you are going to have all the information of the deployed contracts as you can see here I've been doing some testing to deploy different version of the contracts so that's why I have three address for each one of those but you will have just one of them so now if you are using the template we are using for this project is important for you to execute this update front end for the go early Network because this script is going to send the information to the front-end folder on which we are going to get that information as a Json including the apis for all the contracts and as I already showed you the map of the addresses we are going to use for this case with that said we already finished all the part of the smart contracts if you just wanted to learn how to code a dial using solidity that's it you can leave this video now don't forget to give us a like and leave a comment telling us which other blooping you would like to see next because now after we deployed all this we are ready to start building the front-end functionality let's get started with the front end so please if you are you using the template I leave you in the description you are going to have their front-end folder and also you should already have the chain info folder with the information of your deployed contracts so the first step for us is to install all the dependencies we are going to need for this project we chose type in yarn and let's wait until this gets installed I also have to mention that for this part of the video I'm going to assume you already know how to use front-end Frameworks such as react and I'm going just to explain the most important parts just to don't make this video that longer once you have all the dependencies we can just run npm start and this will execute the application on the localhost you will have a template like this one the same one I showed you at the beginning of the video but if you click on any button you are not going to have any functionality and if you go through the tabs well these Tabs are not going to give you any response at all so we are going to code all the functionality we need to connect our wallet get the live information out of the blockchain and then go all through the Boating process so let's get started with connecting our wallet in order to get all this information we first need to have a wallet connected in this case I'm using metamask so let's get started with that here on the components we have a component called header in which we have here all the information for the connecting button including you know the navbar the top nut bar and so on the most important part here is this on clink function on the button which for now is empty we are going to create a function over here in order to connect to metamask so please go to the web 3 section and you are going to have a file named connect wallet.js which already have some basic Imports from eaters and from react itself as we are using these on different files we are going to create a react hook for disconnect function so I'm going to say export function use metamask State let's open the curly brackets here and here we are going to use the functionality to connect to metamask so first let's declare some important variables as we have over here account signal and is connected which are required by ether.js and let's create a new async function called connect to metamask in this connect to metamax we are going to use either.js to go through the connecting process so first we need to declare a provider a provider is going to take the windows Auditorium because we know that metamask work with that window then we need to get the accounts from the add request accounts functionality this is going to take all the accounts on that wallet and then we need to get the signer the actual account which is going to sign the transactions and we are going to take the cone in the index number 0 which is going to be the one is going to be activated when we sign this singing transaction then we just have to update the variables we have here such as the account signer and is connected and of course let's make some error handling over here in order to know if something went wrong so I'm going to wrap all this function in a try statement and set here catch the error and let's console.log the error if something goes wrong and as this is a hook well we need to return those things so return is connected account signer and connect to metamask and as this is that we have already a function we can use to sign over now traditionally we could just use this hook directly on the header but as we are going to use this signer account and is connected States through all the application we should import this on our main app.js so as you can see here I already have that import commandant so let's just remove that comment and we are going to use that use metamask state from the connect wallet once we have that we can declare that functions so we can copy this and paste it over here we are going to use all the functionalities it's connected account signer and the function connect to metamask going to be equal to use metamask State and then we can pass these parameters to the error so connect to metamask is going to be equal to connect to metamask and the same goes by for the other parameters now we can save this and I just made the typo here because it's metamask state so if we save over here this we are going to have this over that means that now we can go back to the header and as you can see here I had already set it up on the template these parameters as inputs so we can use that to connect to metamask so let's do it over here we are going to use this is connected function to verify if the valid is already connected if so we are just going to disable the button and say that we are already connected otherwise we need to execute a function the function we actually need to use is the one we just created we already know it's called connect to metamask once we save this we can return to our web page click on net wallet and is going to save for me that is already connected but that is because I already connected before to this wallet if I disconnect this account and reload the page if I click connect wallet is going to trigger my meta mask I can click on next and now we are connected as easy as that now as we have this connection it means we have this signer account and is connected we can start using that in conclusion with our smart contracts to start executing those functions so here on the app.js I need to send this exact same parameters as I did on the header to the nut bar and understand another part as the component which has all these interface including these buttons and the only thing we need here is actually to send the Diner which is going to be again designer you may notice that here on the header we didn't even use the account and the signer but I'm just sending this over because if you want to upgrade the functionality of this application you can then use all of this within different wallets or in different contexts with that said let's continue looking which is the next thing we have to add here okay here we have a proposal card on which we want to show up all the proposals we have for this smart contract it means we need a function to get the proposals count and if you remember on or smart contracts we have here on the governance their proposal cone which is going to start at 0 and is going to add one each time someone creates a proposal so we need to get this variable over here and if you remember we have this get number of proposals function and this is exactly one we need to create so in order to do that let's go back to the front end here on the web tree files I have another file called get proposal count which already have some imports here we have the Imports for the contract API and the morality is Governor so uncomment this and this Imports of course come from the chain info folder we just send from the build folder on Brownie and here we have the contracts again Morales Governor as you can see here and we have the map of the deployments which we already know are all of these addresses we are going to always take the last one which is going to be the one at the index 0 on each one of those so to get the proposal cone let's use this as we are getting and creating a new hook so function use get proposals we need here another try statement which is corresponding catch or the error let's console.log that error and here we can put the information we need and as we already did before we need here a provider the provider is going to be the ethereum window we need a contract because always when we want to interact with a contract we need a contract address the contract API and assigners so let's take the contract address from the map.json let's take the contract Avi from the contract API we just imported over here so 100 a b equals to contract dot ABI now we have to declare an instance of that token so let's say governance contract is going to be equal to new either's contract and we are going to pass out the contract API and the provider we actually don't need a sign or in this case because these are read-only functions so we don't have to sign the transaction that's why we declare a provider and not a signer now we can save cones value is going to be equal to a weight governance contract the actual name and the function is get number of proposals and this is matter of me because this needs an asynchronous function I just forget to create so let's do that async function get proposal account let's open this up and let's paste all of the try statement inside that function and now it's happy with me and of course we need to return a value so we are going to also create a state value name proposal count and we are going to set up that proposal count with the value but the value comes as a big number from solidity so let's also transform this into a string to string and this is it we are ready we have the function to get the proposal cons just double check that this function name is the exact same one as we have on the contract get number of proposals and yes get number of proposals and as we did on the last hook we just need to return those values so I'm going to return the proposal count and the function get proposal count with that we can import this on the navbar and use that so let's do it now here on the nav bar we can import that get proposals use get proposal so let's copy this let's say import use get proposals from web3 proposals count and then we can use that variables so we can say proposal count and get proposal count copy this let's say const in Brackets this is going to be equal to use get proposals now we can use both this function and the variable so in order to do that let's create a use effect to update that parameter the first time we plot this page so use effect going to be equal let's keep that opened and here inside of the function we are just going to call this get proposal count this is going to update that information each time we reload the page and now we just have to take this proposal count and use it down here on the total proposals section so we can just make this smaller and say proposal on let's save this let's go back to the page and as you can see here we have the number of one and again the reason is because I've been doing testing on this smart contract so I already made one proposal which was already added to the smart contract nice now let's take the total borders and this process is going to be almost exactly the same why because if you remember again in our smart contract the governance token we have this as holders and if we look up for this we have the functioning get Alders Lane which is also a read-only function and is going to return the holder then if an account is a holder of this smart contract that means that account can participate on the voting process so let's do that the exact same way as we did here so I'm going to go faster this time because we are just doing almost exactly the same but just changing the contract address we are interacting with we have another file called get borders count which is going to return that information exactly and actually I'm just going to fill up all that information really fast with a simple copy and paste from what I already have here just don't forget to import correctly both the contract address and the contract Avi said after the borders the Java provider the contract is the governance token the API is the API then we create a new instance of that governance token and then we call this function get holder slang again we can double check that on the governance token get holders linked and the name is exact same so we can return the value but into a two string and as easy as that we have another functionality ready let's use also that on the nut bar so let's take the hook name use get total voters let's copy this go to the node Park imported over here import this is going to come from get borders count if wrong it is and then we can take both the variable and the function and the query the nav bar so we can do the exact same as we did before const Open brackets is this just get total borders and let's create also a hook as we did here in order to update that value the first time we load the page so use effect get borders and now we can just use this voters variable and use it down here Motors space save these go back to the page reload and we have the total proposals and the total voters the number is also one because for this smart contract I'm just using the deployer account and no other accounts now we have the voting power this is going to be more interesting because the boarding power is going to depend on the amount of tokens each account has so we need to get the balance of that token and for that we are going to use Morales so if you don't have a morality account yet this is the part of the video for you to go to morales.io create your account on here on your admin panel you are going to get your free API key which is really good for basic petitions but we really encourage you to take a look to the proof plans if you are going to manage a lot of workload on your applications we are going to use the endpoint get rc20 token balance by wallet and on which we have to first provide or wallet address I already pasted over here the chain we are using wearly which has the code 0x5 and here we have to add the address of the contract we want to check out in this case our governance token if you don't know which others this is don't worry you can just go to your map.json and here on your last deployment you are going to have that contract address so we can copy this go back to the moral exam Point paste it over here and if we click on try it well this is going to give us the response of the total tokens I have on this wallet for the Morales token of course we don't want to just use this on the web page we want to consume this API and for that we need to create a backend but don't worry about that because I already left you the template for the backend as well on the project so we can return to the Morales project here on the backend folder you are going to find a file called Services dot Pi which is going to import from the Morales ebm API just don't forget to use pip install Morales to get access to this and we are setting up our API key your API key is the one you are going to get from your admin panel and in this case you should store that on this dot M5 just remember don't do not share this with anyone because it's sensitive information so here on the web page we can just copy this code go back to the services dot part and paste it over here the import we already have the API we already have so now we can take this and make it part of this function get token balance and instead of using this Burnet address let's use the address we are going to put as parameter in this case this address is going to be the one which comes from metamask the chain is going to be 0x5 we don't need to specify the block and again the token address come from all deployments so go to your map.json take the last deployment of the governance token and paste the address over here instead of just printing the result list return that result let's check if this works so let's say value is going to be equal to get token balance with this address but let's double check if the auto completion is actually getting my address so let's copy over here go back to the code and paste it over here indeed it was a different valid address and let's print that value if everything goes well I can go to my terminal and here on the back end I can go to the tokens python Services dot pi and this is going to return the information of the balance I have on this specific contract so now we know this works properly we can delete this and use this function on a new view this function is called get tokenbalance so you will go to views I already importing this on the third date I leave you and we can say the address is going to be equal to requests dot get.get address and is the only parameter that function is so I'm going to say the result going to be equal to get token balance send in that address and as JavaScript does not understand python dictionaries let's transform this into a Json with Json dot terms of that result and return a HTTP response on a Json format and this is it for this view now we can get debut name go to URLs and add that URL here as a path so path getbalance views dot get balance and as we are using relative pattern names on the front end let's also give it a name just don't forget to import the views from the project and this is it for the backend side with that we already have a way to connect to the Morales API and set the information to the front end each time we connect or we call this get balance endpoint so on the terminal I'm going to run python manage.pyrant server and the only thing left I need is on the front end go to the package.json and add approxy pointing to the AP address on which my server is running so let's connect to that endpoint here we have another file called get tokenbalance which has this access Library don't worry if you install the dependencies of the plant of the template you are going to already have this so let's connect to that endpoint let's create a hook as we did before set up a new variable called user balance which is going to be a user state and there's declared a new async function called get balance of course we are going to send here the wallet address as parameter and let's just connect with to that endpoint with axial so let's say a weight axios dot get let's connect to the endpoint slash get balance and we are going to send the wallet address but we have to put here a question mark and say address equals to wallet address if everything goes well let's say then we want to do something else with the response and let's also catch the error if something goes wrong and Yep this is it now we can make some logic over here as this is going to return a big number in solidity format we need to transform using something JavaScript we'll be able to understand so let's say const balance is going to be res dot beta 0 dot balance I know this is the one we want basically because if we check the endpoint is that exact same part we are going to have an array of elements we are going to take the first one because we just are using one address to check out and we want to get the balance so now let's say it const decimals we know the rc20 token has 18 decimals and let's say now const balance in mrst mrst is the moralist token is going to be equal to ethers dot URLs dot format units and let's send it balance and the decimals and finally let's use that set user balance to put here the balance in morales tokens and of course we need to return both the variable user balance and the function get balanced and here is without an S so yeah that's it now we have this foot which is going to be used to get that balance the difference here is that we are going to need our wallet address over here this wallet address over here of course depends on the signer so let's try to use this on the nut bar the same as we did before let's copy the hook name go back to the header same as we did before let's copy the hook name use get balance go back to the node bar and import that now we can get this user balance and get a balance declare it over here so const it's going to be equal to use get balance and now we can declare a new hook as we did before but instead of just declaring of or using this get balance function remember this is going to depend on the signer so if you remember on our app.js we are sending the signer directly to another bar so we can set up that signer over here as a props so we can use that props now so that's why we are going to say if we have a signer well get me the balance of the signer dot address and of course we need to listen each time that signer changes finally we can use this user balance variable and put it over here so let's save this go back to the web page and as you can see here these are already uploaded the value but let's reload this is going to appear as 0 if we click on connect wallet well now we automatically get the information which is automatically formatted as we decided here using this format units that's nice we are half of the way we have the proposals the borders the boat in power need now we need to get the current value I'm not going to stop displaying how to get the current value because this is going to be again talk to the contract box.sol and just use this retrieve function over here so I'm going to do this really really fast here I have a function called get Korean value let's uncomment this save it over here let's create a new hook called use get value which is going to have the box value reset value connect to that contract create a new instance use the retrieve function and return it as I string on which we are returning the Box value and the get value so now let's as we did we just did copy the hook name go back to the navbart import it over here so import use get value from get current value let's declare those variable and function as we did over here so box value and get value and this is going to be equal to use get value which is imported and now we can use this in this case we want to render this on two occasions so instead of get both let's call that get value but we also want to update this each time we click on this current value because as you can see here we are going to be changing tabs and let's also ask to update that each time we click on here on current value so here in this navigation besides of just changing the tab let's also secure that get value function and we can have two different approaches here we can just leave this as it is or we can also update this each time the Box value changes because I already doing that each time we change the top so now we can just take this box value go back here and change this value to the focus value save this go back to the web page and as you can see here the current value of this box is 7. again this is because I was already making tests in order to record the trailer for this blueprint nice really nice now we need to requests once this account as it is the deployer account already has the necessary funds to participate on the Dow but let's suppose we are going to have a lot more of participants and we need to execute a function in order for them to request and get access to those fonts so let's create a new hook in order to accomplish that again let's go back to Peaceful Studio code we are going to have here another hook which is going to be called get fonts again it has these Imports I'm going to uncomment to get in the contract address and the contract API and let's create another hook as you can see here this process here on the front end is kind of repetitive but I made this that away for you to be able to follow up we are just calling the functions on the smart contracts and creating hooks for each one of those let's here create an async BonChon request fonts which is going to take of course a signer and here let's say try with its respected catch statement the error and let's console Dot Lock the error so now here on this try statement we can again set the contract address set the contract API set a new instance the difference here is we are not using a provider we actually using the signer because this is the actual wallet we want to get funded we are going to create a new transaction await governance token dot claim tokens let's just verify that that's the function name claim tokens that's right and we are going to set up a guts limit let's wait till that transaction goes by one block and Yep this is it now we can just return this function return request once and with that we can just call that function on our project so again we can just take the whole name use request fonts go to the nut bar import it over here the clarity has same as the other const request fonts equals to use request fonts now we can execute this function each time we click on this get fonts button over here so let's do that let's go back to that section get fonts this is for the navigation but actually here we have that button so let's change this empty on click to that request once I'm using the request fonts but I'm not sending over the actual signer so let's code this unless ask here so let's say in the signer over here let's save this and with this this might work properly so let's return here reload this connect wallet we are again connected to the wallet number three let's click on get fonts this is going to trigger the function this time let's confirm and we should just wait until this transaction goes bye once the transaction finishes we go back to the Morales Dao and reload the page as you can see here we already have two borders this gets updated automatically and if we connect the wallet well we are going to have the voting power of this wallet address I'm just going to change my account from the one I deployed the control because that is the cone on which I have more gas to pay for the transactions okay next let's continue so here on the proposed we have two parts one on which we are going to send the proposal description on the proposal value and also something on which we are going to have the last proposal the last proposal is something that is going to be triggered every time we execute that proposed function this proposed function has an event on which we are going to have the proposal ID that proposality is really important because we are going to need that proposal ID to know where to vote and also what proposal we want to execute or not so let's take care of that as we don't want to over complicate these more we are not going to store that proposal ID into a database but instead let's use a really cool functionality of JavaScript with the browser which is the local storage there we are going to store that information so I'm just going to copy and paste this really basic hook I created to do so on this use locally storage which is going to use that latest ID and it's going to have a really generic usage on which we are going to get the latest ID set the local storage with the key and a value get the local storage verified the local storage remove and clear the local storage and also get the IDS which is going to just take that information from their browser locally storage with that said we can go to the new proposal book which is over here as you can see here I have this Imports let's uncomment those and we have the contract addresses the Box contract API remember the Dao or the governor contract is going to execute functions from this contract the moralistic governor of course and we are going to use that use locally storage to store that information on the local storage so we can get it no matter on which tab we are going to be okay let's get started with the new proposal functionality this is going to be the more complex function by far but at the end is still going to be something like really simple if we know what we are doing so let's also say the sport function use create proposal as a new hook let's declare here some important variables or just The Proposal The Proposal description the value we want to store and let's use that use local storage functionalities which is important for the last hook nice now we want to read once every time we execute this proposal that information from the local storage it means we want to get the ID if we already save it some ID on that local storage that's why we are going to use this use effect and now let's create an asynchronous functionality this is a synchronous functionality is going to take the signer The Proposal description and the value as parameters inside of this let's create or try catch statement just for error handling and inside the tray let's start with the actual process so first of all we need to clear the local storage if time we did do this because we don't want to have accumulated anything rather than the last ID now let's say const box contract is going to be they imported contract addresses but we want to be the Box we need the model is governor of course it's going to be the exact same but for the moralist governor we need again the Box API and the governor ABI now we need to create a instance of the Morales Governor so constant Morales Governor contract instance is going to be new eater's contract again the same as we did before you know and now we need to create an interface an interface of that box contract so box interface is equal to new eaters utils interface box.abi the reason is because we don't need an instance of the Box contract as we need for the governor contract we just need the interface to understand which functions this box interface has and we can call that functions using the Morales governor now we need to encode the function into a hash so we are going to set const encoded function equals to box interface dot encode function data we know that the function is called store and we want to set up here a value that value is going to be the one we are going to propose to be changed as you know the value of our contract is 7 so when we create a new proposal with a description and a value this value is going to be the one which is going to be sent as a proposal and once the voting process is over the dial participants are going to decide if they are going to change or not this value now we have to create that proposed transaction so let's say const proposed transaction equals a weight morality Governor contract instance door propose and here we need to send some information I'm going to show you right now we are sending over the Box contract into an array we are sending here zero here is the value we are not sending any value to this transaction because it's not a payable function here we have the encoded function we are saying that week 1 to execute this store function over here and we are sending the proposal description which we are going to have as input parameter each time we execute this and of course we are setting up a gas limit how do we know which parameters we need to use over here well let's just check again or governance Morales contract and here you can see that the proposed function requires the Targets in this case the Box contract the values we are not sending any value here call datas is the function we want in this case encoded function and the description is just a string which is going to be the proposal description as easy as that as we have a delay between a proposal is made and the voting process this wait until three block confirmations each time a new proposed is launched so proposed px.weight tree now we can get that proposal ID from the event I told you which is const proposed LD equals to propose received events and instead of using the arcs 0 I'm just going to say arcs and give me the proposal ID this proposal ID is the one we are going to store on the local storage but remember this is going to come as a big number and JavaScript does not understand that so let's transform this to cons being value equals to eaters dot b number Dot from proposal ID and now let's use all the seters we Define it up here so let's say set proposal to that value set the value we want to store to the value set the proposal description to the proposal description and now let's use that set locally storage to a store day ID and as simple as that we have all the script we need to send our that proposed transaction of course we need to return all those variables and functions of the hook create proposal proposal the new value and the proposal description so as we did before we need to use this on or not bar so let's take the hook name use create proposal over here go to the nut bar import it on the top board from web 3 create proposal and declare those over here now let's take they variables and the function names let's copy this paste it over here and this is going to be equal to use create proposal and now we can start using all these information as we did before with the difference that this is not create proposal but new proposal instead so let's save this a noun or front that is happy with us so let's change this last proposal to the latest proposal which we stored let's go back to the code and use that we are going to use this short variable I declared before the short ID because this is going to return us a really big string of the proposal and we want to format this to something more readable on the front end so I'm going to create a new use effect down here which is going to take that proposal and it's going to format it to a better way and this is going to change each time that proposal also changes now we can use this short ID over here on the proposal section so we can go back to the proposed section which is over here and here we have this last proposal which is going to have this short ID let's go back to propose and as you can see here we get the information of the last proposal again I already have a proposal over here because I already was testing this out at this point we already covered the most important parts of this protein which is getting the information out of the blockchain and know how to execute the different functions on dsmr contracts so in order to prevent to keep repeating myself and just telling we are going to secure this function create a new hook and import it and use it I'm going to show you the final product and explain the process of propose both an execute and how that is related to the actual code so let's go to that so regarding to the voting process we are going to have a boat box which is going to handle the different stages of the voting process we have seven different stations from pending to execute it and it depends into a function called estate we have here another hook called use get a state on which we are again just calling that Morales governor and executing the estate function So based on that states we are going to set up different things if the protein is active well we are going to have three buttons to both favor against or abstain the voting works like this one is going to be in favor 0 is going to be against and two is going to be to abstain the voting system then we have the execute box which is going to basically do the same to get the information of which is the state of the proposal and if the proposal is succeeded it means a proposal when true users has bought it and most of the boasts aren't in favor well this means we can then execute that contract and this is going to also change depending on which is the state of that smart contract again I'm not going to explain one by one these last parts and the reason is because I already show you how to get the information out of the blockchain and how to execute the functions and here we are just executing the functions of that smart contract so let's go through all the process and see if these Works actually properly so I already have connected my wallet the current value is 7. we can get the fonts I don't need it because I already have enough to vote let's create a proposal a proposal is going to say I want to change the value instead of 7 let's say 42 is create that proposal this is going to trigger that transaction and we can wait until that's done remember when we created that new proposal functionality we said that we are going to wait until three block confirmations until they both impross in the starts so now we just have to wait until this finishes we have one block confirmation right now but we have to wait two more in the meantime if we check the logs as I told you we are going to have an event called proposal created which is going to have this proposed ID which is the one we are storing on the locally storage to use that on the other component also we have more information we might need another contests such as the proposal the address the values they call datas the star block and the end block now if we go to the boat section this is going to change and it's going to let us put on that proposal I'm going to vote in favor and say Yes I want to change let's vote in favor this is going to trigger another transaction let's confirm this again let's go back to the blog Explorer and let's wait until this finishes this boat has been processed so this means we have bought it in favor and remember we need to wait until this proposal is finished the reason is because remember on the smart contracts we set this up on the deployment to be equal to at least 10 minutes so we must wait until this proposal has at least 10 minutes from being created until that if we go to the execute function this is going to tell us that the bottom process is still active so we must wait I'll see you in 5 minutes after the voting period has finished it if we go back to the page please execute bar now is going to change and it says that the boat has succeed the reason is because we just have one boat in favor so we can now cue that proposal execution let's confirm this let's check the transaction at it seems that it went properly so nice it's just indexing right now and if we go back to the execute function we can just execute now so let's also execute that function let's wait until this transaction also goes by it seems also has finished it but is chose indexing then another one for Q is of course a success and if we go to the current value now we just have to wait until this transaction finishes the actual execution of The Proposal so let's wait some time when the transaction has finished yet let's return to the page and if we click on current value these values should now tell us that the Box value is 42. so we did it we go through all the process from creating a proposal both in and executing the smart contract and also getting live information out of the blockchain and that was it this was this week blueprint we learned how to create a whole decentralized autonomous organization from scratch going through all of the contracts we created at pretty nice front end with all the functionalities we need so far and we also connected to the Morales API through a backend build on Django I really hope you enjoyed this blueprint so far and I'll see you on the next occasion see ya
Up Next

5:20
Token Engineering: Solving Constant Product Market Maker Formula
@octopusmath
305 views•2022-12-07

52:00
Hybrid Key Establishment in Production: Post-Quantum Cryptography
@durumcrustulum
14.7K views•2025-08-27

13:26
What Is an ERC20 Token? Definition and Technical Standard Explained
@MoralisWeb3
19.8K views•2021-05-26

11:49
Understanding Ethereum: A Comprehensive Beginner's Overview
@99Bitcoins
3.1M views•2018-06-26
Related Study Plans & Knowledge Roadmaps
Structured learning paths in Blockchain & Crypto
blockchain-and-crypto
MPC Wallets: TSS, DKG & Secure Custody
01Foundations of Cryptography & Digital Signatures
02Secret Sharing & Introduction to MPC
03Distributed Key Generation (DKG)
+ 2 more learning modules
24h5 modules
Explore Roadmap
blockchain-and-crypto
ERC-4626: Yield Aggregators & Leverage
01Blockchain, Ethereum, and Solidity Foundations
02DeFi Primitives: Lending, Pools, and Yield Farming
03Mastering the ERC-4626 Tokenized Vault Standard
+ 3 more learning modules
35h6 modules
Explore Roadmap
blockchain-and-crypto
DePIN: IoT Registries, Proofs & Rewards
01Foundations of Blockchain & IoT
02Introduction to DePIN and the Flywheel Effect
03Designing IoT Device Registries & Secure Identity
+ 3 more learning modules
30h6 modules
Explore Roadmap
blockchain-and-crypto
Building EigenLayer AVS: Operators & Contracts
01Blockchain, Ethereum, and Smart Contract Basics
02Proof of Stake and Ethereum Staking
03Introduction to EigenLayer and Restaking
+ 3 more learning modules
24h6 modules
Explore Roadmap