![O que Estudar p/ Trabalhar com Python em 2026 [Guia Completo]](https://i.ytimg.com/vi_webp/WfvUbukJz0A/maxresdefault.webp)














LiteLLM is an AI gateway that enables developers to access over 100 large language models using a unified OpenAI-compatible input-output format, addressing the complexity of managing multiple LLM providers with different APIs, authentication mechanisms, and response formats. The platform offers two primary integration methods: a Python SDK for direct code integration and a proxy server with a web dashboard for centralized management. Key features include model hub management, team-based access control with virtual API keys, cost tracking, rate limiting, logging, and observability integration with platforms like LangSmith. This abstraction layer simplifies multi-model workflows by providing consistent response structures regardless of the underlying LLM provider, while also enabling administrators to enforce usage policies, budget constraints, and guardrails across different teams and applications.
LiteLLM Crash Course for Beginners: Unified LLM Gateway
Added:Hello guys, welcome to the crash course in light LLM. Here is the chart I have drawn. Light LLM to put it in a simple way, it is the LLM gateway or AI gateway where you can call 100 plus LLMs using the open AI input output format. Right?
There are two different ways you can use lighter LMS. One is the Python SDK and another one is with the proxy server, the LLM gateway. I'll be walking you through both of these streams. First, I will go through the website itself. So, you know what you can expect from the website because I can't cover all the things in this crash course. I will walk you through the website. We'll go through Python SDK and normal Python code. First, I will show you with OpenAI and Olama how you can get the responses.
Then, I will walk you through how you can use light LLM to make things simpler. For tracing, we are going to use Langy Smith. I will quickly walk you through that also. So that is half of the video and the second half of the video we'll be using this LLM gateway how we can set up the LLM gateway because once we are able to set up you can see a dashboard where you can have the model hub where you can add different models you can create a teams and provide access for the particular team to use the LLMs. You can also use the uses for the particular teams which LLM uses, how much of the resources and so on. You can see from here all these are baked into this dashboard itself.
You can create a virtual key from where you can provide access to all sorts of models which you can choose from for that particular teams or not. I think this is really good and also there are some of the logs that you can directly go through and see the cost associated with it. So that is what we will be covering and I will also show you how you create the light lm dashboard with the proxy server as it is mentioned here and we will be using light lm to call the proxy light lm to invoke the models and there is different ways how you can do that. I will show you the python code as well as the cli examples from the website itself. This is what I'm going to cover. If this sounds interesting to you then let's get it going.
First thing first, let's go into the main website walk through. This is the website as you can see here. Give developers pedro access. There is try light llm enterprise and there is this deploy light llm open source. We are going to explore the open source. I'll provide the link in the description or it's already there light lm.ai simple to understand and search. This is where we are going to go this deploy light llm opensource. Right. This is the docs and now we are pointing to docs.light light llm from llight llm.ai. Now you can see here there is this enterprise hosted release lm model cost map github discord all the different things which you can just go I'll make this darker so it's easier for my eyes. So yeah now you can see here there is this get started you can just go through this and see all sorts of things but I will get you the flavor of what it is all about in this video. You can go and explore these things. But here there is the setup and deployment and all the endpoints what it is all about. How to do the authentication, model ass, admin UI, spend tracking, rate limits, logging, alerting, all sorts of things. And you can also see here the model assess things. So there are many things baked into the light LLM. The reason behind creating this mini class course is also that I have heard or seen or read different blog posts, YouTube videos talking about lightm and the last one that triggered my attention was also that AWS is creating their own proxy LLM gateway and they are using the light LLM under the hood. So that should be a easy way to do it right because if you go to the specific APIs then you need to have API keys for different and it's kind of hard to manage things as it gets bigger and you need to provide access to different teams. Now let's go into the Python SDK and for that I have already uploaded the code into the GitHub. Let me refresh the page and it is inside YouTube stuff light LLM crash course. You can clone the repository. You can provide or replace this the repository URL. You can go to this one here. Just from here copy these things and so on and all the things are there. I'm using UV to manage the virtual environment. I'm going step by step because this might be the first time you are watching light LLM course or something related to light LLM. If you are already familiar, you can skip the video to which you want. I will provide the timestamps in in the video.
But I have already created one video before related to the UV. You can just watch the video if you are completely new to UV. This is really good that you can replace this pi env poetry ppx virtual env can all be replaced by UV.
It's up to you which you want to use.
But sometimes virtual env might be suitable for simple explorations. But if you are used to with UV, I think you will be going with it. It's really good.
So yeah that is all the code that I have. I have already cloned this in my local computer. I'm using visual studio code here. I'll open this one. So you can see that this is the visual studio code and I have also mentioned all the things here how you can do things because you need to be copying this to env you need to have some open API keys like gro and so on. All the informations is there but I will walk you through this. Here is the first one. How I want to approach in the video is if I directly use light RLM then it might not be easy to understand. First let's understand what we get the responses from three different models. For this case I'm using openAI Olama and Grog models to demonstrate it. Normally you need to get the API key for this one.
There are links that you can go. I'm not going to go through that process because that is the setup step that you can do it yourself. Just get the API key and place that API key into this env. Once you rename this env.example right here, open AI API key, just paste here your API keys and do the same for others.
When I go across those parts and now what you can do is just read this one.
I'm importing OpenAI from OpenAI. I'm loading the environment variables client OpenAI and passing this API key with this. Now I have access to all the models here. I'm using the GPT4.1. What I can do here response client do response create model GPT4.1 and I'm printing the response text.
Let's run this. So once I run this I said here what is the capital of Nepal.
So this is the output text. I want to see the whole response. Right? So now you can see this is the response but I want to see it in a better way. So I'm just importing JSON and here converting response to dictionary. So I can view it easily. So here you can see there is the ID and created at error incomplete details and all sorts of things. So this is good because then you can go through each and every aspects of this JSON file and use this informations in your down stream task or in your applications and so on. This is really good and this is the open AI response. What we want via light lm is use similar kind of responses for all the different lms right okay great now we have openai this response looks really good and I have all sorts of informations here this looks great now let's go with the amma right by the way for using the amma you need to have installed in your computer and again if you are new to you can go and look all sorts of video but I have already created ated video related to Ola. You can just search. I have a playlist here. Just install Olama. You can just go to Olama. It will take you to the website and you can just download it. And once you download it, it will ask also to download the CLI. Download the CLI also. You need to be running it.
Downloading is not enough, right? You need to be running it. And just to give you a idea if you just run Ola in your local computer and if you see these kind of commands then yeah Ola is there right but you need to be running the for example in Mac I can just run and it is running or in your case you can just run sorb as it is mentioned here start you can just go to the terminal and write sorb will be running in the terminal itself. I am already running it up here just to show you the models. Well, you can go to the website here if you want to go with the model. Just go with deepse R1 for example pool something like this. I already have here I can see list. I have one model this deepseek R18B. I can copy this one because before I had many models and I'm using that in the demo. But now I want to show you with this deepse R18B. Right? So here what you can do by the way this is the GitHub Python. You can just go there. I just take this example from there and here I'm just saying okay from Olama import chat and if you are confused and if you are new all the things that needs to be installed are in this pi project tomlal file and when we did the uv sync all the packages are being installed we don't need to manually install because I did manually install in my machine and now it's in the github you can just run u sync that will be the thing that you want to do so yeah I'm just importing these two things and here response chat model here there is llama 3 but what I want to pass is the one that I just copied because it is running locally in your machine so that means you need to provide the name and here I'm saying ro user capital of Nepal and I'm just printing the response here now let's say I'm creating a project I want to use openai growth model slama 3 something I want to have the same response out of it now you can see it is taking some time because it's quite a big model and it's doing the thinking under the hood but here it is doing something you can see okay it is doing the thinking because this tips R1 thinks under the hood and here it says the capital of Nepal is Kathmandu it is also this it is providing all sorts of informations so this is the response message content now I want to see the response of it right similar to before I can just print the response so now you get the difference this is the response model created addon all the different things prompt eval count and so on and if you go up here into the open AI I it is kind of similar but not each and every things here in the JSON DOMs or in the response is the same and the thing is once they are different you cannot use the same logic to implement this into the downstream task. One more example here I'm using now grog just to give you also the example there is the link you can go there quick start you can create the API keys from there it's free what I'm saying I'm importing this and I'm passing the grog API key provide that into the env file and this is the completion all different sorts of things and I just want to print this the capital of Nepalese carpu and this completion looks kind of same now if I print this you can see this looks exactly the same as what we had in the in the open if I choices finish reason and so on. If I go up here, it says here there are choices. No, it is not the choices here. This object is here, output is here, annotations, role. Okay, it's not exactly the same, but you get the point.
It is kind of same and it has all sorts of things here. If I go down here in the grock, there is this ID, created, model, system, fingerprint, uses, and all sorts of things. Looks kind of similar, not exactly the same, right? But now comes the light LLM. I am just giving kind of background informations why we need light LLM and what happens with the light LLM. So this is the docs. Now I just import the completion from light LLM. If you want to see what are the different parameters, arguments, whatever you want to call it inside the completion, you can just run this. And now you can see there are all sorts of information here. But what we will be using right now is just the model and the messages. So now the thing is here you need to have the API key open AAI API key grog API key and so on right but the thing is now you can use the completion right and here this is the open AI this is the prefix that LM expects so I said open AI and GPT 4.1 and I ask the same question here but this is the content and the user I want to print the response and now remember I'm not using the code from the open AI and I don't need to use the code from Olama I don't need to use the code from grog. I can use the same code and just the model change with different API keys. Of course, I need to provide it for different things. Now this is the response. I can go here and run this one. You can see ID created model and this is similar to the open AI schema or open AI chat completion. That is what we want to do. So this is kind of open input and output relations and so on.
That is what we actually want. And if you go to the website also into the light LLM, let me refresh the page. And the main idea here is LLM gateway to provide model assess fallbacks and spend trackings all in open AI format. That is the main gist of it. So now if I go down here, what happens with light LLM? I just run through this one and this is the response. So now let's go with the Olama. For the Olama, what is the change here? We don't even need the API key because we don't have the API key for lama. This is running locally. So same chat completion is here. Completion we just change the model from openai to lama and then we provide the llama 3.
But this is not llama 3 because I don't have llama 3 locally. I was testing this before and I just removed uh that. What I need is the lama model and this is deepsek. I will copy this one.
I will go down here to the lama part and in this llama 3 part I will delete this I'll provide this one right and the message same this is the local host one 1 4 3 4 this is where the amma is pointing to if I click this one is running so you need to have this right you need to provide the endpoint or the pi base for this and yeah now let's just print it again it will take some time because it's running locally and it needs the power of local computer. I'm running different sorts of things here.
So it might take some time to get the response but once we get the response there it is I can print it. Now you get the point. We have this same output right? ID created at model output system fingerprint choices all sorts of things here. And the good part of this now is you can use this in your downstream task. That is the advantage of it. Now let's do the same for Grock. I don't need to go through each and everything.
Now I'm taking one of the model from the grog. You can take this from the grog's website. And if I run the same equation here, it's quite fast because it's running in the cloud. We are just taking the API keys. That's the difference of running locally and in the API keys. And now if I just want to use the response also you can see it is the same response here. Same response is OpenAI. So you get to work with the same things here and there. And now when I'm doing this, I'm not using proxy uh things, right?
Okay. Before going into the light lm proxy part, I want to show you this traceability with lang. If you go to the website with the documentation light lm, let me refresh the page. I will go to the open source and if you scroll a little bit down, there is the thing called logging and observability. Right?
So here there are different platforms and I'm going to use Langmith for that.
If you are new to Langmith, I have created many videos related to Langismith. You can watch any sorts of video but it's there for you. If I go to the code here, I need to first go into the account. All right. So this is the smith.langchain.com. If I go here, I'm logged in already, but you can choose the region you want to go with EU or US.
Here you can create different projects.
If you go here, this is the projects.
You can create a project here. It can be created automatically. I have done some testing before, but you can go to the settings here and create a new API key.
You can create a new one. I'm just showing you how you can do this. You can just go here, create the API key, give some random name and create the API key.
Once you create the API key, you can just go to the env. Right? And now we need to provide these things here. So you need to provide the Lang Smith API key. This is project name. You can give whatever you want. For example, here I can give the name YouTube because it was already YT before. I want to show you that it will be populated once I do this. If I go back to the code and and then this is the call back set Lang Smith as a call back, right? LM will send the data to Lang Smith because it has different projects or platforms as I mentioned. So now you can see I'm just passing these things here. But what I noticed is it didn't work with lightn this models.
Let's check this live and make sure that it does not work. It seems that with it is not showing. Once we have the response, we can go into the lang smith to check if there is the response is here. I will go back here. There's five projects, right? I will just run this again and let me see. There should be a six project. It's still five. That means that it's not there. We cannot see the light lm YouTube, right? And now if I go here and with the grog API key I will just run this because you don't need to provide the same thing again and again because this environment variables you can just pass it once and it will work.
So now we get the answer from this grog API key. Now if I go here there is five and you can see it went to the six and we have this light lm YouTube and it says here run count is one. If I go inside here, you can see light lm YouTube and there is the API from the grog there chat completion. If I drill inside and then I will see the human and AI response, the capital is cutandu and so on. And if you see here there is 0.55 seconds, 27 promps, 10 completion tokens and so on. You can explore all sorts of things. The idea here is that now you have your traces of the project running in the languid using the light lm part.
If I go back into the let me go back.
Okay, it's opening here. I can now close this because I don't need it anymore.
Now I will go here. I will open the excol draw here. This is the light lm.
We we went through the website walk through Python SDK. We run the code and we did the language smmith part. And here if you go down we says when to use when right when to use the Python SDK we use because use Python SDK. If you want to use light LM in your Python code that is what we went through. When to use the light LM proxy use this when you want to have a central service gateway to access multiple LLM. This is going to be more fun. Uh so this is what we will be doing. We will create the dashboard which I showed you before and then we will run this with Python code and we can even do it with call if needed.
Right now the thing is if I go to the light lms documentation this is the proxy and here is the quick start and we are going to use the docker deployment.
One prerequisites for this is you need to have the docker installed. I have this docker installed already and you can see this is the docker desktop.
Let's follow this step by step to to help it running. First we need to clone this right. I will just copy this one. I will go to the terminal here and here I will just do get clone and that's it. So it is cloning and let's do side by side here. So what is the next step we need to do is cd into the project. So it will take some time as you can see there are many different files. So we will be going inside it. Let me make this little bit smaller. So I can just open here and show you side by side. So once we have this cloned it's almost there. Okay. Now it's closed. We need to go inside it. So CD light lm. Right, we are inside. Let me clear the screen. Once I am inside, it says here add the master key. You can change this after setup. So I will just copy this for the demonstration purpose.
It says here you can go to this one password and get the random generated key. But I'm just going to use SK 1 2 3 4 for now because I'm running this locally anyway. It is going to be creating and pasting this key here. We need to provide this light LLM salt key which it recommends. It says here add the light lm salt key. You cannot change this. It is used to encrypt and decrypt your LLM API key credentials. So we can just copy this. Go here. Ctrl + V. Enter. That's it. Now we need to have this source env.
You can see it is there. Now we need to run the docker compose up. I will run the docker compose up. And if I run this, you can see that it is pulling all the images now because I don't have that locally. That's how Docker works, right?
If you have something already installed, it will take those. But if it is not installed, it is going to be downloading from the Docker Hub or somewhere. So here it is going to use this Promethus, DB, Light LM and all sorts of things is going to be installed. So you can see all the informations. You can even go with the other options also. But I think this is really good way with these five six different lines. You can have the LLM gateway being installed. And once we have this, we will go into the dashboard and we will add some LLMs into it and we will use the light lm to call the light lm proxy also and we will also use some other normal python code to do the implementations. If I go here now it is still pulling. You can see here this is pulled and now light lm is almost there and the DB is also going to be running here. So once this is done it will show us the port and the port is local host 4,000 in our case and by the way when this is pulling now you can go into the docker desktop right. So here you can see there is no container because once all the things are pulled it will be appearing here. So you can see here there is the light LLM here and if you go here it is now running and it is showing all sorts of things and it is saying here you can go into the dashboard localhost 4,000 right let me just click this that's it we go here and you can see it is loading now and now you can see this is the LLM API you can go through this you can see all sorts of API listed here but we want to go into the light LLM admin panel on UI right just click this And now it will ask session expire logging out again. If I go here it will be asking you to login. Here you need to provide the admin username and the password you provided when you set up these things. It says here that the username is admin. You can see here admin and the password was for me sk--12 34. Right? I will login. So yeah there you go. Now we have this proxy setup here. I have already done this before this test but you get the point that here there are some models already being used and there is this model hub and so on. But what we are going to do is use the new model. I'm just going to delete this. Delete the model. I'm going to delete this also because I want to show you from scratch. And if you go now to the model of nothing is there because once you delete the models it goes on.
First let's add the model. If I go here, I can add the model and you can choose the provider. I'm going to use open AI.
And once you choose the open AI, it will be showing you all sorts of LLMs here.
I'm going to use one random things. Let let us just use the GPT41 mini. And now you can see this is the light LLM model.
This is the public name. And now if you go down here, you need to provide the API key. That's the part here. You need to provide the API keys for all the LLMs or the providers here. But you can then create a new API key from the light LLM site which you can share. So you don't need to be sharing all the other API keys. That's the good part here. Open AI API key. I can go to my ENB. I'm showing you this because I'm going to revoke this once I create the video. I'm just going to copy my API key. Ctrl C. I will go back to the dashboard here. I will do Ctrl +V and now I can even do a test connection before I run it. Okay, connection is successful meaning it is now connecting to my open AI platform.
So I will close this one. I will say add model and now it says model GPD 4.1 mini created successfully. So now if I go into top here all models it says here this 4.1 mini and if I go to model hub you can see this is there. I just want to show you one other also from the Grock side here. It's the same with anthropic with Azour foundry all the different things but I want to show you from the Grock and this is also free because you can get API keys for free.
If you want OpenAI you can go with OpenAI. Now once I put the Grock you can choose the models from here. I can go with Lama 3. This is the public name and this is the light LM model and you need to provide the API key. Now I hope you get the idea. We provide the API key here. You will see how it works later.
So now I can again go to my VS code. I already have this API key. So I will copy this one. I will go here. I will do the control V. And now I will do the test connection. It works. And now I can add the model. Now I added two models.
Similarly you can add as many models as you want and it will be appearing in this model hole also. So these two things are now there and the log things are here. Once you provide the API keys and once you do the invocation all the logs will be will be here and you can see all sorts of informations here and and so on here you can see everything is being mentioned here easy to track. So this is locks. You can even have the guardrails. You can create the guardrails here. Guardrail name guardrail provider. You can see bedrock guardrail. You can even use that one and laera. And you can have the mode here which is how the guardrails should be applied. You can go to the documentations and so on. But I'm not going to go into the guardrail. If if you need some additional informations or if you want me to create the video in the future related to this, please let me know in the comment section. I will go for that. But in this course, I don't want to go there. This organization is for the enterprise. So we cannot use this now here in this free version. And now this is the uses where it will be shown all the different uses. You can see here I have already tested before of course to create the video. It's not that easy. You need to do the trial and error. Test it yourself and then record the video to show you how it works. Here all sorts of things is spend by provider OpenAI gro which model you have used failed successful spend and so on.
Right? And then the models which I just went through and you can even test it already from here. Here you can see current UI and the virtual key. I can use the current UI. I can choose the model. Now you can see models are there.
I can just go here. Chat completion. You can choose whatever you want from here.
You don't need any other things. And now you can just go here and say capital of Nepal. And then I can just send it meaning that it is working here. And you can see this prompt token out total and the time taken. This means that it is working in the dashboard itself. This is kind of a or playground. You can whatever you want and even clear the chat. But now I want to create a teams.
The teams just think that you can host this somewhere and there are x amount of teams that want to use this glimpse from different platforms. for example, Grog, OpenAI and all sorts of things. They need to go to those platforms, create the API keys and then use it and then you cannot track the cost and so on, right? All sorts of things and guardrails and so on. The good part of light LLM is you can have this hosted somewhere and you can create a new team.
Let's say that I have a team here and I can give the team for now test or I can even give let's say this is the finance team in the company and this organization it's in the enterprise level we cannot use this now and now the thing here is let's say that for this finance I just want to give the model lama 38B I don't want to give it the GPT 4.1 and you can even set the budget here let's say that maximum budget is 10 USD and token per minute limit You can even provide that one here. You can go to the additional things and all sorts of things can be provided metadata, guard rails and so on. Right? But I will create a team now. You can see I created a team called finance which can use only the grog model. Similarly, I can create a team called HR and then I just want to give them GPD 4.1 and set the budget maybe again 10 USD and I will create a team. Now I have created two teams. One uses the Grog model, one uses the OpenAI models. So here you see zero keys, one members, one members. Now I have the teams. So how should I then provide the API keys for them? Because I have the API keys when I set up the models here. And that is as a admin for this LML proxy or gateway or whatever you want to call it. That's what I am responsible for. That means not all the colleagues in your company or wherever wants to be knowing those API keys, right? So it's here it's running locally and if you host somewhere it is running there but it's up to you to manage it.
Now let's say I go to the virtual keys.
This is interesting because here I have already created one but I can now create a new key and the good part here you service account another user you can say just you for now and the team so for which team you want to provide this if you go here it will show you two different things are you going to provide this for finance or are you going to provide this for HR let's say for this example we are going to provide this for finance and key name so here let's say that it is finance finance API key and then I can even select LLM. So I know from where I'm providing and the models. Now comes again because we have just provided this grog because I have already choosed the team right and I can just say here Grog and there are optional settings also you can see budget and so on. And then here you can say okay $10. You can even have the expiry key. So here if you hover on top of it say when this key should expire format 30 years for 30 seconds all sorts of things. It is good because let's say you have a workshop for one day. You want to provide access for just one day or maybe you have a presentation and you want to show how light LLM works and how you can use this for 1 hour. You can just have this expiry for 1 hour.
You don't need to worry about anything because it's already handled by the light LLM case here because we already configureed this. I hope you get my point. Now I create the key. You can now copy this key and it says here save your key because please save this secret key somewhere safe and accessible for security reasons you will not be able to view it again through your light LLM account. If you lose this secret key you will need to regenerate or generate a new one. I will copy the API key. You get the idea how to test the key. We already did this and you can go here in the docs users and so on. The last piece of thing that I want to show you how to then call this from Python code or light LLM that I was showing you before. Now I can go to VS code again. I'll go to the test notebook. And now here I have the code light lm proxy via Python code.
Before we were passing the API keys for different calls. Now I'm taking the key from the proxy. I need to paste it in the ENV. I have tested this before with the normal key here. I will remove this.
I will paste the new key. And by the way, I'm going to remove all these API keys before I upload this video. Right?
So it's safer for me to show you this.
But in your case, please don't show this API keys for others. And now what I can do is this is just a normal normal code here. I'm importing request JSON loading the environment variables. And the URL is where the light lm. If you see here this is 0000004,000 that is the base that we are talking about here. It says the URL is this and you can just have chat and completions right and the headers is application JSON and I'm passing now the light lm proxy API key in the beer. So that is how I'm showing you how it works here. You can now use the data and you can pass the model like this and so on.
And now if I print this what is the capital of Nepal? Now you can see we get the response but we are using this via proxy right so this is the good part here and now you can just go down and here I'm using the different ways how we can show this you can even use the grog but the thing here is what I want to show you is if I go back again so the key that I copied which one was the key that I copied in the envq right so if I go here CK AQ is finance and we provided for the finance the key what was the model it's a grog lama 38b8192 right so if I go to the thing here and if I go here it is using 4.1 mini chat completion the capital of Nepal is Kathmandu and Ber light lm proxy API key but for some reason it is it is using and it is providing me the answer which it shouldn't provide. Now if I use the same thing here right al proxy. Did I actually save this one? I think I didn't save it. Let me save KK J CKQ. So CKQ, right? CKQ. And I think I saved it now. And if I run this again, it shows me the answer. And if I go here again and run this one, it says error.
So here you can see light lm bad request error. You passed in the model grog queen. There is no model name with this string received model group. This is the grog. This available model group fallbacks to none and so on. So that means that it is not providing us the answer because this is the grog queen qw32b. Why this is happening? I just want to show you. But one thing which I'm still confused here is why did it work for the 4.1 that's my point here I'm guessing that because I have the API keys before I will reset this it is reset now if I run this loading the environment variables I have all the necessary things here and if I run this it is not working I just want to have this because before it was working because of the cast API key I was like why it is working otherwise what's the point of just using this because we just want to have this grog uh model to be used in the python code right and now you can see here error key not allowed to access model the key can only access the grog lama 3 model that was what I want to show you but because of the cast things and I have the openi API keys before it was working so I was thinking why it was working so yeah you can see this is the error message and this is good it should work with this now because we have this grog queen this model. So if I run this one, it says here key not allowed to assess model.
This key can only assess Grog lama 38B 8192 and we have different models here.
That was the reason. So I need to copy this. I have this different if I go here and paste this. This should work because this is what we want to work and the finance team will be able to work this.
This is expected.
I hope you get the point because we are just allowing to use this particular model for use and this is with the normal Python code but now if I go back into the excal draw I'll refresh the page we can also use this with the call what we can do I can go to the terminal I can use the call and you can see here I'm just using call 00004000 I'm using the chat completions and so on I'm using CGP 4.1 and I'm just trying to use another API key what I'm trying to show you is here I will use the HR API key.
So if I go to the dashboard I haven't created the virtual key for HR. So I'll quickly do that. I will click the HR. I can say HR API key. The model is GPT 4.1 that I want to provide. I will create the key.
Copy this. Go to the rep and then here I will do Ctrl V. And if I run enter you can see key not allowed to access model.
The key can only access SGP 41 mini.
Again the same thing. I will go here API. I will just replace this. Okay. I replaced already with a new one and then I can go up here. I think it's GPT4.1 mini. Okay. There you go. We have these completions. How can I assist you? So that means that you can use with the call. The idea of showing this is because you want to test with different things. And now the final piece is how to use the proxy via the light LLM SDK.
For this you need to load the environment variables. And we have the LLM proxy. And here is the GPT 4.1 mini.
And I'm pointing to API base. I'm saying API key using light LLM Python SDK to call the light LLM proxy API keys. So I'm saying the same thing. What is the capital of Nepal? It should work or let's see because here it says key not allowed to access the model again because I have different things based on the API key. It just allowed to use for this particular model. And this is a really good example of how we can restrict the LLMs for different teams with different API keys.
Uh and then I can just say run. Okay, it's a draw light lm. This error message key not allowed to access model key name is grog lama 38b. The good part here I was just going to show you this down in another example. But the good thing here is when you run this open AI key, it will work.
If the model is not open AI, you need to have the open AI. I'll just do open AI slash and if I run this it will work.
You can see here I said here not not this one was it here python SDK. Yeah here you can see I'm providing open AI/ Grog. So this was the new thing that I discovered. I don't know it was OBS maybe but I tried so many different things it didn't work. I was like okay why didn't it work? And then you need to have this /opai. And again you can format the things. That's it. And here is the same thing that I said. But here is the link. And you can see here I have the example here. But I have this different API key thing. So it was mismatched here. But if you go just to this link, let me go to the link. And here it says OpenAI compatible endpoints and so on. It is in the in the VS code itself.
So you can just go here look into it.
But you get the point that you can call via light and python SDK but you need to have this open AI in front of this to get it working. But you have many ways you can use call you can use just the p normal python things and so on. If I now go back again to this excal draw and then summarize it. Thank you for being this far if you are still watching. So light lm is really good and it helps you to call 100 plus lms as they have mentioned here in the openi input output format. You can use either with python SDK or with the proxy server. I want to cover all the basics because this is what I explored recently and I find it really helpful. So I just decided to share with you guys. You can use either Python SDK, you can have the traceable somewhere else. And the proxy, I hope you get how powerful this proxy side is because you can have everything set up in this UI. You can be the dictating part of the API keys from different platforms and provide specific API keys. I was still confused in using finance API key and HR API key. But you can restrict those things. And again if you want to go and look the uses part here you can see now we have different models daily spending and so on API you can even see the team uses this is good because you can see spend for team HR team and finance you can see oh okay HR team is spending this they are using 42 tokens and here you can see successful 2 54 tokens and so on and these are the things that you can directly view here from the chart you can even go here and do the chart API key and API keys and so on you and then just mention them. Okay, here is what you are spending or your team is spending. You can even go into the logs. You can do all sorts of admin task from the LLM dashboard itself and the LLM LLM proxy or API not API get LLM getway, AI getaway, whatever you want to call it. So yeah, that's all for this video. Thank you for watching. Let me know in the comment section how you are using it. There are many things still to cover. Let me know if you want me to create new videos or more content about lightm and other topics also. Thank you for watching and see you in the next video.
Up Next
Introduction to Reinforcement Learning: Theory and Applications
@Gonkee
374.3K views•2024-12-23

Secure Multiparty Computation (MPC): Foundations & Challenges
@SimonsInstitute
7.3K views•2015-05-28
Bypassing Tor Censorship: Bridges and Pluggable Transport Guide
@Coding_ForEveryone
397 views•2024-06-11
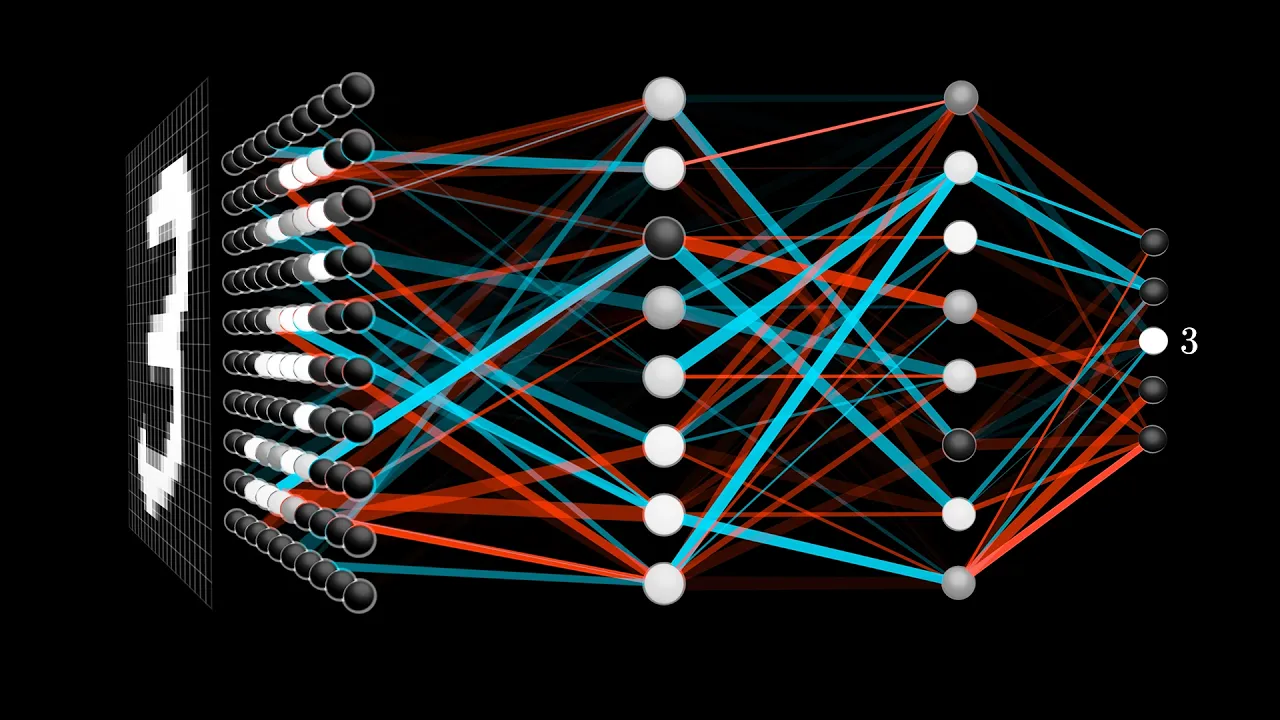
Neural Networks Explained: Math, Layers, and Learning Fundamentals
@3blue1brown
21.9M views•2017-10-05
Related Study Plans & Knowledge Roadmaps
Structured learning paths in Artificial Intelligence