![[Tutorial] How to build a PC! Basic PC assembly tutorial](https://i.ytimg.com/vi/n1AMqICo3t4/maxresdefault.jpg)


























A custom water cooling loop for CPU cooling can be built for under $200 using essential components including tubing (1/4 inch inner diameter), a pump (like Phobya DC12-260), a CPU water block, a radiator with fans, a reservoir, distilled water, and anti-algae additive; the key steps involve proper system preparation, component installation with attention to inlet/outlet orientation, careful tubing routing to avoid kinks, filling and bleeding the system to remove air, leak testing for 12-24 hours, and adding anti-algae treatment to prevent biological growth.
Watercooling Your PC: A Beginner's Guide to Custom Loops
Added:Basic PC anatomy and assembly: Understanding the layout of components like the CPU, GPU, motherboard, and power supply.
Fundamental thermal dynamics in computing: Knowing how heat is transferred from computer chips to cooling mediums via conduction and convection.
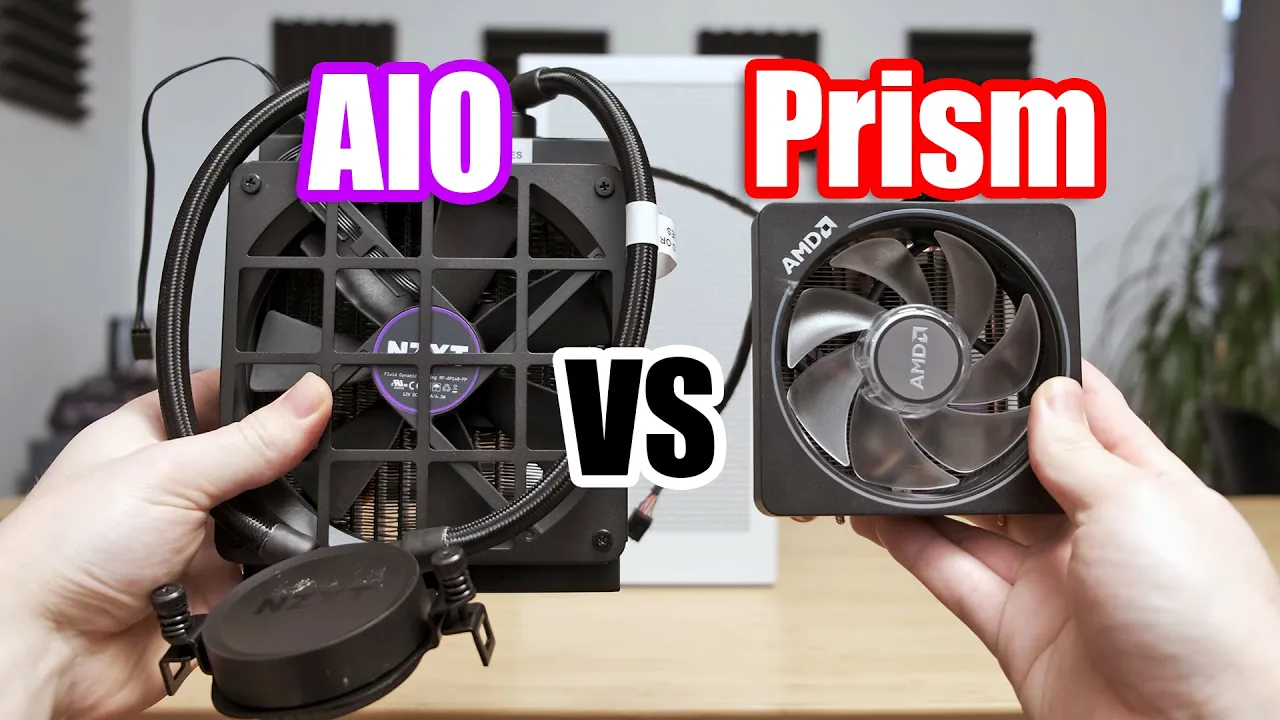
Standard cooling methodologies: Familiarity with traditional air coolers and Closed-Loop/All-In-One (AIO) liquid coolers.
Basic electrical safety and fluid dynamics: Understanding the risks associated with liquids near electronics and how pressure and gravity affect fluid flow.
Hardline tubing techniques: Transitioning from flexible soft tubing to bending PETG, acrylic, or brass tubing using heat guns and bending tools.
Galvanic corrosion and fluid chemistry: Studying how different metals (copper, aluminum, nickel) interact in a loop and the role of biocides and inhibitors.
Thermal performance tuning and overclocking: Utilizing the thermal headroom of a custom loop to safely overclock the CPU and GPU while managing fan/pump speed curves.
Long-term maintenance and loop diagnostics: Learning how to safely drain, flush, and clean a loop, as well as diagnosing pump failures or flow restrictions over time.
539.2K views8.6Klikes30:51Original Release: 2013-10-14
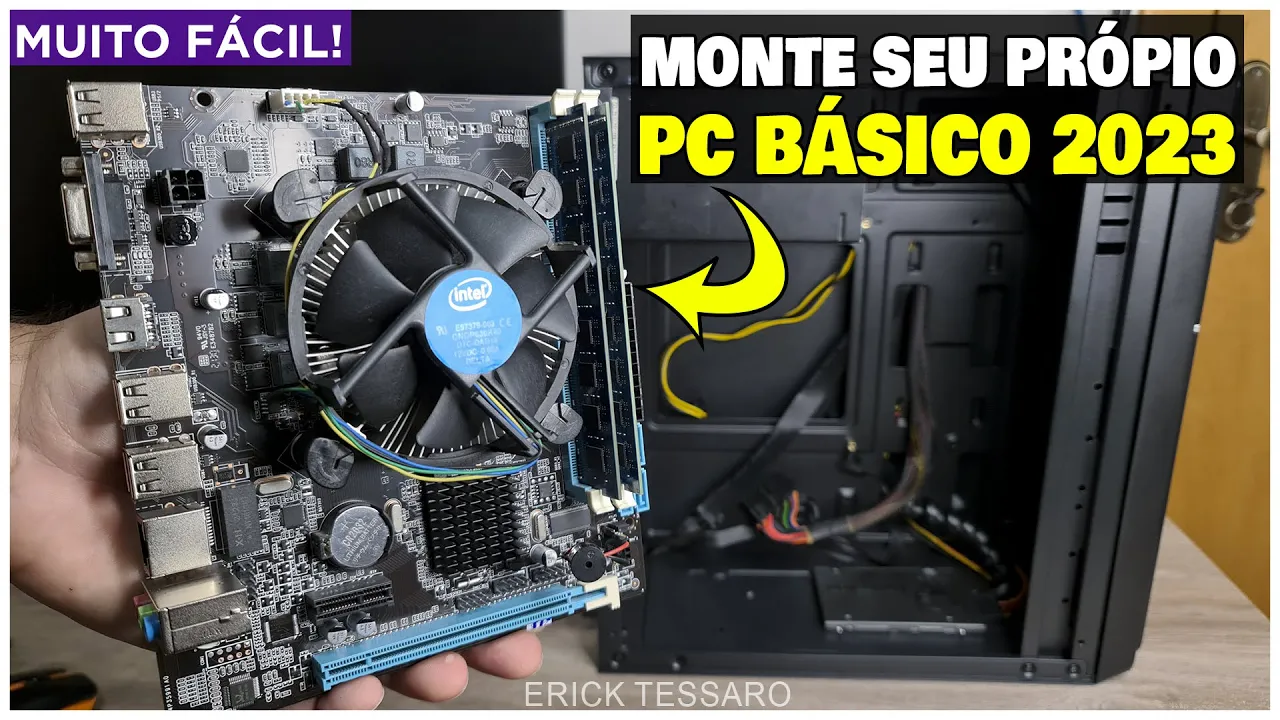
Hey guys you're watching J2 cents and I'm finally going to get to bring you a video that you've been asking for and I've been wanting to bring you for a long time together we're going to build a water cooling Loop for less than $200 so don't go anywhere [Music] when it comes to water cooling Loops they can definitely range anywhere from 100 bucks up to $1,000 depending on the parts that you choose and because there's so many parts in between there a lot of people get very confused on how to build their very first water cooling Loop so together today I'm going to show you all the basics and I do mean Basics on how to build an inexpensive budget custom water cooling Loop for your CPU now when it comes to building a custom water loop that can range all over the place in price and people always ask me why you should build a custom water cooling Loop hey the sun's going away people always ask me why you should build a custom water cooling Loop compared to going with like an h100i or an h80i or a kraken or something like that it really comes down to Future customization the sealed kits are good they don't get me wrong I'm not dogging on the the sealed kits at all in fact we've got an h80 sitting an h80i sitting right here in this very expensive very comp compact build that we did in a previous video but the reason why I certainly Advocate building your own custom Loop is it gives you customization options in the future if you want to add a graphics card to your Loop you can't do that if you go with an all-in-one unit like behind me but you can certainly expand upon and upgrade your system over time if you go with a custom Loop so that's what we're focusing on today when it comes to building your custom Loop there are some parts that are going to be required and we're talking basic parts remember this video here is all about building a custom Loop for your CPU AMD or Intel for less than $200 now when it comes to putting together your system there are some basic parts you're going to need and remember this is a basic build and by basic I mean we're keeping it under $200 which is a very cheap custom Loop first things first you're going to need some tubing and right here we have the master clear it is a red uh tubing and it is/ in inner diameter I pref I I prefer 1/ in inner diameter but you could go 38 76 there's all sorts of sizes when it comes to size they're not going to perform any differently it's just generally as you add more blocks and components to your system you should go with a larger inner diameter that way you have better flow that's the only thing is flow it has nothing to do with temperatures now for the pump in this build we chose the phobia dc12 260 pump uh it is a 12vt pump it's got a three pin header don't put this on your motherboard by the way guys I I mean you could but CH it's just better to hook it up to a Molex adapter um yeah but it's got plenty of flow it's got more than enough power to power this entire Loop uh push the fluid no problem in fact you could even use this with a graphics card or even multiple blocks and not have any problems whatsoever it is a non-variable speed pump but it is very powerful you're going to need a water block for your CPU obviously it's the whole point we're doing this build and for this build we are using the raystorm uh this is a a acety and copper block right here um It Is by xspc it's a great block I used it in my AMD build and we're going to be using it in this AMD build that we're going to be using as a test uh for this entire Loop right here so you're going to need a water block you're going to need obviously a radiator because the radiator is what makes everything cool we are using the xspc um ex240 I believe it's an ex240 is the part number it's a thin 30 mm radiator um it's got plenty of air flow I mean you can see right through it see you can see my face so you can use lowspeed fans you're going to need a way to hold all of your fluid and for that we chose to go with the swifttech uh MC actually I don't remember the part number but it is their micro reses V2 um it's not the flashiest looking Reservoir out there but it's cheap I mean you can get these for 25 bucks brand new and it comes with all the hardware obviously to mount it and it's got multiple port options and it's very anti- turbulent uh with this little shelf in here I highly recommend this Reservoir if you're on a budget you're going to need some fans obviously for your radiator fans are one of those things where noise is certainly the number one issue when it comes to fan and then on top of that you've got static pressure and you want to make sure sure you can get the air through your fans now what I have right here are y loon medium speed fans these are the uh D12 sm2 so this is the uh medium speed fan right here which is absolutely water coolers if you ask any form any water cooling expert they'll probably tell you for the best bang for the buck fan yay loons or where you want to go and you can get these fans for $4 on various water cooling sites and parts uh sites I've sleeved these myself that way they don't look as bad they do come with bare wires these are sleeved already and we're going to be using these fans because of their amazing performance to sound ratio for four bucks you can't go wrong y loon fans definitely consider those now you're obviously going to need some fluid for this build we are just using simple distilled water tap water is no good purified drinking water is no good you want distilled water it's a process that gets rid of all of the impurities and all the minerals inside of uh the fluid and this is the best thing that you can go with for your system and when you're doing distilled water you have to have a way to stop the growth so you're going to want to go with some sort of an anti-algae uh additive this is just PT nuke two drops of it is all you're going to need for the entire Loop um you could pre-treat the water I wouldn't recommend it just add it to your system after it's all put together and bleeding um people are going to ask what about colored fluids or what about like the Nano fluid behind you fluids are one of those those things that have been debated for as long as I've been water cooling which is easily 10 years and distilled water is always one of the best performing fluids that you can possibly put in but because it doesn't have any anti-corrosive in it if you start mixing metals like copper and nickel and brass and aluminum depending on the parts you go with you could start to see corrosion issues so when you go with a premixed fluid from the various companies that are out there typically they have some sort of an anti-corrosive additive put into them now distilled water over time has never shown to actually corrode the metals but there are people that would argue that if you want to take an extra step in precaution you can get what's called a kill coil it's basically just a piece of pure silver that you can coil up inside of and place it inside of a tube or you can put it in the bottom of your um Reservoir in fact they you can see we have these different plugs in here they even sell um kill coils that are on a a a threaded plug so you can use it to plug this at the same time the silver is on the inside I've never ever used a kill coil with any of my distilled water loops and I've never had a problem you could go with an advanced fluid like I have back here in my system which is the mayhem's Nano fluid it's not required it's just one of those things I've actually am testing out for the first time myself and I'm very impressed with this fluid but for the basic build like this distilled water and PT nukes some sort of an anti-algae uh mixture is all you need now last but not least you're going to need some sort of uh tools obviously and for that I've just got my basic multi-tool which you've seen in some of my other videos got different uh Phillips and Flathead screwdrivers and nut drivers on it and then I use uh actual uh tubing cutter for my builds because I do water cooling builds all the time so it's just easier to use that to cut but you could use a pair of large scissors or a razor blade um when you're cutting thin wall tubing like this it's not a problem to use scissors but if you do use thicker 3/4 in wall tubing or something you'll find that razor blades and scissors just can't really get through it as well which is why I prefer the Cutters um these are Cobalt got these at Home Depot for uh about I think 10 bucks maybe 15 at the most so even then it's not that expensive and it may have more uses for you in the future who knows um couple of things accessories that I would say are going to come in handy um zip ties for this build we're not using compression fittings we are going to be using uh Barb fittings you're going to want to have two fittings for every single component that you have cuz every component has an in and an out so many components you have radiator block Reservoir pump that's four you're going to have 2 4 6 eight uh fittings that are necessary and because we're keeping things on the cheap we are going to Simply Be affixing Our tube to the uh barbs by just using zip ties it may look a little ghetto but again guys this is the basic water cooling build here okay so now that we've gone over the parts let's go ahead and turn around and let's get the system prepped and ready to accept the new parts and so we're going to take off the stock cooler we're going to take off the upper fan that's in this case behind me and for those of you that are wondering what we're using here for our video it is an AMD Athlon X4 with a GTX 460 we're not water cooling the card only the CPU and uh we are putting this in a h Cooler Master HF 922 high air flow case so when it comes to getting your system prepped and ready to go you're going to want to remove anything from the case that could potentially be in the way or that wouldn't want to accidentally get damaged and as always when you're working with computers you are going to be even when you're doing water cooling you are going to be working with a somewhat static environment so you want to make sure that you discharge yourself and take the same kind of precautions that you would working and building a computer when handling any of the parts so to get this computer ready to go I'm going to remove the graphics card I'm going to remove any of the cabling out of the way that may be in the in the way I'm going to remove the top fan cuz that's where our radiator is going to go and I'm going to remove our cooler from our from our motherboard but we're going to leave the socket in place we're then going to cool off cool off yeah we're going to definitely cool off this baby we are going to clean off the uh processor here with uh 75% or greater isopropyl alcohol we are using 91% here with a lintree uh paper towel and uh clean it off with a microfiber at the end see you have a nice perfectly clean finish uh on the top of the processor so we'll go ahead and do that and then we'll come back afterwards and show you what comes next okay now on this build because we we are going AMD we're going to have to go ahead and also remove the stock uh socket retainer here for the AMD you're going to have to consult your block and your motherboard depending on the chipset and what you're going with specifically for your parts to see whether or not you do or don't have to do this so definitely consult the manual that comes with your CPU block and follow those instructions not necessarily mine okay so now that we've got the system ready to go I've removed the top fan for the radiator we have room for that and I've removed the AMD socket and the stock cooler from that and this is why I want to point out that it's very important to use quality thermal compound most of the time the thermal compound that comes with your CPU blocks your water cooling kit are going to be perfectly fine but as an option you may want to choose to use a thermal compound that you like for this build I'm going to be using tunic tx4 the socket thermal paste or the CPU thermal paste that came on the stock cooler over time turned into this and as you can see that is a very very nasty uh this is what this is why CPUs cook themselves and overheat over time the thermal compound breaks down and no longer does its job in fact that's one of the reasons why we're water cooling this PC now because this thing has been getting extremely hot and uh for the sake of this video we're now putting water cooling in here so that you guys can learn how to do it so now that we've got all that ready to go the next thing you want to do is you want to install your CPU block onto your CPU use your thermal compound use use the method that's comfortable to you and then we will uh come back and show you what's next okay now we've got the CPU block installed for the manufacturer installation recommendations definitely consult your manual make sure you're installing that right you don't want to take any chances with your CPU socket now most water blocks will have marked on them an inlet and an outlet it's very important that you keep that in mind when you're positioning your block because you want to make sure that it's on the optimal side however you're going to run this Loop so next thing we're going to do is we're going to go ahead and prep our radiator we're going to get our fans mounted to that we're going to get the radiator mounted up on the top now the most common question people ask when it comes to radiator installation and when it comes to the fans is whether or not they should go in a pool configuration which is where the fan pulls the air through the radiator and exhausts it or if they should go in a push configuration where the fan goes under the radiator and pushes air through it there's really not been any seriously conclusive evidence that even one is better than the other the most optimal would obviously be a push pool which is where you have a fan on either side of the radiator kind of like this pushing air and pulling Air at the same time on the different fan uh spots on the fan for the radiator but in a basic build like this we're not going to do that um I personally in low fin in low fin count radiators like this one here which is optimized for slower speed fans I prefer a uh push configuration ation that way the fan has as much air available to it and the air only has one way to go which is through the radiator so because you're dealing with a lower speed fan I prefer a push configuration so we're going to be setting up these fans here to push the air through the radiator like this and that the radiator is then going to get mounted to the top of the case like so so we're going to have the fans on the bottom pushing air through the top now you also want to keep in mind which is going to be most convenient on which end to have the barbs on you can install the radiator like this with the barbs in the back or you can install the radiator the other way with the barbs in the front depending on what's most convenient so you're going to have to kind of plan ahead a little bit on the routing for your tubing and determine which is going to be best for [Music] you now just a little Tech tip when it comes to installing the fans onto your radiator you want to make sure that you use the included Hardware with your radiator if you bought the radiator new it's going to come with the specific screws intended for your radiator if you take screws that are too long say these guys right here they can potentially push all the way through the fan and all the way down into the radiator tubes some of the rows in the radiators which is the passages that the fluid FL uh flows through it's hard to say that the fluid flows through May line up perfectly with those screws and if you puncture that your radiator is toast so you want to make sure that you use the right screw that you don't that it comes with the radiator and if you have to buy Hardware at Home Depot you definitely want to make sure that you measure and get the right screws that way you don't puncture your radiator so a little Tech tip for you be very careful that you don't screw the radiator uh the fan too far down into the radiator and that your screws are the proper length very important okay so now that we've got the radiator together we got the fans mounted uh you want to kind of keep the cabling nice and orderly we mounted the fans on the side that the cables come out the back that way they're easily tucked away and they're not going to be in the way making your build look tacky so now that we've got things ready to go let's go ahead and mount it to the top of the case and then from there we'll start planning where we're going to put our tubing in our pump and we'll get this thing up and running in no time okay we're back we've got the radiator mounted on the top we've got the CPU block installed on the CPU here the next thing we want to do is get the rest of our parts ready to go and you want to install your fittings on top of uh your other parts or in your other parts that's going to include Reservoir pump and uh that's pretty much it what's left on these now a point I want to make when it comes to installing the fittings on your various parts most of the parts you'll be dealing with uh the top of this block this pump this Reservoir they're all plastic so it's really important that you don't overtighten when it comes to installing a metal Barb onto a plastic piece it's really easy to strip out the threads and once you do that you just ruined your day what you want to do is you want to tighten these down hand tight until you can't get them any Tighter and then if what I typically do is I take a wrench and I'll turn it just maybe an eighth turn more now if you're dealing with the metal part you can tighten down a little bit more it's going to be one of those topics that's a little bit debated on how tight you should do it some people say hand tight only and nothing more uh I agree with that statement only for good measure I do about another eighth of a turn more with the wrench and I've never once stripped any sort of thread I've never had any problems so let's go ahead and get the rest of our parts ready to go and what we're going to do now is we're going to start getting our parts positioned on where we think we'll have the most optimal flow and pattern here inside of our system it's going to be a little bit unique in this case this case is not as water cooling friendly as many others on the market if you're dealing with a small case it's going to be really tight and because of the limited mounting options of this pump I'm probably going to end up going two-sided tape uh which may sound really ghetto but I've done it myself for years and had no problems whatsoever but when it comes to the order of Parts since we're now going to be PL in our system is you need to make sure that you have the outlet of your Reservoir directly feeding the inlet of the pump and that the reservoir at least levelwise is higher than the pump that way gravity can feed into the pump when you're priming your system we'll talk more about that when it comes time to fill your system and Bleed it but make sure that you have your pump being fed directly by the reservoir and that the reservoir is a little bit higher than the pump that's very very important okay I'm back now and it's starting to get dark because it took me so long to figure out how I wanted to run this so I've gone ahead and mounted my reservoir and my pump because those are the two as I mentioned in the previous segment that have the most important correlation with each other so what I've come up with here is I've got the pump or the reservoir mounted to the drive cage and I've got the pump mounted to the floor directly below the reservoir so you can see we've got a short little piece of tubing feeding it and we barely made this fit because we have the PCI Express cables here for our GTX 460 and we've got to make a fairly decent Loop out of the pump into the radiator in fact we're going to go into the radiator over here so it's going to be a long piece of tube which isn't quite ideal but unfortunately the half 922 is not as friendly as I would like it to be plus because we're on the cheap we're not using any 45 or 90° elbow fittings because that makes the easily double the cost of this bill so now what we're going to do is I'm going to kind of plan out where I'm going to route my my tubing I'm going to get my tubing cut measure twice cut once because once you cut it you can't make it longer again then I'm going to wire uh hose up we're going to we're going to get some hose up in here keep your mind clean there guys and you're going to pull out your hose again keep your mind clean and we're going to get this thing uh plumbed up and then I'll show you how we came up with the path that we have and hopefully it won't look ridiculous but it's definitely going to get the job done okay now one quick tip I want to show you here with when you're using a thin wall tubing like this it's really easy to get a kink if it's if you can't really see that too well this tube right here is pinched completely shut because of how tight of a bend that is but it's not only because it's a tight Bend it's also because the tubing is too long so if you get a kink like that you can slowly start trimming off the end of the tube and then you'll notice that that Kink will start becoming a little bit less and less each time and you can also kind of do a little bit of a just a little bit of eyeballing on there and then eventually you'll get it so that once it's in there it's not kinking at all in fact we're almost there now we still got a little bit of a kink but we'll get uh we'll get that squared away okay so here's our order we've got Reservoir to pump and one thing that's very important is that you actually have the reservoir feeding the inlet of the pump every pump has an inlet and an outlet and it does matter so make sure you consult your pump's manual to find out which Inlet and Outlet uh which ports are Inlet and Outlet so we're going from Reservoir to pump from pump into the radiator out of the radiator into the CPU block and out of the CPU block back into the reservoir now it's not the cleanest Loop but it gets the job done and this is a when you go with a budget system like this it's definitely going to be about function over form so it it really doesn't look so bad in person I mean you can kind of see on the camera there it's it's a little bit U blood looking and intestin but it gets the job done so the next thing we're going to do now is we're going to Simply zip tie off each one of these barbs uh right on the point where it meets the tube and then we are going to come back we're going to start filling it up and Performing our leak test okay so everything's now plumbed up and all of the connections have been zip tie fitted nothing's going to go anywhere so now when it comes to filling your Loop you're going to fill in uh using your Reservoir obviously hopefully your Reservoir has an inlet on the top and you're going to fill this lower uh or you're going to fill this Reservoir as far up as it will go and then you're going to slightly lean the case around to get some of that fluid to move around into the pump and into into here and then you're going to cycle the pump on and on for only a few seconds at a time just so that it pulls the fluid in once the fluid goes down into the pump you want to turn it off before it runs dry and rinse and repeat that process now it's very important that you don't run your pump dry running it dry is definitely the worst thing you can do for it the fluid actually works as a as a lubricant for the bearing it's a floating bearing in there which means the lubricant moves around the bearing and it causes it to never touch the side of the housing or the motor housing so if you run it dry it's just grinding against the housing and it will destroy a pump in no time flat so what we're going to do now is we're going to go ahead and get the system bled we're going to fill the reservoir as far as we can cycle the pump on and off and by cycling the pump you're going to want to use either a second power supply or you can unhook the 24 pin power supply uh in your plug here and then you you can jumper the green and black uh wire on your 24 pin make sure it is not plugged into your motherboard and then you can uh jump for these two pins cycle your power supply on and off that way you can run your pump without killing your system in the meantime now as you start to fill your system you're going to want to make sure that you don't fill it too fast because you are dealing with a uh closed loop it's pretty much sealed once you start to fill it with water here it may not flow down into the reservoir as fast as you're pouring it you don't want to have it leak inside of your system also once you start to fill up uh down here and the water level starts to rise we have water uh right here in the tube you want to just kind of preliminarily check prelimin preliminarily I don't even know if that's a word you want to make sure that none of these fittings are leaking right here first off so that's kind of your first uh process of doing a leak check is as you're pouring you're going to be keeping an eye out for anything that may be leaking okay so now that we've got the reservoir as full as it will go in fact we've actually backed up slightly into the funnel it's a good thing my funnel makes a seal As I push it down in there this is the part where we're going to jump over our power supply and we're going to start cycling the pump until it pulls that fluid down starts making flow and then we're going to turn it off refill it and rinse and repeat see as fast as I turned on that pump it pulled almost all of that fluid down in there that's kind of the drawback of having a small Reservoir like this but unfortunately it's just the part we're using so we need to make sure that we don't run it dry so it to be fast on the [Music] switch okay we're going to start getting to the point now to where it's going to start making a complete Loop because up until now every time it's pulled in the fluid it's never come back out into the reservoir which means we still have more air than fluid in the system but now we're getting to the point to where it's going to start making a complete flow which is where we're going to want to start doing our leak testing and then making sure that we keep the reservoir topped off as the air Works its way out of the system okay as you can see now like I said we've reached that part where we're getting a complete flow going the water is very air rated for two reasons one the water level is low and two there's a lot of air in the system and it air is going to take time to work its way out it's going to get trapped up here the radiator it's going to get trapped uh some of these tubes so now is where we want to top it off to where the water level is at least higher than the return line and then we're going to just let it run for a while turning it on and off and on and off making sure that we can get the air to move out of the places that it's trapped but as you can see the pump is quieting down we've got a lot less airation going on there but all of these little bubbles that you see churning around here in the corner those are uh a sign that we still still have air in the system so we're going to let this go for a while we're going to turn it off we're going to turn it back on and every time we do you're going to notice that we get more air bubbles now one other thing that you can do to help promote movement of air inside the system is just to kind of slowly tilt it along on its edges like this and every time you do you'll usually see more bubbles working their way out of the system now don't tilt too far especially if you have your Reservoir open because if you do you're going to find that you're going to leak water all over the place and now that we've got the system filled and it's running and we're letting it bleed this is where we're going to start doing our leak test and to do that we're going to put paper towels around all of our components that have a fitting that way we can check to see if we're getting any sort of leakage from uh any of these fittings now one last trick that you can do to help promote the movement of air inside of your system is if you have thin wall tubing like this is you can pinch it a few times and every time you do you'll notice this is semi-transparent tubing so I can see the fluid moving through here and I can also see where we have some of the air trapped now when it comes to leak testing a lot of the experts will tell you that they recommend leak testing anywhere from 12 to 24 hours I I definitely recommend that if you're new to water cooling and you have never dealt with it before I would leave all of your components unplugged leave your paper towels and leave the uh PSU or the power supply unit jumpered like this with the pump running uh for at least 24 hours prior to putting all your components back to Power because I'm not going to do that I'm going to do probably 20 minutes at best because I've done so many systems and I'm so confident in my ability to water cool and the fact that we already have no leaks leaks tend to not really form over time unless you have a degradation of parts or an O-ring fail or something like that which is no amount of leak testing would find if something's going to fail anyway so I definitely recommend if you're new perform a good long leak test if you're an experienced Builder chances are that you're just watching this video for fun and uh we'll want to let this thing run for a while and make sure that we have no leaks now over time the water fluid is going to start to drop because we are still replacing air with fluid so you want to just keep an eye on the water level and you want to refill that as necessary but before you close your Reservoir back up you want to leave at least a little bit of space for air to move to that way the air has a place to go and replace itself with fluid so leave a little bit of air gap at the top don't fill all the way to the brim okay so now that you performed all of your leak testing your system is running there's no leaks you're happy with it the last thing you want to do is you want to add two drops of your anti- fungal anti-algae um your PT nuke whatever you want to call it um to your water cooling Loop and we're talk just two drops is all that's needed this is very strong stuff and you can add this right into your Reservoir and then this will uh this will protect your system from there being any sort of algae growth uh at all over time okay and just one last point I'd like to make now before we finish up is the tubing right here that runs in front of the graphics card I made sure that it was a little bit longer than necessary because we want to make sure that if you have to access your graphics card and get it out of there that you can do so without the tubing blocking it in so we have plenty of slack on here that way we can get the graphics card out if we need to do that okay so that's it now if you followed this tutorial you would have built your very first water cooling system for your CPU this is everything done behind me as you can see we added a red light it really doesn't look too bad and the tubing doesn't really look at a place on this AMD Athlon x4 at stock speeds right now our core under load and this is load 25° C we are running Prime 95 right now and 25° C and the 22° on the CPU socket 25 on the core now this is at stock speeds but what is this mean if when you run this type of cooling option you get a lot more head room to do cool things with your computer overclocking and stress testing and better performance in gaming so now we're going to overclock this thing we're going to end this video hopefully you guys found this easy we're going to overclock this see exactly what we can get out of it see how much temperature Headroom we have this thing is running so cool it's actually surpassing what I thought it would perform as very simple Loop didn't cost a lot I hope you found this video very helpful now if you're not a beginner and you already know the basics of water cooling but you were hoping to learn a little bit more about doing uh Advanced water cooling techniques and multiple radiators stronger pumps bigger reservoirs and how to Plum everything to look very very cool and streamlined and flashy and all that cool stuff and you have a lot more budget to spend to do that then you're definitely going to want to stay tuned for next week when I show you how to build an advanced water cooling system with multiple radiators and high-end luxury parts for water coin thanks for watching guys as always if you've liked this video you know what to do if you stumbled across my channel and liked what you saw I hope you stick around and hit that subscribe button because it'll get you more videos like this for myself Jay's two cents and as always I'll see you guys in my next video [Music]
Up Next

12:54
PTC Enclosure Heater for Resin 3D Printing | DIY Build with W1209 Controller
@vogman
149.2K views•2021-10-22

12:54
Triumph of Orthodoxy Icon: Byzantine Art & History Explained
@BenCallan
2.1K views•2024-08-06
24:12
Optimized Academic Title
@Jayztwocents
2.9M views•2022-04-22

1:42
Game of Thrones Opening Credits: A Cinematic Analysis
@gameofthrones
46.3M views•2011-04-18
Related Study Plans & Knowledge Roadmaps
Structured learning paths in General & Interdisciplinary Studies
general-studies
Elevator Engineering: History, Physics & Cities
01From Hoists to Safety Brakes: The Dawn of Vertical Lift
02Hydraulic vs. Traction: The Engineering Physics of Elevators
03Modern Speed, Safety, and Algorithms
+ 2 more learning modules
12h5 modules
Explore Roadmap
general-studies
Rubber: Material Science, History & Geopolitics
01Origins of Natural Rubber & Mesoamerican History
02The Chemistry of Natural Rubber & Vulcanization
03The Geopolitics of the Rubber Boom & Colonization
+ 2 more learning modules
12h5 modules
Explore Roadmap
general-studies
Containerization: Evolution, Logistics & Trade
01Ancient Trade & Bulk Cargo: Amphorae to Barrels
02The Industrial Revolution & Cardboard Packaging
03The Containerization Revolution: Malcom McLean
+ 2 more learning modules
12h5 modules
Explore Roadmap
general-studies
Textile Tech: Evolution, Labor & Global Impact
01Pre-Industrial Textiles: Handloom & Cottage Industry
02Mechanization: The Spinning Jenny to the Power Loom
03The Factory System & Global Labor Transformation
+ 2 more learning modules
10h5 modules
Explore Roadmap