



















![How to Code an NFT Minting Bot! [ERC-721, OpenSea, Solidity]](https://i.ytimg.com/vi_webp/94kkXt3AoNA/maxresdefault.webp)







![[파이코인] 코인 시장의 낙폭! 파이는? 난리났네요 진짜...](https://i.ytimg.com/vi/Ja7p96ZpsrI/maxresdefault.jpg)
Solidity is a programming language for writing smart contracts on the Ethereum blockchain, featuring state variables for data storage, functions for logic execution, structs for complex data structures, arrays for collections, and events for external communication; developers must understand gas costs, overflow/underflow prevention using SafeMath libraries, and access control modifiers like onlyOwner to create secure and efficient smart contracts.
Master Solidity: A Beginner's Guide to Building Ethereum Smart Contracts
Added:Basic understanding of blockchain fundamentals, including how blocks, transactions, and consensus mechanisms work.
Foundational programming concepts such as variables, control structures, functions, and object-oriented programming principles.
An introduction to the Ethereum ecosystem, including ether (ETH), gas fees, wallets (like MetaMask), and the Ethereum Virtual Machine (EVM).
Core cryptographic concepts, particularly public/private key cryptography and cryptographic hashing.
Advanced smart contract security practices and auditing tools (e.g., Slither, Mythril) to detect and prevent complex vulnerabilities like reentrancy.
Decentralized Application (dApp) integration, learning how to connect Solidity backends to frontend interfaces using Web3 libraries like Ethers.js or Web3.js.
Smart contract upgradeability patterns, such as proxy contracts (UUPS) and the Diamond standard (ERC-2535).
Gas optimization techniques to minimize deployment and execution transaction costs on the Ethereum Mainnet.
Deep dive into Decentralized Finance (DeFi) architectures, including Automated Market Makers (AMMs), lending protocols, and flash loans.
57.9K views1.3Klikes2:18:15Original Release: 2020-07-16
in this video you're gonna learn how to code a solidity smart contract on the ethereum blockchain by building a game with a virtual zombies this is a tutorial for beginners so you don't need to know anything about ethereum solidity or even web development you're gonna do all the coding in your web browser so you don't need to install anything on your computer you're gonna learn a lot it's gonna be easy to follow and fun let's get started for those of you who don't know me my name is julian and on my channel is the blogs i teach blockchain development and how to find your first blockchain job [Music] so you go to this url then you click on get started and we're going to start with the first course which is making the zombie factory all right so let's click here chapter one so we're going to build a zombie factory to build an army of zombies so our factory will maintain a database of all the zombies of our army our factory will have a function for creating new zombies and each zombie will have a random and unique appearance so each zombie will have a dna and the way this dna works it's going to be a 16 digit integer like this one like for human dna each number here will have some real impact on our zombie for example the first two digit map to the the type of the head of the zombie the second two digits the zombie eyes etc so you know what let's play around with the sliders here and see how it modifies the dna and the appearance of our zombies i can modify the head here the eyes like this one your shirt that's pretty cool skin color eye color and after when you're done you click on next so it's this is on the bottom right corner is not visible on my screen so now we're going to start coding solidity so the code of solidity live inside what we call a smart contract and we put spot contract in a single file and the first element in this file is the version of solidity that we're gonna use so here the tutorial tells you that we're gonna use this pragma statement that means we want a version of solidity which is compatible with 3dt 0.5 but incompatible with 3dt 0.6 so at the time of recording this video 3dt is already at 0.6 but in this tutorial for crypto zombies we're going to stick to 3gt 0.5 there aren't too many differences between zero six and zero five so everything that you'll learn in this tutorial will still apply to zero six and we need to terminate this statement by a semicolon like everything in solidity so next we're going to declare our smart contract with the contract keyword and we define the name of our smart contract with hello world we open the parenthesis so actually our contract will be called zombie factory so let's rename this zombie factory all right so then you can click on check answer so we can't see it on my screen but that's below and here victory so now i have the right to click on next next we're going to see what are stage variables state variables allow you to store data in the blockchain for example you can store numbers or string of characters so for this lesson we're going to focus on integer so there are two type of integer in solidity there are unsigned integers so these can only be positive so 1 2 3 etc and you also have some integer this one can be negative or positive but in most cases you will want to use unsigned integer so actually unsigned integer can have different size so when you just write unsigned integer like this this is an alias for inside integer 256 which mean you have a huge number of 256 bits so that means the biggest number you can represent is 2 power 256 minus 1 which is really a huge number so probably never need to store as big of a number so you can also store integers that are smaller for example you ain't eight so in this case the bigger number is two power eight minus one and then you have you in 16 uh 32 64 128 so if you know in advance that your numbers will be smaller than in order to save some space then you can use this specialized type but we're going to stick to you it we're going to use the uin type to create a variable to store our zombie dna so on my screen it's cut off but you should see here the name of the variable dna digits so dna digits and it's going to have an initial value of 16. all right so let's click on check answer yes okay so now let's click on next so now we're going to do some math in our smart contract so in solidity we can do all the basic arithmetic operations so we can add two variables so here if i you int a u into b then i can do a plus b i can also do a subtraction a minus b multiplication division and i can also do a modulo division with the percentage sign so the modulo operator he gives you the remainder of a division so for example if that's um 10 modulo 5 then this will be equal to zero because we can divide 10 by 5 so 5 times 2 and this is the exact result but if for example we do 10 modulo 3 then 3 times three equal nine so the remainder will be one so this operation will be equal to one and actually we're going to use this property because we want to make sure that the dna of our zombies is exactly 16 characters long and for that we can use the modulo operator so actually if you scroll down then you will see instruction to create a variable called dna modulus this is kind of on my screen but let me remove this so you int dna modulus and it's going to be equal to 10 power so power pressure is this one dna digits all right and yes so let's click on next sometime in solidity you need to represent complex data structure and for this you need to use struct so to define a struct use the struct keyword then you name your struct and inside you can define all the different fields of your struct each field has a type and name so in our case we are going to create a struct name zombie so let's do this struct zombie it it's gonna have two field the first one is a name so that's gonna be of type string and the second one is an integer and its name is dna all right so let's check the answer yes this is correct okay so let's click on next so very often in smart contract you need to represent collection of data and for that you can use arrays so arrays in solidity contrary to other programming language can only contain the same element for example in javascript you can have an array where the first element is an integer the second is a string the third is maybe another object in solidity this is not possible all the elements of the array needs to have the same type so you can create arrays that have some simple type like arrays of integer or you can also create array of struct so in our case we're going to need an array of zombie struct so where we're going to declare this is first you declare the type of the array then you put two square brackets then we're going to use the public keyword so the public keyword will allow us to access this collection of data from outside the smart contract and then we write the name of the arrays zombies so here you will note that when i define my struct i use an uppercase but here in my collection my array of zombies here this is lowercase this is just a convention okay so let's check the answer yes this is correct let's click on next so next we're gonna see function so in solidity function are really where things are happening where you can manipulate data so first you define a function with the function keyword then you name the function and then you can give some argument to the function so this is data you're going to pass to the function as input and after you can add some other keyword to your function to describe it so we can make our function public which means they can be called from outside the spot contract otherwise they can only be called from inside the smart contract we're going to create a public function called create zombie and it's going to have two parameter a string and an integer so let's do this function create zombie so here this is going to be a string here we're going to specify that it is a memory string so i'm going to explain this later and here we define the name of the parameter and after that you're going to pass the in the dna argument okay and we make this public and then we open curly braces and after we're gonna fill what's inside but for now we're just gonna stop here so what is this memory thing well there are two ways you can pass parameters in solidity team the first one is pass by value so this is for simple types like integer but for complex type like string or erase want to avoid copying all the data because that will uh take more computational power so instead we're going to use a reference to the complex type and we do this by specifying memory here all right so let's click on check answer okay so this is not happy why i think this is because of formatting okay let's put this on one line directory doesn't make any change for the compiler of solidity but this is just for the crypto crypto zombie games oops i forgot the underscore here all right it's working let's click on next so next we're going to write the code inside our create zombie function and what we're going to do is add some zombie to our zombies array so first we create a new zombie so we declare a variable of type zombie so we specify the memory location so we want this zombie to be temporary and then we give it a name and then we create the zombie like this we pass the argument so name and dna and then we're going to add the zombie to our array so we reference the zombies array we use the push method and we pass out zombie and that's it and so now our zombies array has a length of one and has the zombie that we just put into it so let's check the answer all right so why he's not happy okay because we can also do it in a way which is a little bit faster so instead of doing upgrading this variable here what we can do is just push it directly like this okay let's close the parenthesis and now if we check the answer now it's working all right let's click on next so previously i mentioned that when we create a function here we can specify a public keyword that means this function can be called by anyone outside the spot contract so that means currently anybody can create a zombie but we don't want this we want to make this function only callable from inside the smart contract so that means if i create another function in my smart contract i will be able to call this create zombie function so the first step is to change this into private and as a naming convention we're going to add an underscore to the name of the function so just to be clear this is just a convention so vdt doesn't actually care about this but you're doing this because you want to signal to yourself and to other programmer that the intent of this function is to be private but this is not strictly required all right let's check the answer and yes this is correct so now let's click on next 3t function can modify data inside a blockchain that's the case of accurate zombie function but they can also just read value from the blockchain and in this case we need to declare them a little bit differently so first we need to add this returns keyword here then we need to add the type of the value that we return and finally we need to use the return keyword so let's scroll down and let's see what is our task so we need to create a private function called generate random dna all right so let's do this scroll down function generate random dna it's going to take one parameter called underscore str and this is a string okay so memory location is memory we call this str and we make it private and in order to declare that this is a read-only function it doesn't modify data we need to use the view keyword and then the return scheduler to describe which type we return and it's going to return an integer and for now we will not write the body this will be in the next lesson so let's check the answer yes all right so now we need to implement the body of the generate random dna functions we basically need to generate a random number by using this string here as input so for that we're going to use a solidity function called k check 256 so that is a hashing function so if you don't know what is hashing function that's basically a mathematical function that accepts some input and that produces an output of a fixed size but this output will be very very different if you change just one tiny bit of the input so this is used a lot in cryptography uh on on the web and in computer in general and we're gonna make use of that so catch 256 in input it accepts a data type uh called bytes but this is different from the string that we have so we're going to use another 3dt function to transform our string into a byte that's abi encode packed so i know that's that's a bit cryptic but all you have to understand is that we need to transform the input data type so that it suits what cache 256 is expecting and next capstack 256 is not going to produce the output we want because we want an integer as output and for that we're going to use another feature of solidity that is called typecasting so typecasting allow you to take a data type which is a certain type and transform it into another type so for example here in the example they showed you how you can cast something into a uint to uh eight so all you have to do is to uh you use the name of the type then you put parentheses and you pass the variable that you want to cast so next our task is to implement the generate random dna function so first we're going to create a variable called rand and that's gonna be get check 256 to which we're gonna pass the string but first we need to use api encode packed of sdr all right and we need to cast this into an integer all right and after we're going to return random modulo dna modulus so here why we need to do this because we want our random number to be uh 16 digit at most so here random this variable is going to be 32 digits it's going to be a huge number like this but with a lot of digits or 32 but then these dna modulus this is basically 10 power 16 so it's going to be a huge number 16 so by doing the module division of this number by this one then we know that the the remainder it's going to be 16 digits so that's how you can generate a random number in solidity generating random number in a safe way is a very difficult topic but for the sake of this tutorial we're gonna keep things simple all right so the solution worked let's go to the next lesson so now we're going to combine the two private function that we created before and we're going to create a public function to create zombies so let's see how this work so we're going to create a function here called create random zombie and it's going to take a single argument it's going to be a string so that's the name of the zombie we call this underscore name we make it public because we want these to be callable by outside the spot contract so here we're going to do two steps first we're gonna generate a random dna number and after we're gonna call create zombie so let's do the first step generate random dna and we pass it what we have as an argument name and after we call create zombie first argument must be the name and second argument must be the random number that we just generated so let's check the answer all right i just need to change this to rand d in a otherwise cryptozombie is not happy yes try again and yes it works all right let's click on next so now we're gonna emit an event when we create a zombie so events in solidity allow you to communicate with outside entities like web page who listen to event coming from a smart contract and so this outside entity can show you in real time what's happening in a smart contract so one difference between event and a normal variable is that you can subscribe to an event from outside the smart contract and another difference is that a smart contract can only create an event but once it's been created it cannot be read from the smart contract and it also cannot modify this event so it's good when you want to create some data that is only for outside consumers when you want to use an event there are two steps first you need to declare an event with the even keyword then you declare the name of the event then which field will be inside the event then somewhere in a function you need to emit an event with the emit keyword you reference the name of the event and then you pass the value so in our case we're gonna scroll down to the create zombie function and we're gonna fire our event here so let's scroll down because there are some specific instruction so first we need to declare our event new zombie so let's do this here event new zombie and we use parenthesis so it's going to have a first field which is the zombie id that's a uint then we have a name so that's a string uh string name and finally a field for the dna so that's also an integer dna okay and cv column here all right and now let's scroll down to create zombie so we're gonna emit our new zombie event like this new zombie so for the id i'll explain you just after for the name it's going to be name dna it's easy okay but what about id well when we execute the push method it's going to return the new length of the array so the id will be the index of the zombie in the array so to have the index what we do is we get the new length of the array and we remove one because array zero index it and here we pass the id so now should be fine okay it has worked so now let's click on next so so far we have done the solidity part that's what live on the blockchain but our end users will not directly interact with our smart contracts that's not very user-friendly they need to use the command line so that's not what we want instead we want to offer a nice web interface for our users so a website that can communicate with our smart contract so for that we're going to use javascript and a library that is called web3js later in this tutorial we will go in more detail about how to use web3 but here i'm gonna give you a very quick explanation so here we have the snippets that we would use in a real life application with web3 so first we define api so api this is basically a json document that describes the interface of a smart contract then here so we use the web3 object and we create what we call a contract instance so that's an object that allows to interact with our smart contract so here we need to have this reference to the api of the contract we define the other the ethereum address of the contract on the blockchain because each smart contract is identified by an ethereum address we pass this address to our object and actually with zombie factory we can interact with our smart contract so here we select an html element or a button and we listen to the click event and when this is clicked then we get the value that was inputted so here that's the the text box like you you see here we get the name and then we execute the create random zob function on smart contract and we pass it the name and we scroll down and so we once again we use our zombie factory object and we listen to the new zombie event with new zombie function here and every time we get a new event then we pass the detail of the event to our function generate zombie and so this is going to basically update our image on the front end so it's going to receive the id name the dna so here we just do some we adapt the data it's done very very interesting and here we built an object with a different parameter of our zombie so here we're going to pass the dna string and we know that different pop dna means different things so the first part means the head the second part i mean i choice then share choice etc etc and then there is some code that is not shown here but basically depending on which number you have here we have to map these numbers to uh to different picture and so in the end we can display this so let's play around and let's try to create zombie so for example uh i don't know for my random string a b uh wow cool okay what about c oh wow totally different d e so you can see that if you change just a little bit the inputs then the zombie becomes really really completely different so yeah that's pretty cool so let's click on next and yes we have completed the first lesson of crypto zombies now you can even show off and show you cryptozombie to your friend here you click here and you can share this everywhere cool and after scroll down and we're gonna click on proceed to next lesson [Music] so so far we can create zombie and we can see them on the front end and that's pretty cool but there isn't any gameplay anything that really we can do with our zombies so in the next lesson of crypto zombie we're gonna add a new feature to our smart contract which is zombies will be able to attack their victim so let's start this so in this lesson zombies will be able to create all the zombie by feeding on humans the dna of the newly created zombie will depend on the dna of the zombie that first beat them so here you can try to click on some human and see what happened so it creates a new zombie all right so let's click on next so in this lesson we will see mapping and addresses so in order to make our game multiplayer we need to associate an ownership for each zombie credit and for this we're going to use mappings and addresses so mappings are a way to store collection of data in solidity so the way that mappings work it basically associate a key to a value so first you use the mapping keyword then you declare the type of the key then an arrow key then the type of the value then declare if it's public or private then finally the name of the mapping and the other thing that we're going to use is ethereum addresses so as i mentioned previously smart contracts have addresses but they aren't the only thing that can have addresses so people can also have ethereum addresses so these are series of characters like this and that uniquely identify an account on the blockchain so let's scroll down and so let's see the instruction so first we need to create a mapping zombie to owner so to know which owner own which zombie so the key will be the zombie id and the value will be the address of the owner all right so let's see in the code where we have our command here the clear mapping here all right so we're gonna declare all my ping like this so the key is of type u it and then the value of type address that's public and we call this zombie to owner all right and then it's kind of on my screen but the other mapping we need to create owners zombie count so that basically give us how many zombie owner has so mapping and the key is an address and then the value is a you into how many zombie the owner has it's not public and owner zombie count all right let's check the answer yes this is correct so let's go to the next lesson so we have created our mappings but we're not making use of them so now we need to associate an owner to a zombie when we create new zombie and for that we're going to use a special variable in solidity that is called msg sender so msg sender is the ethereum address that called the function so what is really cool with solidity smart contract is that you are sure with the security of the blockchain that nobody can hack this mhd standard variable every time you call a function on ethereum you need to sign your function call with the private key associated to your ethereum address so it's absolutely impossible to forge this msg standard variable alright so let's scroll down to the create zombie function and first we're gonna update the zombie to owner mapping zombie to owner so the id is this variable id and here the address is msg sender okay and after that owner zombie account so here we reference the sender of the transaction and we can increment a number in 3t with the plus plus operator okay so let's verify and yes it works okay so let's click on next so in 3d another thing that you're going to use often is require so reads requires statement you can basically test that a certain condition is true and if this is true then the execution is just going to continue however if this is not true it's going to throw an error and the whole transaction is going to be canceled that means that any data change that were made before will be cancel and the rest of the function will not be executed so let's scroll down and see the instruction so we're gonna use a required statement to allow player to create a single zombie and after once they create the zombie then they can have other zombies by feeding on humans but initially they can only create one zombie so let's scroll down to create random zombie and here we use a require statement and the way we're gonna do this is we use the mapping of owner zombie count we reference msg sender and this needs to be equal to zero so we can compare this with the double equal operator here okay and so let's check the answer and yes this is correct okay let's go to the next lesson so in solidity sometimes when a smart contract starts to become too big then we want to split the code into several smart contracts and for that we can use inheritance so with inheritance you have a base contract and then you have a child contract that inherits from the base contract and basically any function or any variable that you have in the base contract can also be used in the child contract one thing to understand though is if you deploy this parent contract and this child contract then they will have two different ethereum addresses but if you just deploy the child contract it doesn't mean that you'll have two different ethereum addresses you just have one ethereum addresses it's just that this smart contract will have not only the code that you see here but also the code of the parent contract all right so let's scroll down and what we're gonna have what we have to do is to create a smart contract called zombie feeding so let's do this we scroll down and we create this contract zombie feeding and in order to inherit from the previous smart contract we use the is keyword and our previous contract is zombie factory or and after you we open the curly braces and that's all we do okay so it should be fine and yes this is correct all right so now we separated the two spot contract into different tabs so here's zombie fitting and the other one is zombie factory we're going to use a solidity feature that is called import that allow you to import some solidity code that is not in the same file so if you try to compile the smart contract like this it's going to fail because it doesn't know where is this thing zombie factory fortunately with the import keyword we're gonna import it very easily so we reference the path to the file so that's zombie factory dot so and after anything that you define in this file will be accessible in our contract cryptozombie is not happy because he wants double quotes okay let's fix this actually the 3t compiler doesn't care if you use a single or double quote you just have to be consistent if you start with a single quote you have to finish with a single quote start with a double quote have to finish with a double quote all right so let's verify the answer yes this is correct so this lesson is about the difference between the data location storage and memory so when you create a pointer to a complex data structure like an array or a mapping you can reference two different memory location so storage this is basically what we defined before our state variable so these are variable that you you define outside any function so these are actually installed on blockchain and memory is when you want to copy a variable in a temporary memory location so you use this typically inside a function and after the function finish to execute the variable with the memory location stop to exist so let's scroll down and see what we have to do so we're going to create a function feed and multiply so this function will be called when we want to our zombie to feed on a human so we're going to create this function here function feed and multiply it's getting have two parameter first an integer which is the zombie id and second a target dna so that's also an integer target dna and that's public all right so we want to make sure that the only person who can call this function is the owner of a zombie so remember before we we saw what is a require statement so we're going to use this so we make sure that msg sender is and here we're going to use a mapping that we defined before and since we inherit from zombie factory we have access to all the variables inside so let's go quickly in zombie factory and here we have the zombie to owner variable so let's copy this and so we're gonna reference this with the zombie id so only the owner of a zombie can feed on a human that makes sense and after we're gonna need to get this zombie dna so we want a pointer to this zombie so here we create a pointer of type zombie then we specify the memory location so it's going to refer to one of the zombie that is store on the blockchain so we reference the storage location then we call this zombie then we're going to reference another mapping the array sorry so let's go into zombie factories and here we have we have our array of zombies so zombies and here the zombie id is the index in the array all right so let's go to the next lesson so now we need to finish the feed and multiply function by taking the target dna that was here given as an argument combine it with the dna of the parent zombie and create a new zombie as a result so let's scroll down to see the exact instruction so first we need to make sure that target dna is not longer than 16 digits so we're going to normalize this number so target dna equal target dna and modulo dna modulus so this way we're sure that the target dna is the right size and then we're going to define the new dna which is the average of the target dna and the dna of the zombie so let's call this new dna and it's going to be equal to target dna plus my zombie dot dna so here it's how you access a field on this track with a dot notation and we divide this by two and finally we're going to create the zombie by calling the create zombie function so this is available also because we inherit from zombie factory so create zone b and i forget the order of the parameters so let's go into zombie factory so first the name and after the dna so for the name in the instruction that tells you that for now we're gonna put no name and we can always write a function later to change the dom no zombie name and then mu dna and that's it all right so just have to invert these two things otherwise cryptozombie is not happy all right so now let's go to the next lesson so if you try to compile this smart contract you'll find that we'll have an error and that's because one of the function that we declare in the zombie factory has a private visibility but we use it in the zombie feeding smart contract that inherit from the zombie factory and here we call this create zombie function so let's go inside the zombie factory here we can see the private visibility and that means this can only be used in the same spot contract but not even in child smart contract and inherit from it so if we change this to internal that means that it still cannot be called from outside the smart contract it needs to be called from inside a smart contract or a smart contract and inherit from it like zombie feeding so that's all the change that we need to do so let's check that everything is right yes okay and so now we'll go to the next level next we'll deal with interaction with other smart contracts so our crypto zombies can eat some crypto kitties if you don't know what cryptokitties are there are basically a little cat that live on the blockchain so virtual cat and you can collect this cat and breed them and uh and this is a one of the most popular game on ethereum and so we will need to interact with the smart contract of cryptokitties so in order to do this we need to understand what's an interface so here's an example so we have very simple spot contract with two functions and if we want to create an interface of this smart contract so that could be this for example so we define a contract we call it interface and then we define the function that we want to interact with for example get new we copy the function signature so the function signature is everything except the body so here you can see that we have a semi column here but we don't have the curly braces that we have in the real implementation and we don't have anything inside so to build an interface that's very easy you just declare a smart contract and put the function signature okay so let's go down and see our task so in the smart contract of hello kitty there is this function get kitty with this function signature and this implementation so we will need to build the interface of uh this uh this function here so let's see exactly how we need to call this first we're going to define an interface called kt interface so first let's go to the zombie feeding spot contract and we'll create our interface here so contract kt interface by the way there is another keyword in solidity which is uh interface so if you want to define interface you can either choose the contract keyword or the interface uh the difference is that the interface keyword is more limited so you cannot inherit uh an interface but it seems like in this exercise crypto zombies want us to use the contract keyword so we'll use this then we will copy paste the function signature of function kitty here okay so let's paste this and we will put a semi column here and we don't define the implementation and that's all we need so with this we pass this lesson so now we're going to use this interface so here you have an example that show you how to use an interface so here this is your interface here this is the smart contract where you use it to define a variable where you know where you assign the address of the other smart contract then you're going to define a pointer to this other smart contract so you declare a variable of type interface here then the name of an arbitrary name this doesn't really matter then you use the name of the interface again and between parentheses you put the address of this contract then inside any function if you want to interact with your smart contract you use the variable of the pointer and then you call the function directly and you pass function so so now they tell you that they've saved the address of the cryptokitties and they're available called ck address we're going to create a kt interface okay so let's see right here we can see this address so we're going to create a pointer to our cryptokitty smart contract so kitty interface then we're going to call this kt and we instantiate this kitty interface and we pass the address of hello kitty ck address all right and we passed this level cool so now we're going to use this interface and actually call the cryptokitties smart contract so here you have an example that show you how to handle multiple return so here you call this function that return multiple value and if you want to receive all these value then you use this notation here so you define your variable before and after use parenthesis so in our task we need to first create a function called feed on kt that will call cryptokitties so let's do this feed on kitty then it takes two units parameter the zombie i d and the kitty id and this is a public function all right so first we declare a unit called kt dna and then we're going to call the cryptocurrency smart contract so kitty contract and then the function we want is get kitty and get kitty takes a couple of argument so let me see get kitty oh no just take one argument the id of the kitty so just pass the argument here and this is going to return a lot of the variable so so in total i think that 10 arguments 1 2 3 4 5 6 seven eight nine ten but we only care about the last one the genes so here the way we're gonna ignore the other one is with comma so one two three four five six seven eight and nine yeah gene and then we're gonna call feed and multiply that we defined before and we're gonna pass it zombie id and kt dna oops here node d all right and yeah we pass this level so next when a crypto zombie is created from eating a crypto kitty in the dna we want to add this information so that we can make the difference with crypto zombies that are created normally when a player first entered the game so in order to do this we in the dna of crypto zombie we're currently using the first 12 digit but in total we have 16 digits so we can use the last two unused to uh to handle this information so we'll say that the crypto zombie is created by eating cat that will have 99 in the last two digit for that we're going to use an if statement so if statement exactly like in our programming language if then between parentheses the condition and then it has a body so let's see the exact instruction so first we need to change the function definition for feeder multiply so that it's going to accept a third argument so this string so let's scroll to fit and multiply and add this argument string location is memory and i'm gonna call this spaces okay then after we calculate the dna then here once we've calculated the dna we're gonna test if this is a zombie script from a cat so in order to do this we're gonna hash the specie okay check 2 56 abi and could pack this is because we need to transform the string into byte so that it's accepted by catch up to 56 so species and we're going to compare this with the hash of keycheck 256 abi and code pact here compared to kt so you might wonder why we do all these things to compare these two string can't we compare directly species to kitty well in solidity actually string are not very easy to manipulate and we can't do a comparison of string with this operator so in order to solve this problem we calculate the hash of these two string and then inside the if statement uh we're going to replace the last two digits of the dna so in order to do this we're going to use some modular operation so basically calculate the modular division of the new dna dna by 100 and we add a 99 and then we subtract to the new dna so if you've done some bit wise operation it should sound familiar otherwise i'm just going to skip the mathematical explanation that's a bit boring but it works and then we need to change the way we call fit and multiply here so let's get rid of this and here we add the last argument okay so oops there's a typo here uh okay check and we are also missing a parenthesis here okay and not we good so now it's time to see the front end so let's let's play one a little bit so this is our cryptokitty here so a crypto zombie so let's click on a cryptokitty to attack so this one for example cool we created a new cad zombie all right how does this work with web3 the javascript library to interact with smart contract so here we define the api so the interface to the smart contract and the address of the smart contract then here we define a pointer to the smart contract we use the contract address here we define this two variable here we can get an image of a specific cryptokitties by using the api of cryptokitty that's very simple api you just add the kitty id at the end and then when we click on a kitty image then we call the function feed on kt of our smart contract and so we pass the the zombie id and the kt id and then here when our new zombie is created then we're going to call the generate zombie function i already explained this before in this tutorial so congratulations you've added a really really new cool feature to our smart contract so the next course in the curriculum is advanced solidity concepts so we haven't mentioned a really key aspect of smart contract that's the limited immutability of their code so that means that once you deploy a smart contract to the blockchain you are sure that the blockchain is going to execute exactly the code that you wrote before deploying it so in a way smart contract is like low it's always going to execute the same way so that's a very very desirable desirable property of of smart contract but it can pose certain problem for example if we hard code the ethereum address of some contract so in our case here as bad contract zombie feeding it interact with the smart contract of cryptokitties but what if the contract of cryptokitties start to have a bug in the in the future and and so hacker was able to steal all the money or all the kitty from the smart contract in this case we want to change the address of cryptokitty in our smart contract so instead of hard coding smart contract addresses we want to create a function to make this dynamic so we're gonna do this so let's see the instruction here so we're going to delete the line of code where we output it uh address here so let's do this and here we're not going to instantiate this pointer okay and we're going to add a function called set kitty contract address and it's gonna take one argument address address for this address underscore address make it external so we haven't seen external so far it's basically x no it's like public except it's more restrictive so public you can call the function from outside the smart contract and from inside but external you can only call it from outside so in general it's better to be more as restrictive as you can be with this keyword an inside function we're going to instantiate the pointer here so kitty contract equal kt interface we pass it the address all right all right so next lesson so the problem we have with a set kitty contract address is that everybody can collect that that's actually a very big security hall because a hacker can put whatever address it wants here and it will not point with the to the actual cryptokitty smart contract but to smart contract of the hacker which can do bad things so we want to restrict the access to set contract to this function so actually there is a smart contract that can help us this is the ownable contract of open example so open zip link is the most popular solidity library that's available open source on github and it has many smart contracts that are used by a lot of smart contract project so the contract ownable of open zeppelin has a couple of stuff so we can ignore here the event uh what's important is the address of the owner so here the constructor we haven't seen this before so a constructor is a function that is called only once when the spot contract is first deployed so when the smart contract is deployed we set the value of owner to the sender of the transaction and we emit an event we don't care about that and then we have something that we call a modifier so a modifier is a special function that you can attach to another one so when this function is attached to another one it is executed first so for example if i have function foo and i attach only owner to foo then only owner is executed first and if everything works fine here then what you have here as the underscore is the function it is attached to and so here we will require with this modifier that only the owner can call this so if someone else tried to call a function with this modifier and it's not the owner then he's going to throw an error and everything's going to be reverted so you are protected so after you have a couple of functions for the management of who is the owner but we don't need to get into so much detail so let's see what will be our task so we need to import the content of audible because we're gonna use it in our smart contract so let's do this so first we'll go to the zombie factory function a smart contract so we import vulnerable dots so and after that we're going to enter it from it here so is honorable so here we can see the name of the contract okay and that's it now next lesson so importing this honorable smart contract is not enough and we need to actually make use of it so here in this lesson they explain a little bit function modifier well i just explained this before so i'm not going to repeat this also explain a bit more how you can renounce the ownership uh yeah that's a bit too too much detail here let's add the modifier to set kitty contract address here so only owner so the way we're gonna attach the modifier is like this so you some people don't put the parenthesis but this is a bad convention it's better to do it that way all right oops actually the way they do it in crypto zombie is without the parenthesis that is actually a bad convention anyway if this is what they want all right let's go to the next chapter so we haven't talked of a very important concept in solidity smart contract and that is gas so whenever you send a transaction to a smart contract so that means you call a function that can modify data you need to pay some gas so why first of all why do you have to pay something when you send a transaction well if you don't have to pay anything it would be very very easy to attack the ethereum network by sending some some transaction or even empty transaction that don't do anything but just clog the network so we use the same approach as uh as as with the spam for email so spamming people with email is expensive because you actually you have to pay a little bit for each email so that's the same id for a gas and transaction you have to pay something to modify data on the blockchain however um we don't pay directly in in ether because basically we want to pay recall proportionally to the computational difficulty of our smart contract so if this is an operation that doesn't take too much computational power we should pay less otherwise we should pay more however we don't want to set a price for each operation based on a fixed amount of ether because the value of ether can fluctuate a lot um when if ethereum was launched ether was probably like i don't know the initial price of ether but i think it was like five or ten bucks something very small and in the meantime it became a much bigger so if we had used the ether for the transaction cost now transaction will be really really expensive so instead of that we um we assign we create a unit called gas and different operation on blockchain cost a different amount of gas but what's important is the the relative value of this different operation maybe operation a is equal to 1000 gas and operation b is equal to 2000 gas so that means operation b is twice as computationally intensive as operation a and after that we establish an equivalence between this gas unit and ethers that's what we call the gas price that's a parameter of each transaction that you send to the blockchain and you are totally free to set this parameter as the center of your transaction uh this being said usually there is a market price for this gas price so you can check a website called east east gas station to check out what is the current gas price uh but usually each user do do this on their own and this is managed automatically by wallet uh like metamask but but but in any case as a spot contract developer you have to make sure that your smart contract does not consume too much gas so you need to do some gas optimization so after your smart contracts works well then you start to optimize for for gas there are different techniques for this um so if we scroll down yeah then one technique for example would be to order the the variable in a correct way so in the memory of ethereum for example an integer take a slot of 256 bits so here we have three slot of memory a b c but here actually if we specify that is a unit 32 that means it doesn't take the entire slot of 256 bits so in this case solidity when you see this it's smart enough to put these two variable in a single slot of two uh 256 so this is will be one slot and another slot but if you don't put these two variable here that can fit in a single slot next to each other then solidity won't be able to do uh this optimization so doing an um optimal ordering of variable can help a little bit for gas cost but there are many other technique we're going to add two fields to a zombie struct so we're gonna go here in zombie factory and here we're gonna add new fields so the first one is the level of a zombie so you eat level and second one is oh sorry this is a uint 32 and the second one is also a unit 32 ready time so for example in this case 3t will be able to pack these two variable in a single slot because they fit in a single 256 bit slot okay so let's check the answer yes this is correct next we're going to see the time units in solidity so the way time unit work in solidity is with unique timestamps so unique timestamp is basically the number of second since january 1st 1970 so here on this website i can see what is the current timestamp so here you can see this big number and if i reload then you can see that this is increasing so the unique timestamp of the current time is always increasing so in 3d we're going to store this timestamp in integer so the uiint variable type and we have a couple of helper to create this timestamp so for example here if you use now it's going to give you the current timestamp and also if you want some durations you have seconds minutes house etc so for example if you use one minutes that's going to be converted to 60 for 60 seconds one hour is going to be 3600 because that's the number of seconds in an hour one day to 86 400 etc etc and for our business logic what we're gonna use is this field here ready time of the zombie struck that we've just added before so this really time is a number of seconds that you need to wait before you can feed or attack again with a zombie and we do we implement this rule because otherwise the game will be too easy we'll be able to multiply like thousand times per day with your zombie and that's not really a very fun game so let's see the instruction for this step so first we're gonna define a variable called cooldown time so that's what we need to wait in order before we can use our zombie again so here let's do this you int cool down time and it's going to be equal to one days so internally that means that's gonna be eighty thousand eighty six thousand four hundred and after that we need to update a line of code so let's scroll down so yeah here when we create a zombie we also need to add the two field that we added previously in our struct so level and ready time so for the level so we're gonna start at one we create a new zombie and for the ready time so it's gonna be now plus cool done time and actually we're going to cast this into a uint 32 because we don't need to use you in 256 that's too big right so that means we're going to be able to use our zombie at this time stem here not plus cooldown time let's check the answer and yes that's correct okay next chapter so in this chapter we're going to focus on feeding dot saw and more specifically on the feed and multiply function so that when we call this function we update the cooldown time and also it's not possible to call this function before the end of the cooldown period so that couple of stuff to do in order to implement this business logic and so in this chapter we're gonna focus on two helper function so let's see exactly what we have to do so first we're gonna create a function called trigger cooldown and it's going to update the cooldown time of the kitty so let's scroll down and here we're gonna define our first function trig function [Music] trigger cool down and as an argument is going to take a storage pointer to a specific zombie so with the storage pointer we can pass a reference to a specific struct instance between different function so first you need to specify the type of the struct then you specify the storage location and after you give the name of the argument and so this is going to be an internal function so that means that it can only be called from the same smart contract or smart contract that inherit from this contract and here with our zombie so it has a ready time member and here we're gonna reuse exactly the same logic as we did in the chapter just before so this is going to be equal to now plus cool down time to cool down time that's a variable that we define in zombie factory just before okay and the next function we're gonna define is the is ready function so this function will tell us if the zombie can multiply again so that means if we are after the cooldown period so he's ready and he's also going to take a storage pointer so we can copy paste this and this is an internal functions and then it uses the view keywords so with the view keyword you can create read only function so this function cannot modify the blockchain and it's going to return a boolean so here we specify return bull okay and so here we're going to make a comparison so we're going to check that the ready time is inferior or equal to now so now is the current timestamp all right and so this is going to give us a boolean so true of false so with this we have passed this chapter so let's go to the next chapter so in this chapter we gonna fix the security of feed and multiply so let's scroll down and so here for the fit and multiply function the problem is that anybody can call it in any arbitrary dna here and any species string so we don't want this and actually this function only needs to be called by feed on kibi by this function here so it doesn't need to to be public so we're gonna fix this and replace it by internal that's the first thing so when you write a smart contract you should be as restrictive as possible and if you have a public function that can be internal or private then you should make sure to change this and next in our function we need to make sure that the cooldown period that we're after the cooldown period so for that we're going to make use of the require statement so that's to check that the condition is true and so we're going to call ease ready and we pass the my zombie pointer that we built just before and if this is true then the execution will continue otherwise if this is false then the whole execution of the function is going to stop here and any state change will be reverted and we also need to update the cooldown period after we fit and multiply so for this we're going to call trigger cooldown so let's do this underscore and it takes as an argument [Music] my zombie okay and we pass this chapter so next we created a new file called zombiehelper.saw and we're going to extract some code in this new contract so that help us to keep our code well organized and we're gonna add a modifier function in this file so this time we're gonna use a function modifier with arguments so before we already saw what a function modifier but they can also take some arguments so here you can see a code snippet to give you an example so here you have your modifier you have the body of your modifier the underscore that represent the function it is attached to but it can also receive some argument here and inside your modifier you can make use of this argument so we're going to create a modifier called above level so let's do this and it's going to receive some argument modifier above level is going to take two arguments first a u int that is called level and after another you info zombie id it we're going to require that the level of the zombie is greater than or equal to the level so let's do this with require and we use the zombies mapping it we reference the zombie id dot level and it has to be superior equal to level and after you should not forget underscore to represent the function it is attached to and that's correct all right next chapter so now we're gonna make use of this modifier we just created and we're going to create some function to change our zombies so for zombies we have a level two or higher there will be a function to change the name of the zombie and if you zombie has a level 20 or higher you can also change the custom dna so the higher the level of your zombie the more stuff you can do so uh let's see the exact instructions so first we're going to create a function change name so let's do this here change name it's going to take two argument the zombie id all right and after that we want the new name so that's an argument of type string then for the memory location we call this call data so we haven't seen the call data memory location but basically when you have a function of type external which is the case here then you don't have the memory location instead this is called call data and we're going to call this new name and so this is supposed to be attached to the modifier we just created above level so we're gonna attach it like this and we need to pass two arguments the level and the zombie id so for the level this is two because we want to make this function only executable if uzombie has a level two or higher and for the zombie id this is the zone b id all right and so inside we're gonna first verify that the sender of this transaction is the owner of the zombie so for that we're gonna require that msg sender is zombie to owner and here we reference the zombie id okay and after that we are going to update the name of the zombie so zombies zombie id dot name and it's going to equal to new name okay and then we're going to create another function called change dna so let's do this stage dna it's going to take two arguments the first one is zombie id and the second one is the new dna [Music] and it is also going to be an external function we also attached the modifier above level so this time for the level this is 20 and follow this zombie id this is zombie id all right so we also check that first this is the owner of the zombie that called this function and then we're going to change the dna of the zombie so here's d n a and this is going to be new [Music] okay and this is correct so next chapter so we're going to create a function to return all the zombies of a specific owner and for that we're gonna use a view function so that is read only um so here it gives you an explanation saving gas with view function it tells you that your function are used to save gas but i really disagree with the explanation they give so view function i used to return data not to save gas so let's scroll down and let's see what we have to do so we're gonna create a function called get zombies by owner uh okay so get zombies by owner all right it takes one argument an address called owner oh no spell it right julian okay let's make it external so that can only be called from outside the smart contract and this is a view function so this is read only and doesn't consume any gas and then it's going to return an array of integer so that's how we declare it and we make this memory okay and this is empty for now and that's correct let's go to the next chapter so one thing that is important to understand as a smart contract developer is that when you store data onto blockchain this is expensive so if possible we avoid to do it so in our function here get zombies by owner instead of storing an array of zombies by index by the owner on the blockchain we're going to dynamically build this array and so the memory location will use for that array is not storage but it's called memory so that just exists when you execute the function and after this is deleted so we're gonna declare an array in memory and here we have uh an example of the syntax so first you need to declare the type of the array then you declare that this is an array with the square bracket then you use the memory keyword the name of the variable then use the new keyword again you declare the type of the array so that's a bit redundant with this but we have to do it and after use parentheses to specify the length of the array so this is a big difference with a storage array because with memory arrays you need to know in advance what is the length of the array and this is the fixed size it is not possible to change this after and after here you have the different the way you access each element of the array is with the square bracket notation um and you also don't have access to the push method uh contrary to storage array because you can add dynamically new element okay so let's see what are the instruction so in our function get zombies by owner we need to declare a a uh integer recall result uh so let's do this u int memory and we call this result and this is going to be a integer array and the length of the array should be how many zombie the owner owns and so we can have this by using this mapping owner zombie count and we use the owner variable so let's do this new u int and between parentheses we specify the length of the array owner zombie couch and here we specify the owner all right and for now we're just going to return the result but uh so this this is gonna be an empty array but in the next chapter we're gonna fill it so this is fine i pass this chapter so now we're gonna fill our array with a full loop so first let's see what is how for loop work the way you declare a full loop is that you first use the full keyword then you initialize a counter here then you specify the stopping condition then you increment your counter and after in your for loop then you write whatever code you want to run and what's inside is going to run until we hit the stopping condition here let's start the code so let's scroll down so here first we need to declare a counter variable to keep track of the index in the result array so let's do this and we set it initially to zero well actually you don't strictly need to do this because the default value of an integer is zero but they ask it to they ask us to be more explicit okay so now we're going to declare our for loop so it's going to start from zero um and it's gonna the stopping condition is until we hit the length of the zombies array and we increment i for each pass each side we gonna compare that the owner of the current zombie is the owner that was passed as an argument so here zombie to owner of i and this must be equal to oh no and if that is the case then we increment our result array so result here we reference oops sorry i didn't mean to call this result i meant to call this cancer my bad and this is equal to the zombie id and after that we increment the counter variables so that the next time that we added zombie id to the result array we don't overwrite the previous entry and after we need to close the if statement okay and at the end once we finish the loop then we return the result so we could have done something more simple if we stalled in storage an array of all the zombie id for each address for example for each address here we will have a mapping that point to an array of integers for all this zombie id of these owners so i don't know 3 5 9 12 etc but the prime of this approach is at first it consumed more gas because now we have to store this in storage and second every time we transfer the ownership of a zombie between two different owners we also have to update the this array of zombie ids and so it makes our code more complicated and it also uh make us suspend more gas so that's why we don't choose this approach and instead we dynamically build this array every time okay so we good and let's go to the next chapter so let's wrap up what we've learned in this lesson so first we added a way to update our cryptokitties contract so that allows us to deal with spot construct update then we've learned how we can protect our function with the only owner modifier then we learn about what is gas and how we can optimize for gas consumption in our spot contract then we added the concept of cooldown for our zombies that we have to wait uh before we can uh before our zombie can multiply again and we've also added a function to updated zone b name and dna but this is only after you zombie get up to a certain level and finally we can return an array of older zombie id for a specific address alright so let's click on next and let's go to the next lesson right zombie battle system right let's start this [Music] so in this chapter we're going to see a new function modifier called payable but first let's have a quick recap of all the function modifier we already saw together so first we saw the private function modifier and that is used to make your function only callable from inside your spat contract so that make it more secure then we have internal so that is slightly less restrictive that private service internal you can call your function from inside smart contract and also from spot contract that inherits from the smart contract then with x no the function can only be called from outside spot construct and finally we have public where it can be called from anywhere that's the most permissive uh function visibility but usually we want to avoid this if possible then we have what we what we call state modifier so that's the view and pure keyword so with this modifier you tell solidity that your function is only going to read data and not modify any data on the blockchain so this function will be read only and the difference between vue and pure is that with vue you read data from the blockchain but with pure you you return some data but that is not read from the blockchain for example if you want to do an addition or a multiplication but that's that does not depend on any data from the blockchain and then we have custom modifiers so we saw this in the previous lesson with the only owner modifier and above level so these are basically snippet of code that you will execute before executing a function and we often use them to restrict access to some function so you can attach multiple custom modifier to any function so only owner here another modifier etc etc and then in this chapter we're going to see the payable modifiers so pebble modifier specified that you can send some ether to a function so i know that this is a little bit confusing but with an ethereum smart contract when you execute a function on top of executing the function you can also send some ether to this function so you really do two thing at the same time if you don't have this payable modifier on a solidity function you cannot send ether to this function it will be rejected so let's look at an example so here let's say you have this function and you want to make it able to receive some ether so you add the payable function modifier here and inside here you have an example of how we can access the current ether value that is stored inside the spot contract and so here with this msg value you can know how much ether was sent to the function and here you can see that you can make some compare reason by using the ether keyword so here for example um i want to execute this function only if exactly 0.001 ether was sent so you can see that it reads really nicely that sounds really really intuitive and so if you want to know in the front end when you use the web switch javascript library how you can specify that you also want to send some ether well when you call the function so you specify the the sending address and you specify another parameter here value and here you give it the value in the way so you use this helper function to convert to way uh way as a reminder that's the elementary unit when you manipulate ethers the way is a very small fraction of an ether that's 10 power minus 18 so it's like 0.00 with 18 0. so here for example if you understand the equivalent of 0.001 ether so you need to use this two way function so that it's going to convert this into a big big big number with many zero and yeah that's basically how payable works so now we're gonna start the coding part so first we're gonna define an integer called level up so we're gonna implement a function that allowed to increase the level of our zombie but in order to call this function we need we need to send some ether so first we're going to define what's the level of fee so here we're going to define a variable of type integer level up fee and we set it to 0.01 ether all right and then after we're going to create the level up function just right here so let's do that function level up level up and it's going to take one parameter this zombie id zone b id and we make it external so we can only be called from outside the spot contract and it's payable right and it's function first it's going to make sure that we send enough ether so we're going to require that msg value so that's the amount that was sent in a transaction and this should be equal to the level up fee all right and after that it's going to increment the the zombie of of the owner so zombie id zone then we reference the the level field and we increment it like this all right and we're good so let's go to the next chapter so previously we created a function to level up our zombies and we also need to send some ether in order to call this function but the operator of this smart contract will also want to re-draw this ether from time to time and if you don't create any function for that then you either is going to be locked inside your spot contract so we need to create this redraw function so here you have an example of height work so basically the way you transfer ether in a spot contract is first you need to know what is the recipient address so here with this function owner we're gonna know we're gonna have the address of the owner of the smart contract so that's basically the admin if you wonder where does this function come from it comes from the ownable smart contract here and the problem is that this address is of type address but in solidity there is another type of address which is called address payable and if you want to send some ether it needs to be addressed payable not just address so we need to cast this address type to a payable address type and there is no easy way to do it with solidity 0.5 so we have to use these tricks first we cast the address into an integer 160c 160 bit then we cast this into an address payable like this and after once we have our address payable owner then we can call the transfer method on it and then we specify the amount that we want to withdraw so in this case we're going to withdraw all the ether of the spot contract so we use this keyword which we cast this into an address and then we can access the balance uh of of this uh of this variable so this will withdraw everything in the smart contract so that's how it works so let's scroll down and let's see the exact coding instructions so create a result function in our contract actually let's say it should be identical to the example above so you know what uh actually let's copy paste this it's gonna be faster all right let's do this okay oh yeah and so i forgot to mention that it's protected by this modifier here only owner so this is super important otherwise anybody can go this function and just like take all the money away that's not what we want so in the next instruction they tell you about a potential problem that may occur so let's say that in the future the price of ether changed a lot so the level up fee that we set up in the previous chapter might become very expensive all of a sudden so we need to be able to adjust this fee so that's why we're going to create a function to do this so we're going to create a function called set level up fee let's do this and it's going to take one argument which is the new fee so that's going to be an integer and then we make this external and we also protect this by only owner otherwise anyone can call this function and can set the fee to zero you can level up as much as they want so that's not what we want and all we want here is just to level up fee we're gonna update this to the new fee and that's it and we finished this chapter so now we're gonna start to implement the functionality to actually have battles between the different zombie and so like we did in the previous lessons we're gonna extract all this functionality in a single file so we created this file zombie attack dot so so we need to uh initialize this the code of this file so first we need a pragma statement pragma solidity and it needs to be above or equal to five zero but inferior to 0.6 okay then we're going to import the zombie helper file that we created before so import and then we put the path to zombie helper dot so okay then we need to declare a new contract called zombie attack and have it inherit from zombie helper so contract zombie attack and we make it inuric from zombie helper okay and this is correct so in any good games there is some randomness so we need to be able to generate randomness in our smart contracts so how can we do this well let's see here we have a code snippet for some inspiration so we need some source of randomness now spot contract so we're going to use the timestamp that is used for mining a transaction we're also going to use the address of the center of the transaction and also what we call a non so that's going to be an integer that we increment every time we generate our random number so we're going to concatenate all of this variable here and we're going to use the hashing function of solidity to have a hash of all of this and then we're going to cast this into an integer but that's not enough because if we do this the integer can be anything so we want to generate a random number between 1 and 100 here so for that we're going to use the modulo operator and we're going to have a random number that belongs to a specific range so the problem of this method is that this is actually not secure because if you have a dishonest miner there is a way that this miner manipulates the element of randomness provided to the smart contract and so the miner can have an influence on the random number that is generated so we don't want this is there a way to generate a random number in a safe way in ethereum well there is but it's a bit outside the scope of this tutorial so if you want a hint you basically have to use oracle so these are outside api that will feed the smart contract with some source of randomness but this is really more complex so we're going to stick to the simple solution so first we're going to give our contact i contract a new variable called randoms so we're going to do this here u int run nonce and we're going to set it to zero so then we're going to create a function called ran mode so it's going to generate our random number and it's going to accept an argument so that's an integer called mo that's going to help us to define a range for our random number it's going to be an internal function it returns an integer so the first thing this function is going to do is to increment the notes and after that we're going to combine different source of randomness so api dot encode packed of now then so that's the current timestamp then the the address of the sender of the transaction and finally the nonce then we're going to ash this so with kid shack 2 56 then we're gonna transform this into an integer and we're gonna divide this by using the modulo operator we're gonna divide this by the modulus variable that we receive as an argument and we're gonna return this and let's not forget the semicolon at the end and let's check the answer and yes this is correct okay let's go to the next lesson in this chapter we will start to implement the logic for fighting between different zombies so there will be a couple of rules for the fighting so you choose one of your zombie and you choose a zombie of one of you opponent and you can attack it so if you are the attacking zombie your probability of winning is 70 if you are the defending zombies you probability address 30 so all the zombies will have two new variable win count and a loss count to count the number of win and off loss so if the attacking zombie wins it's going to level up and it's going to spawn a new zombie and if it loses then nothing happens except that it's lost count will be incremented and no matter if it wins or lose the cooldown time will be triggered so that will prevent you from attacking every time so we gonna start to implement this so there is a lot of logic so we're gonna do this across several chapter but in this chapter we have to first create a variable for the attack victory probability so that's going to be an integer and we're going to set it to 70 and after that we're going to create a function called attack it's going to take two parameter first a zombie id and second a target id so zombie id is the zombie you want to use for the attack and target id is the other zombie you want to attack and we make it external and that's empty for now okay so that's correct so now next chapter so next step is to make sure that the zombie you want to use to attack is a zombie we actually own and we actually already implemented this in other functions so instead of doing the same check in different function we're going to refactor everything by using a modifier so here i'm talking of this line of code here msg require msg sender equals zombie 200 blah blah blah so that's what we're going to put inside the modifier so let's create a modifier called owner off uh let's scroll down okay so we're gonna create it here modifier owner off it's gonna take a single argument the zombie id and we're gonna do a require so okay let me scroll up we're just gonna copy paste this line here require msg sender okay and after we execute the function with the underscore all right and after we need to attach this modifier to this function feed and multiply so here we don't need this anymore and instead we can add the modifier here on and off and we need to pass it the zombie i d and that's correct next chapter so we'll continue with our refactoring by reusing the owner of modifier and we'll do this then change name and change dna function so let's scroll down and here when we check that the color is the owner of the zombie we can also make use of this owner of modifier so let's do this owner off and we pass the zombie id okay and let's do this also here in change dna okay let's get rid of this now our code is cleaner let's check the answer it yes all right so enough with refactoring and now we're going to keep implementing our attack function so first we're going to attach the owner of modifier to the attach function so here let's do this owner off and we're going to pass the zombie id okay and next we need to create two storage pointer to the two zombies so our zombies and zombie that we want to attack so we're gonna start with our zombie [Music] so first we define a pointer of type zombie then make it a storage pointer and we call it my zone b and we reference the zombies mapping and here we use the zombie id we provided us argument and after that we're gonna define another pointer for the other zombie we're going to call it enemy zone b and here this is target id okay and the last instructions we need to create a random number between 0 and 99 so we're going to declare a integer called rand and we're going to use the run mode function to generate this random integer and we pass it 100 and that's it oops i forgot semicolon here and yes this is correct all right next chapter so in this chapter we want to keep track of how many battle each zombie has one all lost and for that we're going to add a couple of fields to a zombie struct we're going to add wind cut and low scout so we're going to go to zombie factory dot so and we're going to add this true property here so we're going to use a ewing 16 for inch for each wing count you eat 16 for loss count so how can we choose what kind of u int we want well if we want to take the largest unit we don't put anything and it's like you into 256 so that's probably way too big for our need the smallest uint we can find is ewing8 so if i zombie win every day then it will overflow this integer in less than a year but if we put you into 16 then in this case it's going to overflow after 55 000 something so our players will need to play and win every day for 179 years so we are probably okay with that and the next thing we want to change our function create zombie because now we have to populate the initial value for wind count or loss count so here and create zombie we're gonna modify this when we create a zombie we're gonna add two field so zero win count and zero loss count okay and we're good next chapter so now that we have created and win a win count and a lost count then we need to update them every time there is a battle between two different zombies different depending on who won the battle so let's scroll down to the attack function and first we're gonna test here if the random number we generated is less than or equal to the tag victory probabilities that's something that we defined before if that's the case and that means that our zombie win so we're gonna increment our win count my zombie win count plus plus my we also going to level up so my zombie level plus plus and now we need to increment the loss count of the enemy zone b so dot loss count plus plus and since we won then we're gonna get a new zombie so for that we're gonna execute feed and multiply so we're going to go in zombie feeding because i don't remember what are the arguments of fit and multiply so zombie feeding here and fit and multiply so so the zombie id is our zombie then for target dna that's the dna of the enemy and here the species that tell us to put the zombie string so back to zombie attack okay so here zombie id then enemy zombie.dna and finally the string zombies all right are we good so in this chapter we're going to tackle the case when our zombie lost the battle so we're going to add an else statement in the attack function so here this is the branch where if we win but if we lose we also have to take this into consideration so in this case we're going to increment the loss count on our zombie so my zombie dot loss count plus plus then we're going to increment the win count of the enemy zombie we count and we also going to trigger the cooldown period so that we cannot attack for a certain time so let me see what's the exact name of the function trigger cool down okay and we're gonna pass my zone b okay and we're good so we are finished for the coding of this lesson and now we're gonna test that everything works fine so we're gonna attack another zombie and yes we will after we can see the updated fields of our zombie cool so let's click on next let's proceed to the next lesson yeah c721 and collectibles okay so let's start this lesson [Music] so in this chapter we're going to talk about tokens so if you've been in the ethereum space for well you probably heard about token token are basically smart contracts that represent assets but on the blockchain and you probably heard of erc20 so the problem with token is that we want to make them easily tradable for exchanges but if each token has its own custom logic it's going to be very difficult for these exchanges to to add new tokens so that's why we created exchanges like yes 20 tokens so without going into the detail yes 20 token um specifications specify a set of function that all the east 20 tokens have to implement like transfer from for example that allow you to do a delegated transfer and internally the spot contract is going to maintain a mapping of address to integer and that's how you can know the balance of the different address so yes 20 is cool but this is for what we call fungible assets so for example like like a dollar so one dollar is equal to any other dollar we don't really care but in our case our zombies they are what we call non-funchable one zombie cannot be exchanged against another one because each zombie has its own specificity so we cannot use the es20 token instead we're going to use another standard that we call erc721 so yeah yeah 721 is a token standard for non-tangible asset like our zombie so we are not going to dive into all the details of yeah 7 21.
now that we're going to do it step by step so in this in this chapter we're going to start our coding so here we have a new file zombie ownership dot so so that's the file of our token then this token will represent our zombie so first we're going to declare the pragma statement so for that we can just copy paste from from other files okay and then we're gonna import zombie attack and then we're gonna declare the spot contract of our token that we're gonna call zombie owner ship and this is gonna be is zombie attack okay so it's gonna inherit from the zombies like smart contract and for now we're gonna leave the body empty okay so we pass this chapter so here is the set of function that we need to implement in our smart contracts balance of owner off etc this is part of the erc721 standard so i know that it seems a little bit overwhelming but we're gonna implement this function one by one so don't worry so this is an interface it actually doesn't define the function themselves it's just define a function signature so we're gonna enrich from this contract and for anybody who read the code they will understand right away that our smart contract is in erc721 token first we're gonna import the interface of erc20 like this erc 721.
so and after that we're going to inherit from it like this yes c721 actually let's see how they define it yeah 721 all in uppercase okay so here you can note that in solidity we can have multiple inheritance so here zombie ownership inherit not only from zombie attack but also from yeah 721 and that's all we need to do now so let's check the answer and yes that's correct so in this chapter we're going to implement two functions balance off and on or off so for the balance of function it takes as an argument an address and it's written the balance of token of this address so for example if an address has 10 token and this function is going to return 10. and another function on or off it takes as an argument a token id so in our case it will actually be a zombie id and it will return the address that owns this zombie actually we already have a mapping that stole this information so it's going to be really straightforward so here let's see the exact instruction so for balance of there is a mapping that we already defined before that's going to help us that's owner zombie count and that's index by address so here we just put the owner we got as an argument and we return this and for on and off we have another mapping that's zombie to owner and we're gonna pass the token id and we're gonna return this and we check the answer and yes we're good so we have a problem my friend because we created a function on or off that has the same name of a modifier that we created before and this is not allowed in solidity so can we just change the name of the owner of function we just created this is not possible because here in the standard of yeah 721 we expect a function of called on or off and we have to respect that so instead we're going to change our modifier so let's scroll down and see exactly the instructions so we we're gonna go in zombie feeding and we're gonna change the name of our modifier from on off to only on or off so let's do this so only owner off and after in feed and multiply we're gonna change here the call to this modifier only owner off okay so in this chapter we're gonna implement the token transfer logic so in es721 we have a function called transfer from to transfer a token but there are actually two ways to call this function so the first way if the sender of the transaction put his own address here for the from argument then this is basically the person that owned the token that decided to transfer it so this is the most simple case and the second case is what we call delegated transfer so that means that the person a can approve a person b to transfer token on his behalf so that means that the owner of the token first need to call the approve function to approve the other address and after the other address can call transfer from so we need to implement this but you will notice that both of these functions actually they will reuse the same part of the logic that transfer token for this common logic we're going to create a function called underscore transfer so first we're going to define this function underscore transfer so let's do this let's scroll down and we're gonna define a new function here function transfer and it's gonna take three arguments so first address from then address two and you int 256 for the token id and it should be a private function so when the ownership changes there are two mapping to change first the owner zombie count and the zombie to owner that keep track of who owns what so first we gonna update the owner zombie count by the person receiving a zombies owner zombie count of two we increment this and next we need to decrease owner zombie count for the sender so owner zombie count off from so we're gonna decrease this and after we're gonna update zombie to owner so zombie to owner zombie id and so now it's going to point to the new owner so that's underscore two and finally we need to fire a transfer event that's part of the yeah 721 specification so we're going to use the emit keyword for that and after we're gonna emit this transfer event so let's go inside yeah 721 to see what we have inside so the address from okay you know what let's copy everything otherwise we're gonna forget some stuff so the address from well we already have it from the argument the address two we already have it and the token id yes we also have it okay oops here are many mistakes that's not zombie id but that's token id okay so now we're good so we've done the difficult part now it's going to be easier to implement transfer from so first we want to make sure that when we do a delegated transfers that means when another person try to transfer token on behalf of someone else we want to make sure that this person is actually approved so for that we need to define a new mapping that we will call zombie approvals so we're gonna define this here so that's gonna be a mapping of you in so that's gonna be the zombie id to an address so we're gonna call this zombie approvals and after that in the transfer from function we're going to add a required statement transfer from so first let's check that it's either the owner of the zombie so zombie to owner of a token id and this should be the center of the transaction or the other possibility if this is a delegated transfer so for that it's going to be zombie approvals of the token id and this should be the standard of the transaction and after that if this required statement passed then we can call the transfer function we just forward the argument from to and token id and we're good that's how you do a transfer with erc21 so now we're going to implement the approve function so as a reminder the way you do delegated transfer is first the owner of a token called the approve function by specifying which address will be approved to move a specific token and after the address that's been approved is able to call transfer from to do the transfer so let's implement this so let's go to the approve function so first of all we want to protect this function because only the owner should be able to approve someone so let's add this only owner off and token id okay and after for the body of the function we need to update zombie approval zombie approval token id and this is equal to approved and we're good there is still one more thing to do in the approve function and that's to fire the approval event so let's do this here we're gonna fire this event so we use the emit keyword then approval then i don't remember the parameters so let's go in the yeah 721 specification let's copy all of this parameter here and let's populate this so for the owner so that's msg sender the center of the transaction then for approve well we provide this as an argument to the function and for the token id also and we're good so in this chapter we're going to fix a bug of overflow underflow so in solidity when you define a variable of a certain type so let's say for example u into 8 so that means this integer maximum can be 2 equal to 256 so what happened if let's say you declare you int a here and that's equal to 256 and you increment a is it going to become 257 no in this case it's going to overflow and it's going to wrap around the range so instead of becoming 257 the behavior is that it will go back at the beginning of the range and so now it's going to be equal to zero and it's totally different from what you want and you have exactly the same problem on the other side of the range so if a here start at zero and now you decrement it then it's not going to become -1 but instead it's going to become 256.
so that's a big issue and we want to prevent this because otherwise the logic of our smart contract is totally broken so before in this video i mentioned a solidity library that is called open zip link and open zip link can help us to prevent underflow and overflow bug but with using something that is called safe math so we've already imported safe mass here and here you see this weird keyword that is called libraries it's a special kind of smart contract that doesn't have its own address so we use library when we want to share some code between different smart contracts we're going to use this safe math thing so first we need to import it so we're going to import it here import save math dot so and after we need to use a special declaration so let me scroll down and here we can see this declaration using safe math for units what is this thing so this notation allows to attach all the function that are defining in safe math to the type u in 256 and so after once we've done that then we can have this notation here so a dot add a dot multiply so we will not use this notation the the plus and multiply will not use this and instead we'll execute the method of safe math and the reason why we can access this method is because we've used this notation here using safe math for uint that's it for this chapter we're good so let's go to the next chapter so in this chapter we're going to make use of safe math that we've imported in the previous chapter so here's the code of say smart savemas it looks a bit complicated you don't need to understand everything but the point is that you can see like we have a couple of uh assert here assert assert if this condition is not respected then it's going to throw an error and the whole transaction is going to be canceled so if you have an overflow underflow this is going to be triggered and that's what we want so let's see what we have to do exactly using safe mass in our code so we need to replace all the increment operator with the safe mass method so let's go to zombie ownership and let's scroll down here we use the increment operator but we don't want this instead we're gonna use safe mass like this to add one here this is the contrary we want to remove owner zombie account dot sub in this case sub one and that's it we're good so we're gonna keep making use of safe math in this chapter because there are still some other places where we could have underflow overflow here for example with this increment operator however the problem is the way we define this field they are not uiint 256 but we've attached safe mass to you in 256 only so if you try to use safe mass on a you in 8 or 16 for example is not going to work so we need to have other using safe mass statement here's one for you in 32 and one for you in 16 so let's do this uh here you didn't 32 and the other one u int 16 and now that we've defined this then we can use safe mass for these two types so let's scroll down and see where we need this so here we will replace this increment by safe mass version add one okay do we have any other place where we need to do this no and actually i think i've made a mistake here it's not it's not another version of safe mass for 32 so this is safe my 32 save mass 16. okay and we good okay so now we're gonna finish the refactor with safe mass so we just we still have a couple of places where we have to use safe mass so for example here uh reynolds okay so let's scroll down okay so here we have three oh that's a bit annoying add one here level add one loss count add one another two oh my god are you gonna get done with this okay we count oh please tell me this is the last one all right and we're good so in this chapter we're going to add some comment to our code so when you write s3t smart contract actually you might think that you write the spot contract for the blockchain for ethereum but that's partly true but most importantly you write it for yourself or any other programmer that's going to read the code of your spot contract in the future and that's very important to make it readable and one great way to make it readable is to add some commands so they are different kind of commands so here with a double forward slash this is for single line comment then you have multiple line comment with this notation this is exactly like in javascript and there is also something which is called a nat spec so with uh with three forward slash here you will use some uh some predefined way of commenting your code so like title author what are the different parameter and it is easier for other programmer to understand what's going on and you also have some tools that can extract these comments and build automatically some nice documentation so let's see how uh are we going to comment our code exactly so we're going to add some nat spec command to zombie ownership so first a title so here let's do this title for example a contract that manage zombie ownership okay then the author so i'll put my name but you can put use julian and after we have the dev tag so that explain what the function does so in our case that's to be compliant with open zipping implementation of yeah 721 and we okay for comments so we finish for the smart construct of this lesson woohoo congrats so let's have a quick recap at what we've done so first i've introduced the erc721 standard that we used to represent zombie on the blockchain then we've created an implementation for erc721 then to prevent overflow and underflow of our integer we use the safe math library of open zip link and after we learn how we can comment our solidity code [Music] so there is still another lesson of crypto zombies on web 3 web 3 is a javascript library to connect your spot contract to a web front end but the problem is that this lesson is really outdated so i prefer not to waste time on it and instead check out my playlist on web3 which is up to date another problem with everything we learned in this video is that we use 3dt 0.5 but the latest version of solidity is 0.6 so there isn't too much difference between 3t 0.5 and 0.6 sorry t 0.5 is mostly compatible with study t 0.6 but if you are learning solidity you still need to know the differences and for that i also have a video on this topic so the next question is how you are going to monetize your skill how you can become a professional blockchain developer blockchain developers are very well paid on average they earn 20 to 30 more than web developers as a blockchain developer you could totally earn 100 000 a year and you could also get a remote job way more easily than if you were a web developer so that's why i created a free training on how to become a blockchain developer and it's all based on my own experience when i find my first blockchain job fit 100k a year and remote so you will learn things that are based on my own experience this is not just something that i just copy pasted from who nowhere on the internet and you'll find a link to this training in the description below i'll see you there [Music] you
Up Next
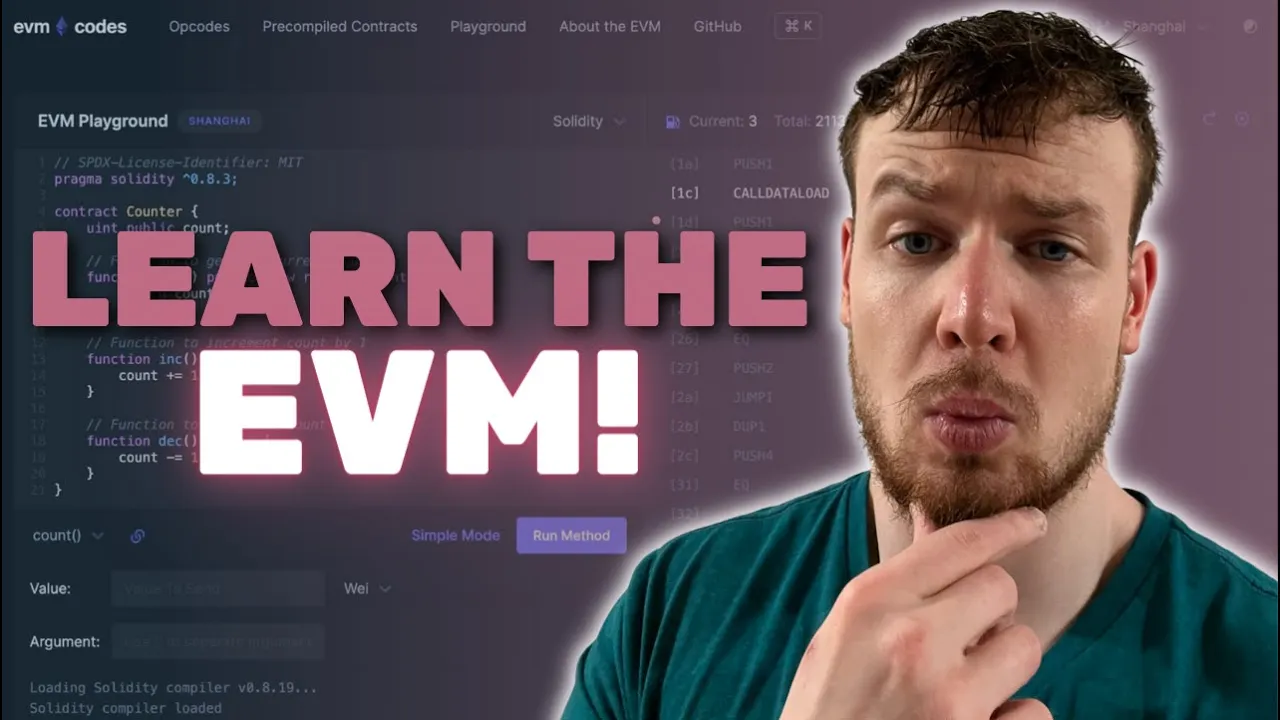
35:16
Understanding the Ethereum Virtual Machine: A Technical Guide
@0xOwenThurm
10.1K views•2023-06-15

52:00
Hybrid Key Establishment in Production: Post-Quantum Cryptography
@durumcrustulum
14.7K views•2025-08-27
21:22
Solidity Timelock Contract Tutorial: Delaying Transactions Securely
@EatTheBlocks
6.7K views•2022-08-02

11:49
Understanding Ethereum: A Comprehensive Beginner's Overview
@99Bitcoins
3.1M views•2018-06-26
Related Study Plans & Knowledge Roadmaps
Structured learning paths in Blockchain & Crypto
blockchain-and-crypto
MPC Wallets: TSS, DKG & Secure Custody
01Foundations of Cryptography & Digital Signatures
02Secret Sharing & Introduction to MPC
03Distributed Key Generation (DKG)
+ 2 more learning modules
24h5 modules
Explore Roadmap
blockchain-and-crypto
ERC-4626: Yield Aggregators & Leverage
01Blockchain, Ethereum, and Solidity Foundations
02DeFi Primitives: Lending, Pools, and Yield Farming
03Mastering the ERC-4626 Tokenized Vault Standard
+ 3 more learning modules
35h6 modules
Explore Roadmap
blockchain-and-crypto
DePIN: IoT Registries, Proofs & Rewards
01Foundations of Blockchain & IoT
02Introduction to DePIN and the Flywheel Effect
03Designing IoT Device Registries & Secure Identity
+ 3 more learning modules
30h6 modules
Explore Roadmap
blockchain-and-crypto
Building EigenLayer AVS: Operators & Contracts
01Blockchain, Ethereum, and Smart Contract Basics
02Proof of Stake and Ethereum Staking
03Introduction to EigenLayer and Restaking
+ 3 more learning modules
24h6 modules
Explore Roadmap