![[Python] أساسيات البرمجة باستخدام لغة بايثون](https://i.ytimg.com/vi/sBh4vNcIPkQ/maxresdefault.jpg)






![Популярные сетевые протоколы и форматы обмена данными [GeekBrains]](https://i.ytimg.com/vi/-hNqCJCw6Og/hqdefault.jpg)


![[2020 Spring - Computer Networks] Lab 1](https://i.ytimg.com/vi/ws2uptjZwmA/hqdefault.jpg)









![[DevOps + AI] 카프카, 대규모 클러스터 운영 후기 / if(kakao)dev2022](https://i.ytimg.com/vi/SuHtHQkRV7g/maxresdefault.jpg)

Apache Kafka is a distributed event streaming platform that enables decoupled communication between microservices by acting as a persistent message broker; it uses a publish-subscribe model where producers send events to topics and consumers subscribe to those topics to process events asynchronously, with key features including persistent message storage (unlike traditional message brokers), horizontal scalability through partitioning and consumer groups, and the ability to handle massive data volumes for real-time analytics and event-driven architectures.
Apache Kafka Tutorial: Python & Docker Hands-On Project
Added:Basic Python programming, including writing scripts, handling exceptions, and managing external dependencies.
Fundamental containerization concepts, specifically how Docker containers run and how Docker Compose orchestrates multi-container applications.
The concept of asynchronous messaging and the Publish-Subscribe (Pub/Sub) architectural pattern.
Core networking concepts, such as localhost, ports, and how independent services communicate over a network.
Kafka clustering and scaling, including understanding partitions, replication factors, and consumer group rebalancing.
Schema Registry integration (e.g., Avro or Protobuf) to enforce data contracts between producers and consumers.
Stream processing frameworks, such as Kafka Streams, ksqlDB, or Apache Flink, for real-time data transformation.
Production-level Kafka operations, including security configurations (SSL/SASL), monitoring with Prometheus/Grafana, and data retention policies.
156.7K views4.4Klikes1:07:58Original Release: 2025-09-29
In this video, we are diving into Kafka.
First by understanding conceptually what Kafka is and why it was developed to solve what problems exactly and then get hands-on with a simple but realistic demo project where we will build a Python application that uses Kafka for a simple use case. It will be a step-by-step guide to make sure you can follow smoothly and understand every step clearly. And of course, you'll find the code repository and other relevant links in the video description. Now, first let's understand quickly why Kafka was even created using real life examples that will make everything click for you. Imagine we're building an e-commerce application called stream store with microservices handling payments, orders, inventory, and so on.
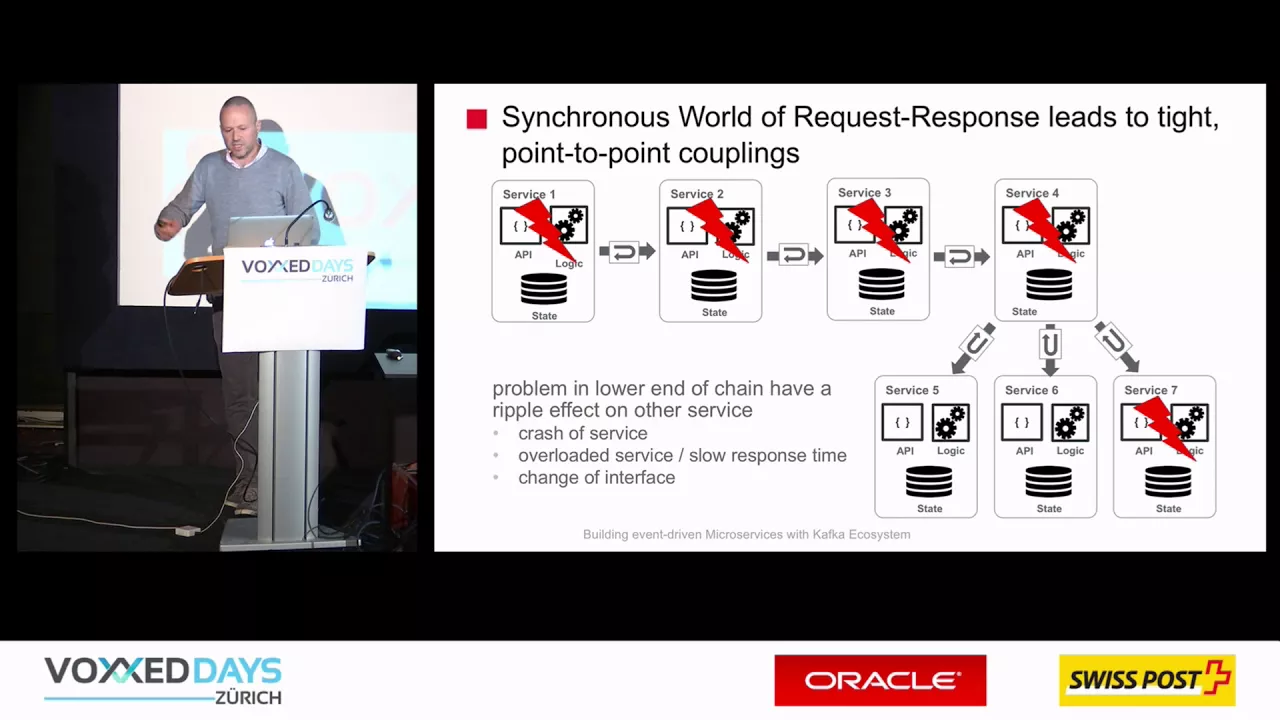
And every time a customer places an order on our online store, like they bought a t-shirt or a bracelet or whatever, that event triggers a chain reaction like t-shirt stock needs to be updated now because we just sold one. A confirmation email is sent to the customer. Invoice is generated and our sales dashboard gets updated with a new revenue number. But we are a small startup. So we begin with a simple architecture where microservices for orders, payment, invoice and so on just directly call each other. And this works fine until our online store becomes really popular. Plus, we announced Black Friday sales and suddenly with thousands of users placing orders and checking out all at the same time, our application crashes under load. Here's what's happening. We have tight coupling between the microservices. So that means if payment service crashes, the entire order process freezes because it depends on the payment service to respond. The services have synchronous communication which means when order service sends a request to a payment service it then waits for it to reply and if it doesn't reply or is slow in reply because it's overwhelmed and overloaded it just waits and hangs there and the front-end service that called the order service is now waiting for order service to respond. So one slow service slows the entire application down and if one service fails it causes disruption in the whole application. Plus in that time of audit we lose all the valuable analytics data. But what if instead we redesigned the system in a way that the orders flowed through our online store like items on a conveyor belt. And this is where Kafka comes in. Think of Kafka as a middleman between these microservices. So instead of services talking to each other directly, they use Kafka as a middleman to communicate. The order service hands an event to Kafka saying, "Hey, an order was just made with these details. Can you just let all the other services know?" And just continues its work without waiting for a reply. So it doesn't wait there to make sure the payment and other services receive that information. It trusts that Kafka as broker will deliver that message. And in Kafka, the services that create these events and handed over to Kafka are called producers. And the events themselves are simple structures with key value pairs. And some metadata about when the event was created, which service created it, and so on, which can later be used for analytics. Now, where do these events get saved? Well, Kafka organizes all the events into topics. So instead of dumping everything in one bucket, they get organized logically. So you may have an orders topic, inventory topic and so on. So you as an engineer decide what topics to create based on your application needs similar to creating a database schema. On the other side, we have consumers. These are microservices that are subscribed to these topics. Which means whenever a new event appears inside a topic that a producer created, the consumers that subscribed to that specific topic get notified by CFKA that there's a new event and these microservices then process that event. For example, as soon as orders topic gets an event that new order was placed, a notification micros service will take that event and send a confirmation email. An inventory service will update product stock and maybe generate new inventory event. A payment service generates invoice and so on. So all these microservices do their work based on that new event. Now, it's important to highlight that Kafka is not a database replacement. Instead, think of Kafka as a tool that enables chain reactions where one event triggers multiple actions, including creating other events or updating the actual database. And it also naturally enables realtime analytics. Think of live sales dashboards or driver location updates in Uber or similar apps. Those are typical use cases for Kafka, especially for applications that produce massive amounts of data life. So with millions of users generating millions of events, how does Kafka maintain performance?
Because Kafka was built to be scalable when we have massive loads of data or events being generated in an application. So how does Kafka achieve that scalable performance? Well, one main component of that is partitions. To understand partitions, imagine having a video production team where one editor edits all the videos, but as you expand, you need to hire more editors because you are producing more videos. And now you can decide to assign one editor specifically to only the short videos and you have one editor for long- form videos and then you have another one for podcast episodes. Same way if you have an orders topic you can actually create partitions within for EU orders or US orders or Africa orders and so on. And you will have one consumer handle the EU orders, another process US orders and so on. So they all get processed in parllet. And now let's say US orders are suddenly 100x more than the other two.
You can keep the performance by adding more consumers for that partition. Same way as if you had suddenly 100 times more short videos to edit, you would just add another editor for short videos specifically. So you have a team of four people doing just the shorts and these are called consumer groups. So when you start multiple instances of a payment micros service for example they will form a group to process all US orders for example and CFKA will distribute that load automatically among them. And finally the data itself those events is stored on CFKA servers called brokers that persist every event as long as it's needed. And this is actually what makes Kafka different from standard message brokers. This means with Kafka events or messages do not disappear once it was consumed by the consumers. They persist on disk. So it can be read multiple times. It can be read by multiple different consumers and it can be used later for analytics. Whereas traditional message brokers are like TV programs. If you miss something, it's gone. You can't replay it. Now, this was a very condensed explanation of Kafka to prepare you for the demo. But I do have a longer, more detailed explainer video on Kafka, which is around 18 minutes, which you can watch right here if you're someone who doesn't want to miss any details. And then you can come back and continue with this video. Now that you understand what Kafka is and how it enables modern microservices applications that need to process lots of data and need to scale for millions of users, let's bring it to life with a hands-on demo that shows exactly how these concepts work in practice. Because you may understand something conceptually, but having experienced it once practically, hands-on, even with a simple example, makes a huge difference.
So to make it realistic and add some context to it, we're going to simulate a simple food delivery back end. The kind of system that would power applications like Uber Eats or Door Dash etc. In our demo, first we will start Kafka instance locally as a Docker container. Then we will use Python to build a small application with two parts. We're going to have a producer that simulates a customer placing a food order. It will send that order as a JSON message to a Kafka topic called new orders. And we're going to have a simple consumer that subscribes to that topic and prints out any new orders it receives representing a backend service like an order processor or inventory tracker.
Basically, a service that processes the new order event. And we're going to be using PyCharm IDE to write our Python programs for producer and consumer and run all the programs including the Python applications and Kafka everything from a central convenient interface to make it super easy for you to follow. So this is going to be a minimal but very realistic example of how CFKA producers and consumers interact with CFKA in a real world architecture. So let's get started. So first we're going to create our Python project and for that we are actually going to download PyCharm which is an IDE for Python applications.
You can just type PyCharm download from Jet Brains.
Just choose the one for your operating system and there you go.
install PyCharm in our applications. And here we have it. Before we move on, I want to give a huge shout out to the sponsor of this crash course that basically made this video possible for you. PyCharm is the only Python IDE you need, no matter what kind of project you're working on. It comes with out of the box support for Python databases, Jupiter, PyTorch, TensorFlow, Hugging Face, if you're working with data science or AI, Django, Flask, Git, and more. It also has a built-in context aware AI assistant and smart coding agent called Juny, which literally helps you move faster from idea to implementation. So whether you're building web applications, data pipelines, whether you're working on machine learning modules or full AI systems, PyCharm can handle all of it.
So you can download PyCharm to not only follow along this demo, but to also use it for all your projects. And the best thing about it is that it's free forever. And if you use the link that we provide in the video description, you will actually get one month of pro version included. So you can even test out the pro features for free. So use the link or you can directly scan this QR code here. And let's move on. So let's open the ID. And this is our fresh installation view. And we're going to create a new project. And this is going to be a Python project. And let's call this stream store. That's the name for our imaginary application that we're building. We're going to use the defaults. So PyCharm actually gives you built-in Python virtual environment for your project. And you can choose the latest Python version. If you don't have it locally yet, you can just select it here and PyCharm will automatically download it in the background. And that's it. We are good to go. Create our project.
Great. So this is our empty project. Let me zoom in a little bit and let's get started. So the first step in our demo is going to be to basically just start Kafka locally on our machine so that our application can connect to Kafka by sending in events as well as consuming those events that Kafka stores. And we're going to start Kafka as a Docker container with Docker Compose. So going back, I'm going to look up Kafka image on DockerHub.
So this one is from Confluent official image for Kafka.
And we're actually going to use the latest tag 7.8. 8 three. So that's the image we're going to use. And this is a version of Kafka that uses the built-in K raft. So in my other CFKA explainer video, I actually explained that in the older versions, Kafka was dependent on Zookeeper, which is an open-source project, an external project that was used to manage and orchestrate Kafka brokers. In newer versions, Kafka has this functionality built in with a feature called K raft.
So that's what we're going to get with the latest image. So in our project, we're going to create a new file for Docker Compose and we're going to define how to run Kafka in there. So let's call it Docker Compose.
And I'm going to paste in the basic configuration. This is the version for Docker Compose and this is the Kafka container configuration. So, so we're starting Kafka container on this port.
We're going to call it CFKA and this is the image with this tag.
And we also need to provide a few environment variables to our Kafka service for it to run properly.
And we get this autocomp completion in PyCharm as well for different configuration languages and programming languages which is pretty convenient.
And let's go through each environment variable one by one and explain what it is. So first of all we're going to set CFKA K raft mode to true. As I explained, Kraft is basically CFKA's built-in system that allows CFKA to manage its own metadata and the Kafka cluster coordination internally and so on. So, kind of do the operations work of the Kafka brokers and so on. And as I said in earlier versions, Kafka used this open-source project called Zookeeper, which meant that you would need to install and configure that in addition to Kafka. providing versions starting from three. Actually that dependency on this external tool was removed and replaced by building that feature into Kafka itself which is simpler and a preferred way of deploying Kafka for modern setups actually. So K raft is basically new part of Kafka that lets it manage and operate itself.
Great. The next thing we need to do or we need to configure is set the cluster ID. And I've just created this random string. So it's not an integer. It's basically a random um arbitrary ID and Kafka node ID which is an integer. We're going to set it to one. So what are these two values and what do they actually do in the configuration? So, Kafka is designed to run as a cluster made up of multiple nodes and these nodes are called Kafka brokers. You remember I mentioned that brokers store and manage the data those events that are created and consumed organizing them into topics and partitions under the topics. And these brokers handle requests from producers that are sending the data and consumers which receive the data or which read the data from Kafka.
And in a production environment, you will have a Kafka cluster with multiple brokers that work together instead of just one broker because you want to have fault tolerance and scalability and not just be dependent on one node, right?
because if that crashes then you don't have the service anymore. So CFKA in production mode will be deployed as a cluster and that cluster has an ID that basically all those brokers underneath share and one of those brokers is going to have a role of what's called a controller. The controller is basically responsible for managing the cluster's state. So that's kind of the the big boss, the manager of everything. It tracks which broker is the leader for each partition. Reassigning partitions in case of broker failures and basically handling all the cluster administration tasks and at any given time only one broker is an active controller. So if that broker crashes another broker will take over as an active controller. Now in our case for simplicity we are deploying or one broker CFKA cluster. So we're going to have just one broker which will also act as a controller. So the cluster ID is for Kafka cluster and the node ID is for that one broker that we are deploying and its ID is integer.
So we're going to assign it one. Then we have another configuration that's called Kafka process roles. So let's explain that one as well. This configuration tells Kafka that this node that we're defining here will act both as a broker and controller. As a broker, it will store and serve the data. As a controller, it will manage the cluster coordination. And in KF mode, a node can play either or both roles. So, we're setting this here as well. Then we have an environment variable called CFKA controller quorum voters. So what is that? This basically defines or which brokers our controllers and can vote on important cluster decisions. And in our case we only have one controller which is node one which is running or accessible at Kafka port 9093.
And if we had more brokers who had controller role, you would basically list them all here, right? So you would have two ID of the second broker accessible at this address. Now, as I said, you only have one active controller at any time.
So just one of them will be the active controller. However, for redundancy and fall tolerance, we can define a group of controllers. So you still have one active controller or the leader of the group that is managing the cluster and the rest are kind of like backup controllers that participate in consensus as passive voters and are ready to become the leader if the active controller fails or crashes basically. The next one we have is called Cafka offsets topic replication factor and this is actually very important and a required attribute otherwise our application will not work.
So what this means is when we set the replication factor to one, which is what we're going to do, this means that there is only one copy of the Kafka metadata that keeps track of which messages each consumer has read. If our Kafka goes down, the tracking data again, meaning Kafka knows and tracks which consumers have read which events from which topic.
So that's the metadata that it kind of keeps as a journal and setting it to one means that there is no backup for that metadata. So if Kafka crashes the metadata is lost basically. So in simple words replication factor one means no backup just one copy. And in production environment of course to make sure data is not lost you would set this number higher so that the metadata is actually replicated in Kafka and it's stored in multiple locations. So if we don't do not explicitly set it to one by default it's actually three. That's the default value um for a cluster of three nodes.
But since we are running just one node we're going to need to set it at one as well to override the default otherwise it's going to give us some problems while using CFKA. We have four more environment variables to configure. So let's add them one by one. Next one is CFKA listeners. So this tells Kafka to open two doors. One for regular data traffic on port 1992 where Kafka is accessible. So that's going to be plain text protocol. This is where producers and consumers connect to Kafka, right?
Write the data, read the data. So that's one endpoint where Kafka listens or is accessible for producers and consumers.
And then we have another one like a special endpoint or door for controller communication on port 9093, right?
That's where the brokers communicate with each other. So that's node to node management configuration, right? Which they use to do the administrative stuff and so on. So one door for clients and one for controllers. Then we have another variable called Kafka advertised listeners which then tells the clients they're supposed to talk to Kafka explicitly saying hey guys this is the address where you can talk to me and in our case this is going to be localhost because we're going to run it locally on port 9092. So this is advertised or basically what CFKA explicitly tells clients to connect at this endpoint. And then we have the same thing for controllers that again tells controllers explicitly use and this is the shortcut for the URL use the controller door with this URL for all controller to controller talking and voting. So this makes CFKA controllers use this special controller door just for their own management communication. And finally, the last configuration we're going to set is CFKA log directory, which tells Kafka where to store all of its data files like broker logs, controller metadata, and so on our computer's disk, right, where the Kafka is running. So in our case, we're going to let it store in this folder. So that's where all the data is going to be, which is in Kafka running environment, which is container uh the Docker container. And talking about data that Kafka generates and stores, we also want to persist the data locally on the computer, right? So whenever we run docker containers they have this virtual docker file system where everything gets stored and if the container is removed if we create a new container all the data is gone. So if we want persistence we need to configure volumes which is just docker concept. So we're going to create a volume here. We're going to call it cafka k raft or cfka data. We can call it whatever. And then we're gonna configure here at the same level as environment volume or volumes.
And so this is going to be volume on our computer and that will be bound to where Kafka actually stores all the data. So this is the path inside the container where Kafka service actually will store data by default. So you can actually look up this path inside the container um in the documentation and then we are basically replicating or saving that persisting that on our local computer with this volume and that's it.
That's our CFKA configuration for local environment.
And once ready we can actually start Docker service first of all. So make sure you have Docker running.
There you go.
Docker is up and running. And what we can do actually is go to services or directly here. As you see in PyCharm, you have this um triangular icons which let you start services. So if I click here, it will execute docker compose up command in background as you see and it will start all the services defined here. We just have one service. So, it's going to start that one. So, just click here. Or you can also right click and start with the run docker compose, which is basically the same as going to the terminal and executing docker compose up, right?
But we can do it directly from here. And as you see, container cafka started and it's running in the background.
And if I do docker ps, we should see our Kafka container running. Perfect.
Awesome. Now that we have Kafka up and running, we can actually write our first producer that will generate an event. So we are simulating a food delivery application. So our producer will basically be an order service that will create an event every time a food order is placed on our website and send that event to CFKA for any consumers in the back end to process that event. So that's going to be a Python program and let's call it let's call it producer.py which is a technical name. You can also give it or like a logical name like new orders. And the first thing we need to do is to install a Python library for Kafka connection. So for our Python application to communicate with Kafka, we need a Python library for Kafka that basically has the functions and interface to make those requests. And that library is called Confluent Cafka because that's the service we're using.
And we can actually install it directly here in our virtual isolated Python environment as you see right here. And let's do PEP3 which is Python's package manager. Install Confluent Cafka. That's the name of the library. Let's execute. And there you go. Successfully installed. The newest version successfully installed.
And you can actually see it in your projects external libraries.
So site packages. There you go. We have Confluent CFKA. So we can validate that it was actually installed and we have it available now to use in our project. And the first thing we're going to do is basically just import the producer from the library that we can use to produce events. So from Confluent Kafka, which is the library name, we're going to import producer. And as you see, PyCharm is trying to guess and help us with the import, which is again convenient. And there you go. And now we can use that producer. And again, we're having the auto suggestion here. If you click on tab key actually you can take over the suggestion which I'm going to do now and that's the configuration we're using. So basically we're creating new Kafka producer configuration and we're telling it where Kafka is accessible. Remember this advertised listeners for the clients localhost 19 1992. So that's where the producer or Kafka client can talk to the Kafka server. So we're configuring it here in the code. And this is the value for bootstrap.servers.
Bootstrap term basically refers to Kafka using this address. This one here to discover all the brokers in the cluster.
So all the Kafka nodes or servers will be accessible at this address. It's not the most intuitive name, but that's how it's called. So, with this configuration, we're simply telling producer, if you want to send the events that you produced to Kafka, this is where you can send it to. And we're saving that producer instance that we're creating here in a variable. Let's actually call it producer with lowercase. And we can use that variable now to send the events. As an alternative, maybe just a personal preference, we can save this separately as um we can call this producer config.
And again, let's autocomplete and we are creating producer with this config. So later if you want to extend this configuration, add more details, then you can do it directly here.
Awesome. As a next step, let's actually create and prepare an event that we're going to send to Kafka as a producer, which is going to be a very simple JSON structure. Let's call it order and take over some of the suggestion from PyCharm.
So, we have order ID and let's create a unique ID um using uyu ID library or function.
That works. And we need a string here.
So, we can just turn it into a string. And this is um a Python library, a built-in library. It says unresolved reference. So, just click on import. And we're going to see it right here. There you go. So, this basically generates just a random unique identifier. We are turning it into a string because we need a string version of that and setting it as order ID.
Let's say for each order we also have the user. So I can log to this account and order stuff on there. And that's my username. Then let's say we also have um an item basically what I ordered. Let's say that was a mushroom pizza.
And finally, we have the quantity.
Let's say I ordered two share.
And that's our order data. And that's how events look like. We have simple key value pairs list that carry some information about that event. So this is the actual data we're going to send to Kafka or to consumers actually in the back end through Kafka. But first, this is a JSON object and we actually need to convert JSON to CFKA compatible format which is bytes. Again, with built-in functions and libraries, super easy to do. First, we convert this dictionary data type or object data type to a JSON string. So, it's going to be JSON dumps.
That's the function name. So we're taking the order and with JSON dumps function we're converting this whole thing this dictionary into a string representation and then we are encoding it into um yeah UTF8. So this will basically turn the order dictionary into a string and this will then encode that string into byte format which Kafka actually understands or can receive and handle and we can save that final result into a variable. And there you go. And again this is a library that we need to import. So there you go.
Great. So now we have the event which is ready to be sent to Kafka and that means let's send it and again we have the autocomplete. I'm actually going to write this out so that you can follow.
So this is our producer which already holds the connection to Kafka through this configuration and we're going to say produce.
We're going to say produce. So please produce an event topic and value and actually autocomplete this. So what this does it sends the value that we have defined here of this event and it sends to cafka and says it please save it or add this into topic called orders. Now if this topic does not exist yet because we haven't created any topic in Kafka yet, right? Kafka will actually automatically create a new topic and save this value there. So this does two things in one, creates the orders and then puts this new order event there.
And the next time it sends another event, the orders topic will already be there. So it will just be appended or edit in the topic. So pretty straightforward actually. And the final step that PyCharm keeps recommending to us is producer.flush which is actually a best practice to make sure our program runs cleanly. So what this means is that CFKA producer actually buffers messages for performance. So instead of sending each message and each event one by one, let's say our application is getting hundreds and thousands of orders u every hour.
Instead of sending each event one by one, it collects 10 events or or a group of them and then sends them in batch.
And that means if the program crashes or stops at some point, the flush will make sure that all these buffered events that haven't been sent yet get sent before exiting the program. So it kind of forces or flushes those events to CFKA which is very important because otherwise those events will actually be lost and will never lend to Kafka. So the consumers will miss those events.
That's an important addition here and definitely something that you need to implement in production environment. So always call this before the script ends.
And talking about handling things when things go wrong and application crashes.
As a final step, let's actually add a call back that will track whether our message was delivered successfully or not. Again, when our application sends the events to Kafka, many things can happen on the way. Maybe Kafka crashes, maybe the application crashes, maybe some connection and network error in the in the middle. So, we can add an explicit functionality that tracks whether our message was actually delivered to Kafka or not. And if it wasn't, if there was an error, it logs the error. So it makes the troubleshooting just easier. So what we're going to do and the way we do it is right here where we have producer and we have topic to which we're sending the value itself. We can add a call back here and again it is suggesting callback and we can create a function that that is executed as a callback and let's call this function delivery report because that's what it's going to be and let's create this function. So right before orders let's create a Python function which is going to have so this is a callback. So, it's going to get an error message, which is going to be empty if everything was successful, and the message. And again, going to type it out. And we're going to say if there was an error, we want to see what that error was.
And we're going to print out delivery.
Yeah, let's actually autocomplete this one. Delivery report error or delivery failed. Let's select this. and print out the error message so that we know what actually happened and if not so if there is no error it means that it was successful and in this case we can print out let's do green check and again let's autocomplete and I'm going to say delivered And we're getting bytes back again. So let's extract the value.
Let's convert it back to the string. So that's going to be displayed which is going to be the order that we sent.
Awesome. So that is actually the full producer code that is sending this order to Cfka and then it is printing out whether it was successful or not. So now since CFKA is already up and running, we can actually run this producer pi and see what happens. So if you rightclick here, let's do run producer.
And we have the output here. Let's close the services actually. And there you go.
It says delivered. And this is the value that is printing out which is the event that we sent. And let's do one more thing. Let's say you want to know exactly what is in that message because right now I'm reading the value and then decoding it. But let's say just you know for troubleshooting purposes you want to inspect yourself what is um inside. So we can actually troubleshoot that or log that by printing out this message and all its fields by using dear or directory uh function. So let's run this again. And as you see, this is the actual directory or all the fields that this message um directory actually has, including the partition and offset, which topic this message was actually uh written to or which topic it's coming from, the value which we're accessing right here, timestamp, um and so on.
And here's what's also interesting.
Another way to troubleshoot or debug.
Let's say we have some issues here.
Again, you just want to inspect what's happening. If I add a break point here and let's run this in debug mode instead of run mode.
So right here we have the message error is none. So there's no error basically and the message is not visible. What you can actually do is you can evaluate the expression directly here.
We can call this dear message function on this line and if I execute I'm going to see the result and again that's the value topic and so on.
So that's actually a pretty interesting way to do the troubleshooting by evaluating any variables directly here.
And since we now know which other keys or information we have in this directory, we can actually let this run.
we can add another line that tells um some additional information about which partition or topic the message was delivered into and so on. So let's say uh delivered to message dot topic.
So that was a function actually and partition. There you go at offset message.offset.
And now let's run this again.
Let's see what we get. There you go.
fever to orders topic partition zero because we haven't defined any partitions inside at offset three because this is the third event or message that we're sending so that's the offset if we do it again there you go and what we also can do and I'm actually explaining this and showing these parts explicitly because obviously when you're programming when are writing an application, you're doing a demo, more than 50% of the time things go wrong. So you need to troubleshoot and check what went wrong, which is an essential skill.
And that's why I'm showing you all this troubleshooting site as well. And one important way to troubleshoot is basically check let's say you are sending these um events but they're not being saved into topic. So how can we check directly with Kafka if the topic was created and what events are inside and we can actually check that um well since our CFKA is running in docker container we're going to first get the integrated uh interactive terminal of cfka and the name of the container is cafka.
So now we are inside the cafka container we can execute this cafka command. So what comes now starting from here is going to be the cafka commands that you can execute against a running uh cafka instance. So cafka topics and so this is kafka cla list. So we're going to list all the topics that Kafka has.
Bootstrap server, which is what we saw here in the configuration, localhost 9092. That's where Kafka is running inside the container, right? And if I execute this, you see list of all the topics that Kafka is keeping track of.
We just have one which we created with the first message that we sent right here.
And you can also check the events that are in a specific topic. So instead of listing the events again, we're defining for Kafka CLI where to connect to the Kafka server and then we're going to say describe.
So give us details about topic called orders. So this describes the the metadata of the orders topic. So it basically gives you the topic ID um how many partitions it has. We just have one the replication factor which we defined in the configuration in docker compose and so on. And again if you want to see what other options are available.
So this is Kafka CLI.
You can check the official documentation or directly here in the CLI. We can also do help and you will see all the available subcomands and you can see different cafka commands including cafka topics and so on. We have Kafka console consumer. So let's see what subcomands are available here. And this can basically give us I'm going clear this a little bit. This can give us a list of all the events in a specific topic. So topic orders and we have this flag from beginning. So it starts from the first event.
Let's execute.
And there you go. So we have one, two, three, four, five events. Actually, we're sending the same stuff. So those are the events inside the orders topic.
Again, all these commands that I'm executing here, including the installation and the Docker exit commands, as well as code, everything will be linked in the video description so you can follow along easily. So, grab it from below.
Awesome. So, we have generated uh a bunch of events which are stored in Kafka. Now it's time to write a program that actually reads those events and processes them as a Kafka consumer. So let's do that as our final step. So now let's write a Python consumer program that listens to any events being added to the orders topic in Kafka.
And every time a new event gets added there, it prints out these incoming messages. So it basically reads them out from the topic. So again, it connects to CFKA at the advertised endpoint where CFKA is accepting calls from producers and consumers. It reads out that new event from the orders and it does something with it. In our case, we're just going to print it out just to have a simple use case. But of course you can do anything once you have the event in the program. So let's create a new Python file and let's call it we can call it consumer but considering that you may have multiple consumers for the same event. So you can have three different microservices that all listen to the same topic events basically doing different stuff. As I explained before when a new order comes in we generate an invoice with an invoice service. We send email confirmation with a email notification service. Um maybe update sales dashboard whatever right so instead of consumer let's uh let's call this tracker maybe. So this specific microser let's say it just tracks um new events and in the logic we're going to first connect to Kafka broker so that we can subscribe to a topic and then start listening to messages and that topic and once a new message gets in we process them one by one and for consumer there's the same object as for producer in the same confluent CFKA library. So if I do Confluent Cafka, it's going to suggest me to import and consumer.
And the same way as we defined a connection configuration for producer, we're going to do it for consumer as well. So let's call it consumer config to keep it consistent. And here we're going to define first of all the same Bootstrap servers because we're going to need to connect to CFKA. So that's the first part. Then we're going to need a group ID. So what is group ID? Group ID basically identifies a group of consumers that are instances of the same program. So these are not tracker and then inventory and other services but these are multiple replicas of the same tracker application. So let's say for scalability and for high performance we run multiple instances uh which you can easily do with Docker containers in Kubernetes cluster for example you have multiple replicas of the same application and in order for Kafka to know these are actually copies or replicas of the same application that all want to read and process the the events in parallel for better performance. they are all assigned the same group ID so that they logically grouped together for Kafka right and so if we started three instances of the tracker application they will all get this shared group ID so Kafka knows this is the same application just different instances and it will then distribute the load among them automatically so that they can read those events from Kafka in parallel and let's call this border tracker ID. So that's how they're going to be called.
And finally, let's set the auto offset reset to earliest. So what this configuration does is in very simple words the auto offset reset setting tells a Kafka consumer so it tells our consumer what to do if it cannot find where it last left of reading messages. So in our case we have um five events already in the orders topic. So when consumer connects to Kafka and it doesn't see which message it read as the last one, what to do in that case, right? That's the configuration we're setting here. And we're saying with earliest, basically, if you don't know where you left off reading those messages, just start with the earliest. Start with the first one.
So it will start reading from the very beginning of the topic, starting with the oldest one and basically processing each event one by one to the earliest one. And with this configuration we can create a new consumer instance and save it into this variable.
And now so consumer is not sending events it is subscribing to topics in order to read the events. So we're going to execute subscribe function and this is very straightforward. We're just going to say subscribe to the orders topic. And again a one consumer can subscribe to multiple topics. So this is an array or list. So you can basically just list any topics that the same service wants to subscribe to. Simple as that. And let's um add like a debugging line here that says let's find some green emoji.
There you go.
And let's say consumer is running and subscribed to orders topic and again we get autocomp completion. So now we're going to write a logic that basically tells the consumer to check actively continuously whether there is a new event in this order in this topic that it's subscribed to. And we do that by basically running this continuous loop. And inside let's actually use autocomplete and let's explain what this is. So on a continuous loop over and over again, it pulls messages or it basically pings Kafka asking is there a new event in this topic that I'm subscribed to or not. If there is no new event since the last time it read the event, then the message will be none. There is no new event basically. And in that case, we just going to continue. Nothing to do.
If however there is a new event but there was an error in reading out or connecting to Kafka or whatever we also want to handle it and let's again use our very descriptive emojis and let's say error and let's just print out this error.
message whatever that is and continue.
All right. So either there is no message no new event to read from the the orders topic or there is a new event or some kind of message but there is an error.
So in both cases we are handling them.
And in success case, so if there is a new event that consumer hasn't read yet and there's no error in connection, then we have a success case in which scenario we want to read that value from Kafka and do something with it. So let's first of all save it as a value that we just read from the topic.
And as you see, we are decoding it because we're getting the bytes. So we're transforming it into string. And then we can take the string representation of JSON and transform it back to Python dictionary so that we can actually extract the values from it. And we can do that by JSON loads.
So we are basically transforming the string to JSON or Python dictionary actually and let's call this order and let's import JSON.
So we have it available and now we have an actual dictionary representation of the new event that we just read from Kafka. And now you can do whatever you want with that. We're gonna print it out.
And let's again do some let's call it a package or something received order and let's actually extract values from it. So we know the the values what they are. Let's do quantity. And again this is Python dictionary and you just use the syntax for accessing values in a dictionary like this with um square brackets and the name of the key.
So we have um order this many times this item from let's do autocomplete again from this user. So we have the detailed message of what that order was actually. And one more important thing about the poll and how this works in the background. It's important to understand that CFKA is designed so that consumers ask or pull the broker if there are any new messages instead of CFKA pushing the messages to them on its own. So this polling actually lets consumers because the same consumer subscribe to multiple topics.
So this polling allows consumers to control how and when and how many times they read those events and messages from different topics. And this could be great for load balancing for pausing and catching up. So this keeps the protocol simple. It's reliable. It's scalable.
And it lets the consumers basically control the speed and duration and frequency of when they consume which events. They can replay events, reread them, and so on. So that means subscribing to topics actually just means that consumer is telling Kafka I want to read from this specific topic but the consumer must still pull to actually retrieve new events from that topic rather than Kafka pushing the messages to our code automatically. So that's just one detail which is important to understand. And now let's do one more thing here actually. So producer program runs, sends the order event and exits, right?
This doesn't run in the background. It does its work and it exits. The tracker is still running as you see. We can stop it, rerun it. It's basically running and listening to the events because we have this while loop which is running continuously. So, what I'm going to do is I'm going to change the order here, simulating that someone else. Let's say Nicole ordered chicken burger.
You know what? Let's do something a little bit more healthy.
Maybe chicken bowl.
Yeah. And also note here we have tracker running. And in producer, I'm going to do run producer. There you go.
A new event was added. And if I move back to the tracker, you see that it immediately pulled and got the new event of the new order. There you go. So, every time a new order comes in, the tracker is basically pulling to see is there a new event? And once there is it reads it out and does something with it.
So now there is a one final thing that we are going to optimize in our code. So let's observe now. So tracker let's stop the tracker.
And as you see when we stop the application we have this it's it's more like a warning or or like a message about ungraceful or or not clean termination of a program. So what we're going to do is again this is important especially for production environments.
We're going to add a logic to gracefully shut down our consumer uh CFKA consumer application. So in case it crashes or it gets uh restarted or stopped whatever to make sure that everything gets cleaned up just like we did with producer right so we have this uh flush to make sure the producer doesn't hold any events that it hasn't sent yet to Kafka the same way we're going to make sure that when when the consumer application stops or crashes everything gets cleaned up so to say the connection which is you know open and pulling from Kafka is shut down gracefully Y the application stops gracefully and we don't have this keyboard interrupt trace. Um this is actually um a Python issue. So Python raises this special error called keyboard interrupt whenever we manually stop script and this exit code and this message here basically just mean that program was ended by you not by an error in the code itself. So it was manually ended. But more importantly in addition to that we also want to make sure that when the program ends when the consumer program ends whether manually stopped or program crashed or whatever the consumer connection to CFKA is always cleanly closed because if program crashes while consumer connection is still open while it's polling for new events it can lead to things like resource leaks or issues on the server and so on. So in real production environment closing consumer connection when program stops for any reason it's kind of a must. So we're going to cover that here as well. So combining all this graceful shutdown here and closing connection we're going to add a optimization here. So, we're going to do we're going to wrap this around with a try catch block. So we're going to run this in try and or try except in Python and if there is an exception such as keyboard interrupt this is the name of the exception here.
So in this case, we are just going to print we're going to catch that um error so to say and we're just going to print out a statement basically.
Let's again use our emojis. Let's do something red.
Not a broken heart, but maybe this one here.
Yeah, let's do like um stopping consumer something more elegant than this trace here. So that's just going to take care of you know shutting down the application manually and this is an important one we're going to do finally. So whatever happens here right whether it's in the try uh a crash whether it's um an except or maybe some other exception an error that happens other than this one we want to always close the consumer connection.
So this thing that we are initiating here we want to close it whatever happens in this block and that's it that adds that final optimization and again let's run this now and as you see it doesn't print out anything because it has already read all these events in the orders topic there's nothing new so it just waits for new stuff to appear and if I again simulate let's say another user orders 10 let's call it Lara let's say Lara orders uh 10 frozen yogurt something like this and let's run it again and check the tracker again it prints out or reads that event and now if we stop the tracker Let's see what happens. It just says stopping consumer process finished with exit code zero. All fine. Awesome. So now we have a working producer, a cafka broker in the middle and a consumer. So producer broker consumer setup end to end and messages are flowing through CFKA in real time which makes it a very simplistic but also realistic end toend setup for a CFKA application. I really hope you enjoyed this tutorial. I hope you learned a lot and you feel like this hands-on practice actually made a lot of the concepts demystified for you, especially seeing this end to end process from start to finish. If you did get a lot of value from it, then make sure to pay it forward and share it with one colleague or friend who you think might be interested and will benefit from this skill set as well. So, thanks for learning with me and I'll see you in the next
Up Next

17:06
How Social Media Algorithms Manipulate Human Behavior
@ChrisWillx
27.9K views•2021-08-27

87:26
Introduction to Secure Multiparty Computation with Yehuda Lindell
@fhe_org
7.7K views•2021-02-04

4:55
HTTP Requests Explained: GET, POST, PUT, DELETE
@codecademy
103.1K views•2021-10-07

19:25
Enigma Machine Mechanics: WWII Encryption Explained
@JaredOwen
13.2M views•2021-12-11
Related Study Plans & Knowledge Roadmaps
Structured learning paths in Computer Science
computer-science
Container Runtimes: Namespaces, Cgroups & Go
01Linux Systems & Go Programming Foundations
02The Core of Isolation: Chroot and Filesystems
03Linux Namespaces: Process Isolation
+ 3 more learning modules
32h6 modules
Explore Roadmap
computer-science
Building a CHIP-8 Emulator: Rust & CPU Basics
01Computer Architecture Foundations (Bits & Bytes)
02Rust Programming for Systems Development
03CHIP-8 Virtual Hardware Specifications
+ 2 more learning modules
32h5 modules
Explore Roadmap
computer-science
Building BitTorrent: Go, P2P & Concurrency
01Go Fundamentals & Concurrency
02Networking Foundations & P2P Architecture
03Bencode Parsing & Torrent Metadata
+ 3 more learning modules
26h6 modules
Explore Roadmap
computer-science
Actor Models (C++ Concurrency & Lock-Free)
01C++ Multi-Threading Foundations
02Thread Pools and Task Scheduling
03Atomics and Lock-Free Queue Design
+ 3 more learning modules
45h6 modules
Explore Roadmap