Building OAuth 2.0: Node.js OIDC Server
Learning Goal: Design, architect, and implement a production-grade OAuth 2.0 and OpenID Connect (OIDC) authorization server from scratch using Node.js, Express, and native cryptographic modules. You will transition from web foundations and cryptographic theory to implementing highly secure, standards-compliant authentication and authorization endpoints.
- Prerequisites: Solid familiarity with JavaScript (ES6+), basic understanding of Node.js and REST APIs, and foundational database knowledge (relational or document-based).
- Estimated Total Study Time: 25 Hours
Module 1: Web & Security Foundations
This module sets the technical baseline. Before writing security specifications, you must master the fundamental mechanics of the stateless HTTP protocol, the Express.js framework, and basic cryptography—specifically the conceptual and practical differences between symmetric and asymmetric algorithms.
Recommended Videos

- Why this video: Understand the fundamental architecture of the Web. This video provides a conceptual breakdown of the stateless HTTP request-response cycle, outlining how clients communicate commands and servers return resource payloads.

- Why this video: Express.js will serve as the core routing framework for our custom identity provider. This crash course details route handling, middleware integration, and request/response manipulation, preparing you to write custom HTTP endpoint actions.

- Why this video: Standard OAuth 2.0 and OIDC servers rely heavily on asymmetric cryptography. This explanation contrasts symmetric mechanisms (shared key) with asymmetric systems (public/private keypairs), which are critical for signing tokens that external clients can verify without having access to your private signing keys.
- Why this video: A deeper look at cryptographic programming using Node's native
cryptomodule. This talk demonstrates how to leverage built-in OpenSSL capabilities to generate keys, create hashes, and perform secure cryptographic operations on the server side without relying on bloated, insecure third-party libraries.
Knowledge Checkpoint
- Can you trace the execution flow of a custom Express.js middleware function?
- Why is asymmetric encryption preferred over symmetric encryption for signing authorization tokens?
- How does the stateless nature of HTTP influence how we maintain session history?
- What is the role of Node's built-in
cryptomodule in secure server-side key generation?
Module 2: Authentication vs. Authorization & JWTs
In this module, you will learn to separate the concept of who a user is (authentication) from what they are allowed to do (authorization). You will explore the operational failures of server-side sessions at scale and master JSON Web Tokens (JWT) as a stateless, securely signed vehicle for conveying authorization data.
Recommended Videos
- Why this video: Understand the limits of stateful, session-based storage. This video highlights why memory-bound cookie/session authentication struggles during horizontal scaling, paving the way for stateless token-based authorization.

- Why this video: An entry-level breakdown of JSON Web Token anatomy. Learn how the Header, Payload, and Signature are base64url-encoded and packaged together to transmit verifiable claims securely over the wire.
- Why this video: Practical step-by-step guidance on signing and verifying JWTs inside a Node.js backend environment. This tutorial covers access and refresh token flows, manual extraction from the Authorization Header, and handling expiration windows.
Knowledge Checkpoint
- What are the three parts of a JWT, and what role does each play?
- How do you securely verify a JWT payload on a backend without hitting a central database?
- Why does token-based authentication simplify horizontal scaling compared to session-based architectures?
- What is the security risk of storing highly sensitive information in a JWT payload?
Module 3: The OAuth 2.0 Protocol & Grant Types
This module focuses on the OAuth 2.0 framework (RFC 6749) as a delegated authorization specification. You will analyze the four core protocol roles, master the security mechanics of the Authorization Code Flow, and contrast it with alternative workflows like Client Credentials.
Recommended Videos

- Why this video: An absolute must-watch industry standard reference. This comprehensive session clarifies OAuth 2.0 delegation patterns using analogies, breaking down the separation of roles between the Resource Owner, Client, Authorization Server, and Resource Server.
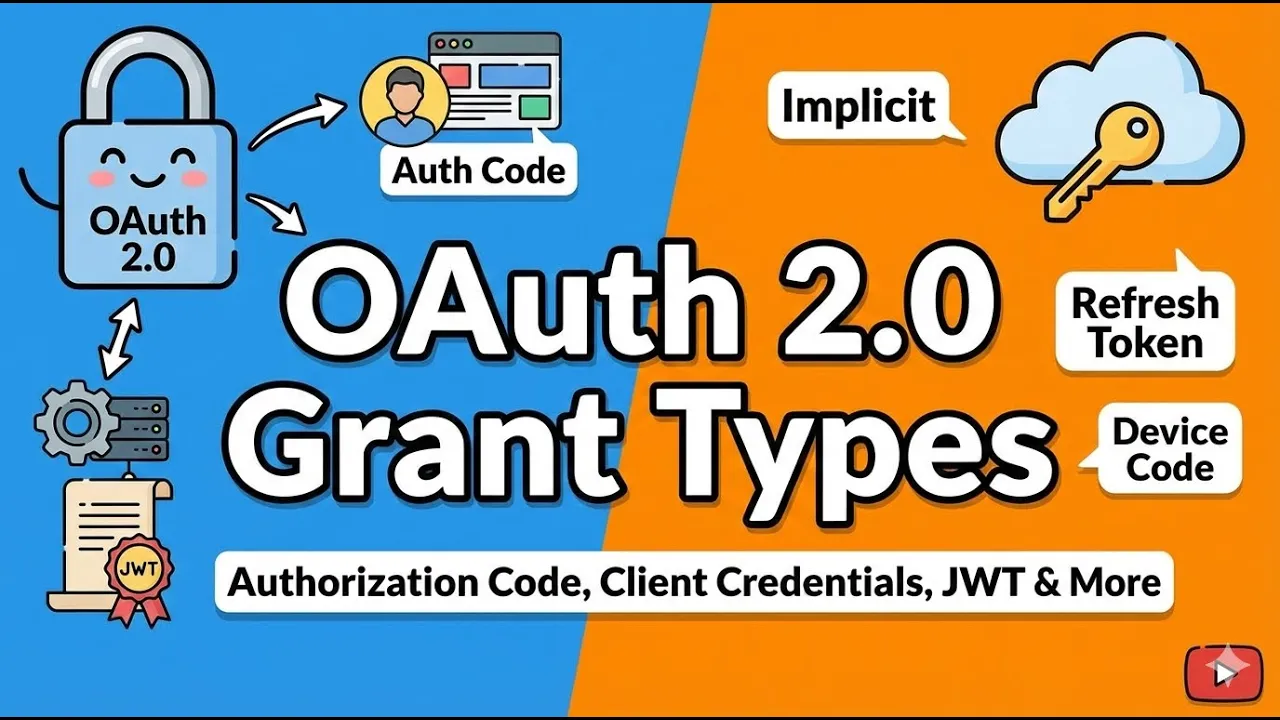
- Why this video: A focused, high-level comparative mapping of core OAuth 2.0 grant paths. Use this to quickly contextualize when to execute an Authorization Code Flow (interactive user client) versus a Client Credentials Flow (machine-to-machine authentication).
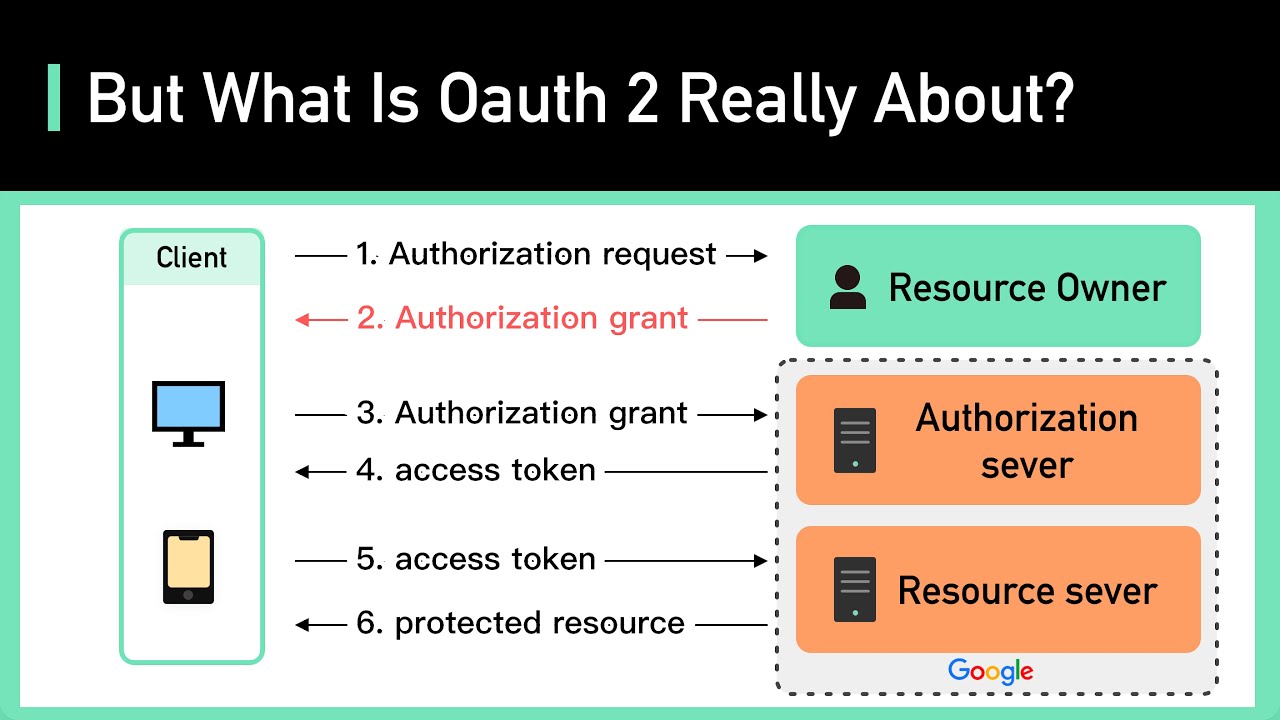
- Why this video: A clear step-by-step visual animation tracing the redirect choreography of the Authorization Code Flow. This outlines how authorization codes are cleanly exchanged for access tokens via back-channel communication.
Knowledge Checkpoint
- Define the exact responsibilities of the four core OAuth roles: Resource Owner, Client Application, Authorization Server, and Resource Server.
- Why does the Authorization Code flow use a temporary authorization code before issuing an access token?
- When would you use the Client Credentials grant instead of the Authorization Code flow?
- What is the functional difference between front-channel and back-channel communication in web protocols?
Module 4: Database Schema & Crypto Setup in Node.js
This module transitions from theory to architecture. You will design a schema optimized for storing client credentials and temporary authorization codes, and you will set up asymmetric key generation to sign tokens using RS256 inside Node.js.
Recommended Videos

- Why this video: This video guides you through manually signing tokens using asymmetric cryptographic keypairs in Node.js. It explains how to sign payloads using an RSA private key with the native
cryptomodule, bypassing automated high-level helper libraries.
- Why this video: While using Java, this session breaks down the relational schema structures required to manage users, roles, and privileges. Use it to understand the conceptual relationships that must be mirrored in your custom database layer.
⚠️ Curriculum Gap Resolution: Custom OAuth 2.0 Database Schema & Cryptographic Signing Blueprints
Note: Existing video courses rarely show how to design custom identity schemas or set up RS256 cryptographic environments manually in Node.js. Use the production-grade reference blueprints below to build these foundational components.
1. Cryptographic Keypair Generation and RS256 Helper
To support asymmetric signing (RS256), you must generate a cryptographically strong RSA private/public keypair. The Private Key is kept secret by your Authorization Server to sign tokens, while the Public Key is distributed globally to verify them.
// keygen.js - Execute once to generate public and private keys const crypto = require('crypto'); const fs = require('fs'); const path = require('path');
function generateKeys() { const { privateKey, publicKey } = crypto.generateKeyPairSync('rsa', { modulusLength: 2048, publicKeyEncoding: { type: 'pkcs1', format: 'pem' }, privateKeyEncoding: { type: 'pkcs1', format: 'pem' } });
fs.writeFileSync(path.join(__dirname, 'private.pem'), privateKey); fs.writeFileSync(path.join(__dirname, 'public.pem'), publicKey); console.log('Successfully generated private.pem and public.pem keys.'); }
generateKeys();
Below is a secure implementation to sign your JWTs using Node's native crypto module:
// tokenSigner.js const crypto = require('crypto'); const fs = require('fs'); const path = require('path');
const PRIVATE_KEY = fs.readFileSync(path.join(__dirname, 'private.pem'), 'utf8');
function base64url(stringOrBuffer) { const buf = Buffer.isBuffer(stringOrBuffer) ? stringOrBuffer : Buffer.from(stringOrBuffer); return buf.toString('base64') .replace(/=/g, '') .replace(/+/g, '-') .replace(///g, '_'); }
function generateRS256Token(payload, extraHeaderClaims = {}) { const header = { alg: 'RS256', typ: 'JWT', ...extraHeaderClaims }; const encodedHeader = base64url(JSON.stringify(header)); const encodedPayload = base64url(JSON.stringify({ ...payload, iat: Math.floor(Date.now() / 1000), exp: Math.floor(Date.now() / 1000) + (60 * 60) // 1 hour expiration }));
const signatureInput = ${encodedHeader}.${encodedPayload};
// Sign signature input using SHA256 with the RSA Private Key const signer = crypto.createSign('RSA-SHA256'); signer.update(signatureInput); signer.end(); const signature = signer.sign(PRIVATE_KEY);
const encodedSignature = base64url(signature);
return ${signatureInput}.${encodedSignature};
}
module.exports = { generateRS256Token };
2. Relational OAuth 2.0 Database Schema Blueprint
Your custom database must track registered applications (clients), valid redirect URIs, active user profiles, and ephemeral authorization codes. Implement this design in your database of choice (e.g., PostgreSQL, SQLite, or MongoDB):
-- OAuth 2.0 Database Schema Design (SQL Reference)
-- 1. Users Table CREATE TABLE users ( id VARCHAR(255) PRIMARY KEY, email VARCHAR(255) UNIQUE NOT NULL, password_hash VARCHAR(255) NOT NULL, created_at TIMESTAMP DEFAULT CURRENT_TIMESTAMP );
-- 2. Registered Clients (Applications requesting resource delegation) CREATE TABLE clients ( client_id VARCHAR(255) PRIMARY KEY, client_secret_hash VARCHAR(255) NOT NULL, -- Never store raw secrets! client_name VARCHAR(100) NOT NULL, redirect_uris TEXT NOT NULL, -- Comma-separated list of permitted callback URLs allowed_grant_types VARCHAR(255) NOT NULL, -- e.g., 'authorization_code,client_credentials' allowed_scopes VARCHAR(255) NOT NULL -- e.g., 'openid profile email' );
-- 3. Ephemeral Authorization Codes (Short-lived, one-time use tokens) CREATE TABLE authorization_codes ( code VARCHAR(255) PRIMARY KEY, client_id VARCHAR(255) NOT NULL, user_id VARCHAR(255) NOT NULL, redirect_uri TEXT NOT NULL, expires_at TIMESTAMP NOT NULL, scope VARCHAR(255), used BOOLEAN DEFAULT FALSE, -- Codes MUST be invalidated immediately upon use FOREIGN KEY (client_id) REFERENCES clients(client_id), FOREIGN KEY (user_id) REFERENCES users(id) );
Knowledge Checkpoint
- How do the RS256 and HS256 algorithms differ from each other?
- Why is it a critical security risk to store raw client secrets in your database?
- Why must authorization codes have a very short lifespan (typically under 10 minutes) and be instantly invalidated after their first use?
- What security exposure is prevented by strict redirect URI matching in your schema?
Module 5: Coding the OAuth 2.0 Authorization Server
In this module, you will build the core endpoints of your OAuth 2.0 authorization server using Express.js: /authorize (handling GET requests for consent, and POST requests for user authentication) and /token (securely exchanging codes for asymmetric JWT access tokens).
Recommended Videos
- Why this video: This video focuses on writing raw HTTP integrations without third-party frameworks like Passport.js. Analyzing these network requests directly will help you design endpoints on your own authorization server.

- Why this video: A conceptual look at the server-side consent flow. This shows how authorization servers prompt users to grant or deny permissions to a requesting client app.
⚠️ Curriculum Gap Resolution: Coding the Endpoints from Scratch in Express.js
Note: YouTube tutorials focus heavily on consuming third-party APIs (like Google Login) rather than writing custom /authorize and /token endpoints. Implement these endpoints using the reference backend routes below.
1. The GET /authorize Route (Client Request & Consent Form)
This endpoint validates the client, scope, redirect URI, and renders a consent screen to the user.
// routes/authorize.js const express = require('express'); const router = express.Router(); const crypto = require('crypto'); const db = require('../db'); // Simulated database layer
router.get('/authorize', async (req, res) => { const { client_id, redirect_uri, response_type, scope, state } = req.query;
// 1. Validate inputs const client = await db.findClientById(client_id); if (!client) { return res.status(400).send('Unauthorized Client ID.'); }
const allowedUris = client.redirect_uris.split(','); if (!allowedUris.includes(redirect_uri)) { return res.status(400).send('Invalid redirect URI configuration.'); }
if (response_type !== 'code') { return res.status(400).send('Unsupported response type. Only "code" is allowed.'); }
// 2. Verify Session (Mock user login check)
if (!req.session.userId) {
// If not authenticated, redirect user to login, carrying redirect parameters along
const loginParams = new URLSearchParams(req.query).toString();
return res.redirect(/login?${loginParams});
}
// 3. Render Custom Client Consent Page
res.send( <html> <body> <h2>Consent Authorization Request</h2> <p>Application <strong>${client.client_name}</strong> is requesting the following scopes: [${scope}]</p> <form method="POST" action="/authorize/consent"> <input type="hidden" name="client_id" value="${client_id}" /> <input type="hidden" name="redirect_uri" value="${redirect_uri}" /> <input type="hidden" name="scope" value="${scope}" /> <input type="hidden" name="state" value="${state || ''}" /> <button type="submit" name="consent" value="allow">Approve Access</button> <button type="submit" name="consent" value="deny">Deny Access</button> </form> </body> </html> );
});
module.exports = router;
2. The POST /authorize/consent Route (Generating the Code)
This handles the user's approval, creates a temporary auth code, and redirects the browser back to the client application.
// routes/consent.js const express = require('express'); const router = express.Router(); const crypto = require('crypto'); const db = require('../db');
router.post('/authorize/consent', async (req, res) => { const { client_id, redirect_uri, scope, state, consent } = req.body; const userId = req.session.userId; // Retrieved from active authenticated session
if (consent !== 'allow') {
const errorUrl = ${redirect_uri}?error=access_denied${state ? &state=${state} : ''};
return res.redirect(errorUrl);
}
// Generate an ephemeral authorization code (hex format, 16 bytes) const authCode = crypto.randomBytes(16).toString('hex'); const expiry = new Date(Date.now() + 5 * 60 * 1000); // Valid for 5 minutes
// Save the code to your database await db.saveAuthCode({ code: authCode, client_id, user_id: userId, redirect_uri, expires_at: expiry, scope, used: false });
// Redirect user back to the client application with the temporary authorization code
const redirectUrl = ${redirect_uri}?code=${authCode}${state ? &state=${state} : ''};
res.redirect(redirectUrl);
});
module.exports = router;
3. The POST /token Route (Exchanging the Code for a JWT)
This handles the back-channel POST request where client credentials and the authorization code are exchanged for an RS256 JWT access token.
// routes/token.js const express = require('express'); const router = express.Router(); const crypto = require('crypto'); const db = require('../db'); const { generateRS256Token } = require('../tokenSigner');
router.post('/token', async (req, res) => { res.setHeader('Cache-Control', 'no-store'); res.setHeader('Pragma', 'no-cache');
const { grant_type, code, redirect_uri, client_id, client_secret } = req.body;
// 1. Authenticate Client Credentials const client = await db.findClientById(client_id); if (!client) { return res.status(401).json({ error: 'invalid_client' }); }
// Use a secure timing-safe compare operation for the client secret const hashedSecret = crypto.createHash('sha256').update(client_secret).digest('hex'); if (hashedSecret !== client.client_secret_hash) { return res.status(401).json({ error: 'invalid_client' }); }
if (grant_type !== 'authorization_code') { return res.status(400).json({ error: 'unsupported_grant_type' }); }
// 2. Validate Authorization Code const savedCode = await db.findAuthCode(code); if (!savedCode || savedCode.client_id !== client_id || savedCode.used || new Date() > savedCode.expires_at) { return res.status(400).json({ error: 'invalid_grant' }); }
if (savedCode.redirect_uri !== redirect_uri) { return res.status(400).json({ error: 'invalid_grant' }); }
// 3. Prevent Code Replay Attacks (Mark code as used immediately) await db.markAuthCodeAsUsed(code);
// 4. Issue Asymmetric Access Token (RS256) const tokenPayload = { sub: savedCode.user_id, iss: 'https://your-auth-server.com', aud: client_id, scope: savedCode.scope };
const accessToken = generateRS256Token(tokenPayload);
res.status(200).json({ access_token: accessToken, token_type: 'Bearer', expires_in: 3600, scope: savedCode.scope }); });
module.exports = router;
Knowledge Checkpoint
- Why is it important to include the
Cache-Control: no-storeheader on the token response endpoint? - What is code reuse/replay, and how does marking the code as used in the database prevent it?
- Why must the
/tokenendpoint require client credentials when exchanging a code, whereas/authorizedoes not? - How does strict redirect URL validation prevent interception attacks during code redirection?
Module 6: Extending to OpenID Connect (OIDC)
This module builds on your OAuth 2.0 implementation to create an OpenID Connect (OIDC) provider. You will add identity validation to authorization flows, generate ID tokens (identifying the user via claims), expose user profiles through /userinfo, and establish an OIDC discovery configuration.
Recommended Videos

- Why this video: Understand the discovery capabilities introduced by OIDC. This video details standard identity endpoints, focusing on the configuration document
/.well-known/openid-configurationused by clients to fetch provider details.
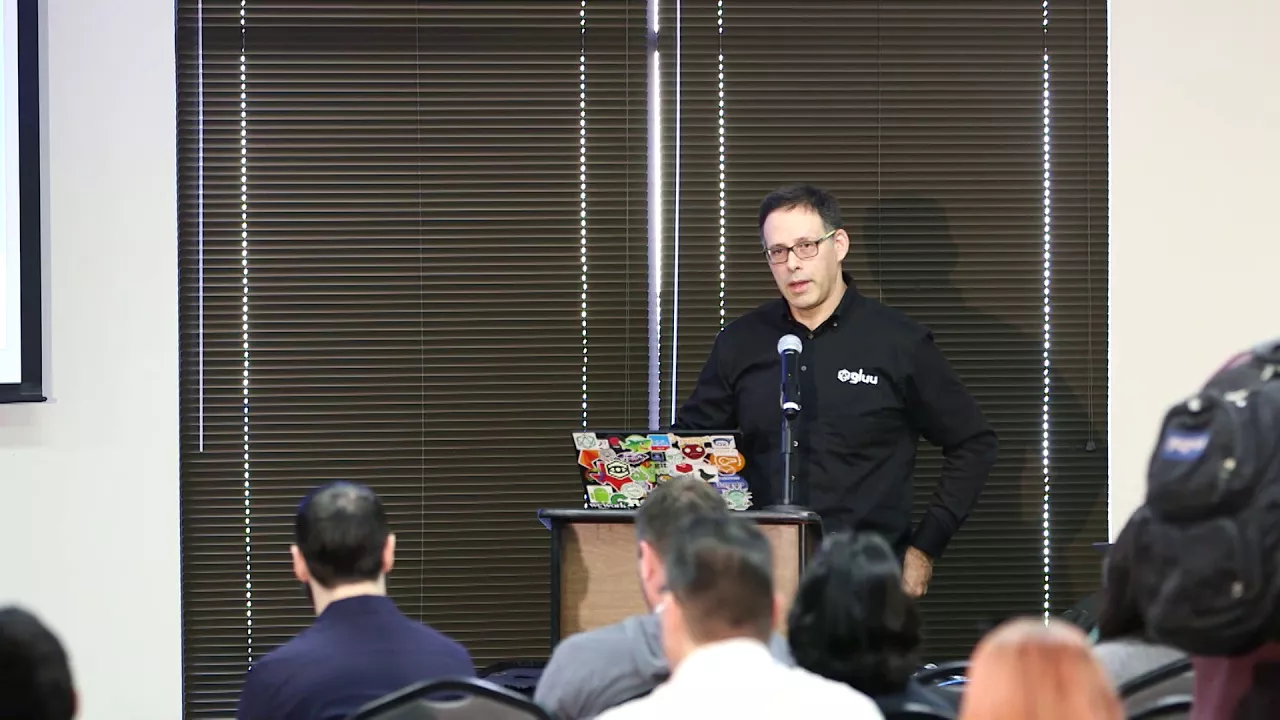
- Why this video: Learn the architectural history of the identity layer. This contrasts pure authorization with authentication, clarifying why the OpenID Foundation developed OIDC to standardized identity on top of OAuth 2.0.
⚠️ Curriculum Gap Resolution: Implementing OIDC Features in Node.js
To complete your custom server, you need to manually implement OIDC specifications. The Node.js code templates below show how to build an ID token generator, user profile endpoints, and the server discovery document.
1. Generating OIDC Compliant ID Tokens
If a client requests the openid scope, your server must issue both an access_token (for authorization) and an id_token (for authentication, verifying user identity).
// oidcTokenHelper.js const { generateRS256Token } = require('./tokenSigner');
function generateIDToken(user, clientId) { const oidcClaims = { iss: 'https://your-auth-server.com', sub: user.id, // Unique identifier of the authenticated user aud: clientId, // Target client app identifier exp: Math.floor(Date.now() / 1000) + (15 * 60), // ID token typically expires faster (15 mins) iat: Math.floor(Date.now() / 1000), email: user.email, email_verified: true };
// Sign ID token as an RS256 JWT using your private key return generateRS256Token(oidcClaims); }
module.exports = { generateIDToken };
2. The GET /.well-known/openid-configuration Discovery Metadata Endpoint
This endpoint exposes your server's capabilities and endpoint locations to clients as a JSON metadata object.
// routes/discovery.js const express = require('express'); const router = express.Router();
router.get('/.well-known/openid-configuration', (req, res) => { const rootIssuer = 'https://your-auth-server.com';
const metadata = {
issuer: rootIssuer,
authorization_endpoint: ${rootIssuer}/authorize,
token_endpoint: ${rootIssuer}/token,
userinfo_endpoint: ${rootIssuer}/userinfo,
jwks_uri: ${rootIssuer}/.well-known/jwks.json, // Exposes your public RSA keys
scopes_supported: ['openid', 'profile', 'email', 'offline_access'],
response_types_supported: ['code'],
grant_types_supported: ['authorization_code', 'client_credentials'],
subject_types_supported: ['public'],
id_token_signing_alg_values_supported: ['RS256']
};
res.status(200).json(metadata); });
module.exports = router;
3. The GET /userinfo Endpoint
The /userinfo endpoint returns profile claims about the authenticated user. Access must require a valid bearer access token in the request header.
// routes/userinfo.js const express = require('express'); const router = express.Router(); const crypto = require('crypto'); const fs = require('fs'); const path = require('path'); const db = require('../db');
const PUBLIC_KEY = fs.readFileSync(path.join(__dirname, '../public.pem'), 'utf8');
// Helper to manually verify RS256 JWT access tokens function verifyRS256Token(token) { try { const [headerB64, payloadB64, signatureB64] = token.split('.');
const verifier = crypto.createVerify('RSA-SHA256');
verifier.update(`${headerB64}.${payloadB64}`);

// Decode base64url signature back to raw buffer
const signatureBin = Buffer.from(signatureB64, 'base64url');

const isValid = verifier.verify(PUBLIC_KEY, signatureBin);
if (!isValid) return null;

const payload = JSON.parse(Buffer.from(payloadB64, 'base64url').toString('utf8'));
if (Date.now() / 1000 > payload.exp) return null; // Expiration check

return payload;
} catch (err) { return null; } }
router.get('/userinfo', async (req, res) => { const authHeader = req.headers['authorization']; if (!authHeader || !authHeader.startsWith('Bearer ')) { return res.status(401).send('Unauthorized: Bearer token is missing.'); }
const token = authHeader.split(' ')[1]; const claims = verifyRS256Token(token); if (!claims) { return res.status(401).send('Unauthorized: Invalid or expired access token.'); }
// Extract the user ID from the token's subject ('sub') claim const user = await db.findUserById(claims.sub); if (!user) { return res.status(404).send('User not found.'); }
// Return standard user profile claims res.status(200).json({ sub: user.id, email: user.email, email_verified: true, preferred_username: user.email.split('@')[0] }); });
module.exports = router;
Knowledge Checkpoint
- Why is OIDC referred to as an "identity layer on top of OAuth 2.0" instead of a standalone protocol?
- What is the structural difference between an Access Token and an ID Token in OIDC?
- Why is the standard discovery path located exactly at
/.well-known/openid-configuration? - How does a client application use the JWKS (JSON Web Key Set) endpoint to verify ID tokens?
Course Map
This flowchart maps the recommended module order and dependencies to follow as you build your implementation.
Key People Index
The following engineers and educators are referenced in our video resources:
- Zach Gollwitzer (@zachgoll): Developer and educator specializing in simplified cryptographic structures and deep-dive explanations of JWT design in Node.js.
- Travis Media / Brad Traversy (@TraversyMedia): Creator of popular development courses, providing the core foundational guides for web framework architectures.
- Michael Schwartz (@lascon512): Cybersecurity expert and identity strategist who presents comparative architectural insights on SAML, OAuth, and OIDC.
- Yonatan Mevorach (@BuildStuff): Professional cryptography presenter focused on utilizing built-in server-side modules to secure modern backend software.
Final Self-Assessment
This self-assessment evaluates your understanding of the concepts covered in this curriculum. Ensure you can confidently complete each of the items below:
- Explain how asymmetric RSA key verification works without sharing private key material.
- Implement Express middleware that parses request bodies and routes with strict token verification.
- Define why horizontal scaling renders stateful session-based cookie storage inefficient.
- Sketch the visual data interaction flows for the Authorization Code Flow.
- Create a relational database schema mapping clients, users, and authorization codes.
- Write Node.js code utilizing the native
cryptomodule to sign a JWT using the RS256 algorithm. - Write code for GET
/authorizethat validates registered clients and prompts user consent. - Build POST
/tokenroute logic that processes incoming credentials and securely generates access tokens. - Mitigate authorization code replay attacks by invalidating active codes immediately upon exchange.
- Explain the distinction between an OAuth 2.0 Access Token and an OpenID Connect ID Token.
- Expose an OIDC discovery endpoint at
/.well-known/openid-configuration. - Implement a
/userinfoendpoint protected by Bearer access token validation.