












![Spring Security Access Token and Refresh Token Tutorial With Jwt & Redis [2025]](https://i.ytimg.com/vi/2z_FRqOes4s/maxresdefault.jpg)







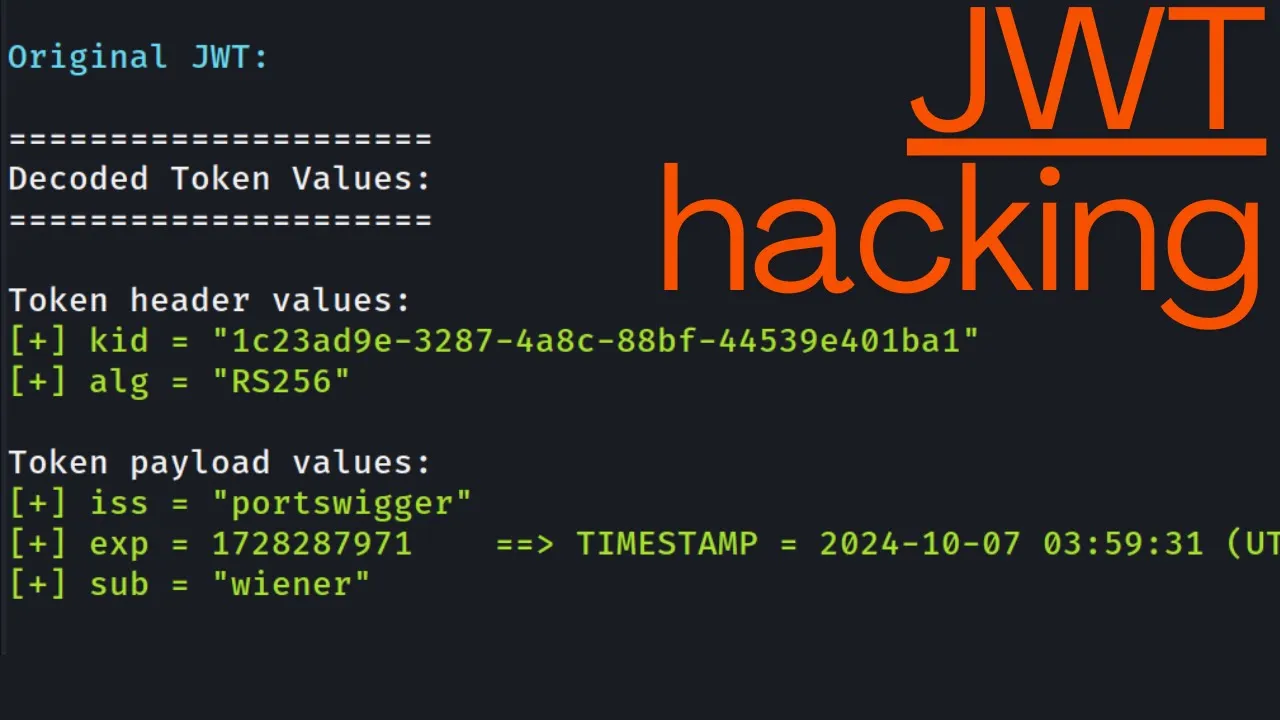




A JSON Web Token (JWT) is a compact, URL-safe token consisting of three parts—header, payload, and signature—separated by periods, where the header specifies the signing algorithm (such as RS256 using RSA with SHA-256 hashing), the payload contains claims or metadata about an entity (typically a user), and the signature provides digital verification using public-key cryptography; the token is created by encoding the header and payload in base64 URL format, then signing their concatenation with a private key, and verified by decrypting the signature with the corresponding public key to ensure authenticity and prevent tampering.
How to Derive, Sign, and Verify JWTs with Node.js
Added:Fundamental understanding of Node.js, asynchronous JavaScript (async/await), and package management using npm.
Basic knowledge of web authentication concepts, specifically the difference between stateful (session-based) and stateless (token-based) authentication.
Familiarity with the structural anatomy of a JSON Web Token (Header, Payload, and Signature) and Base64Url encoding.
Basic comprehension of cryptography principles, particularly the difference between symmetric algorithms (shared secrets) and asymmetric algorithms (public/private keys).
Implementing Refresh Tokens and token rotation mechanisms to safely manage short-lived Access Tokens.
Best practices for secure client-side token storage, including the trade-offs between HttpOnly cookies and Web Storage (LocalStorage/SessionStorage) to mitigate XSS and CSRF.
Developing authorization middleware in Express.js to guard API routes based on JWT payload claims and roles (Role-Based Access Control).
Scaling authentication architectures by transitioning from symmetric signing (HS256) to asymmetric key pairs (RS256) for microservices.
Exploring industry-standard authentication frameworks and delegation protocols that utilize JWTs, such as OAuth 2.0 and OpenID Connect (OIDC).
13.1K views546likes44:16Original Release: 2020-02-24
this video is part of the nodejs passport jeaious user authentication series the playlist for that series is in the video description and you can go check that out from the beginning if you're following along with that then welcome back today we're gonna be talking about JSON web tokens and before we get started I would recommend that if you haven't watched it already watched the video on public key cryptography or asymmetric cryptography that I made which is in the playlist I've also separately linked it in the video description it's gonna help you understand what's going on in this particular video a lot better the questions that I'm going to answer in this video is first what is a JSON web token we will then go into answering the question of how do we derive a JSON web token like what are the pieces of it and how would we actually create one using code and then finally I'll give you a little bit of context as to how it applies to user authentication among other use cases we'll start the video off by looking at the JWT or JSON web token spec on the internet Engineering Task Force it is going let me switch to Google Chrome real quick you'll see that they have a write-up on J WTS and the specification for using them we'll come back to this in a minute to look at a few things but this is a very well-established type of token per se I guess you could call it a token that we use to transport some sort of data on the web now something a little bit more friendly that we can look at is a website called JWT IO and right here I am looking at the example JWT and we're going to be able to visualize what is going on a lot easier once we kind of understand what the JWT is we'll actually go into writing some code to kind of replicate this example right here so to understand a JD JWT it's pretty simple there are three parts you have the header the payload and the signature now the header and the payload pretty easy to understand the signature not so much because there's actually multiple types of signatures that you can do and therefore it adds a little bit of complexity on top of that a signature is a digital signature and it has to do with public key cryptography or just symmetric cryptography depending on which algorithm you're using so it requires a little bit of background knowledge which is why I recommended watching that video that I had created on public key cryptography before this one now you'll see in the algorithm field up top we can kind of scroll through all of the different choices that we have for writing a digital signature on a JWT but in our case since I had you watched the public key cryptography video we're going to do the RS 256 algorithm which is basically as you'll learn more when we get into the code is telling us two things so number one we're going to use RSA private and public keys that standard and then number two we're gonna use the sha 256 hashing function to actually take a hash of the header and payload data I know that's a mouthful we haven't learned anything yet so just hold on to that knowledge in the back of your head we'll come back to it and understand it in a lot greater detail in a few minutes let's start out by getting a basic understanding of what a JSON web token is so I mentioned that it was made of three parts you have the header the payload in the signature and these are highlighted on the page here in the different colors and they are separated by a single period so the first part in red is the header then you have the pink part which is the payload and finally this turquoise part is the actual digital signature now what you're looking at right here is base64 URL encoding and I'm not gonna get super into it but just a few fun facts about base64 URL encoding it's a encoding spec that basically aims to standardize character sets and it's derived from the base64 encoding which was originally created well before you know my time of learning to code but from what I understand the idea there was previously before the utf-8 standard where we had you know standardized character sets there was debates over whether you know there should be four bits or five bits or seven bits or eight bits within a single byte of data and before that was standardized as eight bits per byte there was varying use cases and different you know protocols and applications would use different number of bits in a byte and so therefore you might have an application that actually cuts off the last two bits of data so what base64 was aiming to do was basically add this thing called padding into the data and so it makes it so that there's no chance that any of the data is going to get lost in transport and then the base64 URL encoding is just one extra step because there were some characters within the base64 encoding that are not exactly URL friendly or file name friendly so converting base64 to base64 URL just makes it safe to transport over the Internet and we also know that this format in general is not going to lose any data which is obviously very important when we're talking about user authentication which is a very common use case for JWT I know that was a bit of a long-winded explanation of in encoding not so interesting but as we actually derive this JWT with code you're gonna see that we're kind of constantly having to shift between the different encodings and it's going to become a little bit more important later all right now that you know what you're looking at here on the left let's talk a little more conceptually what we're seeing here on the right side so on the right side all we've done is we've taken these base64 URL encoded characters and we've decoded them into JSON objects and in the header you'll see that we just have a couple things we have an algorithm and a type and this is pretty self-explanatory but when you're transporting JSON web tokens over the web it's not always the case that the receiver of the JSON web token is going to know you know anything about the JSON web token to start with so in the header the sender of the JSON web token or the issuer is going to identify which algorithm they use to create the digital signature and then of course we say that the type of token is a JWT because there's actually other types of toca tokens that we can use here aside from just JSON web tokens so we have again chosen the RS 256 algorithm which says we're using public key cryptography for the digital signature along with the sha-256 hashing function and what we're going to do is well actually before I get into this let's cover what the payload is then we'll get into that signature so the payload is basically going to be metadata about some entity and in most cases it's going to be about a user because JW T's are commonly used for user authentication so in this payload you're not gonna see any sort of credentials if you see credentials in a JWT payload then you know that the developer has done something wrong because you should never ever put credentials or sensitive information in the payload it's publicly available anyone could decode this JWT just using a simple base64 URL decoding algorithm so what this data gives us is just general information about the user so you'll see the sub or subject is going to tell us who the user is in many cases you'll see some sort of database ID put in here so that when an application decodes the JWT they see okay here's the sub it is this ID let me look up this ID in my user table in retreat retrieve the full user object so that's what the sub is name obviously just the name admin just another metadata property and then IAT is issued at so it gives you the timestamp of when the JWT was issued now we also have additional what they call claims that's kind of the proper term for these pieces of data we have additional claims that we can define and if you go over to the specification for JJ WTS you have all this information but down here at the bottom or somewhere in the middle we have the registered claim names so these are registered it says the following claim names are registered in the I Ana JSON web token claims registry established by section 10.1 so in other words these are kind of the official claims that you'll be using and if you wanted to issue data beetee's that would be interpreted by various applications you would want to use these standard claims so that everyone knows exactly what they mean so let's just go through the most common ones and then there's a few others at the bottom you can look through on your own so first is the issuer claim this is going to identify the issuer of the JWT now in our case we probably don't need this because we are both issuing and verifying a JWT within the same application but in many cases for more complex architectures you'll see a certificate authority who is actually being it's the certificate authority acts as the third-party authority that is trusted to issue JWT tokens and that is literally all they do so we have we basically can establish a centralized authority that everyone trusts and that centralized authority will sign the JWT s with their private key and because they sign it with their private key they'll say ok here's our public key and anyone in the world can say ok I trust that institution and I'm gonna verify this JWT with their public key if it matches I know that this JWT was issued by a trusted Authority so that's kind of where you'll see the issuer claim the subject claim we already covered the audience claim is going to generally be the resource that will accept this JWT so in other words if the JWT is only intended to be used with a specific application it would probably list some sort of URL or base URL that will identify which server the JWT is valid for so in other words if Google issued a JWT token they might put in the audience claim ww Google com and if the JWT is attempted if if you attempt to use the JWT in a different context other than google.com it's going to be reject then finally with the expiration claim which basically tells you when or what point in time this JWT token is no longer valid there are additional claims that you can put in here we saw the IAT issued at claim but you can also and this is important you can also make up your own claims this by no means has to be standardized you can put whatever metadata that you want in the payload and last but not least we have the signature at the bottom we've already kind of touched on it I talked a lot about how this actually works from a cryptography perspective in that video that I asked you to watch before this one again link is in the description for that but anyways I think it would be helpful to go through kind of a conversation between the server and the client to understand how this JWT is working in real life so I've put together a basic little representation of this and what we have here is what I kind of perceive as the conversation that the server and the client would have if they could talk to each other in human terms of course so the server just think of this as any application we're kind of removing the idea of certificate authorities from this basic equation we're just going to assume that the server will just say it's an express j/s application is both issuing and verifying the JWT tokens so we don't have that third party certificate authority in this equation so what's going to happen is our client or just basically our user someone's sitting behind the computer who is visiting our application on the web is going to go to the login page and say hey server I want to login to your application here's my username and my password then the server gets that information in the form of a post request and it's gonna say okay let me check on that I want to go through my verification algorithm and look you up in my database to make sure that you exist and you entered valid credentials we'll assume that the user did so the server says okay your credentials look great I'm going to sign a JWT token or JWT with my private key that only I know about so the server is the only entity that has any knowledge of that private key they're gonna sign it and send back the JWT in the response body so then the client or the user basically this this doesn't actually have any user interaction it's invisible to the actual person behind the computer but the browser or the front-end application is going to receive the the response and say hey thanks for the JWT I'll keep this stored in my browser's local storage until maybe it expires so then the client is going to once they're logged in they're gonna want to do something so maybe this client wants to go edit their profile so they'll type in the URL of the profile just say some site comm this is just an arbitrary value and then they're going to need to attach that JWT token or I keep saying JWT token but it's JSON web token to the HTTP header that's called the authorization header and so in the authorization header is where that's going to be stored the server is going to receive that JWT in the request body and then we're going to say okay I just talked to you we're familiar but I still need to verify that JWT because I don't know if in the time that you chose to visit the profile that's one tamper with it so we're gonna take the JWT and now the server says okay I signed it with my private key but now I'm gonna take my public key that everyone knows about but I don't care because it doesn't actually matter I'm gonna take that public key and verify the signature on that JWT and the server says okay that signature is indeed valid I know that you know you are actually you and the claims made on the body of this JWT are valid let me go ahead and look you up in the database load your user profile and give you the information required to actually edit that user profile so that is the basics of how a JWT works I'm going to in a few minutes go through the code for deriving a JWT but I will also mention again this video was intended to be kind of part of my nodejs passport j/s video series which the playlist is listed in the description below if you wanted to know more about what we just talked about how this actually works in practice written in code say for an angular application go ahead and follow that series through the end use the passport JWT authentication strategy and you'll see exactly how this works in practice but for now we are going to jump into the code editor and actually see this process written out how we issue a JWT and then how we verify that JWT just using the built-in nodejs crypto library to start off with we're going to go through this part where we issue a JWT to keep it as simple as possible I'm going to take the example off of JWT i/o so if you visit this you should see the same thing and I'm gonna actually be showing you how we get to this JWT how we actually issue this one and then how we verify it using the public and private key so you should be able to verify how this works by just coming to this site and you can actually follow along with the nodejs crypto library so I'm gonna go ahead and just copy this entire token again this is in base64 URL format or encoding so I'm gonna copy that and then we're gonna come into the code editor and paste it in here so I first need to create a file so let's just say issue JW t.j.s and you can see that on the left here I've already pasted in the private and public key those came from that JW t dot IO website all right so I've copied in the key right here let me just put this as a string and store it in some sort of variable so we'll say cons JW T equals that so this is the exact JWT that we saw from that example website now in order to properly do this we need one NPM library and it's called base64 URL so I've already installed it but you'll come down here to your terminal and install base64 URL to follow along with this so I'm gonna go ahead and require that in real quick so we'll say base64 URL and now we can take this JWT right here and convert it into something that we can actually work with we now need to split up this JWT into its parts which if you remember is designated or delimited by this period so we can do that using some simple JavaScript so we'll say a JWT parts equals JWT dot split and we'll specify that period so now if we were to console that log the JWT parts we should have an array of those three parts so let me go ahead and try that real quick and you can see that we have an array and the array contains the three different pieces of that JWT token again these are still in base64 URL encoding let's go ahead and split these into variables so I've just written this code already we basically say header in base64 URL URL format is going to be the first one so in our array right here we're just grabbing that piece and then so on and so forth with the remaining two now what we have to do is we have to actually take this base64 URL format and convert it to something else now that we have this in pieces we can decode this with the base64 URL decoder the NPM module we included up here and we can see the actual JSON objects that these represent so let me put those in variables real quick so we have the decoded header payload and signature and we're just using that base64 library and using the decode method and we're passing in the base64 URL pieces and then finally we can console dot log those to the terminal and you can see what they look like decoded so let's go ahead and console dot log those we're just taking these three variables here and logging them save the file let's give us some space in the terminal here and let's run this again so you're going to see the first part is the same thing that we saw on Google or on the in the browser at JWT i/o and the second part also so these match perfectly as we would expect and then we have a bunch of gibberish at the bottom and the reason being is because we haven't actually decrypted the signature yet so once we decrypt the signature then it will be in a format that we can understand a little bit better now that you've seen this decoded I'm gonna actually comment all of this out for a second because we don't need this we're gonna actually derive this JWT from scratch so commenting that out for a second we'll just face it down to the bottom and what we're gonna do is actually create this from scratch by first creating the JavaScript objects that we want to put in the header and the payload so you can see that these are the exact same header and payload objects that we printed in JSON format below now obviously these are in JavaScript format so we will need to convert them into JSON format by saying using the json stringify method so let's do that right now I pasted it in the JSON that stringify method and stored these two objects as json strings in these two variables the next thing that we have to do because right now these are just in JSON format we need to actually convert that JSON format into the base64 URL so to do that we'll use this base64 URL library and we'll just put it through the basic function and convert it so here we go copy this in I'm just copying code that I wrote before to speed things up but anyways we have new variables hopefully these are labeled appropriately for you but we have a base64 URL header and payload all we've done and we actually need to change this a little bit so we're gonna just use our import here base64 URL and the basic function that comes with that library is just a function to convert any sort of object into the base64 URL format so these two variables store the correct format for our header and our payload now we have to actually sign and issue the JWT but first let's go ahead and check this we're just going to console blog these two values to make sure that we have actually converted these original JavaScript objects correctly so let's go ahead and clear the terminal give us some space and run this again and you'll see these two values which we can actually check from the commented out code so here's our original JWT that we just took from the website and posted right in there and you'll see that this first value matches the first value of there and then the second one if you wanted to go out there and confirm that it also matches so we've got what we need again the last thing we have to do is actually take some sort of hash of these two pieces of data and then sign that hash and put that in the signature in order to sign this we need to import a few more libraries so at the top i've imported the built-in nodejs crypto library and then from the crypto library we can also implement the algorithm that we're using for this JWT so this is going to allow us to sign the JWT using this specific algorithm and then we need the file system from the nodejs framework so that we can access the private and public key that we have saved in this current directory now that we have our imports come down here get rid of these console logs and we're going to create the signature so the first step is to use this signature function and we want to write some sort of data to it so right here we're just passing in the header and the payload separated by this period and this is going to be the data that is actually hashed using the sha-256 hashing function this is all kind of done with in this node crypto library but we're going to hash this data and then we're going to sign the hash so we've loaded the data in here the last thing that we have to do is load our private key which we're going to be signing it with and then use these signature functions sign method to actually sign the JWT here's the code to do that copy it in first we need to load our private key that's literally just loading this private key pen file and I actually need to change the name for this to work correctly so private key p.m. and it's important to put this in utf-8 encoding and then we are going to convert this is kind of an important part we are going to sign this data which is going to give us a base64 encoded signature so then to actually derive the JWT we're going to have to convert base64 to base64 URL we can do that with this imported library right up here so I'll show you the code for that here's the code that we use to do that so we just basically take the signature that we got from the node crypto library and we convert it from base64 to base64 URL so now the signature should be in the same exact format that we were expecting earlier let's go ahead and verify that real quick so signature base64 URL we'll print that out really quickly and you're gonna see this value right here let's go ahead and just verify it real quick so here again is our JWT we need to come all the way out to the last piece of it and here we go there's the last piece and you can see that the first couple letters are matching up and if you were to go through all of it it's going to match to the character so right there we from scratch created a JWT token using the nodejs crypto library now there is an easier way to do this and I will show you that in a few minutes but first we need to verify this JWT that we just issued since we already have a lot of the basics set up we're just going to uncomment some of this code to verify the signature so let me just make a comment for this first part probably should have just named this file JWT because we're doing both the issuance and the verification in the same file so here is the issuance part right here and then end of issuance and then here is the verification and we will go ahead and implement this now so when we verify a JWT we are basically receiving the JWT in the base64 URL format in this case we just are going to use this one right here the one that we just created because we know that it's exactly the same as that example online so to get the JWT parts we're going to uncomment that we will uncomment this part we don't need any of these things right here and I think we're set so now we can actually verify this JWT to do this we'll actually have to just create one more line in the imports and this is going to be the verify function from use the same exact algorithm so we've got the issue or the create JWT function and then they create verify or the verification function as the verifier of this JWT we have received the entire JWT right here we've split it in two parts and now we have to actually do something with those parts so the first thing we'll do is we'll take the header in the payload and just like the signer of the or the issuer of the JWT did we're going to take the header and the payload in append them together separated or delimited by the period and since the the nodejs crypto library only accepts base64 encoding we need to take the base64 URL signature and convert it using the base64 URL NPM module to base64 so now that we have that we can finally I guess decrypt the signature so we're gonna take our public key that corresponds to the issuer issuers private key and we're going to decrypt the signature so the first thing we need to do is actually get the private or the public key in here so I'm gonna just copy this line and use that we'll say public key and we just need public key p.m. so now that we've imported our public key that we're verifying with we are finally ready to verify this JWT so let's copy this in the signature is valid variable is basically going to run the node.js crypto library verify function that we imported right here so verify function dot verify we're gonna pass in the public key that we imported from the filesystem we're going to pass in the JWT signature base64 format and then the most important part this will really trip you up it took me honestly hours to actually get this to work because I had not included the base64 format in the verify function so that's really important and once you've done that we should console that long the signature is valid and I think it returns a boolean whether it's valid or not so let's go ahead and try that really quickly node issue well it's not really issue JWT but bear with me we get first the signature that we were console logging right up here and then the signature is valid variable returns true so we have successfully verified this JWT and essentially we've gone through the whole process so we created the JWT from scratch and then we verified it from scratch now if you wanted you could use all the code that we just used in this example for your web applications to sign and verify JWT tokens but like I said earlier there is an easier way to do this and that easier way is using the JSON web token NPM library and what this library is is basically an abstraction of the node.js crypto library and it gives you a little bit you know more options because in this example we were just using the RSA 256 algorithm and we didn't even get into okay what if we use a different JWT algorithm so the JSON web token library is going to give you a lot of flexibility and it also kind of abstracts away all of the things all of these you know when we have to convert from base64 URL to base64 you don't have to worry about doing that in this library so this would be the library that I would recommend using in any sort of web application where you're issuing and verifying JWT s and in the next few minutes I will show you exactly how to use it to save us a little bit of time I've just copied in my implementation of the JSON web token library if we wanted to accomplish the same exact things that we did with the node crypto library now obviously since this is abstracted a little bit you're not going to get to see the little bits and pieces that are happening and you don't get to truly understand what is happening with the Jade JWT but it does make your life a lot easier when you're actually coding so let me explain to you what's going on here the first thing you'll notice is I imported the JSON web token library I already installed it with NPM install JSON web token so that is what that import represents we use the file system the node.js file system to grab the public key and the private key that we were using earlier so again this is the public key and private key from that example on JWT io and then you'll notice this payload object is very similar we've seen it before because it's the exact same payload object but you might notice that you don't see the header and the reason being is that is one of the things that this library abstracts away all we have to do is provide the algorithm and the library creates the header on its own so you'll see in this next line we have a variable called the signed JWT which is a product of the JSON web token library sign method where all we have to do is pass in the payload object in JavaScript form so we don't have to do any of that JSON dot stringify stuff and then convert it to base64 URL none of that we can just pass in a JavaScript object then of course we pass in the private key that we want to actually sign it with as we know that's how Jada beauties work and then finally in the options object we just have to give it the algorithm that want to use and based on this algorithm the JSON web token library is going to figure out what the header needs to be so it will then combined that header and the payload just as we did with the node crypto library it's going to sign it with I actually think they used the node crypto library underneath the surface so they pretty much do exactly what we did earlier to sign this and then to verify it again just one simple line of code or a couple of simple lines of code we just used the JSON web token verify method we passed it we pass in the signed JWT or this basically it's going to be received in the authorization HTTP header for a web application so we take that JWT pass it into the verify function we use the public key that corresponds to the signers private key in this case since we're doing the signing or the issuance and the verification it's just these two this key pair and then again we have to pass in the algorithms that it will accept in this case RS 256 and then we have a callback function in the callback function if there's an air we know that the verification has gone wrong and either we have the wrong public key to verify this JWT with or the JWT was tampered with and we don't want to use it so let's go ahead and just verify that this works really quick so you can see it in action I will console dot log the signed JWT value so let's just do that first really quickly and you'll see this value right here which if you were to match with the value online it's going to be the same exact thing so you can do that on your own time but just trust me that is the same exact JWT and then here we can go into the callback function and let's say console dot log err and we should expect that we don't see any air whatsoever because we verified this successfully so we get null as the air as expected and then we can also console that log the payload which is the second argument that it returns and you should get the same payload that we had defined right up here except this was when we issued it and then this is when we signed it so you can see how this might work in an actual application you might have a post route that is going to verify credentials and then it will sign in return a JWT in the response and then you might have another couple routes that are like authenticated routes and you might have some sort of middleware like passport je s that is going to underneath the hood use this JWT dot verify method and use the public key to verify the JWT s that are being passed through the authorization headers so again if you want to see how that's actually implemented in a web app in the description to this video I have listed the playlist to the passport je s authentication series you'll skip to the the second half of that series where I talk about the passport JWT strategy and you'll see exactly how we use this JSON web token library along with some middleware to authenticate users into a real world Express application I know this was a long-winded video and if you made it to this point congratulations it takes a pretty long attention span to get through all of this material but then again we never said that user authentication was supposed to be easy it is inherently a very difficult subject to understand and although it might seem easy on the surface especially if you are abstracting away all of these details with some sort of middleware or other library if you're trying to debug user authentication or implement your own strategy you really need to understand all the concepts that we just talked about so if you liked this video if you found something useful in it be sure to give this video a like and subscribe to my channel if you're continuing on with the passport Jas series or you want to start it link for that is in the description below or you should just be redirected to the next video
Up Next

72:13
Spring Authorization Server Tutorial: Boot 3.1 Auto-Config
@coffeesoftware
96.4K views•2023-05-27

87:26
Introduction to Secure Multiparty Computation with Yehuda Lindell
@fhe_org
7.7K views•2021-02-04

4:55
HTTP Requests Explained: GET, POST, PUT, DELETE
@codecademy
103.1K views•2021-10-07

19:25
Enigma Machine Mechanics: WWII Encryption Explained
@JaredOwen
13.2M views•2021-12-11
Related Study Plans & Knowledge Roadmaps
Structured learning paths in Computer Science
computer-science
Container Runtimes: Namespaces, Cgroups & Go
01Linux Systems & Go Programming Foundations
02The Core of Isolation: Chroot and Filesystems
03Linux Namespaces: Process Isolation
+ 3 more learning modules
32h6 modules
Explore Roadmap
computer-science
Building a CHIP-8 Emulator: Rust & CPU Basics
01Computer Architecture Foundations (Bits & Bytes)
02Rust Programming for Systems Development
03CHIP-8 Virtual Hardware Specifications
+ 2 more learning modules
32h5 modules
Explore Roadmap
computer-science
Building BitTorrent: Go, P2P & Concurrency
01Go Fundamentals & Concurrency
02Networking Foundations & P2P Architecture
03Bencode Parsing & Torrent Metadata
+ 3 more learning modules
26h6 modules
Explore Roadmap
computer-science
Actor Models (C++ Concurrency & Lock-Free)
01C++ Multi-Threading Foundations
02Thread Pools and Task Scheduling
03Atomics and Lock-Free Queue Design
+ 3 more learning modules
45h6 modules
Explore Roadmap