
















This comprehensive Python crash course covers all essential programming concepts for absolute beginners, including variables (integers, floats, strings, and booleans), conditional statements (if, elif, else) with logic operators (==, !=, >, >=, <, <=), collection data types (lists, tuples, sets, and dictionaries), loops (for loops with range() and while loops), functions with arguments and return values, and classes with objects. The course emphasizes practical hands-on learning through Google Colaboratory, covering variable naming conventions, arithmetic operations, and debugging techniques. Students will learn to write their own functions, create objects from classes, and apply these concepts through practice problems like list manipulation and number guessing games.
Python Crash Course: Master Variables, Loops, Functions, Classes
Added:hi everyone and welcome to the python crash course for absolute beginners this video is meant for those of you who are very new to programming in general and wanted to get started out by learning python in this video I'm going to cover all the essential information about python that you'll need to know to get started as a python programmer I've split this crash course into eight sections and in each section we cover one or two key topics that you'll need to know I've uploaded each of these eight sections as individual videos on this channel if you prefer to watch them separately otherwise I've compiled them all here in this video as a super cut to have it all in one place time stamps for every different learning topic will be in the description without wasting any more time let's get right into the video enjoy python is a pretty awesome language and I strongly believe that it's the best option for people who are just getting into programming python is an all-purpose programming language meaning you can program a huge variety of different things with it and it's extremely versatile it is much simpler than other popular languages but can still do some extremely powerful things python emphasizes readability meaning it reads a lot like English and can be learned very quickly although python is All Purpose it excels especially in the following Industries Ai and machine learning data science application programming and even web development all of these fields are very high in demand at the time this video is being uploaded making python one of the most popular if not the most popular programming language in the world so I'm going to teach you everything you need to know about python step by step by the end of this course you'll have a strong understanding of the language and be able to begin your python development Journey to start off let's set up our environment to write any sort of code we'll need a code editor where we can type and run our code for this course we're going to be using Google code laboratory much like Google Docs or Google Slides Google collaboratory is an online cloud-based tool and this one in particular allows us to edit and run python code extremely easily so we don't have to worry about any sort of installation of the Python language or any other third-party Tools in setup will only take us about 30 seconds so first open up a new tab whichever browser you're using in this case I'm using Google Chrome and go to collab dot research dot google.com and once you're there you'll see a page that looks something like this now if you're used to using other Google tools you'll notice that this layout looks fairly familiar probably so let's create a fresh file to start coding in go to the top left of the screen click file and click new notebook if you're not already signed into a Google account it'll now prompt you to do so now that we've opened up a new file you should see this page it looks something like this which is just a blank notebook with the name untitled.ipy and B now ipy and B is just the file extension so let's change Untitled to say hello world and then press enter now let me quickly explain how Google codelab works before that let me just zoom in so it's a little bit easier for you guys to see okay so in Google codelab you have what are called code cells which are these dark boxes that have a run button on the left hand side of it now if I click this one right now this run button it won't do anything obviously because we don't have any actual code in there but when you do have code and you're ready to type you type in these boxes so super simple Let's test it out to display any sort of output in Python we use what's called a print statement so to do that I'll show you so we type print then parentheses and notice if you type parentheses it'll automatically autofill both the opening and closing parentheses and then you want to put quotation marks as well and I'll do the same thing where it's going to auto fill both the opening and closing quotations and then within that we're just going to type hello world and then now we just press the Run button and voila hello world is displayed so let's say you want to print something else as well so let's click after this closing parenthesis here press enter to start a new line and let's write print hello YouTube and now if we go over and press play you'll see that both hello world and hello YouTube are displayed now if we wanted to make a new code block go to the top of the screen here and you'll see this Plus Code button so click it and now you'll see this new code cell appeared here now let's write print testing testing and if we go over and press this button you'll see it just prints testing testing now notice that it doesn't print hello world in hello YouTube because this run button only executes what is inside of its particular block so it's only going to print testing testing so for this video I really just wanted to show you how to get the environment set up and give you a very very basic overview of the Python programming language so I'm going to go ahead and end this video here so it won't go too long and next video we'll actually start to dig into some real programming Concepts like variables take care hi everyone and welcome back to the python for absolute beginner Series in this video we're going to cover a fundamental part of python variables variables in my opinion are probably the most fundamental aspects of python and just programming in general so what is a variable a variable is basically an alias to some piece of data they allow us to easily store and access data if you're familiar with algebra you know you can have letters that equal numbers like x equals five for instance and we would call x a variable in programming is super super similar so we can assign any letter like X or even a word like sandwich to some piece of data what kind of data can we store in variables let's quickly go over that so python has quite a few different types of variables but we're going to focus on four in particular that I believe are the most basic and essential variables to start off with and we'll get into more later we have numbers which are just numeric values strings and a booleans we break numbers into two categories ins and floats so let's start with int it represents any whole number examples of an INT would be 1 5 or 12. literally any whole number you could think of this is arguably the most common variable you're going to see floats represent any number that have a decimal value examples of a float would be 5.7 1.8 and 9.0 if there's a decimal value in the number at all it's a float even if it ends in a 0.0 like 5.0 or 8.0 it is still a float because it contains a decimal a string is any combination of letters examples of strings would be the letter A a whole sentence like hello my name is Austin or hello world or even just random letter gibberish like this in Python and in most other languages we always surround strings with either double quotations or single quotations that's why if you remember in the last episode when we type print we use quotations to type hello world because hello world is a string the last type of basic variable that's super common is called a Boolean and if you're new to programming you've probably never heard this term before a Boolean literally just means true or false booleans are super simple but yet they play a huge part of python and computer science in general we'll talk a little bit about them in today's episode but we'll dive deeper into booleans in the next episode when we cover something called conditional statements so now that you have a basic understanding of the main variable types how do we actually use them let's jump over to Google collab that we set up last episode and you can either continue writing in the same notebook that we made last time or just create a brand new one so to assign a variable to an INT we write this x equals 5. now it seems super simple but let me quickly just break this down so we're on the same page here x is the name of our variable and you can name it literally whatever you want there are some naming convinces you'll have to follow to prevent errors but the name of the variable can be pretty much anything you want it to be the five is what we want our variable to equal and this is basically the data we're storing and this is what we're going to fill in either an integer float string Boolean or so forth in this case we're using a 5 which is obviously an INT and lastly this equal sign is something called the assignment operator and it basically lets the computer know that you're assigning a variable technically it reads from right to left saying 5 is being assigned to the variable X in other words x is now storing the value 5. I'm going to quickly write a comment off to the side here and comments are basically lines of code that are used just for the user to kind of document what they're doing and just write personal notes to themselves so the computer actually completely ignores him and if you want to write comments in your code just type this little hashtag or pound symbol so I'm just going to write just what I said here x is variable name five is data we are storing I want to make a quick note here that the order of assignment here absolutely matters so x equals 5 is not the same thing as writing 5 equals x the variable name that you're creating should always be on the left hand side like this and the data you're putting in it should always be on the right hand side so if I have 5 equals X and I try to run that I'm actually going to get an error here and this error says can't assign to literal because we're trying to assign a value to a variable which doesn't make sense in this order so long story short just keep the variable name on the left hand side and keep the data you're storing in it on the right hand side so if we just delete this and run it again error is gone no problem so now let's try and print out our variable and we're going to be using the print statement that we showed you in the last episode so make a new line here we're just going to type print parentheses and then put our variable name inside of those parentheses and notice how this time we're not actually using any quotations around the variable like we did when we were typing hello world and the reason for that is because quotation marks interpret very literally so if I typed print quotations X and I press run it's literally going to print the character X but if I remove the quotations and I run just print parentheses x and run it it's going to print out five before I move on I just want to make a super quick note here so we're on the same page these lines are going to run in order so this first line here x equals 5 is going to run first and then right after it's going to run print X and this is how python Works in general so you got to keep this in mind that these lines run always from top to bottom okay so now let's move on to the other variable types I mentioned earlier that another type of data is called floats which are basically just decimal values assignment is going to look identical to what we just did except for flows will obviously have a decimal value instead of a whole integer so let's actually create a new code block here and we're going to do just that so let's make a new variable Y and instead of setting it equal to an INT we're going to set it equal to a float so let's say 6.3 and if we want to print this variable out we're going to write the same print statement like we did up above so we're going to write print parentheses and then inside of that put whatever the name of your variable is and if we run this you'll see it'll print out 6.3 and I should really mention now that there's a really neat thing in Python where if you want to check what the type of your variable is because maybe you're not sure you just want to see what the output is there's actually a really easy function for that so if I do underneath this line I write type y and I run that the output should say float because Y is of type float because it is 6.3 which is a decimal value so if I run this yep you'll see 6.3 and then float and I'm going to go ahead and add that type up here just to this one so you can see that X should output int so we do Type X and the output should be it perfect so that's definitely a useful tool if you want to debug or just have that in general so you can check a type maybe if you're not sure what it is all right so let's go ahead and assign a string here so I'm going to open up a new code chunk I'm going to just click on this block and plus plus code at the top so I can insert a new block below this one and remember for Strings I said that we always use quotation marks when we're assigning a variable so let's say we want to have a string called hello world let's do Z equals quotation marks hello world and if we do the same thing we've done with all the other variables we go down print Z we press run hello world is displayed and again just like the other ones if you want to check the type of the variable and see what type of variable it is you can always just do type parentheses and then your variable name and that'll say Str which is just short for string so let's make another code block here and we're going to cover booleans so remember that I said that booleans are either true or false and we have pretty much two ways of actually assigning booleans the first way is to literally assign it to the value true or false like this so let's make a new variable my variable equals oops spell that correctly my variable equals true now we can do that or if we want to have something that equals false we can also do something like my other variable equals false and just a quick note remember I said that variable names can be pretty much anything so I'm just kind of making these names up as I go I was using single letters up here just to save some time but variable names can be whatever we want so this first way here definitely comes in handy and this is one way you can assign booleans but the other way is to use something called logic operators and logic operators are basically something that will evaluate to either true or false and we'll definitely get a lot more into these into the next episode but for now just imagine we have less than signs and greater than signs if you think about it any expression containing a greater than or less than sign is either going to evaluate to true or false if I ask you is 5 less than 10 you're either going to reply yes it is or no it isn't meaning that it's either going to evaluate to true or it's going to evaluate to false right so I can actually assign a Boolean like this I can say my variable equals 5 less than 10.
5 less than 10 is either going to be true or it's going to be false in this case 5 is less than 10 so 5 is true so this is going to basically say the same thing as writing this my variable equals true because 5 less than 10 evaluates to true if I wanted to do false same view we would do my other variable equals 5 greater than 10. now obviously 5 is not greater than 10 so this is going to evaluate to false which is the equivalent of writing something like this so in summary booleans are always going to be true or false whether you actually write them as literally true or false or if you write them as an expression that is evaluated as either true or false so if we make two more lines down here just to print out these variables we'll do print my variable go one line down print my other variable and like I said this should evaluate to true and this should evaluate to false so the result should be print true and then print false and if we run it yep you'll see true and then false so now you may be wondering is it possible to change and update variables and yes it absolutely is so let me go ahead and delete these code chunks here so if you want to delete code chunks we'll just go to this trashcan button delete cell we're going to delete this so we can free up some space here and go back up to the top and we'll just make a brand new one up here so it is possible to update and change variables so let's say we have a variable x equals eight and say for whatever reason we want to change it eventually to x equals six so we can just do x equals 6 right below it now let me print these out just so I can show you how this works if I make a line under this one and I say print X and make a line under this one that says print x what do you think the result is going to be now remember I said that these run in order so first I'm assigning X to 8. and then I'm printing X so it should print out eight and then I assign X to 6 and then print X again so X should print out 6. so the result we should see is eight and then six and if we run it oh you'll see 8 and 6.
one of the unique things about python is that we can actually change the same variable to a different type so instead of x equals six let's write x equals hello world and then print it out and you'll see that we have eight and then hello world so this is kind of a unique thing in Python and it's perfectly acceptable though I probably wouldn't recommend constantly switching around a type of a variable just because it doesn't usually make a lot of sense to do so so let's delete this chunk here and I'm going to write three new lines let's say we have x equals 10 we have x equals 20 and then x equals 30. and then let's say at the very end of this Chunk we want to print out X so with this code here what do you think the end result is going to be remember I said that everything in Python runs in order from top to bottom so if I have this print X down here at the bottom it should be equal to 30 because x equals 30 is the most recent line of code and therefore is the most recent update for X so if we run this we should see 30.
one of the really interesting things about variables is that you can actually assign a variable to another variable so I'm going to go ahead and press the clear output button and then to delete this to free up some space for us so let's say we have a new scenario let's say we have x equals 12 and we say hey we want to make a new variable y that also equals 12. now we could just write y equals 12 obviously but instead X already equals 12 so we could write Y equals X and in this case now Y and X are both point to the value 12. now note and remember that the order of this always matters so the variable on the left hand side is the new variable we're creating or updating so saying Y equals X makes sense but writing x equals y would not make sense so we're creating a new variable y so we put on the left hand side equals x is the value we want to store so now if we go down we print out X and then we print out y they should both be equal to 12.
next let's go over some basic math operations that we can use in Python just like basic math we have four main math operations in the Python language there's actually also a fifth one that we'll talk about too and I'll go over that a little bit later so the basic operations are addition subtraction multiplication and division and hopefully those all sound pretty familiar to you the fifth one is called modulus and I'll go over that one last so let's open up a new code chunkier let's open up a print statement so let's say we just want to do some basic arithmetic some basic math here and we want to start with addition first so addition we're going to use with the plus symbol let's say we want to do 5 plus 5.
we're going to print that out the result is 10. pretty self-explanatory let's say you want to have more than just two numbers we can do five plus five plus seven plus nine press play we get 26. so python computes this very quickly and it's very easy to do math let's say you want to do subtraction right we'll do 8 minus five run that three awesome so we know subtraction is pretty easy we can also add more than two numbers if we want like this that output is one let's say we want to do some multiplication and division so multiplication we would use this asterisk symbol which is on the eight key on your keyboard or some people just call it star and this is how we do multiplication in Python so that's what they wanted to do four times four run that 16. same thing as before we can do more than two numbers four times four times four we're going to get 64. now lastly let's say I want to do some division division in Python uses the forward slash operator so let's say I want to do 10 divided by 2 we would do 10 forward slash two we go run and we get 5.0 the great thing about math and python is that it's pretty easy and self-explanatory because we're using the exact same math operations that we learned as kids in school the fifth operator is called modulus and you probably haven't heard of this term before and modulus is represented by the percentage symbol let me just write this off to the side modulus is percentage symbol so let me quickly explain what modulus is so modulus is very similar to division except it gives you the remainder between two numbers so if you recall when you first learned division you probably learned about finding remainders for example if we wanted to write 10 divided by 4 and we output this 10 divided by 4 doesn't divide evenly as you can see if we run it the result is 2.5 but let's say we wanted to divide using only whole numbers we could say that 10 divided by 4 is equal to 2 with a remainder of 2.
what about 10 divided by 3. 10 divided by 3 doesn't divide evenly either if we run it we're going to get 3.33333 repeating forever right or instead if we're using only whole numbers we could say 10 divided by 3 is equal to 3 with a remainder of 1. and the modulus Operator just returns that last remainder number so when I write 10 modulus 4 the remainder should be 2.
so let's write 2 here boom if I wanted to do 10 modulus 3 remember I said the remainder should be 1. so we should print out one here and if say we're trying to do a modulus operation on numbers that actually divide evenly like 10 modulus 2.
obviously there's no remainder in there since I divide evenly so the modulus results is zero so the reason I actually wanted to go over arithmetic and basic operations in Python is because they come in handy when you're assigning or updating variables and you can freely do operations between variables as long as they're of the same type relatively speaking so let's say we have a new code chunk here so we have x equals 5. now we want a new variable y that equals 5 times the amount of whatever X's so we can make a new variable y that equals x times 5.
and if we go and print both these out we should get X is equal to 5 and then Y is equal to 25.
so let's run that and you can see we get 5 and 25 and let's even say we want a new variable let's go ahead and delete these print lines here let's do a new variable Z that is equal to X Plus y and then now we just want to print out Z we already know that X is five Y is 25 so now we're doing Z equals 5 plus 25.
printing that out and we get 30.
so I think now you should have a pretty solid grasp of variables in Python we've covered what the different variable types are like ins floats strings and booleans we also covered how to assign variables how to print them and how to do different operations between variables including math operations before we close this video out I want to quickly cover one more thing and that's variable naming conventions so let me go ahead and delete all of these blocks here let's go back up to the top and we'll make a new one I mentioned earlier that you can name a variable pretty much anything that you want but there are a few rules that you need to follow so a variable can only contain numbers letters or the underscore character but the caveat is that they cannot start with a number or else the computer gets confused and will throw an error another rule is that it cannot have any spaces in it so let me just write out a couple of examples of variable names that work and are perfectly legal and some that don't work and are illegal so let's say we have legal variable names right here let's write out a few legal ones and then let's write out a few illegal ones all right so as you can tell all of these four here do abide by the rules they only contain numbers letters or the underscore character none of them start with the number and none of them have any spaces in it now let's go through some of the problems with these variables down here and why they're illegal this is illegal because it starts with a number and we can't do that this variable has a space in it and then this variable has a hyphen and the only special character that's allowed is an underscore hyphens are not allowed so to sum it up basically just don't start a variable with a number don't have any spaces and don't contain any special characters that aren't an underscore and besides that feel free to name variables whatever you want now typically when naming variables that are multiple words long we use something called camel case or snake case these are both naming conventions that make variable names more readable so camel case let's write camel case here camel case is when we capitalize the first letter of each word except for the very first word so an example of camel case would be my VAR written like this let's say my variable name like that so we can see that we're capitalizing the first letter of each word except for the first one and snake case let's write snake case is something similar except instead of separating it by capitalization we separate it by underscore so the equivalent of these two in snake case would be my underscore VAR or my underscore variable underscore name now I personally prefer camel case and you'll probably see me using camel case throughout these tutorials but it really just comes down to personal preference so this video is getting to the point where it's fairly long now but we've touched base with the fundamentals of variables in Python now you should now know what variable types are how we assign variables how we name variables and how we can do math operations between different variables now there is a disclaimer that this video is probably going to be the longest in the series so if you're able to get through this video congrats the rest will be quite a bit shorter in the next episode we're going to cover something called conditional statements so take care everyone and I'll see you then hi everyone and welcome back to the python for absolute beginner Series in this episode we're going to cover something called conditional statements a conditional statement is something that essentially dictates the flow of code we can use conditional statements by operators called logic operators I briefly mentioned them in the last episode but we're going to fully cover logic operators in this episode so a logic operator is an operator that goes between two values to form an expression and will cause this expression to evaluate as either true or false in the last episode I mentioned less than and greater than signs and those are both logic operators we've got four more to cover today but they're all pretty self-explanatory the first one is the equals condition this one is exactly as it sounds and it checks if two values are equal to one another and you write it by writing double equal signs it will always be double equal signs and this is super important because this is a very different operator from the assignment operator that we covered last episode which is just one equal sign this expression will evaluate to true if two values are equal to each other one example where this is true would be 10 equals equals 10. one example where this is false would be seven equals equals nine which is pretty self-explanatory the next operator is the not equal condition and this operator is the exact opposite of the equals condition and it checks if two values are not equal to each other so we write it by writing an exclamation point followed by an equal sign this expression will evaluate to true if two values are not equal to each other one example where this is true would be eight not equal to ten one example where this is false would be ten not equal to 10. so also pretty self-explanatory word the next operator is the greater than sine which we showed last episode this operator checks if the first number is greater than the second number if the first number is greater than the second number this expression will evaluate to True one example where this is true would be 5 greater than 3. one example where this is false would be three greater than five and the next operator is greater than or equal to this is almost identical to the above condition except it also checks whether or not the values might be equal if the first number is greater than the second number or the two numbers are equal this expression will evaluate to true we have the same examples for this one as the above one but just keep in mind that the values could be equal and make it true the next operator is less than which you also saw in the last episode this operator checks if the first number is less than the second number if the first number is less than the second number this expression will evaluate to True one example where this is true would be 3 less than five one example where this could be false would be five less than three and the very last operator is less than or equal to this operator again is very similar to less than except it also checks if the values are equal if the first number is less than the second number or if the two values are equal this expression will evaluate to True again we'll use the same example for this one as the above one but keep in mind that the values could also be equal and still be true so now that you understand what the six logic operators are let's go over how to actually use them these operators become useful when you want to write statements called conditional statements that can control the logic flow of our code so with conditional statements we have three keywords that we're going to want to know and I'll just comment these here so we have if we have elif which just stands for else if and then we also have else and with these keywords we use logic operators so let's say we have a scenario let's say I want to run a block of code but I only want to run it if 5 is less than 10. so let's check that so let's space down two lines and let's write if parentheses 5 less than 10. now after the closing parentheses type a colon and then press enter and then from here we're going to type print 5 is certainly less than 10. now let me explain what's going on here so this if right here signifies a conditional statement and it's going to check if whatever is inside of the parentheses is true if what's inside is true then we will run whatever code is indented underneath the if statement a colon after the conditional statement lets the computer know that the very next line is going to be indented and this is how python organizes its code if you forget a colon or if you forget to indent the computer is going to throw an error in most python editing environments like Google colab once you type a colon the next line should automatically indent for you but if it doesn't just use the Tab Key to indent yourself now let's run this code to see what actually happens so if we run it and we'll give it just a second you'll see that it prints out 5 is certainly less than 10. so we wrote that if 5 is less than 10 then we're going to print out this statement and 5 is certainly less than 10 so this evaluates as true so this piece of code is ran and we can actually put as many lines under an if statement or any conditional statement as we want so say I wanted to print more things under here like print blah blah blah and then I'll print something else I'll just say print still inside if statement and then I run it again it's going to run all these because as long as these are indented underneath the conditional statement it's going to tell the computer that we're still inside the if statement but when we want to get out of the if statement we're going to unindent so that's unindent here and let's just print now we are outside of the if block and if you'll run it you'll see all four of these will print but just know that this fourth one here prints outside of the if statement and not inside of it so let's test something then if we change this if statement to say if 5 is greater than 10 then this block of code with this if statement isn't going to run at all and why because the expression inside of our conditional statement this 5 greater than 10 is not true and a conditional statement is only going to run if this piece of code right here is true so if we run it you'll see that it's only going to print now we are outside of the if block because basically what happens is we hit this line we say hey is 5 greater than 10 no so we skip all this code because it's inside the if statement and we instead just go to this line of code instead of just using two random numbers like five and ten let's use what we learned last episode to implement some variables so let's make two new variables up here let's make x equals five and then we'll make y equals eight so let's go back into this if here and then replace the condition with X less than I we're going to go ahead and delete this code here and we're just going to print out X is certainly less than y so what do you think is going to happen here so we have x equals 5 and Y equals 8 which means that X should be less than y so this line of code should run and if we run it we'll see that it does in fact run or if statements become powerful is when you combine them with elif and else statements elif just stands for else if and it basically means if the first condition isn't met let's check this other condition instead so below our current if statement let's make a new line and unindent let the computer know that we're outside of this block and let's write elif parentheses x greater than y and we'll type a colon and then press enter and then we're going to write a print statement that says it appears X is greater than y now if this first statement isn't run this LF statement will say hey let's try this condition instead so in our case we're first checking if x is less than y if it is we'll enter this block of code if it isn't we're going to keep moving and check this LF statement and if this is true then we'll enter this block code so let's change our variables around here so that we triggered the second L if block so let's say x equals 10 and Y equals 6. and now if we press run you'll see it prints out it appears X is greater than y can actually have as many LF blocks as you want so let's change the conditions of our variables let's just look at the X variable so in our first statement let's change X less than y to say x equals equals seven in our LF statement let's change this just to say x equals equals nine and we're going to change the text here for the if statement we're going to say now inside if statement and then for the L if we're going to say now inside first alif statement and then we can make another LF block so let's make let's make two more actually so I'm going to copy this and just paste it so now we've got a couple of Ls blocks and let's change the conditions of these so let's change uh let's say this one to x equals equals five and then finally we want this LF block to trigger so we're going to set this to x equals equals 10 because we know we set x equal to 10 up here so we'll say this is the second LF block and this is the third alif block so what's going to happen here is if we run it it'll say now inside third Ellis statement because what we're doing is we're going to the first if statement we're saying is x equal to 7 no it's not so go to the next elif is x equal to 9 no so we skip that is x equal to 5 no so we skip that again and then we say is x equal to 10 and actually yes it is equal to 10. so we're going to enter this block of code and then print out now inside third elif statement the last conditional statement word we need to know is else so else basically runs if everything else has not been met so it's basically like a default it says hey all the conditional statements that came before me have failed to execute so let's run whatever is in my code chunk and I'll statement has to come after an if or an L if as it wouldn't really make sense to have an else statement just sitting by itself and unlike LF there can only ever be one else statement in a continuous series of conditional statements so an example that we have currently let's add an else statement at the very bottom let's say else and then we're going to print the value of x could not be found and notice that the else doesn't take in any parentheses or parameters you're like the other ones because it's a default so it's just going to trigger if nothing else does so we don't need anything like this inside the else statement so let's change the conditions here so that we actually do enter the else statement so instead of having this LF statement say x equals equals 10 let's say x equals equals 12. so now we're going to go through all of our conditions we're going to say is x equal to 7 nope is it equal to 9 no is equal to 5 no is it equal to 12 no and because nothing else has been triggered now we're going to enter this else statement so if we run this it's going to print the value of x could not be found most common combinations of conditionals at least in my experience are either just one if statement by itself one if statement followed by an else statement or one if statement one L if statement and one else statement although sometimes you may need to use multiple LF statements one of the really cool things you can do with conditional statements in Python is having multiple logic operators so in all of our examples here every conditional statement has only one expression inside the parentheses let's say however we want one of our blocks to check for multiple conditions let's say in our first if statement we want to see if x is equal to 5 or if x is greater than 7 and we can actually do just that by writing the or keyword so so like this let's say x equals equals 5 or X greater than 7. and the or keyword makes it so that if either of the expressions are true the conditional will run so in this case X is not equal to 5 but it is greater than seven so we're going to run this conditional block and it's going to print now inside if statement and we also have the and keyword the and keyword makes it so that both of the conditions have to be true so if we do x equals equals five and X is greater than 7 this is not going to run because even though X is greater than 7 it is not equal to five so the and operator does not let this code run so if we run this we'll see that it again defaults to the else block so let's do a little bit more practice I want to set up a little testing program here that allows you to easily test how these conditional statements work so I'm going to delete everything and delete all this I'm going to clear out the output I'm just going to make sure we have a fresh notebook here to work with and I'm going to make a new variable called let's just say user number and I'm going to assign it to input parentheses quotations enter your number here now input is a built-in function in Python that basically captures input from the user and whatever is inside of the parentheses in our case enter your number here is displayed to the user when the user is prompted for the input so once the user types in their number and presses enter we capture that input and in our case I want to assign that input to a variable I just made up called user number so I'll show you how this works and actually let's make another statement here where we're going to print out whatever the user entered so if I press run there's going to be a little text box that shows here shows up here so it says enter your number here and let's say I want to say uh 59 and then I press enter it's going to capture that and store that value inside user number and then it's just going to print that out so this is where our conditional statements are going to come in so let's say we have a conditional that checks what the letter grade of our user score is so let's write a conditional flow that prints out a certain line of text depending on what the user enters so we're going to assume a grading scale that 90 to 100 is an a 80 to 89 is a b 70 to 79 is a c 60 to 69 is a d and anything below 60 is an F so let's write this below and just follow along with my code here so I'm going to make two lines under here I'm just going to say if user number greater than equal to 90 and user number less than equal to a hundred and this is true I'm just going to print out you have scored in a and what this is saying is if whatever number the user inputs is greater than equal to 90 and it's less than equal to 100 meaning it's in the range 90 to 100 and we're going to print out that they have scored an A and let's make some other statements to check for the other letter variables so let's make L if user number greater than equal to 80 and user number less than equal to 89 and then we're just going to print you have scored a b and then I'm just going to copy and paste some of these down to make it a little easier make sure this is unadented we're going to print these and then we should have five letter grades because we have a b c d and f so we'll have this one say between 70 and 79 and then this one is 60 and 69 and then this one for f should say if it's greater than equal to zero and less than equal to 59.
and the little typo here let me change these so they're lowercase and then we'll change the text within each of these so we have this plug here should represent the squaring an a this is getting a b this is getting a c so let's change this to C which I just little face here and then we have another LF statement for D so we'll scale U of squared a d and then we'll say you have scored in F so the conditions we've written in here should check all the numbers from 0 to 100 but what if the user enters something that isn't between 0 and 100 or is in some like invalid value so let's write an ifs or an else statement sorry at the bottom here that's a default that's going to say you entered an invalid number and basically what this is going to do is in each of these we're going to say okay is it between 90 and 100 that's in a 80 89 B 70 79c 6069 D and then between 0 and 59 is an f and then if for some reason the number wasn't caught in any of these we're just going to say that hey the user entered an invalid value okay so I want to go ahead and run a couple of tests here so let's go ahead and run this and our problem is to enter a number let's say um we want to have somebody score a d so let's put in 64 and we're going to press enter looks like we got an error here uh oh okay I see what happens so this I guess this input statement here when it captures the user input it's actually storing my input as a string and not an integer so to get around that we can actually wrap this in the int little function here that basically will just convert what our input is to an integer so let's try running it now I should fix that let's do 64 again and yep it'll say you have scored a d and then let's just run a couple of tests here let's say hey somebody scored an 87 what should that be that should be a b right so we say 87 press enter you have scored a b let's check for an a let's say they scored 98 you have scored an a let's check the bounds here so let's check a hundred and zero so 100 should be in a right yep so you've scored an a let's check if they scored zero zero should be an F yep you have scored an f and then we also want to check our else statement so let's say the user enters 16547. now that's not a valid grade obviously so what's going to happen is it should trigger this else statement because it's not within any of these ranges here so we do that and it says you have entered an invalid number let's try another invalid number let's say 135 and I'll run that invalid number and then you can just keep testing this as much as you want so if you want on your own time you can make a copy of this code here if you want to mess around with these conditional statements and then kind of give you a good idea of how these statements actually execute but one more time we'll just say I want to get a c uh enter your number he goes enter 76 press enter UF Square to C okay so by this point you should have a reasonably strong understanding of conditional statements in Python in this video we learned what logic operators are what if L if and else statements are and how we can use these all to control the flow of code in our program I'm going to link a couple of resources in the description below if you're still struggling to understand the concepts behind this video next video we'll go over data variable types that can hold multiple pieces of data instead of just one like the types you've learned so far take care everyone and I'll see you for the next video bye everyone and welcome back to the python for absolute beginner Series in this episode we're going to cover data types that can store collections of data so in episode two we went over a variables that store just one value whether it was a string and Boolean or whatever else our variable only ever stored one value there are many times encoding however that we find the need to have variables that store more than one value for instance what if we wanted a variable that could hold all of your friends names in it we'll need a variable that can store multiple values for that and that's what we're going with today's episode we have four types of data in Python that can store multiple values in it and I'm going to go over each one they all share similarities to some degree the first one we have and probably the most commonly used is a list a list can have duplicate values it is ordered and it is changeable changeable just means that we'll be able to update the values in the list whenever we want and ordered means that the items have a defined order that will not change a list would look something like this we always denote a list by using the square brackets and we separate list items by commas in our example we're storing three strings that each represent one fruit oranges are in the first spot crepes in the second spot and apples are in the third spot we can add as many other things as we want to the list but oranges will always be first grapes will always be second and apples will always be third unless of course we delete these values from the list or something another example of a list storing ins would look something like this an extremely important aspect of this is what's called indexing indexing means The Ordering of the values we say that the first element of every list starts at index 0. the next value is at index one the next is at index two and so forth so in this case of a list that has oranges grapes and apples we would say oranges are at index zero grapes are at index one and apples are at index two this index number is super important because this is how we're going to be accessing and modifying data in our list next we have a tuple and a tuple is almost identical to a list except there is one main difference values in a tuple cannot be changed this means that we can't add delete or modify any values inside of a tuple aside from that it operates very similarly to a list we write it almost the exact same too except instead of using square brackets we just use parentheses or round brackets so we would write a tuple like this the same rules also apply as a list we separate items by commas and the items will be in the same order every single time if we wanted a tuple of ins we could have for instance 5 3 8 and 7 and a tuple just know that once we create these tuples their values cannot be changed or modified in any way tuples have the same indexing as lists the first value is at index 0. the next value is at index 1 and so forth the next one we have is a set sets also share some similarities with lists and tuples but are a bit different sets unlike listen tuples are not ordered meaning if I have a set that contains three items those items are not always going to be in that same order another key thing about sets is that they are partially changeable existing values in a set cannot be modified however you can freely add and remove items from a set as you please we write a set similarly to how we write lists and tuples except we use squiggly brackets for sets so just remember a list is square brackets tuples is parentheses and set is squiggly brackets another important thing about sets is that duplicates are not allowed meaning we can't have the same value twice let's take an example of a set that looks like this right now we see it in the order of 10 20 30 and 40. but because a set is unordered it could be 20 30 10 40 for example sets always print out in a random order imagine that lists in tuples which are very similar structures are like people in a single file line everyone is in a particular spot and that order will never change sets however are like a room full of people that are constantly moving around there's no order so anyone could be anywhere in the room at any given time in terms of how these data types relate to each other listen tuples are like fraternal twins and sets are like that third sibling that don't quite fit in with the other two if we have two fraternal twins and one Misfit sibling this last data type is like the distant cousin dictionaries are the fourth type and they're very different from the other three yet also the most unique dictionaries rather than just storing data on their own use what are called key value pairs a dictionary would look something like this notice that we use squiggly brackets for dictionaries just like we do for sets one key value pair from this dictionary would be brand Chevrolet displayed like this brand is the key and Chevrolet is the value we always denote a key value Pair by writing whatever a key is then a colon then whatever the value is Akia is basically telling us what kind of value it is stored if we have a key name brand and we're specifically talking about cars you can probably assume the value associated with it is going to be some sort of carbon similarly if we have a key value pair where the key is name we know the value associated with it is going to be someone's name a key has to be a string but a value can be of any type noticing the above example that all of the keys are surrounded by quotes because they are strings some of the values like Chevrolet and Malibu are surrounded in quotes because they're strings but for instance we can have an INT like 2008 as a value too so we're not limited to just strings in the value fields we separate key value pairs by commas just like we would separate list items by commas dictionaries are ordered just like listen tuples meaning key value pairs will always appear in the same order dictionaries also like lists can easily be changed and modified as we please dictionaries do not allow duplicates you can almost think of dictionaries like tables like this dictionaries are used pretty often and they're very useful in a lot of different scenarios so now that we've gone over the four collection data types I want to show this graphic here just so you can visualize the similarities and differences between all these different collection types lists are ordered changeable allow duplicates and rewrite them by using square brackets tuples are ordered unchangeable allow duplicates and you write them by using parentheses or round brackets remember listen tuples are almost identical except for the fact that tuples cannot be modified at all sets are unordered partially changeable don't allow duplicates and rewrite them by using squiggly brackets dictionaries are ordered changeable do not allow duplicates and just like sets we write them by using squiggly brackets the way we differentiate dictionaries from sets is that dictionaries use key value Pairs and sets do not so we've talked about what each data type is so now let's actually code them let's go in order of how I presented them so let's start with lists and tuples because lesson tuples are almost identical I'm just going to cover both them at the same time so let's make a new variable let's call it myvar and let's make it equal to a list so I'll make it equal to 1 3 5 7 and 9. and notice how for a list we use square brackets and we separate each entry by a comma now because lists and tuples are ordered we say every number has a certain index which basically means the position that it is in every list in Tuple starts with index 0 and just goes up from there so in our case at index 0 we have one at index one we have three at index two we have five at index three we have seven and at index four we have nine this index number is how we access data so let's say you want to grab five from this list what index is 5 in well we have 0 1 2 so we know that 5 is in index 2. so if you want to access that we write something like this so square brackets are always going to be what we use to access list and Tuple values and inside of those square brackets we always put an index number so this statement is basically saying hey let's look at myvar which is a list and then let's look at whatever is an index to and let's actually wrap this in a print statement here so you can see and if I run it index 2 should output 5.
yep so if we run it you'll see we get five so what if I want to grab a different number let's say I want to get I want to print out this 3. so what index is 3 in well 3 is in index 0 and 1. so we know three is in the first index so let's instead of printing myvar index two let's print my bar index one and it should output 3.
so note that in this list we only have indexes 0 1 2 3 and 4. so if I try to access index 5 I'm actually going to get an error because it doesn't exist so if I try and do this index 5 this error is going to say list index out of range and that literally means I'm trying to access part of a list that doesn't actually exist so if I just want to print the entire list out State let's clear this output here if I want to print the entire list out I would just remove this square bracket here and just like any other variable I would just type print and then the variable name run it and you see it prints out the entire list let's say we want to change a value in this list let's say I want to change this 3 to a 6. to do that we'll need to know the index that it's at well we already said we know that 3 is at index one so let's write it like this and I'll make a space here so if we want to modify a value we'll use the same square brackets I already showed you so we write myvar at index one equals six now this statement is basically saying store the value 6 at the first index of my VAR so now if we run this which is going to print out the entire list you'll see we now have 1 6 5 7 and 9.
let's say I want to change this 7 to a 15. so we'll do my VAR we know that 7 is at index 3 so we'll do myvar at index 3 equals 15. and now we've printed out again you'll see that 7 has now been replaced by 15. what if we wanted to add and remove values from a list completely to add values we use the dot append method so let's say we want to add 17 to the end of our list so let me make a space here and to do that we're going to write the name of our list dot append and then put parentheses and then whatever value you want to add to the list you put inside the parentheses here so we're going to add 17. and now if we run all this code which is going to change this 3 to a 6 it's going to change the 7 to a 15 and then it's going to add a 17 at the very end so if we print it out you can see it did just that what if we instead want to add a new item to somewhere else in the list that isn't at the very end for that we can use the insert method so the insert method has two values they need to put inside of it the first one is the index you want to insert at and the second one is the value that you actually want to insert so let's say I wanted to insert the integer 3 at index 2. I'll make another space here and I would just write myvar dot insert and then like I said the first value should be the index for an axis so we said we want to go to index two and then we want to insert the value 3. so now if we print this out you'll see that at index 2 it just added a 3 and it pushed everything else over what if we want to remove a value from a list it's super similar to append except instead of writing a pen we write pop so let's say we actually don't want this 17 at the end of our list anymore so let's write myvar dot pop so after all these statements I'll make more space scroll down a little bit so you guys can see a little better we write myvar dot pop and then make sure to add parentheses if you write it like this and don't put any number inside of these parentheses it'll automatically remove the very last item on the list so if we run this statement you'll see bam the 17 is now gone so we can actually specify a specific index with pop if we don't want to remove only the last item so let's say you want to remove this six well we know this 6 is at index one because we have 0 and then one so let's say we just pop whatever is at index one and now we print it and the six is gone we've covered a ton of information about list in the last couple of minutes let me summarize everything so you can get a more clear and concise picture so I'm going to go ahead and delete all of this here I'm going to make some comments here so to make a list we write whatever we want our list name to be let's say my list we write equals then do square brackets and can insert whatever we want inside of here separated by commas the index of a list represents the position the first item of the list is always at index 0 and we just go up from there so we have index 0 index 1 index two and index to access a list item write the name of the list variable in this case my list then square brackets and then whatever index you want to access so if we want to access 5 this is at index one so we'd write it something like this to update a list item write the name of the variable so write my list then square brackets of whatever index you want to use so we'll say 2 and then set it equal to whatever value you want to update it with so let's say 10.
so in this case index 2 represents seven so we're replacing 7 with 10.
to add an item to a list we would just write the name of our list dot append and then add whatever value you want to add inside the parentheses so let's say I want to add 3.
next to add an item to a list at a specific index we use the insert method so we would write my list dot insert parentheses and then the first value is the index you want to insert at and the second value is the value that we actually want to insert so let's say at index one we want to insert the value 40.
to remove an item from end of the list we would use the dot pop method so in this case we would write my list dot pop and that will remove the last element of the list to remove an item from anywhere in the list so to remove an item from anywhere in list we would use the dot pop operator except we would put whatever index we were to move as let's say we're going to move the value at index two if we would write my list dot pop and in parentheses we'd put two I know so far this is a ton of information all at once so feel free to come back to this video whenever you need to use it as a reference I'll also drop a few links in the description that basically have all this information that I just mentioned we're going to be using lists all the time so there's a good chance you'll see lists being used in the coming videos as well pupils are going to be pretty much the exact same as the list except you don't have access to these append insert and pop methods you also can't update any Tuple values and that's because we mentioned earlier that tuples are unchangeable the only difference in how you make them is using parentheses instead of square brick let's make a tuple now so I can show you what I mean so let's go ahead and add another code block underneath this one and that's why a new Tuple let's say my Tuple let me scroll down here my Tuple equals parentheses yes comma no comma Maybe so I can still print out and access Tuple values just as I can with lists like this if I write print and then we do the Tuple name so we do my Tuple at index let's say index one and if I print it out it should print out no because no is at index one but if I try and update it in any way so let's say we try to do we try and update this let's say we do my Tuple at index one equals LOL and I try and run it I'm actually going to get an error here it'll say Tuple object does not support item assignment because you literally cannot assign anything in a tuple so if I try and use another function like append let's say we use a pen which obviously we can use with list let's say for a tuple I try and do dot append let's just add haha on the end try and run that I'm also going to get an error saying there is no attribute append because it basically doesn't recognize this method at all because we can't add or remove anything from a tuple so Tuple values can never be changed or modified in any way so hopefully now you should have a pretty strong understanding of how lists and tuples work so now I'm actually going to delete this code chunk here and I'm going to make a new one scroll down to it and now I want to cover set we said that you initialize sets by using squiggly brackets so let's make a new set containing some strings of fruits so we'll make a new variable my set and set it equal to some Roots here say bananas um we'll say grapes and then we'll say apples and that's a oranges and if you remember one of the main rules of sets is that they are unordered so if I actually take my set and I print out the whole thing you'll see that it's not necessarily going to print in the same order that I initialize it in so you see when I print it it goes apples oranges bananas grapes which is a completely random order and if I run it over and over again it's going to print in the same Order each time in this case but just know that this ordering is kind of happening behind the scenes and that like with listen tuples if we were to print it out it would print exactly in order but because of the set is not ordered this is going to be just kind of randomized almost because of this unordered aspect we actually can't use square brackets to access individual values in a set another thing to note about sets is that they are partially changeable when I say partially changeable I mean that you can add and remove values from a set you can't update existing values so for instance I can add cherries or blueberries and whatnot to the set so if I wanted to I could also remove these values from the set once I felt like it but I couldn't change one for say from oranges to Pineapple because sets don't allow you to update or modify existing values to add values in a set we use the dot add method so if we wanted to add let's just say a number 25 to this set we would write something like this we would write my set dot add and then inside parentheses we would print 25 and if we run this which will print out the entire set you'll see It'll say or it'll now have 25 in it although again the order is randomized but we still added 25.
if we want to remove an item from a set we use the dot remove method you can actually use dot pop to remove set items just like we could with lists but because the set is on order it's going to remove a random element which usually isn't what we want so to remove something we would write dot remove like this so let's say we decide that we actually don't want this 25 anymore so we'd write myset dot remove and then inside of the parentheses we would put 25 and if we run this now and print out the entire set you'll see that 25 is now gone because you can't access any individual set Elements by themselves the only way to access them is by iterating through the entire set or iterating through every single item so we can iterate through all items of a list and Tuple as well that's a whole other topic though that we'll cover in the very next video so just like we did with lists let me summarize sets for you so I'll make some space down here clear this output scroll down so to make a set we would use whatever we want our variable name to be so in our case we'll say like my set equals squiggly brackets and we can insert whatever we want here let's say 17 25 and and remember set items are not indexed so we can't access individual elements at all so the only operations you need to know for now are add and remove so to add to a set we would just use the dot add method so let's say in my set we want to add the value 32. so we do myset dot add parentheses inside of parentheses let's put 30. to remove an item we use the dot remove method so let's say to remove item from set and if we wanted to remove let's say this 38 we would just write my set dot remove 38. like I mentioned we could also use the dot pop method with nothing inside the parentheses but that's going to remove a random item so that's probably not the best option all right and finally last but not least I'm going to open up a new code block here so we can cover the last data collection type which is dictionaries so dictionaries are super unique and have quite a few different applications in program I mentioned earlier that dictionary is use key value pairs so let's make a new dictionary so I can show you how they work so let's just name it my dictionary equals squiggly brackets and then just follow along here so I'm writing a key that is name then a colon and then inside the name I'll just put Austin and then the next key value pair you want let's just say email and then I'll just make up some email here let's just say Austin gmail.com and then separate another comma for our last key value pair let's say we want phone so I'll do that then a colon and then I'll just write some made up phone number like that so this dictionary has three key value pairs the first one is this name with a key of name and a value of Austin the next one is this with the key of email and a value of this made up email address and the last one is this with the key of phone and a made up phone number so same as the other collection stats we can also print out the entire dictionary if we want to so let's do a print statement and let's do my dictionary let's run it and you'll see it prints out the entire diction to access items in a dictionary we can use square brackets sort of similar to how we access list and Tuple items except dictionaries aren't indexed so instead of putting the index number inside of square brackets we put whatever the key of whatever value we care about so let's just say I want to grab this email right here so to do that I would write my dictionary square brackets and then write email so what this is saying is let's look at the my dictionary actual dictionary and then let's grab whatever value has the key of email so if I wrap this here in a print statement you'll see that it should output this made up email address here and yep it does print it out right let's say I want to grab Austin from this dictionary so to grab Austin I would just put in name right here and we print that out and you'll see It'll say Aus Keys always have to be strings so you're always going to have to have quotations inside of the square brackets here so to change items in a dictionary we use this exact same syntax so let's say I want to change this name to instead of Austin let's just say Jackson so let me make some space here and I would write my dictionary name and then let's just change it to Jackson and then if we print it out here you'll see when it prints the name it prints out in Jackson because we updated it on this line the super cool thing about dictionaries is that this is actually how we add elements too so if I wanted to add a key value pair to my dictionary I would simply put a key inside the square brackets that doesn't already exist so let's add something let's just say my dictionary let's add a new key called birth month then let's set it equal to October and I'm actually going to delete this line here just so we can output the entire dictionary and if we run this you'll see that as a scroll bar here but it added a new key value pair at the very end of it with just birth month and October to remove an item from a dictionary we would just use the dot pop method and inside the parentheses we'll just put the key of the key value pair that we want to delete so let's say I no longer want to have this entire email field here so let's make some space I would write mydictionary dot pop and then inside of the parentheses I would just put email and now if we print out the entire dictionary you'll see that the email field is now removed let's say I also wanted to get rid of the birth month field I would just do the exact same thing so let's do mydictionary dot pop and then we'll pop off birth month and now if you print it out you'll see birth month is gone too and now we just have name and phone left dictionaries have tons of use cases in Python so I'd strongly recommend getting familiar with them so since we went over these couple of things let's quickly summarize so I'll make some space down here and let's write to create a dictionary we would just write our variable name in this case we'll just do my dictionary equal sign squiggly brackets and then insert as many key value pairs as we want so let's just make one that says Name colon let's just say George and then use a comma to separate different key value Pairs and then we'll say email and then we'll just do LOL so to type a key value pair we write a key that will always be a string so it's surrounded by quotations and then colon and then whatever you want our value should be and then we separate different key value pairs by a comma so next to access items so to access dictionary items let me actually just clear this output here we would use square brackets like this so let's say we want to access this value George from this dictionary we would write my dictionary square brackets and then the key of whatever is associated with that value so we write an a to update items in a dictionary we use the exact same syntax except we can assign it a new value so to update dictionary items let's say you want to update the name that we just accessed we would say my dictionary name let's just change it to insert name here and that's how we update a value in addition to add items to a dictionary go ahead and scroll down here we just use the square brackets again except we make sure that whatever we're putting inside the brackets is something that doesn't already exist so let's just say we want to add a new field that says birthday and then we'll just add in a month let's say October to remove items from a dictionary so to remove items from dictionary we use the dot pop method and insert the key of whatever key value pair we want to remove so let's say we want to remove the email field from this dictionary we would write my dictionary dot pop parentheses and then we would type in email so in this video we covered the four data types that can store collections of data you learned about lists tuples sets and dictionaries for lists you learn how to make one access values update values add values and remove values for tuples you learn the exact same things minus updating value since you can't do that with tuples for sets you learned how to make them how to add values to a set and how to remove values from a set and lastly for dictionaries you learned what key value pairs are how to make a dictionary how to access certain key value pairs how to update values how to add values and how to remove values so in this video we've covered a huge amount of information so don't be discouraged if it doesn't all click right away I'd highly recommend hopping into Google collab and messing around with these different collection data types the best way to fully understand these data types is just through trial and error and it may take a bit of time I'd also highly recommend if you're struggling or forgetting how to do certain operations to refer back to this video if you need help like I mentioned before I'm also going to link a few resources in the description so that you can use these to help guide you through your Learning Journey next video will cover something incredibly important which are Loops take care and I'll see you next video hi everyone and welcome back to the python for absolute beginner Series in this episode we're going to cover loops loops basically allow us to repeat some code over and over again until we decide to stop it python has two types of Loops that we'll discuss in today's episode so I mentioned in previous episodes that variables and conditionals are like the bread and butter behind python but Loops are what makes programming powerful with two lines of code I could print every number from zero to a hundred thousand we're going to go ahead and jump right into the code this episode the first type of loop that we have is called a for Loop and recall it that because we always start these kinds of loops with the word for I'm going to go ahead and write out a simple for Loop here and I'll explain what each part of it does so let's write 4 x in range parentheses and we'll do 0 comma 10 then I'm going to write a colon after this to indent and I'm just going to write print X okay so now let me break this down so if I run this code you'll see it should output all the numbers from 0 to 9. so when writing a for Loop we always start it with the word four our goal with this Loop is to print out every number between 0 and 10. so we need a variable that can represent each individual element and that's where this x comes in this basically means that we are representing each individual number with the variable X so what the first iteration of the loop X is equal to zero and then the next iteration it's equal to one then the next one that's equal to two and so forth this variable name can be literally whatever we want it just needs to follow the variable naming conventions that we discussed in episode 2. then we have this in range component here and this range of numbers is the range of numbers that we're iterating over in our Loop so this first number within the range parenthesis should be the number that you want to start at and this second number should be the one you want to end at I'll make a quick note here that this second number is not included in the range but it'll print everything up to that number that's why if you see when this code is run it prints everything up to nine but then it doesn't actually print 10 because it doesn't include this number so if I wanted to print everything including the number 10 I'd have to make this actually 11. I run that you'll see it prints that and then 10 is added here to the end so I'll go ahead and change this number back to a 10 here and altogether this statement is basically saying let's look at every number between 0 and 10 and at every number we're going to execute some block of code the code that is executed at every single block depends on what is indented underneath this for statement so in our example we're simply printing out every single number note that we set X to represent each individual element so when we write our print statement we're just printing out X this line containing the four statement is generally called The Loop header and whatever is indented underneath is generally called The Loop body so let's trace this Loop step by step once I press run so once I press run we hit this first line here so first we set up a range of numbers 0 to 10 and then we set x equal to the first number in the range so at the very first iteration X gets set to zero so then we enter this block of indented code and we just print out X so we print out zero then we go back up to the loop header and now we set x equal to one we enter the body again and print out X which is equal to one then we go back up X is equal to two then we print out two go back up X is equal to 3 then print out three and so forth and we do that up until we hit x equals 10 because 10 is the last number in this range but because that's the last number once it hits 10 we don't enter the body so that's why 9 is the last number that is actually printed out in this series in our case we're just printing out the item in the range but we can have as many lines as we want and we can do literally whatever we want with inside the loop body so above this for Loop I'm going to make a new variable call it count and I'm going to set this equal to zero and basically what I want to do is that every iteration of the loop I want to add 3 to account so I'm going to go ahead and delete this print statement here I'm going to write this statement here so we're going to do count equals count Plus 3.
now if this statement is essentially saying is take the existing value of count add 3 to it and then update it so this is the new value of count so what's going to happen is we start out at 0 once the program starts and then at the first iteration of the loop we're going to add 3 to it so count is now equal to 3. then we're going to go to the next iteration add a 3 to it now it's equal to 6. go to the next iteration add three more now it's equal to 9 and so forth and this might look a little confusing here the fact that we have two variables the of the same name in the same statement here but just know that this is what we're updating it to and this is the existing value of count so we're just taking the existing value and adding three more to it and what I want to do here is after the loop is done I want to go ahead and describe a print statement and print count and if you look at this Loop you can take a guess that the output for count should be 30 right because we go through this Loop 10 times and at every single time we add three so if I run this you'll see it prints out 30 for count and on a quick little side tangent here there's actually another way you can write this line here without writing it like this because this looks a little bit awkward right so if you want to just increment a number or a variable by three we can also just do count plus equals three and these lines literally mean the exact same thing this is just a shorthand notation way of writing it so if we I'm just going to go ahead and comment this out and run it again you'll see we still get 30 because this line is basically the equivalent of this line it's just a shorter way of writing it it's a little more convenient a little more widely used so I'm going to go ahead and just delete this counted line out here so we can have it written like this and remember when I said at the start of the video that I could print out every number from zero to a hundred thousand in two lines of code well let's do that so I can show you so I'll go ahead and delete this account variable here and I'll delete this print and let's just change this back to where we had it before so we'll do just print X I'll go ahead and clear this output here so I said we want to do every number from zero to a hundred thousand so let's change this range to zero to a hundred thousand and then let's run it and let's see what happens and as you can see it is literally printing out the console every single number from zero to a hundred thousand so if you were to try to do this on paper from zero to a hundred thousand that would take you maybe a few hours maybe even longer but in Python we can do this in about let's say 20 to 30 seconds which is awesome so I'll let this finish running here and Bam that was finished we've just printed every single number from zero to a hundred thousand and it did that in 32 seconds this is what I meant when I said Loops are what makes programming powerful okay so let's keep this moving so I'm going to go ahead and clear this output here and I'm going to clear up this code block because I want to go over A New Concept and what I want to go over now is another way that we can use for Loops so this syntax will look a little bit different but it's going to involve what we learned about list in our last episode so let's say we have a list and we'll call it my list and let's just set it equal to a list that we have last episode so we had something like oranges we had apples and then we had grapes so he went over last video how to do all these different operations with lists but we never covered how to go through all the items at once so to iterate through all the elements of a list we could also use a for Loop but we wouldn't use the range method instead we would do something like this we would write 4 x in my list and then colon same thing and we just do print X now this looks pretty similar to our method using range except this time we don't need to use range because we're giving it our own variable in this case my list so this Loop header is basically saying we're going to look through every single item in my list and at each iteration we're going to set that item equal to X so then in the body if we just print out X we're actually going to end up printing out all the elements of the list so for example when the for Loop starts it's going to set x equal to oranges and then we print that out and then it goes back up here it sets x equal to Apples then it prints that out then it goes back up one more time sets x equal to grapes and then it prints that out so we can actually run this and you'll see it prints out oranges apples and grapes so it actually does not matter how long this list is if we run a for Loop like this using this method the number of times a loop will run is equal to the number of items in the list so in this case we have three fruits so the loop is going to run three times if I replace this list with a list of ins like one two three four five and run this Loop it'll run five times because there are five items we could use this exact same type of for loop with tuples sets and dictionaries too all we need to do is write four and then we make up some variable name to represent each individual element and then we're going to write in my list or whatever your list variable name is once you do that you just type a colon to let the computer know that you want to indent and then whatever you want to do inside the loop body you just write here and like I said we can do this with lists sets dictionaries and tuples but something really interesting about python is you can actually do this with strings too so let's say we have another variable let's just call it my string and let's set it equal to say bananas and I'll throw this output here and instead of saying 4X in my list I want to make it 4X in my string and if you do it on a string it'll actually Loop through the string and I'll print out each individual character oops didn't mean to switch those there so if I run this you'll see it prints out each individual letter because instead of like a list instead of taking each individual element separated by commas if you pass in a string to this for Loop it'll treat every individual letter as each iteration okay so now with for Loops you should have a decent understanding of the two types of ways that we use for Loops so the first way that I showed you was to use the range method so we would do like we had 4X in range and we give a range of numbers like 0 to 10 and then we would just indent and then we would say print each individual element so this is the first way that we did it and that's just using a range of numbers the second way that we can do it I'll change this back to my list here the second way that we can do it that I just showed you was instead of giving it a range of numbers to give it some variable that has multiple items in it so that can be the collection data types we have an over list episode so uh list sets tuples dictionaries and like I just showed you you can do it with strings so these two ways here are pretty much the two ways that we're always going to use for Loops in some way or another in Python so now I want to move on to the second types of Loops in Python so I'm going to go ahead and delete this code block here and I'll just open up a brand new one just a clean one so we're going to cover while Loops next so while Loops are Loops that run using a conditional statement if you watched episode 3 you should be familiar with how General conditional statements work so as long as a certain conditional statement is true a while loop will continue to run but as soon as it becomes false this while loop will stop so how do we actually write a while loop so we would write it something like this we would write bio then parentheses and then inside of these parentheses we put whatever we want our conditional statement to be so let's write a little conditional statement inside of here let's write 1 less than five then we're going to write a colon to let it know we're going to indent so we're going to go into the body and then let's just print something like LOL so now I want you to see if you can find a problem with this Loop here I said that once a while loop reaches a false condition inside the parentheses it's going to stop but the issue inside of here is that one is always going to be less than five no matter what so if we run it this Loop is going to infinitely print LOL because it's never going to stop and I can actually show you if I try and run it it is literally just infinitely printing LOL and it's never going to stop so I should actually stop it for crashes here and I might actually but let me stop it so as you can see infinite Loops are really really bad and if you let them run long enough they could crash your program and your entire computer so that's why I went ahead and stopped this execution here I'm going to go ahead and clear this out too so the important thing about while Loops is making sure that they have an in condition so you have to make sure that this conditional statement right here will eventually be false so let's make a condition inside these parentheses here that's actually going to eventually be false so I want to make a new variable up here I'm going to call it X and I'm just going to set it equal to 0 to begin with so instead of having one less than five I'm going to replace this one with an X so our conditional while loop will run as long as X is less than five so what we need to do here to ensure this Loops ends is that we need to increment X so that it will eventually be greater than 5 so that the loop will come to a halt so we're going to use that same operator we showed earlier with doing plus equals to increment so we're going to do X plus equals one and what this is essentially going to do when we trace this is we're going to start this program set x equal to zero and then we're going to look at this line and say is 0 less than 5 yes it is so we're going to enter the body and the body is just going to increment X by 1.
so now X is equal to one then we say is 1 less than 5 yes it is so into the body set x equal to 2 now because we increment by one more is two less than 5 yes run it again and again and again until eventually X is no longer less than five so I'm going to actually print out X here just so you could see and if I run this block of code you will see it prints off one two three four five and actually I want to make a change this instead of printing off X after I increment I want to print out X before we increment just so you can see this process a little bit more clearly so we run it now and now we get 0 1 2 3 4. so like I said we start at zero and then this is true so we head to the loop body print 0 and then we move X to one then we go here we print out one move X to two then we go here print out two move X to three and so forth until once we hit five so we're gonna when we have four here we print out X and then we increment it to five and then we go back up to this header here and we say is five less than five no it's not so now we break the loop and obviously this five here just an arbitrary number that we just made up if we wanted to increase the range we could say x less than 20 and if we ran this you'll see it prints every number pretty much from 0 to 20 but not including 20 because like I said once X is equal to 20 we're not actually going to enter the body so one thing I really want to note here is that if this while condition is never true in the first place the while isn't going to run a single time so I'm going to clear this output and I'm going to change this to say x greater than 20. and if we run this you'll see literally nothing happens so it doesn't matter how many times you run it nothing is going to happen and why is that well we set x equal to 0 at the very start and then when we look at this line we say is 0 greater than 20 no so we never even enter the while loop in the first place so this while loop is never going to run which is why if we run this code nothing happens and it just runs instantly but the difference is that when we have X less than 20 this initial statement at the very start of the program run is true so that's how we enter the loop in the first place so the biggest and most important thing about while Loops in Python is being extra extra careful to make sure the loop cannot be infinite so we have to make sure this conditional statement will eventually be false if we don't and we're not careful we'll be left with infinite loops and those are something we you never want to have in your program so I showed you first when we had like a while one less than five in this conditional line here but let's say we forget to increment X if I delete this line here and forget to increment x x is always going to be zero so this is going to run forever so if I run this it should infinitely print out zeros and I can show you like this and it's just going to keep on printing this Forever Until eventually something's going to crash so now that you've seen what to avoid with while Loops I want to do a little summary here so I'm going to clear out this output here and let's just let's just make this X plus equals one we'll add this increment back in so we have that there just so it doesn't give us an error um so I'm going to do a little summary here between while loops and for Loops so what I showed you so far was how to use for Loops in two different ways so we did 4X in range 0 to 10 and then and we'll say print X and then what I showed you just before this was 4X in my list let's say we have a list that we just make with orange apples grapes and we can do that and then print X and then this is what I just showed you just now was how to use while Loops so these are the three main ways that you're gonna loot you're gonna use Loops in Python so usually iterating through a range like this with a for Loop iterating through a list with a for Loop or iterating under some conditional with a while loop so the main difference in functionality between the loops is this so for Loops are meant for when you have a list with a length that isn't going to change or when you know exactly how many times you want to run a loop while Loops are used if you want to be a little more loose with your loops and only end once a certain condition is meant so this allows you to do a ton of things with while Loops but it also leaves you open to having infinite Loops if you're not careful so an application of while Loops would be if you're programming a game for instance so let's say you have a Boolean called game started if game started is true it means the game is currently in progress if game started is false it means the game hasn't been started yet so we could say while a game started equals true and then run whatever code it runs the game as soon as game sorted is false meaning the game has ended the while loop will stop and the game will stop running so now that you should have a solid understanding of for loops and while Loops I want to go over two practice problems to solidify your understanding just a little bit more so I'm going to go ahead and delete all this here and make a fresh code block so we can start with this first practice problem here okay so let's say that we have a list right now let's just call it my list one and it's going to contain the values one two three four and five now the prompt for this problem is that we want to make a new list called my list two I'm just going to comment this here we want to have a new list minus 2 that contains double all the values from my list one so we essentially want my list two to look like this we want two four six eight ten because essentially what we're doing is just doubling each of these elements from list one but we want to do this without actually just initializing it like this because what if the values in my list one change so what if we change this to like three six nine and whatever we want what these to reflect accurately to say you know 6 12 and then 18. so we always just want this list two values to be double what is in list so I'll go ahead and fix these here and I'll make these corresponding again okay so first just to start off I want to initialize my list to as just an empty list just to show that it's empty for now and that we're going to add to it later so how would we go about solving this problem by using a loop with all programming problems you should first just take a second to actually break down the problem and think about how you might do this so let's think about this from a practical perspective so I said we want to go through each of the elements in my list one and double them and then add that element to my list two so what we're really trying to do is Loop through all the items in my list one at every item multiply it by two and then use the dot append method that we learned last episode to add this number to my list two so for example at the first element of my list one we would just double it and then use the append method to add to my list two then we go to the next element double this and we append to add four and so forth so let's go ahead and write a loop for that so I already showed you how to use a for Loop to Loop through a list so let's write this let's say four item in my list one and then we're going to write a colon to indent and then inside the body what we want to do is take each individual element which is represented by item and then you want to multiply it by 2 and then add it to my list two so we can actually do that in one line and I'll show you and I'll go ahead and go over this and explain it if you don't understand it right away so I'm going to write my list 2 dot append and this my list two dot append you should have learned in the last episode when you went over how to add elements to a list so this is just basically going to add an individual number to my list 2. and inside of this parentheses here what we want to do is we want to take the element from my list one and then just multiply it by 2. so let's do item times two and the reason we do items times two is because item represents each individual element in my list one so essentially what we're doing is just taking each element we're multiplying it by 2 and then we're just calling this append method to add it to my list two so if I actually go to the very bottom here and I print out my list two it should print out 2 4 6 8 10 because we are just doubling all of these values and yep you can see it prints out two four six eight ten let's say I want to change the values in my list one let's do this to 5 10 15 20 and 25. and now if we run it you'll see it prints out 10 20 30 40 50 because it is still double all of the values from my list one so I get that if you're brand new to python this code might be just a little bit overwhelming or confusing to understand at first so don't get caught up if you don't quite understand what's going on right away I strongly encourage you to hop into your own Google collab notebook of your own and just mess around with this python code maybe just copy and paste what I have and just try out some new things the best way to test your understanding of a concept is to build it yourself so try messing around with lists and for loops and just see what you can do so I'm going to go ahead and delete all this here and I'm going to move on to our second practice problem so I'm going to delete this cell open up a new one and our second practice problem is going to contain while loops first I want to make a fun little mini game we want to build a super basic number guessing game we'll have a number between 0 and 10 that is the correct number and will prompt the user to take a guess if the guess is correct the program will stop if the guest is incorrect the program will keep running let's build the guessing functionality first if I'm going to start off by making a variable name called correct number so let's say correct number and we said we want it to be something 0 through 10 let's just let it equal to 7 to start off and this will represent the number that we need to guess correctly so the correct guess would be seven so let's also make a variable called user input and this is going to represent whatever the user inputs into the keyboard so this is going to be basically what their guess is so we're going to do user input equals input let's just type please enter a number from 0 to 10. and if you remember in episode 3 we use this input function before and if you're not familiar what it basically does is just prompts the user with some text so we say please create a number from 0 to 10 and then it opens up a little text box and the user can type something in and then press enter and just like last time I'm going to wrap this whole thing in a int parenthesis here so that we can ensure that whatever the user enters is always going to be an integer so so far we have correct number which is just seven and then we're storing our user number in user input so now what so now we need to write a conditional statement that checks if the number the user typed in other words user input matches the correct number which is just correct number variable so let's write a conditional let's write if user inputs equals equals correct number and then in status if statement I just want to print let's say you guessed the number correctly but what if the user guesses incorrectly for that we'll use an else statement so let's say else and we'll just print let's say you did not guess correctly so now let's just run this program so I can show you kind of how this works so I'm going to run it and it's going to prompt us it's going to say please enter a number from 0 to 10. so we know that the correct number is 7. so let's enter something intentionally wrong like 5.
so when we enter 5 what's going to happen is we hit this if statement we're going to say is 5 equal to 7 nope so we enter the else statement and it's going to print off you do not guess correctly so we can see that our conditional here is working just fine let's test actually guessing the correct number now let's say we input 7 and yep it'll say you guessed the number correctly so we can tell our conditional works just fine but this isn't entirely what we want remember that we said that we wanted the program to keep running until the correct number is guessed right now we'll only run the program one time because we don't have any kind of loop or anything so this is where a while loop would come in so we know that a while loop has to run based on a conditional statement that'll either be true or false so let's make some space up here and I'm going to make a new Boolean I'm just going to call it game active and set it equal to true and what this is going to mean is that if this value is true if game active is true then that means that the game is still going on if it is false that will mean the game has stopped in other words if the user guesses the incorrect number this variable should stay true if the user guesses the correct number but want to change its Boolean to false so that the game ends so let's go ahead and write a while loop now so I'm going to actually move this up I'm going to cut and paste this up here at the top and inside of our loop we're going to want to have all of these lines of code because we're going to want to say at each iteration the user will take a guess and then we'll check is it correct or is it not correct and we don't want to have these two lines inside the loop because these want to be initialized before the loop starts so let's just go ahead let's fix some of the spacing here and let's just write a while loop so we want to say while game active and this is essentially the same as saying while game active equals true but because it's a Boolean we can just write it like this and we want to do actually is we want to indent all of this code inside of the while loop because we want it to run at every single iteration so I'm going to highlight all of this and then press tab so now we have one thing left to add so if the user guesses the correct number which is represented by this if statement we're going to need to add a line that updates game active to be false because we said if the user guesses the correct number we want to end the game so we need to break the while loop so under this print line I'm just going to make a line here that says game active equals false and make sure again that we're capitalizing these F's and T's on false and true so once this line is changed to false we will not continue to run this Loop because the while loop is only going to run while game active is true and if the guess is incorrect we don't need to change game active at all because it'll still be true so let's run this code a few times so we press run and it prompts us for a number from 0 to 10. so let's do an incorrect guess let's say two oh well it didn't guess correctly so it's going to prompt us again let's say we put none and that was another correct or incorrect guess sorry so a prompts us again let's say six that's incorrect so it keeps prompting us and then once we input 7 which is the correct number it should say you guessed the number correctly and then the program halts so we don't get prompted again for input and let's actually try this again let's change the correct number let's say correct number this time is going to be 4. so let's rerun this and let's just get some incorrect numbers first let's get seven that's incorrect so it prompts us again let's do 9 incorrect so it prompts us again let's do five and correct some process again and then let's finally do four and then it prints out you guess the number correctly and the program ends so just like with the for Loop section and the other practice problem this practice problem might look a bit daunting if you're not super super familiar with loops just yet and obviously it takes time so I'd highly encourage you to go into your own Google collab notebook and just copy and paste this code and just mess around with loops as much as you want just try with while Loops try with for loops and just see what you can do with python so hopefully now you should have a decent understanding of how loops work in Python so in this video we went over for loops and while Loops you learned how to use for Loops to iterate through a certain set of numbers and also through a list then you learn how to use while Loops to keep running as long as a certain condition is met then we went over two practice problems to solidify your understanding of each type of loop with your knowledge so far of Loops conditionals variables and collection data types you should actually now be able to build almost any Python program that you want as you now know the bread and butter behind python functionality in the next two episodes though we'll cover functions and classes which will both make your life a ton easier when building your own programs so take care everyone and I'll see you in the next video hi everyone and welcome back to the python for absolute beginner Series in this episode we're going to cover something called functions although you may not recognize what functions are just yet we've actually used them a ton in the past couple of episodes if you recall to print something out we would just type print then print parentheses and then type whatever you wanted to with inside these parentheses what about when we have let's say a variable let's say x equals five and we want to check the type of it when we write type of X or how about like in the last episode when we use the input function like this to prompt the user to enter some number these three lines of code this print statement this type statement and this input statement are all what we call functions so functions are essentially blocks of code that can be called or in other words run by typing their name followed by parentheses these three functions here that we've used are all built-in functions in Python Meaning they simply come with the Python programming language a function call is when we type the name of the function followed by parentheses so this line up here would be calling the print function this line right here is calling the type function and this line right here is calling the input function functions can take in what are called arguments and these are what we put inside the parentheses of a function call so for example this print function takes in one argument which is a string in this case hello world even though it can be any number of words long it's still only one argument because it's one string we only pass in one value or variable to type meaning that this also has only one argument and the same is true for input it just has a string as its one argument but there are functions where you need to pass in more than one argument one example would be the power function this function is written something like this we would write Tau let's say 5 2 and it basically returns us 5 to the power of 2. in this example we're passing in two arguments and they're both ins anytime you pass in more than one argument you separate the arguments with a comma so these built-in functions are great it can hopefully give you an idea of how functions work but this isn't necessarily why functions are important in Python functions are important because in Python you can write your own functions and the point of writing your own functions is to not have to repeat code over and over again so let's say that for whatever reason we want to print out a greeting message that has a couple of different print lines in it so I'm going to go ahead and delete this and start fresh let's say we want to have a line that says print let's just say hello user and you want to have another line that's another print statement and we're going to say how are you doing today and then we'll have another one that'll say it is very nice outside this afternoon and then we'll have one more that'll say do you have any plans for the day so what if we wanted to run this code let's say three times it would be super annoying if every time they wanted to run it we had to copy and paste it like this so we don't want to have something like this where if we run it three times we literally copy and paste it three times the solution to this problem would instead to write a function maybe it is called a greeting that had these lines of code inside of it then whenever we wanted to display these greeting lines we would just call the greeting function once and it would do it all for us so let's actually do that so I'm going to go to the very top of this page here and I'm going to write a function so first we write def followed by a space and then our function name so we'll just do greeting and then parentheses and then just like we did for conditionals and Loops we'll type a colon and indent to let the computer know that we're now inside this function and inside this function now I'm just going to cut and paste this code I'll make sure to re-indent this so it looks something like this so when writing functions in Python we always start them with death and death is just short for a Define Because the actual code of the function is called the definition of the function so all of this here is just the function definition so then we write the name of our function whatever we want it to be and Then followed by parentheses and note that we have to have parentheses right after our function name even if we don't put anything inside them and I'll explain what these parentheses actually do in just a moment then just like the loops and conditionals we put a colon so we know that the following lines are going to be indented so note that this function doesn't actually run any of this code until we call it so because we just have this function definition here if we run this this block here we'll see that nothing actually happens so we'll give it a second and you'll see the code is complete it doesn't print out anything and that's because I'm just defining this function I'm not actually calling it so let's actually call this function now so to call it we would use the same type of syntax that we did when calling any other function so below here I'm just going to type greeting with parentheses and again we need parentheses when calling a function so make a note to never forget these putting the parentheses right after the function name is how the computer knows that we're referring to a function let's run this code chunk and then now you'll see that it prints out all these lines of code and now anytime we want to Output these lines of code we can just call the greeting function so let's test this a few more times let's clear this output here and I'm going to call it let's say two more times and I'll just write greeting again here and then greeting again here and if you run it this time kind of cluttered here but you can see it printed this off three times so here's the first time here's the second time and here is the third time so pretty neat huh this allows us to avoid having to duplicate all of our code over and over again we just write it once within inside of a function and then whenever we want to use it we can simply just call the function so just to quickly reiterate what we just learned functions are some block of code like this that you can Define on your own whenever you want to use that code you can just call it by typing the function name and parentheses where you actually write the function itself right here is called the function definition hence why we use the keyword def when defining it when you actually run the function code like this this is called the function call so let's move on to arguments now so I mentioned with our built-in functions like print when we would pass in arguments we would do something like this right inside the parenthesis user would write hello world and this hello world string here represents an argument that we're passing in so what if we want our own self-defined functions to have arguments to add that we add these arguments within the parentheses in the actual function definition and inside the function call so inside of our function definition let's just make an argument let's call it ARG one and that'll just be short for argument one and then I'm going to change this body here I'm going to delete most of this I'll actually delete this to figure this output so inside of here I actually just want to print ARG one and then I want to call this creating function so I'm going to call greeting and I'm going to pass in hello world and then if we run this code now you'll see that it prints out hello world so let's say I want to call it again let's do another greeting call and let's just pass in hello YouTube and if we run it again you'll see it prints out both hello world and hello YouTube so here's what's happening so every time that we call this function we pass in one argument in this instance hello world and this argument is represented by ARG one in the function body so when we call a greeting I can pass in whatever argument I want and our function will print it out the number of arguments in your function call like this should always be equal to the number of arguments in your function definition here so our function definition has one argument ARG one so our function call needs to only have one argument no more no less if I change our definition here to have two arguments let's say ARG one and arc2 and I try to run this I'm actually going to get an error here because we're only passing in one argument when the definition is expecting two and let's try the reverse let's make this have only one argument but I'm going to pass in two arguments to the call and that will also give me an error because the number of arguments in the function definition is not equal to the number of arguments in the function call so long story short always match the number of arguments in the definition with the number of arguments in the call so I'll go ahead and delete this here so I can fix it run it again and you'll see everything is back to normal if we have multiple arguments the order of the arguments is extremely important so let's say in our greeting function we now have three arguments let's have ARG one R2 and R3 and inside of this print statement I'm going to change a little bit here I'm going to write Arc one is equal to and I'll tell you what this means in just a second how I'm doing this little print statement here all right R2 is equal to arc2 and then we're going to print our three is equal to R3 so basically the way I'm writing this print statements here you might notice there's a comma here which is a little bit confusing because we just said print statements have one argument but essentially what we're doing here is we're just combining a string and a variable in the same sentence so that we can print them out together and I'll show you what it outputs in just a second so now in our function call note that or sorry in our function definition we have three arguments so in our function call we need to pass in three arguments so let's delete this and let's say we want to pass in three numbers let's just say five seven and three and if we run this code you'll see that it says ARG one is equal to five R2 is equal to seven and R3 is equal to three and this order happens because when we call the function the order of arguments matters the first value passed in in our case five is going to get assigned to ARG one the second one passed in which is 7 is going to get assigned to arc2 the third one passing Arc three is gonna get assigned to ARG three so the order matches up exactly and it's always going to be that way so if I wanted let's say 7 to be ARG one I would have to change the order to have 7 here and 5 here because it translates directly the order so one two three and then one two three and if you print it out here you'll see it now says Arc one is equal to seven R2 is equal to 5 and R3 is equal to three and while we're here now is a super good time to mention something important so the reason I wrote this function at the top of the page and not the bottom or anywhere else is because a function has to be defined before it is called so remember that python is pretty strict about running its code in order so we need to have function definitions at the top of the page if I call a function before it's defined let's say I have something up here and I'm calling greeting up at the top let's just pass in six five two and I try to run it I'm going to get an error because at this point the code doesn't know that this function actually exists yet because we haven't reached that line so when we call this function greeting it's going to throw in error so just make sure that you always Define functions at the top of the page so you can avoid errors and it'll save you a lot of time when troubleshooting so the last important thing that I want to go over with functions is return values so right now in our function all we're doing is basically writing a couple of different print statements but what if we actually wanted to do some math or some other operations inside a function and then assign that to a variable somewhere else in our code and that's where our return statement comes in so I'm going to go ahead and delete this function actually I'm going to delete this whole code block here I'm going to make a new code block so we can start fresh and I want us a new scenario here so let's say I want a function that will return the square of a number so if I pass in 3 let's say to the function it should give me back 9. if I pass in 4 the function should give me back 16 and if I pass in 5 for instance the function should give me back 25 and so forth so let's write a function called Square number so I'm going to write def let's say square number and then we'll write parentheses and inside of these I'm just going to pass in one argument and I'll just call it X and then I'll write the colon here indent and to get the square of a number we know that we need to multiply a number by itself so I'm going to take our argument X and just multiply it by itself so I'm just going to write x times x now we need some way to get this result back to our code whenever it is called and that's where we write a return statement so before this x times x here I'm going to write return so I'll show you how this actually works now so let's actually call this function down here let's write square number and then we're going to pass in 5. and if we run this you'll see that it outputs 25.
so what's happening is we call the square number function here right and then we pass in 5 as an argument now when you look at the function definition we're basically just passing in 5 to this x argument and then we're just returning 5 times 5. so when we call this that's why it outputs 25. so let's actually make a variable now so we can store this let's make a new one called my variable and let's set it equal to this and then now if we do it like this it's not going to print anything out because we're just doing a variable assignment but now we're going to store the value 25 inside of my VAR so now if we just print my VAR it should print out 25. the important thing to know here is that this return statement basically specifies that we're just storing x times x within the function call so whenever we call square number five this is now storing the value 25. if we were to call square number four this function call would be now storing the value 16. so this return statement basically just tells us what we're going to actually store in the results of the function call when we're actually calling it let's do another quick example so you can kind of get the idea of how this return statement works so I'm going to go ahead and clear this output and delete all this and I want to write another function called sum three values so I'm going to write diff let's say sum 3 values and then parentheses and then we're just going to pass in let's say three arguments let's say X Y and Z and that's because we're going to be summing three values together so we're going to pass in three arguments then I'm just going to do a colon indent and inside of here I'm just going to write return X Plus y plus Z then down here let's actually call this function so we just Define some three values now I want to call it so we type the name and then parentheses and then let's say we want to pass in let's just do five five and five and if we run this you'll see that it outputs 15. so we can return literally whatever we want from a function and this return value is always going to get stored in the function call so if we want to access the return value we can grab it by doing this and one important note here is that we should only ever have one return statement in a function so we don't want to have like say return X Plus Z now if we do this we actually won't get an error you'll see it still outputs 15 because basically it's going to return at the very first return line that it sees so it's just going to return here and it's going to completely ignore this line but the general statement of Truth for writing functions is that we don't want to have multiple return statements we just want to have one because we can only ever return one value from a return statement so at this point I want to summarize what we've done so far so so far you've learned what some of the built-in python functions are how we can make our own functions to prevent repeated code how we can call our own functions and how we can return values from these functions to solidify your understanding a bit more let's do a practice problem for this practice problem let's say we have a list that has all ins so I'm going to go ahead and delete this make a new code block here so I want to have a list that has all ends so let's say we'll just call it my list and let's just do five two nine and six and our goal is to write a function that can find the highest number out of this list if our function works correctly it should end up outputting 9 because 9 is the highest number out of this list so how can we solve this well when I have a variable called Max or maximum that can store the maximum value at the end of our function logic we'll want to return that Max so how do we find this Max well we can Loop through all these numbers using a for Loop and then find our Max that way so let's get to writing let's make some room up here and we'll go ahead and Define our function so let's write Def and we'll just call this function find Max and we're going to pass in one argument let's say list VAR and this will just be short for list variable and then we'll do the colon and indent and I said that we want to have a Max variable though we can return at the very end so let's make a new variable called maximum and we'll just say start it at zero for the sake of this code so then we want to use a for Loop that we learned last episode so our list is represented by the argument list VAR so let's Loop through that list so let's say four number in list bar we'll just do the indentation here and then what we want to do now so at every item in this list what do we actually need to accomplish so we want to compare the current value in the list to our maximum value if the current value in the list is greater than the maximum then this current value should become the new maximum and we can write that exactly like this so write an if statement and we'll say if number is greater than maximum and like I said number represents each individual element in this list variable so that would represent like a 5 or a two or a 9 or a six so if the number is greater than the existing maximum then what do we do then we should update the maximum to equal this number if the current number is not greater than the maximum we can keep the current maximum where it's at so we don't need to do anything and we can continue the loop the last thing we need to do is to return the maximum so let's make a new line here and let's write return maximum and notice how I make this return statement at the same indentation level as the function so we want to make sure that this return is not inside the if or inside the 4 because if it was like this then we're doing something entirely different because it's inside the if statement and if we're doing it like this we're doing something entirely different because it's inside the for Loop so we want to do is have it outside here at the main level of indentation of the rest of the function so now let's try calling this function and actually testing it out so we have this new variable down here that we said earlier my list and we set it equal to 5 2 9 and 6. so let's just make uh let's say we're going to just call this here and then we're going to do find Max and we're going to pass in our list and if we run it you'll see that it outputs 9. so we pass in this list in other words 5296 to this function here this function runs all of its logic and it Returns the number that it finds that is represented as the maximum let's try changing this list around to different numbers just to test out this functionality let's do four three two and one if we run it you'll see the maximum is four let's do um 25 10 27 50 and if you run it you'll see it outputs 50 and we'll do it one more we'll just do let's say 7 15 12 and 6. and you'll see it outputs 15. now I should quickly note that this function is actually pretty much completely obsolete because there's actually a built-in function in Python called Max that does this exact same thing so we actually don't need to actually really write this out but I just wanted to kind of give you this as an example so you can see how this worked so like the actual like built-in pipe python function we would do Max of my list like this and it would still print out 15 because it runs pretty much the exact same logic I just wanted to do this so I could show you guys kind of how the code was working with inside the function so I'll go ahead and change this call back to our function here find Max and then what I really want to do now is just kind of show you how this function works if you're having trouble maybe understanding it so this might look super daunting because we have a whole lot of indentation going on kind of happening here all at once so if it confuses you just try and break it down line by line and I'll go ahead and follow along with that so first with this line we're just defining a function and we're calling it find Max and here we're just passing in one argument which is list far so then we're creating a variable called maximum and for the sake of this code we're just setting it equal to zero and this maximum is going to be what we want to return at the very end of the function then we take the argument that we have list VAR and we Loop through every single item in that list and that each item we check we say hey is this current number greater than the existing maximum if it is let's update the maximum to be this new number and then if it's not nothing else happens so we go to the next iteration of the loop and this keeps going and going and going until it finds the maximum and it stores it and then it Returns the maximum and then when we call this fine Max function it stores the maximum in this function call so now let's actually trace this step by step using the list that we pass in so when we call find Max on my list here's what happens so we look at the function definition and we start with maximum equals zero so we're making a new variable maximum and setting it equal to zero and then we're going to start to Loop through all of the items in the list that we pass in as an argument so in this case the list that we pass in as list bar was 7 5 12 and 6. so the start of this for Loop is going to start at the number seven so we say is 7 greater than zero yes it is so we're going to set the maximum equal to seven then we go back to this for Loop and we say is 15 greater than 7 because 7 is the new maximum 15 is greater than seven so we update the maximum to equal 50. we go back to the for Loop and then we say is 12 greater than 15 because 15 is now the new maximum we say no 12 is not greater than 15 so we just continue and then we hit six we say is six greater than 15 no it isn't so we just continue but now the for Loop is done so we unindent and go back to this return maximum and 15 is in maximum so that's what we return so that's why when we run this call find Max my list we get 15.
and just like I mentioned before it should be a general rule of thumb that you always have the return statement at the same indentation level as the rest of the function and not inside another four statement or an if statement because for instance if I had it like this and I tried to run it it would return 7 which is not correct and if I did it like this it would also return 7 which is not correct so we need to make sure it's outside of any for Loop or while loop or a conditional statement and it's just with the same indentation level as the rest of the function and it'll run properly hopefully now you should have a decent understanding of how functions work in Python we learned built-in functions how to make your own functions how it can call our own functions how we can use arguments and how we can return values from our functions like always I'd strongly encourage you to hop into your own Google collab notebook and just mess around with these because the absolute best way to learn is by trying it yourself our next video episode 7 will be the last primary video in the series and that's where we'll cover classes after that we'll do one wrap-up video that contains some summaries in the Outlook moving forward take care everyone and I'll see you in the next video hi everyone and welcome back to the python for absolute beginner Series in this episode we're going to cover classes and objects classes and objects are definitely an intermediate level topic but I wanted to take an episode to go over them because you'll see them used all the time in Python there's quite a bit to unpack with classes so I'm not going to go over every single aspect of them but rather I'll go over everything you need to get started in programming we have two main types of programming Styles the first one is called functional programming in functional programming is all about using functions which we learned last episode to organize and run all of our programs the second one is called object oriented programming sometimes called oop for short and this type of programming style uses what are called classes and objects to organize and run all of our programs these are two very distinct styles of programming and they look very different functional programming came first and then object-oriented programming came a little bit later there are pros and cons to each of them if you continue on your programming Journey you'll find that some people feel very passionately about one style style or the other and it's kind of like a civil war in the programming World many programming languages support both functional programming and object-oriented programming but some languages require you to write in a particular style we're here to talk about python though and here's what you need to know python uses both object-oriented programming and functional programming but I would argue it's a little bit more object oriented than functional this means that you'll have to know how to use classes and objects in Python because chances are you'll see classes and objects pop up all the time so what actually are classes classes in Python and in most other programming languages are used as a way to organize data and instantiate what are called objects a class is basically a user-defined blueprint for creating instances of that class which we call Objects for example we could have a class called car then we could create a 2016 Dodge Charger from this class and we would call this Dodge Charger an object then we could create another car a 2018 Honda Civic and also call that an object of the car class another example would be making a class called dog we could have a beagle with the name Mario and he would be an object of this dog glass we could also have a dog named Coco as an object of his dog class as well the point is a class is a generic way of making a blueprint for something then we can use this blueprint to make objects of this class so let me show you how you can actually do it so we'll hop over to our Google collab notebook here so the first example I used for a class was the idea of having a car class so let's write out an actual car class in Python so to begin writing a class in Python we use the convenient class keyword like this then we write whatever we want the class name to be so in our case we'll name this class car and note that with classes in Python it's a good practice to always capitalize the first letter of the class this helps differentiate between functions from a user perspective since functions should always start with a lowercase letter so after this card word we'll type a colon and indent so we know that we're now inside of this class because this is a class and not a function we don't have to worry about always typing parentheses after the class name so order some descriptive qualities that we could use to describe a car typically we might say we have like a make model color and a year for instance so I'm going to make a comment with this I'm going to say what do we want in a car and then let's just write what I just said so we'll have make we'll have model we'll have color and we will have year okay so the question is how do we actually Implement these qualities for our class so that we can create some car objects in Python we do that through What's called the initialization function and what this function does is sets all the attributes that we want for our class and here's how we write this function like all functions we're going to start it with the keyword Def and then we're going to type underscore underscore init underscore underscore and then parentheses make sure it looks exactly like this because if it's not written like this it's not going to accomplish what we're trying to do then inside the parentheses we're going to write all the attributes that we want to pass in we said we wanted to have make model color and year but we need to add one more argument and this one is extremely important our very first argument no matter what class we make or what we're doing should always be named self I'm going to add this here and I'll explain why we need this we said that the whole point of classes was to make objects of this class which are just instances of this class this self-argument right here basically represents the current object that we are talking about so I'm going to write a few more lines of code and hopefully you'll start to see what I mean by that so let's write a colon here and we're going to go ahead and indent onto this function to let it know we're now inside of the init function and then I'm going to write all of these attribute assignments out and then I'll explain what they mean and how they're working in just a second so first I'm going to write self dot mate equals make self dot model equals model self dot color equals color and self dot year equals year now at first you might be thinking this looks like it makes no sense like what are we doing here and don't worry you're not alone because most beginners think that so let me break down what we actually have here and while here I'm going to go ahead and just hide this header here so we got a little bit more room I'll fix this type over here okay so when we create new objects of a class this init function that we have defined right here will always be called automatically and it'll look at whatever values we passed in as the make model color and the year now I said that self represents the current object that we are talking about so what we're saying with this line here is that this objects make is equal to the make that we pass in as an argument what this line is saying here is that this object's model is equal to the model that we pass in as an argument and you get the idea with color we are assigning this object's color to the color that we pass in and we are assigning this object's year to the year that we passed in so well and whenever we're creating objects and making these attributes here we're going to use this dot operator which is just the dot or the period on the keyboard and I'll explain what that means here in just a second but just know for now that this is how we actually initialize all the attributes for a class that we want so let's create an actual object of this class so I can better explain what all this is doing and actually show you how it works so I'm going to go ahead and get out of here I'm going to unintendent from the function I'm going to indent from the class too so we're back at the main level of indentation and to create an object of a class we would create a variable similar to any other data type so let's make a new variable let's call it my car object and we're going to set it equal to car parentheses and this is where we pass in whatever qualities we want this car object to have so I want this car to have a make let's say Chevrolet let's say I want the model to be a Malibu let's say I want the color to be red and the year will be 2008.
so here's what actually happens when I write this line here so I pass in Chevrolet as the first argument Malibu as the second read as the third and 2008 as the fourth so the computer sees that we're creating a new car object because we have this car keyword here which is just the name of our class so what it does is it looks inside this car class and it's going to immediately and automatically call this init function the init function is going to take in the arguments that we specified here so Chevrolet is going to be assigned to make Malibu is going to be assigned to model red is going to be assigned to color and 2008 is going to be assigned to year so these values here in the parentheses all the values except for self represent the arguments that we pass in when creating our object like this then inside of our actual init function with these lines we are setting our actual object attributes to equal these arguments so we're saying this object's make is equal to the make that we pass in this object's model is equal to the model that we pass in and so forth or this whole thing May confuse you or throw you for a loop is when we have this self argument here because last episode I said that when calling a function we need to pass in exactly as many arguments as are in the function definition except here this init function takes in five arguments but when we're actually calling it we are only passing in four arguments so having this self-argument here kind of throw things through a loop because it causes the function definition to always have one more argument than the actual function call so we can ignore the self-argument when creating new objects as you noticed here we're not actually referencing any self argument just know that this self-argument is used inside the class to refer to an object of the class like with here with the attributes so you're not actually required to name this argument itself but self is the standard and that's what you're going to see everywhere C might as well just use it the only requirement is that it needs to be passed in as the first argument let's make a few more cars now so you can get a better understanding of classes and objects so I'm going to rename my car object to instead just say let's just name it car one and I'm going to copy and paste this line twice just so we can have some more cars here I'm going to make Car 2 and I'm going to make car 3. so for Car 2 let's make this a Ford let's give it a model of fusion let's say the color is black and we'll make it like a say 2016. and then for car 3 we'll name this uh Hyundai and we'll do an Elantra and we'll say that's let's just say gray and we'll give it a year of 2020. and now inside this init function I'm actually going to write a print statement here I'm just going to write print we have just made a new object to show you something here because every time we create an object this ended function will be run so if down here we are creating three cars we should see that we printed out this line three times so if I go ahead and run this code here you'll see it will print out we have just made a new object and it'll do it three times so now that we've gone over how these objects are created let's see what we can actually do with some of these objects so I'm going to go ahead and delete this print line here since I already showed you with this output and so we know every car now has a make model color and year because we Define those attributes within the init function so to actually access properties of an object that's already created we use What's called the dot operator which literally just means the dot or period on your keyboard so let's say we want to access let's say the make of car two to do that we would just type car2.make and it's super simple just like that if we wanted to access the model we would just do Car 2 dot model so the general syntax is just the object name followed by a period followed by the attribute that you are trying to access so let's actually wrap this in a print statement here and if you run this and we see section is back to make here if we run we print car2.make you'll see it prints out forward and this makes sense right because when we created our car 2 variable here we passed in Ford as the make argument let's try some more things let's print out car2.color if we do cartoon.color it should print out black let's do car one let's say car one dot model and you'll see it'll print out Malibu let's say we want to do car one dot year and it would print out 2008. so to grab any attribute of any object that we want we always just type the object name followed by a DOT followed by the attribute that we're actually trying to access but you have to make sure the attribute actually exists though because if it doesn't and you try to use the dot operator you'll get an error so in our init function we only Define make model color and here so let's say for whatever reason I try and access car one dot trim now if I try and run this I'm going to get an error that says car object has no attribute trim and that's because we didn't Define trim anywhere within this class so the computer gets confused here and hence why it throws an error so I'm just going to go ahead and clear this output here and I'm going to go ahead and just delete this line so in addition to just viewing attributes using the dot operator we can actually also use the dot operator to change and update attributes as we need to so when we created car one we initialized it with the color red so what if we had a change of art later in the program and decided that we want to change the color of car 1 to let's say white and we would just use the dot operator in the exact same way and it'd be super simple so we do car one dot color equals white for instance and we would just assign car1.color to whatever new variable we want it to be in this case white so now if we actually do print R1 dot Color Oops car window color here you'll see it outputs White one of the really really neat things about classes in Python is that in addition to storing values like make model color and year we can also store functions inside of classes so let's unindent and get out of here and let's make another function let's just call it print make and just like any other function that we have to write within our class we're going to pass in the first argument as self and we're going to type a colon indent here and inside of here I'm just going to type prints let's say the make of this object is a then we'll do this notation here we'll do self dot make so now that we wrote this function here every single car object we've created is now going to have access to this print make function so let's actually call it so let's clear this out here let's delete this line and to call a function we use the dot Operator just like we would when accessing attributes but we have to be sure to add parentheses at the end so the computer knows that it's a function so we'll go ahead and type car 1 dot print make and again make sure we're adding parentheses here and then let's run this code here and you'll see it prints out the make of this object is a Chevrolet so why does it print this out so we're calling print make using car one so we reference this printmake function up here so what does this self represent when we're calling it using car one we said that self represents a particular object that we're talking about so when we call car1 Dot printmake self is equal to car one so really when we're typing this line here we're saying print the make of this object is a and then we're typing car one dot make because self is equal to car one since we're calling it using car one in this instance if for instance down here we change this to car3.print make now we are recalling this print make function with car 3 so if we run it it'll say the make of this object is a Hyundai a lot of times you'll see what are called getter and Setter functions in Python classes so getter functions just return a particular attribute of an object and it's just a fancier way of using the dot operator like we've already done to get object attributes so we would write a getter function like this we would say def let's say get make and we would just pass himself as an argument since we always need that and then inside of the function we would just type return self dot make when this function is called it's literally just going to return the make of whatever object is calling it so now if I were to go down here delete this line and now we're just to write car1 dot get make with parentheses to let it know that it's a function and if I ran it it would say that it's a Chevrolet if I change this to car2 dot get make you'll see It'll output forward and if I change it to car3 dot get make you'll see It'll output Hyundai a federal function is similar to a getter function except it is used to update a variable instead of just retrieving it so to write a Setter function for make we write another function down here let's call it def set make and then for our arguments we're just going to pass in self and make and then we're going to do a colon to indent here and what we're going to do here is just self dot make equals make and you'll notice that this syntax here looks pretty similar to the syntax that we have in our init function here so when we call this set make function we want to pass in the make as an argument and this make is going to represent the value that we want to update to and then of course like always we have the self and then inside of this we're saying this object's make is now equal to the make that we're passing in as an argument so for instance to use this function I'm going to go down here and I'm just going to write car 1 dot set make and we're going to set it to a Toyota and I'll clear this output here I'm going to change this one to car one so what's happening is we first initialize car one and it has the make of Chevrolet and then with this set make function we're updating it to the Toyota and then this git make function should print it out so if we run it you'll see that it prints out Toyota here so basically any time that you want to write a getter function like this you just need to pass in self as an argument and then pass in whatever attribute you want to update and then inside of here you just want to write self dot whatever that attribute is equals whatever that attribute is and like I said you certainly don't need these getter and Setter functions here that I just wrote Because I already showed you how to get attributes and update attributes just using the dot operator but you may see them at some point or want to use them to make your code look a little fancier I want to go ahead and end this video here we've covered a huge amount of information and I don't want to keep throwing more things at you for right now there's a decent amount more to cover in regards to classes but this is a beginner course and I just wanted to give you the basics so that you could at least have an understanding of what classes are and how to make objects of these classes if you made it to the end of this video I want you to give yourself a pat on the back classes are not an easy topic to understand for beginners and like I said classes are definitely more of an intermediate skill level topic anyways please do not be discouraged if some of this doesn't make sense to you just yet take some time to try out classes on your own using this video as a guide like always I'll drop some resources in the description that should hopefully help you out a bit at this point you have pretty much all the knowledge you need to get started with building some of your very own python programs the next video will be the last video in the series and in that video I'll go over a bunch of small miscellaneous things that may not have fit neatly into the previous videos I'll also talk more about moving forward with python and how you can begin creating your own projects take care everyone and I'll see you in the last episode hey everyone and welcome back to the final episode in the python for absolute beginner series I hope you've been able to learn a lot during this series and if you've made it this far I really commend you because learning programming from xero can be pretty difficult in the last couple of videos we've covered pretty much all the basics that you'll need to know to get started in Python each of the videos was reserved for one or more Core Concepts but there's a couple of things here and there that didn't fit nearly into the Core Concepts that are still really important to know I want to take this video to cover Concepts that may have been overlooked in previous videos and reiterate some key Concepts that will definitely help you out at the end I'm going to go over how you can keep moving forward in Python and what your next couple of steps should be I want to start off by reiterating how to use indentation in Python I've gone over quite a bit in the previous videos but I want to cover it so we're all on the same page here writing colons and indenting is how python knows when you're inside of a function Loop conditional statement Etc and it's probably the most important syntax thing to pay attention to when you're writing python code the best practice for indentation is to just use the tab character wants to tab over indentation will cause errors in your program if it's not done correctly just remember anytime we want to get inside of a block of code like inside of a function if statement for the class or whatever it may be you will always need to indent let's say I try and write a for Loop something like this let's say 4i in range 0 to 10 and I type a colon except in this line I don't indent and I'm just going to print out I if I try and run this it might take a second I'm going to get an error because I didn't indent after putting a colon and just give it a second more and there we go so you see there's an error here because I didn't indent and it specifically says expected and indented block and if I were to do something else let's say I were to take this colon away an hour to indent I would also get an error because I need both the colon and the indentation so the golden rule is that colons and indentation go hand in hand so after you have a colon you must indent and to get inside of any block like a for statement you need to indent as well so now if I run this you'll see it prints out correctly where you have to start really paying attention is when your multiple levels of indentation in so let's delete this I'm going to clear this output here oops and let's say we have a function let's say def my function and inside of this function I want to do a for Loop so let's write 4i in range 0 to 10. now inside of this for loop I want to have a conditional so I'm going to write if I greater than 5 then inside of this I want to print something else like this let's just print out um I so now I have one two three levels of indentation going on so if I write at this first level I'm writing inside the function if I'm writing at this level I'm writing inside the for Loop and if I write at this level I'm writing inside the if statement so just always try and be mindful of how many levels of indentation you have and again indentation is super super important and bad indentation could cause you to be troubleshooting bugs for long periods of time if you don't know what you're looking for speaking of troubleshooting bugs I want to talk about that next there is absolutely no avoiding errors in bugs in your program no matter how skilled you are you're always going to run into problems even programming experts run into errors all the time what makes a good programmer is finding out how to efficiently solve these bugs if you type something into your code editor that isn't valid python code or you just try and do something funky the computer is going to complain and throw an error message so for instance let's just delete all this and I'm just going to write something like let's say print Z now if I run this I'm going to say if the error is going to say name Z is not defined and that's because we never ever defined a variable named z so how do we solve this here if you're a mediocre programmer you'll sit there and try to figure out the error for yourself however if you're an amazing programmer what you'll do is take this error you're going to go and copy it go to the next tab paste it like this and you'll be introduced to this magical site called stack overflow stack Overflow is a site that allows programmers to ask literally any question about programming and other programmers can answer that question if you're having an error or problem with your code there's a 99.9 chance that someone else has had that exact same problem and the question has been asked and answered on this website as a programmer stack Overflow is going to be your absolute best friend so get used to visiting it it's so popular in fact that if I actually go back to co-laboratory and I have this error you'll see there's a whole button underneath this error design that literally just says search stack Overflow a lot of other editors have something similar that will link you to the stack Overflow to explore any errors that you're getting but what happens when your code is not running as expected but you're not getting any errors of course you could search it on stack Overflow because stack Overflow doesn't just include errors but many times you'll need to re-read through your code and evaluate what's actually happening let's delete this here and let's say we have a function let's call it double number and we're going to give it one argument number and the goal of this function is to return double of whatever the number is that we pass in so in here let's just write 2 times number then outside of this I want to make a variable let's just call it X and I'm going to set it to equal to double number four well if we double the number four that should be equal to 8 which means X should be equal to 8 right but if I go ahead and write print X you'll see that it prints out none for what's actually happening here moments like these can be confusing because you're not getting an error in your code but something is obviously going wrong and so we look at what our code is doing and realize oh hey in this line we're not actually specifying a return value in this function and we forgot the return keyword so now let's just write return and now if we run this code you'll see It'll no longer say none and X will now be equal to 8. computers don't really ever make mistakes when it comes to software because computers only do exactly as they're told if there is an error in your code and your code isn't doing what you want the mistake is from the programmer not the computer so as tempting as it may be to say wow this computer is stupid and doesn't understand what I'm trying to do remember that a computer is only as smart as the programmer in regards to getting errors you just have to adopt the mindset that oh this means I did something wrong not the computer something I talked about in episode 2 and episode 6 was naming conventions so by naming conventions I mean how we typically name variables functions and classes so recall that to name any of these we cannot have any spaces we cannot have any special characters besides underscore and we cannot start these names with a number a few examples of perfectly correct names would be my variable my function variable 1 variable 2 and so forth in terms of style it is mostly up to you how you want to write names but your name should always be relevant to what you're trying to do so if you're capturing user input and storing it in a variable you should probably call the variable user input or something that can tell you what it means and a lot of the examples throughout these videos I used X or my variable or my function are super generic names like those to name variables but in reality those names don't indicate what the variable actually does so try and stay away from those super generic names we also went over two styles for naming variables Kim more case and snake case so camel case is when you make the first letter of the variable or function lowercase and then every word after that starts with uppercase so you're basically separating words by capitalization so an example of some Camel case variable names would be my variable user input or big variable or something like that snake case is when instead of separating by capitalization you separate all words by underscores and everything in the name is lowercase so the exact equivalent variables in snake case would be my underscore variable user underscore input and big underscore variable either one is fine but some people prefer one or the other so it's good to know both Styles these rules apply to functions and variables but classes are a tiny bit different so I'll make this note down here it's good practice to always capitalize like this always capitalize the first letter of a class and this is so that as programmers we can differentiate a class from other data types so example of class names would be oops would be car dog animal and something like that where we're just capitalizing the first letter so everything else like variables functions and so forth should pretty much always start with the lowercase letter while classes will always start with an uppercase letter another thing that I wanted to cover that I think is super important is methods that are associated with strings and lists so methods are basically like functions except we always use them with a string or list or some other data type and we can use them by using the dot operator so remember when we used append remove pop and those kinds of operations when working with list well those are called Methods specifically list methods so to use methods will always have a variable that's a list or a string so let's make one let's just say my list equals one two three four five then to use methods we'll type the variable name like my list the dot and then whatever method we want to call so let's say we want to call the append method we would just do my list dot append and then we'd fill in whatever we want here so let's say six python has a ton of built-in methods so I'll go over a few with this first that we've already learned for all these examples we'll just use this my list variable but obviously this name can be whatever we want so to add an element to the end of a list we'll use this dot append method that we've already written here so we entered six inside the parentheses so that means we should add a 6 to the end of my list so let's actually print out my list here and you'll see if we print it there is now a 6 at the very end to remove an element from the very end of a list we would do something like dot pop so after we've added the six let's do my list dot pop and now this should actually remove the sticks that we just added so we'll see if we print it it's just back to one two three four five to clear all the elements of a list we can use my list Dot clear and now if I run it you'll see the list is completely empty to copy all the elements of a list we can use something like my list dot copy so the list of methods goes on and on and on and I'll link a page in the description where you can see all these different built-in list methods you do not need to know all these by heart because honestly you can just look them up if you need them but knowing them might help you out in the long run strings have these same methods too and you can use methods with them just like we can with lists so let's clear all this out here I'm going to clear the output and let's make a new string we'll just call it my string and I'll name it after myself so I'll just name it Austin so let's go over some of these methods that we can do with this string and the main difference between string and methods or sorry string and list methods that is super important is that string Methods will not change the original string at all so if I want to do anything with string Methods I need to make a new variable from it let me show you what I mean by that so there is a string method called Lower that puts all the letters of a string into lowercase so if I call my string dot lower like this and then I try and print out my string we'll see if we run it notice how there is still a capital A in the front and not all the letters are lowercase this is because string Methods do not modify the original string at all if I want to apply this method I need to make a new variable to actually see it so let's actually write my a second string and set it equal to my string dot lower and then here we'll print out my second string and then now if you see if we run it you'll see now all the letters are lowercase because it has actually applied the dot lower method let me now show you a couple of other string Methods so similar to lower we can also use upper to make a string entirely uppercase so if I replace this dot lower method with upper and I print out my second string you'll see that Austin is now all capitalized there is also a function that checks if a string is entirely uppercase or not and it's simply called is upper so is upper will basically return true if the entire string is all uppercase and it'll return false if the entire string is not uppercased so in here I'm going to write my second string dot is upper and because we've already capitalized this string here this should return true so if you print it out you'll see it prints out true another useful thing that you can do with lists and strings is called slicing so slicing allows you to to only look at certain parts of strings or lists to slice a list we would use square brackets that you should hopefully now be familiar with so I'm going to delete this and make all this room appear free I'm going to make a new list called it my list I'm going to set it equal to 2 4 6 8 and 10. and let's make a new variable let's call it my slice list enter slice we're going to use the square brackets and some slicing operator which we indicate by a colon and I'll show you what I mean let's say we want to get this slice list to just grab 2 4 and 6 from this original my list variable to do that we would write my list square brackets 0 colon 3. now this is basically saying to grab the indexes of my list from 0 to 3 but not including three this ending index here after the colon won't be included in the slice meaning we're really just grabbing indexes 0 1 and 2. so now if we go in print out we print out my slice list you'll see that it prints out 2 4 and 6.
what if I wanted to grab two four six and eight then we would just change this 3 to a 4 here because where gravity index is zero one two and three now which is just 2 4 6 and 8. what if I wanted to just grab six eight and ten I could do a similar thing except I want to start with index 2 because that's where index six is so let's do two and then we want to grab indexes two three and four so we'll have to have this one as a 5 here and now if we run it you'll see it prints out 6 8 and 10. one neat thing is that you don't actually need numbers on both sides of the colon if you don't want so let's say I wanted to grab everything from index one onwards I could just write it like this I would write one colon and it'll print everything out from index one all the way to the end of the list so you see it prints out four six eight and ten if I wanted to do index two and onwards I could just replace this one 1 with a 2 and if I print it out you'll see it prints out just 6 8 and 10. so there's a lot of different ways you can do slicing with this if I wanted to grab everything up until a certain index I could do the opposite of this so if I wanted everything up to index 4 I would write colon 4 because this is everything up to index four but not including four so if I actually print this out it just prints out 2 4 6 and 8 because it's grabbing indexes 0 1 2 and 3. if I wanted to print everything up to index 2 but not including index 2 I would just write colon 2 like this and you'll see it just prints out two and four so basically if you write a number before the colon like this let's say two colon and you print that out it'll grab everything from that index until the end if you write just a number after the colon it'll grab everything up until that index but not actually including that index so it would just print out two and four it's certainly not essential to know this but it's a useful trick if you ever need to mess around with or manipulate some list and you can do this exact same spice operation on strings as well the reason I wanted to cover all these topics with you guys is to drive home some key Concepts and some other useful tools that might help you out when you're coding in Python I want to take the rest of this video now to talk about how you can move forward in Python and what your next couple of steps could be throughout these videos I've taught you essentially all the key topics that you'll need to know as a beginner in Python but if I just gave you all the tools necessary to build something what good are they if you don't actually know what to build so the most important thing moving forward with python is actually building your own programs and working on your own projects this is by far the best way to apply what you've learned which in turn helps you learn so much more when you actually get some practical experience programming projects are also showcased to potential employers when you're looking for programming jobs employers want to look at what projects you've done because those projects help them gauge what kind of programmer you are so the question is moving forward what kind of project should I work on and here's where I tell you the type of project you do should be dependent on what interests you are you interested in machine learning and data science grab a free data set off a site like kaggle.com where there are countless data sets over any possible topic then maybe take a look at the pandos library for python that can help you out with all different types of data sets hop into a Google collab notebook and start coding look up tutorials if you need to Google as many stack Overflow questions as you need but just get started what about if you're interested in making games in Python you should check out pygame which is a simple python library that can make some fun little interactive mini games through Python Programming maybe you want to make a Hangman game or Connect 4 or Checkers or some basic game like that look up some videos on how to use potty game hop into a python editing environment and get started what about if you're interested in using python for databases and web development check out mongodb which is a free to use database that can be accessed using python read some of their tutorials hop into an editing environment and get started messing around with some of the code no matter what project you want to do the biggest and most important rule with this is to just get started even if you don't know what you're doing just try to get started and look up help when you need it if you get stuck in the learning phase where you're just endlessly watching YouTube videos all day but not actually coding anything you're going to learn practically nothing about python real programming expertise comes from working on your own projects and actually doing it surprisingly actually coding is how you become a good programmer not by watching 100 YouTube videos and not coding at all if you're completely lost on where to start I've compiled a list here for you with a ton of different project ideas just pick one of these that interest you and see what you can do there's a few simple game ideas like a number guessing game hangman dice rolling rock paper scissors Tic-tac-toe and so forth if you want to get more advanced with their games you can build something like the snake game or something like Connect Four and another popular project among intermediate programmers is building a calculator app if building Bots interests you you can try making a Discord bot or a Reddit bot in python or something like that as a couple of data science things too which are pretty cool you could analyze your own Amazon spending habits using python you can analyze your Netflix watching habits you can analyze some survey results maybe analyze some salaries of different jobs and so forth in future videos I may go through some of these project ideas to show you how I might go about building them I guarantee you there are tutorials for every one of these products that I've mentioned here that you can watch if you need a bit of a boost in getting started just remember that to get better you should actually be coding to get some real life practical experience I really hope you've enjoyed this python for absolute beginner series I hope that I've been able to help you out in getting started with your Python Programming Journey stay consistent with it and keep working hard and I'll promise you you'll become proficient becoming a programmer isn't easy but you absolutely do not have to be a genius or even very smart to become one keep working hard at it and you will see how significantly you're going to improve over time even if you're just learning one tiny thing each day you're gonna have roadblocks and problems along the way but every time you get past one of those you're that much better at programming because you learned something new I believe in you and you should believe in yourself too you can do whatever you set your mind to and learning programming is no different on that note I'll leave you to start your journey and I hopefully I'll see you again in my future videos take care
Up Next
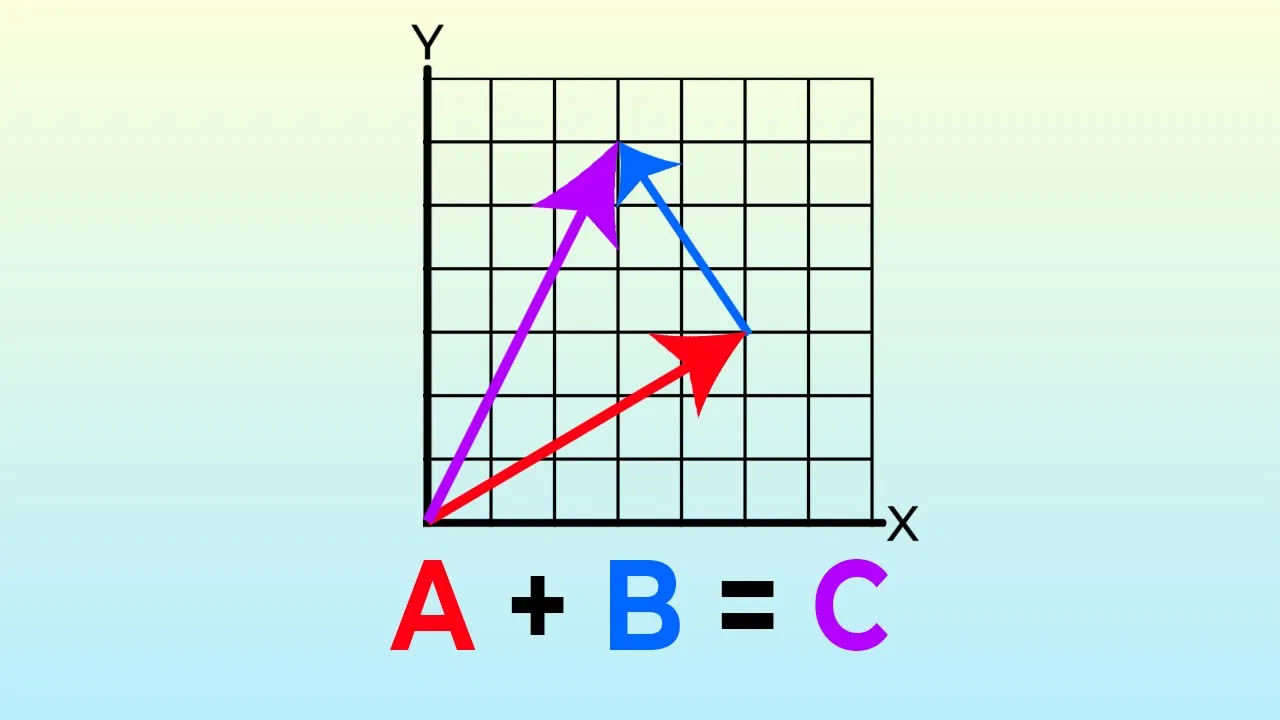
Vector Math for Game Development: A Linear Algebra Primer
@Bitlytic
21.4K views•2021-08-23

Introduction to Secure Multiparty Computation with Yehuda Lindell
@fhe_org
7.7K views•2021-02-04

HTTP Requests Explained: GET, POST, PUT, DELETE
@codecademy
103.1K views•2021-10-07

Enigma Machine Mechanics: WWII Encryption Explained
@JaredOwen
13.2M views•2021-12-11
Related Study Plans & Knowledge Roadmaps
Structured learning paths in Computer Science