

![Deep Learning Full Course 2026 [FREE] | Deep Learning Tutorial | Deep Learning Course | Simplilearn](https://i.ytimg.com/vi_webp/EdHdYJZKEf0/maxresdefault.webp)




















![[빅데이터분석기사 필기] 기출문제 6회 61~80](https://i.ytimg.com/vi/UxxXPR1_XCs/maxresdefault.jpg)








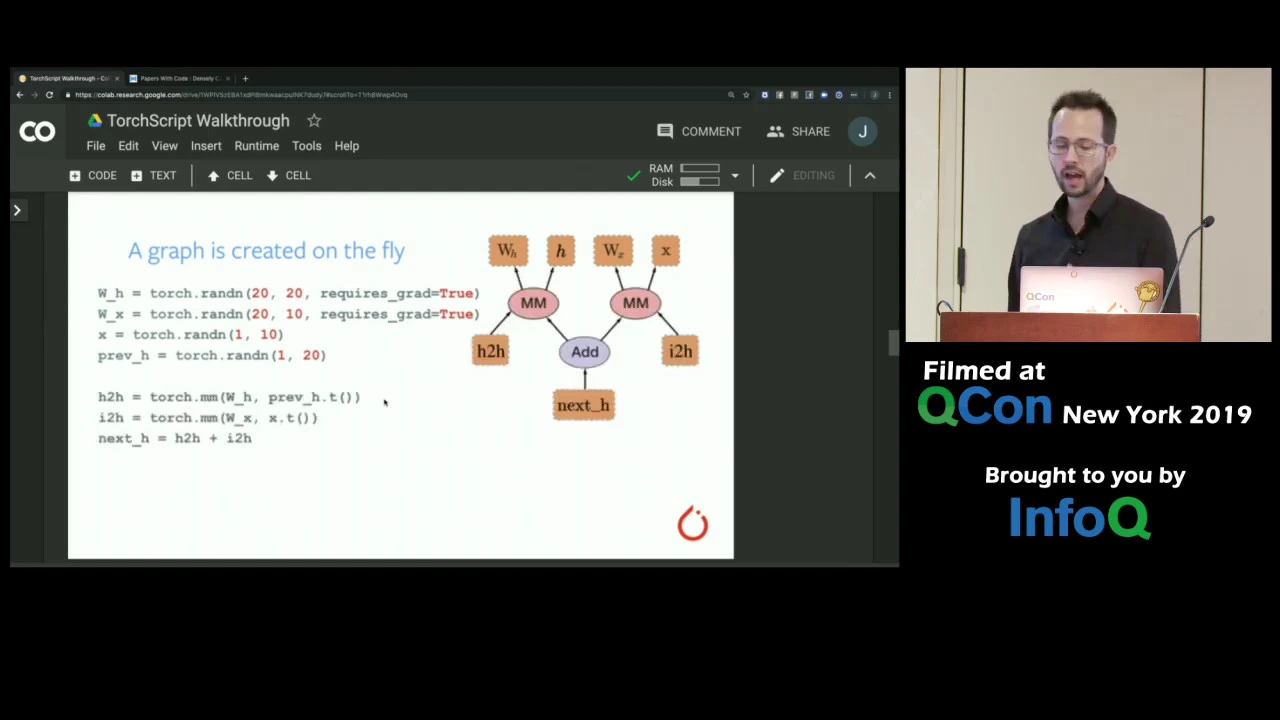
This tutorial demonstrates how to build a neural network image classifier from scratch using PyTorch, covering key components including torch.nn for model construction (Sequential, Linear layers, activation functions), torch.utils.data for data loading (Dataset, DataLoader), and torch.optim for optimization. The process involves preparing data using torchvision transforms, defining a model architecture with flatten and linear layers, compiling the model, and implementing training and validation loops with loss functions (CrossEntropyLoss) and accuracy metrics.
Build an Image Classifier in PyTorch: Step-by-Step Guide
Added:Proficiency in Python programming, particularly Object-Oriented Programming (OOP) concepts like classes and inheritance, which are essential for defining PyTorch models.
Fundamental understanding of Machine Learning concepts, including supervised learning, gradient descent, loss functions, and backpropagation.
Basic familiarity with linear algebra and multi-dimensional arrays (tensors), ideally through experience with NumPy or PyTorch basics.
An understanding of how digital images are represented as numerical data (pixels, channels, and dimensions) and the necessity of data normalization.
Exploring advanced Convolutional Neural Network (CNN) architectures (such as ResNet, VGG, or MobileNet) and implementing Transfer Learning using pre-trained models from torchvision.
Applying data augmentation techniques and regularization strategies (like dropout and weight decay) to mitigate overfitting and improve model generalization.
Deepening evaluation practices by implementing confusion matrices, precision, recall, and F1-score metrics, alongside systematic hyperparameter tuning.
Deploying the trained PyTorch models to production environments using frameworks like TorchScript, ONNX, or serving them via web APIs (e.g., FastAPI or Flask).
416 views18likes29:40Original Release: 2024-10-02
hey everybody Dr data science here and welcome to the pytorch stepbystep series where we will cover everything you need to know about pytorch from the basics to Advanced deep learning topics all the code used in each video will be available on GitHub and you will find the link in the description below if you enjoy these videos don't forget to like And subscribe for more content now let's dive right in the first thing we want to do is import pytorch and the technical name is actually torch and then we can also check the version of pytorch using this uh print option that we have here so you will see that in this case we have pytorch version 2.3 so my recommendation is to make sure that the first uh number here is two so you're not using pytorch version one and also here we have Cuda because we have a GPU uh available on this machine so the goal here is to understand the basics of pytorch by creating a simple neural network model for image classification and a very important module inside part torch is this torch.nn uh which is the core module for building neuron networks it provides a comprehensive set of classes and functions to Define models train evaluate um you name it and here's the breakdown of the key components that you need to know so torch. n and includes containers such as sequential if you want to construct feedforward models by stacking layers in a sequential man or you can use also the module uh which is the base class for all neural network models in this video we use sequential because it's a little bit easier but obviously module is a lot more uh powerful another thing that you need to know about this torch.nn is also the the the way that we can access different types of layers in neural networks including linear layers convolution recurrent layers Transformer layers so you can see that we have access to all sorts of layers that we need to build neural network models we also can access uh built-in activation functions such as realu um or exponential linear unit and many other activation functions and also we have access to Lost function so you see that in this case because we are using a classification problem uh we need to use the cross entropy loss function and that's something already available within torch.nn another thing that we need to know about py torch is that the way that we can um you know create a data set and fit that to the model is different from other libraries including tensor flow and cares in a sense that it's a little bit more object oriented way meaning that we have two important um modules uh one data set and the other one data loader uh which you can import them through torch.
.data right so we always want to use this torch. u. dat and we import data set and data loader so data set is an abstract class just representing a data set and the nice thing is that allows you to uniformly load and process your data so that's something that is very useful if you want to have a custom data set or even use a standard data sets that already available uh in pytorch but one thing that we always also you know need to remember um to use is this data loader so data loader is a class that wraps um around this data set to create an iterable right so remember in in in uh when we talk about neural networks and deep learning models the way we train them is we provide batches of data and the way that we can create these batches is using data loader so that's something that it's very important here to create batches shuffle them or uh do other things that we need for uh training purposes because in general we are not able to provide the entire data for training in neural network model when we have very large data sets but the most important thing that you need to know about data loader is grouping data into batches of a specified size right that's what it's known as batch size okay so now that we know com you know the motivation behind uh most of these uh things that we are importing here so we are importing torch. NN as NN so we don't have to use the full name anymore this is the Alias uh from torch.
utils dat we import data set and data loader we technically don't need data set here because we are using a built-in um data set in torch region but we definitely need data loader and also we need the optimization technique uh for for implementing gradient descent and that's through torch. op team right so that's inside torch. op team and not torch.nn that's something to to keep in mind so we're going to run this cell everything is okay now so since we working with um image uh data sets here in this in this video uh we need to also learn how to um transform these images meaning that you will see soon that the image that we have here is in a format called pil or pill python image Library whereas in in py hor we want to work with tensors so we have to you know get this image and create a tensor and the way that we can do this is using torch region. transforms and we use V2 which is an extension of the original torch region.
transforms and this allows us for you know Advanced uh data augmentation and pre-processing techniques for especially images uh including uh resizing normalizing flipping images and creating tensors Etc so this case we mainly use in this cell for for image data set so we're going to import torch region uh we're going to import torch region.
trans transforms. B2 as transforms also we need to use this functional from torch Vision transforms which you can think of this you know really as the name suggest is like a function that we can apply for example to create tensors and we also import mat flood Le for visualization purposes before we really dive into um these specific details I would also like to um tell you about model agnostic code in pytor so depending whether you have access to GPU or not um one thing that you can do is that you can um use this um torch. Cuda that is available to make sure that you actually have a GPU and you correctly install Cuda to be able to uh utilize uh your GPU and you can see that here is true meaning that we have access to that so you can write your code in model agnostic form so meaning that if torch. Cuda that is available is true then the device that we want to use is Cuda and otherwise is CPU and so the nice thing with this kind of kind of like conditioning here is that if you have like let's say only access to CPU is still your code will work and this device will be set to CPU and if you have GPU they will be set to Cuda and so you can see that when we print device we get Cuda and because this is in this case we have GPU so in the rest of this notebook we're going to focus on three parts preparing data using data set data loader defining and compiling the model using torch.nn and then writing um like two for Loops one for uh training and then one for evaluation purposes right so for one we use training data and for evaluation we need to use some holdout or test data so let's look at preparing data in this case we're using a built-in data set which is available in torch vision data sets here's the link there's actually a very nice list of um Vision data sets and one of them is M data set right so these are the handwritten digits that we have and um the way you can access this is by um creating a route or path that you can use to store the data and also mentioning whether the the train is set to true or false so for training data train is true for validation or testing data the train option is set to false and obviously we want to download this so you can see that in my case this is much faster because I do have um this thing downloaded so you can see it here that I have this data set already downloaded okay so what's inside this thing so here's the thing right these are not just tensor we have a lot more information you can see that this train set right it has uh 60,000 data points right so 10 digits 6,000 per samples per class um and this is for the training purposes you can look at the validation so here we have 10,000 um so we know that for em data St you have a total of 70,000 data points that we have uh divided them into two groups one for training and one for validation but what's inside this swing so for the train set we know there are 60,000 data points or elements let's look at the first one and if I run this you can see that this is actually a two pole because we have these parentheses the first one again is an image this pill image that I said python image Library and we have this number here five so it is easy to Guess that this is the label or or the digit that that image is representing so we can use this unpacking to separate the image and label so now if I run this D you can see that that's digit five right and of course you know computers don't know exactly what this represents they just look at this as a 28x 28 array but if we and and this is the type of it because it's an image right but if I look at the label you can see that now the label is five right so we have this image here and we have this label and we want to train a neural network model that we can fit these images and get these labels from the model and again I would like to emphasize that this pill is essentially a python object that encapsulates all information and properties related to an image so that's very common to use when you have any type of image processing and for this label U this looks like an integer but you know you can always use type anywhere in Python to find the type of the object and this is an integer so that's great the last thing that we want to do here uh which is very important in terms of pre-processing is being able to get this pill image and create this to a tensor right um so in this case we can use from the functional Dimension we imported this as F we're using two underscore tensor right so this means that you convert a given image in the form of a pill image in general and you create a pytorch tensor so that's great let's see if this works or not so we have f.2 tensor this is the pill image that we had before and now I call this image tensor after the conversion and if you look at the Tope you see that this is indeed a torch tensor which is great that's what we need in order to be able to fit this into uh a neuron Network defined inside pych and in order to make this you know more I would say principle and efficient one thing that you can do is inside transforms there's this thing called compos which means that you can create a p planine a series of transformations in this case we don't want to you know manipulate the data very much the only thing we want to do is to create tensors from these pill images and for this we use the Lambda function so we create this Lambda this is the keyword so the input is image and each image will be um sort of like fed into this you know function two tensor so this means that get each pill image and create the pytorch tensor and that's the main transformation that we want to do and I call this TRN right so that's like the the transformation that we have so if I for example give us an input argument image to TRN you can see that we get the torch. tensor and the nice thing is that once we do this also we do normalization meaning that now um the maximum element or value of each tensor is one and the minimum is zero so this is a very common thing to do when you're working with any kind of image data to make sure that the pixel values are always between 0 to one and if you look at the shape in this case you can see that this is 1 by 28 by 28 something important to know about pytorch the way that we represent images uh is uh through this threedimensional tensor or array of of size Channel height and width and if you have a color or RGB image you have three channels right RGB red green and blue and if you have a gray scale image you only have one channel and um now we can use plc. imow to to U plot this image right that's what this im here stands for the only thing to know is that you know uh if you just give this uh image sensor you will get an error because it's a three-dimensional array um so the only way to really you know um fix this problem is to get rid of this you know first AIS which is always one so it doesn't really have much information and that's what we use using this squeeze right so this will automatically you know squeeze this one so it means that the result would be 28 by 28 and the color MTH is obviously gray okay so this is that 28x 28 image that we got from the pill image and convert this to a p torch tensor and in order to make sure that you apply this to all the data points that we have so you remember we had trained set and validation set there is an attribute called transform and you set this equal to TRN that we defined so this means that from now on then we work with this training set and validation set we are going to apply that transformation that we Define which is mainly just converting everything to a py torch tensor okay so now let's not forget to run this and this is the part that is very important so in order to be able to um you know provide this data into uh divide this data into batches and provide these to uh you know during the training process you know in one batch by one batch we need to use this data loader right so this data loader uh we need to do use once for the training one time for validation the main thing you want to use is bad size so we want to make sure that in both cases we use this B size 32 and we set the shuffle equals true for training and the reason is that at the beginning of every Epoch so one Epoch means one time we go through the entire data we want make sure that we Shuffle the the data right we change the order of the data so we are not always going through the data um with the same order so that's kind of like helps in terms of convergence and usually like generalization performance so now we know about data set and data loader that was the first part of um this video in the second part we want to Define and compile a model right so one of the most important thing to know here is that we have this 28 by 28 tensor and we want to make this a onedimensional tensor or in other words you want to flatten this tensor so inside that torch.nn that we imported as Ann there's this flatten layer that does this in order to see this we create this tensor right of U you know I can just run it so you can see it right which contains one two three and 4 56 so that's our original tensor the size of this is 1x 2x 3 right so the first axis is one and if we um spit this to the flatten layer as we expect you can see that now we have the first row and then the second row is added to the first row so now it's a onedimensional uh sort of like representation of these two-dimensional data right and the first AIS always is one because that's technically the bat size so that's kind like important to remember that the way that we fit you know data to to in this case to like a neur Network model the first element is the bat size and in this case is one in in general because we set the bat size to 32 later on it's going to be 32 and then you know we have the channel and then we have height and then width okay so now we want to define the layers for our model so the first layer again should be a flattened layer meaning that we get this 28 by 28 image and we have only one channel and now we have something of size 1 by 28 by 2 eight uh which is if you do the math it's 784 elements now the next thing is to create a linear layer so to create uh this an and the linear that connects this 784 neurons to another set of neurons and that's what is called the hidden layer and in this case we assume that we have 512 neurons there so this is something that we have to specify and you can obviously change this as you want and once we do this remember neuron Network we have this linear transformation and then we have some nonlinear activation function and for that we use Rectify linear unit so in this case if I print layers you see that we have platin as it says here it starts this this platin starts applying this transformation to to flatten or vectorize everything from the second dimension because indexing it starts from zero so this is technically second and again the idea is that you always have something of this size back size number of channels height and width so what you really want to do you want to have B size and then everything else to be flattened or voriz so that's Channel height BD which in this case is 1 128 28 the I added full description here so you can always read this text here and that should really help you okay so now we want to comp complete this right so these three layers are what we just talked about now let's say we want to also add another hidden layer so we have another hidden layer with 512 elements or neurons in it and we use OU activation function and you can always print this to make sure that this is working the way that you expect right so it gives a lot of information in terms of this is the linear layer input features we have 784 output is 512 and the same thing for the other one from 512 to 512 and now let's complete this neural network right so this is what we already covered and then in the final layer because we have a classification problem and we have 10 digits we have this nend classes equals to 10 and we use this linear rayer and so now in order to create our Network what we really need to do is use this nn.
sequential and this means that now we want to use a fit forward Network that we you know stack together all these layers in a sequential Manner and the way you do this is that if you just provide this list or python list that we have called layers you get an error because you really have to unpack this or open this and there's a trick in um python which is very useful and using the asterisk right before your UH list so this is what it's called an operation called unpacking which takes all the elements in the list and unpacks them so tells this nn. sequential use this n and that flatten and and. linear so this will allow you know a nice way of unpacking all the layers that we have inside this layers list and here you can see that right we have a sequential model uh we have technically you know six layers with flatten and then the first hidden layer the second and then the output layer one thing that you need to do because our code is model agnostic is to uh um to send this model to the device right so we we send it to device right and so you can see that now um we have everything on and the GPU that we have and something that has been added to the version two of pytorch is that you can also compile your model and this will accelerate model training and inference by optimizing a lot of operations under the hood so um that definitely I would say something you want to do if you're are using pytor version 2.0 and later so in this case uh that's what we have and then the third part is training and evaluating our model okay so when you want to do um training one of the most things is to define a loss function and a loss function is what uh you know measures the the the disagreement between true and predicted values and since we using classification again here we use the cross entropy lot which is part of that torch.nn as we promised and the nice thing about this is that this also automatically applies the softmax layer right so this means that you do not need to put a soft Max activation for your last layer U because it automatically does that for us and also you know the negative log likelihood which is the actual cross entropy loss function so therefore in this case we Define our loss function right so this means that you know our loss function accepts two things the the the the predicted logic Logics or what our model predicts in this case and then the true labels we also need to have our optim Optimizer here to be able to reduce the value of this lost function we use the addom optimization technique and you have to pass all the parameters of your model so you know what you're updating and that's what this model. parameters is right so it gives you all the parameters and you can even like list it here so if you convert this small do parameters to python list you will see that these are all those like weight metrices that you have that takes you from one layer to the next layer right and these things are filled in with values right now because you always initialize these uh weight metrices randomly right so there there are some values here probably right now this is a really bad model because these weights have not been optimized but you will see what we have inside these model.
parameters and the next thing you need to do is to be able to evaluate the accuracy of your model which is the number of correct predictions so one thing you need to know is that how many training data points you have how many validation data points you have and and that's um relatively easy to do you know we can you know just check the length of the data and now we need to write a function to measure the accuracy for each batch because remember when you're working with in a neuron networks you always provide a batch at the say at one time so that's a subset of your entire data so in order to create to measure that so we look at the Logics or the output of the model so this is before the softmax the true label and the total number of data points or samples that we have so for your you know Logics we need to figure out you know for each U rule uh where we have the maximum value because that's where you know that data point belongs to so we have this output. AR Max um we have dim equals 1 so that means that is rowwise and we want to keep this Dimension so meaning that we don't want to reduce the the one of the axes that we have in the data and then after this is a very simple thing right because this P or PR contains the digit number that we have and we want to see whether this is equal to the true labels and we can use this view as to make sure that we have exactly the same dimensions and axis so we can do the comparison and then you count the total number of correct predictions right because anytime you get a one that's a correct prediction and use. item to convert this py sensor to just a number so you want to you know extract that number this is very important to use that item and then you return this number of correct predictions over the total number of samples that you have Okay so let's run this so now we ready to write our training Loop and this is very important so we have to keep track of two things the loss and accuracy right because you have cross entropy loss and usually we want to know the classification accuracy we put the model in the training mode right so that's model that train that's important and if you use some special layers like Dropout and now this is the main part so you write a for Loop to go through that train loader right so remember train loader was what we got using data loader which you have these different batches and so at every Epoch we have to go through all these batches you first send your data into the GPU right so this is important if you have a GPU with limited memory you don't want to send everything there so we send just what we need then we send the input which are this images just the model get the Logics or you know the the values of the 10 nodes that we have and it is important always to make sure that we zero out the gradients from previous step to prevent accumulation that's how P torch is so you need to make sure in this case for fit for one neural networks um to use this zero graph and then we evaluate the value of the loss function for that batch so that's why we call that bash life and that's the logits and through labels and then you use Dot backward to find those gradients and once you find gradients now use Optimizer do step to be able to update the model parameters using gradient dist which here we use add so remember that you want to keep track of all the L values so we look at this value of loss that we have for this patch added to the loss and similarly for the accuracy we're going to look at the accuracy for this batch and add it to the total accuracy and at the end we can you know print this using dot format so we print the value of loss and accuracy at the end of this for Loop right so this is not inside the for Loop is right after that and we have a similar thing for validation or testing part but except the fact that here we don't want to update model parameters so it's a little bit easier we still have to keep track of loss and accuracy we put the model in the evaluation mode we want to make sure that we are not you know messing with the gradient so we use torch. no grad right and then we go through the valid loader and in this case we send the data to the device so that's a you know whether it's CPU or GPU and also you know find the value of the output for the input and measure the loss function and accuracy and print them once we're done right so now let's say that we want to have five EPO meaning that we want to go through the entire data five times so we write the for Loop for going through this epoch we print the epoch number and we run the training Loop and validation Loop that we have and so this will take a little bit time because of course we have to send the data to the GPU and you know go through the entire for Loop because we have like for say 6,000 dat points and each um ebug we have to divide this into batches of size 32 so you can do the ma math to see the number of times that you actually have to update model parameters so so you can see that we start to see results last function value for the first Epoch and the training data is 300 and then for the validation data the accuracy already is pretty good right so it's more than um 90% but you will see that it it's getting better too so we are waiting here to actually get the results for all the five Epoch I want to show you how much this will take time on the GPU that we have here so you'll see that we got the results and we have a model model which is about like 98% accurate so this is not the best accuracy you can get using you know this MN data set but the nice thing is that this is a pretty simple neural network model and we are not using any convolutional layers and that will be the topic of a future video so now let's see how good or bad this model is by just looking at one image so remember we had that image tensor that we defined earlier which was this digit five and let's just send this to uh to the device which here is GPU and see what the output of our model is so as we said earlier our model here creates um 10 uh values because we have 10 nodes or neurons in the last layer and the way that this works is that we're going to look at the maximum value because that means that it's the most likely class that that data point belongs to and it's obviously this one uh it might be a little hard to write our count but you can obviously use that Arc Max with de equals one meaning that we want to go through AIS one or rowwise and in this case you see that the result is digit five so you can see that this neural network model that we have now can uh correctly identify the class for this data point
Up Next

25:43
Math for Game Programmers: Building a Better Jump | GDC
@GDCFestivalofGaming
502.9K views•2016-12-12

87:26
Introduction to Secure Multiparty Computation with Yehuda Lindell
@fhe_org
7.7K views•2021-02-04

4:55
HTTP Requests Explained: GET, POST, PUT, DELETE
@codecademy
103.1K views•2021-10-07

19:25
Enigma Machine Mechanics: WWII Encryption Explained
@JaredOwen
13.2M views•2021-12-11
Related Study Plans & Knowledge Roadmaps
Structured learning paths in Computer Science
computer-science
Container Runtimes: Namespaces, Cgroups & Go
01Linux Systems & Go Programming Foundations
02The Core of Isolation: Chroot and Filesystems
03Linux Namespaces: Process Isolation
+ 3 more learning modules
32h6 modules
Explore Roadmap
computer-science
Building a CHIP-8 Emulator: Rust & CPU Basics
01Computer Architecture Foundations (Bits & Bytes)
02Rust Programming for Systems Development
03CHIP-8 Virtual Hardware Specifications
+ 2 more learning modules
32h5 modules
Explore Roadmap
computer-science
Building BitTorrent: Go, P2P & Concurrency
01Go Fundamentals & Concurrency
02Networking Foundations & P2P Architecture
03Bencode Parsing & Torrent Metadata
+ 3 more learning modules
26h6 modules
Explore Roadmap
computer-science
Actor Models (C++ Concurrency & Lock-Free)
01C++ Multi-Threading Foundations
02Thread Pools and Task Scheduling
03Atomics and Lock-Free Queue Design
+ 3 more learning modules
45h6 modules
Explore Roadmap