



![Buoyancy and drag in fluids [IB Physics SL/HL]](https://i.ytimg.com/vi_webp/qEWpHhRtxT4/maxresdefault.webp)









MathWorks has developed an open-source virtual RoboSub environment using Unreal Engine for visualization and Simulink for dynamics modeling, enabling students to simulate AUV navigation, control, and autonomy before hardware testing; the system supports importing custom AUV geometries, configuring hydrodynamic coefficients (simple or complex), integrating sensors (IMU, DVL, cameras), and testing PID controllers for tasks like navigation gates, torpedo firing, and marker dropping, with future plans for ROS integration and Linux support.
MathWorks Virtual RoboSub Simulation Environment | Webinar 2026
Added:Basic proficiency in MATLAB and Simulink, including model-based design and running simulation loops.
Fundamentals of rigid-body dynamics and kinematics, specifically applied to marine or underwater vehicles (hydrodynamics, buoyancy, and drag).
Introduction to classical control theory, such as PID controllers, state-space representation, and feedback loops.
Basic understanding of robotic sensors (IMUs, sonar, cameras) and their role in state estimation.
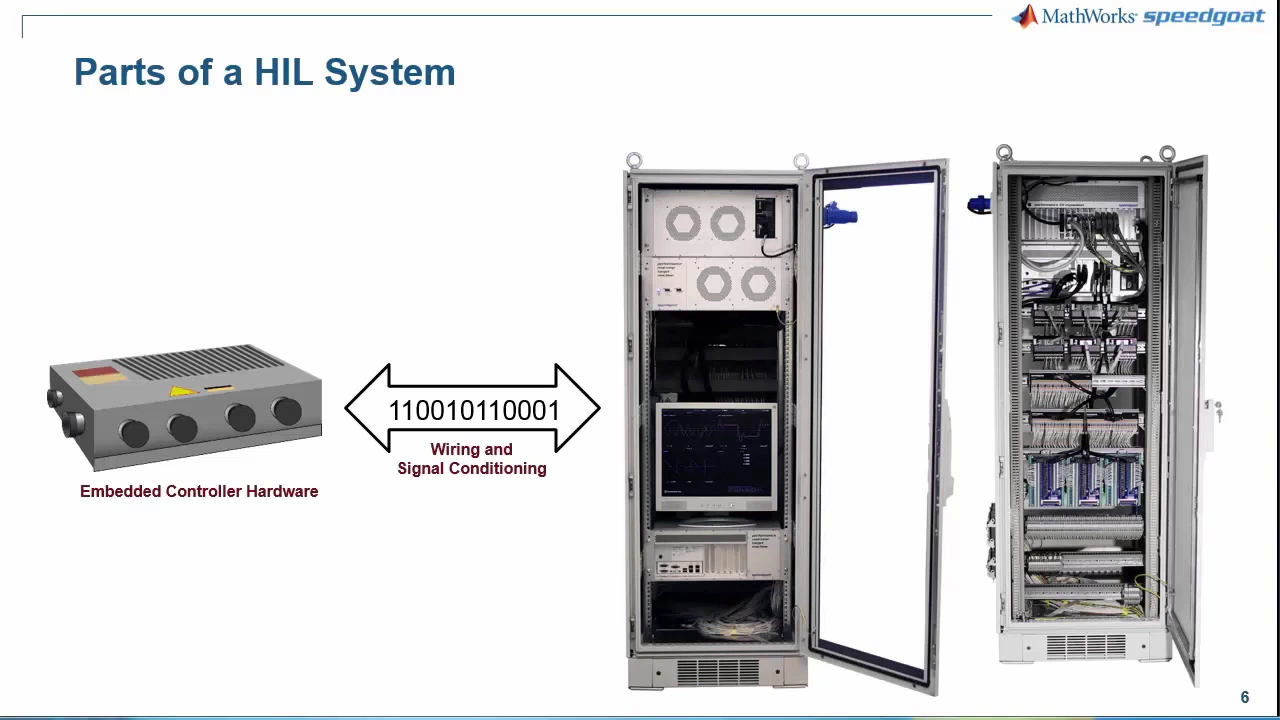
Transitioning from simulation to Hardware-in-the-Loop (HIL) testing to deploy algorithms onto physical AUV hardware.
Advanced underwater localization techniques, such as Sensor Fusion (Extended Kalman Filters) combining DVL, IMU, and GPS data.
Implementing computer vision and deep learning algorithms for real-time target recognition and tracking under water.
Developing multi-agent coordination strategies for collaborative marine robotics and autonomous underwater fleets.
209 views10likes58:25Original Release: 2026-03-10
Welcome everybody to our first MathWorks miniseries session of 2026. Can't believe it's already March of 2026 here at Robo Nation. We're already one event into the year having just completed our RoboBoat competition. Um, as you can see here on the screen, we've got the word Robo Subub up here. So, we hope a number of our Robbo Subub community members have joined us today. Um, this one will also be very interesting for those of you who will be competing at robot X and bringing an AEV to the challenge. Um, but all of this is possible because of one of our partners over at MathWorks, Abhishek Shanker, who has been working um very very diligently and very hard um to make something really special possible for you guys, which is a virtual environment um modeled after Robo Subub um specifically after our pool out in Irvine that we have been participating in for the last few years and will be returning to in July. Um, so this is just a fun and exciting opportunity for you guys to check out this virtual environment, learn how it works, learn how to get um, your vehicles and everything um, loaded into that system. Um, we actually have been partnered with MathWorks for a number of years. In the last couple of years, they've been doing something really special with us, which is a a MathWorks simulation award. And so that's something we also encourage you guys that are part of RoboSub, Robot X, and SUAS to pay special attention to during the the minieries that we have um throughout the springtime because that's a really great opportunity for you guys to get your name out there more as a team um challenge yourself more, get some resume building opportunities is to compete for those particular simulation awards. So without further ado, I'm going to pass it over to Abhishek um who has walked the walk of all of you guys.
He's a former student um now works at MathWorks and is our liaison um to one of our one of our big time and longtime SP sponsors over at MathWorks. But without further ado, I'll pass it to him to talk about this very exciting virtual environment.
>> Thank you Alicia and hello all. I'm super glad to be here. Uh this is something that we have been working on at the math works for about a four months now. um we were able to build like a virtual environment for Robocub.
Um I'll get started with the presentation. Um the agenda for today is going to be a little bit of introduction and motivation on why we did this. Um and then I'll talk about the dynamics model we used to like simulate a like an AUV. Um we are using an Unreal Engine based environment in the background for the visualization. So I'll talk a little bit about that. Um I'll also touch about touch on some of the future work we have planned and um and as Alicia mentioned we do have a matchworks award for um Robosub robotics and SUAS um so I'm going to talk a little bit about how [clears throat] that would look like this year for robos sub and then at the end we'll leave some time for questions uh so for the motivation part um like I said math works has this environment uh that was built to allow students to simulate the dynamics of an AUV and also let the teams test um their solutions in simulation before they get into the water. So often times uh software teams are often waiting for the hardware team to get their AUV done so that they can go ahead and test. Um so this is something that they can do in simulation to get their software working in parallel and then hopefully reduce the development time for the competition.
Um and we also are planning to host like a virtual robos competition. Um this is again part of the math works award. Last year if you remember we had um just uh an award for how award that basically scores you on how you use sim link and matlab for uh for your a design. This year we're going to do something very similar to Robosub uh but in the virtual environment so that this will give you some time to like run your algorithms and your navigation in simulation so that when you come to Robos you'll be better prepared and a lot more of you can qualify and get to the finals.
Um and of course we give out uh $1,000 to the winning team. So there's also a monetary aspect to it. But I'll talk a little bit more towards the end um about this competition.
And then uh finally we also thought this would be a good use um for researchers and professors who are doing marine engineering and have like a generic underwater environment.
Um right so these are the requirements that we kind of worked with. uh it's a very high level but what we wanted was realistic underwater environment because um as you know Robos has a lot of vision based task solving so it the underwater environment needs to look good so that you can use that data the visual data in simulation um and then deploy it in the real world and then uh obviously we need support for some frequently used sensors like IMU DVL um cameras pressure sensor etc. Um, we also need the dynamics with some varying complexity. So by varying complexity, what I mean is some teams uh do a lot of work on their AUV and they get um they also do a lot of analysis.
So they get the coefficients um they do CFTs, they get coefficients of drag. Um so we want to be able to import those coefficients into sibling so that you can get a much better fidelity in simulation.
But uh for those who don't have time to do all that or have not got to that stage yet, you can always uh go with a simpler model. So you give um a simpler track coefficients to like approximate the AV dynamics um uh to like a really good extent. Um and then I'll talk about how that looks like uh when when I get to the dynamics part of it. And we also wanted to support some actuators like torpedoes and droppers uh which are again very common in Robbo sub and something that a lot of teams struggle with especially station keeping and trying to have the um the AU shoot the torpedo um correctly.
So this is the quick view of the environment. Um right now the pool is pretty sparse. you see only um like a few objects in there. So, there's this navigation gate. Um and then there's a torpedo board. Um right now it's pretty sparse because uh we we will update it once we get um sorry, we go back.
Yeah, we'll update it once um once the task details have been uh released and then you'll have uh whatever task that has been planned for this year's robust sub in this environment.
Uh yeah, and then of course what task can you actually do in this simulation environment? Uh we could do the navigation gate. Um this is based off of the these pictures are based from last year's competition. This will be updated. uh for this year I I saw the images were released so I'll update them um once I get a chance um and we'll also uh have like buoy so you could do the slalom and we have torpedo boards for you to practice torpedo firing we also have the market dropper task and the u the octagon surface uh we don't currently support uh any of the uh pinga task so you uh right now that is still something that we are considering and trying to figure out how to fit it into this uh into this environment but um hopefully we'll have that uh in the future or in the next iteration.
Now I'll quickly talk a little bit about the environment. Um so the environment was modeled using the water plugin uh that comes with engine. It's an experimental plug-in. Um, and then the underwater look was achieved with some custom post-processing block um to kind of match what uh we found in the in the real data that teams have uploaded to to the robonation box. So if you see here that is um an image from uh underwater taken from one of the AUVs and then this is the simulation environment. Um the the flow texture has not been updated yet. Uh but you can see like um the fog that is there. Uh like the distance um looks a little blurry than what whatever is nearby.
And then um there's also some costics which uh causes some issues when you're trying to detect stuff under on the floor uh especially when it's bright and sunny. So we added that. um it's it's not realtime costic so you don't have to worry about GPU usage it's just a pattern that's being projected on the floor and this is also something that can be turned on and off so that you can you know collect images without these and then add uh collect images with the costics to get like more variety in your data now I'll talk uh switch to simulink and then show you the dynamics model and some of the task demo that we Um we open the lab.
So this is the similic model that um you know that that's responsible for the environment. Actually before I show what's inside this um I want to let you know that all the files that I'm working on is available on GitHub um under methods robotics robos virtual environment. It's also available uh this link is also in the video description.
So you can click on that to see uh to like go here you can clone it and uh work on it.
Another detail is that this is open source. So you can uh you can contribute to this branch uh to this uh model. You can you know do your own work raise full request and then we review it and then add it. So if someone wants to add uh a different sensor or wants to you know they have an idea for the um for the underwater finger task you can uh make your own developments and then add it to the uh and then raise the PR and then we'll approve it uh once it goes through our uh verification process.
All right, let me go back to sim link.
Uh, yeah, high level. This is what the model looks like. Basically, you have a mask subsystem. What that means is there's a bunch of blocks inside this uh big blue box. But then uh we give the mass gives you like an interface to uh interface with all the parameters inside this box. So if I open this, if you just double click on this um you'll see it has all these parameters that you can enter.
And these are like generic parameters for your AUV like um we support like STL files so that you can have your AUV body in the simulation. Um what's your center of buoyancy what's the height or diameter of your AUV? What's the volume inertia mass and all such details and also the thruster position. So if you have like six sesses, how are each of them located with respect to the center body of your um of your AUV? So if you have six, then I would have like uh post for each of them. And then um you can also choose what kind of battery you're using. Um so we have like 10 to 20 volt um and then you just let us know what kind of what uh number of thrusters you're using.
Right now these cluster values are modeled based on the T200s. Uh we are we will be adding more support for like T500s and Tunds in the future. But since T200 was the most common one, that's what we started with.
And then if you click on hydrodnamics, this is where I mentioned where you have like different fidelity for your simulation. Um so this is the simple one where um there's a linear drag coefficient and a quadratic drag coefficients. So this one acts when the AUV is moving at low speeds and then uh the quadratic drag acts when the AUV is moving at high speeds [snorts] and then uh we also have like an angular damping coefficient.
Uh so these can be tuned to your system.
I'll talk a little bit of how we can do that um when I run this model. But this is how you do like simple hydrodnamics.
Um if you want to do complex um what that does is importing your coefficients from um any uh CFD software that you've used.
Um what we're doing is getting the roll, pitch, yaw, normal, all these coefficients as separate axis and then uh doing a more uh involved hydrodnamics for for this to uh for this to take effect. So you'll see more realistic movement. Um but if you start with simple, you still get a pretty close approximate. Um this is useful when you see like uh some peculiar behavior that you don't see in simulation but it happens in real life.
It's probably because um some of these coefficients are creating some kind of a force or a moment to make that AUV spin or move in an undeid direction.
So once if you have a more complete estimate of your coefficients then you could use the complex but you could always start out with um with a simple hydrodnamic simulation.
So these are the AUV parameters and then there are sensors. Right now we have two cameras DVL and IMU. So um for the camera I have one that's facing downwards and then one that's facing forward. You can set these parameters of your camera based on what camera you're actually using so that you can match um you can match the real sensor and you can also output depth uh from your camera so to like simulate the depth data. Um outputting semantic segmentation uh doesn't work right now but then um I'll be making some updates to make that work as well. So that way you can get uh ground truth data for the data that you collect.
Uh forward camera is the same thing. It has the same exact parameters. Um it's just not rotated. So if you see downward camera is rotate, it's pitched down by 90° uh to face downwards and upward is just zero.
And then we have the DVL. Um it has two modes, water tracking and bottom tracking. And then uh we have the IMU which has a bunch of values that you can put. These are values that you get from the IMU data sheet. So this is again to um model realistic noise from whatever IMU that you're using for your AUV. So you can just go to the data sheet, pick up these values and then put it here to get a more realistic um idea of what kind of noise you can noise you can expect from from the IMU.
Um yeah, so you could do that for the accelerometer, gyroscope and magnetometer. Um if you have a 9 axis IMU and then um like I said we have two two actuators, a torpedo and a marker. Um this is basically where the torpedo is located in your um in your EU. So the location where you have the torpedo mechanism at.
And then um some environment constants like water density, acceleration, um if you want water current or not. Um and do you want to enable water costics?
So I'm going to check enable right now and apply it.
Uh before I go in and show what's inside, I'll just quickly run this demo to show you how the environment looks.
I'm going to change this to infinity so that it doesn't stop halfway.
Right. This is the environment right now. Um you can see I have an AUV model here that's just it's positively buoyant. So you can see it just floats up. Uh where you can see the gate, the torpedo board over here and then there's a marboard boat right over here. And then these images will be updated later.
Oh, and of course there's like a octagon right here for you to surface. Um and then you can see here this is like the marker that we have and then um this is the torpedo uh that was fired.
This is I know this is like the uh the barebones of the environment. Um you can always add more stuff. You can import um files from Blender into this environment and then place it wherever you want. You can modify it um like that. I'll talk a little bit about how you can do that um in actually the next step. Let's stop this model right now and then um I'll go inside the the mask subsystem. Um so oh wait before I go inside I also have to talk about the inputs to the subsystem. Um so you have thruster PWMs that would be the input.
So if you have six thrusters you need an array of six values for your PWMs. Um, so here I have a 6 + one double. Um, and then you need a fire command for the torpedo and the marker. So that just be a step signal really. Uh, just changes from zero to one to fire that uh fire that system.
Now to go inside, you can uh click on this little arrow you see here, or you could also do um shift U. I'm just going to click here and uh this is what's inside that main subsystem. So you have the dynamics, you have sensor modeling, you have the actuators and then you have um some visualization. So I'm going to quickly start with visualization because I want to touch on how you can import uh meshes into your um into your into the simulation. So for example, if you want to add uh some image from your blender and you let's say you import export the image or like the object from Blender as an FBX file.
Um you can go um actually hold on let me just create something to show you.
You just search for Simling 3D actor.
You can open that and then set the path to that source file to like that FBX file. And then uh in the transforms you set the XYZ and RO picture and then the scale. Um just to uh make sure you guys are aware of this until units are centimeters. Um and then a lot of times when you uh export from Blender it's usually meters. So when it comes here it might be blown up. So make sure either the scale in Blender is set to centimeters or when you get it here you scale down by value of 100.
Um yeah so you can add any of the objects from Blender into this environment by just uh getting in a sim simulation 3D actor and then setting the source um setting the path to the to the FBX file you exported. going to delete that.
Um and then the dynamics is uh what does all the physics of the AOV.
So you have um uh environ environmental forces and moments block that calculates forces and moments due to hydrostatics and hydrodnamics. So if I go inside, you can see there's a hydrostatic block uh which just calculates um your force due to gravity and then buoyancy and then you have a hydrodnamics which takes in the speed and then multiplies it with your linear and quadratic um coefficients. This is for the simple system and then this is the more complex system which um which basically takes in all the constants and then simulates the aerodynamic forces and moments.
Those are the environment forces and then uh we also calculate the forces due to the thrusters. Um so based on the PWMs and the location and the orientation of these thrusters, uh this calculates the total force and the total moment from your um trusters which then gets added with the environmental forces and moments which are then fed into the six solver um which basically takes in the forces and moments and then solves the differential equation to get you a velocity, position and all the robot states for the next time step and then it does it every time step. Here for this model the time step is set to um 10 milliseconds. So it runs 100 times each second but if you want higher fidelity you can also reduce uh the time step to maybe 5 milliseconds or even 1 millisecond.
Um yeah so you get all of these states uh right here. So if you zoom in you can see velocity position oil angles quundians rotation matrix and the velocities and then you calculate acceleration which then is your entire robot state and then what the sensor block does is take this robot state and then basically add in some noise. Um so for example the IMU um had just adds in noise whatever that was added in the mask that I showed in the first page um and then outputs this noisy values to your sensor uh sensor bus and then uh DVL uh does that u right now what I have for the DVL is a file that just takes in the speed and the depth and then adds some noise and then outputs it. So it is not a highfidelity simulation of a DVL. It's more of a workound to get some kind of a DVL output. But uh again this is something that we are working on to get a better model for it. And uh and of course the cameras um produce the images that also go into this sensor bus.
And then um finally the actuators. Uh the two actuators are very similar. Uh for example, the torpedo takes in the robot state and what it does is samples it um to get the current robot's position at the time of firing so that it can whatever physics is done to the uh to the torpedo block. Um, for example, if you're calculating the new position once it has been fired, it's just uh added to the uh the position the AUV was at when it was firing so that you know it moves in the right direction and right uh right velocity.
So um that's basically what this does.
It um has a trigger subsystem which then gets the initial state when it was fired and then we do the same thing. we get the environmental forces and moments acting on that uh torpedo and then um update the torpedo states which then goes into the visualization environment.
That is uh the same thing for the marker dynamics as well. Um for the marker it's a little more easier because um I'm assuming the marker is very heavy and so the main force acting on it is the uh is the gravitational force and there's not a lot of buoyancy. So it's much more simpler to do the dynamics for the marker. Um and then you get like you get the marker position which then goes um into the visualization block. So you have the torpedo, the marker and the robot um going into visualization which then does you know all the visualization for you guys to look at.
So that's the gist of the environment.
Um you can find actually uh more details if you go here there's like a PDF it's loading. So there's like a PDF that has um a lot of details on each of these. So it talks a little bit about the coordinate systems used uh the all the mass parameters that I just mentioned uh some sensors actuators and uh how the dynamics is done for all these blocks. So this is a little bit more in detail um and it also links to a lot of mathworks documentation pages um if you want to know how certain blocks work or how certain blocks um respond. Uh you can also check that from through the the links in this document and um and of course if you still have any questions you can reach out to me on Discord or you can also email robotics arenaworks.com and we'll get back to you and try to fix it as soon as possible.
Right. Uh before I go to the task um Alicia, are there any questions? Yes, we actually have a few questions. Um, one of our one of our attendees noted that they didn't do any of the work last year for the Robo Subub award. So, they're they're noting that they're curious to do that for their team. So, that's very exciting. Um, but another one of our questions that we have um is what is the best way to tune P controllers using this model?
>> Uh, okay. So, I'm actually going to show you uh that in the next section. I'm going to talk about uh I'm going to simulate some of the tasks and I have like a simple P to control the AUV. So I'm going I'll quickly talk about that in the next section but hold on to that.
>> Great. Great. We will hold on to that question. Um a couple more quick questions. So uh one of them was so our software team will have the ability to customize it further than the base model you've created. So this >> Yeah. So you can add in more files from Blender. Um, and the ideal environment itself uh will be also open source. So you can go in and then change like if you don't want a pool, you can change it into like a tanstick environment or something else as well. So you'll have like full ability to change anything that you want in this in this environment.
>> It's amazing. Amazing. And I know you you've added the graphics from last year into it and you said you'll be adding the the updated graphics for this competition. So thank you so much for doing that. And then like you said, you'll be able to to do a little more customization. And then the final question we have right now is on I think a couple screens ago when it you had velocity E and velocity B and they asked what is the difference between velocity E and velocity B, >> right? Um so velocity E and B are like the velocities in different coordinate systems. Um the net coordinate system is velocity E and velocity B is like body coordinates. So for example um if you have like the AUV uh my background is not letting me show the object. Okay, assume this is the AUV and if it's moving forward, this is um forward X for the um for the body for the AUV body.
But if if the net, for example, if the net coordinate system is also X in this direction, they all line up and velocity B and velocity E would be same. But if the AV is rotated, then your velocity B would actually be uh Y of velocity E because it's rotated 90° in in Y. So that's basically what it means. It's just velocities in different coordinate systems. U based on what you use for your development, you can either you know use velocity in the body body axis or you can use velocity in the net axis.
And again that's more uh that's explained um along with the coordinate systems in the PDF that is in the GitHub. So you can always get more information there.
>> Great. Thank you so much Abishek.
>> Mhm.
>> All right. So I will now go to the next model that um as one of the questions was on Ps. and go to this model and I show um how I did a simple P for for this robot reader.
All right. So here you can see um the AUV block that that was there last time.
But then instead of like having constant blocks that is feeding into it, we have a planning and control block that would uh give a cluster PWM values and torpedo command. And if you go inside here, um what it does is it's a simple state machine that tells the robot where to go and then there are different PIDs um to simulate to like control the robot to make sure it you know it stays on the path that the the mission [clears throat] plan is you know sending it. So how this works is um in here I have some states. So, initially I tell it to dive to a certain depth. Um, and then it's going to move forward to the navigation gate and then move to the location based on these values to go to the torpedo task and then it's going to go there and then uh stabilize for a few seconds and then fire the torpedo and then it's going to surface. So, that's like the flow of this logic. It's going to dive, go through the gate, fire the torpedo, and then surface up. And once you have these reference positions, so of course right here, I'm I am using my knowledge of the simulation environment to give it direct positions of where it needs to go. Uh when you do it in simulation or when you do it in the competition, you don't have the direct information. You need to rely on sensor values. So you need to check on your camera uh check where where the target board is and also you know do some kind of state estimation make sure you're where you think you are and all that stuff but I am not doing all that this is just a simple example to show if you know where to go how can you like uh set up a few P IDs to achieve that um here I have like three P IDs for X Y and Z um and then I have some constants here. Um, this was tuned based on simulation. So, I would run it, uh, see how the system performs and then tune it based off of the performance. Um, and then I also have some saturation because the thruster cannot put in more than this number of this Newton of force in into the into the AUV. uh for example I have two thrusters facing forward and each 200 each T200 thruster can u can output f around 5.2 to uh kilogram force, right? And then um and then it's around minus4 in the negative direction.
So I add these so that the P doesn't, you know, tell it to do like a,000 units of uh thrust. And then um and then I have some anti- windup so that the saturation doesn't affect the P loop.
Um, and this is just a basic P block uh from Sim Link. And then I'm again just going in and then dividing it by two because I have two thrusters. Um, and then I have a lookup table that basically calculates the required PWM for whatever thrust the P is telling it to output.
And once I have that, I'm going to send all of that into Terra PWM. And then the torpedo command would go here.
So uh before I show you how the tuning was done, I'll just quickly show you the the model itself and how it runs.
So that is the camera.
Um then if I go here you can see that it is moving forward. Um actually hold on let me pause this.
I am going to show you with respect to the uh the planning part. So you can see that it is currently in the navigation stage um I mean in the nav stage in the in the mission plan. So I'm going to continue and then you can see that it's going into the navigate um and [clears throat] there's also the camera view but I am going to minimize it so that I can focus on the environment and then uh once it has gone it's going to dive down again because it's in a torpedo dive stage and then it's going to move in the X is like right here and then it's going to move forward again till it gets close to the to the torpedo board.
So once it's nearby, it's going to stabilize for a couple of seconds and then fire the torpedo.
So you can see the torpedo fired and then the torpedo just floats up and then it's going to surface once it's done with its mission.
So that's the the model. Um again like I said navigation part was made super simple here because I already know where the AUV has to go and then um and then I'm using simplified hydrodnamics. So some of the movements uh doesn't create any quirky you know AOV twists or turns uh but that just shows you how this can be done simply and then um for the P tuning itself what I did was um so right now if I open this code you can see the the errors um I am going to reset it so that it's new okay so you can see see the X, Y and Z error and then you can see that every time I give a new command the error goes up and then settles back to zero. So this happens in all these axis it goes up come back to zero then um it keeps happening really and then in some cases you see like overshoot and you see that it takes a lot of time for it to go and so these are all depends on your system requirements. So like what's the maximum speed you can go in and um and what's the maximum force and if it's if it's positively buoyant then there's going to be a lot of force pushing it up already. So if you have um if you set a set a Z reference that is higher than the robot then it's going to be pushed up pretty soon. So there might be some overshoot before it settles at the reference value. Um and then for tuning itself what I would recommend is uh you go inside here and then you basically comment out the visualization part right um because for tuning how the AV response you don't need all the the visualization um so I'm just going to comment that out uh just make sure that if you comment out the visualization you also need to comment out the camera because without the visualization part, the camera is really not going to see anything and it'll throw an error.
So now you can go in here and then um let me just show for example I'll delete these two and just show how the Z performs and I'll give it 30 seconds to run. If I run it, yeah, the model ran pretty quickly. Uh because without without visualization, it's really fast. And you just open. You can see that um the this was the error.
Um let me actually zoom in so that you can see. Uh for now, don't mind the blue and yellow lines. I deleted those. But you can see that the error goes up and then there's like a little undershoot before it, you know, settles back. Um so you can work on work on that. Um for example, I can go in here and then reduce the p value maybe and make it like 75.
And then you can see that the undershoot is uh maybe 18 into 10^ minus 3. Um so let's see with 75 it gets lower than that. Again really this undershoot is totally fine in a lot of cases but if you want really stick control you can always tune it. Um, so I'm going to run it again with a new P value.
And uh, oh, actually it did it overshoot more than uh, more than what it did before. So I'm going to go back and then change it to 120.
Reset a little bit.
Yeah. And now you can see that the overshoot is considerably less. So it all depends on your uh design parameters and what you want to do. But um but yeah, that's how you would typically tune like P for the the controller.
So right now I'm doing more of a position control, but if you want to do Oh, sorry. If you want to do velocity control, you could do that as well. Um so instead of uh taking the robot's position value from from the robot state you would be subscribing to the robot's velocity or robot's you know acceleration or body velocity and you just click on this plus and that would be a new input in this bus selector.
So that way you could do like velocity control if you want to do uh you know for example a joystick control you could do you could tune it with uh with this as well but yeah that's how tasks are task can be executed um and of course this is all in sim but if you already have I know a lot of students use ros 2 a lot which is great so if you want to do if you want to use frost two with this simulation environment it's actually pretty easy to do So uh what you would do is just go in um so you need to like publish the sensor values and then subscribe to so instead of this planning and control this will be coming in from your ROSS um code right. So you need to subscribe to thruster PWM and torpedo command. So that you could do by just searching for roster subscribe and then that would be like a subscriber block that you get and then you just um if you if you already have a roster network running you can just select from a Ross network. Um right now I don't have anything running so I just have the basic ROS ROSS topics but um if you have something then all those topics would show up. Um I've talked a little bit about this in my previous webinars. So I would suggest looking into those with proponation. Um and then yeah so what you would do is subscribe to the topic that you're publishing with the PWM sins. Um and then that would go that would go in here. So instead of this you'll be sending the message directly into your simulation.
And then uh the same for publishers as well. So if you if you want to publish for example the IMU data or the image data um what you would do is ask to publish and um let's say you have the image somewhere in this uh in this bus. Um there's like a ROS image writer I think. Yeah there's an image writer for ROS too. And then you just pass that image um into this and then the message into this and then choose the topic the same thing. And then you would be publishing your simulation the images from your simulation to the ROSS network which you can then subscribe to from your ROS machine.
All right. Um yeah. So that's how the uh sim the dynamics works. Um and then how we can you know tune controllers or you know test out basic navigation and see if the robot behaves um like you want it to. The other thing that I want to talk to is also tuning these uh values.
So for example hydrodnamic coefficients uh these values really depend on your AUB. So uh for example if your AUV is positively boiling right and then you place it at a depth of 1 m below the pool you can see how long it takes for the AUV to like surface up and then use that to determine um the track coefficients. So this is the 30 is the drag coefficient in X 22 is in Y and then 220 is in Z. So for me uh in X it's going to be very small because um because the shape of my AUB it's um it's more um what's the word for it? It's more optimized I guess. And then um when it goes up there's more surface area. So there's going to be more drag when it's going up or down.
And then you can change it and then simulate the system to see if it matches your real AUV's performance. And once you have a close enough estimate, you should be pretty good to continue with your simulation environment.
Aerodynamic, that's the word. It's more aerodynamic in the X direction. So it doesn't it has lower jack.
Uh but yeah, I'll go back to the presentation.
Uh so for the dynamics results like I said uh for a positively pointed system this is how it would behave. You can see that this takes about um uh what maybe like 1.7 seconds to get to the uh top of the water. Um this could be pretty fast. Maybe your AV doesn't go up so fast. So then you would change that D coefficient to reflect what happens with your AUV. And then you can also see you can also do that in different axis. You can give a like a constant positive velocity in the x direction like surge velocity and then see um or like constant thrust values in the search direction and then see when the velocity stabilizes. Um so initially it's going to accelerate to a value and then the force from the thruster is going to match the uh the drag force and it's going to stabilize at a constant velocity. So you can see how long that takes for the velocity to like um to like come to uh come to a stable value and you can use that to tune your uh drag coefficients linear and quadratic drag coefficients and you can do the same thing in y and y and all the different axis as well and uh here you can see um the ro stability for example if your center point is above center of mass um if there's a role moment it's going to stabilize back because of the difference uh in the buoyancy and mass and again if it's offset in the y-axis you'll see the robot basically flip because now um mass and points here are acting with with some radial distance which would then cause a moment about the uh the x-axis.
So this is just some uh test examples that I chose. Um again you can do some more tests. Make sure your AUV performs like how you think it would perform in the water or like how you would actually performs in the water to match the simulation with uh with the uh the actual AV.
Now that um I've showed you what is here, I'm going to talk a little bit about some of the future work that we have planned. Um right now collision is not great. Actually collision is non-existent in the model. It would basically just go through the walls. If you collide with the uh with the walls of the the pool. This is because um the unal physics kind of messes up with the similing physics. Um so there is some issues with the collision uh which is why it's turned off for now. uh but once we have that figured out we will update it so that there's better contact and collision modeling for these objects and then uh of course we want higher fidelity sensors like for the DVL and maybe more sensors as well um like you know FOGS uh which is something OSC was working on um things like that and then uh we wanted to support acoustic task and then increase number of torpedoes to two and then also to improve the pool floor texture. Right now it's pretty blank. So we'll improve that texture and then have some automated scoring. So if you do a run in simulation then you would get like some kind of a score uh based on how the AUV performs. And the other one was like have an additional environment for transte and when we go to trans tech um so that uh you can use that to simulate the AV.
Um and then there are also one more thing that I forgot to mention is that right now this system works only in Windows. Um we are working on a Linux executable that also works on Ubuntu. So hopefully it should be out soon but I cannot make promises because we have some other issues going on but um hopefully it'll be soon and ideally this month.
Yeah. And finally, I want to talk about the MathWorks award.
Um, Alicia, how much time do we have?
And I did not check time at all.
>> You are good. We still have some time and we can go over a little bit if you've got time still. Um, but we've got about 10 minutes or so left and then a few questions to answer, but you've been answering the questions along the way without realizing.
>> Okay, that's great. Um, so yeah, back to the Math Works Award. Uh the last year we had um a lot of good submissions um for the award for uh Robocub. Um and shout out to ETSs Montreal for winning the the award last year. Uh but this year we're going to try to do like a virtual competition with the task being very similar to Robosub which would then give the teams uh a chance to like test their solutions in simulation and be better prepared for the actual competition. Uh to reiterate this is only for the students who have already registered for Robosub. Um you can use the environment otherwise if you've not registered for Robos you can use it for your own personal research but you will not be eligible for um for the competition or the the math so uh so the prize is worth up to 2,000.
The winning teams gets $1,000 and then 750 for the second and 250 for the third I believe.
And we will have more details out. Uh we'll work with Robonation and send out more details uh once we once we have finalized the environments.
Uh but that's it. Uh if you guys have any questions, I'd be happy to take them, but you could also email them to robotics arenaworks.com or reach out to me in Discord. um if you're part of the robberation discount.
>> Fantastic. Thank you so much, Abishek.
Um like Abishek mentioned, the award he just spoke about is is specifically for students that are registered for RoboSub, but registration is still open.
We have till April 1st. Um so for those of you that are curious what RoboSub is, make sure to visit roboub.org to learn more about it or feel free to reach out to competitions.org, which we'll throw into the chat. Um and you can learn more about the Robosub competition there. before you head out, I'll ask a few of these questions. I know you just touched on some of them.
>> And then um like like Abbyek mentioned, if you've got more questions about um the specific environment, please feel free to reach out to him. Um I know you just touched on it. Um one of our questions was about if this is you said the link only gives a Windows executable. So will you be able to provide a Linux executable on Ubuntu which you just discussed?
>> We will we will be doing that. Um so we have been swam with some kind of other work right now but we will be uh compiling a Linux executable and also open sourcing the uh until editor itself so that you can compile it yourself in the future if you [snorts] want to make any changes and you don't have to depend on us for that.
>> Fantastic. Um our next question was um can the simulation be used for hardware in the loop simulation? Can we have this simulation running on a lab machine and have the control and autonomy code running off device on the actual AUV hardware?
>> You could do that. Um it it might be a little more involved. Uh you'll have to set up more stuff. Um but it it's definitely possible. You can it it also depends on what you're using to communicate. If it's ROSS, it's like I showed you it's pretty easy to do it.
Uh, but if you're using some other modes, then we can definitely work on it. So, send me more details on on what your setup looks like and then I can work with you guys to get that up and running.
>> Fantastic. Um, Alex, if you missed that, make sure you reach out to Abhishek with some more questions about that specific query. Um, we've got another question which is, is this the same signal? So the signal that you were I think discussing a little bit earlier that our real ESC's are receiving and does the simulator include thruster response delay?
>> Um we don't have a response delay right now. Um right now it just takes in PWM values and then provides just as soon as those values are being received. But if that is something that's important, we can try you can also add that as an issue to GitHub. See if uh and then we can try to work on that um in the future as well.
>> Awesome. And then we had a little bit of a discussion in the chat about FSMs um finite state machines. So is this implementing a finite state machine or something closer to a behavior tree? uh the state flow chart that I showed you.
Uh let me switch back to that model.
This is a finite state machine. So um it's just going from one state to another. Uh the the statement inside like the square brackets are the conditions for it to change states and then the ones inside the curly brackets are the output um from once it does that transition. Um, and this is also a really nice way to develop state machines because you can uh like add break points here. Um, you know, if you if your state doesn't change from one to another, you can set a break point and see why it's not happening. And you can also generate um C uh C code out of it.
So once you're done developing, you can deploy it as a C++ ROSS node or um or just like a library that you can, you know, link it to your existing project.
Yeah, these are state machines.
>> Fantastic. Um, one of our our questions in that discussion about about the state machines was um they were interested to hear whether the architecture is meant to stay FSM based as team scale up missions or if there's flexibility to support other approaches.
>> Um, if you're using Sim Link, um, we don't support behavior trees if that's what you want to you want to use. uh VMD support state close and FSMs. Uh but if you want to use behavior tree, you can always you know build it in your if you already have one running you can just you know output those as ROSS topics and subscribe to them here. Uh but right now we do not support um heavy trees.
>> Great. Thank you for answering that question. And then our last um last question that we had for today's webinar is are the competition elements such as the gate, octagon, torpedo and task panel fixed in the 3D space of the simulator or does their uh does their pose estimate update too?
>> Uh right now they are fixed in the simulation environment. You can modify that to like you know move it to turn it around if you if you want but um once the simulation starts wherever you place it they would be fixed with it so that you don't see the the sway of those objects that you would typically see in a real world environment. Uh we tried to model that but just turned out to be a lot of physics and slowed down the system by quite a quite a lot. So, for now, we we just don't support um physics for those subjects.
>> Great. Thank you so much for answering all these questions. We got a bunch of thank yous as well in the chat. So, thank you so much. Um and again, this is a a big shout out to Abbyek here. He he pulled this together and did this for each and every one of you guys that's in the comments and also those of you who are listening and those of you who will listen um when you see this webinar at a later time. Um, but it's it's going to be such a wonderful addition to the robo sub community. So, please send your big thank yous in the chat or the comments or feel free to email and reach out to Abishek directly and set say thank you for pulling this together um for Robo Sub.
>> Yeah, thank you all >> and thank you Alicia for organizing this webinar.
>> AB: Absolutely. Um, like Abby mentioned, please uh feel free to reach out if you've got questions if you've got questions for Robo Nation about the Robo Sub competition or any of our other programs. Um feel free to reach out to competitions.org and visit rooub.org as well. But thank you so much and we look forward to seeing you guys next month um for our next MathWorks miniseries session. We'll be sending out a bunch of emails and posting on Discord and over our various social media channels to promote that.
But we'll see you guys next time. Thank you.
Thank you.
Up Next
113:00
Delta Robot Solutions Online Training: DRAStudio & Programming Overview
@electromechanica2045
176 views•2024-09-11

80:01
Trajectory Generation Methods for Robot Path Planning
@mehran1384
23.1K views•2021-07-24

11:04
How to Build a Self-Balancing Robot: Arduino Nano & MPU6050
@easytechzones
16.8K views•2022-03-09

25:22
Micromouse: The Fastest Maze-Solving Robots on Earth
@veritasium
23.5M views•2023-05-24
Related Study Plans & Knowledge Roadmaps
Structured learning paths in Robotics
robotics
Building Delta Robots: Kinematics & Pico
01Foundations of Delta Robots & Mechanical Design
02Electronics and Microcontroller Setup with Pi Pico
03Delta Robot Kinematics and Coordinate Math
+ 3 more learning modules
65h6 modules
Explore Roadmap
robotics
Building Ballbots: Dynamics, Kalman & LQR
01Embedded Electronics & Omniwheel Actuation
02Ballbot Kinematics & Rigid Body Dynamics
03IMU Sensors & Kalman Filter State Estimation
+ 2 more learning modules
42h5 modules
Explore Roadmap
robotics
Micromouse: Hardware, PID Control & Flood-Fill
01Electronics & Teensy Microcontroller Basics
02Sensors and Actuators: Motors, Encoders & IR
03Precision Movement: Implementing PID Control
+ 2 more learning modules
35h5 modules
Explore Roadmap
robotics
CDPR: Kinematics, Arduino & Winch Control
01Foundations of Arduino & Basic Electronics
02Stepper Motors and Winch Mechanics
03Kinematics of 2D Cable-Driven Robots
+ 2 more learning modules
28h5 modules
Explore Roadmap