







![SOLIDITY – БАЗОВЫЙ КУРС [Урок 3]](https://i.ytimg.com/vi/EYZUabLpgUc/maxresdefault.jpg)














A Web 3.0 music NFT player application enables fans to purchase and resell tokenized music as NFTs, with artists receiving royalty fees on each sale. The application uses a Solidity smart contract that implements the ERC721 NFT standard and includes marketplace functionality for buying and reselling tokens. Audio files are stored on IPFS (InterPlanetary File System) for decentralized storage. The frontend is built with React.js and connects to the blockchain through MetaMask, allowing users to browse, purchase, and manage their music NFTs. The smart contract handles all marketplace transactions, royalty distributions, and ownership transfers on the Ethereum blockchain.
Building a Web3 Music Player with Solidity and NFTs
Added:Basic proficiency in JavaScript and React.js, including state management, hooks, and component lifecycles.
Fundamental concepts of Ethereum, EVM, and Solidity smart contract development (variables, functions, mapping, and inheritance).
Understanding of NFT token standards, specifically ERC-721 (Non-Fungible Tokens) and metadata structures.
Knowledge of decentralized storage concepts, particularly how IPFS (InterPlanetary File System) hashes and hosts media files off-chain.
Familiarity with Web3 provider libraries (such as ethers.js or web3.js) to connect a frontend application to blockchain wallets like MetaMask.
Advanced smart contract security practices and auditing tools (such as Slither or Mythril) to protect marketplace funds and royalty distributions.
Layer 2 scaling solutions (e.g., Polygon, Arbitrum, or Optimism) to significantly reduce gas fees for frequent minting and trading of music NFTs.
Implementing meta-transactions (EIP-2771) and gasless transactions to improve user experience for mainstream listeners who do not own crypto.
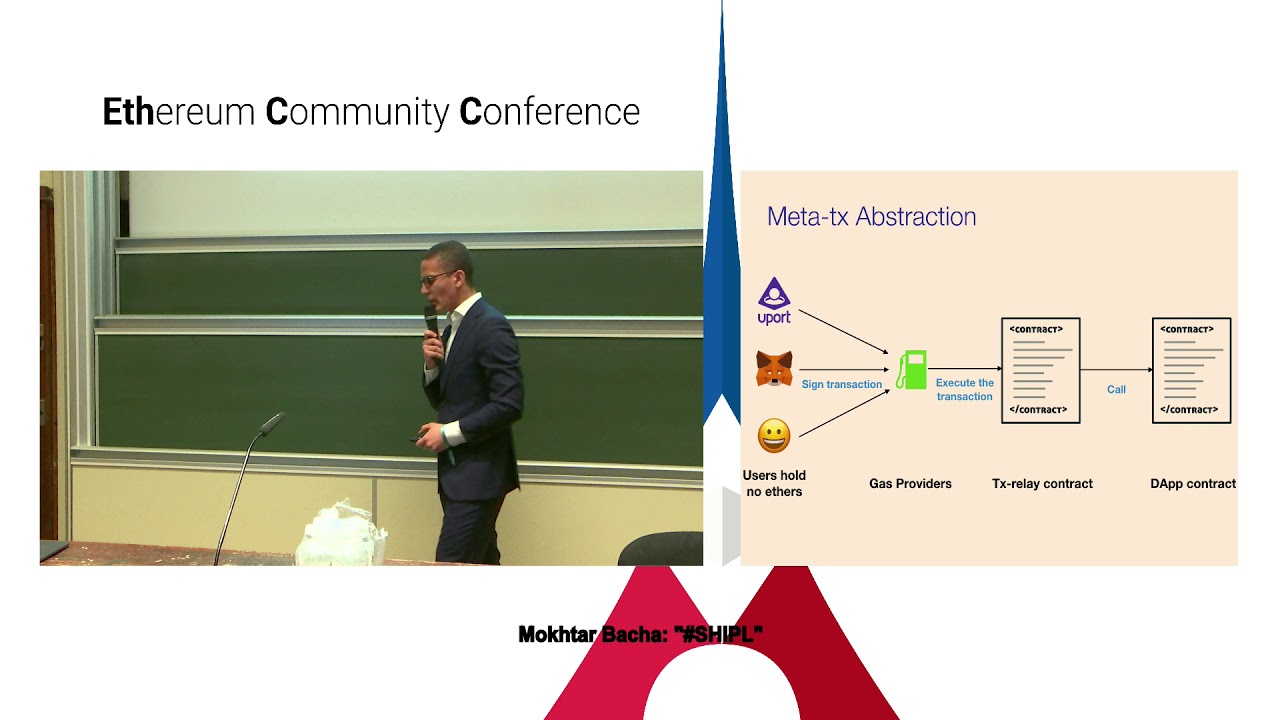
Exploring decentralized streaming protocols (such as Livepeer) for high-bandwidth, decentralized audio/video streaming rather than static IPFS hosting.
Designing Decentralized Autonomous Organizations (DAOs) for community-driven music curation, platform governance, and collective ownership.
51.5K views1.2Klikes1:54:27Original Release: 2022-04-08
web 3.0 holds the potential to completely change the internet as we know it we're seeing tons of people flock into this space to build the next generation of blockchain based applications and one industry that's primed for disruption is the music industry and in this video you're gonna learn how to create a blockchain based music player just like spotify that's completely powered by web 3.0 and nfts this is an amazing project to learn the fundamentals of blockchain development how nfts work and to use for your portfolio if you're trying to land a high paying web 3.0 job you don't have to be an expert get started today you're going to learn all the programming languages and skills as you go like how to write the smart contracts and solidity how to write tests how to make a website and then actually how to put this project on a blockchain so if you're new around here hey i'm gregory and on this channel i turn you into a blockchain master so if that's something that you're interested in then smash that like button down below for the youtube algorithm and subscribe to this channel and if you want to learn how to master blockchain step by step start finish then head on over to dap university dot com forward slash boot camp to get started today and if you have been watching this channel for a while then i want to introduce you to somebody who's going to help me make this tutorial today so i'm inviting ethan onto the channel to present on this topic he's going to walk you through the entire process step by step he's a total expert and he's going to do an amazing job explaining how this works and show you everything that you need to know all right so what are we talking about today ethan yeah so in this video i'm going to show y'all how to build basically a web 3.0 spotify clone and the artist of the songs that are represented as nfts will receive a royalty for each uh nft that's sold yeah very cool and i think this is going to be a big area where we could see some disruption in the music industry with web 3.0 so i'm super excited to have a look what we're going to build today so let's get started let's get a preview of the app we're going to build today in this tutorial on the home page we have a music player that will allow us to listen to any of the music nfts listed for sale it works just like a regular music player there is a play slash pause toggle button forward and backward skip buttons [Music] but what makes this player different from a regular music player is that there's a button at the bottom that allows users to purchase the selected music token with ether and once you have purchased one you can view it in the my tokens page where you can also play it see the price that you purchased it at and resell it using this resale form so two let's say i want to sell it at a higher price try to flip the nft song and when i do that we can go back to the marketplace and you'll see it's been relisted at the higher price you can also go to the my resales page and view it here under the listed we can play the song as well here and view the price that we have it listed at we can also view all the assets that have sold and none are currently listed because no one has purchased the icelandic arpeggio nft but we can change that by purchasing it like so okay now if we go back to my resales as you can see it's now listed as a sold asset here's a diagram of how the application will work let's first look at how a web 2 music streaming app like spotify works so whenever you use spotify you typically access it on a mobile device and this mobile device talks to a web server this is where all the code user data artist data and audio files for spotify is housed and whenever you hit play on one of your playlists a request is made to serve the corresponding audio files back from the server to your mobile device this is how most music streaming apps are built but it has a few downsides for one if you discover an up-and-coming artist that you think has a chance at becoming wildly successful in the future spotify or any other streaming platform does not provide a convenient way for you to bet on that artist's future success fans have to resort to collecting physical merchandise sold by the artist or attend their shows to support them and from the artist's point of view the revenue they generated from spotify is based solely on the number of streams they receive not on the magnitude of support they receive from their fans for instance the stream count for two artists may be equal but the number of fans who'd purchase signed copies of their work could be substantially different so we don't want to build a centralized music player website that disconnects artists from their most diehard fans we want to build it in a decentralized way with a very different revenue model that best leverages fandom so i'll show you what that looks like instead of having an application that talks to a web server we're going to build a blockchain-based nft music player application you can access the application through a web browser with a blockchain wallet extension like metamask the browser will talk to a website written in javascript html and css the website will read and write data directly to the blockchain where our code will be written in ethereum smart contracts deployed to the ethereum blockchain and then all the audio files will get stored on a decentralized file storing system called ipfs we're going to have a single smart contract that powers the entire application it will serve two purposes it will represent the collection of music nfts and a marketplace whereby users can buy and resell them in case you're unfamiliar with what exactly an nft is you can think of it as a unique digital asset an nft smart contract keeps track of the metadata of the nft which in this case is an audio file deployed to ipfs a corresponding id and the address of the owner of the nft there's also special functions on the nft contract that allows you to transfer your nft to a different account and mint new nfts we're also going to add royalty fees to this main contract such that each time a music nft is sold the artist of the music will receive the royalty payment now let's start installing the dependencies we need for this project starting with node.js so you can install it directly from the node.js website and if you're not sure whether you have nodejs installed yet or not you can open up a terminal and type the following command node dash v then hit enter and it should output the version of node that you have installed if you have it installed and for this tutorial i recommend installing any version of node between version 17.0.1 and 16.14.1 to avoid dependency issues next let's go ahead and install the smart contract development framework we're going to use for this tutorial hard hat hard hat will allow us to write smart contracts in the solidity programming language write tests against them spin up a local development blockchain and deploy our smart contracts to it next we're going to install hard hat from our terminal using node package manager which came bundled with our installation of node that we did a moment ago so enter this command npm install slash last save slash dev hard hat and for this tutorial we're gonna use a very specific version of hard hat so version 2.8.4 to avoid any potential dependency issues so go ahead and hit enter next we're going to install metamask a crypto wallet browser extension that will turn our browser into a crypto compatible browser so go ahead and go to the official metamaster.io website hit download now then click install metamask for chrome go through the setup steps and once you've completed that go to your extension settings browser extension settings and ensure that metamask has been enabled and you'll know it's been enabled once you see this box icon at the top right hand corner of your screen alrighty now that we've installed all the system specific dependencies we need for the project let's go ahead and start setting up the project so instead of coding everything out from scratch i'm going to use as a template this starter kit that i created so go ahead and copy the url to it which you can find linked in the description down below and once you do that open up a terminal and then enter into the directory where you save all of your coding projects so for me that's in documents development then once you're there we're going to enter the command that will clone the repository which is get blown and then paste in the url add a space and then we're going to set the name of the project so going to be music dash nfts then hit enter next we're going to enter into the newly created directory by typing cd music nfts hit enter then we're going to install all the starter kits dependencies by typing npm install then hit enter alrighty once it's done you'll know that the installation was successful if you see added something something packages it's okay if you see some warning messages as long as there are no error messages then you know the installation was successful now before we move on we're going to need to install a couple more dependencies for the nft music project that wasn't included in the starter kit so if we go back to our application preview we can see that each time we click on one of these navigation links the app routes us to a new page this feature doesn't come with vanilla react so we're going to need to install the react router dom dependency to support it so to install it go back to your terminal and enter npm install react router dom at 6 then hit enter next let's install the identicon dependency which we'll use to generate a unique identicon for each music nfc to install it enter npm install identicon.js then hit enter lastly we're going to add the open zeppelin smart contract library to our project this is just a library of a bunch of secure pre-made contracts that developers can reference when they're building out a new smart contract so they're not constantly reinventing the wheel or common patterns that developers often implement into their contracts so we're going to use it to import the erc 721 nft standard we're going to look at that more in depth once we get to it to install it enter the following command npm i at open zeppelin flash contracts at version 4.5.0 then hit enter alrighty now that we've installed all the dependencies we need for the project let's go ahead and take a tour of the project source code so to do that go ahead and open up the project with a text editor of your choice i'm going to use vs code and i'm going to do that from the terminal by entering code space dot then hitting enter so this is a hard hat and react project combined into one inside of the source directory we have two more subdirectories a back end and a front end inside the back end this is where the smart contracts or the smart contract rather for the project will live written in the solidity programming language we will also have put the tests that we're going to run written in javascript to test the behavior of our smart contracts to ensure that they're behaving as we expect them we're going to put that in the backend as well and we also have this deploy.js script which we're going to run to put the smart contracts on the blockchain the specifically the hard hat development blockchain which we're going to boot up from the command line and we also have a frontend directory this is where all the code or the client-side application will live and we're using the react framework [Music] as the front-end framework to build out the client-side application and do they react as a component based framework and components are essentially just reusable pieces of code that have their own state management system at a high level we're going to look more in depth at how react works once we start building out the client-side portion of the app and we also have this package.json file and it contains all of the project specific dependencies and as you can see as the react router dom identicon.js and open ziplin contracts dependencies which we installed one by one manually then we have this hardhat.config file and inside of here we specify the version of the solidity compiler we're going to use to compile our smart contracts from human readable code to the code that the evm understands which is byte code we also specify where the smart contract inside of our project will live and this may look a little unfamiliar to you if you've used hard hat before that's because i'm manually configuring hard hat to look for the smart contracts right here and the tests right here and to put the artifacts that are generated after each smart contract is compiled and the cache as well into the backend portion of the app as opposed to the default location which is at the root of the project next let's boot up the web server of the client side application to ensure that everything was set up properly but do that enter into your terminal npm run start and then hit enter alrighty and that command should have opened up the website or the starter kit so the code inside the front end portion that i showed earlier and right now the app.js component that we see rendered here is not connected to the blockchain in any way eventually we do want to connect to the blockchain but before we do that we have to finish building out the back end portion of the project so we need to write the music nft player contract write test against it to make sure that it's behaving as we expect it to and then we need to deploy it to a local development blockchain that will spin up with hardhat and then we can start connecting the app to the blockchain and then modify the code in the app.js the html and css code to create the final product that you see here so we have a lot of work ahead of us so let's get started with building out the smart contract alrighty first things first let's go ahead and create a new directory inside this back-end folder to contain our smart contract so you can either do that from the terminal or by right-clicking this folder creating a new folder and then naming it contracts it's up to you but i'm going to do it from the terminal so go ahead and open up a new terminal tab so like so then we're going to enter into the projects directory and and then okay then we're going to type mkdir source backend and then contracts cool and that created the contracts directory so inside of here let me create a new file and i'm going to name it capital m music nft market place and the way we name salinity files we abide by a certain naming convention where we capitalize the name of the contract and if there are multiple words in the name we capitalize the first letter of that word with no space so this is capitalize m capitalize nft capitalized m marketplace all right so at the top of the solidity file we're going to specify the sbdx license for the smart contract as well as the version of solidity the smart contract will be written in next we're going to import two contracts from the open zeppelin library that our contract that we're creating will inherit so we're going to import an ownable contract which will give our contract special permissions to the deployer of the contract or could be any particular address then we're going to import the erc721 standard nft standard so the erc721 standard essentially defines this set of all functions external functions that a nft contract needs to have okay and this is a agreed-upon standard by the ethereum community and the reason why we need the standard is that you want to ensure that all nft contracts are compatible with other wallets and marketplaces that are in the ethereum ecosystem so as well as other contracts that potential contracts that interact with nfts and it also saves developers a lot of time from having to reinvent the wheel each time they create a new nft contract they can just implement the standard and append the nft contract where needed for their particular project so here's a code of open zeppelin's erc 721 contract that our music nft contract will inherit meaning that our contract will have all of this code inside of it and essentially what we will be doing when writing the music nfc contract is appending this erc 721 contract to accommodate marketplace functionality so buying and selling of nfts as well as royalty fees the functions that our smart contract will interact with is this mint function to create music nfts and this transfer function to transfer nft ownership for each marketplace transaction so let's go ahead and create the music nft smart contract so we're first going to use the on track keyword followed by the name of the smart contract then the is keyword followed by the name of each of the smart contracts that our music nft marketplace will inherit so the erc 721 notable contracts and then we're going to write some curly braces and inside of these curly braces is where the code or the music nft marketplace contract will live now let's declare some state variables you can think of state variables as the storage of this smart contract it's the data that's stored on the blockchain the persistent data so the way we declare a state variable is first defining the data type of the variable so in this case a string and then we followed it up with the name of the variable so base uri in this case and between the data type and the name of the variable we can also include a visibility keyword to specify whether we want this variable to be read by outside accounts in this case we do so we use the public keyword and then we use the equal sign followed by the value assigning to the variable which is a url that points to where all the metadata for the music nfts are located on ipfs so the reason why we have to specify the data type of variables and solidity is that solidity is a statically typed programming language which means that the data type of variables cannot change so for instance i can't reassign this base uri variable a number or an address it has to stay as a string now the reason why we are specifying the base uri where we can find all the nft metadata as opposed to assigning a separate uri for each nft is that we know what the metadata will be for the entire nft collection before we deploy the contract now the way i generated this base uri is by first creating the json files that contain the metadata for each nft like i've done here setting the name of each file to its corresponding token id after that you're going to need to generate a single car file from them using this car.ipfs.io website so click on this open file picker then simply select the json files then go ahead and download the car file and once you have the car file you can use the nft dot storage app to upload the car file to ipfs so and click upload choose file downloads then upload and once it's been uploaded you can copy the link to where you can access it on ipfs like so and then save that into your smart contract i use this same app to upload the audio files for each nft then i put the link for it on the audio field of the metadata like this now before i finish coding out the rest of this contract let's go ahead and deploy it to the blockchain and then interact with it through the hardhat console to ensure that we set up the backend portion of the project correctly first let's spin up a local development blockchain which the hardhat framework provides us with so to do that go to your terminal and enter the following command mpx hardhat node and then hit enter alrighty and here is the development blockchain that's running from our terminal that we're going to deploy our smart contract to as you can see it comes with 10 accounts and each account is funded with 10 000 fake ether and here's the address of each account with the associated private key right below it i should mention that whenever you spin up a new blockchain with hardhead it always generates the same 20 accounts so these accounts are publicly known and therefore you should definitely not use them to store real money since anyone can gain access to these accounts and steal your funds alrighty now that we have our local development blockchain up and running let's go ahead and open up this deploy script and then add the code we need to it in order to deploy the music nft marketplace all right now let's write the code that will actually deploy the music nft marketplace contract to the blockchain so first things first we need to get the contract factory for the nft marketplace and the way we do that is by calling the get contract factory method on the globally accessible ethers object that's injected into our hard hat development environment and we pass as input the name of the contract so music nft marketplace so in case you're unfamiliar with what ethers is it is just a javascript library or interacting with the ethereum blockchain and we're going to use it quite extensively to write test against our smart contracts and build out our client-side application so that it's able to interact with the blockchain you could think of the ethers js contract factory as an object that allows us to create the special transaction we need to deploy a particular smart contract to the blockchain and we can do that by calling the deploy method on the contract factory and it returns a promise that eventually resolves to an instance of the deployed contract and we can use this instance to interact with the contract from within a javascript environment notice that we have to use the awake keyword for each of these function calls this is because each of these functions interact with the blockchain and the blockchain is slow so they each return rather than getting the blockchain data immediately it returns a promise and we have to wait for that promise to resolve before assigning the blockchain data to each of these variables after that we're going to pass the smart contract instance and the name of the contract to this save run in files function which saves a copy of the smart contract address and avi to this frontend directory so that our client-side application can access it and the reason why it needs to access it is that it needs these two pieces of information the smart contract address and the api to generate an instance of the already deployed music nft marketplace contract alrighty and that completes the deploy script now let's go ahead and run it to do that go back to your terminal and open up a new terminal tab because now we have two different processes running in the main terminal window so we have the web server running in one tab and the local development blockchain running in another so let's get a fresh tab going enter back into the project directory okay and then we're going to write the command mpm run deploy then hit enter oh no we have a compilation error darn it so i know why it's because we need to call the constructor function on the inherited brc721 contract you could think of the constructor function as a special function it's only executed once immediately after it's been deployed to the blockchain so to call the constructor function on an inherited contract we first pass to that inherited contract the argument of the constructor function and we do that by first writing some parentheses after the name of the contract and then we pass into those parentheses the arguments for the constructor function so the erc721 constructor function accepts a name and a symbol argument so this will set the name of the nft collection as well as a symbol of the entity collection so for the name we'll pass gap by and for the symbol we'll pass e e-a-p-p oh and i almost forgot before we run the deploy script again we need to um log the address of the nft marketplace contract to the console so that we can create an instance of it inside the hard hat console so let's go ahead and deploy the contract we're running the deploy script npm run deploy suite and it worked and here is the development account that deployed the contract and by default this is the first account listed and we also log the account balance which is 10 000 ether and the deployed smart contract address now let's go ahead and enter into the hardhat console by typing mpx hard hat console then we have to specify the network that we're going to interact with localhost so network local host and all this hard hat console is is just um javascript environment for interacting with the blockchain and any smart contracts deployed to it let's first fetch the music nft contract like so a weight and then we're going to call the get contract at method on the globally accessible ethers object then we're going to pass to it first the name of the contract so music nft mar get place followed by the contracts address and quote copy that from here then paste it okay then hit enter awesome it says undefined but we can log the output by typing contract and then hitting enter sweet so here are all the externally accessible functions essentially the interface of the contract so these are all the different functions that we can call on it let's go ahead and call this base uri function to fetch the base uri so we can do that by typing const uri awaits contract base uri and then hit enter okay type uri and enter sweet and here is the uri that we assigned to the base uri state variable inside of our contract awesome now let's fetch the name and then the symbol of the nft contract so like this name await contract dot name sweet daphy awesome that's what we expected now let's do the same thing for the symbol like so replace name with symbol okay then hit enter and symbol awesome d-a-p-p all caps awesome so that completes the first smoke test we've got this deploy script working so that when we run it it deploys our smart contract to the blockchain and we've interacted with it from the hardhat console reading each state variable on the contract so the next thing we want to do is continue coding out the rest of the smart contract and as we build out each functionality we're going to write an automated test for it this will prevent us from having to use the hardhat console over and over again to test the behavior we're just going to write a test script that will do all that stuff for us when we run it that will help to speed things along significantly so let's get a quick review of how the contract will work before we continue coding it out so this contract will represent a collection of audio files as nfts we can think of the audio files as songs in an album we already know what songs will make up this entire album for this project i'm using eight different songs so we can mint them all upon deployment this contract will also function as a marketplace so after we mint them we're going to list them for sale as marketplace items and after we have written the code that handles this initial setup of the contract aka the deployment we will create the functions that fans will interact with which will include the buying of music nfts and the reselling of them and we want to program these functions in such a way that the artist who dropped the album receives a royalty fee for each sale so let's get started so we need to include a few more state variables inside this music nft marketplace contract so that'll include the file extension of the metadata so dot json and as well as the address of the artist so that our contract knows which account to pay the royalty fees to and we also need to know the amount of the royalty fee the address data type in solidity represents an ethereum address you could think of these addresses as auto-generated usernames names that identify both externally owned and smart contract accounts on the ethereum network the un-256 data type represents unsigned integers so positive integers that take up as much as 256 bits of storage next we're going to define our own custom data type to represent market items we can do that in solidity using a struct so to define a struct we first use the struct keyword followed by the name of the struct then curly braces inside these curly braces is where we set each data field of the struct so for the market item that will include the token id seller and price and in order for the seller address to receive an ether payment we need to mark it as payable also we need to define an array of type market item to contain all of the market items now let's create a constructor function so as i mentioned earlier the constructor is a special function that's called only once upon deployment to define it we use the constructor keyword followed by parentheses inside of which we define the arguments of the constructor then the code of the constructor is contained in these curly braces in the constructor we're going to initialize the royalty fee address of the artist and the price of the music nfts so we're going to need to pass as inputs to it a royalty fee artist address and an array of prices to avoid naming complex between arguments and state variables we name each argument with an underscore at the beginning we're also going to mark this constructor as payable so that the deployer can send the required ether upon deployment to cover the royalty fees or listing the nfts on the marketplace since the deployer will be the initial seller of each and then inside the function body we're first going to use the require statement to ensure that the ether sent which we can reference using msg.value global variable is enough to cover the royalty fee for each token listed on the marketplace and we can calculate that amount by multiplying the prices.length times the royalty fee and prices.length represents the number of elements in the array which should equal to eight next we're going to initialize the royalty fee artist and then create a for loop that iterates through all of the elements inside the prices array inside the for loop we're first going to ensure that the price is greater than zero then we're going to mint the nft or this address setting the nft's token id as the current index i'm going to pass those two values to the mint function that we inherited from the erc721 contract and then we will add the freshly minted nft to the market items array using the push method and for the push method we pass in a freshly initialized market item struct so the way we initialize it is by using the market item keyword so the name of the struct then we pass in the values we we want to set for each field of the struct so for the token id we set the current index and for the seller we set it as the deployer which we can reference using the msg.sender global variable so that's the account that called the constructor and then we cast it as payable and then for the price we set it as the element at the current index in the prices array alrighty and that completes the constructor function now let's write the test script to test it out so let's go ahead and make the directory that will contain the tests so inside this backend folder go ahead and right click it then click new folder and we're going to title this test okay and then inside of here we're going to create a new test file we're going to call it music nft market place dot test dot js then hit enter so we're going to be using a few different tools to write our smart contracts for our testing framework we're going to use mocha which will allow us to write organized test cases and it runs on the back of node.js and we're also going to use the waffle and chai assertion libraries to compare return values with expected values so first things first we're going to import the chai assertion library at the top of our testing file we don't have to import mocha or waffle because hard hat injects those two into our testing environment automatically so to start things off i'm going to paste in some boilerplate code so this code essentially does the exact same thing we did when we ran the deploy script and then interacted with the contract from the truffle console so inside this before each hook we deploy the contract in the same way we did inside the deploy script except this time when we call the deploy method on the factory we pass in the construct arguments which includes the royalty fee address of the artist and the array of prices we can also send the ether needed to cover royalty fees by passing a metadata object as the last argument setting the value property as the deployment fee we then fetch the name symbol and base uri from the contract just like we did from the hardhat console and then check to make sure that it equals to the expected value i should also mention that because you can't represent decimals and solidity only integer values we need to convert any values that represent ether to the smallest subdivision of ether before we pass them as input to our contract the smallest subdivision of ether is called whey and one ether is equal to 10 raised to the 18 way or one followed by 18 zeros way we can use the parse ether method to easily convert units of ether to units of whey so for the royalty fee prices array and deployment fees we need to represent all those values in way units when passing them to the constructor so let's go ahead and finish testing the deployment of the contract so it should track the name symbol uri as well as the royalty fee and artist okay and that'll look like this so we just call the royalty fee method on the contract and then ensure that equals to the royalty fee variable we set up here and essentially do the same thing for the artist oh and by the way we can get the development accounts on the local blockchain by calling the get signers method on the ethers object and it returns an array of all of the development accounts and we're going to set the first account as the deployer the second as the artist the third is user one and the fourth is user two next let's test that it mints then lists all the music nfts so first we're going to check that the nft balance of the contract is equal to eight next we're going to check that all the market items are correct by first mapping through the prices array passing an asynchronous callback function that first fetches the item then checks that the items fields are all correct and because we're passing an asynchronous callback to the map array method we need to cast it in a promise.all method to wait for all of the asynchronous calls to resolve and lastly we need to check that the ether balance is equal to the deployment fees so we can do that by calling the get balance method on the ethers provider passing the address of the contract and then we ensure that it's equal to the deployment fees variable awesome and that completes the deployment test now let's go ahead and run them so go back to your terminal and if you're still inside the hardhat console you can exit out of it by typing the dot exit and then hit enter alrighty now to run the test we need to type the following command npx hard hat best and then hit enter sweet and everything passed awesome alrighty now let's go back to our contract and then create a function that will allow only the owner to update the royalty fee so to do that we first need to define a function and we could do that using the function keyword followed by the name of the function and then in parentheses we pass the arguments of the function so in this case the updated royalty fee and then we set the visibility of the function with the visibility keyword so we're setting it as external which means that only outside accounts can call this function and then we apply the only owner modifier to the function which we have access to from this ownable contract that we've inherited and what this modifier does is that it checks that the account that is calling this function is only the deployer of the contract and after that inside the function body it simply updates the royalty fee state variable alrighty now let's write the test for this update royalty fee function so we're going to describe updating royalty fee and only the deployer should be able to update royalty fee okay now we first call the update royalty fee function then we call the update royalty fee function again except this time the user account calls it instead of the deployer and the way the user calls it is that we have to first connect the marketplace nft marketplace contract with the user one signer so we do that by calling the connect method on it passing in the user one and we expect that it's reverted with ownable caller is not the owner and after that we check that the royalty fee has indeed been updated and is equal to the fee value that we passed into the update royalty fee function alrighty now let's run the test again sweet everything passes now let's start creating the function that will let fans purchase music nfts so this function will accept token id as an input and we're going to mark it as external as well as payable and inside the function body we're going to assign the price of the market item a local price variable and we're going to do the same thing for the seller of the market item and then we ensure that the ether sent with the call to the buy token function is equal to the asking price of the item and then we update the seller field on the item to the zero address since no one is selling the item anymore it's been purchased and then we transfer the nft from this address to the address that called the function aka the buyer and then we pay the artist the royalty fee by calling the transfer method on the artist's address and we do the same thing for the seller except we pay them the ether that the buyer sent with this function call lastly i want this function to emit an event now an event allows us to log data to the ethereum blockchain and you can use them as a cheap form of storage or to update user interfaces of dapps when listened for so let's go ahead and define a market item bot event at the top of the contract right here then we're going to emit it at the bottom of this function so to define an event you first use the event keyword followed by the name of the event then parentheses and inside of these parentheses that's where you define the different fields of the event separated by commas so for the marketing bot event we're going to log to the blockchain token id the seller the buyer and the price of the purchased item and then we're going to set the token id and seller fields as indexed and this will allow us to search for market item bot events with the token id and seller fields as filters then we're going to emit the event like this passing in the token id or the token id field the seller local variable for the seller the buyer the account that called the buy token function and the price field we're going to set to the price of the market item so first things first we get the initial each balance of the deployer and artist account by calling the get balance method on each of their accounts then user one calls the buy token function on the contract purchasing the first music nft so the music nft at index is zero and then we check that the market item bot event was submitted with these arguments so for the token id it's zero the seller is the address of the deployer the buyer is the address of user one and the price is the first price in the prices array we defined up here after that we get the final eath balance of the deployer and artist then we check that the item's seller field should be the zero address then we check that the seller received the payment or the price of the nft sold and then we checked that the artist received their royalty payment and that the buyer is now the owner of the nft and then for the fail case user one tries to buy the token except this time they send the incorrect price so they send the price for the second item so the item at index one and we expect it to be reverted with uh please send the asking price in order to complete the purchase error message wheat and that completes the buy tokens test now let's run it once again mpx hard hat test hit enter sweet everything passed alrighty now let's write the last function to complete the marketplace functionality of our smart contract so first we check that the user submits the royalty fee then we check that the price the user is trying to resell their token at greater than zero and then we of the market item that is being resold to the price argument and we set the seller field as the account that's calling the resale token function casting it as payable and then we transfer the nft from the user to this contract and lastly let's go ahead and emit a market item relisted event but first we need to define it like we did the market item bot event so that will look like this so it's basically the same as the market item bot event all the fields are the same except we don't have a buyer field and then we're going to admit it like this passing the token id argument as the token id field the account that called the resale function as the seller and then the passed in price or the price field alrighty now we're going to create the test for reselling tokens and we're going to have this before each hook which makes it such that user one purchases an item before we run either of these tests the first test checks for success conditions so should track resell item increase ether balance by royalty fee transfer nft to marketplace intermittent market item relisted event and the second should test the fail case so should fail if price is set to zero and royalty fee is not paid so first we create a resale price variable and assign the value of to ether convert it into whey and then we fetch the initial nft marketplace balance or rather music nft marketplace balance and then user one lists the nft or the resale price hoping to flip it and double their money and then we check that a market item relisted event was emitted with these arguments over the token id zero the seller is the user one address and the price is the resale price then we get the final balance of the contract and next we check that the final market balance is equal to the initial marketplace balance plus the royalty fee and then we check that the owner of the nft is now the marketplace contract then we get the item from the items mapping and check that the items fields are correct so that the token id is equal to zero seller user 1 address price resell price and for the fail case we check that it's reverted when the price is set to zero so price must be greater than zero that's the error message we expect and then we check that it fails when the royalty fee is not paid so we're setting that the value is zero and we expect the error message to output must pay royalty already and that completes the reselling tokens tests so let's run the test script see if everything's working as it should sweet all the tests passed so at this point we have completed the marketplace and royalty functionality of the smart contract but there are a couple more functions that i do want to add now these functions are not going to update any of these state variables so they're not going to cost any gas but rather they're going to fetch data from this smart contract specifically we're going to write one function that's going to fetch all of the market items that are listed for sale and then we're going to create another function that fetches all of the tokens or the items that the user owns so let's focus on this get all unsold tokens function first so we're going to mark it as view because it's not modifying any state variables it's only reading them and then we're going to say returns some data and that data is going to be of type market item it's going to be a market item array inside the function body we first fetch the unsold count by calling the balance of function passing in this contract's address and that'll get the number of nfts that this contract owns which represents the unsold count and then we create a new in memory market items array and whenever you create a new in memory array you it has to be of fixed length and we specify the fixed length in parentheses like so and we're going to set the length equal to the unsold count and then we create a new local variable a current index and then we're going to create a for loop that loops through all of the tokens in the collection and then inside the for loop we have an if statement that checks if the token seller is not a zero address and if that's the case then we know that that market item or token i'm using the two terms interchangeably i hope that's not too confusing has not been sold yet it's unsold it's still listed on the marketplace so we can assign that market item the element at the current index in the tokens array and then we iterate the current index value and after that once the for loop has ended this in memory tokens array will contain all of the unsold tokens and then we can return them like so alrighty and that completes the get all unsold tokens function now let's focus on the get my tokens function so this function is going to function in the same way as a get all unsold tokens functions i'm using the word function a lot here but um yeah so the only difference is where instead of fetching the unsold count we're going to fetch the my the users token count which we can so instead of passing the contract address to the balance of function we're going to pass the users address and instead of checking if the seller field on the market item is not equal to the zero address we're going to determine if the owner of the token is equal to the user alrighty and last but not least we need to include one more function this is an internal function and it's going to override the base uri function that we inherited from the erc721 contract so that it returns the base uri state variable that we have defined up here like so already and that completes the entire music nfc marketplace contract you should definitely give yourself a nice pen on the back right now you've come a very long way in this tutorial and all that we have left for the back end is just to finish up the test by writing the test for these two getter functions and then we can start building out the front end part of the project so we're describing getter functions and in the before each hook user 1 will purchase item 0 and user 1 will also purchase item 1 and then user two will purchase item four and we have created variables that store the ids of the sold items the items owned by user one as well as the items owned by user 2. so for the first test we're going to check that the get all unsold tokens function fetches all the marketplace items up for sale and we do that by first calling the get all unsold tokens functions on the marketplace assigning that to unsold items variable and then we check to make sure that all the returned unsold items have filtered out the sold items like so and then we compare the length of the unsold items array to the price's length minus the sold item's length and we expect this to evaluate to true since the number of unsold items is equal to the total number of items in the collection minus the sold items and then for the get my tokens test user one will call the get my tokens function and that will get all of their items then we check that the returned my items array is correct and that the owned by user array length is equal to the returned array length and then we essentially do the same thing but for user 2 we get all of user 2's items and then we check that the returned items array is correct and then we compare the links oh and by the way this code and this line of code might seem a little confusing all it does is check if the elements contained in the mid items array is also contained in the owned by user array and then this line of code checks that none of the items in the sold items array are in the unsold items array now let's run the entire test script for the last time to ensure that we have alrighty and that completes the final test now let's run the entire test script for the last time to ensure that we have our entire back end totally complete so let's go ahead and do that mpx hard hat test hopefully everything's working first time around awesome everything passed now we can finally start building out the front end alrighty so now let's go ahead and deploy the completed smart contract to the blockchain but first things first we need to modify this deploy script so that it passes the arguments for the contracts constructor to this deploy method so we can do that pretty easily by copying the code we used to deploy the contract in the test and then replacing it with this code and then set the second development account as the artist account and then we can copy the royalty fee prices and deployment fees variables that we defined in our test script into our deploy script like so we also need to copy them paste the two-way function that we defined in our test which converts ether units into way units like so awesome now let's go ahead and run the deploy script vm run deploy and hit enter wait we successfully deployed the completed smart contract to the blockchain oh by the way i should mention that this npm run deploy command is a command line shortcut that i have configured inside of this package.json file right here and it executes this much longer command so yeah if you've used hardhat before and we're confused by that command that's where it's coming from here's the starter kit we began the project with we're going to spend the rest of the tutorial modifying its source code to turn it into the final project that you see here so to do that the first thing we need to do is connect it to the block chain but to connect to the blockchain we first have to connect our browser to the blockchain we can do that by importing the accounts on our hard hat development blockchain into a meta mask but before you do that make sure to add hardhat to the list of available networks on your metamask if you haven't done that yet click this drop down oval button then click add network and then you're going to fill out all of these fields with this information alrighty once you've done that head on over to the terminal tab where you have your development blockchain running go ahead and copy the private keys for account number two account number three and then import them into your metamask now the reason why we're importing account number two and number three is that these two accounts will represent the users of the app while account number zero represents the deployer and whoops account number one represents the artist account alrighty so go ahead and copy the private key for account number two then click the metamask icon and then click this circle icon at the top right then hit import account and then paste in the private key hit import and then do the same exact thing for account number three alrighty now that we've connected our browser to blockchain let's connect our client side app to it so go ahead and locate the app.js component you can find that in the front end components directory open it up alrighty so to speed things along i'm going to paste in some boilerplate code into this app.js file all this code does is render our nav bar and links the navigation links in the nav bar to the route of our app using the react router dom dependency that i have imported here for the front end part of this tutorial the main focus is on connecting our client-side website to the blockchain not on designing the ui of the app with html and css if you'd like to know more about how this boilerplate code works you can check out the other tutorial i made where i built an nfc marketplace like openc we're going to import the ustate hook from react which will allow us to create essentially a mini database on our front-end website we're going to use the hook to store the account that's connected to the app so we can render it in our nav bar we also need to know when data is being loaded from the blockchain so we can display a loading page instead of the contents of the app so we're going to put that in the state as well the way use state works is that it first returns a variable we can use to reference the stored value in our app and a setter function that updates the returned value by passing the updated value to it we also pass to the use date hook itself the initial value of the stored variable so the value of the variable before the setter function updates it for the first time so for loading we're going to set it initially to true and account null okay so let's go ahead and create this function that will connect our client side app to the blockchain which we're going to call web3handler and then fetch the music nft marketplace smart contract deployed to it so we're going to use the ethers library which we've imported up here to create this connection in the same way we used it inside of our test and deploy scripts except this time ethers is going to connect to metamask and metamask is already connected to our hard hat blockchain so ethers will use metamask as its ethereum provider there are many different types of providers but the provider offered by metamask is called a web3 provider so that's the one we're going to connect to the way we do that is my instantiating a new web3 ethers provider and pass in the globally accessible window.ethereum object which is injected into the browser by metamask we also need to get the account that's connected to the app and we can do that by calling this request method on the window.ethereum object and this returns an array of accounts and all these accounts represent all the accounts inside of the user's metamask wallet but it's the first account in this accounts array that represents the account that is connected to the app so we're going to pass that to the asset account function now in order to fetch the music nft marketplace contract from the blockchain we need to get the signer of the account that's connected to the app and we can do that by calling the getsigner method on the provider which will return a signer and then we can pass that signer to this load contract function that i have defined below the web3 handler function next let's go ahead and add another staple value that will store the contract because eventually we're going to pass the contract to a home my resales and my tokens components which we're going to create once we're finished building out this app component next let's go ahead and get a deployed copy of the contract we could do that by instantiating a new ethers.contract object and we pass into it the address of the contract as well as the abi of the contract and the signer all right now let's go ahead and import the contracts avi and address from this contracts data directory and this contracts data directory is created from the save front end files function inside of our deploy script so each time we run the deploy script a new contracts data directory is created with this information alrighty and then we set the contract state and set the loading state to false alrighty now that we have created the function that connects our app to the blockchain let's take a preview of our app so let's test out the navigation links see if it routes us to the correct url when we click it let's click my tokens awesome then my resales sweet and then back to home to reset it awesome okay now let's go ahead and click this connect wallet button which will trigger the web3 handler function that we just created okay sweet and we choose which account to connect with we're going to choose account to okay connect sweet and now our app is connected to blockchain with account number two alrighty so the next thing we want to do is build out the components for each of these navigation links starting with the home link alrighty so let's go ahead and create a new javascript file for the own component like so new file home.js and just like with the app component i'm going to paste in some boilerplate code into this home.js file so this home component needs to fetch all of the unsold music nfts and in order to do that needs access to the music nfc marketplace contract so we're going to set it as a property of the component like this and because this component is fetching data from the blockchain we're going to keep track of when it's loading and when it is loading we're going to return a loading page so let's go ahead and define the use date hook that will store the market items as well as the function that will fetch them so first things first we need to call the get all unsold tokens function on the contract to fetch all of the unsold tokens and then we're going to map through the unsold tokens assigning the returned array to a market items variable inside the callback first we're going to get the uri url of the current token by calling the token uri function on the contract and then we're going to use the uri to fetch the nft and metadata stored in ipfs using javascript's fetch api to do that we pass in the returned uri plus the file extension so dot json and then that will return a response and then we call the json method on the response and that will eventually return the metadata and once we have the metadata we can use that to generate an identicon which is that unique icon associated with each music nft that's generated and the seed we use to generate each identicon is the metadata name plus the metadata price and then we return an item object that combines the price of the item the item's id the metadata of the item so the name and the link to where the audio file of the nft can be found on ipfs as well as the identicon alrighty and once we have all the market items then we're going to store them on the state by passing the market items array to this set market items function and then we set the loading to false sweet and that completes the load marketplace items function now we want to make it such that each time this home component is mounted to the dom which means that it is someone refreshes the page or they route back to the home page then we want the load marketplace items function to be called automatically and we can do that using the use effect book so that's going to look like this now this use effect hook accepts a callback function and this callback function is called each time the component updates and it updates each time the stateful values change or update so each time loading changes the use effect hook is triggered likewise with market items and it's also triggered whenever the home component is melted now we only want to load the marketplace items when the component mounts not when it updates for changes in loading and market items so to do that we're going to say if market items is null then we're going to call load marketplace items that's what this line of code does and this works because the only case in which market items is null is when the home component is being mounted alrighty now let's create the function that will allow users to buy music nfts like so and this will be an asynchronous function call and it'll accept an item value as a parameter and inside the function body we're going to call the by token function on the contract passing in the item id for the value price of the item and then we're going to load the marketplace items again calling the load marketplace items function but before we call it we want to ensure that the transaction to buy the token completed so we can do that by calling the wait method on the transaction response which will wait for transaction receipt to be returned awesome now let's start building out the user interface of the home page so let's go down to this final return statement and first we're going to check if the market items length so marketing's array length is greater than zero and if it is that's where we're going to display the music player and if not then we're going to say and no listed assets alrighty now let's add a couple more pieces of data to our state that we need to build out a functional music player so that's going to include um an is playing value so we need to determine when a music nft is being played or not as well as the current music nft being displayed so that's going to include an is playing value to determine if a music nft is being played or not as well as the current music nft that's being displayed by the player and we also need to use the use ref hook to keep a reference of the music nft's audio so that we can control when to play and pause it we also need to use the use ref hook to create a reference of the music nft's audio file so that we can control when to pause and play it awesome so moving on we're then going to render the audio file of the music nft using this audio tag setting the source as the audio link on the market item that's currently being displayed and then we set the reference to it and then below it we have the music player represented as a react bootstrap card and inside the card's header we keep track of the current music nft's number and the total number of music nfts and then we display the image associated with the music nft which we've generated as a identicon and then we have a card body inside of which we have a card title and that is where we display the name of the nft and below the card body we have a card footer and that's where we have a button that displays the price of the nft and we have to convert that from way to ether using the format ether method on the ethers.utils and then for the on click attribute we pass in a callback function which triggers the by market item function that we created up here and it passes the current market item as an argument so inside of this card body and below the card title is where we're going to place the music player controls so the skip forward and backwards button as well as the toggle play and pause button but before we render out the interface of the music layer controls we first need to create the functions that it'll interact with first let's create the function that the skipping buttons will trigger each time they're clicked so we're going to tell this function to skip song and if the forward skip button is clicked then we're going to pass true to the skip song function and if the backward skip button is clicked we're gonna pass false so let's first handle the skip forwards case so when that happens we're going to want to update the current item index so we're going to call the setcurrent.index function i'm going to pass in a callback and inside that callback we're first going to create an index variable assigning it the current item index then we're going to increment it so increase it by one and if the index is greater than the market item length minus one so this value represents the last index in the array then we're going to loop back around to the first index so index 0 then we're going to return index and for the skip backwards case we're going to do something very similar except we're going to decrement the index and if the index is less than zero then we're going to set the index to the last element in the market items array and then we're going to return it awesome and now let's create a use effect hook to handle the playing and pausing on the music player so it's going to play the audio file if is playing is true and if it's not and is playing is not equal to null which means that the dom is not being mounted then we're going to set it to pause and we need to check that is playing is not equal to null because if we try to access the audio ref when the component is mounting we're not going to be able to and that will cause our app to break alrighty now let's go ahead and add the controls to the music player like so and then when the pause play toggle button is clicked we update is playing with the opposite value so if his playing is true we set it to false if it's false we set to true so if is playing is true we render a pause icon and if is playing is false we render a play icon awesome and that completes the entire home component now let's go ahead and import it inside of our app.js component like so awesome and now we can set the element attribute of the home route to the home component awesome now let's go ahead and return to our app and test out the home component so click connect wallet sweet and here is the music player on the home component we have the name of the nft the identicon and then the number so one of eight awesome now let's click the play button pause it sweet then try out the back skip button see if it returns the eight out of eight music nft sweet and it does then the forward button back to one out of eight yes great okay awesome that is so cool okay now let's try to purchase one the icelandic arpeggio buy it for 1 eth okay confirm the transaction sweet and now it is no longer displayed in the music player there's only one out of seven available to purchase now let's build out the my tokens component so that we can view the icelandic arpeggio nft that we just purchased so let's create a new file for the my tokens component my tokens.js all right sweet so let's go ahead and paste in some boilerplate code for the my tokens component so for this component we're going to load the tokens so the user's tokens in the same way we loaded all of the marketplace tokens on the home component except we're going to call the get my tokens function on the contract instead of the get all unsold tokens and we're going to use the same use effect hook to trigger the load my tokens function when the component is mounting now the main difference between the user interface of the my tokens component and the home component is that the my tokens component is going to list all of the tokens on the page as opposed to displaying them in a music player format so that means we need to create an array of audio refs to contain each of the tokens listed on the page so let's go ahead and start building out the user interface we're going to map through the my tokens array and inside of the callback for the map we're going to display a card and we're going to have it the associated nfts audio and inside the card we will display the denticon for the nft as well as its name and the price that the user purchased it at we're going to store the audio ref in the audio refs array at the same index that the associated nft is located at in the my tokens array now below this card title we're going to render the play pause button but before we write the code that does that we need to add a couple pieces of data to our state specifically we need to keep track of which token in the my tokens array the user has selected to play as well as the previously selected token the reason why we need to keep track of the selected token as well as the previously selected token is that we need to know which audio files we need to play and or pause anytime the user clicks on the play slash pause toggle button or any of the tokens so here's what that would look like when we render out the play slash pause button when that button is clicked we set the previous to the currently selected then we set the selected to the current index of the token in the my tokens array and we only toggle is playing if none of the tokens are playing or if the selected token is equal to the token at the current index so that way if a user hits play on one song and before that no songs are playing his playing is triggered on but if the user decides to hit the play button on a different token then the is playing variable is not toggled however if the user then hits the pause button this time on the song that's currently playing then it will be toggled and it is playing is true and the selected token is equal to the current index of the token in the my tokens array then we render a pause button or that token and then if not then we render a play button so inside the use effect we're going to check if it is playing and if that's the case then we play the selected audio ref and then we check if the selected is not equal to the previous and if that's the case then we pause the previous audio ref and in the case where is playing is false then we pause the selected audio ref this logic makes it so that when a user is playing a token right and then they decide to play a different token it prevents both songs from playing at the same time it pauses the previously playing token and then plays the current alrighty now let's go ahead and render out the resale form of the token inside of this card dot footer but before we do that we're gonna need to add a couple pieces of data to the state specifically we need to keep track of the id of the token whose input into their resale form has most recently changed as well as the value of that input and we're going to save that into resell price variable and resell i d variable respectively so for the resale form when the resale button is clicked we're going to trigger the resale item function which we've yet to define passing in the item and then for the form whenever there's a change to it we're going to set the resale id which represent the id of the item and the resale price the value inputted and then we're going to manually set the value inside the input field to the resale price if the resell id is equal to the item id and then null if that's not the case so this will make it such that the user will only be able to set the resale price of one token at a time alrighty now let's go ahead and define the resell item function up here so first things first inside this function we're going to do some basic form validations so if the resale price is set to zero or the item id does not match the resale id and the resale price is a null value then we return all right and if we pass those validations then we first get the royalty fee from the contract then we convert the resell price from ether to way units and then we call the resell token function on the contract passing in the nmid rice and for the metadata the royalty fee is the ether value and then we update the my tokens page by calling the load my tokens function alrighty and that completes the entire my tokens component now let's go ahead and import it into our app component and then add it to the my tokens route like so so let's go ahead and preview the my tokens page fingers crossed everything worked sweet see if it plays nice now i'm going to purchase another music nft okay confirm now let's see what happens when i play spanish moss and then hit play on that make arpeggio sweet so it automatically pauses spanish moss and plays icelandic arpeggio when spanish moss is playing and i click play on icelandic arpeggio awesome that's what we expected now let's try to resell one of the music nfcs i'm gonna resell the icelandic arpeggio the first one i bought for a higher price of two eth try to double my money click resell okay confirm sweet now let's see if it's in the marketplace awesome and it's now listed for a price of 2 eth sweet alrighty now let's build out the final component of our music nft player project and that's the my resells so that way we can view the icelandic arpeggio token that we recently relisted on the marketplace alrighty so at this point you know the drill let's create a new file in the component directory name it my resales dot alrighty so i'm going to paste in some boilerplate code now this resales component is going to display all of the tokens in the same way we displayed all the tokens in the my tokens component which is listed all on the web page so we're going to use the same use effect to control the playing and pausing of tokens and we're going to keep track of the selected and previous tokens as well as the audio refs so rather than calling getter functions on the contract to fetch the tokens that we need we're going to use events to fetch the resale tokens now the way we do that is by first calling the query filter method on the contract then we pass in a filter that defines the events we are looking for and the way we create a filter is by calling the filters method on a contract then on the filters we specify the name of the event that we are filtering for and then we pass to it for each field of the market item relisted event the value that we're filtering for and if we are not filtering for a specific value on an event and if we are not filtering for a specific value on that events field we set it to null right so in this case the only field that we are filtering is the seller field so we're looking for all the marketplace item relisted events where the seller is equal to the account so the account that's connected to the app which we have passed into this my resales component and next we're going to fetch the metadata of each nft and add that to an item object in the same way we did for the my tokens and home component except we're going to map through the returned events so because of that we need to first fetch the arguments from the event and after that we then fetch the sold resale items by querying market item bot events with the seller set as the user so we're doing this because in addition to displaying all of the items that the user has listed for resale we're going to display all of the ones that have actually sold and after that we filter out the sold items from the listed items then we set the sold items and set loading to false alrighty so we've fetched all the data we need from the blockchain with this load my resales function we don't need to create any functions that write data to the blockchain this my resales component merely reads data from the blockchain there's no writing to the blockchain note we can't make any transactions within this my resales component so let's go ahead and focus on building out the user interface from this point on so first things first we check if the listed item's length is greater than zero and if it is not then we display no listed assets and if it is then we map through the listed items array displaying a card to represent each token as well as an audio tag just like we did for the my tokens component except the only difference now is that we're not going to include a footer that has the resale form and right below the listed items we're going to display all of the sold items checking if there are any sold items there isn't we say no sold assets if there is we map to the sold items array and then we return a card or each token kind of like we did for the listed items except this time we're not going to have a play button for it since all of the sold items will also be included within the listed items so if we want to play a song that's within the sold so if we want to play a song that's within the sold items we can just play it in the listed items area oh and i almost forgot there's one last thing we need to include in this component and that is the use state hook or the sold items alrighty and that is it we have finished the final component of our music nft player application now all we have to do is import it into our app like so and then add it to the appropriate route like that okay now let's check out the final product so let's hit this my resales navigation link hopefully everything works sweet awesome so the icelandic arpeggio that we relisted on the marketplace it is below this listed category we play it works and it displays the price that we listed it at now let's go ahead and switch to a different account and purchase it so let's go to so let's go to the other account this one all right now let's refresh the page connect wallet go home okay my tokens none my resales none that's what we expect so let's purchase the icelandic ego five for two east okay confirm wait awesome it's in our my tokens page okay now let's switch over to the other account refresh page connect wallet okay awesome it's listed as a sold item sweet alrighty that is it everyone we have built a full stack music nft player app a web 3.0 spotify clone so congratulations you've written the smart contract you put it on the blockchain you've written tests against it we used ipfs to store the audio files and react.js to build the client-side website you see here so yeah this is a robust decentralized application that allows fans to purchase and resell tokenized songs from their favorite musicians and so if you want to take this to the next step there's a ton of things you could do to it you can add a feature that allows artists to create a new music nft collection for their latest album you could also store each album's cover photo on ipfs and store the hash that points to it in the smart contract and yeah as always please smash the like button so this video can get recommended to more people and yeah if you want to take the next step eager to learn more about blockchain so you can land a high paying blockchain development job build your own project or become a freelancer head on over to dappuniversity.com forward slash bootcamp to get started today alrighty that's all i've got for this video i hope you got a lot of value out of it until next time thanks for watching dap university
Up Next
33:04
Data-Driven Progress Monitoring for Speech Sound Disorders
@KellyVessSLP
326 views•2025-01-19

12:54
Triumph of Orthodoxy Icon: Byzantine Art & History Explained
@BenCallan
2.1K views•2024-08-06
22:27
Build a Decentralized Application (DApp) with Web3
@DappUniversity
198.4K views•2018-03-07

1:42
Game of Thrones Opening Credits: A Cinematic Analysis
@gameofthrones
46.3M views•2011-04-18
Related Study Plans & Knowledge Roadmaps
Structured learning paths in General & Interdisciplinary Studies
general-studies
Elevator Engineering: History, Physics & Cities
01From Hoists to Safety Brakes: The Dawn of Vertical Lift
02Hydraulic vs. Traction: The Engineering Physics of Elevators
03Modern Speed, Safety, and Algorithms
+ 2 more learning modules
12h5 modules
Explore Roadmap
general-studies
Rubber: Material Science, History & Geopolitics
01Origins of Natural Rubber & Mesoamerican History
02The Chemistry of Natural Rubber & Vulcanization
03The Geopolitics of the Rubber Boom & Colonization
+ 2 more learning modules
12h5 modules
Explore Roadmap
general-studies
Containerization: Evolution, Logistics & Trade
01Ancient Trade & Bulk Cargo: Amphorae to Barrels
02The Industrial Revolution & Cardboard Packaging
03The Containerization Revolution: Malcom McLean
+ 2 more learning modules
12h5 modules
Explore Roadmap
general-studies
Textile Tech: Evolution, Labor & Global Impact
01Pre-Industrial Textiles: Handloom & Cottage Industry
02Mechanization: The Spinning Jenny to the Power Loom
03The Factory System & Global Labor Transformation
+ 2 more learning modules
10h5 modules
Explore Roadmap