![[5]–ROS2 Basics Explained – Nodes, Topics & Messages [شرح بالعربى]](https://i.ytimg.com/vi_webp/x7fgj2tMVLg/maxresdefault.webp)







![[ROS Q&A] 137 - How to Tune Navigational Parameters Using a Graphical Tool?](https://i.ytimg.com/vi_webp/s0JA9jjZi44/maxresdefault.webp)








This tutorial demonstrates how to implement outdoor robot navigation using GPS by configuring the robot_localization package to fuse GPS, IMU, and odometry data, replacing the traditional AMCL localization approach used in indoor navigation; the process involves creating custom launch files to launch an empty map server, configure the robot_localization node with appropriate sensor topics and frame names, and integrate with the move_base navigation stack to enable autonomous navigation in outdoor agricultural environments.
Outdoor Robot Navigation with GPS Using ROS: Jackal Simulation
Added:Basic understanding of the Robot Operating System (ROS 1 or ROS 2), including nodes, topics, messages, and TF transform configurations.
Familiarity with the Gazebo simulation environment, including how to spawn robot models, load worlds, and interface with simulated sensors.
Fundamental concepts of robot localization and state estimation, particularly the integration of Wheel Odometry and Inertial Measurement Units (IMUs).
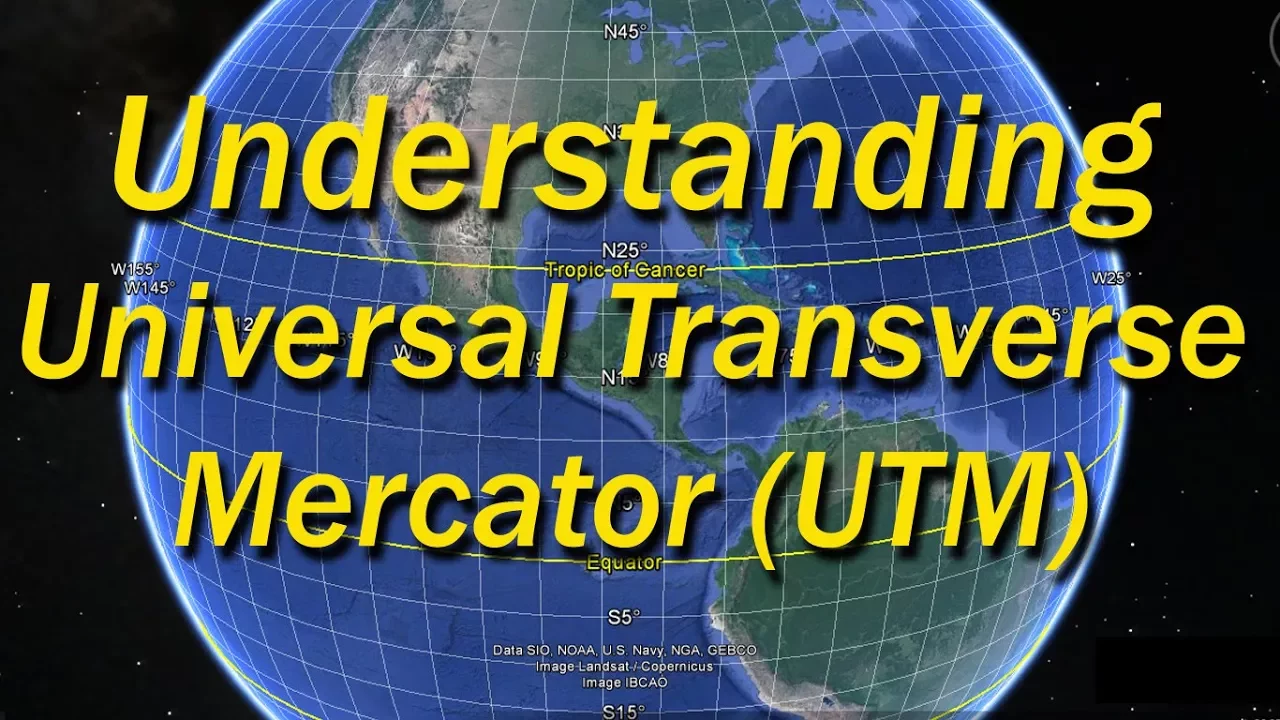
Understanding of geographic coordinate systems (Latitude, Longitude, Altitude) and map projection systems like UTM (Universal Transverse Mercator).
Transitioning from Gazebo simulation to deploying and tuning navigation stacks on physical outdoor UGV (Unmanned Ground Vehicle) hardware.
Configuring RTK (Real-Time Kinematic) GPS systems for centimeter-level positioning accuracy in precision agriculture.
Integrating 3D LiDAR SLAM (Simultaneous Localization and Mapping) to navigate GPS-denied or degraded environments, such as under dense tree canopies.
Implementing specialized coverage path planning algorithms for autonomous agricultural tasks like harvesting, seeding, and row-following.
15.8K views192likes1:03:11Original Release: 2018-04-07
[Music] yes now I am ready for this magnificent class that we have today this is a next Ross live class on Saturday requested by the team the people the community of the Ross agriculture group so welcome everybody I hope that you are ready here and that you are willing to practice Ross and make a robot move around by using a GPS so let's go by this let's start let me tell you that we are going to follow a tutorial so I'm going to explain and do with you but you have to also do with me so in order to have access to the code to practice at the same time as I am explaining we are going to use the robotic Knight Academy and I have put the link on the robotic Knight Academy on the chat so you can go there I assume that you have a free account there so I'm going to provide you access to all of you now for the full courses during the day of today while we are doing this Ross life class ok so let's go let's go to starting with this with the access so what I'm going to do is to share with you a link then you have to visit that link and then by visiting this link you will have activated a full access to the Academy ok so let's go for this then let me copy the link here on the here let me copy on the chat the link is here so to many windows open you see yep so in order this link to work for you you have to have an account at the robot ignite Academy okay so if you don't have it you should have done it previously then go fast now undo it today we are not going to use the wrath of Allah - to do because it's something special today so here is the link on the chat and then visit that link so you will get the access to the ignite Academy I see on the child that many people is sharing their email so I'm going to say do not share your email today today is special [Music] we are going to use robot ignite Academy so not possible so some people get 404 let me see what is happening so maybe it's been let me go again let me see maybe it was updated okay so yeah because the link has some time and I generated before ok don't worry don't worry people here come to the rescue so here is the new link sorry it's because I had everything prepared and this link has some time out and he was there for maybe one hour that I generated previously for two tests that everything is working so I presume that this link is now working for you please try it and let me know so once you have access to that link then you should let me share with you my screen so you should see this screen here ok paste not found I so ok so I don't understand let me just copy and paste test this with myself out we are starting good so let me just copy with me and see okay so I have to login with another account free account okay copying the link okay yeah I see yeah yeah so you don't have to copy you just have to press the link Oh No okay so I see I see it's a problem of the chat of hangouts okay so it's because it's as you can see in my page is working so then the the problem is that this hangout chat is doing some error in D it when I copy this so let me just put something here so how can I solve this maybe just copy in the last part so maybe it will not come so let me copy into think parts yeah so the first part will be HTTP dot this will be the first part and then the second part will be this so if you put everything together you should be able to go there and let me know if it is correct for you and I'm sorry for this I'm sorry for this is yeah it's a problem with the with the chat because he has to cut at some part oh I don't know what is doing here it's kind of adding some stuff yeah what okay so looks like you are getting in now great great so now let's continue from here just one thing great so people are supporting that is working great so let's move from this point the thing is first I have some issues with my Internet and I'm sorry but I'm trying to solve this with the Internet provider since many days ago but still not found the error so you may see like the quality is is getting is getting so sometimes it blurs so I apologize for that I cannot do anything more so here nielsie says that now success niels you have to have a previously account created on robotic night academy if you don't have it you will not be able to to get the access so yeah so what about this class ok in this class today not success ok so people still reporting not working so have you created a previously account ok yeah so follow the email so now I see that people is reporting success ok so go ahead then what is the class about today here it's about making a robot navigate by using a GPS in the outdoors in the outdoors so it's very important here that you understand what you are going to need in order to use this knowledge that we are going to have here today for your own robot so in case that you want to apply this to your own robot what do you need to have first you need to have russified robot that means a robot that it has a computer with Ross and that this computer can connect to the wheels and to the sensors so basically that computer has to provide you access to a topic for commanding velocities to the robot and another topic that provides you automata and then you need a laser on your robot do you need a laser on your robot that is also russified so it has its publishing data of the laser on a row stop it you need you need also an IMU sensor again with Ross and a GPS so if you have this in your robot you'll be able to replicate what we are doing here if you don't have a robot like this or you still need to build then I'm going to recommend you very very quickly one place where you can get some of those sensors of those platforms that already work is called Ross component it's a shop online that all the things that they sell here it's already working with Ross so everything you have sensors I am use GPS lasers you have mobile robots there and so you can have a look here for example this platform is quite is the summit in Excel it's quite interesting for doing some information some movement outside outdoors and it's already providing all that so let me tell you that I have no relation other than with Ross component other than friendship so so I don't have any Commission or else with these guys here and then so I recommend you that you come here and then you check for the GPS I am use and everything there so you can have your robot ready for for working ok so next thing ok Kyler says that he has posted here some links on Ross agricultural general and great Jasper sign you can sign up for this lab group online at the Ross AE Wells website link is at the class description ok yeah so maybe for next future classes we are going to use this a kind of a slack chat because it is chat of Ross itself YouTube is providing as is providing many many errors ok so then once you have your robot that has come on bell odometry laser and I am you then the next thing that you need is to use some software and this software is already provided basically is this that we are going to use today here so you don't have to to build that software you just need to learn how to use it that's what we are going to learn here today and then you will have to adapt to your robot topics etc just change the configurations let me tell you also that before we start that the subject that we are dealing here today it's a complex subject so I suppose that you already know the basics of Ross so basically for this course you will need to you have to know about the following things if you are inside the robotic Knight Academy then you need to know about Ross basics it means how Ross works services topics etc then you will need to know about Ross navigation this is about basic navigation of robots with lasers and Islam and another thing that you will need to understand is TF also okay so those are the subjects you can do those subjects here on the robotic Knight Academy or look around in the internet or do whatever you want but those are mandatory okay so now let's go with the practice of today let me check the child I see that there are some people okay so yeah so it looks like everything is working everybody is more or less following so if you are here inside the robotic Knight Academy let's go down down down and let's select these cores here that it's called the mastering Ross with jackal so your select your star course and let's start the course yeah no I don't know what is doing this internet connection is stupid so yes so here we go and it may happen depending on how many people is here on there what the course that you have some delay is just the first time that you are loading the system okay so do not worry about that it's going to load for all of you so there I have my robot there it is okay so I hope that you are all in let me know if you are so I'm going to show you how to make a robot navigate using a GPS in the outside and also will give some indications about how you would modify this for your specific robot so in case that you are as I mentioned at the beginning building your own robot or you have bought a different robot and you want to use the same things for other robot so this is just to learn how to use the software and where to touch in order to configure so people it's there waiting for it for load ok so while we waiting please post your questions on the chat if you have any at present let me see in the meantime I'm going to drink something that I have here on my table yes that's right great so no questions I see that there is some delay so that's normal between what I speak and then when people is noticing that what I have said so writing on the chat also it has some delay so those are the tools that we have here and we have to deal with this but I'm sure that it's not going to be any problem so if you are ready probably if you are not you can follow my screen at present so here is the course you have to select unit 2 you select the units here at the bottom select unit to set out doors navigation so unit 1 of this course is is about how to navigate in doors you need to is or navigating outdoors and here Michelle is indicating that his simulation looks different from yours but maybe it's because I have been moving the robot around previously to start just to check that everything was working but probably if you move around the simulation you will see that is the same environment maybe your robot is around here in the middle I don't know I don't remember exactly where does it starts so your your simulation should be starting from fresh or because you haven't selected the unit 2 also should be so please select number 2 and let me know if you still don't have it ok so let's continue here unit 2 it says well basically some GPS basic concept so I'm going to skip a lot here because otherwise we are not going to to do okay so first step is that we are going to load an empty map so if you know about navigation in indoors you usually need map it's a map of the environment ok and then the robot is localized itself based on that but in this case here we are going to use an empty map and use this as a reference and this is B this is this kind of trick for using the Ross nodes that use maps for navigating without having to create a map this is just a trick ok so this is already provided so what we are going to do to start is to create these packets that I have here that is called my Jack all tools piece 1 so for that go to one of the shells and then go in case that you don't have it go to the caffeine worker space so here you know that you have a cutting workers face and then source then s RC and I have this delay my connection that is coming all the time you are going to see that is kind of periodic cut my connection so I apologize for this I cannot do anything more I have tried to do many things but so a present haven't solved it so you go to this directory caddying workspace / source and this is basically what contains my code here those packages in my case in your case should be empty just with one see make list okay so you go there and then you create a package and there so you create a package how do you create a package like this Kathleen create package then the name of the package please use this one because otherwise we are going to have a lot of errors when I increase that I send you an information so create my package my jackal tools Ross PI I hope that you can see it is then I'm not going to create it again because I already have it here okay but you just do this and then you will create these jackal tools my jackal tools okay so if you have it then let go further inside there do you create a lounge directory so you go inside my package my jackal tool sorry and then here you do M Qadir and a launch file so I launch the regulatory so you have this then you will have a launch directory then inside this lounge directory Miklos of things here so inside this launch directory let's create this start map server dot launch how can you do this it's very easy so if you go to the lounge and then you right-click this menu will appear you can say new file and a new file and you say new file what okay sorry it's because this delay that is making me and not show the result here it is so you will get this and then here you can put your name is in that case is start map server dot launch map server dot ok so inside that start the map server dot lunch then you have to copy and paste the code that is here this is for launching the map server is a map server that is going to use an empty map is the one that is going to launch the map server with an empty map with this right so do like this and just to one one change for me so just do one change then the changes instead of using this my jacket tools then remove the mind here ok so you remove this and then allow jacket tool so it's going to use an empty map that is already provided in robotic night Academy why we are doing this is because you haven't done probably that you need one of these course and because of that you don't have an empty map created so that is why we are jumping to another chapter so we need to do a small modification so by doing this you are going to use one that we already have provided here in the in the system ok so by having this what we can get is an empty map for the for the system for navigating ok so far so good this empty map is necessary for the move pace the move basis module inside the navigation stack is the one that generates paths and it needs to have a map for that so because we are going to use it for generating navigation trajectories here so we need an empty map because we know have a map of the whole area agricultural area that we are going to use okay so that's so far so good then another thing the next step is to launch the localization system so from the unit one you have seen if you have done it that in order to localize the robot you need a package that is called a mcl that's a particle filter that is the one that does the localization on a map but in this case we have an empty map and we don't want to localize using the laser but instead we are going to localize the robot using the GPS so we don't need to launch this am CL that is why it says disconnect am CL basically we are going to use another node that is called dead let me show you here okay okay so no it's not here yet it's it's beneath let me see okay so yeah so it's a robot localization here okay so let's wait a little bit until there and then in this case or what it says is okay let's let's create a new round file here with this name that will contain this code here so you can just do the same thing go to launch create a new file and then put that name here please write the same names otherwise things will be will create you will create errors that is very difficult to debug from here from there from the distance so I cannot go and see your screen and say oh you have missed here so once you know understand the whole process you can't put your own names and everything will work it the same way but it's just too simple try and make it easier so create that file that I have already created here it's a where is it navigation with GPS here a des this is my file I'm going to increase the size so you can see it better and I'm going to indicate that is an XML so we can see colors okay so so far so good then by doing this this is the file that we are going to use for navigating with GPS okay so still we'll need to do some more things let me know if you are not following or some steps are wrong or something in your case so then what else okay so we have to create another file that is this move base dot lunch with map move based lunch and it's a you are going to create here and launch again right click new file and then put this name on the file and then copy the content here just put it there then what have we done I will show you later what have we done okay so just be real with me then what happens here what is happening here so what is happening is that if you know about robot navigation when you generate localization system based on the particle filter on the a mcl what you are basically doing is to provide a transform from the map to the odometry so why is this because we are providing to the robot when we want to move the robot from one location to another we are providing those two in map coordinates so we say a please go to the corner 25x in X and 15 in Y so those are my coordinate and then the AMC L is the one that transforms those coordinates in the map into audiometry values that the robot understands that is the local reference system that the robot has so he understands his local robot frame of reference so that's done by the AMC l but now we have disconnected this because we don't have a map at the error map it's it's not provided so how we are going to do this well instead of doing this we are going to use this robot localization package that is the one that provides this transform based on the GPS information actually we are going to use GPS IMU and odometry data merge and Walter is saying on the chant that the text isn't clear in you mean on this screen you mean on the screen probably and then yeah I apologize this is related to my internet connection that they have those problems and then it keeps me cutting the speed I don't know what is happening so as epsilon is indicating all the code that I have here in my screen in this you can copy from here it's exactly the same yeah okay so let's continue so basically what I was saying is that these transform that was provided by a mcl we are now going to provide it from the robot localization package and this robot localization package it uses gps IMU and odometry data merge in order to calculate this transform so it can tell us in which location of the empty map our robot is okay so let's create so yeah so here's is if somebody is indicating me that I should force 720 but I think that already did so anyway so let's keep moving forward so then for this let's create another lounge file this lounge file with this name start nav star naps at lunch and for this go to lunch right-click new file and then copy on the copy here the code that is implemented here on the text just copy and paste copy and paste then we are going to see now we are going to see what this means more or less okay just the important parts okay so let me just put this bigger so because the explanation is better so I'm going up a little bit so here let me recap it's just starting the map server with an empty map okay we are going to see how these map loops enough in the RV's in a few minute then here we launch the map server and the move ways the move ways is the package that allows us to to move the robot by using the path planning and then here it starts the artists for localization with a very specific conflict of localization okay so that's basic then this with map move based at launch is this lunch file here that is the one that is launching the movies with some specific parameters okay those are the parameters that you may have to tuned for your specific robot how to tune this is explained on the previous chapter how to tune that and the previous chapter just in case that you need that it's not the goal of today here here the goal is about the GPS so here we are on the startup side and what we are doing is launching this package robot localization with the naphtha transform node and here there are many options here that you can check for that but the ones that you should especially that you should have especially pay attention for your own robot are those is just the topic here you have to put the topic of your robot in which you are publishing the IMU data remember the beginning of the classes I told you you need to have an IMU sensor that is publishing data and a topic of Ross so that topic is the one that you have to put here for your robot then the same thing for the GPS so you have to launch a GPS node and check that that is publishing on Anna topic and then you put that topic here and again the same for the odometry okay so then we have that some parameters you can check that later you can check that later but then I think that the most interesting part here is that we lounge here they we do the launch of this and then we check that everything is more or less working so let me see let me check that I'm not missing anything these are more additional explanation spiration let me check wait a second okay still still we don't have to launch it okay still we need to modify the start navigation with GPS a Kiev launch file okay at the beginning of this we have created that file here here star navigation with EKF and the only thing that we did was to remove the AMC L from the previous chapter okay so we have this version map server move base Arbus only loading this now we have created many many other launch files and now we are going to connect everything together and what we do is to start the nafs at launch and start the robot localization akf okay and the rest is what we already had this is the rest what we already had so what can you do for this please don't get confused just open this file star navigation with GPS akf that is here star navigation with GPS okay EKF and then just copy all this because you are not going to miss anything this is the correct way so we probably we try to make you move step by step that's why sometimes you you have to create a file and then modify afterwards so you understand the different parts then you copy and paste here everything so you have here the lounge of the GPS - automatic conversion and then this is the the module that does the localization on the map then the map server the move base and then the our base okay so we are almost there we are almost there now we need to configure configure this localization know that we are using here here this localization robot localization node it needs to have some information on yun file that is here so this young file contains the how to configure this robot localization node in order to work for our robot ok so the content of that file is explained here they're beneath and it contains a lot of information here about mattresses and everything that it will just configure in this it will take for one hour so what is important here is that you indicate their odometry topics that you are using so in this case for the odometry for the IMU and for the GPS okay so those are the most important parameters the rest you can use the default ones even if it's not like this but most of the cases it will work another one that you need to configure properly is this what is the name of the odometry frame what is the name of your base link frame what is the name of the wall frame that if you don't know you don't have you have to set the same to the map frame and then what is the name of the map frame so the my frame name is map as you know from the previous TF structure here here we are calling map this is the name of the frame then we have the autumn frame and then we have the base link frame so those are the parameters that you shifted here autumn frame is of them base link is base link and then map is map and this one just set to the same value and many other things but don't don't worry about that because it's too much it's too much in case that you want to know more about this than there is here and in this link that I'm going to put beneath the video you can see here some data for the how about how this works sorry is not that one is this one sorry is this one yeah and not yet no not yet as let me see a here configured robot localization yet is this one yeah okay yeah so here it is and then in this page that I'm going to put beneath this video you are going to see more details about how to configure everything and it's also these those values that you see on those mattresses so you can see on this on this page a little bit more explain so for now just take those ones that are the default ones so now yeah so he says where to copy the robot localization file yes good question sorry I didn't explain that here you should open here at param you should create a para más de rectory how do you do this on the directory right click new folder and then you get the name params also from here from the shell of course is the same thing here you I have already my parents and directory but you can do an MK here okay peer parents and then put your file there in the inside there so I have my file in this case that is call the file is robot localization with GPS and it's okay so I didn't put it here robot localization with GPS let me see okay so let's create it just right now I copy here from here copy and rename so for the name you've seen I copy paste just in order to not forget something or make a an error while tapping so I'm going to copy everything and paste it here okay so I have my file here great so so here is more expression then we are about to launch everything and see if it is working okay there's one question more on the chat that says when you are ready for questions my robot doesn't doesn't have encoders on the wheels to publish odometry data can determine on whether your example will work okay you need to have odometry data in some way in some way so I mean you can maybe you don't want to have odometry data because the robot localization node is very powerful so you you can avoid including here in this conflict especially the odometry data for your robot and then it will use the IMU and the GPS information but I think that it will not work so well because IMU has a lot of noise GPS has a lot of noise so is the combination of all of them that provides you a good automata maybe for your application is good enough it depends on the application also another thing that you can do is that if you don't have encoders to publish the odometry data you can launch a note that I don't remember the name now but there is another note in Ross that allows you to compute odometry based on what the laser is detecting so the laser detects the obstacles then the robot moves then those obstacles have changed location related to the robot because the robot has moved and then based on that this node can compute a kind of audiometry [Music] then this odometry is the one that you can use and feed this robot localization algorithm that will be a good solution then let me write down here to find the name of that node because I don't remember is is a note that computer computer demetri demetri without and colors encoders using using obstacles detected so I'm writing that here and I will put it beneath okay then Niels is asking where to put the navigation message odometry file sorry that's not something that we have to do where is it that message navigation message automatic file no no okay you're here no no no this is just an example of so it's not an example he's showing you this structure of what an automatic message has and then here you don't have to do anything with this so you don't have to create this navigation message automatic file this is not okay just this is something that you should see when you type this okay so let's continue then we were here here here here with this config file let me put it bigger okay so then we should have to do this exercise but we have already done it and then here then mm-hmm let me see yeah so now we are ready to launch this launch file and then if we launch this we should be able to see something like this on another screen and make the robot navigate using GPS okay so let's let's launch it and see what is the result and let's see because that is going to be funny okay there is another before I launch it there is another question it says a wreath is indicating another case might be when we use UI V's instead of real robots so we don't have a dama tree yes but you always have a geometry you can always in some sense compute an odometry an Adama tree is just a way of the robot to feeling how much has moved itself from its previous position so I'm sure I don't know too much about you a ABS but I'm sure that there is a way of computing how much that robot has moved from the previous step on a small steps that's your odometry that's how you generate an odometry okay so let's go and launch this file that is the one that launches everything that is the star navigation with GPS EKF so for that as you probably know ross launched then the name of your package my cat called tools and then start navigation with VPS and i think that i'm going to take another drink because my screen is still frozen for for my internet connection oh there it is there's so almost there a star navigation navigation with GPS yes okay so let's launch it please launch it all of you and let me know if it is working for you launching everything and this launch file is interesting because it also it is also launching the our base with a very specific configuration that you can use to check that everything is working ok so our base has been already launched it but you cannot see here why because it's on a special screen in order to access the screen that shows the graphical applications you have to press this icon here it's an icon that is beside on the right-hand corner right top corner of the editor here open graphical interface you are going to see that a new screen appears on my side and then here it is my our base running so here you have a button here that you can press in order to see the configuration options okay so let me check if everyone is following up to this point okay so let me see on the chat what people is saying the Lazer's esteli a nose is indicating the laser scan mature package can compute the odometry based on the laser scan using the ICP algorithm oh yeah that's it that's a package that I was looking for thank you very much ste a nose that's the one exactly so that's an example of an of a note that is computing odometry without having encoders that you can use things of other still jános that one the Neels is indicated error is neither a large file okay so you have a problem with your command that you have sent so um let me see here if you have launched a DS specific command so let me put a bigger on the screen so you can see my command very clear is here okay so bigger and let's remove this so we can show it bigger Ross launched magical tools star navigation with GPS akf so you should have this why because this you should have created my jacket tools package that is here then you should have created inside my jacket ood you should have created this lunch directory then inside this lounge directory you should have created this start navigation with GPS akf that is this one here okay okay so let me see if one of those steps that I have mentioned and Neels is not correct for you because the problem is just there yeah a typo okay that is very difficult yes that's and that's very good because it's just a stupid mistake so it's very easily to find and to solve it okay Michel he's indicating that managed to get it going very good so now if you have this then you can start sending goals to your robot and sorry this message is because of my connection is I'm sorry and and we are going to get it all the time so I apologize it's only my case in your case should not happen that okay so here we have here we have we have the robot and this is something that the robot is detecting with the laser if we go to here to my screen of the of the simulation let me see where is the robot I don't I cannot see it oh there it is yeah so you can see that this laser the laser here is detecting these three here and why is being shown here in the and this and the our base because we have the configuration now how do you provide a goal to this robot to go to a specific location okay so let's say that we want the robot to go to another location for example let's see in the middle of the okay wait here in the middle of the trees then let's send a navigation goal so you have here an option here you have an option that says navigation goal if you press here and then you put into another place click and then hold then you detect the direction where you want the robot to face to and then you leave then the robot is starting to move into that direction as you can see has generated a path a global path and also a small path and you can see here sorry it's my screen again frozen and you can see here that there is a okay it's already gone but I wanted to show you the obstacle so I can I can show you by providing that another path so I'm going to provide another goal here close to the e to the tree so let's say here you can see that there is a tree that is being detected and as the robot approaches it then it generates this mark that is the secure locations where the robot can move from outside from here the robot can move securely this is the local course map that is computing this and everything is based on the GPS location so the goals that you are providing are provided based on the map of course they are mapped that but the localization of the robot on that map are made by using the GPS coordinates here littlez has a problem says resource not found name okay so and this error is is very very ugly so let me see here what could it be then let me know the others if you are following if it's working for you if it is not working for you let me know [Music] so I'm here today we are almost about to finish but I still has some stuff to be soft but I think that we'll have to leave for another session and it's about creating it's about creating an application that makes the robot move based on GPS values so you can move the robot here on the area of the of the of the field that by providing different GPS coordinates so you can say the role of please go here then from here go to here from here go to here based on coordination coordinates on GPS coordinates and already had prepare this for you it's a it's another code that I have here but this has quite a lot of stuff in it this is not this is the latest part of the of the of the tutorial but in the tutorial doesn't show how to do it so you have to do by yourself then I think that a good thing that we the best thing that we could do is to stop here for today you can assimilate and let's do a second session about that specifically talking about how to do that how to move the robot around an area with GPS localization and providing a set of points to that how do you think about this because I think it's too much for today and also it's very late so questions also give me some questions then here people in the chat is saying that is working Walter perfect and epsilon also is mine is to do with cross map errors okay so epsilon has caused map errors okay let me let's check what is this give us more information Arif says mine worked properly jacoub it works great steely honest I have a question by your spinned how well does a reliable laser scanner works outdoors and the real light conditions how accurate can be the measurements be okay that's a very good question so for that you will need to buy a good laser a good lighter and the ones that I have used is for indoors in my case but I I know that there are some good lighters there that for example the ones that use the autonomous cars and so you can buy one of those and those are working under terrible conditions in the outside so I'm suppose that they work quite well they are expensive they are very expensive but if we are talking here about machines that for agriculture I don't think that this could be a problem okay Ross agriculture I suppose that this is Matt hello Matt he says that it sounds good that we stop here and continue with this second part on just a session for showing how to do specifically it is because we have the system working now the basic system working so Michelle work it here good Epsilon got it now Ricardo very good epsilon a al Jones similar question how will you calculate the crosstrack error between the desolate path and the auto path okay so for that you can access there for calculating the the error that you have you have access to your position to the local path and to the global path this information is provided here you see here this is this in this image that you can see here this is still the local path a latest global path sorry this so you have access in the same way as this page has access has printed here the path then this is just a topic this path is being published on a topic on a row stopping so you can access from your code to that path also you can access to the location of the robot then you can compute the difference the square different whatever the error measure that you want to apply to the your location and the location that the robot she'd be so that's possible actually it's very easy it's more a matter of dealing with all the numbers there and but it's very easy because you have a topic polish in your position a topic polish in the path absol another question had to change my jacket to just jackal in some other lunch files okay still IANA yeah so Epson yes yes I have detected this well I was preparing this it's an error in our tutorial so we should provide completely my jackal yeah but I happy that you managed to detect this s/t Liana's thanks a lot Jakub a question ricardo what courses at robotic night academy you must recommend for a person who has just completed your Ross in fact a C++ course I am looking for balance development okay so for that then you should let me see where I have this the Academy okay here now here then in that case once you have this the Ross basics then what I would say is Ross navigation probably you are going to need it and then it depends on your knowledge what you would like to do with your robot maybe perception if you need it or manipulation in any case I will continue with navigation and prior to navigation do the TF do the TF and then I will also recommend you to do the robot creation with you RDF and Ross control so my suggestion will be first do you have done this one drawers basics either in C++ or empath then move to DF you have to understand ta very well then move to you RDF then move to Ross control and then move to Ross navigation and then from that you have a quite good overview of everything and then you can move to whatever you like the most so mass more questions more questions can the next lesson be on Ross agriculture and their use of zoom Bob I don't know what is zoom can you tell me more about this about you so then if there are no more questions I see there are no more questions there I think that we are going to leave it here you can send me more questions you can put them beneath the video or you can send me directly to my email and I will answer them here is my email and then other Jakub he says gracias muchas gracias ok thank you Matt I really think thanks a lot ok yes the subject of this that we are teaching here is quite a difficult subject so we have tried to make it as simple as possible by providing everything and where you should modify this for your own robot so there is a lot more to learn about that and to understand really really what is happening there but I think that going so deep it's not a good idea so the the best idea is we have something that is working then we modify in order to allow the robot to move around they feel based on our decisions not on our based on a graphical our base like here because this is I mean in the field you are not going to to be providing those positions to the robot so it has to be a program that automatically provides those so and that is what we are going to see on the next session ok so that's a program that I have here already created for you and that I would like that we create this again together on the next session okay so thank you very much for all of you if you have questions you have there please give us a thumbs up subscribe to our channel we are publishing one new video about Ross every day showing teaching how to do things and then so that's all keeping touch kit I'm going to send you an email to all of you about the next session that I will discuss with Matt which one will be the best day or day or time to do this next session so thank you very much everyone and see you see you around and if you are tired have a drink okay cheers mate [Music]
Up Next

11:34
SLAM Simultaneous Localization & Mapping: Oxford Robotics Demo
@Computerphile
167.7K views•2022-08-31

58:25
MathWorks Virtual RoboSub Simulation Environment | Webinar 2026
@RoboNationInc
209 views•2026-03-10

56:57
ROS Navigation Path Planning with move_base: A Practical Guide
@TheConstruct
50.1K views•2018-02-16

25:22
Micromouse: The Fastest Maze-Solving Robots on Earth
@veritasium
23.5M views•2023-05-24
Related Study Plans & Knowledge Roadmaps
Structured learning paths in Robotics
robotics
Building Delta Robots: Kinematics & Pico
01Foundations of Delta Robots & Mechanical Design
02Electronics and Microcontroller Setup with Pi Pico
03Delta Robot Kinematics and Coordinate Math
+ 3 more learning modules
65h6 modules
Explore Roadmap
robotics
Building Ballbots: Dynamics, Kalman & LQR
01Embedded Electronics & Omniwheel Actuation
02Ballbot Kinematics & Rigid Body Dynamics
03IMU Sensors & Kalman Filter State Estimation
+ 2 more learning modules
42h5 modules
Explore Roadmap
robotics
Micromouse: Hardware, PID Control & Flood-Fill
01Electronics & Teensy Microcontroller Basics
02Sensors and Actuators: Motors, Encoders & IR
03Precision Movement: Implementing PID Control
+ 2 more learning modules
35h5 modules
Explore Roadmap
robotics
CDPR: Kinematics, Arduino & Winch Control
01Foundations of Arduino & Basic Electronics
02Stepper Motors and Winch Mechanics
03Kinematics of 2D Cable-Driven Robots
+ 2 more learning modules
28h5 modules
Explore Roadmap