



















This tutorial demonstrates how to build an Arduino-powered hexapod robot with 6 legs, a head, tail, antennas, mandibles, and functional eyes, controlled via a custom smartphone app; the robot uses 21 servos (18 for legs, 2 for head movement, 1 for tail, and 1 micro servo for mandibles), an Arduino Mega microcontroller, a 3S LiPo battery with DC-DC buck converter, and a custom PCB for power distribution and Bluetooth communication, with movement controlled through a custom-built Android application using MIT App Inventor.
Arduino Hexapod Robot: Construction and Control
Added:Basic C/C++ programming for microcontrollers, specifically understanding variables, control loops, and using external libraries like the Arduino Servo library.
Fundamental DC electronics theory, including voltage, current, and the necessity of isolating high-draw motor power supplies from microcontroller logic power.
Concept of Pulse Width Modulation (PWM) and how it is utilized to control the angular position of servo motors.
Introductory schematic reading and the foundational workflow of electronic circuit design.
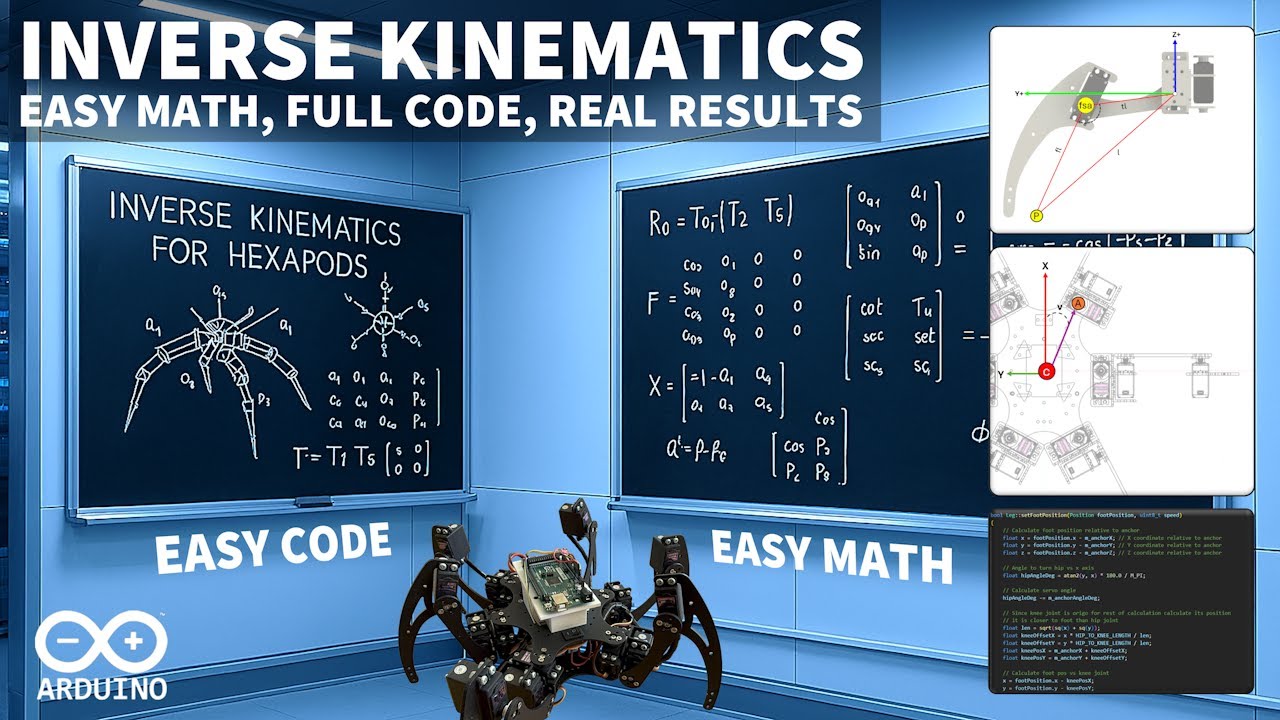
Mathematical implementation of Inverse Kinematics (IK) to coordinate 3DOF (Degrees of Freedom) limbs for smooth, organic walking gaits.
Integration of feedback sensors, such as Inertial Measurement Units (IMUs) for dynamic self-balancing and terrain adaptation.
Advanced high-current PCB design techniques, focusing on trace width calculation, thermal dissipation, and decoupling capacitors.
Connecting the Arduino controller to a companion computer (e.g., Raspberry Pi) using ROS (Robot Operating System) for higher-level autonomous navigation and SLAM.
221.1K views4.8Klikes20:42Original Release: 2018-12-11
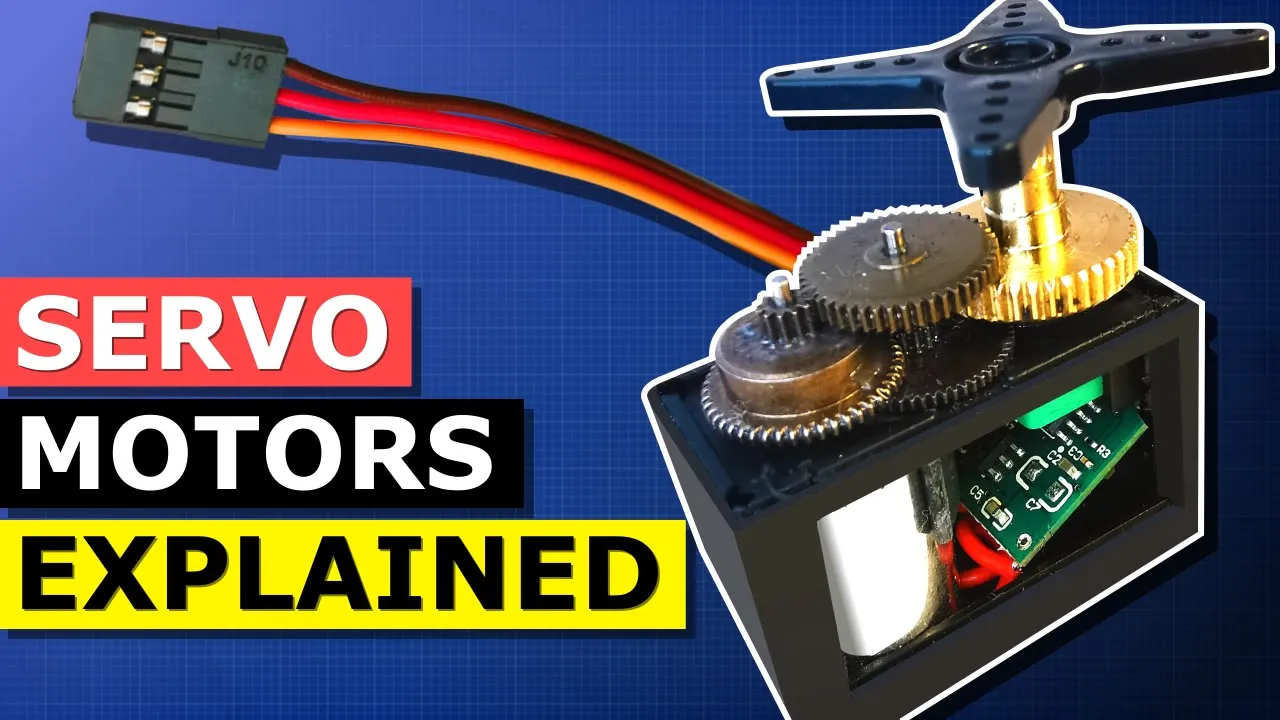
hello they're here from Halton mechatronics calm and in this video I will show you how I built an Arduino base hexapod as the name suggests the hexapod has six legs but in addition to that it also has a tail or abdomen a head antennas mandibles and even functional eyes all of this makes the hexapod look like an INT so therefore we can also call it an arduino and robot for controlling the robot i made a custom built injury application the app has four buttons through which we can command a robot to move forward or backwards as well as left and right along with this main functions the robot can also move its head and tail also it can bite grab and drop things and even attack as I mentioned earlier the robot has functional eyes or eye specifically designed the head to fit an ultrasonic sensor so if we try to touch the robot hit or get our hand closer to the sensor the robot will initially prepare for an attack if we move back the robot will dismiss the attack but in case we get our hand closer to it it will attack and bite us so how cool is that stick around and you'll find out exactly how I build it and how everything works as usual I started by designing the hexapod using a 3d modeling software the hexapod has six legs and each of them consists of three joints or service that means we need total of 18 servos and in my case I used the EMG 99 six-hour service on the backside we have the tail which is also driven by another mg 1996 our servo the head of this end robot has two degrees of freedom or it can roll until and again is driven by two more servos so we need total of 21 servos for this project type mg in 1996 R and additionally one smaller is gene ID micro servo for the mandible here we also have the eyes of the end which are designed to fit on HC SRO for ultrasonic sensor all of the parts are assembled between two plates and additionally I made an interesting curved cover for the top plate in order to hide all of the wiring the Arduino and the battery between the two plates you can find and download this 3d model as well as D STL files which are used for 3d printing on my website article the link is in the description of this video I guess you already know what's next and that's 3d printing the robot parts personally I find 3d printing time-lapses very satisfying to watch so here are few so you can enjoy too I used the Cree a Leticia 10 3d printer for all of the prints and it did a great job there is also a link to this 3d printer in the description in case you want to check it out the most difficult part to print was the heat because I want it to be a single print for that purpose I had to use a support overhang jingle of 60 degrees as well as some support blockers anyway that reality CR 10 did a great job and the head turned out perfectly so once we have all of the parts printed we can move on with assembling the hexapod I started with assembling the legs for securing the service to the printed parts I used aim tree bolts and nuts as well as spring washers the lengths of the bolts needs to be at least 12 millimeters and in my case that I used 16 millimeters long bolts we need around 200 bolts for the whole assembly for connecting the links to each other we can use the round horns which come along with the server package as accessories however we need to drill three millimeters holes on each of them so that the bolts can pass through or we can use metal round holes which already have in 3d threads and they can be bought separately when securing the links to the servos we need to make sure that we always connect them at the same position and that they have the full range of motion we should notice here that the servos have a small triangular support on the topside which needs to be removed I used a simple utility knife to do that so in that way the service can be placed flash with the printed parts before inserting the third serving place we first need to insert a m4 bolt which will be used for connecting the leg with the base plate so here's how the leg assembly should look like it is actually very easy to assemble it but now we need five more of them [Music] once we have all of the legs ready we can move on with installing them to the body of the robot order two plates first we need to secure the round horse onto the top plate using the same method as previously with aim three bolts and nuts then we can simply connect them to the service chaffed using the bolts but before we do that we need to adjust the position of the servos to be exactly in the middle this is the dead so that we can get the full range of motion of the servos and we will also reduce the adjustment or the calibration process when programming the Arduino after securing the legs this project already started to taking shape and look like a hexapod there is one more horn at the backside and that's for the tail servo which also needs to be secured at this point next we need to place the hexapod upside down and so we will be able to insert the bottom plate to the aim four bolts of the legs then we can secure the legs to it using some plain washers and self-locking nuts we should be careful how much we tighten these bolts because these are actually the pivot joints and the legs should be able to rotate while being secure enough next we need to install the first server for the head and that's for the roll movement this servo should be placed perpendicular to the base plate so for that purpose I made two small plates which are first secured to the server then we can insert the servo between the two plates and now we can easily secure it with the same three bolts and nuts next we have a u-shaped bracket and here we need to attach two round holes for connecting the two servers for the head again before securing the bracket to the roll servo we need to make sure that the position of the servo is in the middle so it can rotate schneider degrees in both directions next is the tilt server bracket so here first we need to insert m4 bolt and secure it to the u-shaped bracket before mounting the tilt motor we also need to insert four or m3 bolts which will be later used for securing the head then we can insert the tilt servo to their bracket and carefully fit the shaft to the round horn it's a bit tight here but the u-shaped bracket can helpfully flex a little bit lastly we need to secure the servo with the m3 bolts and with that the head mechanism is completed now it can both roll and tilt next before attaching the head to the mechanism first we need to reassemble it or attach the mandibles together with the smallest Jannetty servo and the ultrasonic sensor again it's a bit tight here but I still managed to insert the first mandible and secure it to the head using a m4 bolt you can notice that there is a small hole at the eyes area which is specifically designed so we can pass through a screwdriver to tighten the bolt next goes the microserver in place and it is secured using two screws on the second mandible first we need to attach a small arm horn for the is gene ID server then we can insert the mandible in place pair the tube gears and see if you read to the motor shaft using a screwdriver next we can put the ultrasonic sensor in place the ice holes are made exactly to fit an ultrasonic sensor so I simply used a few drops of AC glue to secure the sensor to the head there is one more detailed to be added to the head and that's the antennas for that purpose I use three millimeter thick wire which I cut it to around 13 centimeters in hand and I slightly bend it to get the desired shape again I use few drops of AC glue to secure them to the head finally we can attach the head to the roll until mechanism with the four bolts be previously inserted the head is now fully functional and it can roll it can tilt and it can even bite there are two more 3d printed parts to be installed that's the tail which can simply slide into the tail bracket and the curved cover which we will actually use at the end to cover up the electronics so this is the final appearance of our end robot and I really like how it in this blue and white color combination okay now we can move on with the electronics here's the circuit diagram of this project which is actually simple although it looks a bit complex because of the mini server connections besides the 22 service we need an H Co 5 Bluetooth module for the smartphone communication and some capacitors and resistors of course the brain of the robot is an Arduino board and in this case that's the Arduino mega because it's the only board that can control more than 12 servos using the server library for powering the robot I will use a 3s lipo battery which has a voltage of around 12 volts lipo by risking Hindle higher amount of control so they are suitable for this project because if all servos are engaged at the same time at full load they can draw around 10 amps of current however the service operating voltage is limited from four point eight to seven point two volts which means that we need to use DC to DC buck converter to convert the 12 volts to five volts even in case we use 2s lipo battery which has a voltage around seven point four or eight point four volts when fully loaded we still need to use a buck converter the butt inverter that I will use for this project can handle up to eight amps of current but I would recommend to use one from ten to fifteen amps just to be sure that you will have enough power and it won't overheat in my case the maximum current draw that I notice when the robot was moving was around six amps now if we try to connect everything together it will be quite a mess because of the mini server connections therefore I designed a custom PCB using the ECD a free online circuit design software this PCB will actually act as an Arduino mega shield for the hexapod because we will be able to directly connect it on top of the Arduino mega board I arranged the server connections close to each other and included two big capacitors next to them to keep the voltage more stable also I included a connection for our inner f24 lo1 transceiver module in case we want to control the robot using a radio control there are several digital and analog pin connections five volts and ground connections to LED connections as well as the connection for monitoring the battery voltage the 12 volts battery voltage will pass through a voltage divider made up of two resistors r1 and r2 which will reduce the voltage below five volts so that the analog pin can safely read it in this way we will know when the battery will need to be recharged so once I finish the design I generated the Gerber file needed for manufacturing the PCB then I ordered the PCB from jlc PCB which are actually the sponsor of this video here we can simply drag and drop the Gerber file and once uploaded we can review our PCB in the Gerber viewer if everything is alright then we can go on and select the properties that we want for our piece of it in this case I chose the PCB color to be blue in order to match with the Arduino board color and that's it now we can simply order our PCB at a reasonable price note that if it's your first order from jlc PCB you can get up to 10 PCBs for only $2 nevertheless after several days the PCBs have arrived the quality of the PCB is great and everything is exactly the same as in the design okay so now we can move on and assemble the PCB I started by soldiering male pin headers to the PCB which will be used for connecting it to the Arduino board once we place the pin headers on the bottom side we can use some kind of plate to hold the pins and flip the board now we need to solder all of them to the PCB once finished with that we can move on with the server connections for which we also need male pin headers at this point we can actually insert the pin headers for all connections and use the same method to flip the PCB and solder all of the pins to it at the end we need to solder the resistors the capacitors and terminal blocks and that's it d Arduino mega shield for the intro what is now ready now we can simply insert it onto the Arduino board next we need to set the back converter output voltage to 5 volts we can do that by adjusting the potentiometer you can notice here that I added a power switch to the input and connected the battery 12 volts to the 12 volts pin on the PCB which will be used for monitoring the battery voltage however remember that the main input to the PCB must be 5 volts so now we can insert the electronics components between the 2 plates again it's a bit tight here but still we can fit everything in first goes the battery which I secured using a tape and on top of it goes the Arduino together with the PCB we made next we can connect the inner f24 lo1 transceiver or just the bluetooth module depending on what type of communication we will use I also inserted a LED for indicating when the battery needs to recharge lastly we need to connect all servos to the servo pins while doing this make sure you write down to what pin number you connected to each servo after we connect all servos we can simply put the curved cover on the top plate and we are actually done with this project what's left to do in this video is to take a look how the Arduino program works so for controlling the servos we will use the basic server library and for the booted communication we need to include the software serial library as well first we need to define all servo objects as well as some variables needed for the program below in the setup section we need to initialize the Bluetooth communication the pin mode for the ultrasonic sensor the LED and also define the pins to which the servos are connected then using the write function we move the servos to their initial position here is actually where we can calibrate our service consider that you won't be able to set each server at the exact position when assembling the robot but here we can do adjustments and find out our initial values and from there we can program the robot movements so let's take a look how I made the hex I made a separate custom functions for removing each leg Alec move cycle includes two phases called swing and stands in the swing phase the leg moved from an initial position to a final position through air while in the stands phase the leg move from the final position back to the initial position with the leg end effector touching the ground in this way the body of the hexapod will move forward or opposite of the direction of the stands face so I manually program the position of each servo to achieve these movements using the main loop and some counters so first the two outer servos rise the leg and the third server connected to the body starts to rotate in a particular direction when the third servo is ten steps before it stops rotating we start to move the two servos back at the same position to touch the ground this completes the swing face or the leg move from its initial to the final position then we rotate back the third servo from the final to the initial position and that completes the stance phase after the leg executes one cycle the counters are reset and the leg will repeat the cycle over and over again each iteration or step is executed in the main loop section where there is also a delay time which controls the speed of the servo I made functions like this for all other legs as well as some additional functions for moving the legs in the opposite direction for achieving reverse left and right movements in similar way using counters for keeping track of the steps I programmed the rest of the functions like moving the head moving the tail the mandibles and so on so for example if we want to move the robot forward we need to call the six move leg custom functions which will constantly repeat in the main loop you can notice that the three legs are offset so when the leg number one 3 and 5 are in swing phase the other trial X 2 4 and 6 our instance phase in case we want to move left we call the appropriate move left set of functions these commands are actually coming from the Bluetooth module or the custom-built injuried application from our smartphone let's take a look at the app and see what kind of data it is actually sending to the arena I made the app using the MIT App Inventor online application and here's how it works so the graphics of the app are actually images that I made and paces buttons at the bottom we have a slider for controlling the speed of the robot and at the top we have the buttons for connecting to the Bluetooth module let's take a look at the program or the blogs behind the app so for example if we click the forward button the blocks in the if statements will be executed that means we will send the number 2 to the Arduino and that will execute the move forward set of functions at the same time we can notice that we change the image of the button to the other highlighted version of the same image if we press again the same button now the blocks in the else statement will be executed that will send the number 0 to the Arduino which will reset all counters and move the robot to its initial position also we set back the initial image of the button so I used the same principle for all other buttons let's take a look at two more functions that the Arduino program and that's the battery voltage monitor and the ultrasonic sensor so with the battery voltage is lower than 11 volts we will turn on the LED and if you ultrasonic sensor that takes an object closer than 40 centimeters the robot will prepare for an attack in case there are no longer objects in front of it it will dismiss the attack and if the object is still present and closer to the head the robot will attack so that's pretty much everything for this video I know this was a bit longer video but I simply couldn't explain everything in a shorter period of time note that if you decide to build this project you need to be prepared to face some difficulties the biggest problem for me was the poor performance of the servos that I used so that's it don't forget to subscribe and for more tutorials and projects visit how to mechatronics calm
Up Next
5:01
Team RUDRA System Acceptance Review | University Rover Challenge
@RUDRASRMMARSROVER
7.5K views•2020-02-27

12:54
Triumph of Orthodoxy Icon: Byzantine Art & History Explained
@BenCallan
2.1K views•2024-08-06
29:57
Controlling Stepper Motors with Arduino: A Guide
@HowToMechatronics
1.6M views•2022-05-15

1:42
Game of Thrones Opening Credits: A Cinematic Analysis
@gameofthrones
46.3M views•2011-04-18
Related Study Plans & Knowledge Roadmaps
Structured learning paths in General & Interdisciplinary Studies
general-studies
Elevator Engineering: History, Physics & Cities
01From Hoists to Safety Brakes: The Dawn of Vertical Lift
02Hydraulic vs. Traction: The Engineering Physics of Elevators
03Modern Speed, Safety, and Algorithms
+ 2 more learning modules
12h5 modules
Explore Roadmap
general-studies
Rubber: Material Science, History & Geopolitics
01Origins of Natural Rubber & Mesoamerican History
02The Chemistry of Natural Rubber & Vulcanization
03The Geopolitics of the Rubber Boom & Colonization
+ 2 more learning modules
12h5 modules
Explore Roadmap
general-studies
Containerization: Evolution, Logistics & Trade
01Ancient Trade & Bulk Cargo: Amphorae to Barrels
02The Industrial Revolution & Cardboard Packaging
03The Containerization Revolution: Malcom McLean
+ 2 more learning modules
12h5 modules
Explore Roadmap
general-studies
Textile Tech: Evolution, Labor & Global Impact
01Pre-Industrial Textiles: Handloom & Cottage Industry
02Mechanization: The Spinning Jenny to the Power Loom
03The Factory System & Global Labor Transformation
+ 2 more learning modules
10h5 modules
Explore Roadmap