

![Обзорный курс по FastAPI за 1 час. Создаем биржу труда. [ЧАСТЬ 1]](https://i.ytimg.com/vi/PVebRy0_K0s/maxresdefault.jpg)



















![[ML News] Geoff Hinton leaves Google | Google has NO MOAT | OpenAI down half a billion](https://i.ytimg.com/vi/cjs7QKJNVYM/maxresdefault.jpg)
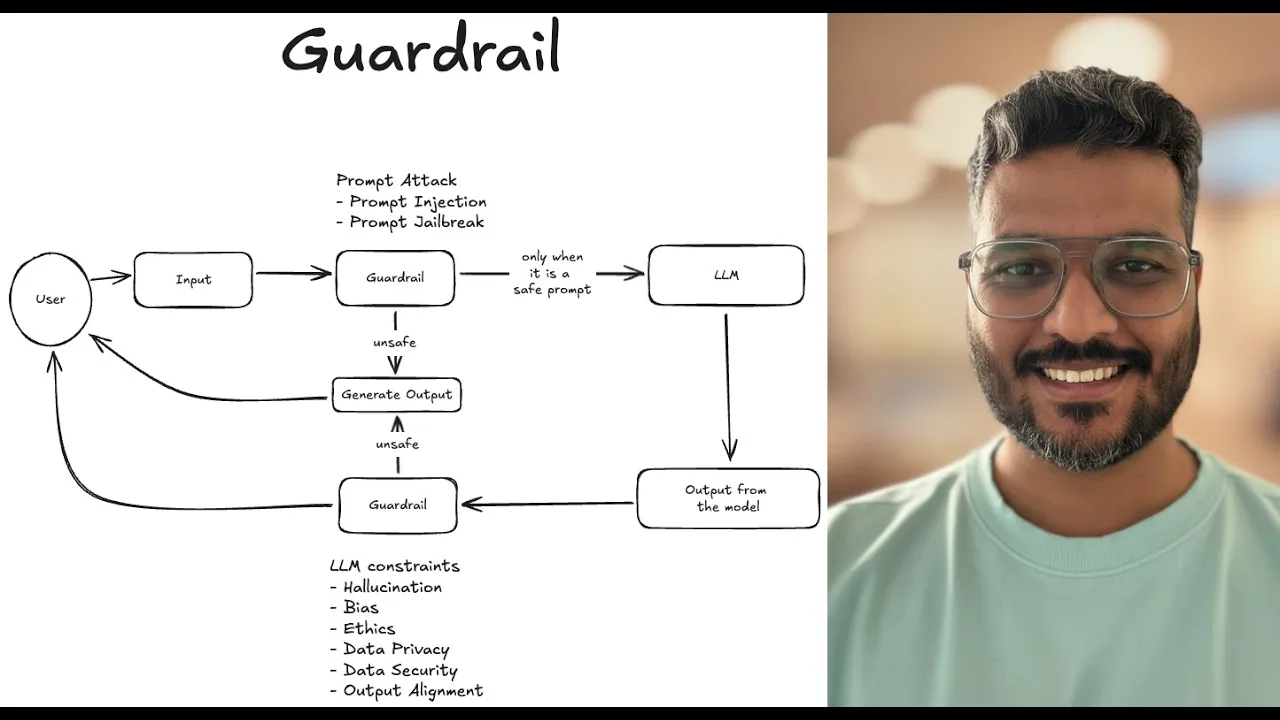





This video teaches how to build a secure Python API using FastAPI and Ollama to control access to a local large language model (LLM), demonstrating the importance of separating front-end from backend logic to prevent security risks and unauthorized API key usage, while implementing authentication through custom API keys with credit-based rate limiting.
Python API Tutorial: FastAPI, Ollama, LLM Security & Deployment
Added:Proficiency in Python programming, particularly modern features like type hinting and asynchronous programming (async/await) which are core to FastAPI.
Fundamental understanding of RESTful API design principles, HTTP methods (GET, POST), and client-server communication.
Basic knowledge of Large Language Model (LLM) concepts, such as prompts, tokens, and local model execution.
Familiarity with web security essentials, including environment variables, API keys, and basic token-based authentication concepts.
Deploying the FastAPI application using containerization tools like Docker and orchestrators like Kubernetes for production-ready scaling.
Implementing Retrieval-Augmented Generation (RAG) by connecting the secured API to a vector database (e.g., ChromaDB, Pinecone) for querying custom datasets.
Integrating LLM security guardrails (e.g., NeMo Guardrails or Llama Guard) to detect and prevent prompt injection attacks and toxic outputs.
Setting up comprehensive API monitoring and LLM observability using tools like Prometheus, Grafana, or LangSmith to track latency, token usage, and system health.
125.8K views3.4Klikes21:16Original Release: 2025-02-21
AI models are powerful tools but in order to use them properly and securely you need to control them using an API so in today's video I'm going to show you how to write a very simple python API to control access to an llm or an AI model now first I want to explain why you actually need to do this you understand the security and the importance of setting this up now let's say that you want to use an llm something like chat GPT or something like deep seek right if that's the case what you're probably going to do is you're either going to attempt to run this locally or you're going to use the cloud provider so you're going to go to deepseeker open aai you're going to generate an API key and then you're going to take that API key and that's what you send anytime you want to make a request or use the llm now this is great and it works well if you're doing this locally but in a production environment if you were to take this API key and you were to use it directly from your own front end so something like a website or a mobile application you'd be introducing a huge security risk the reason why that's the case is because if you use one of these keys from your front end then anyone who has access to your front end code will be able to see and use that key so they could really take advantage of that and they could send all kinds of requests and cost you a ton of money because anytime you send a request to something like a cloud provider will it cost you money and even if you're running this locally on your own computer it costs you compute time or resources so the main idea here is that you only want to invoke an llm especially if it's it's coming from a provider like open aai from something that's secure something that you control which would be a backend server or an API the basic flow would be if someone has access to your front-end application they would then send a request to your own backend from your backend you could then control whether or not you wanted to send a request to the llm so you can control roughly how much it will cost and which of your users are allowed to use the llm this is common practice from all of the AI applications that you've used before and you'll typically notice that you get something like credits so maybe you have 10 credits where you're able to call an llm 10 times and then after that you would need to pay money to the service provider to compensate them for how much the llm is costing hopefully that makes a little bit of sense but the basic idea here is that we need to be able to control the calls to our llm so that we can decide which users can call it or not call it and make sure that it doesn't cost us too much money so with that in mind let's get into it and start building this out so like I mentioned you can control access to any llm that you want and you can use something like open AI or deep seek but in my case I'm just going to run an llm locally on my own computer using something called AMA this is completely free it's open source and it lets you run models on your own machine assuming you have good enough Hardware I have an entire video on how to set this up so I'll leave it on screen but I'll give you the cliff notes Here what you need to do is simply download ama if you want to set this up on your own computer so once you've downloaded and installed this you can open up a ter teral or a command prompt and inside of here you can just type AMA to make sure this is working if for some reason the command isn't recognized you can try running olama by just typing the name of the application if you're on something like Windows and double clicking it to run now once olama is working you can pull an olama model that you want to run locally now to do that you type a llama pull and then you put the name of the model in this case I'll use a model like mistro but you can use models like llama 3 and any open source model really you want you can pull it and run it locally assuming you have sufficient hardware and all of the hardware requirements are specified on the olama website where it lists all of the different open- Source models so I'm going to pull the mistal model I already have this downloaded so now it's on my machine and then if I wanted to use this model I could type llama run and then mistl and then I can just start chatting with the model like I would in any other case now to leave I can type slash bu and that's great and now we'll be able to use AMA from our python code again I have an entire video in case you're confused or more help that I'll leave on screen okay so now that we've done that what we're going to do is start setting up a basic API to use our llm model now again you can use any llm that you want here the important thing is that we just set up the API and we secure it properly so for this video the IDE that I'm going to be using is pycharm now this is one of the best idees when it comes to working with python especially for things like apis and dealing with Frameworks like Fast API Jango or flask which we'll be using in this video now I have a long-term partnership with py and if you guys want to get access to the professional Edition with an extended free trial of up to 3 months you can do that by clicking the link in the description py charm has two versions The Community Edition which is completely free and the professional Edition which you do need to pay for but again because you're a viewer of this channel I can give it to you 3 months for free so you can try it out and see if you like it it has all kinds of great features and we can actually test our API directly from the IDE which makes our life a lot easier and you'll see that in this video again links in the description so first things first we're just going to set up the dependencies for our python project to build this API so I'm going to make a new file I just opened a folder here in this IDE so I went up here and I just opened a folder I called it API for llm and then from here I'm going to go new file and then I'm going to call this requirements.txt okay from this requirements.txt file I'm just going to specify the dependencies that I'll need for my python project and obviously you need python installed in order to follow along with the rest of these steps so I'm going to install fast API UV corn olama Python d.v and then requests okay now fast API is what we'll use for building our API it'll be very simple don't worry uicorn is for running our fast API application olama is for interfacing with olama to use a local llm and then python. EnV is for loading in an environment variable file and request is for Center request when we later test our API now we've specified these in our requirements.txt so the next step is to Simply install them so what we're going to do is just open up a new terminal instance I just have one here and make sure it's in the same folder where your requirements.txt file is if you're opening the terminal from an IDE or an editor then it should just already be in the correct directory from here assuming we have python installed we're going to type pip install - R and then requirements.txt now this is just going to install all of the dependencies into our main python installation if you want you can use a virtual environment but I'm not going to cover that in the name of time if that command doesn't work you can try pip 3 install - R requirements.txt and what this does is install all of the dependencies from the requirements file now that we have all of that installed we can start writing some simple code and get an API up and running so what I'm going to do is make a new file and it's going to be a python file and I'm just going to call this main.py you can call it anything you want but I recommend naming it main just to stick with the um kind of conventions I'm using in this tutorial it'll be a little bit easier to follow along with okay so from here we're going to make a very simple API and to do that we're going to say from Fast API import and then fast API and then we're going to import o Lama okay then we're going to make an app so we're going to say app is equal to fast API and we're going to Define an endpoint an endpoint is just a URL on this server that we can access so for now we're going to say ATA dopost and we're going to do slash generate now you can call this anything that you want but what this specifies is that you need to send a post request which is a type of HTTP request to this URL and then the function that we write which will be called generate will run whenever we go to this/ generate rout now inside of here we're going to take a prompt which is a string and what this specifies is that you need to pass a query parameter which looks like this prompt is equal to and then whatever the prompt is whenever you want to call this rout so we know what the prompt to the llm should be from here we can generate a simple response by saying response is equal to ol. chat from the chat we're going to say the model is equal to whatever model we pulled and we want to use in this case it's mistal then we're going to say messages is equal to we're going to specify a list and we're going to put a python dictionary in the python dictionary we need to specify the role as user and then the content as The Prompt okay so you can pass multiple messages here but if you just want to pass one then you just do it like this and obviously you can modify the call to the llm but I'm just keeping it basic for right now after here we're going to return the response and the way we'll do this is we'll return a python dictionary that has response and then the response and this is going to be the message and the content just so that we strip out the information that we actually want so that's literally it we're saying okay we want to chat with AMA this works because we've downloaded on our machine we specify the model we want to use the messages that we want to pass you could also pass a system message if you wanted to customize the prompt or something and then you can have a response we say response message content okay now we need to run the API so to run the API we can open up our terminal and make sure again you're in the same directory where your python script is and you can type uicorn and then main colon app-- reload now what these variables are right here main is the name of my file so main.py and then app is the name of my fast API application so app so if you've changed either of those you need to adjust these right here and the D- reload will run this in development mode so it will reload the server anytime any changes are made so if I hit enter here you can see that now the API is running it tells us what port it's running on so Port 8000 on Local Host and now we need to test it now there's various ways to test the API but if you're working inside of py charm then you can open up this endpoints tab you can find it by clicking on these three dots and look for it here or you can see kind of a circle inside of a half circle from here you're going to specify the main. apppp package okay you're going to press the slash generate so it can automatically actually read um the endpoint and then what you can do is see the kind of sample request right here so you can see it says post local hostport 8000 SL generate and then you'll need to add this query parameter question mark prompt equal to and then whatever you want to prompt the llm with once you do that you can hit submit request you can wait for this to run it will take a second and then you can see the response right here so let me just make this a little bit bigger so that you guys can read this and you can see that we get the response from the llm it says hello world it's a classic example blah blah blah blah blah and you can use it as you see fit now other than that the easiest way to test this if you're not using something like py charm is to download a tool called postmen so I'm just going to open it up right here this is a free tool that you can download on your computer whether it's window Mac Linux ever that allows you to test your apis really easily so if you don't have familiarity testing them simply download and install this tool and then open it up and I'll show you how to use it so assuming our API is still running in our terminal we can open up the postman application from here we can press this little plus button you might need to make an account or it might ask you for some stuff you don't need to but just get into this workspace press on plus and then what you're going to do is change get here to say post because we're sending a post request from here you're going to type in the URL so HTTP colon colon SL localhost SL generate okay and we need to make sure this is Port 8000 so sorry Local Host Port 8000 SL generate question mark prompt is equal to whatever you want to prompt so something like hello world and then what we can do is we can press on send Postman will automatically send the request for us again you just need to make sure you have a URL that looks like this when we do this you can then see that we get the response back from the llm okay so now we've written a basic llm but we want to make this secure we want to add some kind of authorization or at least some logic so that not anyone can just use this so what I'm going to do now is adjust this code so that only someone that has access to our function or to our API will be able to use the llm because after all that's the entire point of this we don't want to let just a random person use the llm we want to maybe control their access okay so now let's add our own version of an API key now this is a key that someone will need to send to our backend server if they want to utilize the API now what we can do with this key is we can just give it to certain users or we can generate it however we want in any way that we see fit and we can have some kind of value attached to this key to limit the number of requests that someone could send so for example any API key that I give to someone maybe it only has a limit of 10 so after you've used the key 10 times maybe you need to pay more money or you need to wait a day or something something like that before you could use the key again I'm going to set up some basic logic but it will give you a sense of how to do this so what I'm going to do is I'm going to import a few things so from Fast API I'm going to import depends HTTP exception and header okay I'm then going to import OS and I'm going to say from.
EnV import load. EnV now I'm going to call the load. EnV function and what this is going to do is load a value from our environment variable iable file which I'm going to create right now so inside of our directory we're going to make a new file and we're going to call this EnV okay inside of here we're going to say API key is equal to and then we can set this to some secret key that we would only give people that we want to have access to our API in order to use the llm now you could have as many API Keys as you want and typically you would generate these for users so when people have an account they would sign in and then you could issue them an API key and they need to use that API key to access the API that's a more advanced topic and I'll leave a video on screen that shows exactly how to do that but you'll get the idea with what I show you right here so in this EnV file we've specified a variable called secret key now what we're going to do is we're going to load in that value so we're going to say API Keys is equal to a list or sorry is equal to a set and inside of here we're going to say os. getv and then the API key now this works because we've l loaded in the environment variable file and now we can get that environment variable and we put that in our list of valid API keys and if we wanted to we could associate this with a value like 10 and then we could subtract from this value anytime someone uses the API and treat this as like their credits so I can say you know this key has five credits remaining so we could change this to API key credits or something and you know what let's go ahead and do that okay now that we've done that we're going to write a simple function that will verify that a user has an API key before we allow them to continue so I'm going to say Define verify uncore aior key and we're going to specify xcore aior key we're going to say this is a string and this is equal to header and then none okay now what this is going to do is it's going to look in the headers of our request which I'll show you in one second for a variable called X API key if finds it it's going to associate it with this parameter right here and then allow us to read it in and use it inside of this um what do you call it function so what we're actually going to do here is we're going to say credits is equal to API key credits. getet xapi key now we're going to specify the default value is zero and what this means is that we're going to attempt to get whatever the number of credits are associated with our API key but if that API key doesn't exist then we're just going to get zero then we're simply going to check if the credits are equal to zero so we're going to say if the credits are less than or equal to zero then what we're going to do is we're going to return or sorry we're going to raise an HTTP exception and we're going to say status 401 and then we're going to say invalid API key or no credits okay just telling them hey you don't have any credits left or your API key is expired or actually from here we can just return the X API key so if they do have a valid key we can return it so we can use it later on and then inside of here we're going to we're going to make sure that they have an API key and that it's valid before we allow them to use this function so to do that inside of the parameters we're going to add X _ API key we're going to say this is type string and this is equal to depends on verify API key now just let me use this variable and then it will light up so you can read it easier but what this means is that we're depending on this function call and then if this function call raises an error we just won't do anything inside of here whereas if it Returns the API key then we're good to go and we'll enter this function so inside of here the first thing we're going to do is just subtract our credits so we're going to say API key credits at X API key and then we're just going to say minus equals 1 so we're just going to subtract one from that to specify hey we're removing one of your credits because now you've successfully used this function and that's it that's literally all that we need and now we've added kind of control to this API where you can only use this if you pass us an API key now again we've just hardcoded an API key here from our environment variable file F but you could dynamically generate these however you wanted to and you can handle them for various users so I'm showing you the logic but obviously you would need to go a step further with this to have correct authentication and authorization for a larger Scale app so now that we've done this we want to test the authorized API so we should be able to rerun this so here it looks like it was rerunning but I'm just going to shut it down and restart it to make sure it loads in the environment variable so same thing uvicorn main app reload so now to test the API again there's multiple ways to do that but I'm just going to use Postman so that it's universally available for all of you and I'm going to keep the same request that I had last time except this time I'm going to go into headers now inside of headers here I'm just going to add the header for my API key so I'm going to add the header of xcore API uncore key like that I believe that's what we called it and then for the value I'm going to say secret key okay all right so a silly mistake here but actually we want to use uh High when we specify this in the header not underscores so just x- api-key and then put the value secret key you don't need any quotes and now when we send this you should see that it works it just takes a second and then we get the response back and if we try to do this now five times let's just keep doing it so that our credits go lower and lower you should see eventually when we get to the fifth request that it doesn't work and it tells us that we run out of tokens and you can see that's what we get it says invalid API key or no credits so there you go we've now built an authenticated API that allows us to utilize our llm with this API key now again you want to manage these Keys correctly there's a lot of other logic and things you can do and I will leave a video on screen that will help you do that now beyond that I'm quickly just going to show you a python script that you can use if you wanted to test the API from python code so I'm just going to make a script called test API now what I'm going to do is just copy in some code so here is the code you can see that I import requests I import the code to load my environment variable file I specify the URL that I want to send my request to and the prompt that I want to pass to the llm I then specify my headers so I have my API key which is equal to what I'm loading from the environment variable file content type application Json send a post request with my URL and my headers and then I print out the response. Json now I just restarted my server I took a quick cut so when I restarted the server it will reset the amount of credits that I have and now if I run this file just takes a second and we should see that we get our response and we do you can see that I get the response back from the llm okay so that's pretty much all I wanted to show you in this video I know there was a lot but I wanted to explain how you set up a simple API with this API token which you can then use to control access to the llm the llm call here can be anything that you want but it's important that you do gate it and you do control it from a backend server so that front-end users can't directly access your tokens now you may be asking well what about this token right here the whole point of this token is that you control this token rather than open AI or deep seek or something like that so now if you want to invalidate the token if you want to have a certain number of credits if you only want to give it to premium users or paid users you can do that right you can control how you want to issue this token but if you just use an openai token now anyone that has access to that can go and utilize open aai and cost you a ton of money so that's why you want to set up this own kind of custom back end where you have full control as the developer and the app owner I will leave this code in the description in case you want to check it out it'll be available from GitHub if you enjoyed the video make sure to leave a like subscribe to the channel and I will see you in the next one [Music]
Up Next
6:42
Deploying Ollama on Kubernetes: A Step-by-Step AI Model Serving Guide
@CloudtechsClub
1.2K views•2025-11-23

12:54
Triumph of Orthodoxy Icon: Byzantine Art & History Explained
@BenCallan
2.1K views•2024-08-06

30:36
Python Pandas Tutorial: Data Analysis Fundamentals in 30 Minutes
@TechWithTim
155.1K views•2025-08-06

1:42
Game of Thrones Opening Credits: A Cinematic Analysis
@gameofthrones
46.3M views•2011-04-18
Related Study Plans & Knowledge Roadmaps
Structured learning paths in General & Interdisciplinary Studies
general-studies
Elevator Engineering: History, Physics & Cities
01From Hoists to Safety Brakes: The Dawn of Vertical Lift
02Hydraulic vs. Traction: The Engineering Physics of Elevators
03Modern Speed, Safety, and Algorithms
+ 2 more learning modules
12h5 modules
Explore Roadmap
general-studies
Rubber: Material Science, History & Geopolitics
01Origins of Natural Rubber & Mesoamerican History
02The Chemistry of Natural Rubber & Vulcanization
03The Geopolitics of the Rubber Boom & Colonization
+ 2 more learning modules
12h5 modules
Explore Roadmap
general-studies
Containerization: Evolution, Logistics & Trade
01Ancient Trade & Bulk Cargo: Amphorae to Barrels
02The Industrial Revolution & Cardboard Packaging
03The Containerization Revolution: Malcom McLean
+ 2 more learning modules
12h5 modules
Explore Roadmap
general-studies
Textile Tech: Evolution, Labor & Global Impact
01Pre-Industrial Textiles: Handloom & Cottage Industry
02Mechanization: The Spinning Jenny to the Power Loom
03The Factory System & Global Labor Transformation
+ 2 more learning modules
10h5 modules
Explore Roadmap