

















This video provides a comprehensive introduction to Linux terminal fundamentals for absolute beginners, covering essential commands for navigation (pwd, ls, cd), file manipulation (touch, cat, mkdir, mv, cp, rm), process management (top, htop, ps, kill), mounting devices (mount, umount, lsblk), and environment variables (export, echo), along with shortcuts (Ctrl+C, Ctrl+Z, Ctrl+Shift+C/V) and tools like sudo, tldr, and package managers.
Linux Terminal Crash Course: Essential Skills for Beginners
Added:Basic understanding of what an Operating System is and the concept of a Command Line Interface (CLI) versus a Graphical User Interface (GUI).
Familiarity with the concept of a hierarchical file system, including files, directories, and absolute versus relative paths.
Knowledge of how to access a terminal environment on your current system (such as Terminal on macOS, terminal emulators on Linux, or WSL/Git Bash on Windows).
Introduction to Shell Scripting (Bash) to automate repetitive command-line tasks and write basic executable scripts.
Advanced text processing and searching utilities in the terminal, such as grep, sed, awk, and regular expressions (regex).
Linux Package Management and system administration, including installing software packages and managing system services using systemd.
Basic network configuration and secure remote server administration using SSH (Secure Shell).
4.9K views302likes52:07Original Release: 2025-12-22
This video today is going to be a crash course on using the Linux terminal.
Primarily useful for those of you who know nothing about it, but also for those of you who know a little bit about it or know a lot about it, but want to brush up on their basic fundamental knowledge. So, the idea is we're going to cover the fundamentals of using the Linux terminal. We're not going to go deep into one niche like networking commands or text processing commands. My goal is to just get you started and then you can explore uh specific niches in more detail or I can also make a more detailed video. Today I want to focus on stuff like navigation, mounting, uh looking at processes, the basic stuff that you're going to need all the time and not on specific commands. Of course, there are countless commands that I would like to cover here, but I want to keep it short and this crash course is going to be focusing on the fundamentals. If you like this video, let me know by hitting a like button and subscribing, but now let's get right into it. It's not a game, it's a game.
[music] >> All right, so I want to get started right away with a crash course. And the only prerequisite for this video today is that you have some sort of Linux installation somewhere. I'm not going to cover the Linux installation process.
You either have Linux on your desktop PC, on a laptop, in a virtual box, on WSL, on Windows. You connect to a server via SSH. You use some emulator in the browser. I don't really care. But I recommend you have some terminal that you can use to follow along with this tutorial because you will learn the commands and you will learn to use the terminal by actually doing it, not just by listening to me and watching me type commands. So don't try to memorize the commands. Play around with the commands over time. You will use them over and over again and they will become normal to you. It will be a very natural thing to just use the terminal. So you need to have some Linux system. And how you find a terminal there? Usually you have some start menu, some launchers, some search bar. You just type terminal and then you have some application that is the terminal. To be precise, you have two things that are not super important for a beginner, but you have on the one hand the application itself. In my case here, elacrity. This is the terminal emulator.
And then you also have the shell itself.
So the shell is the actual CLI that you're working with. So when I type a command like ls here, that is actually a command that is executed by zshell in my case. The default shell on most systems is bash. Both are uh going to be okay for this video today. So, doesn't matter if you have bash or zshell. You can just follow along with this tutorial here.
But the basic idea is you have a shell and this shell is usually displayed to you or you're accessing this shell via something called a terminal emulator which is this application in my case as I said elacrity. But we're not going to focus too much on that. My focus is going to be on working with the commands for this. Let me enter the full screen here. Let me clear the screen and let's start with the most basic thing ever. So I open the terminal. What's the first thing I want to know if I don't know anything about the terminal? Where am I?
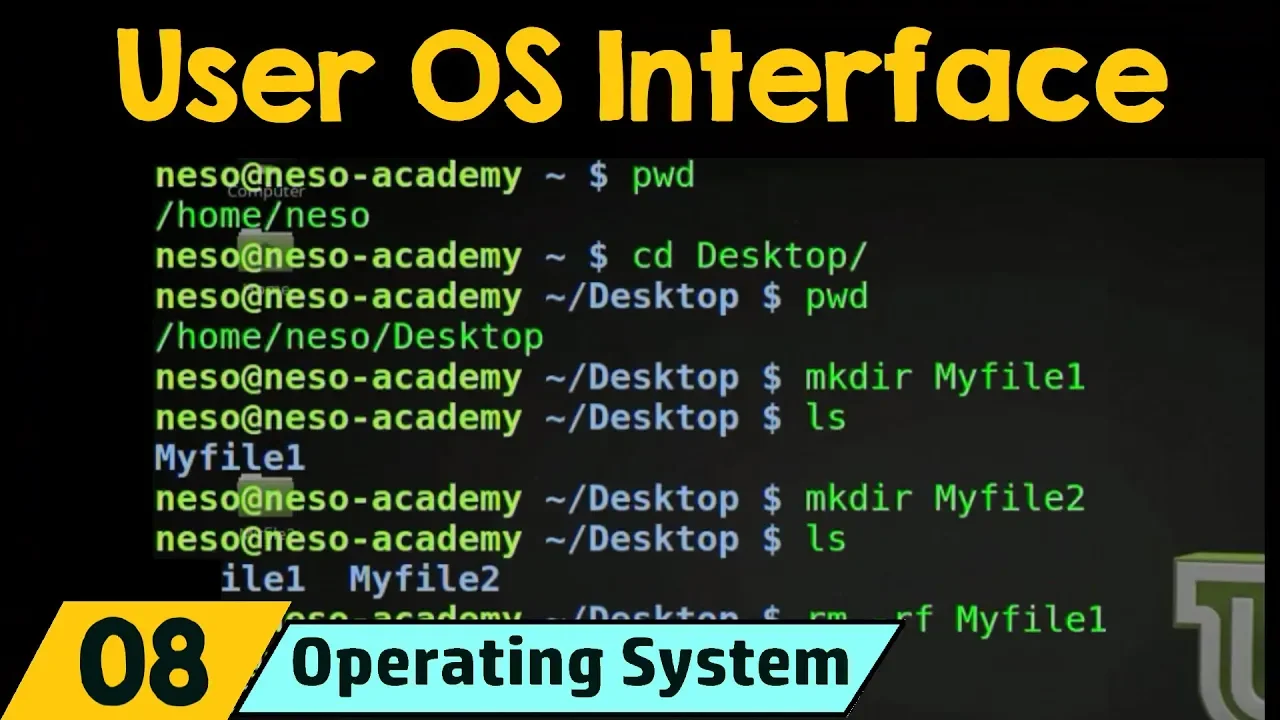
This is the first question. So where am I located in my system right now? If I type the command pwd, which stands for print working directory, I'm going to see that I'm right now in /home/nural9.
Now, I don't want to focus too much on the file system of Linux in this video today. I will mention one or two things maybe as we go, but this is not a Linux tutorial in general. This is a Linux terminal tutorial. But the home directory is where you have all your stuff, documents, desktop, pictures, videos, everything that belongs to a specific user is in home/ username/ something. So by typing pwd I can see currently my terminal is located or my shell is located in the home directory of the user neural 9 which is me. Now if I want to see what is inside of this directory I can use the ls command. So ls basically shows me whatever I have in this directory. Now don't be confused if your terminal doesn't show all these fancy icons. The default terminal often times doesn't have the uh styling to make this look good. So this is actually a zshell with oh my zshell and also with a certain theme. This is not too important but what you see is what you have here. In my case the icons already tell you okay these are directories these are files. So that's quite convenient but in general ls shows you what you have here and you can also take a look at a more detailed view by saying ls-la.
This will give you more information that we're going to talk about as well in a second here. Now there's quite a lot of stuff on my screen now that I don't want to see all the time. I want to go back to the top with my uh command where I'm where I'm writing the command essentially. And to accomplish this, I can clear the screen. So I can type clear and all of this is going to disappear. So now I'm back to the very beginning. So ls just shows me what do I have in this directory. Now let's say I want to go into one of these directories. So I want to go for example into documents right now. How do I do that? I do that with a command called cd which stands for change directory. So cd space. So, whites space and then documents. This basically means change the directory to documents. This works because documents was contained in home neural 9 where I'm already uh located.
If I want to go to a specific path that is not related to the current directory that I'm in, I have to provide the full path. So, I can either type cd documents or I can also say cd home neural 9 documents. That would also have the same effect. I'm going to end up here. And if I now type pwd, you can see home neural line documents is where I'm currently at. Now I can continue to do that and I can also uh provide a longer relative path. For example, I can go to in my case now here I know that I have programming and I know that in programming I have neural 9 and that in neural 9 I have tutorial. So I can just type this and now I'm in this specific uh directory. Now if I type something that doesn't exist like this for example, it's going to tell me no such file or directory. So if I now say ls here, I don't have anything in this directory. This brings us to the next command. How can I create a new file?
Now if I just want to create a file without doing anything else, so without writing any content into this file, I can just say touch. Touch basically creates a file and I can say touch test.txt for example. This will create a file. I can see that this file exists by saying ls again. There you go. Test.txt.
txt but this file doesn't have any content. Now how can I see what the content of a file is? I can use a different command again called cat c a t. So if I type cat actually I need to of course provide the file name cat test.txt. This prints nothing because there's nothing inside of test txt.
There's no content in it. So I don't see anything. Now we get to something that might be a bit confusing to some people.
This is nothing that you have to learn.
This is just something that I want to mention here for the sake of completeness. You can also write stuff in the terminal. So you can edit files in the terminal using a terminal editor.
Now there's Vim, there's nano, there's also theoretically Emacs which uh most of the time I think is its own application. But uh Vim and Nano are like the go-to terminal editors that you have. So on almost every system you will find vi or if you don't find vi you will probably find vim which is vi improved or you will find nano. Both editors can be used in the terminal on almost any system. The catch with vim is that often times it confuses people the first time they use it. Now I personally love vim.
I think it's uh at least the vim bindings are like the best thing that has ever happened to me on a uh coding level because it's uh an amplifier. It's an accelerator when it comes to efficiency to productivity and coding, but it's very confusing for a beginner.
But what you can do is you can type vi or vim depending on what your system allows you to do and then test.txt.
This opens the file now in the terminal editor vim. Now the biggest confusion people have here is how do I do anything? They start uh typing on letters, nothing happens. They want to do any combination to leave the terminal to leave the editor. they are not successful in doing that. Uh right away the first thing that you want to do if you don't know how to leave Vim, you just press the escape key a couple of times. This is like the foolproof way to exit Vim. You just spam the escape key a couple of times and then you type colon Q. That's it. Colon Q, enter, and then you left Vim successfully. But if you want to do something in Vim, you can just uh press the I key and it's going to put you into insert mode. Then you can type some stuff here. Then you can press escape to leave the insert mode and you can do colon wq to write and quit. So that now wrote this random string into test txt. I can see that this is the case by saying cat test txt.
And now I see that this is the content of this file. So for vim, I have uh multiple videos on this channel. If you want to learn vim, I highly recommend to do that as an advanced programmer at least. But for now, just accept that there's this vim uh editor. You also have nano. As I said, this is usually more beginner friendly. You can just use the arrow keys. I mean, you can also use the arrow keys in Vim. But you have here uh Ctrl X for exit, control O for writing and so on. It's easier to work with for a lot of people. So either Vim or nano is something that you can use in the terminal. But now what else can we do? We can also take this file and copy it. So for example, I see now I have test.txt. Now I can say cp test txt test 2 txt to copy one file to the second destination. This works in the same directory. Now you can see I have test and test two and also if I say cat test two you can see it has the same content but this also works in different directories. So I can also copy from one path from one absolute path to a completely different path on my system.
So something like copy etc some file here to home neural 9 something else like I can provide full paths and copy across the whole file system. Now I can also move which has a different effect.
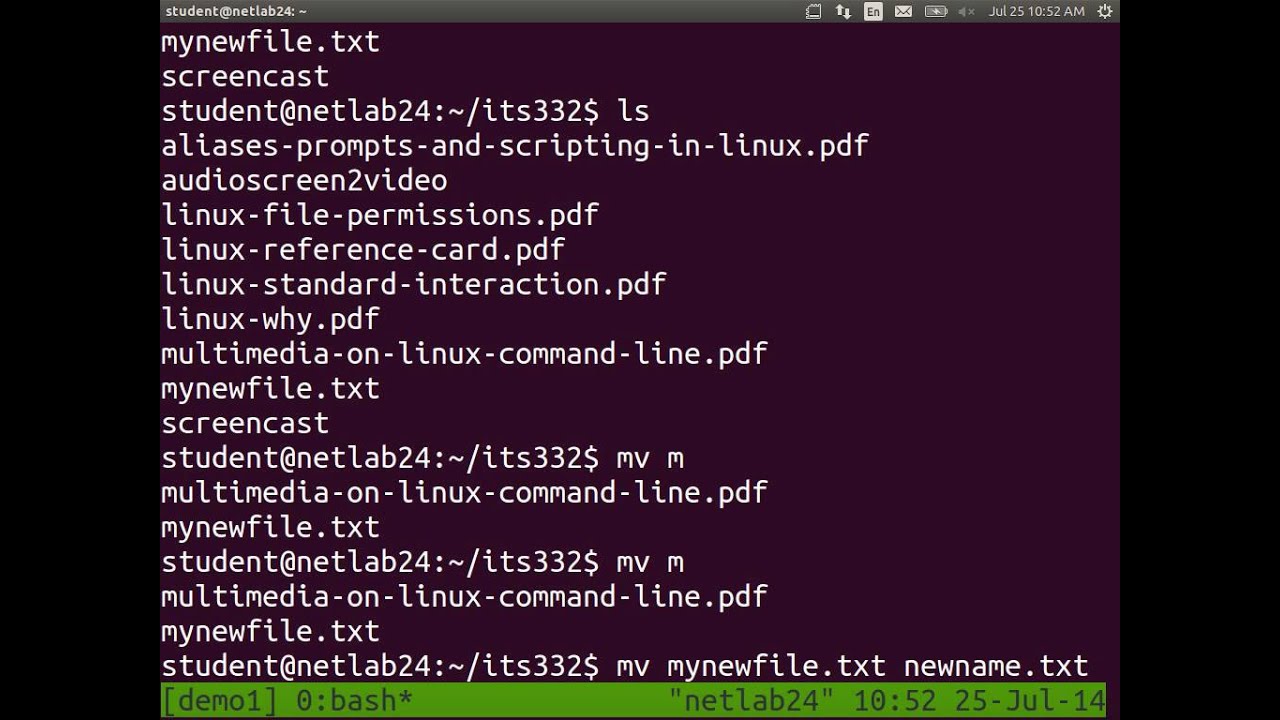
If I move for example with mv the test 2 txt file to test 3 txt.
Um now I have test and test three. So test two does no longer exist because I basically renamed it to test three but it still has the same content. So if I say cat test txt test 3 txt sorry um we can see that this is still the same string. So these are the very basics. We can also do similar things with directory. So if I want to create a directory I have to say mk dear for make directory then the name of the directory. Let's call this one example.
And if I now say ls in my case because I have the styling I can see the difference. in a lot of shells or in a lot of default settings, you're not going to see the difference between a file and a directory. You have to figure it out by trying to navigate into it or by using different flags. But essentially, I can go now into the directory. I can go also back. How do we go back? We can use the cd command with two dots. So I can say cd dot dot to go up one level. So to go from example to tutorial.
So now I'm in tutorial again. So let's repeat that example pwd. I'm now in home neural 9 documents programming neural 9 tutorial example cd dot dot gets me one level up same path but without example and now I can show you for example we can take the file test 3.txt and I can move it into example by doing that we no longer have it here but if I go into example and I say ls we can see the file is now located here. So I would say that these are the very very basics of navigating through the system. Don't forget the clear command if you have too much output that you don't care about.
These are like the very basics with that you can navigate across the system. One more thing maybe you can also do a recursive um or actually one thing that I forgot actually this is important. We can also delete files obviously and we do that using the RM command. RM stands for remove. By the way this dot dot thing that I just did is not something that works by default. This is specific to Zshell, so ignore that. Um, but what I can do here now is I can remove the test.txt file for example. This just deletes it. So if I now look at it, it's no longer there. But now for a directory, what you want to do, especially when a directory contains also files in itself, uh, you want to do the recursive deletion. So rm-r example, that would now recursively delete everything that's in the directory. And that is the clean way to do that. Now with all this information, you will notice at some point when using these commands that you don't have the permission to do everything. For example, there is a very important file um on your system if you go to slash etc or etsy or whatever you want to call it etc called resolve.com. This is for your DNS settings. So if I try to let me use vim for this if I say vim and then I want to open this file uh you can see I can do that. So I have here my name servers and my DNS servers but I will not be able to edit stuff here. So even if I know how to use Vim. So even if I go into insert mode uh you can see the warning down here changing a readonly file then I can maybe try to do something. Let's add a comment or something. And now I can try to save to write and quit like we did before. And I'm going to get this readonly option is set. I can try to overwrite this. So I can try to do WQ and then uh exclamation mark but it tells me can't open file for writing. So I don't have the permission to do anything with this file. And this is not limited to Vim. This is also um the case if I do anything else like trying to delete it, trying to move it, trying to rename it or anything like this. It just doesn't work because I lack the permission to do that. This is because I'm acting as a normal user right now. If I want to act as a super user, as a root user, I have to provide a command called pseudo which stands for super user do. So I'm doing something as a super user. This of course only works if I have super user privileges. If my user is uh allowed to do that and of course if I also know the user uh the pseudo password. So if I say now pseudo vim etc resolve conf I can now do this but I'm first going to be prompted for the password. So now I can type a password and now I can edit this file. I can say test comment for example. I can write and quit and this time it worked. I mean actually yeah there you go it worked because I used pseudo privileges. I can also open it as a normal user again. I can see the change is still there but I cannot do anything myself if I don't have the pseudo privileges. Also if I want to remove this comment I need super privileges uh super user privileges. So the pseudo command is the most essential command probably. You always need it if you have to do anything that requires permission. Installing packages, uh, deleting, changing, renaming, whatever you want to do, like anything that requires more access rights will require you to use pseudo. And there's also other flags that you can use in combination with it, but we're going to keep it simple here.
When you need elevated privileges, you use pseudo. Now something else I want to show you here is how we can interact with the terminal not just on a command level but also on a shortcut level. So for this I want to use a very simple command as an example. There is the command called date. D date just gives you the current date. So the day and also the time and I can run it over and over again. And you can see that the seconds are updated. So 22 23 24 25 and so on. And I can combine this now with a different command which is called watch.
Now these two commands are not really essential. I'm just using them to showcase something which is that I can now combine them to watch the same command. So watch date. What this means now is that every 2 seconds it's going to rerun the date command automatically.
I'm not doing anything and it's going to constantly give me the new output of this command. So the reason I'm showing you this is because the question could be how do I actually get out of this?
Now in this particular case the watch command can be terminated by just pressing Q. So if I just press Q, I can exit. But this is not always the case.
Sometimes I'm not able to do that.
Sometimes I'm stuck here and Q doesn't do anything. And the common way to exit an application uh in the terminal is to use the shortcuttrl C. So control and C sends an interrupt signal and basically quits the application. C does it most of the time. Another example would be let's briefly write a Python script. I'm going to do that in Neoim now just for the sake of efficiency. If I say main py and I now say that I have uh import time is now just basic python. I'm doing an endless loop. I'm waiting for 1 second in each iteration. Before that I print hello. That is an endless loop. This program goes on forever. I can now run this by saying python or python 3 main py. And now you can see this is running.
I'm not doing anything. And if I want to stop this now I have to dotlr c. This is a keyboard interrupt in python. So if I say Ctrl + C, this is going to end. You can see that I interrupted this application using thetrl C uh shortcut.
Sometimes this is blocked. Sometimes you cannot do that, which is um something that has to be resolved with another technique with another command that I'm going to show you later on. But most of the time, Ctrl C, especially spamming C a couple of times will get you out of most things. But sometimes you don't want to necessarily quit the application. You actually want to just put it in the background. And for this you can use a different shortcut which is Ctrl Z. So Ctrl + Z is not undo. Ctrl Z here is put into the background or detach you could say. So if I run the same application here again Python main py and now I don't press Ctrl + C but Ctrl Z what happens is that I basically suspend it and it's now in the background. So the application is not actually terminated. I can just work with a terminal as before, but the application is still running behind the scenes. And I can see what applications or what processes are running in the background by using the jobs command.
Jobs shows me here that there is a process uh Python 3 main py here. This command is running in the background.
And if I now want to take it back into the foreground, I can say FG to uh take this Python 3 main py into the foreground again. I can also send it back. Ctrl +- Z into the background. I can also do the same thing by the way multiple times. I can run the application again. Ctrl + Z. If I now say jobs, you can see I have one and two both of them suspended and I can say foreground two for example. It's actually uh percent two. Sorry, foreground percent two or foreground percent one to get the job into the foreground. So this percent symbol is important.
Um, now one tip that I want to give you here and this maybe already introduces a concept that I'm going to cover later or actually maybe let's just do it now.
There's a thing on every Linux system called the package manager. Depending on what your distribution is, you're going to have uh a different package manager.
Most of you guys watching this since you are probably beginners have a Debian or Ubuntu based distribution. So something like Ubuntu, Linux Mint um or also Pop OS. most likely using one of these distributions, especially if you don't know what your package manager is. In this case, 99% of the time it's going to be apt. So, you want to do pseudo apt install to install new applications onto your system. This requires pseudo privileges, which is why we use pseudo.
Uh, but pseudo app install and then the name of an application will install it onto your system. Then you also have on Fedora for example, pseudo dnf install as far as I know. On Open Souza, I think you have zipper or something like this.
And on Arch Linux, you have Pac-Man, which is what I have. Pac-Man-S installs packages from the Arch Linux packages. And sometimes you will be able to install packages like this. Sometimes you have to go the extra mile. In the Arch case, you sometimes go to the Arch user repository. In the case of Ubuntu, you sometimes add uh PPA. I think PPA was the name, repositories. Or you just go and download an app image or something like this. or you compile yourself but you can get external pieces of software using the command line which is the preferred way to do it. So if you have for example if I'm on Arch Linux want to use um I don't know any editor any editing software shortcut for example or Audacity or zoom or any other piece of software if I can get it using pseudo Pac-Man- s and then the package name whatever it is Libra office for example if I can do it like that that is the preferred way to do it I still can also go to the website and download an app image or something but that is the preferred way to do it now why am I saying this now because there is a package called TLDDR.
It depends on the operating system you're using. [clears throat] Maybe you have to go download an app image. Maybe you have to install it uh using another package manager. I'm sure you can figure it out by googling. But one tool that is very useful for learning commands on Linux is TLDDR. This is a tool. What you do is you type TLDDR and then you follow this up by the package name uh command name of course. So TLDDR CD for example.
Very simple. What does it do? it changes the current working directory. Then you have some examples of what to do.
There's also a command that is a bit more verbose on Linux. This is also something that you don't have to install, which is the man command. So this is the manual, the man pages, so to say. If I type man CD, I'm also going to get a description of the command for changing the directory. And this is quite useful, but you can see it's quite verbose, very detailed. You have to read a lot of stuff. And it's maybe not the quickest way to learn about a command.
TLDDR shows you, okay, that changes the directory. I can go up, I can go into a directory, I can go to the home directory. So, if I just type cd, I can go to the home directory. If I type cd dash, I can go back to where I was. And that is what you get summarized here.
Same thing if I go tlddr and I type what did we cover? Uh, let's go with watch for example.
Then I can see what the watch command can do. And I have different flags that I can use. For every command that we cover, most likely there is a TLDDR page. Just something that you can use to get started uh and learn stuff easily.
So the reason I covered this is because I just looked up uh for the foreground command that you can do this by using a percentage symbol and not just a job number since I didn't use this command for quite some while. Uh I forgot that.
So that's the basic idea here. Another thing that you can do is you can also send the process into the background immediately. So I have here this Python file. I can do Python 3 main py. And now what I can do is I can use this amperand. So this ant symbol basically to send this to the background. So to continue to use the shell, but this is going to be running in the background.
So if I run this, you can see hello.
It's executing all the time and showing the output. And I can still interact with the terminal. I can still write ls.
I can still write pwd. And it's happening simultaneously. But I can also get it into the foreground by saying fg.
Now I have it here. Now I can do Ctrl + C to end it. So yeah, these are the very basics of putting stuff into the background, getting it back into the foreground and so on. And now what's also interesting is how can we deal with the output of commands. So for example, ls is a command. It outputs main.py. pwd has some output. Uh my Python script has some output. By default, this is all printed to stdd out to standard output, which is what we see here on the screen.
I can also take that and put it somewhere else. I can say put this into a file. For example, simple example of this would be pwd and then I use this closing angle bracket or you could also say the greater than sign to say get the output of pwd and put it somewhere else.
And this somewhere else could be lock.txt for example. And if I now look at this, first of all, I didn't get any output. Second of all, I now have a file lock txt. And if I use cat to see the content of lock txt, you can see it contains the output of pwd. Exact same thing can also be done here with the python command. Python main py. And now you can see all of this is running. But the output is not printed. It's actually stored in lock txt. What's also interesting is that this is not going to happen for the error message. If I now dotrl c, this causes an keyboard interrupt uh which means it's an error actually. And this is going to still be printed to standard error which is this here. So if I take a look now at log txt, you can see it contains a bunch of hellos which were previously printed onto the screen onto standard output.
Now it just contains the error message.
But this also doesn't have to be the case. I can also say for example that I also want to feed the errors into the lock file. First of all, how can I do this with only the errors? If I only want to feed the errors into the log file, I can do two and then the greater than sign. So, python main uh main py 2 greater than and then lo txt. By doing [snorts] that, I get hello in the command line again. But if I do ctrl c, we don't see the error message anymore because the error message is now in log txt as you can see. And now the combination of the two, how can I actually get everything into log txt?
So, no output in the command line. I can do that with a small trick. I can say python main py I want to feed the output to log txt and then I also want to feed the error messages to the same place where the output was fed to. So two greater than and then and one. This basically means also feed the error messages to the same place. And if I do this now we get no output, no output.
And then if I say C, still no output.
And in my log file, if I open this with cat here again, I can see the entire output now and also the error message.
Now, as you see, every time I use this, this is overwritten. If I just want to append to the existing text, I have to use uh two of these symbols. So, if I say for example now pwd lock txt, that just replaces the content of lo txt. And if I do it again, I just get the same um the same text here. But if I use two of these angle brackets, um, what you see is that it gets longer every time. So I can run this a couple of times here. And now if I take a look at it, it's always appended as additional content. It's not overwriting the existing file. That is the essence of that. Now, one more thing that you can do is you can also pipe the result. So this here is just directing it, redirecting it to a different uh stream so to say, or to a different place. What you can also do is you can use the pipe symbol which is this here.
So this uh how do you call it? I mean I always call it pipe symbol the straight line the straight vertical line here to say take the output of one command and feed it into the next command. For this we're going to introduce a command called grep. Grep is a uh command for recognizing patterns for finding patterns. We can actually ask TLDDR um what it actually is officially because I don't know what the official definition of GP is. But it says here find patterns and files. Yeah, basically that and we can now use this GP tool in combination with something else to spot certain patterns. For this, let me just briefly create a uh test file here. So I'm going to use Vim to say test.txt. I'm going to say hello my name is neural 9 and I am older than 9 years old and let's use uppercase n.
So the only reason I'm writing this is because I want to use the word nine two times so you can see how it's being found. Then uh have a nice day for example that is going to be my file. I can look at it and now I can take this output of cat and I can feed it into the gre command. So I can say cat test txt pipe and then I can say gp and I'm looking for a certain keyword for example nine. If I'm looking for nine now you can see I get only the two lines where nine occurs and it's also highlighted here with color neural 9 and 9 years old. And if I do the same thing with something else like am for example then we can see it's found in name and also in and I am. And again same thing you can do a lot more stuff with grap.
You can actually use regular expressions. There's much more that you can do here after context before context. So for example I can rerun the nine query and I can say B2 actually I think B2 like this. And it shows me also the two lines before that. So this is also quite useful. And of course, this doesn't have to be used with grap. It doesn't have to be used uh with cat. It can be used with anything. I can run ls and then I can say grab.txt to find all the text files that are out put out by ls. And now I see log txt test.txt or I can say I want to find all the py files for example. But that is how the pipe symbol works. Now one more thing that I want to show here just uh because it's a nice thing to know. Sometimes you want to just redirect the output into nothingness into nirvana so to say. So if I have here main py and I want to get this output and just feed it into nowhere. So I just want to get rid of it feed it into the void then I can just say redirect this to /deaf null. This is a device in Linux so to say that is nirvana. Basically put it there. I'm not interested in it. Just remove it. Uh yeah just a nice thing. Sometimes you need it. Sometimes you just don't want to feed this stuff anywhere. You don't want to get it on screen. You also don't want to save it somewhere as a file. you just want to get it out into nothingness. That is a useful thing to know. Cool. Then let's move on with something quite fundamental which is copying and pasting. So not files but actually how do I copy and paste content from the terminal because we discussed already that C actually interrupts. So C sends an interrupt uh signal to the process which means get me out of there interrupt the process. So how do I actually copy? Because if I just mark this for example and I say control C this doesn't work as a copy mechanism.
So how you do that in a terminal is you use control shift C. So I mark this and I say controll shift C and then likewise I don't do controlV I do control shift V to paste. That's basically it. There's also some other stuff that you can do and this might actually slightly differ.
Not not entirely sure if this differs from um emulator to emulator, but you have certain keyboard shortcuts that allow you to easily navigate stuff. For example, here I have the command Python main py def null and I can use the arrow keys to go left and right, but I can also say control arrow keys to jump words so to say. And I can also um do Ctrl E to go to the end and Ctrl A to go to the beginning. This is also a nice nice thing to know. And if I delete in my case here, I can do altdelete to delete entire words. Yeah, also quite useful uh if you need it. Now let's move back to working with files. This is something a little bit more advanced.
Now I didn't want to cover it in the very beginning, but now we know a little bit more about the terminal. We know about pseudo privileges. Now we're going to talk about ownership groups and uh the mode of a file. So if I use ls, I just see what files I have. If I say ls-la, I see more than just the uh files themselves, more than just the file names, I also see this fancy looking thing here in the beginning. And I also see a username and this here is the owner of the file. And I can also get the group. I think if I say l a, I can also see the group. In this case, the group is also neural 9. But this here looks odd. So what is that? And why do we need to know about this? I'm going to try to keep this simple because this can be a bit confusing especially if you want to understand it on a technical level. So I'm going to try to keep it very concise. But this here is the mode so to say. We have here three instances of the same sort of permissions. We have read write execute read write execute or maybe you can see it here better. Read write execute read write execute read write execute. Some of them you can see have a hyphen here which means that this permission is not given. What this basically means is that the log file here that we have belongs to neural 9 and it also belongs to the group neural 9 on Linux and the owner of this file which is neural 9 is allowed to read that file and is allowed to write to that file to change that file but nobody is allowed to execute this file because it's not an executable. It's not a script. It's not a binary file. It's just text. Nobody's allowed to execute that file. The group members belonging to the neural 9 group are allowed to read the file but not to write to the file and not to execute the file and everyone else is also allowed to read the file but not to write or execute the file. Now sometimes you might have no permissions uh and you can change the permissions that a file has by using the chod uh change mode command. So change mode basically allows you to say that I don't want to have any permissions on lock txt. I can do that by saying uh change mode zero lock txt. And now if I run the same command from before, you can see I only have hyphens here. Now if I say the complete opposite of that, everyone should have all the permissions. So if I say change mode 777, I'm going to explain why 777 is the opposite of zero in a second here. But if that is what I set up for lo txt, you can see that I have all the permissions here. Now everyone on the system can read, write and execute log txt. This is the maximum permission possible. So let me briefly explain to you. I'm going to use neovim for that. You don't need to know what neoim is. It's just an editor that I use. I'm going to use it to explain this concept here. I'm going I'm going to try to keep it simple. So we discussed that we have these three instances of permissions. So we have three times read, write and execute permissions and we have the three different entities or or actors you could say. We have the owner of the file, we have the group that the file file belongs to and we have everybody else. So the question is is the owner allowed to read, write, execute. Is the group allowed to read, write, execute? Is everybody else allowed to read, write, execute? And we can represent this as zeros and ones. So we can say okay the owner the three permissions for the owner can be 00 0 for not allowed to read not allowed to write not allowed to execute. If I'm allowed to read but not to write or execute I have 1 0 0 and if I'm allowed to read and write but not execute I have 1 1 0. If I'm allowed to do everything I have 111. And for those of you who know about the binary system this can be now converted to a decimal number. 111 means that the owner is allowed to do everything. that is seven. If you take 111 in binary and you turn it into decimal, that is seven. Which means 1 2 and 4. 4 + 2 + 1 is 7. If I say for example, I'm allowed to read and nothing else. That would be four. That would be the number four for the owner. And now I can do that for everybody here. So I can say, for example, the owner is allowed to read and write but not execute. That would be 1 0. What is that in decimal?
That would be six because I have four plus two but not + one. That is six here for the owner. Then what about the group? The group is allowed to read but not to write or execute. That would be a four for the group. And for the for everybody else, I want to have no permissions zero. So the code I want to provide to change mode is 640 to achieve these permissions. That is the code to achieve what I just explained here. So 640 if I now actually I'm just going to go out of here. If I now say change mode uh change mode 640 of lock txt and then I rerun the command that we talked about here you can see that this is exactly what we achieved. Read write for the owner read for the group nothing for everybody else. And we can also see that this has an effect. So if I say again this is the permission here, I can still go and edit lock txt with vin. I can just go in here, type stuff, save it.
That's it. But if I say now change mode zero lock txt, then of course um I don't even have the permission to read it. I cannot even open this file. I cannot even see what's in there with cat permission denied. I cannot access this file. I don't have the permission. Now of course we know about this already.
Pseudo can do anything. So pseudo block txt this of course works because with pseudo I can do absolutely everything.
This is the super user command. There's nothing that pseudo is not allowed to do. But I'm allowed to I'm I'm not allowed to look at this file anymore.
Now I can change the mode to maximum permissions. Again this works because I'm also the owner of the file. This is the next thing. I can also change the ownership. So I can say for example uh remove all the permissions from me but also change the owner with ch own change owner of the file to root. So change owner root of lo txt. Uh now actually I'm not allowed to do that. I have to use pseudo but there you go. I can now uh see that the user owning this is root. And I'm not sure actually if I can now change the mode. No, I can no longer change the mode of lock txt because I'm not owning that file. So, I don't have the permission to do any of that. But of course, I can now use pseudo again to achieve this. I can also change back the ownership to neural 9. So, change the owner to neural 9 of lock txt and this then works. So, that's the basic idea. We can also do change group which I'm not going to cover here now.
Use tlddr if you want to use that. But change mode, change ownership and change group are the three commands that we can use to alter the permissions that we have on certain files. And this is especially important because often times you will have some binary file, some script that you want to run and you're not allowed to run it. So you will try something like dot slash and then the file name or you will try some binary file you want you want to run it and you're not able to do that. For example, you have some app image you want to run it. You're not allowed to do that. Not because you don't have the privileges as user, just because the mode of the file doesn't allow to execute it. And in this case, what you can do is you can just add the permissions. So change mode plus X and then the file name gives you the additional permission to do that. Let me show you that briefly. If I have here my Python script, there's no X right here.
And uh if I say now uh change mode plus x main py and I rerun this you can see that the executable permission was granted here for everybody. That's the idea behind this. Cool. So now we covered quite a bit and I want to move on to working with processes. I don't want to go into too much detail here. As I mentioned there's so much you would want to cover in a crash course. There's networking stuff, there's file manipulation stuff, there is string editing stuff, and there's a lot of stuff that you can do with processes. I want to just cover the very basics here because this is essential. Now, on most Linux systems, without having to install anything, you can just run the top command to get a nice interactive view of the processes. Now, I'm not sure if this is a default Linux application. I actually don't think so. But on most Linux systems, especially as a beginner, you probably have Ubuntu pops. You do have top on your system. You just run it and you see all the processes that you have on your system. You can also navigate here using the arrow keys. I personally don't like to use top. It's just yeah not not a very userfriendly application I think. But thankfully and you can exit it with Q by the way.
Thankfully there are more modern versions of top called HTOP and then even a more modern version written in Rust called Btop. So this is something again you want to install with your package manager. pseudoapp install htop uh pseudo pacman- s htop and then you can just run htop and it looks like this. This is more user friendly here.
We can also just navigate around the different processes. We can kill them by using F9. Uh we can search them and filter them. So I can say F4 and I can for example look for something that includes Python and I can take a look at that if I want to. But my personal favorite and this is just a quick introduction here is BTOP. Btop is basically like HTOP but with a better user interface. That is BTOP. You can still do the same thing. You can filter.
I can filter for Python here. You can see something is running. And I can also kill these processes uh which I'm going to show you with a different uh process actually. So let me run my main py file here again in the background.
And now actually I'm going to open up a second terminal. I'm going to go into Btop. I'm going to filter for Python and this is the one probably here, Python 3.
I'm going to say shift K in my case because I set this up to use Vim binding. So shift K. Yes. And now it killed this process. This is the UI version to do that. You can also do the same thing with terminal commands. How would you do this? First of all, let me open up a second terminal again. Let me navigate to my tutorial directory. Don't care about these fancy commands I use.
Sometimes I use new vim. Sometimes I use auto jumper. These are tools that are not part of this crash course today. I'm just using them to navigate around uh more quickly. But now I'm in the same directory here in the left and right instance. And I can run the Python script again.
And at the same time, I can use a command called ps aux. This is going to show me all the processes that are running on my system. And of course, I can just scroll through that and take a look at it. Or I can use what we learned before. I can combine this with a pipe and GP to find certain processes. For example, I mean actually right now I see the process that I'm interested in, but if I don't see it, I can just say look for Python 3 for example. And then I see a couple of things here. Some Gunny Corn server running on my system, but I can also see here this Python 3 main py file. And the important thing if I want to do something here with this process is I'm interested in the process ID.
This is the P ID. So I can copy this and I can say kill and now let me show you that this is still running. I can say kill this process ID to kill the process. So I located the process with ps aux and then I killed it by providing the ID. Uh same thing should work by using the name and pkill. So pkill python 3 terminates this python 3 application here. And uh same thing should also work with kill all but that's a little bit overkill at this point. So that's just a quick thing that you can do with processes. Sometimes relevant because you have something that you cannot quit something that you cannot escape and you want to do it in the terminal. Maybe you just have access to a TTY which is something we didn't cover yet. But um if you only have access to the terminal and you need to terminate or kill a process you can do it with kill or pico or with something like btop for example. Then maybe some uh very basic stuff. I hope I don't run this here now. This would be fatal because I'm recording for quite some time already. But if you want to reboot your system, what you do is you say reboot. And I'm yeah, I'm going to type the T now, but I'm not going to execute this. Reboot would just reboot the system. Shut downhow would shut down the system.
Now, uh these are two basic things that you can do with a terminal, especially if you're on a server. That's probably the preferred way to do it. Actually in my system here as you can see I don't even have any shutdown button. I always do reboot or shutdown in the command line. It's just easier uh because otherwise you have to move the mouse which you know not everybody thinks like that. But yeah this is something that you should also know when working in the terminal. Uh besides that the last two things I want to show you here is on the one hand how to work with devices how to mount volumes or how to mount stuff in general and unmount it and how to work with environment variables. So, for this here, I have a USB flash drive. This is uh this USB 3.0 uh flash drive here. And I'm going to plug it into my computer now and show you what we can do with that. So, once I plug this into my computer, on the one hand, I can open up Thunar, which is my file manager, and I can see that there is this device here. But in the terminal, I can also just run the command ls blk which is list all the block devices and the USB flash drive is a block device. Now in my case here I have a couple of things that you might not have. On the one hand I have the NVME hard drive which is where my Arch Linux distribution that I'm using right now uh sits. You can see that this is mounted at slash which is the root directory. And then I also have something up here which is my old popos directory. You can see that this is mounted. It's slash mnt pop. You don't need to understand what a mount is yet.
Uh so that is just my old operating system, my pop OS operating system. Here we have my Arch Linux. And this thing here uh 32 GB roughly uh is my USB flash drive. So I know that my USB flash drive is SDB and the specific part that I'm interested in mounting is SDB1. just right now it's partitioned because it's an Arch Linux uh bootable USB flash drive. But essentially if I want to take this and mount it somewhere on my system, this means that I want to be able to access it at this directory. So right now this device exists and I can also go to the slash device uh not with ls but with cd. I can go to slashdef and here I can see all my devices and there is also a directory for this specific device. So sdb down here as you can see but I cannot navigate into it. So if I want to actually navigate into the content of this flash drive I can either use a guey option. So if I do that in thunar if I click on this here this is going to automatically mount it at a specific path. But I can also do that manually. So if I do that here by clicking automatically what thunar did is it mounted it at /run media neural 9 and then arch 202510.
That is the bootable arch USB flash drive. If I now rerun the lsbl command, you can see now this is mounted here at /run media neuron 9 and so on. Now if I want to choose a different point at this point now I need to first unmount the volume. So I can use a command called u mount not unmount but u and I can either provide the directory or I can provide the device. So I can either unmount the directory here run media neural 9 or I can unmount sdb2 uh sdb1. So that would be defaf sdb1.
Now it's unmounted. You can see failed to open directory. This was a thunar message here. And this is no longer mounted. So if I go and list this, it's no longer mounted. But what I can do now is I can mount this at a different point uh onto a different directory. So I can go to /mnt for example. Here I already have a directory called USB mount.
There's nothing in here. I can also remove this directory. So remove USB mount. Do that with pseudo privileges since we're here in the mount directory.
And basically what I have here now is I can create let's say test mount or whatever you want to call it of course with pseudo privileges. And now I can say I want to map the content. I want to map this device. I want to mount it to this directory. So I can say mount defaf sdb1 test mount and of course as always p s pseudo.
Now if I go into test mount you can see I have the content accessible here. So that is how you can do that. You can now also say umount defaf sdb1 and of course one more time pseudo and you should probably also leave this directory for this to work. So mount and unmount are quite useful or mount and mount are quite useful to u either do this with USB flash drives but I also did it for example with my popo directory. So, I have my POP OS um hard drive as we saw. This is my SSD that I have here, 1 TBTE, and it's mounted in MNT POP, which means that I can just use this here in my file explorer. Even though I'm not using Pop OS, I'm actually using Arch Linux here. I have access to all the files of my Pop OS system because I mounted it by default.
Okay. And then finally, we have one more thing, which is working with environment variables. For that, I'm going to go back into my tutorial directory. And in here now I can show you the difference between uh having an environment variable set and not having it set. So environment variables are basically just values named values key value pairs you could say that are present. They can be present because you set them in this session. They can be present because they were set in a config file or because they were set in um a startup file or something like this. But essentially if I go and use a command called echo, I think we didn't cover this one yet. Echo is a very simple command. It just takes some input and puts it out. So, echo hello gives me hello. Uh, and if I say now echo and I don't use just the text itself, but I actually use um the dollar sign before that. So, dollar hello for example, this now assumes that hello is a variable, a key to a value. It isn't in this case.
There is no key value pair where the key is called hello. But I can do something to export that. So for example I can say echo hello and then dollar name like this and I just get hello. But if I say export name is equal to neural 9 for example that is now an environment variable that was exported to this specific session.
And if I now go and say echo hello name I get hello neural 9. So yeah, that's that's quite useful sometimes, especially if you have to provide something like an API key, for example, an OpenAI API key for some application that you're running. So that's it for this video today. I hope you enjoyed it and hope you learned something. If so, let me know by hitting a like button and leaving a comment in the comment section down below. As I mentioned a couple of times, I would have liked to cover much more than that, but for a crash course, it's roughly an hour, so I don't want to cover too much in one video. This is targeted towards beginners. If this video does well, I can also make an advanced crash course where we go deeper into networking, deeper into text processing, deeper into user management.
But for a beginner, I think this is a good place to start. So, let me know in the comment section down below if you got any value out of this video. Also, on my website, in case you're interested, I offer tutoring and also services. So, you will find a services tab and a tutoring tab there where you can see what I have to offer. If you're interested in anything, you can go to the bottom and contact me via email or LinkedIn. And besides that, don't forget to subscribe to this channel and hit the notification bell to not miss a single future video for free. Other than that, thank you much for watching. See you in the next video and bye.
Up Next

35:22
Image Geometry and Planar Homography | Computer Vision Lecture 9
@PeterCorke
182K views•2012-10-10

87:26
Introduction to Secure Multiparty Computation with Yehuda Lindell
@fhe_org
7.7K views•2021-02-04

13:31
Machine Learning Model Explainability with SHAP in Python
@NeuralNine
10.1K views•2024-02-26

19:25
Enigma Machine Mechanics: WWII Encryption Explained
@JaredOwen
13.2M views•2021-12-11
Related Study Plans & Knowledge Roadmaps
Structured learning paths in Computer Science
computer-science
Container Runtimes: Namespaces, Cgroups & Go
01Linux Systems & Go Programming Foundations
02The Core of Isolation: Chroot and Filesystems
03Linux Namespaces: Process Isolation
+ 3 more learning modules
32h6 modules
Explore Roadmap
computer-science
Building a CHIP-8 Emulator: Rust & CPU Basics
01Computer Architecture Foundations (Bits & Bytes)
02Rust Programming for Systems Development
03CHIP-8 Virtual Hardware Specifications
+ 2 more learning modules
32h5 modules
Explore Roadmap
computer-science
Building BitTorrent: Go, P2P & Concurrency
01Go Fundamentals & Concurrency
02Networking Foundations & P2P Architecture
03Bencode Parsing & Torrent Metadata
+ 3 more learning modules
26h6 modules
Explore Roadmap
computer-science
Actor Models (C++ Concurrency & Lock-Free)
01C++ Multi-Threading Foundations
02Thread Pools and Task Scheduling
03Atomics and Lock-Free Queue Design
+ 3 more learning modules
45h6 modules
Explore Roadmap