











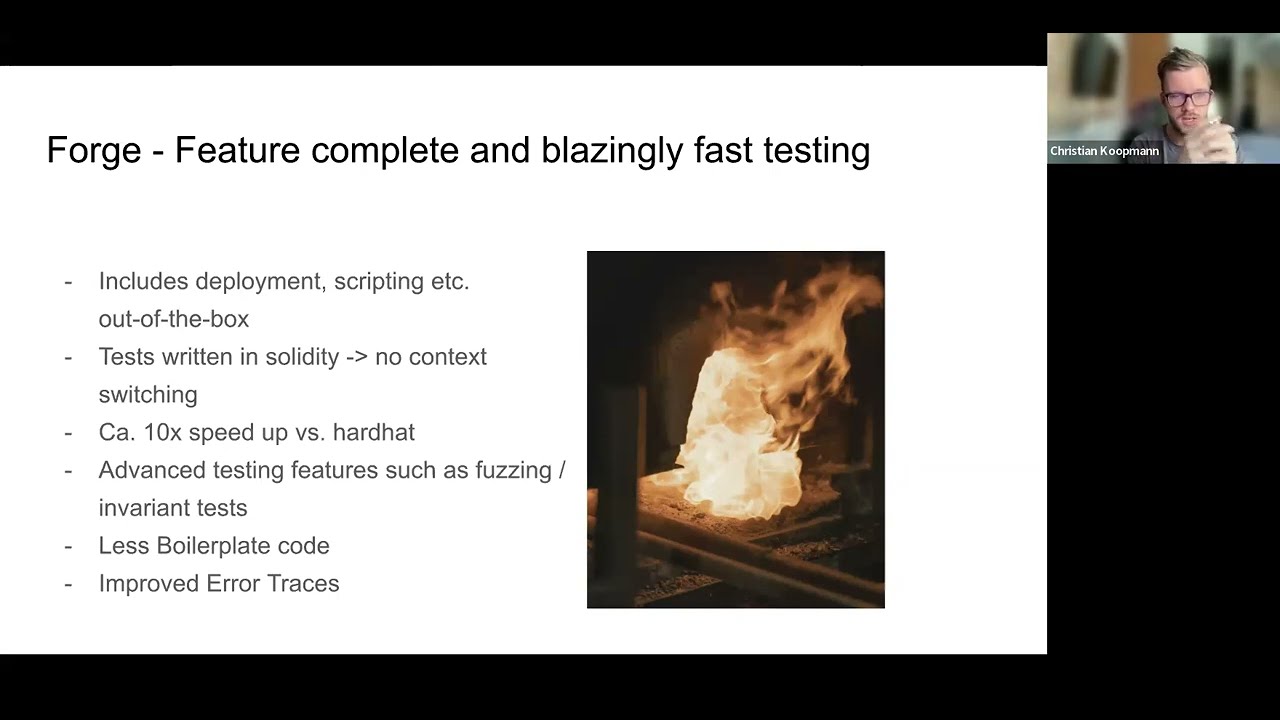







Foundry is a fast, portable, and modular Ethereum development toolkit written in Rust that consists of three main components: Forge (CLI for project creation, testing, and scripting), Cast (command-line tool for interacting with deployed contracts), and Anvil (local Ethereum node emulator). Unlike Hard Hat which requires switching between JavaScript and Solidity, Foundry allows developers to write tests, scripts, and deployment code entirely in Solidity, significantly reducing context switching. The workflow involves creating a new project with forge init, writing smart contracts in the src folder, writing tests in the test folder using Solidity assertions, deploying to a local network using Anvil, and optionally deploying to live networks like Optimism using environment variables for RPC URLs and private keys. Advanced features include using cheat codes like vm.startPrank() to emulate different users during testing and vm.expectRevert() to verify expected reverts.
Foundry Smart Contract Development: Build, Test & Deploy Solidity
Added:in this video you're going to learn smart contract development with foundry so what is foundry if we go here to the github repo you'll see that it's described as a blazing fast portable and modular toolkit for ethereum application development written in rust now this is very comparable to something like hard hat something like truffle adapt tools or brownie and it's made up of three main pieces you have forge you have cast and you have amble and we're gonna kind of go over all these in depth in this video but uh forge is something like npx hard hat where you might use it to create a new project and run scripts and do things like that you have cast which allows you to call and interact with evm smart contracts that have been deployed to the network or test out uh transactions and then you have anvil which allows you to spin up a local ethereum node this is very similar to ganache or hard hat network and now in addition to the three clis we also have the forge standard library and this is a collection of contracts that we're going to be using to kind of allow us to do a lot of the things along with the cli so they kind of worked hand in hand so using the forged standard library we can do things like mock users we can simulate different environment things and we're going to kind of be leveraging all those things together and you know in this video so some of the main differences versus something like hard hat which is what i've been using for a while now is that with foundry you can write your tests in solidity so with hard hat you're doing a fair amount of context switching between javascript and solidity so you're writing your smart contracts and solidity but you're writing your scripts and your tests in javascript so with foundry most of that context switching is completely removed in addition to that it's also very fast so because we are writing uh you know solidity and it's compiled and that the toolkit is written in rust it's pretty fast it's very fast um in addition to that you have scripting that's also solidity so in hard hat we would write our deployment scripts in javascript and with uh with foundry we can actually write those in solidity as well so tests and scripts are all in solidity and then finally we have cass which is a very very powerful command line tool and with cast we can interact with the uh projects and the contracts that we deploy with foundry or we can really just interact with any contract in existence so that's going to be kind of like the quick overview and in this video i want to kind of build out a couple of smart contracts from scratch create a new project uh test them out deploy them and just see how all this stuff works together so i'm hoping to make this a fairly short video where you can kind of learn how to get up and running with foundry as quickly as possible if you want to learn more about foundry check out the github repo here also check out the foundry book which is a really great resource and along with this video you should be able to kind of get fairly far along so with that being said i'm going to go ahead and start writing some code so the first thing we might want to do is go ahead and install foundry now i already have this installed but let's say you did want to install this on your machine you would just copy and paste this command in your command line and after that you will have a forge cast and anvil available to you so then you can run something like forge dash dash help and you'll see that we have quite a few different commands that we can use and what we want to do is use the init command to go ahead and initialize a new project now we can initialize one from within an empty directory or we can create our own directory by using forge init and then passing in the directory name so this might be foundry example or something like that and this will create a new folder called foundry example and with that being created let's go ahead and open this up in our text editor and take a look at what's created the folder structure has a an src folder which holds our main contract we have our script folder which holds our scripts and we have our test folder which hold our holds our tests and we also have our lib folder which includes already forged std library now if you want to make sure that your imports are working as expected here you'll notice that we're kind of referencing forge std and we're not really defining the path i've set up remappings which basically tell my text editor where to find these files so if you'd like to set up remappings let's say you're using vs code you can install the solidity extension and then you can go to your settings and look for solidity and we're going to have these two different configurations we want to configure the the package default dependencies contract directory as src because this is where our contracts are going to live so this way we can just import from src and then for our package default dependencies directory we want this to be lib so here we have lib slash forge std and then this way when we import from forge standard library it will automatically know that we want to go in the lib folder so uh these will be probably set as something else so if you want this to work without having to kind of define your exact paths then you can go ahead and set this up like i have it so now that you have your remappings kind of set up then what we want to do is maybe just try out one of our commands so we can kind of like generate and a build and uh build out our abis by running forge build and this will go ahead and compile our contracts and there's really nothing for us to to kind of like build out yet so if we go to the abi we don't really have anything um because we don't have any methods or anything installed or say defined here yet so what i want to do is create a pretty basic example to get started that i think would be a good starter project and for us that's going to be kind of like a counter example so instead of having src contract let's rename this to counter and i will call this counter and what we want to do is just have a way to define a counter variable that's an integer and then we're going to have a way to increment decrement and then read the the value so for the constructor we want to say ins underscore count and we can then just set counter i'm sorry let's call this count and then we can say count is equal to count all right so with uh that that means we deploy the contract we'll pass in that value and we can now define a couple of functions so we'll say function increment counter and we can now just say count plus equals one and we could do the same thing with uh decrement counter and we can say minus equals one and then we can have now just a function git count and this will just return the count i guess i need to say public view returns all right so with that being said like with that being written we're good to go and we can now maybe go ahead and compile this again forge build and we can now go check out our new api under counter json and we'll see that we have our api ready to go for us so now that we've you know generated a basic contract let's now write our test for that so to do that um what we want to do is go ahead and go to [Music] contract dot t dot sol and this is going to be under the test the test directory now with with foundry it's going to look for any function in your entire project that starts with the keyword test so here we have a test example so if we run forge test it's going to find that one function that's going to go ahead and run it so here we have test example so what we want to do is test out our counter so the first thing we might do is go ahead and get a reference to the contract so the way that we might do that is go ahead and import src slash counter that soul and now we can say counter counter and now we can go ahead and run a setup function actually this would be counter counter and here we can go ahead and say counter is equal new counter and then pass in the initial value for us that would be like something like 10.
and now we can start using counter to call functions on so we might have function test git count and here we can say and value is equal to counter dot get count and now we can do some assertions so by with the uh the standard library that we're given um we can actually go to forge let's try to find the standard library actually i might search here okay cool so we have the ford standard library reference here and then we have this std assertions so these are the different assertions that we can use um so certain false insert equals assert approximate equals or whatever like i think there's actually a lot more assertions than this but let's just go ahead and start with these let's actually search for this yeah here we go so under asserting under uh the ds test reference there we go these are like all the assertions that were that we have so what i am going to do is use assert equal so what we might want to say here is a start equal val value and then like 10 because we expect that after we've deployed this then the value should be 10.
and if we run forged test then we get test get count okay and if we change this to 11 run it again this should fail so that that's working good so i'll let that go back now what if we wanted to log something out we can actually do that as well by default the ford standard library also comes with us a set of logging uh functionality i guess you could say so if i like search for log and we get a login here under the forge book you'll see that we can emit a log just by calling omit log and passing in a string we can define the type so log int is what i'll be probably using and then we can also do a log named and this is actually probably what i'll be using so i'll say of emit log named and then here i can pass in the value is and then value now you'll notice that if i run this test again this is actually not going to be logged out by default that's because we need to explicitly describe how verbose we would like the output to be so we can do dash 2vs 3vs or 4vs depending on how much for verbosity we would like so i'm going to use vv and this will go ahead and log out the value is 10. so if you're writing uh logging and you do want that to to come in your you know when you're testing you need to describe how verbose that you would like it to be so now let's run an increment test so i'll say function test increment counter and i will say counter dot increment counter and now we're expecting the value to be 11.
and i might even just log this out as well because uh we're when we're calling this we're kind of given a fresh counter and by default we're going to be starting at 10 so when we increment it should be 11. so let me go ahead and try running this and there we go we see the value is 10 and the value is 11.
so we have uh you know set up a basic test and we've uh written a basic contract so now the next thing we might want to do would be to kind of deploy this to our uh local node and then maybe we can deploy it to a live network later so to start the node all we need to do is run the anvil command and i'm trying to think might be the best way to do this if i should just break my windows up into i can run anvil and here we're given our um private keys our accounts and rpc endpoint and we're kind of given some you know basic configuration now there are a ton of different flags you can pass anvil so i can say anvil dash dash help and you can see all of them so that's not really the focus of this video obviously is to go in all that depth but we're gonna just start off with what it gives us which is fine and with this local network we can now essentially just uh deploy to this network and then make contract calls against the local network so the way that we're going to do that is with the solidity scripting so i can now go to contract.s dot sol and here is what i want to go ahead and do so i'm going to go ahead and import from we want to import the counter and when we call the run function this is where we're going to be writing all of our code so here we can go ahead and we're going to use some of the the cheat codes i guess you could call them and the two that we're going to do are vm.start broadcast and then we're going to call vm.stop broadcast and this is going to execute transactions in between the start and the stop and this is going to be where we kind of deploy our contract so all i really need to do is say new counter passing in the constructor argument which would be 10.
and i think that's all we really need so we have the counter we call a new counter we're starting and stopping the broadcast and we're good to go and what we can now do is go to our cli and we can now run that script so we can say forge scripts scripts or script slash contract dot s dot sol and we can go ahead and grab the name of the script which is contract scripts and then we can now define the fork url and this would be the rpc url if it's a live network and here we're going to say http colon slash slash localhost 8545 that's where we're going and then we want to go ahead and define our private key now if this was a live real private key i would definitely store this in the environment variable since we're basically using these local temporary private keys i'm just going to copy and paste that there and then and then we can go ahead and actually run this now this isn't going to deploy to the network it's actually going to simulate what a deployment would look like so here we're gonna see that we say simulation complete how much this would cost to deploy and a lot of interesting information including some information about the transaction that's kind of like saved to this broadcast folder which is pretty nice now once we're ready to actually deploy this we can run that again and we want to now add the broadcast flag and once it is completed successfully you'll see that we have the transaction information saved to a local folder we have a message that says on chain execution complete and successful we have the contract address logged out here as well as here and we can now use that contract address to make calls against it using cast so that's we're going to do next so i can say cast call passing in the contract address and then i can pass in any function from our abi so here i'm going to say git count which returns an ent and there we see that we have 10 which is the value we expect we can now also send a transaction using any private key so let me go ahead and store this private key as an environment variable or one of these private keys and i can now call a transaction or submit a transaction by saying cast send the contract address and then we can go ahead and define the function that we want to call so here we might say increment counter and then the private key should be set in our local variable and let's see your cast send i think i need to [Music] see here i actually should have said export private key all right so we just made that contract call and now if we run git count again then this should be 11.
and there it is so we've successfully written compiled tested and deployed locally a smart contract so the next thing that we'd like to do is deploy to a live network i in this example i'm going to be deploying to optimism the only things that we really need to change at this point are going ahead and setting our environment variables for the actual live private key as well as the rpc endpoint that i'm going to get from infira so i'm going to take a quick break i'm going to go ahead and set those environment variables and then we're going to come back and deploy to optimism okay we're back and now we can go ahead and run forge scripts script slash contract.s.sol contract script and then we can now pass in the rpc url as rpc url and we can pass in the private key and then we can pass in broadcast and if this is successful we'll wait a couple of seconds and then we'll jump into optimistic ether scan to verify that our contract has been deployed to verify our contract we'll go open our browser and we'll go to optimistic.etherscan.io and we'll go ahead back here to our deployment we'll copy our contract address we'll paste it into the search bar and here we see that our transaction has been deployed we have our contract deployment information here we have our transaction hash we have all this metadata about the transaction and everything worked as we expected so now that we've deployed to a local network and we've deployed to a test network we kind of have a good understanding of how foundry and the different cli and things work together the next thing i want to show you is how to emulate another user and to do that we're going to be deploying an erc 721 token contract and to do that we're going to go to solidity by example and we're going to find this erc721 contract and i'm going to go ahead and copy this to my clipboard i believe that worked and i'm going to go to source and i'm going to create a new file called erc721.soul and i'm just going to go ahead and paste that there and there we have like a bunch of code that i just copy and pasted from solidity by example and we we kind of just want to see how we can emulate um another user in the sense of like we want to initialize a new erc721 token and then we want to like transfer it we want to burn it or things like that so that's kind of like the general idea around around this so that this is just going to allow us to use the prank cheat code which allows us to emulate another user which i think is a really cool thing to kind of show off so what i'm going to do is i'm going to go to test i'm going to create a new test called well actually let me go here and i'll import erc721 and i'm just going to delete all this stuff so now i can set erc 721 and then i'll go ahead and create a couple of addresses okay and then in the first function we want to go ahead and just test out minting a new token so what i can do is say i can function test mint token and i can say erc and now i can start calling functions on this so i can see erc721.mint and then if we go to the mint function you see that we have uh who the token is being minted to in the token id so i might go ahead and pass in bob and then like took an id of zero and then what we want to do now is get the address of this token maybe to make sure that this was minted and properly given to that user so we might say address owner of is equal to erc721.ownerof passing in the token id of zero and what we can now say is want to assert equal that bob is equal to owner of okay so let's go ahead and run that test and close that so testament token work so we have that working the next thing we might want to do is transferring this token to someone else so i'll call this test transfer token and we can go ahead and mint a new token to bob and then this is going to be where we kind of start using the prank where we want to start emulating the user bob because only bob can transfer you know this token to someone else because they're the owner of it so we can now say vm.start prank passing in bob and then now we are essentially acting as bob on future transactions so we can now say erc721 dot safe transfer from and we can say bob mary took an id of zero and now we can kind of do the same thing here where we want to assert that the new address is equal to mary because we've now transferred that token so let's run this test and there we go we have that uh working so we have testament token and test transfer token and we might want to do something like get the balance like how many tokens does that user hold so we might say function test get balance and i'll just copy a lot of this code here we're going to go ahead and create a new erc721 we're going to mint a bunch of tokens okay and then what we might want to say is balance is equal to erc721.balance of bob actually balance and this should be like five one two three four five okay cool so i will go ahead and try that for test looks like it's working now if we want to make sure that these are working i might say okay let's change this to four and i might say bob now we should have two failing tests yep get balance failed transfer token failed because we asserted that bob was the owner when actually mary was the owner okay the last thing we want to do is a burner token so we want to make sure that only the owner can burn a token so and now we are going to try to emulate mary and then try to burn the the token it should not allow us to do that because only bob should be able to burn so we can now say vm.start prank pass in mary and we can go ahead and say erc721.burn and we can test this out and this should fail and it fails and it's given us the reason is that the not the owner of the token so if we if we remove this or let's actually say bob why not allow bob to burn the token this should pass now there's also this i would say utility or assertion where we can say expect revert and then on the next call we can expect it to fail and if it fails then it's actually a passing test so what i might say is like vm.expect reverts and here we can pass in the name of the the error so not under token is what we're expecting and then now we're trying that and i think we need to put that right here so when we run this test we're expecting this to fail and therefore this entire test should pass and there we go we have our test passing because this failed now if we decided to to prank as bob and burn it like it should work this should fail because we're expecting um the call not to we're expecting call to revert but it's saying it did not revert as expected so that's that's pretty sweet and um you know all that seems to be working great now um again you can omit logs so we could say i met just a log where we can say log address for example and then we could still run our tests with like the dash vv flag and the address of mary it's uh zero zero two which is about right because we set it here so with uh with that that should be a good like overview slash intro to using uh all the different clies and libraries that foundry has now i haven't gotten even i've barely touched the iceberg the tip of the iceberg because if you look at all the different cli utilities or like options i would say for forge by dashing passing in forge dash dash help each one of those commands has dozens of sub-commands or sub-options and if you say cast help you'll see the same thing and then as well as anvil so all of like i've i've i've really barely touched the surface but i think like what i've shown you should be a great intro level um amount of information to kind of get you started writing smart contracts and interacting and deploying you know using foundry and i think that that if i had known this it would have been a great way to help me get going so i'm hoping this helps other people as well and that's kind of it so i appreciate you checking this video video out be sure to share like subscribe all that follow me on twitter i'm at dabit3 and i will see you next time
Up Next

Yearn Finance Explained: A Comprehensive DeFi Yield Tutorial
@Cryptomoonofficiall
23.4K views•2022-07-09

Triumph of Orthodoxy Icon: Byzantine Art & History Explained
@BenCallan
2.1K views•2024-08-06

Full Stack Web3 Development: Tools, Protocols, and Frameworks
@naderdabit
31.4K views•2022-04-09

Game of Thrones Opening Credits: A Cinematic Analysis
@gameofthrones
46.3M views•2011-04-18
Related Study Plans & Knowledge Roadmaps
Structured learning paths in General & Interdisciplinary Studies