![如何从微软下载和安装 Windows 11 官方 [教程]](https://i.ytimg.com/vi/cPGtNfbKEJ4/maxresdefault.jpg)















![Learn Python - Full Course for Beginners [Tutorial] | Learn Python in one video | Undergrad Academy](https://i.ytimg.com/vi/LJ0UcTuqptk/maxresdefault.jpg)







This comprehensive Python crash course covers fundamental programming concepts including data types (integers, floats, strings, booleans, lists, tuples, dictionaries), control structures (if statements, while loops, for loops), functions with arguments and return values, variable scope, and exception handling. The course teaches Python 3 syntax, operators (arithmetic, comparison, logical, bitwise), and built-in functions like print() and input(), providing beginners with essential skills to start programming.
Python Crash Course for Beginners: Complete Guide in 1 Hour
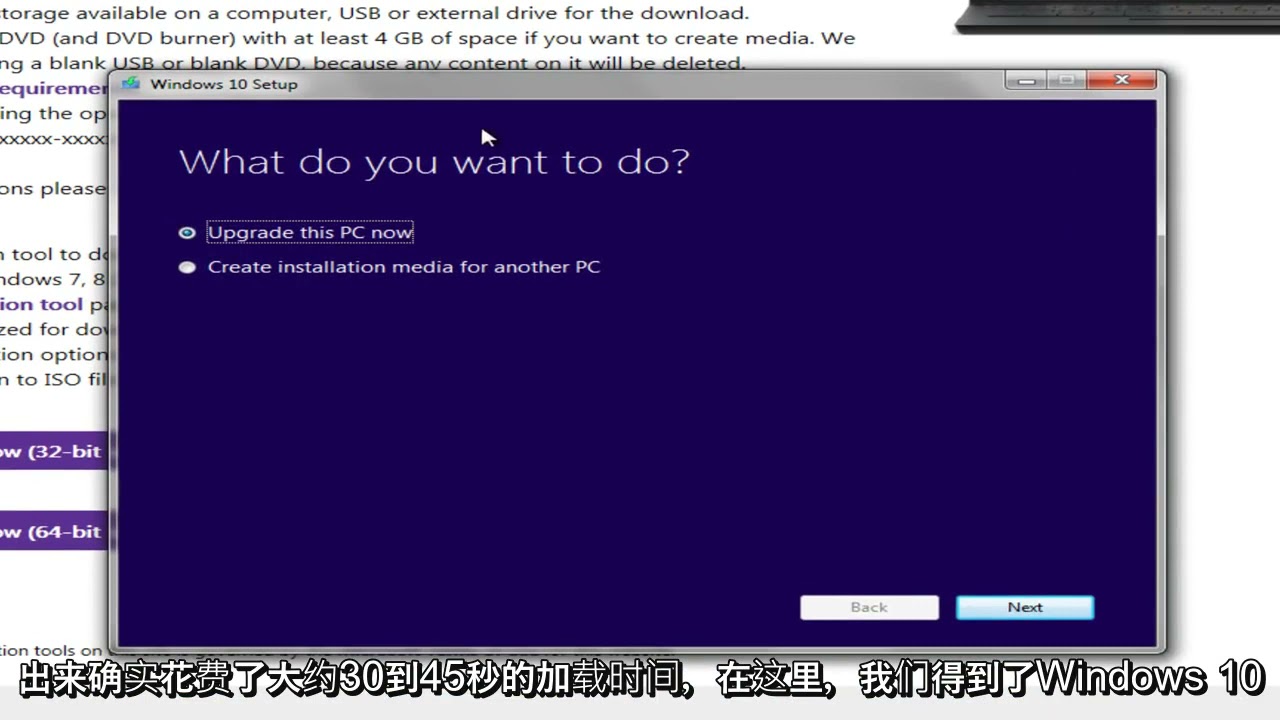
Added:Basic computer literacy, including downloading and installing software, and navigating a file directory system.
Elementary algebraic concepts, specifically the understanding of variables, expressions, and basic arithmetic operators.
A conceptual understanding of what programming is, namely giving a sequence of step-by-step instructions to a computer.
Familiarity with the concept of a Command Line Interface (CLI) or terminal, as it is often used to run Python scripts.
Object-Oriented Programming (OOP) in Python, focusing on classes, objects, inheritance, and encapsulation.
Advanced Python data structures such as dictionaries, sets, tuples, and techniques like list comprehensions.
File Handling (I/O) operations to read from and write data to external files (e.g., TXT, CSV, and JSON format).
Understanding Python virtual environments and package management using 'pip' to integrate third-party libraries.
Introduction to specialized Python frameworks and libraries for web development (like Flask/Django) or data analysis (like Pandas/NumPy).
18.8K views377likes1:14:30Original Release: 2025-05-06
First, let's briefly talk about Python.
What is it exactly and what are its powers? Python is a programming language loved by many people due to the fact that it's easy and intuitive. It's free and open- source and it can be widely used for a variety of tasks in order to solve so many everyday problems. At the end of the course, we're going to talk a little about the details of Python. But first, let's install Python and get started. In this course, we're going to use Python 3, Python's newest version.
If you're on a Linux computer, you'll most likely already have Python 3 installed by default. Open your terminal and type Python 3. If everything is installed correctly, you'll see a short message showing the Python version. In that case, you're ready to work with Python. Otherwise, go to the Python website and install Python for your operating system. The Python shell that starts when typing Python 3 can already be used in order to execute some basic Python commands. You can also create a Python file and open it in your code editor.
Make sure that the file has the py extension so Python knows that it's a Python file. In order to execute the code within that file, write Python followed by the name of the file and the PI extension. Perfect. We just executed our simple script. In this course, I'll mainly be using the shell directly in order to explain the concepts. However, feel free to follow along using the editor instead. In Python, we can use literals in order to encode data and put them into your code. A literal is data which values are determined by the literal itself. For example, the number 200, the string hello, the string Python, or the number minus 89. Any other data such as name, C, H, and print are not literal.
We don't know what value they have or what they're supposed to represent. There are four types of literal. The first literal type is the integer. An integer is a number that doesn't have a fraction. So for example, the numbers 200, 1,289,91, - 90, or 1 million. The underscores in the 1 million are just a way for developers to make large numbers more readable, but they aren't necessary. There's also octal numbers.
If an integer number has a zero o in front of it, we know that it's an octal number. You can calculate the value of an octal number by first assigning a value to each number from the right starting at zero. These values are used in order to calculate 8 to the power of these values. It's 8 since it's an octal number. Then we calculate the results. 8 to the power of 2 results in 64. 8 to the power of 1 results in 8 and 8 to the power of zero results in one.
Finally, we multiply the result of the previously calculated values with the numbers of the actual number. 64 * 1 is 64. 8 * 2 is 16 and 3 * 1 is 3. Then there's hexadesimal numbers that work almost identically to the octal numbers. However, instead of using eight as the base, a hexadeimal number uses 16 as the base. You can identify hexadimal values by the zero x in front of them.
First, we calculate the position of each value starting from the right. These values are used in order to calculate 16 to the power of these values. Then, we calculate the result. So, 16 to the^ of two results in 256. 16 to the power of 1 results in 16.
and 16 to the power of zero results in one. Finally, we multiply the result of the previously calculated values with the numbers of the actual numbers. So, 256 * 1 is 256, 16 * 2 is 32 and 3 * 1 is 3. This results in 251. Then there is another type of number namely floating point numbers. A floating point number has a non-mpty decimal fraction. Numbers that contain a lot of decimals can also be written with an e in order to represent the number in a more economical form. Then there are strings which are used to represent text. In order for Python to recognize the value as a string, the value needs to be wrapped in either double quotes or single quotes. If you need quotes within the string itself, you can do so by using a single quote. if you started the string with a double quote and vice versa.
Another way of being able to use quotes within a string is by using the escape character. The escape character lets Python know that the quote after the backslash doesn't mean that the string ends there, but it's just a quote.
Lastly, there is booleans. There are two boolean values.
Something is either true or something is false.
Sometimes you'll see that the truthfulness of a value is represented by either a zero or a one. In this numeric context, a one means that the value is true, whereas zero means that the value is false. Let's summarize everything that we've just learned about literals. First, we have several ways to display numbers in Python. An integer is a number without a fraction and can also be displayed as an optal or a hexadeimal number. Then there is floating points which are numbers that contain decimal.
Strings are used in order to represent text and can be wrapped in either double quotes or single quotes. If you want to use quotes within quotes, you can either use the other type of quote in order to make sure that Python doesn't see this as a delimiter and ends your string. Or you can use the escape character to let Python know that the quote is a special character. Lastly, there are boolean values that specify whether a value is either true or false. They can also be represented as numbers. Zero being false and one being true. Let's run our very first program. Let's see what happens when we run this line of code. Print hello future Python programmer. After running this line of code, you see that Python returned a sentence saying hello future Python programmer. the exact same sentence that we saw on the line that we just wrote. Let's take a closer look at the print function that we just ran. The line that we previously wrote consists of the word print, an opening parenthesis, double quotes, a line of text saying hello future Python programmer, double quotes again, and closing parenthesis. Combining all these characters together made it possible for Python to understand that we wanted to print the line hello future Python programmer. But how is it able to do that? The word print here is a function name. A function is part of our code that we can use in order to custom effect or evaluate a value. In this case, we use the print function to print the line hello future Python programmer to the terminal. Some functions come from Python itself. In this case, we never told Python that it should print something to the console when we use the print function. It already knew this since it's a built-in function.
Functions can also come from one or more of Python's modules. Some modules come with Python and others require some installation. How modules can be installed will be covered later.
Lastly, we can also write our own functions in our programs to make our code simpler, clearer, and just more elegant. Let's take a look again at the anatomy of the function that we just saw. Now that we know what the word print is for, what about the other values? This is another component of functions, namely arguments. We can pass arguments to a function by placing them between parentheses.
In this case, we pass the line hello future Python programmer as an argument to the print function. The line is delimited with quotes and a value between quotes is called a string. The quotes cut out a part of the code and assign a different meaning to it. The quotes tell Python that the text between them is not code and shouldn't get executed. Python should just take it as it is.
If we passed another string to the print function, Python will print that string instead. Now, let's see what steps Python takes in order to execute a function. First, Python checks if the name of the function is legal. If it's a built-in function, it browses the internals in order to find an existing function with that name. If that fails, the execution is aborted. Then Python checks if the function's requirements for the number of arguments allows you to invoke the function in the way that you just did. When the arguments have been validated, Python leaves your code for a moment and jumps into the code of the function that you want to invoke. In this case, the internal print function gets executed and uses the value that we passed as an argument to the function, the string, hello future Python programmer.
The function is executed and in this case prints the line that we passed to it as an argument. Finally, Python returns back to your code and it resumes the execution of the code block. Since the print function is an extremely important function when working with Python, let's look at all the possibilities that this function provides.
If we want to print multiple lines at once, we can do so by invoking multiple print functions, each on their own line.
An important thing to keep in mind is that there cannot be more than one instruction on a line in Python. If you want to print a longer sentence that should be separated with new lines, you can do so with a new line character. The N stands for new line, and the backslash lets Python know that the next character after the backslash has a special meaning. This prints the sentence with a new line. So far, we've only passed one argument to the print function. But what happens if we pass multiple arguments instead, each separated by commas? Python prints the exact same line as it did when we just passed it as one string. When we pass multiple arguments to the print function, Python combines the arguments together and prints them all on one line.
In order to get a little more control over the output, Python allows you to pass special arguments to the print function, namely keyword arguments. One keyword argument is the end argument.
The keyword argument end determines the characters that the print function sends to the output once it reaches the end of its positional arguments. Previously, we saw that invoking the print function on two lines meant that their output was also printed on two lines.
This happens since the new line character is the default value that Python adds once it reaches the end of its positional arguments. With this end keyword that consists of just an empty string, we told Python to use an empty string instead of a new line. This means that both lines were printed on the same line. You can pass whatever value you want to use at the end of the hello output. Another keyword argument is se.
This keyword allows you to control how Python separates the outputed arguments, which is just a space by default. Combining the SE and end keyword arguments gives you full control over the print functions output. In this case, we're separating the arguments in the first line by an exclamation mark and a space. We're ending the output with a heart emoji and a new line. The second line is separated by a comma and a space and ended with a smiley emoji.
So, let's summarize everything that we just learned about the print function.
Print is a built-in function that allows you to print values to the console.
Since it's a built-in function, we always have access to the function without having to import it or specify it anywhere. And since it's a function, we can call it by invoking it with parenthesis. In between these parentheses, we can pass the values that we want the print function to output to the console. We also learned that the backslash is a special character in Python that we can use in order to tell Python that the next character is a special character. We saw this with the new line character that is specified by a backslash followed by an N for new line. Then we saw that we had full control over the output with the keyword arguments such as set and end. Python has seven types of arithmic operators. The exponentiation operator receives a base and an exponent. You may be used to using superscripts when working with exponents, but in Python, we use the double asterisk instead of superscripts. We can now calculate the results for all the expressions. You may notice something special going on with the decimals. It's important to remember that if both values are integers, the result will also be an integer. However, if at least one of the values is a floating point number, the result will be a floatingoint number as well. You can use the single asterisk in order to perform multiplications. The floating point versus integer rule that we previously saw applies here as well. So, if at least one of the operants is a floating point number, the result will be a floating point as well. With the division operator, we can divide values.
However, you may notice something different here. Whereas previously the operators returned an integer if both of parents were integers, the division operator always returns a float, Python always returning a float when dividing values may not always be the behavior that you want. Luckily, Python also allows us to use the floor division operator or the integer divisional operator in order to return an integer as long as both the parents were integers as well. Besides returning an integer, the floor division operator also rounds the values towards the lesser integer value. For example, 6 / 4 with the normal division operator is 1 1/2. But with a floor division, it rounds it down to the lesser integer value that is close to which is one.
When we divide 6 by -4, the result with the normal division operator is - 1/2.
However, when we divide them with the floor integer, the result will be rounded down to the lesser integer which is minus2. With the modulo operator, we can calculate the remainder after division.
We can calculate the remainder after dividing four by two with modulo operator. Since four can be divided into pieces of two, there is no remainder after the division. So, 4 modulo 2 returns zero.
Now let's try to find the remainder after dividing five by two. After five pieces have been split into groups of two, there is one piece that remains.
This is the remainder after dividing 5 by two. So five modulo 2 returns one. We can use the plus sign in order to add values and the minus operator in order to subtract values. So far we've only worked with binary operators. A binary operator expects two arguments, one on the left and one on the right. However, the minus operator is also a unary operator. We can use the minus operator in order to specify that the value should be negative such as -2. For example, -6 - 6 is -12 or 10 - - 6 is 16. So far, we've only used one operator in the expressions. However, we can of course use as many as we'd like. There's just one important thing to keep in mind, their priority. The unreal parents have the highest priority. Then we calculate the exponential expressions followed by multiplication, division, floor division, and the modulo. And last but not least, all the additions and subtractions are calculated. Let's take a look again at this example. There are no unary operators at the moment. So the next most prioritized oparent is the exponential operator which we're using here to calculate 6 ^ of 2 and 6 to the^ of 2 is 36. Then the most important oparents are the division and the multiplication operators which we're using here. In this case if the two operators have the same priority we calculate it from the left hand side. So first we calculate 36 / 9 which is 4. Then we calculate 4 * 10 which is 40.
Finally, we only have the least prioritized operators left, namely the plus and the minus operator. Again, we calculate the result from the left hand side. 10 - 40 is -30. -30 + 1 is -29. This is why the result is -29. With sub expressions, which are expressions between parentheses, we can change the default hierarchy a bit. Sub expressions are always calculated first.
In this case, the sub expression 2 + 3 results in five after which the result of that sub expression is multiplied by two and 2 * 5 results in 10. Even though the operator within the subpression had a lower priority than the multiplication operator, Python calculated the result of the sub expression first. Since sub expressions have a higher priority than the multiplication operator, so far we've worked with some arithmetic operations that didn't really make sense. In this case, the two doesn't really represent anything, nor does the five. Now, let's say that the two stands for the amount of apples that we want to buy, and five is the amount that they cost. Instead of just using two and five, we can make use of something called variables. Let's create a variable called amount of apples and assign it to the value of two. Then let's also create a variable called cost of apple and assign it to the amount that an apple costs namely five. Now let's try to use the print function again but using the variable names this time instead of just the direct numbers. Python prints the exact same numbers as we saw before namely 10. You can see a variable kind of as a bucket to store a value. A variable has a name such as amount of apples and cost of apple and a value such as the numbers 2 and five. If you want to give a name to a variable, you must follow some pretty strict rules. A variable name can be composed of uppercase and lowerase letters, digits, and an underscore.
The name of a variable must begin with a letter or an underscore. Upper and lowerase letters are treated as different variables. So this means that the lowerase cost of apple is not the same variable as the uppercase cost of apple. They can both have entirely different values and can be used in totally different contexts.
And lastly, the name of the variable cannot be any of Python's reserved words. The meaning of a reserved keyword is predefined and cannot be changed in any way. If you want to use a variable name that should have the same name as a reserved keyword, you can do so by, for example, changing the casing. It can happen that over time the value of a variable should change. Let's say that the price of an apple increased by $2. This means that the new cost of an apple is the original cost of an apple plus two. We can reassign the cost of apple variable to be the original value of the cost of apple plus two.
When we print the sum again of the total amount of apples times the cost of an apple, it now correctly prints 14 since 2 * 7 is 14. We just incremented the value of the cost of apple variable by setting the value of cost of apple equal to the current value of cost of apple plus two.
There is actually a shorter way of writing this. So-called shortcut operators allow us to reassign the value of a variable based on the current value. In this case, the shortcut operator plus equals tells Python that we want to set the value of the cost of apple equal to the current value plus two. When we print the sum again of the total amount of apples, it now correctly prints 14. The shortcut operator doesn't just work for the plus operator. It works for all the other operators as well that we've previously covered. So, as you can see, the shortcut operator makes it easier to write shorter and cleaner code. Let's summarize the things that we've just learned about variables.
With variables, we can store values. We give a variable a valid name, namely a name that starts with a letter and contains uppercase or lowerase letters, digits, or an underscore. The name of a variable cannot be the name of a reserved keyword. Python allows us to redeclare variables over time just by assigning it a new value. This can also be done with a shortcut operator that makes it easier for you to write shorter and cleaner code. We write code that may not be extremely obvious to other developers on our team. In that case, we can write some comments in our code by writing a hash followed by the comment that we want to add. Whenever we actually run the code, this comment is emitted.
Python doesn't do anything with them.
Their sole purpose is to add some extra information for other developers on our team or just for yourself in the future.
If your comment is pretty long and should be on multiple lines, make sure that you add a hash in front of all the lines. If you don't do that, Python will try to evaluate the code, which most often just ends up in a syntax error.
Although adding comments is a nice way to make sure that everyone understands your code, definitely don't overdo it.
It's always best to aim for self-documenting code. For example, writing a comment explaining what each variable represents is really not necessary here. We know that the amount of apples should represent the amount of apples and the cost of apple variable represents the cost of an apple. You can also comment out code that you temporarily don't want to use.
In this case, since we commented out the cost of apple variable, Python will not create a variable called cost of apple.
So when we try to use it in our print function, Python will throw an error since it doesn't know anything about a variable named cost of apple. Let's summarize what we just learned about comments. A comment is only useful for humans, and you can add them to your code in order to provide additional information that may be useful for other developers on your team or just for yourself in the future.
However, wherever possible, try to write self-documenting code that doesn't need comments in the first place. We've seen that the print function allows us to print values to our console. Now, let's look at another useful function, namely the input function. The input function prompts the user to input some data from the console. It's able to read this data entered by the user and returns it to this running program. If you want to store the value that the user input, you can assign a variable to the input function. Let's say that we want to know our user's favorite caller. The value of this variable will be whatever the user wrote as input. We can now use that value that the user submit in our program. The value of the input function is always a string. Even if the user inputs a number, this number is actually just a string. And this is important to remember. If you want to do some arithmetic operations based on the value that the user input, Python throws an error here. Since we're trying to subtract 10 from a string, which is not a valid operation. If you want to make the string an actual number, you can use built-in functions in order to change the type of data. This is called type casting. There are two types of functions that we can use there in order to type cast data. int in order to turn the string into an integer and float in order to turn the string into a floating point number. In this case, since age is an integer, we can wrap the value of the h variable in the int function in order to turn it into an integer before we subtract 10 from it. Since 22 minus 10 is a valid operation, Python doesn't return an error and just returns the result 12. You can also wrap the input in the int function directly. In that case, the value of h is always an integer. Let's summarize what we've learned about the input function. When using the input function, the program stops and the user gets prompted in order to submit a value. If you want to add a string in front of the user input, you can do so by passing the string to the input function. The result of the input function is always a string. With type casting, however, you can change this to be a numeric type. And a program that doesn't use any inputs is called a deaf program. In Python, we can use six comparison operators in order to compare values. The equal operator checks if both values are equal to each other. For example, 2 equals 2, but 2 doesn't equal 4. The string hello is equal to the string hello, but it's not equal to the string goodbye. Next is the not equal operator, which does the exact opposite of the equal operator. Since 2 is not not equal to two, it returns false. But since 2 is not equal to 4, it returns true. Then there is the greater than operator which checks if the left hand apparent is greater than the right hand apparent.
The greater than or equal to operator is almost identical to the greater than operator. However, this operator also returns true if both values are equal to each other. The smaller than operator returns true if the left-hand apparent is smaller than the right- hand apparent and the smaller than or equal to operator also returns true if both values are equal to each other.
Comparison operators are very useful when we want to run code based on a certain condition. In order to run code conditionally, we can use Python's built-in if keyword in order to decide whether it should get run or not. If the condition after the if statement is true, the code block gets executed. If it's not true, it just gets ignored and Python continues to execute the rest of the code.
Let's say that we have an input that we can use in order to get the user's age.
Based on their input, we will print you're an adult if the age is greater or equal to 18. If that's not the case, we won't print anything. Since age was greater than 18 in this case, namely 22. The string you're an adult got printed to the console. It's important to remember to write a colon and add indentation. You can indent it by either using tabs or spaces as long as you stay consistent. So far, we've only seen that code can be executed if the condition is true. However, we can also add optional instructions that let Python know to execute a certain code block when the condition is false, namely with the else keyword. If the condition is true, the code block after the if statement will get executed. But if it's false, the code after the else statement gets executed. Besides if and else, there's another keyword you can use, namely L if. You can use L if in order to add another condition. If the first condition returns false, then Python will check if the condition in the L if statement returns true. And if that's the case, that code block will get executed. However, if the first condition already returns true, only the code block in the if statement will run. The rest of the L if and else block won't run. Even if the condition in the L if statement also returns true. Code within the code blocks after an if, L if, or else statement can also contain conditional code. If the person's age is exactly 18, which can happen since we initially check if the age is greater or equal to 18, we'll print you're exactly 18 years old. If that's not the case, it means that the person is older than 18 years old. They cannot be younger since the first if statements condition wouldn't have had returned true in that case.
[Music] The while keyword allows you to execute code as long as a certain condition is true. This means that the code block can run repeatedly as long as the condition returns true. Let's say that we want to play a little guessing game with our users. We have a secret number that they have to guess between 0 and 5. And as long as they didn't guess the number correctly, we'll prompt them again until they guessed it correctly. When the user guessed the number right, namely the number three, the condition guess is not equal to the secret number returned false and the while code block didn't get run. Just like the if statement, a while statement can also accept an else block. Let's congratulate the user when they guessed the number correctly. When the user guessed the number correctly, the condition for the while statement returned false and the else code block had executed instead which printed the text congratulations, you got it. Another way of executing code repeatedly based on certain values is with a for loop. This is an example of a for loop. First, let's look at the range function. The range function is responsible for generating all the desired values of the control variable.
In our example, the function will create values from 0 till 9. Then there's I, which is the control variable of the loop. This variable counts the loop's turns automatically. You can also add a first argument to the range function in order to determine the initial value.
Normally the code block in a for loop will keep running as long as it's in range. However, in some cases, we don't want to continue the loop after a certain event happened since it may just be unnecessary. Let's say that we want to stop the execution for the for loop if the current value of i is two. We can do this by creating an if statement to check if the current value is two. And if that's the case, we break out of the loop with the break keyword. Execution now goes like the following. I is now equal to two. The if statement returns true, which means that Python stops the execution of the loop. In some cases, instead of breaking out of the loop, we just want to skip the current iteration. This means that for specific values within that range, the code block won't get executed. You can do this with the continue keyword. I is now equal to two, which means that the iteration will be skipped. Nothing will be printed.
Instead, Python will just go to the next value. Let's recap what we've learned in this section. With an if else statement, you can run code conditionally. The while keyword allows you to execute code as long as a certain condition is true. This means that this code block can run repeatedly as long as the condition returns true. And lastly, a forin loop is another way of executing code repeatedly based on the elements in a sequence. When we're writing programs, we often want to check whether certain assumptions or expectations are true or false. Let's say that we have two variables representing two different ages, namely age 1 and age 2. Based on their values, we want to print different lines to the console. If both ages are higher or equal to 18, we want to print you're both adults. If one of them is higher or equal to 18, we want to print one of you is an adult. Otherwise, we want to print you're both children. In Python, we can write these conditions with the and or or keyword.
The first condition, so if both ages are higher or equal to 18, can be written with the and keyword. With the and keyword, we can get a boolean value based on the values that we pass. If both are true, and returns true.
Otherwise, if only one of the value is true or none of them are true, it returns false. In this case, if both ages are not higher or equal to 18, the condition will return false and the code block in the if statement won't get executed. Next, we have the condition within the else if. This condition can be written with the or keyword. The or keyword, we again get a boolean value based on the values that we pass. It returns true if both values are true or if only one of the values is true. It only returns false if both values are false. So in this case, if one of the ages is higher or equal to 18, we print one of you is an adult. Else it means that both ages are lower than 18 and we'll print you're both children. There is another logical operator which only takes one value. For example, if we want to print you are not hungry if the is hungry variable is false, we can use the not keyword in order to determine whether is hungry is false. In this case, is hungry is false.
So not is hungry returns true and the line you are not hungry gets printed. So far we've seen the and or and not logical operators. Beside the logical operators, we also have bitwise operators. Bitwise operators allow you to manipulate single bits of data. The first operator, the emperand, is used for bitwise conjunction. For example, let's perform the bitwise operation with the integers 15 and 22. For simplicity, let's just visualize these bits. Now, let's see what happens when we perform the bitwise operation on these bits. As we saw before, the conjunction bitwise operator only returns one if both bits are one.
Otherwise, it returns zero. In this example, 1 and 0 returns zero. 1 and 1 returns one. 1 and 1 returns one. 1 and 0 returns zero. 0 and one also returns zero. These bits correspond to the integer six. So when we print the result of the bitwise operation, six gets printed correctly.
Now let's look at the other bitwise operator for disjunction. We'll be using the same integers. This bitwise operator returns one if either both bits are one or if only one of the bits is one. In this example, one and zero returns one. One and one returns one. One and one again returns one. One and zero returns one. And zero and one returns rest of the zeros all return zero.
These bits represent the integer 31. So when we print the result of this bitwise operation, you'll see that 31 gets printed. The next bitwise operator is the exclusive or operator. This operator returns one if only one of the bits is one. If both of them or neither is one, it returns zero.
This means that 1 and 0 returns one. One and one returns zero. 1 and one again returns zero. 1 and 0 returns one and 0 and one returns one. These bits represent the integer 25. Then there's the last bitwise apparent that just takes one argument namely the negation. The negation returns one for every zero and zero for every one. These bits correspond to the integer minus 23.
We can also abbreviate the bitwise operations as the following to keep our code clean and concise. Lastly, there's something called bit shifting. With bit shifting, we can literally move bits a certain amount of places. Let's take this operation as an example. What we're basically telling Python here is that we want to move all the bits that represent integer 22 to the right by one.
Let's visualize what this would look like. If we shift all the bits to the right by one, we now have a new set of bits that represent another integer, namely the integer 11. We can see that Python prints this integer when we perform the binary right shift. We could have also told Python to shift them by two, in which case the result is the integer five. Now let's perform a binary left shift by one.
This set of bits represents the integer 44. Maybe you've noticed a pattern here.
When we performed a binary right shift by 1, the result was 11, which is exactly half of 22. When we performed a binary right shift by two, the result was five, which is a quarter rounded down. Then when we performed a binary left shift by one, the result is 44, which is exactly 22 * 2. Performing a binary right shift is the same as an integer division by two.
And shifting it by two is the same as an integer division by four. A binary left shift by one is the same as multiplying it by two. And shifting it by two bits would be the same as multiplying it by four.
Let's recap what we've learned about logical and bitwise operations. The and not and or operators return either false or true based on the values that we pass. These operators are very useful in if statement conditions. The bitwise and or exclusive and not operators allow us to manipulate single bits of data. They return either zero or one based on the bits that are passed or the bits that correspond to the integer that we pass.
You cannot use them with floating point numbers. And we can perform a binary right shift or left shift which shifts the bits a certain amount to the right or to the left and returns the integer that corresponds to the new set of bits. If we want to have a collection of multiple elements, we can create a list.
In a list, each element is a scaler and each element in the list has an index.
The very first element in a list has index zero. The second element has index one and so on. If we want to get a specific element from the list, we can access this value by writing the index in square brackets after the name of the list. We can also change the value on a specific index. Let's for example change the value on the first index, so USA to be UK instead. The first item in the country's list is now equal to UK instead of USA.
The built-in len function allows us to get the length of a certain list. In this case, there are three elements in the country's list. So, the len function returns three. We also have access to the dell keyword, which allows us to delete an item in a list. If we want to delete the second item in the list, we can specify that by deleting the item on index one in the country's list. Canada's now gone and India has index one instead. So far we've seen that we can get values in a list by specifying their index. However, we can also get items in a list by specifying a negative index. For example, if we want to get the value of the last element in the country's list, we can specify this by accessing the value on index minus one. We cannot access values on indices that don't exist. For example, there is no fourth index or minus4th index. In that case, Python throws an error saying that you're trying to access a value that's not in the range of the list. In order to change the data in lists, we can also use built-in Python methods. Methods are specific kinds of functions. They behave like a function and look like it, but their purpose is a bit different. Whereas a function acts on its own, a method is owned by the data that it works for. For example, the methods on lists in Python are used in order to manipulate the lists on which they're invoked. Two important methods are append and insert. With the append method, we can add a new item to the end of the list. With the insert method, we can insert a new item in between values instead of just at the end of the list.
The first argument that this method receives is the index that the new value should have. In this case, it should have the index two. So the existing items in the list have to shift one place to the right. In some cases, we want to swap values within a list. Let's say that for example, USA and Canada should swap places. One way to do that is to create a temporary variable that stores the value of the first item in the list and then change the value of the first item in the list to have the value of the second item in the list. And lastly, we set the value of the second item in the list to have the value stored in the temporary variable which holds the value of the previous first item in the list, namely USA. Although this is all valid Python code, there is an easier way to write this. We can easily swap values with just this one line. What we're saying here is that the value of the first item in the list should be equal to the value of the current second item in the list and the value of the second item in the list should have the value of the current first item in the list. The values now successfully switch places. Two other useful list methods are sort and reverse. The sort method sorts the array on which we invoke the method. By default, it sorts ascendingly from the lowest value to the highest value or from the lowest letter in the alphabet to the highest. Beware that this method modifies the original array. Now, when we print ages, we see that the array has been sorted from the lowest to the highest value. The reverse method reverses all the elements in the list.
The first item becomes the last item and the last item becomes the first item.
When we print ages, we now see that the list has been reversed. With a for loop, we can loop over a list. Let's say that we want to know the average age in this list of ages. In order to calculate the average, we first need to know the total amount of all ages combined and then divide that by the length of the ages list. In order to get the total amount of all ages combined, we'll create a variable called total that will store the total amount. Next, we have to loop over the list with a for loop and increment the value of total with the value on the current index. On each iteration, the value of total will increase with the value of the currently active element.
The total of all ages combined is 198.
Now we can calculate the average by dividing the total by the length of the list which we can calculate with the len function. When we print the average we see that the average age of all ages is 49 and a half. There is one important difference when working with lists versus working with regular variables. When we define a normal variable, for example, a name variable that holds the value of the string Lydia, Python stores this value in memory directly with a string. When we create a list, however, we're actually creating a variable which value is simply a reference to the address where that list is stored in memory.
Whenever we're trying to create a new variable that should have the same value as the ages variable, for example, called ages 2, we're actually copying the reference to the same spot in memory that ages refers to. This means that whenever we change the value of an element on the ages list, for example, by changing the value of the first element to 92, you'll also see this change on the ages 2 list. If you don't want this to happen, you can slice the list. We can slice a list by using square brackets and specifying an optional start and end index that specify how we want to slice that list.
The element on the start index is the first element that should be included in the new list. And the element on the end index won't be included in the slice list, but it'll be sliced exactly before that element. Let's say that we want to create a new list that should only contain the first two elements of the letters list. So letters A and B. We can create this new list by slicing the letters list and specifying that we want to slice it from the elements in index zero to the elements with index two. Now when we print the first two variable, we see that a new list has been created that only contains the first two items.
If we only specify a beginning index, we're slicing it from that index all the way to the end. And if we only specify an end index, we start from the very beginning until that index. You can also specify negative indices, which is useful if you don't exactly know the length of the list. Let's say that we want to create a new list, that is a copy of the letters list, but the first and the last elements are cut off. We know that the last element is on index minus one and the first element is on index one. So we slice it from the start index one and end index minus one. Actually we don't have to specify any indices at all. In this case the entire list gets copied. This solves the issue that we saw before where we would set one variable equal to another list.
When we're slicing the list we're creating a whole new list in memory.
This means that if we modify that list, you won't modify the original list. We can also use the dell keyword when slicing the list. However, there is one big difference here. Whereas we're creating a copy when we're creating a list without indices, if we delete multiple items by using the dell keyword and slicing elements, we are modifying the original array. We can even delete all elements in an array if we don't specify any indices. Now when we print the letters array, you'll just see an empty array. Python gives us an easy way to find out whether an element is in the list or not. For example, if we want to check if B is in this letters array, we can type B in letters. Python returns true if the element is indeed in a list.
If it's not, it returns false. If you want to specifically find out if an element is not in a list, you can use not in, which is basically the exact opposite of in. So far, we've only had lists which elements were just one single value.
However, the element of a list can also be another list. Let's take this classroom for example. There are four rows, each with four students. In the Python world, we can write this as the following. We create a list with four elements. Each element represents a row of students which each have four elements that represents each student. The list that we just created here is called a 2D array or a matrix. A 2D array is a list that consists of other lists. Now, let's say that we want to get an individual student. Let's say that we want to get Sarah. First, we have to know which row they're on, the third row in this case. in our 2D array.
That is the list on index two. However, we're not quite there yet. We just have the entire row of students. Now, within this list, Sarah is on index one. So, we can get this value now by accessing the element on index one. Perfect. Now, when we print student, we see that is equal to Sarah. So far, we've seen 2D arrays, but you can also have 3D arrays.
For example, if we want to create a list that contains the entire school building. Let's say that a school building just consists of having multiple classrooms stacked on top of each other. When we write this in Python, it would look something like this. This seems a bit complex, but the school variable is a list that consists of other lists. And each list on the first level represents an entire classroom. This type of list is called a 3D array or a cube. Let's say that we want to get student Max from the school three-dimensional array. First, we need to know which floor Max is on. He's on the first floor. Then, we need to know which row he's sitting on. He's on the third row, so index two. Lastly, we need to know which seat he's on. He's on the second seat, so the seat with index one. Perfect. Now when we print student we see that we have max. So far we've been using some common built-in functions such as print len and input. And we saw the difference between a function and a method. In Python functions come from either Python itself such as print len and the input functions from modules or from your own code. First let's talk about creating our own functions. It happens many times that we want to repeat a certain part of our code. However, the more we repeat it, the higher the chances of accidentally introducing bugs and just overall decreasing the readability. Instead, we can isolate it into its own function. In this case, let's call the function input number.
We just created a function by using Python's built-in dev keyword, which is short for definition, and it lets Python know that we want to create a new function. This is followed by the name of the function and two parenthesis followed by a colon. Next, we have the function body, which is what the function is all about. The function body contains the instructions that we want the functions to execute whenever we use this function in our code. In this case, the function should prompt the user to enter a number using the input function and automatically converting it to an integer by using int. However, there is one new keyword here, namely return. And although this keyword isn't necessary when writing functions, this return keyword tells Python that this function shouldn't just execute a certain block of code, it should also return a certain value. In this case, it should return the value of the number that the user wrote in their console. Let's rewrite the repetitive code to use our own input number function instead. Perfect. We now have multiple values that all invoke the input number function when we're trying to access them. Now, let's print the value of input one. The value of the input one variable is now the value that the user wrote to the console. This happens since the input number function returned the value of the input and we set the input one variable equal to the returned result from the input number function. We can do the same for all the other variables. Input 2 has a value of 34. It's important to remember that we cannot invoke a function that Python doesn't know about yet. For example, if the function is defined on a line below the line on which we're trying to invoke it, Python will throw an error saying that it's not defined yet. Python also allows us to pass values to a function. We can pass these values between the parenthesis. For example, let's say that the input number function shouldn't just return the number of the user's input, but it should return the number of the user's input multiplied by a value that we pass to the function. Our input number function now has a parameter called num. In order to specify the value of num, we pass an argument. Let's say that we want variable input one to have the value of the user's input multiplied by 10. We now pass 10 as an argument to the input number function. So the value of num in this case is 10. The value of input 1 is 10 * 12. So 120 in total. The function can also have multiple parameters which are all separated by a comma. In that case, the position of the arguments that we pass matters. For example, the first value that we pass is the value of num one and the second value that we pass is the value of num two. Or in other words, we're giving the first parameter the value of the first argument and the second parameter the value of the second argument. If you don't want the position to matter, you can also pass named parameters. For example, if we want the first argument to be the value of the second parameter and the second argument to be the value of the first parameter, we can do so by explicitly passing the named parameters. The num 2 parameter is now equal to 10 and num one is now equal to 20. Just make sure that you don't pass arguments that are pointing to the same parameter. For example, by first passing an unnamed argument that gets passed to the num one parameter and then also passing a named argument that also points to num one. Python wouldn't know which value you'd want to use and throws an error. We can also set default values for parameters. In that case, the user isn't required to pass a value for the num parameter. Instead, by default, it'll have the value of 10 and the user's input will be multiplied by 10.
Since we didn't pass a value, Python used a default value of 10 and multiplied our input of 12 by 10, resulting in 120. If we did pass a value five, for example, Python wouldn't use the default value, but use the value that we passed.
The function now returns 60. There is one important keyword here that we've been using the whole time, namely return. However, like we said before, functions don't necessarily have to return any value. They can also simply perform actions. For example, printing something to the console. In this case, we're printing the sum of the values of the arguments that we pass to the function. If Python encounters a return keyword, it stops the execution of the rest of the function body. If we for example just added a return statement in between these lines, Python would never reach the line on which we print the sum and it won't print anything. In some cases, you might want to return early from a function. Let's say that we don't want the function to print anything if the sum equals zero.
If the sum doesn't equal zero, for example, by passing four and two, which results in six, the condition in the if statement returns false. So the function doesn't return but prints the sum instead. However, when the sum equals zero, for example, by passing minus1 and one, the function returns and doesn't print anything. As you can see, the return keyword gives you, besides the possibility to return a value from a function, also a lot of control over the execution of your function.
Although the return word isn't necessary in a function in order to return a value, Python still always returns some kind of value. This value is called none. In this example, we have a simple function that returns true if the past argument is an even number. If it's not an even number, we simply won't return anything. Let's print the result of the is even function when we pass the number six, an even number. Since six is even, it returned true. Now, when we try to print the result of an odd number, it returns none. None basically tells us that a variable doesn't have any value. So far, we've only passed strings and numbers to function, but we might as well pass lists. Let's say that we have a function called multiply values to which we can pass a list. First, we create an empty list called multiplied values. And later on, this list will include all of our multiplied values. Then, we loop over the list that we pass to the function. For each element in that list, we append their multiplied value to the multiplied values list. And lastly, we return the list that now contains all of the elements that we passed to the multiply values function times two. Let's try it out with some lists. Now when we try to pass something other than a list, Python throws an error since we cannot loop over an integer. An important thing to remember is that parameters and all values that are declared within the function body are scoped to just that function. This means that variables that are declared within the function body are only available within that function itself, not outside of it. Let's take the result variable here as an example. Within the function body, we declare a variable called result. That is the result of the value of the input of the user multiplied by 100. If we try to print the result variable outside the input number function, Python throws an error. It doesn't know what result refers to since the result variable is only available within the function body of the input number function and not outside of it.
However, we can use variables that are declared outside of the function within the function body. For example, the num variable. It can happen that we have a variable with the same name both outside of the function body, namely in the global scope or inside the function body or in the function scope. In that case, Python will use the variable that's declared inside the function scope. only if it sees that we're trying to reference a variable that it cannot find inside the function scope, it'll look for the global scope. We learned that by default, variables declared within the function scope are only accessible within that function, not in the global scope.
However, if you want the variable declared within the function scope to be accessible in the global scope, you have to add the global keyword with the variable name that you want to make globally accessible.
Now when we try to access the variable from outside the function scope, Python will successfully return the value. Previously we talked about the fact that variables that represent lists behave a little differently compared to values like strings and numbers by the way they're stored in memory. The same concept applies to parameters. First let's see what happens to a scalar value. We have a variable called h that is equal to the scalar number 22 and a function called multiply that receives a parameter. It sets the value of the parameter equal to its value but multiplied and then prints the multiplied value. Let's pass the age variable to the multiply function.
Python prints the string with the multiplied value of age namely 44. Now let's print a value of age. The age variable still has the value of 22. This happened since Python basically creates a copy in memory for scalar parameters.
We didn't modify the original age variable that we passed but instead we created another variable for the parameter and it received the same value as the age variable. When we multiplied that value only the value of the parameter got multiplied and age remained 22. With lists however this works a little different. In this case, we have a variable that is a list containing some numbers 1 2 and three. We know that variables that have list values are stored with a pointer to the location of the list in memory. The change first item function receives a parameter called list. The function changes the first item in this list to have the value of 9. Now let's pass the nums list to the change first item function.
The first parameter now points to the same list object in memory as a nums list. When the change first item function modifies the first item in the list, we will also see that modification on the original nums list. So far, we've only talked about lists. We've seen that we can change the data in the list by, for example, deleting items or appending them. A list is mutable. Immutable data can be updated any time. Another type of data in Python is immutable data. Data that cannot be modified. An example of this is a TP. A tpple is an immutable data type that we can write by using either parentheses instead of the squared brackets that we previously saw when we created lists or simply as a set of values separated by commas. In order to read data from a tpple, we can use many of the same methods as we've previously seen on a list. For example, by using a for loop or slicing the tpple. Using methods to modify the contents is not allowed though since a tpple is immutable. For example, when we try to use the append method, Python throws an error telling you that this method is not available on a tpple.
You'll get similar errors for other operations that would modify the tpple's contents. The elements within a tpple can be of any type. In this case, we have a tpple that contains a number, a string, a variable, and another tpple.
You can also create a tpple with just one element. But in that case, just make sure that you write a comma at the end of it. Otherwise, Python has no way of distinguishing a regular variable from the one element tpple. Another data type is the dictionary. Let's say that for our application, we need to know the usernames of our users. In Python, we can write this as a structure like this.
This structure is called a dictionary. A dictionary consists of keys and values.
Together, they make key value pairs. All the key value pairs in a dictionary are surrounded by curly braces and the keys are separated from the values with a colon.
We can get specific elements within a dictionary by writing the name of the dictionary and writing the key which value we want between brackets. Whereas we would write the index when working with lists, we now just pass the name of the key for the dictionary. For example, Sarah. If we try to access a key that doesn't exist on a dictionary, Python throws an error.
We have access to some built-in methods that we can use on dictionaries in order to make it easier to access their contents, namely keys, values, and items. When invoking the keys method on a dictionary, an iterable keys list gets returned. This list is a sequence of all the keys within the dictionary. And although we cannot iterate a dictionary with a regular for loop like we can with list and tupils, we can iterate over the result from the keys method. Let's say that we want to print every key value pair separated by a dash. We iterate over the iterable returned by the keys method. Print the key and then print the corresponding value by accessing that key on the dictionary. The values method is almost the exact same as the ye method, but instead of returning an iterable containing the dictionary's keys, this method returns an iterable containing the dictionary's values.
The items method is a little bit different. You see that it again returns an iterable, but this time it's just filled with tupils. Each tupil is a key value pair. We've now seen three methods that we can use in order to read the data.
But how can we modify a dictionary? If you want to update an existing value, we can do so by accessing that value using the right key and assigning the value that it should have.
Let's change Max's username to Max123. Max now has the username Max123. Now, let's say a new user gets added. Her name is Chloe with the username Chloe 123. In order to add a new value, we can use a method called update. To this method, we can pass the key value pair that we want to add. So, the key Chloe with the value Chloe 23 in this case. Now when we print usernames, we'll see that Chloe has been added. Now let's say that Max deletes his account and we want to remove the key value pair that it connected to Max.
We can do so with a Dell keyword and accessing the key of the key value pair that we want to delete on the dictionary. Now when we print usernames, you'll see that max is no longer a part of it. In order to remove all items from a dictionary, you can use the clear method.
If you just want to remove the last item in the dictionary, you can use the pop item method. You can see that the last item, namely Joe, is no longer available on the username's dictionary. And if you want to copy a dictionary, you can use the copy method. When Python tries to execute your code and something goes wrong, Python raises an exception. This means that it stops your program and it creates an exception which is a special type of data. If an exception has been raised, the exception expect something to take care of it. However, if there's nothing to take care of it, the program will be terminated and you'll see an error message instead. Otherwise, if you do handle the exception well, the suspended program can be resumed and its execution can continue.
You can handle an exception with the try and accept keywords. The code block after the try keyword may or may not perform correctly. If it fails, the code block after the except runs. Since we handled the exception in this case, Python will return to the previous nesting and the try except section ends as the rest of the code gets executed. However, there are many different things that can go wrong in your program and many different types of errors can be thrown. Python allows you to create exceptions that only run if a specific error has been thrown. For example, if we have code that accepts some user input and we want to divide one by that value, there are two things that might go wrong. The user might give us a string as input, in which case we try to convert a string to an integer, which throws a value error. Or the user inputs zero, in which case we're dividing by zero. This results in a zero division error. Let's handle the exceptions with a try except block.
You'll see that when we enter the string as input, the value error specific except block gets executed since Python raised a value error. When we give zero as the input, a zero division error gets raised. So the code block of the zero division error except branch gets executed. If you're working with named except branches, make sure that you specify the unnamed except block last and that you don't use more than one except branch with a certain exception name. The unnamed exception branch will be executed if there are no dedicated branches for the exception that got raised. If any of the except branches is executed, no other branches will be [Music] visited. Python 3 has 63 built-in exceptions which all form a tree hierarchy. For example, a zero division error is a special case of a more general exception named class arithmetic error. An arithmetic error is a special case of a more general exception class named just exception. And an exception is a special case of an even more general class named base exception.
Since the zero division error is a special case of arithmetic error, we could replace the dedicated exception branch to only look for any arithmetic error instead. Since this error doesn't always mean that it wasn't able to divide by zero, the message that we print should also be a bit more general. If we have both a zero division error and an arithmetic error branch, it'll only execute the first matching branch. This means that the order of your branches matters. If you want to handle two or more exceptions the same way, you can add the names into a commaepparated list. Errors can also be raised inside functions. In that case, you can either handle it inside or outside the function. First, we can run this code and handle the exception inside the function. If you prefer to handle it outside the function, you should invoke the function in the try block instead. You can manually raise an exception with the raise keyword. This can be useful if you want to simulate raising actual exceptions to test your handling strategy or to partially handle an exception and make another part of your code responsible for completing the handling, which enforces the separation of concerns.
Let's always raise a zero division error in the calculate user input function.
You can raise without any exception name. However, you can only use this unnamed raise inside the accept branch. This means that the same exception will be reered immediately. To handle this reaed exception, we need another try except block. Another keyword in Python is the assert keyword. The assert keyword evaluates an expression and if this expression evaluates to true, a nonzero numerical value, a non-mpy string or any other value different than none, it won't do anything. Otherwise, it automatically and immediately raises an exception named assertion error. This can be useful if you want to be absolutely safe from wrong data if you aren't sure that the data has been carefully examined before. for example, inside a function used by someone else.
Raising an assertion error exception secures your code from producing invalid results and don't supersede exceptions or validate the data. The Python documentation gives you a clear overview of all possible errors. And although you don't have to know all of them by heart, it's just useful to know the most common ones and make sure that your code can handle certain errors correctly.
[Music]
Up Next

28:30
Supervised vs Unsupervised Learning: ML Foundations
@digiLab_ai
108 views•2023-06-22

87:26
Introduction to Secure Multiparty Computation with Yehuda Lindell
@fhe_org
7.7K views•2021-02-04

4:55
HTTP Requests Explained: GET, POST, PUT, DELETE
@codecademy
103.1K views•2021-10-07

19:25
Enigma Machine Mechanics: WWII Encryption Explained
@JaredOwen
13.2M views•2021-12-11
Related Study Plans & Knowledge Roadmaps
Structured learning paths in Computer Science
computer-science
Container Runtimes: Namespaces, Cgroups & Go
01Linux Systems & Go Programming Foundations
02The Core of Isolation: Chroot and Filesystems
03Linux Namespaces: Process Isolation
+ 3 more learning modules
32h6 modules
Explore Roadmap
computer-science
Building a CHIP-8 Emulator: Rust & CPU Basics
01Computer Architecture Foundations (Bits & Bytes)
02Rust Programming for Systems Development
03CHIP-8 Virtual Hardware Specifications
+ 2 more learning modules
32h5 modules
Explore Roadmap
computer-science
Building BitTorrent: Go, P2P & Concurrency
01Go Fundamentals & Concurrency
02Networking Foundations & P2P Architecture
03Bencode Parsing & Torrent Metadata
+ 3 more learning modules
26h6 modules
Explore Roadmap
computer-science
Actor Models (C++ Concurrency & Lock-Free)
01C++ Multi-Threading Foundations
02Thread Pools and Task Scheduling
03Atomics and Lock-Free Queue Design
+ 3 more learning modules
45h6 modules
Explore Roadmap