












![[OpenCV и роботы №1] Распознавание цветных объектов. Движение по линии и целеуказание | Orange pi](https://i.ytimg.com/vi/grqoGBd1ch0/maxresdefault.jpg)





![This AI Webcam Follows You with Gesture Control and AI Tracking [Aicoco 2K Streamcam]](https://i.ytimg.com/vi/B0gnSyElBkI/maxresdefault.jpg)


This tutorial demonstrates how to perform object detection and tracking using the HSV (Hue-Saturation-Value) color space in OpenCV with Python. HSV separates color information from luminance, making it easier to detect specific colors by defining lower and upper HSV boundaries. The process involves converting an image from BGR to HSV color space, applying inRange() function to create a binary mask for the target color, and using bitwise AND operation to isolate the detected object. Trackbars can be used to dynamically adjust the HSV boundaries for precise color detection. The same technique can be applied to live video input for real-time object tracking.
OpenCV Object Tracking with HSV Color Space | Python Tutorial
Added:Basic Python programming skills, including familiarity with arrays, loops, and importing external libraries like NumPy.
Understanding of digital image fundamentals, specifically how images are represented as multi-dimensional coordinate grids of pixels.
Familiarity with the RGB/BGR color space models and how digital images represent color channels.
Introductory OpenCV concepts, such as loading images, displaying window frames, and capturing live video feeds from a camera.
Applying morphological transformations (such as erosion, dilation, opening, and closing) to clean up noise in the generated color masks.
Implementing contour detection to find the boundaries of the tracked color object and calculate its centroid for coordinates.
Exploring advanced tracking algorithms in OpenCV, such as Meanshift, CamShift, or deep-learning-based trackers (KCF, CSRT) to handle occlusions.
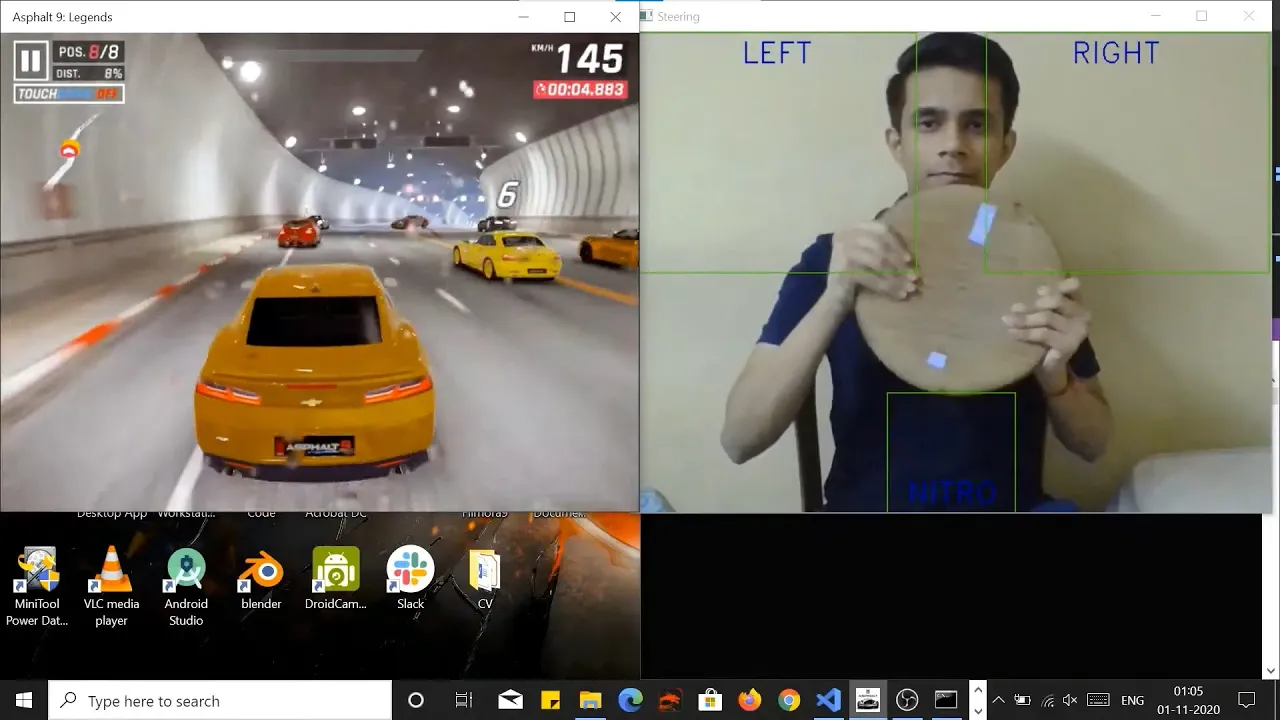
Integrating object tracking into real-world applications, such as gesture-controlled interfaces, basic robotics, or automated video editing.
152.5K views2.1Klikes19:52Original Release: 2019-03-31
hey guys welcome with the next video on open CV tutorials for beginners using Python in this video we will see how we can perform object detection using HSV color space now we have already seen how to work with BGR or colored images or grayscale images and we have already seen how we can convert from colored images to grayscale images so there are more than 150 color space conversion methods in OpenCV and one of them is colored image to HSV image now what is HSV color space so HSV stands for hue saturation value so H stands for hue as for saturation and V for the value now generally RGB in RGB color space are all correlated to the color luminance that is what we loosely call intensity in other words we cannot separate color information from luminance so HSV or hue saturation value is used to separate image luminance from color information so this makes it easier when we are working on or we need luminance in our images that is why generally we use HSV in the situation where color description plays a very important role now as I said HSV stands for hue saturation and value but what is the meaning of each and every single word in HSV now HSV is also known as the hack scorn color model so this color space can be described in this kind of cylindrical cone model where hue is this circular angle which varies from 0 to 360 and hence just by selecting the range of hue you can select any color so you can see different colors are available at different angles so these colors are basically red yellow green cyan blue and magenta so hue is this angle in this cylindrical cone now we have saturation so the saturation is amount of color that is the depth of pigment or the dominance of hue and this value is described from the center towards the outer layer of this cylindrical cone so you here you can see at the center this saturation start at zero and it can go up to one at the end of this cylindrical cone and this saturation can be increased from zero to hundred percent similarly the value is basically the brightness of the color so this brightness can be increased from zero to one from the bottom of the cone to the top of the cone so all these three value hue saturation and value can be used to pick any color as we can do with the BGR color space so this is the brief introduction about HSV color space and now let's see how we can use this HSV color space to detect an object in an image so here I have this simple code to load an image using I am Reed method and show it inside a window so by now you might already know how this code works so let's run this code and let's see what does this code do so I have this image which is called Smarties dot PNG and here are some circles in different colors so we have blue circles or green or red orange and brown circles here inside this image so let's say we somehow want to detect only the blue so girls or balls or green circles or balls how can we just detect only these balls let's say we just want to detect the green balls how can we achieve this using open CV we are going to see this using this HSV object detection and here we have one more window which is the tracking window which is coming from this code which is C v2 dot named window and the name of the window is tracking so this tracking window we are going to use little bit later when we will add the track bars to our image but let's say we want to use this image and detect these colored balls so first of all after this image is red what we want to do is we want to convert our colored image into our HSV image and by now you might already guess how to convert an image you can just write h as v is equal to c v2 dot cv t color and then your frame name which is frame in this case and then c v2 dot whatever color space you want to convert from and whatever color space you want to convert to so you can just write color underscore BG r to HSV so this is the property we are going to use now in the next step we will threshold the HSV image for a range of blue color so we are going to just define L underscore B for lower blue color and then we are going to use the numpy array so NP dot array and inside this array we are going to define the lower range of blue color now by experience I know that these HSV value for lower blue color will be a hundred ten comma 50 comma 50 right but you might not have every time the idea what is the lower color range or the upper color range of some color so that is why later in this video we will use the track bar in order to perfectly define the lower and upper values for this HSV color space right so right now I'm just going with my experience so for the upper value I'm going to define the next variable which is UB is equal to NP dot RA and then once again I'm going to define these three colour channels which is 1:30 comma 255 comma 255 so this will be the upper limit for the blue color for our HSV image now in the next step what we are going to do is we are going to threshold the HSV image to get only the blue color let's say so I'm going to just define a variable called mask here and then I'm going to use C v2 dot in range method where I will provide first of all my HSV variable or image and then I will provide the upper and lower range for this function so my lower range is this numpy array for the blue color so I'm going to just say L underscore B is my lower range and u underscore B is my upper range now we have already seen how we can use bitwise and or bitwise operations on images so what we are going to do next is we are going to define a variable called re s and then we will just call C v2 dot bitwise and to mask the original image so here the first value will be our frame which which is the color the frame right so this is the frame which we have read from this image which is the Smarties image so this is the source one so Stu will be the same so the frame itself will be the source 2 and what we want to do is we want to provide the mask of the lower blue color and the upper blue color values right so here we can just say mask is equal to whatever mask variable we have created so this is the attribute we can set in order to apply the mask for the lower blue value and the upper blue values so once we have this result frame what we can do is we can use this CV to dot I am show method in order to show the mask let's say so we are going to show the mask and we are going to show the result using our ES variable so this is going to open three windows and let's see what happens when we run this code so we are going to run this code and this opens three windows here and now you can see the mask first of all so we are just detecting the blue colored balls using this mask that's why we have defined the lower bound ation of the blue color and the upper bound ition of the blue color right so that's why it's only detecting you can see the blue ball is here here and here and here also you can see the mask also detects only the blue values here right and then in the result you can see when we have applied this mask and we have masked all the other things other than the blue colored ball you can see only the blue balls here so the same method you can apply to detect any other colored ball from this image now as I said it's not easy to detect these lower and upper bound ation for the colors so that's why you can use the track bar for adjusting these lower and upper bound ation of any color so for that what we are going to do is first of all we will create a named window and then we are going to create a new window which we will use to adjust the lower and upper bound ation of HSB values so now I'm going to just use CV to dot we have already seen how to create a track bar so I'm not going to explain in detail how this works but let's say this track bar name is lower you 4lh okay so this is the lower hue value and then the name of the window which is tracking which is this one so we are going to provide the name of the window and the next argument will be the starting and the ending value so we are going to define the start value zero and the end value let's say we are going to define 255 here okay and the last thing we want to give here is the callback function which I have already created which is this function which is just doing nothing we are going to just provide this callback function as a dummy function so it's not going to do anything so this is the track bar for the lower hue value similarly we are going to define the track bar for lower saturation and lower value and upper saturation upper value and upper hue okay so this will be lower saturation this will be lower value and then this will be you H which is upper hue and then this will be you as for upper saturation value and this will be upper value right so H as we lower values and adjust we upper values so here we are going to set the initial value for the upper value so let's say everything is set to the maximum so 255 255 and 255 here okay so the lower values are set to zeros and upper values will be set to 2:55 now you already know how to get the values from attack track bar so you can use for example l underscore H for the lower QL use is equal to cv to dot get track bar position so just use get track bar position method and then first of all gave the name of the track bar from which you want to get the position so let's say we want to get the position from the LH track bar and then the name of the window which is tracking in our case so here is the second argument and similarly what we are going to do is we are going to define the other lower values and upper values so and also the name of your track bars so once you have the values of lower HSV and upper HSV you can provide these values here in place of these aesthetic values so first element of this array will be L edge and then the LS variable and then the L V variables similarly for the upper bound ation we will provide these three upper bound asian variables and now when we will run our code let's see what happens so we are running our code and you can see these windows these three windows one is the mask other is the result and the third one is the frame and we also have these track bars in order to change the value of lower and upper HSV values so first of all let's set this mask for the blue color so I'm going to just move it to 110 as we have done in the last step and then this will be around 50 and this also will be around 50 okay so let's move it to 50 and upper value here will be around 130 right so you can see once again using this track bar it's easier to adjust these lower and upper bound ation and now you can see all the three blue colored balls so you can refine this object detection by moving these track bars little bit left or a little bit right you can see here now let's adjust this value to detect some other ball so let's say we want to detect the green balls so let's see what happens when we just change the saturation values here and you can see now you almost see the green values and the blue color is almost disappearing so you can see now there are only green balls which are detected and all the other balls are masked so you just need to play with this track bar for the lower HSV values and the upper HSV values and you will be able to detect the object whatever colored object you want to detect from the image now this is the object detection from the image similarly we can use the same method in order to track an object from a live video so I'm going to just escape to just close all the windows and in order to change this code for the video input what we can do here is we can just add this code so we are going to just add the cap variable which is the capture variable is equal to CB 2 dot video capture so we are going to use this one and we are going to capture the video from our default camera which is at the index 0 and then you already know how we can read the values from the camera input so I'm going to just comment this code and instead of reading the image what we are going to do is we are going to write underscore comma frame is equal to cap dot read which is going to read the frames from your default camera and at the end when you are done playing with your images you can just destroy this cap using the release method so you can just write cap dot release just going to release all the cameras you are just capturing right so now this is the three line code you need to use in order to capture the camera input and then track any object of any color so I'm going to run this code now and you can see I'm just holding a blue colored object here and I'm moving this object on the left and right and you can see only blue colored object is detected and every other frame value is masked so this is how you can do the object tracking of any color using the HSV color space so you can see the real image which is captured from the camera and then the mask and then the result of the mask and the real image in this blue colored object tracking so this is how you can do object detection and object tracking using HSV color space I hope you've enjoyed this video and I will see you in the next video
Up Next
14:06
OpenCV Python: HSV Color Detection and Masking Tutorial
@TechWithTim
131.2K views•2021-02-19

12:54
Triumph of Orthodoxy Icon: Byzantine Art & History Explained
@BenCallan
2.1K views•2024-08-06

11:04
Docker Tutorial for Beginners: Introduction to Containerization
@ProgrammingKnowledge
33.9K views•2020-01-15

1:42
Game of Thrones Opening Credits: A Cinematic Analysis
@gameofthrones
46.3M views•2011-04-18
Related Study Plans & Knowledge Roadmaps
Structured learning paths in General & Interdisciplinary Studies
general-studies
Elevator Engineering: History, Physics & Cities
01From Hoists to Safety Brakes: The Dawn of Vertical Lift
02Hydraulic vs. Traction: The Engineering Physics of Elevators
03Modern Speed, Safety, and Algorithms
+ 2 more learning modules
12h5 modules
Explore Roadmap
general-studies
Rubber: Material Science, History & Geopolitics
01Origins of Natural Rubber & Mesoamerican History
02The Chemistry of Natural Rubber & Vulcanization
03The Geopolitics of the Rubber Boom & Colonization
+ 2 more learning modules
12h5 modules
Explore Roadmap
general-studies
Containerization: Evolution, Logistics & Trade
01Ancient Trade & Bulk Cargo: Amphorae to Barrels
02The Industrial Revolution & Cardboard Packaging
03The Containerization Revolution: Malcom McLean
+ 2 more learning modules
12h5 modules
Explore Roadmap
general-studies
Textile Tech: Evolution, Labor & Global Impact
01Pre-Industrial Textiles: Handloom & Cottage Industry
02Mechanization: The Spinning Jenny to the Power Loom
03The Factory System & Global Labor Transformation
+ 2 more learning modules
10h5 modules
Explore Roadmap