



![Основы VCV Rack [RUS]](https://i.ytimg.com/vi/XY2Jeml7HdE/maxresdefault.jpg)
![What is MIDI? Understanding MIDI Message Structure [Part 1]](https://i.ytimg.com/vi_webp/0VWHnVJI0Ec/maxresdefault.webp)
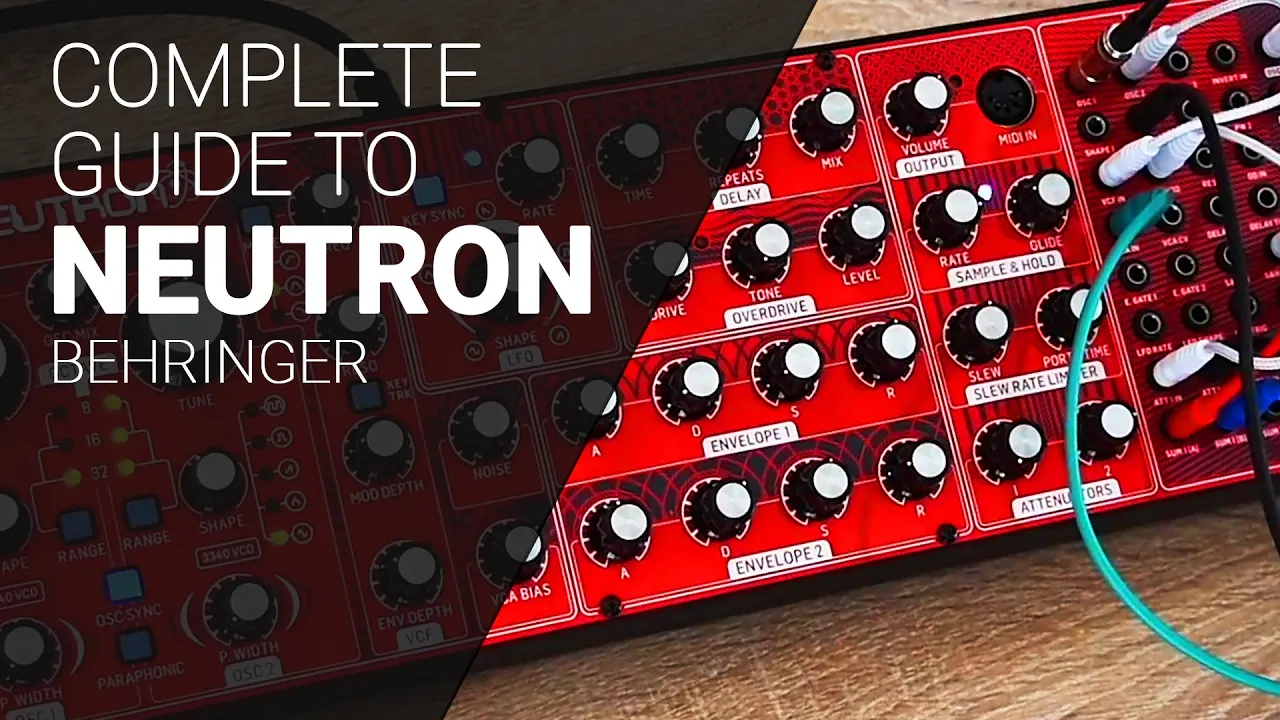


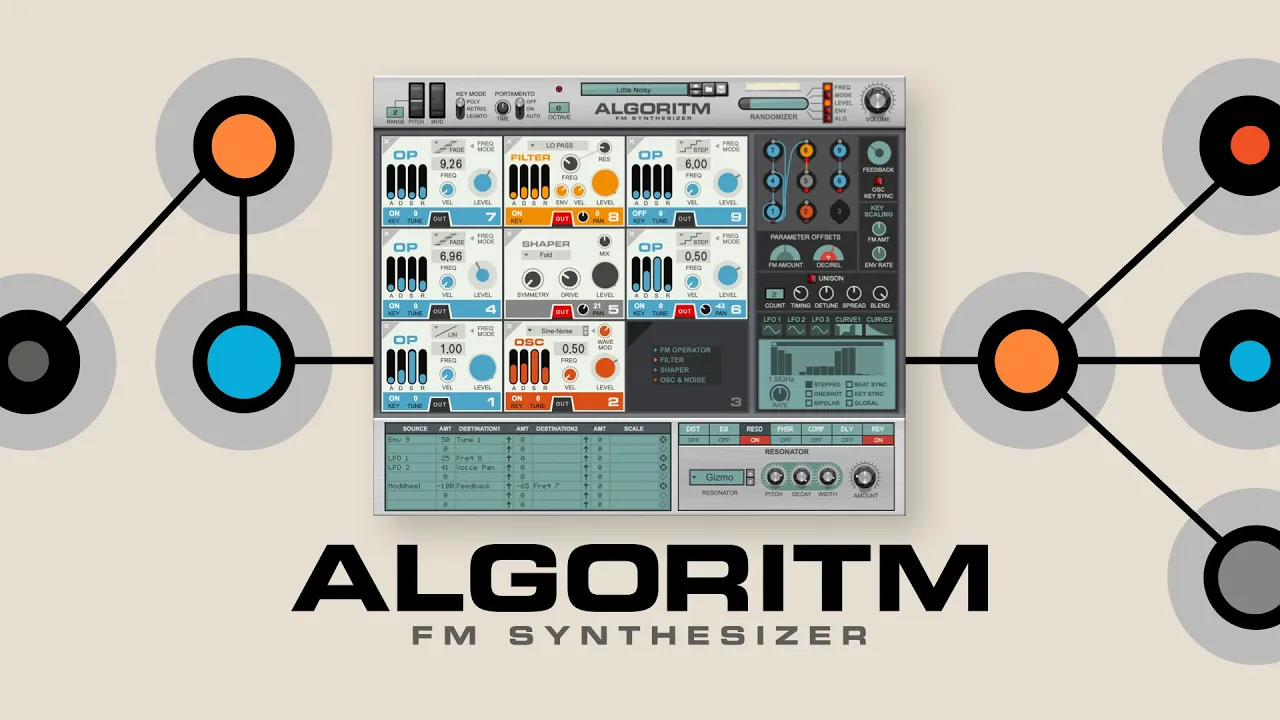


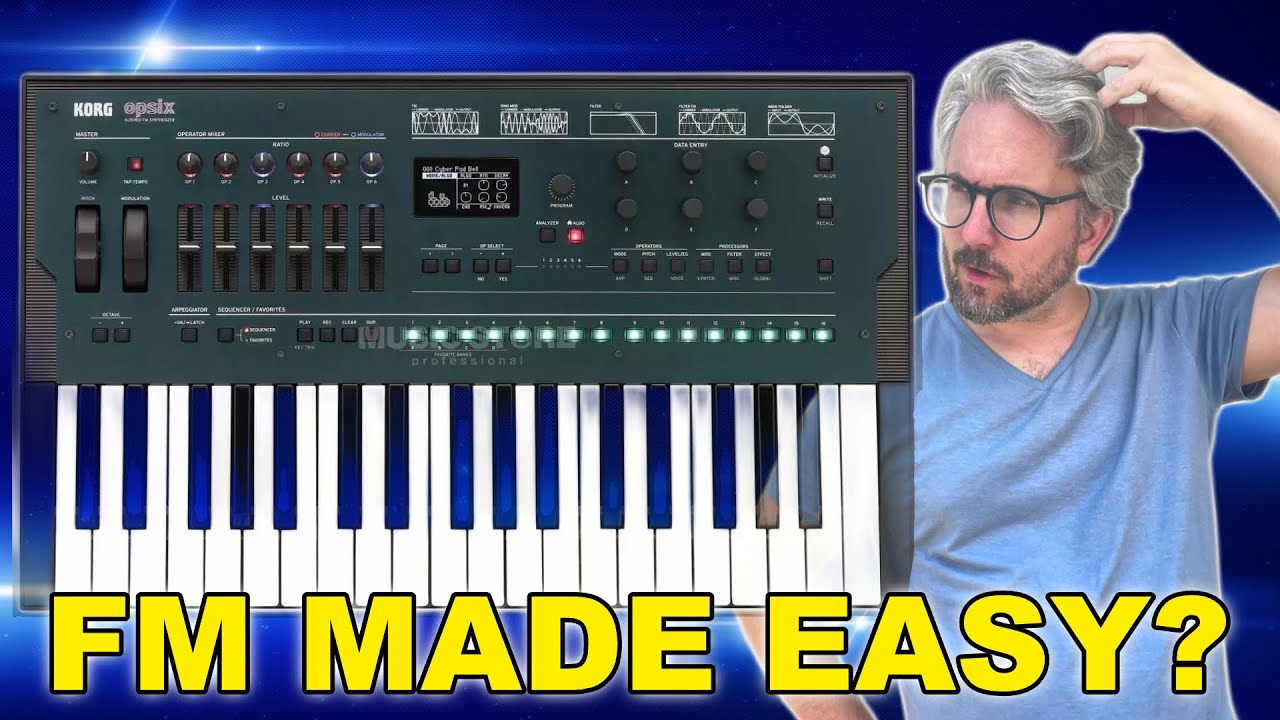
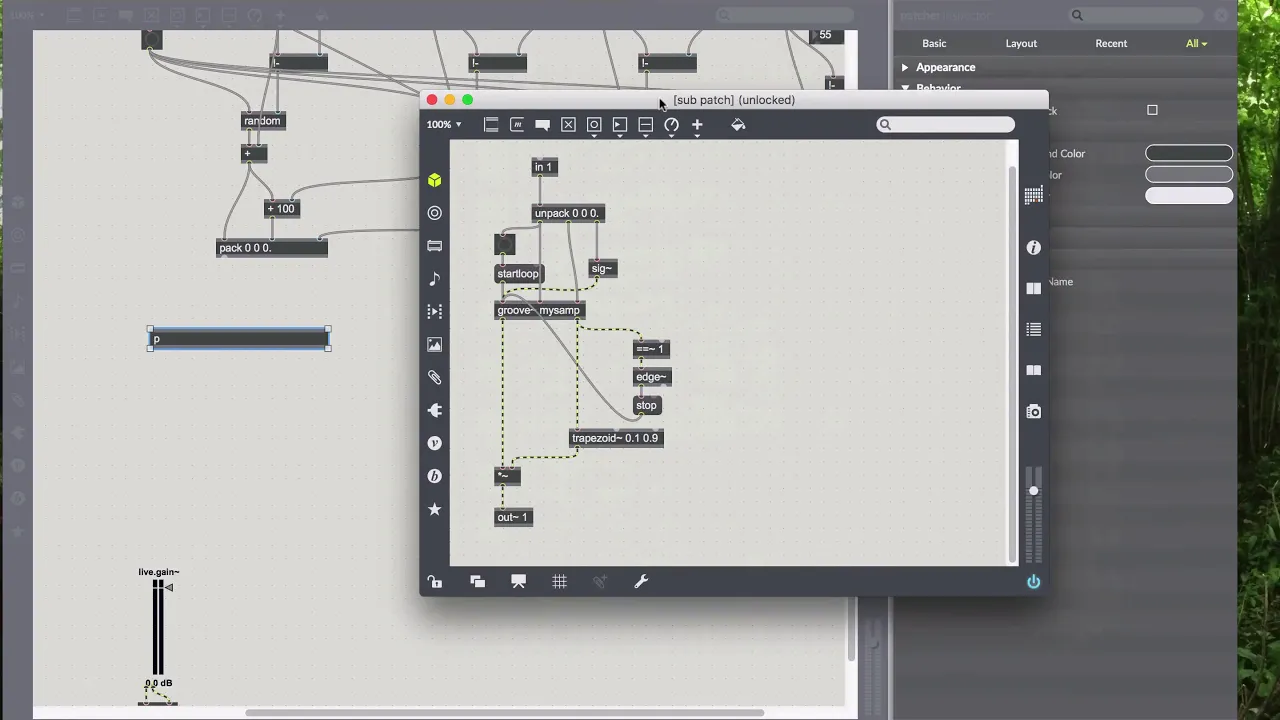






This tutorial demonstrates how to build a polyphonic FM (Frequency Modulation) synthesizer using Max for Live within Ableton Live. The process involves creating a carrier oscillator that generates tones based on MIDI note frequencies, a modulator oscillator that modulates the carrier's frequency to create timbral changes, and envelope generators to control attack, decay, sustain, and release. The key to achieving polyphony is using the poly~ object, which manages multiple voice instances of the synthesizer patch, allowing simultaneous playback of multiple notes. The tutorial covers essential concepts including MIDI data parsing, frequency conversion (MIDI to frequency), signal processing in the MSP (Multiple Signal Processing) world versus the Max world, and proper envelope shaping for musical articulation.
Max for Live Tutorial: Building a Polyphonic FM Synth in Ableton Live
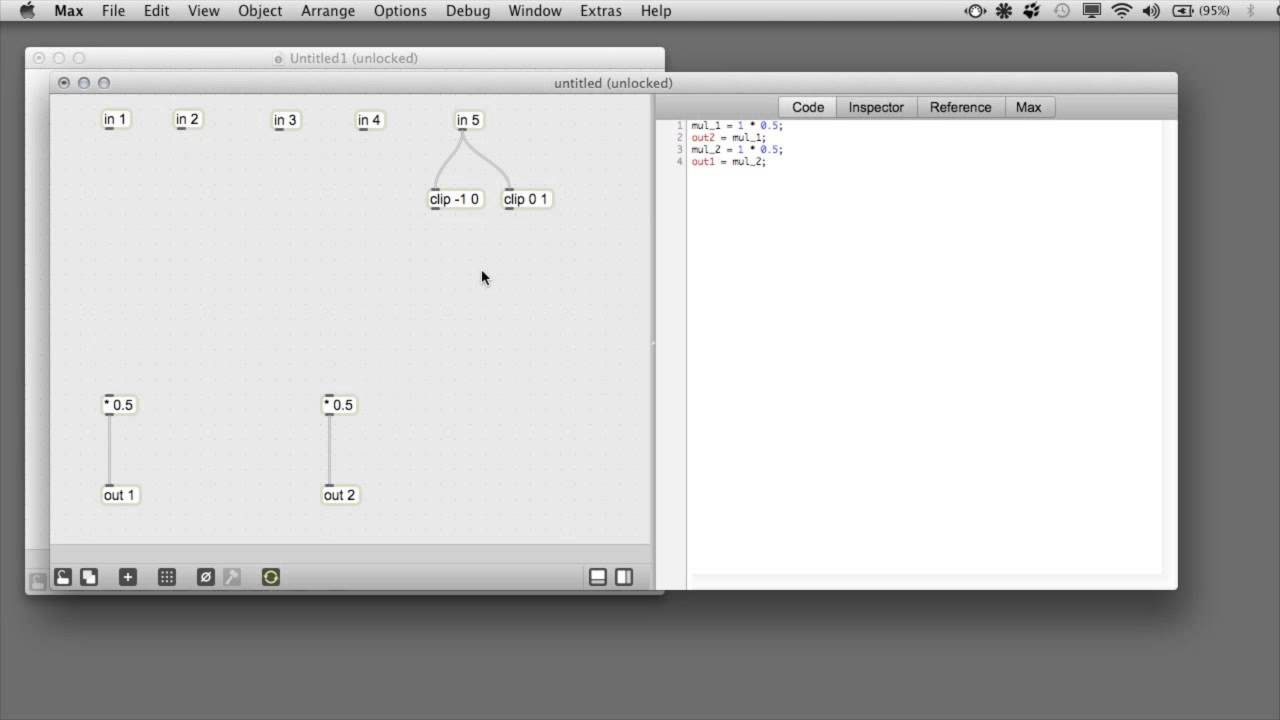
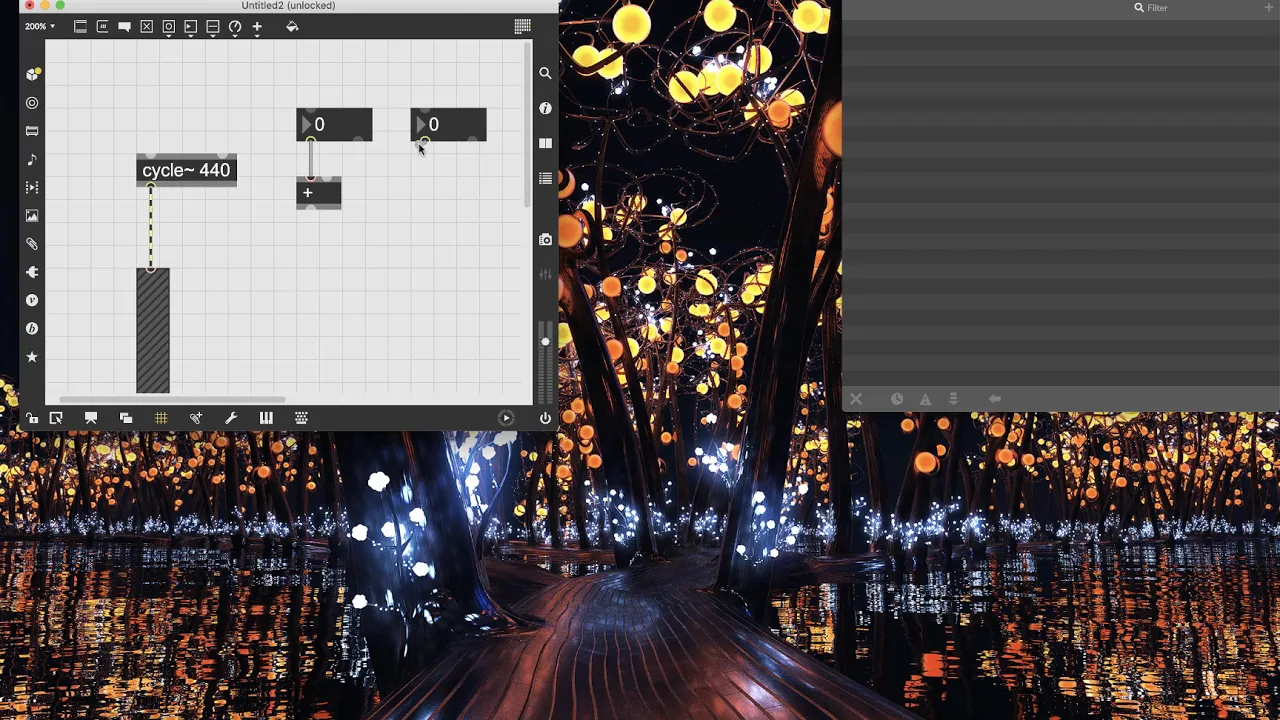
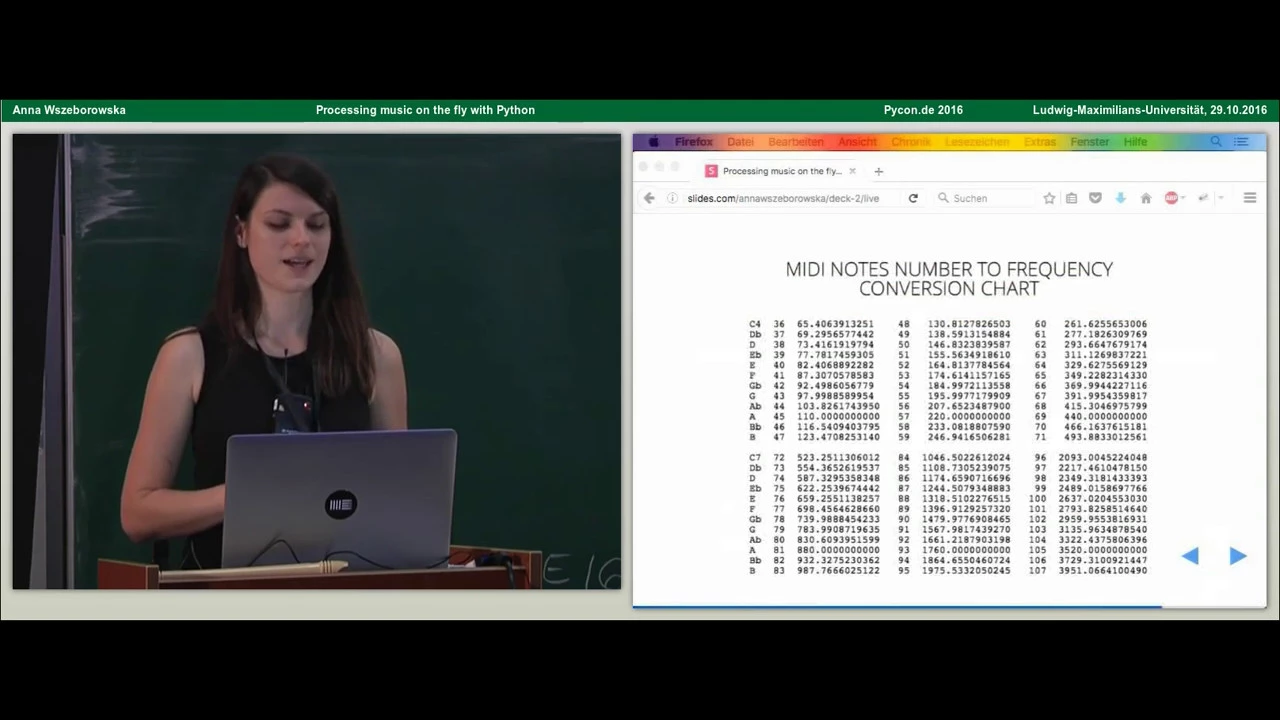
Added:hey guys and welcome to another drd tutorial today we're going to be taking a look at how we can program up our own polyphonic frequency modulation based synthesizer using Max for live inside of Ableton Live so this is not a rehearser or overproduced video it's going to be kind of a long one because we're going to really talk about everything along the way and I'm going to make a few mistakes so you can kind of see what it's actually like to be programming something inside of Max relive and how to work through all of that and we're going to end up with something that kind of sounds like what you're hearing now so uh Buckle in strap up let's get going all right let's begin by cleaning up our set getting rid of the things that we don't need any of these audio tracks any of these return tracks I just like to do that because I like a clean slate to begin working with and then the next thing we'll do is we'll go into our browser go to Max for live and there's three different types of Max for live effects or instances we have Max audio effect we've got the default here at the top of the folder if I drag and drop that into a track here see it loads up a new track there and we've got audio input on one side and audio output on the other side so a Max audio effect receives and sends audio along if we go back to our browser and we load up a Max instrument you can see that it receives midi we see a midi meter on one side and then an audio meter on the other side audio uh meter on the other side so so uh we can then understand that that's receiving midi and then somehow inside of there we're going to translate midi into audio and pass along audio the final instance of Max instruments or Max uh stuff in here is the max midi effect that uh we can assume receives midi and sends midi so those are kind of our three default um starting places for building up a Max for live anything so we're going to start with the max instrument because we want to be able to receive midi and send out audio we're going to be building a synthesizer here so now that we've got that default loaded up onto a midi track we can go ahead and crack open or launch Max so then we can start editing this patch and do that by clicking on the edit button there uh we can see that I am not recording am I recording I am recording good um looks like I had a few things going there we can get rid of all those old patches I must have improperly closed it out last time um and now we've got our patch open and I've just expanded it out um I'm not going to be going into detail in this video about navigating or the basics of Max there's plenty of other videos out there on that in this one we're going to be talking all about just building our uh frequency modulation synthesizer so let's start by cleaning things up we can see that Max has labeled some things for us here that we've got our midi from live which is coming in through this object the Midian object and then it's prompting us build your instrument here how exciting and then uh at the bottom here we've got our plug out which sends out our stereo output channels from it um another important thing is we can see our device height limit here Vertical Limit there so we've got from this line to that line of space that we can fill that's going to be visible when we move back into Ableton we'll talk about how to prepare all that space and make it look pretty towards the end of this video so let's start by cleaning things up I don't want all these comment boxes I like a nice neat uh work space to work with um and now we're good to go so the first thing that we're going to need to do is translate our midi input signal so we're receiving all of our raw midi messages in through this midi in um so there's two different types of objects that can actually receive midi inside of Max there's the midi in object and there's also the note in object I found that the midi in is a little bit more reliable although a little bit more complex the note in is a little bit more simplistic and that it's already kind of prepped some of this data or sorted through some of this data for so we can see there's pitch there's velocity and there's the midi channel so a little bit more simplistic and that's just looking for note in information where the midi in object is receiving all the different possible streams of midi data that we could be getting um and I've just found that this one's a little bit more reliable when working inside of a synthesizer although a little bit more complex so let's go ahead and delete that out of there so the next thing we need to do is we need to somehow sort or parse this midia information so we're going to create a new object type in MIDI parse and this object is responsible for receiving midi data so we're going to connect up our midi output there or midi input I should say into our midi parse and now we've got all these different boxes down here for um separa separating out our data and this first one is the one that we're going to need to start with the pitch and the note or the pitch and the velocity output there so it's sorted everything and it's giving us just note on and note off with their pitch and velocity so if I connect that up to an object that unpacks that data um we could give it an argument saying that I want it to unpack two integers um but by default that's what it's going to do so we can just leave it in its default State and now if I connect up underneath that um some integer boxes and the default there is just I to generate two integer boxes connect that up stretch this out a little bit to keep things all square and even and then if we jump back over to to live let's just program up a simple uh little sequence here so we can see some data flowing in and out and get that playing shift tab to see our devices we can see there's Medi data pumping out of that clip into our devices flow here and feeding into our Max instrument back over to Max you can see aha we're getting data and if we were to pass all that along to our Max console we'll call this um uh note connect that up there go to our Max console you can see our flow of information there passing along there um what's kind of interesting to look at is if we delete that cable so we stop that flow is we're always getting the note on and then a little bit while later the note off message for all of that so we get the note on which is the note name or the note number plus a um velocity that is anything other than zero and then later we'll get that off message for that same note name which is 65 and a zero for velocity so that's all that's passing through this section over here so we can actually get rid of that print for now clear out our console collapse it down so we don't need to look at it and now we're ready to start using that midi data so the next thing we need to do is we need to translate this midi message into some sort of relative frequency for our uh synthesizer and that we don't want to be producing um 6765 as our frequency but we want to actually be getting the frequency of the note that that represents so we could actually switch this up if we wanted to I can go to the inspector for this object here by going command I launch as my inspector let's change its display format to MIDI C4 and now we can actually see the note um the midi note number or the name of the pitch that we're calling up by that sequence of midi data that's flowing in there um so we want to get the frequency of those notes so to do that that there's an object for it MTF midi 2 frequency m2f drop this in here connected up in our signal flow and now at the bottom there we connect up I've connected up a flum or float box the shortcut for that was just the F key over an unlocked patch gives me a flum box just like I gave me an integer box and now we can see the frequency of the note that we're calling there with our sequence then next we'll need something that can actually generate a tone or a audio signal from that frequency so let's create a new object call it our cycle and a Tilda um there's two different worlds in our Max for live stuff there well actually there's kind of uh three and a half there's um our Max World which all these objects that we' used so far have been in the max world where they're just passing along um control or just data and it's all waiting for to be prompted it's not passing it um all the time it's only passing it when that data information changes so in this case it's only passing it when our sequence of notes tells it to the second world is the um MSP or multiple signal processing world and those are all indicated by having a Tilda at the end of them and these are exchanging data at our audio rate so whatever our sample rate is if we jump back into live go into our audio preferences we can see currently we're samp at 44100 which is 44,100 times per second we're exchanging information about what is the current state of our audio Network um and so in this case this little object is going to be constantly sending out information and expecting to receive information 44,100 times per second or whatever our current sampling rate is so if we have over the top we can see that we've got two inputs for this object one is the frequency input and it can receive either a signal so a message the MSP world or a float something from the max world and either of those values or types of values is going to specify the uh frequency at which this object is going to produce a tone uh one of the awesome things about working in Max is that if you ever don't know about an object you can just simply use the shortcut command shift H or control click on it and go to open cycle help so just open whatever this object's um help file is [Music] sorry I'm not sure why that was so distorted um but we get this awesome actually it's a Max Patch that tells us all about the object that we're working with so we can see that this is a sinusoidal oscillator so it's going to generate a sign tone at Whatever frequency we tell it to so let's get out of that box um so if I connect up our flow of data here the midi in which is parsed out to give me the note on and note off messages we get our note message here our velocity messages here we translate that note name into a frequency which passes into this box and then we use that box to specify the frequency at which this Max um or this MSP object which produces a sign tone at which frequency that object is going to produce a sign tone then we're nearly there we should also add in some um volume control just while we're working in here we might delete this out later so I'm going to create a new object called the live. gain live just means it's going to look like a Ableton uh live live object and then gain mean it's going to give me gain control so if I hit create there got two inputs we'll just connect up one of the inputs which is going to send the same signal to both sides if I connected up another input to the right hand side then we'd have stereo feed passing through this let's take that same output and connect it up before we do that let's lock our patch command e or click on the lock in the B bottom corner there turn the volume down there just so we don't hurt ourselves or others and then connect up both of these patch cables if I hold shift before I release this patch cable it allow me to create and connect multiple patch cables from the same output to multiple inputs so release shift before I connect the second patch cable and now I've got that all connected up you can hear over so quietly in the background there we've got a super simple synthesizer that's creating s tones based upon the uh midi notes that we're passing into it so we're we're already we're already making sound with just a few uh objects here we've got something really awesome so uh The Next Step here is to actually get um some uh envelopes happening here so right now if I were to jump back over to live exit out of this hit stop you see right now we're not playing everything is stopped but we're still producing the frequency and it's just producing the frequency of the last received note here so there's nothing that's telling this uh signus oscillator to stop making sound nothing is turning off the the audio after that note off message is received so what we need for this is an envelope to control this a really simple version of this would be to take and multiply this signal by the velocity if we were to multiply it by the velocity um as it is right now which is a number that ranges between 0 and 127 we'd likely blow up our ears or our speakers or our headphones because um both uh Max as well as Ableton is expecting the um output of a signal to range between um positive and Nega one um so if I connect this up to an oscilloscope here and let's bring the frequency down to 1 Hertz so we can see it um this is ranging back and forth between the top of the display here is representing positive one and going down to netive 1 we can think of this in the world that we live and breathe in as being positive and Nega negative air pressure which is what audio is if you look at your speaker you can see it's got these big cones on it um and in the uh analog audio world these are voltages that we're visualizing here positive one voltage or negative 1 voltage and what that's doing is is actually pushing out your speaker cone uh at positive one or sucking it back in at negative one which in turn is causing the air molecules in front of that to move in or out which then turns what we're seeing here or creating inside of our computer back from just being zeros and ones or kind of abstract things into actual air moving back and forth in a room that we can then experience as music or Sound or whatever we're trying to create so the point I'm trying to make here is that um we're expecting all of our systems are expecting to stay within that positive 1 to negative one range so if we take and we multiply the output of this sign tone generator by uh a value that's going between 0 and 127 that's going to go well beyond the range that our system is expecting so we need to translate this range down into that negative 1 to positive 1 um or just 0 to one range to do that really simple we can just create a new object tell it to multiply uh I'm sorry divide the signal by 127 and adding a decimal point decimal points are really important in programming in that they specify whether or not we're expecting an integer so whole numbers 0 1 2 3 4 5 so on or um floating points so expecting decimal points after our integers and it's really important because if I just do divide by 127 then we're only ever going to get a zero for anything that is less than 127 and only get one when we're actually um sending in a velocity of 127 so it's going to really limit the range of amplitudes that we can actually trigger here so I want to have a decimal point there that way I get all the values between 0 and 1 just like we're getting all the values between 0 and 127 so connect these up and let's put a float box underneath that so we can see that value then let's get our sequence playing again jump back over to Max and now we can see that I'm getting numbers going back and forth between zero and the uh scaled version of R 100 as velocity up there so then the uh the simple version of an envelope would be just simply to deconned dragging over those to select those patch cables and then hit delete so the simple version would be to just simply create a signal multiplier object which allows us to take and multiply two signals together first operation there is that star there which is the uh equivalent of multiply and then the second thing there is um the uh Tilda there letting me know that this is going to be processing signals so if we connect up our oscillator there and our value of velocity which has been scaled to Z or one and we just look at this first and foremost we can see we're getting uh the signal passing through there and then it's getting silenced when we've turned back to zero here so really simple envelope there that's just turning it on or off with our note on and note off messages so if I connect that up huzzah we've got uh something that's really basic simple there where it's turning it on or off but what if I want something that's a little bit more robust it isn't just simply on and off whenever that note begins and ends um we can do that using an adsr object which produces an attack Decay sustain and release envelope so it's an envelope generator so if we add that in there we can see that this first one is expecting whatever is going to trigger it whether this be a signal or a float and that's expecting to receive a value between 0 and 1 one if we send in a zero it's either going to stop the envelope or tell it to um move into its release stage of the envelope um or if we receive a value any value that's greater than zero it's going to trigger a new envelope to begin then these other inputs here is um for our attack time our Decay time our sustaining value and our release time so let's use some uh kind of prettier looking uh user interface objects here to control uh the shape of our envelope so let's go live.
dial and then let's jump into the inspector for that dial so I've just opened up my inspector window I've got that dial selected so I can edit it and let's change its range to be from zero let's potentially have some fairly long envelopes so 0 to 5,000 and then let's uh change it unit style to time and then let's uh establish an initial and since this is going to be my attack let's have it at at um at least 5 milliseconds and then let's change its short name to attack then let's take and just option drag that out twice so we can have our tack let's change the second one to be Decay and let's change its initial to maybe 250 milliseconds and then this last one is going to be the release so when my note off message is received how long is it going to take for the amplitude of the note produced to return back to um silence so let's change this one to release and let's change its initial to maybe 500 and then let's add in one more here option drag it here and this one's going to be our sustaining value and let's change its range from 0 to 100 because we're not specifying a time we're specifying um a value range from either silent to um full amplitude and let's change its initial to 100 so we always have sustain and let's change its display style from time to percentage so now we've got a dial that goes from 0 to 100 and we're good to go um so now we've got something that's going to specify our attack time so take its output something that's going to specify our Decay time something that's going to specify our sustaining value but remember we're expecting um audio um sign to range between 0 and 1 so if I specify a sustaining value of 100 which is the maximum output this uh dial is set to um send we're going to get a signal that's going to distort or clip inside of our digital world or blow up our speakers if nothing else fails before it gets there um so rather than connecting up this value here I'm going to connect up the value on the right hand side which is always going to send me a raw value output which is just specifying where is this dial and location of its rotation as a value between zero and 1 which is perfect or I could just simply divide the output of this dial by 100 and get the same results but this is just a little bit more efficient that I don't need to create another object to do it and then connect up the release value or release time maybe stretch this out a little bit so we get everybody nicely connected it's always just kind of the frustrating thing about using that other side there so maybe let's just because I'm all about neat and tidiness let's distribute evenly horizontally there we go um so now what this is expecting if we connect up another scope here and I connect up a toggle there we can see our envelope there's our sustaining value if I set up some release time and I turn it off you can see it sloped back down set up some other values here trigger new envelope sweeps up Decay down oror sustaining value holds it the sustaining value until I send in a value that is zero and then it will return back to you can see here remember this display is positive 1 to negative 1 so this is ranging from positive 1 to zero right at the middle there so now we've got an envelope generator three stage or four stage envelope gener we've got a tactic Cas sustain and release we're going to use that to multiply the output of our cycle or our tone generator here our oscillator so let's get rid of that toggle and let's connect up the output of this object into here which is our 0 to one value based upon our velocity then the output of that into our signal multiplier here so we're got uh we've got our tone generator coming in the left our envelope generator coming in the right both of them multiplying together to generate the output of our oscillator so now if I jump back over bring down my attack [Music] time so one of the things that I find nice is to um have exponential values in here and that often I like to work down in this tiny um uh time range and then once I'm up into larger ranges it needs to be a little bit less specific so let's change um each of these uh just the time value here to having an exponent of 3.33 333 just give me more exponential and then if I bring this down here you can see that I've got a much smaller range there um that when I'm working in the in just the uh the tens of milliseconds I've got a lot more control and then as I start to sweep up here you can see that once I'm over 1 second here we're just big values tiny values [Music] all right so already we've got a pretty awesome synthesizer here we're generating the tone at whatever note that we're specifying and we've actually got it velocity sensitive at this point too so if I jump back over here and I edit some of these [Music] velocities let's make this one really [Music] loud so we could call that good could say that's our synthesizer uh let's uh let's go get a beer um end of the day but what we're really interested in here is generating a frequency modulation based synthesizer so this is just the heart of it so let's before we move on let's clean things up a little bit um so that we can start to organize things so let's collapse this into or encapsulate that inside of a sub Patcher so control or right click on it um I think we can do it in here [Music] somehow looks like maybe I've got to go up to object it's been a while since I've done it the long way uh edit ENC capsulate there we go so edit menu command shift or shift command e is going to encapsulate it so let's do that command shift e drops that inside of a sub Patcher sub patchers are always identified by starting with a p then we can give them a name just as kind of like a reminder of what's going on in there um Med data and then if I lock my patch and I double click on that you can see it actually opens up another patching window that contains um the devices or the objects that I've encapsulated inside of that sub Patcher so our midi parse and our unpack as well as an input and two outputs so we're just kind of uh organizing things here based upon function then let's drag these guys over here and let's encapsulate all those together and call it R um and generator you'll notice that our the sound of our synthesizer has gone back to being a very short um uh envelope and that is because when we encapsulate that those are now new objects that have yet to have received any of the data from these dials um so just kind of we'll have to resend all that information if we uh if we want to change any of that stuff so just realigning that something around there and then let's encapsulate this we probably should have stuck that inside of our midi data uh yeah let's do that so let's de encapsulate this one so let's go up to edit de encapsulate and re- encapsulate it with all of this stuff encapsulate midi data nice and then let's put this one uh inside here um maybe should put that inside of there ah it's good enough whatever um so we've cleaned things up a little bit and let's go ahead and stop our sequence there so now what we want to do is we want to modulate the frequency of this oscillator um with another oscillator frequency modulation so to do that let's get another oscillator going let's bring it in here and just for the time being let's specify its frequency with a flum box there a floating value box um and let's um translate this value into being rather than just a max value U decimal point value let's translate it into being a signal using the Sig Tilda object so this is just going to turn this into a constant non-time varying signal unless our sequence is running so you can see that it's translated it switched from being a Max cable there to an MSP patch cable down there at the bottom we can exit out of there now if we disconnect that reconnect it you'll see we've got a uh cable there that's letting us know we're sending uh data there at our audio rate so now we've got our frequency for this oscillator pumping out at um audio rate um at whatever we specify with those midi notes um so then let's take and let's modulate that by adding in another signal into that signal flow so right now it's just zero the pumping in there get that running to confirm that it's still the same thing cool still the same thing and then let's take and add in a volume controlled oscillator there so right now we've got frequency and volume of that oscillator and add that into that right there get our sequence running again actually let's get a new sequence that's just a g and then let's take and multiply that out so it's a whole bunch of measures long so we've got a G3 here that's held out for like 129 measures um get that one playing lovely jump back over and now let's specify that this has a frequency of one and let's gradually bring up its amplitude let's actually connect up Scopes to all of these so you can see and here what's happening and I actually think there's um a nicer one let's go to the plots help menu go to audio and let's steal this [Music] one so there's that one there's that one so now we can see there's our s tone pumping out of there and there's our modulating s tone it's right now just kind of wiggling up and down just a little bit it's got a tiny amplitude as we start to increase its amplitude you can see it moving up and down more and [Music] more and you can see now that we've broken that rule that we've established where this is now louder than um one and or positive one and negative 1 but that's okay because we're not using it to plug in directly to our speakers instead we're plugging it into a value that specifies the frequency of something so this is just changing the frequency at which this thing is generating an oscillation back and forth between positive and negative 1 so by the time this comes out of this object down here we still have a value that's between positive and negative 1 so sweeping this up let's go bigger now we can hear frequency modulation so what's happening here is we're taking a object which is producing a s tone so it's oscillating back and forth between positive and netive 1 out of this cycle object here one time per second but then we're multiplying that signal it's going back and forth between positive negative 1 by uh 139 let's make this an even 1,000 so what that now means is rather than having signals going back and forth between positive and negative 1 one time per second we have a signal that's going back and forth between positive 1,000 and 1,000 1 time per second as we multiply it by that value then we're taking that time varying positive 1000 pumping out of this here and adding that into our non-time varying value which is a g uh G3 I think it was um that's coming in here so we're adding those two values together so we've got the frequency of a G3 plus or minus 1,000 Hertz or 1,000 um one time per second just giving us this up and down so we're going up up 1,000 from G3 and down 1,000 from G3 one time per second at the shape specified by our oscillator so a sign tone here thus we have frequency modulation now uh the amplitude of our modulating oscillator specifies how much modulation is actually happening so if I go down to zero you've got no modulation if I go to 10 now we're modulating the frequency up or down by 10 Herz and then the frequency of modulating oscillator is the rate at which that is happening so how many times per second do we go up or down the um value of our modulation index or the amplitude of this so how many times per second do we go up or down by 10 so as I start to increase that let's jump up to a nice 100 so I start to increase our [Music] frequency we gradually move out of this world of hearing it as vibr we can actually track that G3 moving upward down and now we're starting to hear it more and more as just the [Music] tamber let's make it more and more modulation [Music] [Music] it's beautiful isn't it I love frequency modulation so that's the basic idea of it we've got one oscillator that is actually producing the results so the frequencies or the sounds that we hear then we've got another oscillator that we're not actually hearing but all we're hearing is the influence or the amount of modulation that it has on the frequency of the oscillator that we actually are hearing so let's clean up our patch a little bit let's get rid of those Scopes we don't need them and now let's um rather than having these values be arbitrarily connected or arbitrary to uh the cycle um or the frequency that we're actually producing let's have those be related to the values or the midi notes that we've got coming in so rather than um uh going straight in let's add in another signal multiplier object here it's now producing a frequency of zero and then let's connect up the frequency of our incoming midi note and then let's um add in another live.
dial call this one are um uh um mod freak or maybe like our uh ratio that's fine too and then let's change its value to range from uh zero to um maybe 16 or 32 and let's um unit style float and initial let's have its initial be one and expon one is good for now all right let's leave it that we can connect that up here set it to one and now as I get my sequence [Music] [Music] running we've got specifying the frequency of our modulating oscillator as a relationship to that incoming mini note so if I set it to one we've actually got the same exact frequency set for our modulating oscillator as um our carrying oscillator is supposed to be specifying or creating then let's also have the amplitude of this be uh a relationship to uh our incoming midi note um so let's go uh another signal multiplying object connect that up and let's add in another one and call this one our um brightness and 0 to 32 is cool for that one too connect that [Music] up so how much modulation is happening or how bright it is [Music] [Music] and then maybe we want a second envelope generator so that it's not necessarily always modulating it but rather we can change when that modulation is occurring so let's option drag that whole bit connect that up here pump that into there and then let's um turn this into a trigger object and Order the operations um so trigger sends out whatever information is coming in at the outputs we specify so I wanted to send out this integer um first to our uh oops I did this wrong first to our envelope generator so send in our velocity to the envelope generator and then second send our velocity along to um our actual output so this will get triggered first and then this will get triggered second um Within within milliseconds of each other um but U just want that to make sure that's happening and then last but not least we need to multiply our modulation signal by our envelope signal so few patch cords connected wrong here into that guy so now I've got an envelope that's actually manipulating the output of my oscillator here and we can connect that up here [Music] so now you can hear our our cycle or our carrier has a separate envelope to the actual modulation [Music] envelope so the world is really kind of Limitless at this point of we're going to keep things simple but just kind of throw some things at you you can imagine that now we could change all these values here so that they're not just stationary values but we could actually add envelopes to those values as well so that we're not just going uh constantly every time 2.01 is the relationship of our modulation frequency to our carrier frequency but actually have that ramp up and down over time using an envelope so not a small stretch of the imagination there to to start to collide those two worlds together but let's keep it simple um so this is going to be the basis of our sound generation uh uh thing here so let's uh do some cleaning here let's collect all this together um encapsulate it call this as our um modulator and make sure that everything's kind of pretty here um that's cool that's going there that's fine that that's going there maybe just do a little bit of routings here I'll stretch this out boom and then arrange distribute horizontally something like that uh then let's make sure this is nice and tidy looks good that looks good know I love things to be nicely organized here so let's tidy that there put that there and let's move all this down a bit here oops [Music] slipped so uh command y to Route some of these patch C tables route this one move that down a bit this one that down a bit let's route this one let's route all these all right looking fairly tidy so now we've got um a synthesizer here that will produce uh whatever tone we've specified here let's jump back over [Music] [Music] and we can already start creating some really complex things um let's turn this into something we can actually work with inside of Ableton so to do that let's go through and let's highlight all the things that we actually need to touch in order to make this sound work oops holding shift those are all our user interface objects that we actually need to touch and let's right click or control click on it go down to add to presentation so in Max there's two windows there is our edit window and our presentation window so if I add these to presentation you'll see they all get highlighted or kind of glow that redish color and then if I switch over from my edit window to the presentation mode you'll see it gets rid of everything that I didn't tell Max to add to the presentation window and now I can actually move these bits about so let's add in our attack over here and then our modulation um beneath that and then our Rao and our brightness and then maybe let's turn this into rather than being vertical let's switch this to being horizontal stick that over here maybe line these guys up like so and then let's slide things over just a little bit add in a comment box using C to create a comment box and then type in in um carrier command J Will truncate that box to the length of text that's been entered into it add another one in there call this one our modulator command J to truncate that one line both of those up looks like we need to slide things over just a little bit there we go then the last thing is you'll notice that if I switch back over to my presentation or my edit window that vertical Lim limit line is still in my edit window and not in my um presentation window so to get that I'll go into my inspector oops since I don't have any objects currently selected there's nothing in my inspector so I need to switch over to editing or show the Patcher inspectors the inspector for this patch itself and then we're going to go down find somewhere in here we'll find View and then underneath that open in presentation so if I click that first thing you'll notice is that that Vertical Limit line shows up here and what this means is now when we open up this Patcher rather than opening by default to to the edit window it's going to open by default to the presentation window which is where we made everything look all pretty so let's slide everything down here then let's lock our patch command e and then let's actually save this for the first time we probably should have saved a long time ago in case something happened that I wanted to be able to recall this we should have done that but let's do it for the first time so let's do command s and then let's save this into a place where it's going to go minus by default going into my uh instrument presets Max instruments and you can see all the stuff that I've made and Max for live there and I'm going to name this as my drd um simple fm- synth and I like to give mine version numbers 2016. 06 dot uh what is today's date the 27th 27. verion 01 uh so if I make more versions of this it's easy for me to jump back to editing um a previous version of this so there's my P save and then we can command s again and then W to close it out jump back over into live and now you can see we've got this pretty little device in here that is playable inside of uh live so now if I [Music] beautiful maybe create a return track dump onto that return track some Reverb go fully wet on that Reverb nice long let's go high quality and then send some of my signal to that [Music] and we also need some DeLay So let's add some uh maybe some pingpong delay onto another return track go fully wet with that one good amount of feedback three is good let's also add some Reverb to that DeLay So let's enable our send to send a crank that all the way up and now we get oops we got to send [Music] it's beautiful so now the thing that we're all always wanting is great I've got these really cool sounds yes it sounds awesome with Reverb yes it sounds really cool with some ping bong delay on there but I want to play more not notes um I can press down as many as I want or program in something that should play lots of notes and Trigger that and it's creating a really complex sound but it's only playing one of those notes um so we need to go polyphonic um this isn't too hard but I promise you the first times you try to do it you'll run into problems and we're probably going to run into problems while we try and accomplish this because it always seems to be a little bit finicky you know it's expecting things in certain ways certain orders and and and I don't always get it right so let's get it right together let's stumble through it together and let's turn this into um or turn this translate this from being just a monophonic uh frequency modulation synth into a polyphonic frequency modulation synth so we can have all the goodness of playing many many many many notes um so let's crack this back open uh turn to our editor here's our patch um let's take and oops we've got some kind of hanging command J there to truncate those let's move this down over here carrier modulator um and now what we're going to do is we're actually going to kind of cut out of this patch all the bits that make it work um and copy those into another patch that will then later load up inside of a new object called the poly Tilda object which allows us to call up many instances of a single patch um uh as many as we want and thus we get pipany so let's copy this we need all this all this stuff here um is that how I want to do [Music] this uh I think this is how I want to do we might have to come back and change this um but let's take and I've highlighted all the bits that make it work and then let's copy it let's create a new Patcher uh new Patcher and let's copy that in here paste uh um actually what would have been easier first is if over in this Patcher with all those selected I encapsulated those all first [Music] encapsulate uh cool let's edit a little bit more let's take and let's um drop into a Pock object so there's two types of objects allow us to collect multiple um uh multiple streams of data into one stream uh list of data and that is the either the pack object or the pock object the only difference being CK or k there the pack object what's uh unique about this one is uh it's not going to pass along the data that it's receiving until the leftmost um Inlet changes um so this is really good if I if I've got all this data and I don't want it to send until the last bit of data is received but if I wanted to always be sending out regardless of which um piece of information has been received I use the pock object so it's going to always when any any one of them changes it's going to pass that data along so let's use the pack let's provide it with some arguments um I'm going to be connecting up these uh dials here we've got one 2 3 4 five six dials there so let's specify that it's going to be receiving or expecting to receive 1 2 3 4 5 six floating Point objects or floating Point bits of data that's hence the f there stand for floating point then let's connect up each of these drag it over here you're not going to let me fine do it this way Long Way Decay comes out of that one sustain remember to grab that from the raw value rather than the displayed value and last but not least our release we go and then we're going to unpack all that data I know this seems redundant but I promise I'll explain 1 2 3 4 5 6 unpack all that data back into its respective expected locations like so uh did I get that right so these two go in here uh then that one one that one that one that one yep um so the reason that I'm doing this is so that um once we encapsulate all this stuff we'll only have to use one Inlet to specify or send all the data to our modulating oscillator and we're going to do the same thing for our um uh our carrier envelope here so let's create a new pck object this one only expects four floats a new unpack object that does same unpacks for four Connect those two up uh then let's option drag to grab each of these connect it up there then replace each of those [Music] here then align these [Music] connections cck stretch this [Music] out reroute that patch cable command y and maybe slide all this down just a little bit oops there we go so now when I go back and I select this patch this one this one uh this guy and this guy and this guy so leaving all the things that I touch plus these Pock objects out of my selection there as well as leaving the midi in and the plugin not selected then I encapsulate those command shift e or go up to edit uh what was it edit encapsulate it's going to drop all those inside of a sub Patcher just like we've done before and now you can see I've only got three inlets I've got my midi Inlet my carrier envelope Inlet and my modulators stuff there so what that's done is it's extremely simplified the amount of connections that I need to have into this and let's rename this as my um FM Sy stret that back out cool let's see what's inside of there lock our patch double click on it there's what's inside of our patch it actually looks pretty tidy it's not too messy so now this is what we can take and copy and paste into a new Patcher so let's exit out of that one create our new Patcher paste it into there and we want to be able to save this as a Patcher that we can then load up inside of our poly object poly til object which is going to allow us to go polyphonic so if you're still scratching your head hang with me I'm sure I promise that once we look back at all these steps it's going to make sense as to why we've done we've done all this so we need to alter our patch just a little bit so that when we load this up inside of a poly object it works the biggest thing is we need to switch out these inlets for the types of inlets that the poly object likes and that is the in um and they're all Max messages for inlets we can just call this one in1 and then place this connection here delete that Inlet create another one in two connect this one up here delete that out of there and then in three connect that one up there and we only have one outlet but it's sending out a signal so we do out Tilda one connect that up there and close that out of there so then the only other bit that we need to do here is we need to know when so we're going to be loading up multiple copies of this patch um so we want to be able to play 16 simultaneous notes we're going to tell our poly Tilda object to load up 16 copies of this patch but then the poly Tilda object needs to know which one of those patches or which one of those voices is currently being used so that if we ask it to create another note it will use a different or an unused version of this patch so to do that we're going to go into our carrier envelope generator let's tidy this up a little bit J to command J to make that sometimes when we copy and paste things get shortened strangely and we're going to add in this uh adsr envelope is perfect for the job because it's actually um meant for connecting up to or use inside of a poly object so we're going to load up uh this poly object um which is um respon responsible for reporting to the poly to the object that this poly object is inside of um and Reporting whether or not it thinks it's being used or not so if we create that it's only got one Inlet that's expecting um uh mute message or whether or not it's busy or not so if we connect up the mute Outlet of the adsr object that will confirm whether or not this adsr object is currently generating an envelope and this is creating the actual volume output of of our synth so um if it's busy if it's generating an envelope it's it'll say hey I'm in use if it's not generating an envelope it'll tell this polyils object hey I'm not in use so you can use me and just to be sure let's also connect up the signal output from this envelope generator which remember is ramping from zero to one or whatever our velocity calls for and back to zero so if it's ever at a greater value than zero it'll tell this poly til object hey I'm currently generating an envelope and and when it's not generated envelope it'll go back to zero and it'll tell this poly object hey I'm not making an envelope so you can use me all right let's resize that window exit out of there and let's save this patch let's save it somewhere that um uh our uh poly Tilda object can find it so let's go to the desktop let's call this one the drd um poly FM version 0 one for the day let's also copy that um file name and then let's save it and then if we go back to our Patcher first thing we want to make sure is that Max is actually looking at our desktop so let's go option file preferences and see that one of the user paths here is actually pointing to the desktop so here's my Macintosh users my my user account and my desktop and it's also searching all subfolders um if it wasn't there I could add a path and tell to look at that desktop or if you're already saving your patches in a location um like a um your your Dropbox or something like that um you can point Max towards that location the important thing is that Max knows to look for where this file is so we can load it up inside of a poly til object so now if I come back to our um max for live patch create a new object call the poly Tila patch it's going to take an argument which is which patch do you actually want to load in here since I copy and pasted that name when I was saving our previous file the drd poly FM version 01 I can just paste it in there then the next argument is how many instances of that patch do you want this poly Tilda object to load up so let's be uh let's say 16 um 16 voices um and loads up we should see our three inlets double click on it there's actually the object inside of it then we need to send a few messages to this thing to get it started um so let's create a load bang object which um we'll send out a bang every time the patch loads up and I think we need to send out um the messages of um Target zero um and voice uh actually let's just do Target zero connect that up and what that specifies is that when this patch loads up um we're telling it all the information that we're sending to you um Target all of the instances of the patches that are loaded inside of it we could alter this and say um actually don't Target everybody just Target this number instance of that patch 0 through 15 um I'm sorry 1 through 16 would give us um the ability to Target specific ones um if we needed to change just one voice for example um rarely do I need to do that then we can connect up our um envelope information here just switching all these over our output there we go and then um we also need to prepend our incoming midi note um uh note um let's see does it tell me somewhere again noxiously loud note um instances for some reason I don't think that note was what we [Music] wanted all right we might have to play a little bit um midi note and then connect this in there then connect that in there so there's some step in here that we need to um before the midi information the raw midi information that we're passing into there we need to tell it that this is actually midi information that it's receiving um so there's some special command that needs to precede that so that the poly object actually knows what it's receiving but let's see maybe we've got it here so let's put this over here SL this all in line stretch this back out send in our Target zero respecify all this information uh and see if we're getting [Music] information nope all right find out why um let's try changing you to note nothing all right let's go look at a previous one that I've built um let's look at the fat Molly freeze unlock okay so in this case I've got the midi parse actually outside and then it says midi note interesting let's see what happens if I just go straight in it's really loud see do we have pany nope not that one this one please let's go no modulation nope all right so let's change our patch a little bit let's go um change this into midi note and then let's go open our recent um open recent our poly FM and let's extract out uh let's see how did I do this so it goes um midi in MIDI parse and then only passing along that information got it all right so with our object here let's copy this bit here change this into an unpack uh turn that into a signal so we're actually going to be receiving in this Inlet the midi note and the velocity we're going to turn velocity or the midi note send it in there and then the velocity will go in here and we can disconnect that guy now we should have essentially the same looking thing got it in there then copy this guy delete it out of there save it close it punch it in here and let's see so this should be disconnected and we should have midi parse and take that pitch velocity patch it in there and now let's reload our Patcher resend all the information jump back over to alive jump up uh let's try Target zero see it's never just I mean maybe if I was a wizard at this stuff it would work every time but not a wizard still not working why not load Mass Target zero which passes into that guy let's add in the uh attribute of Steel one which is just going to tell this guy that if you uh run out of available patches I've asked you to produce more than 16 notes simultaneously you'll steal the oldest one in order to make the newest one um but let's also see if there's anything else inside of here that should be there so unpack this [Music] poly Ah that's blatantly obvious we've forgotten our midi to frequency inside of our Patcher we're just going straight from the midi note to the to uh to our cycle object so let's go uh new object MTF slide that in here click beautiful save it reload our Patcher just by respecifying [Music] it uh send in our messages [Music] huzzah we've got pany so then we can collapse this back down hit save close it out get rid of our reference patch there close all those things out don't save that one jump back over into live and now we've [Music] got let's start to bring in some modulation [Music] those glitches are just because my screen recording software is running right now so it's actually let's give live a little bit more time to make these things happen and then let's have a nice long attack on our modulator there [Music] [Applause] [Music] add in some [Music] [Applause] Reverb add in some delay [Music] thanks for watching and as always I hope this video helps you not only unlock and understand your tools but also inspires you to create and share if you enjoyed this video be sure to like it share it with your community and subscribe to my channel to hear about all my future videos if you have any questions feel free to comment below or send me an email via my website which you can find Linked In this video's description thanks
Up Next

Stepper Motor Working Principle: 3D Animation Guide
@tazbidahmed7765
176 views•2022-02-23

Ultrasonic Transducers: Resonant Frequency Measurement and Horn Design
@imajeenyus42
229.9K views•2017-02-22

Polymer Environmental Degradation: Mechanisms & Stabilization
@iit
1.8K views•2012-07-10

How a Student's Question Saved a NYC Skyscraper from Collapse
@veritasium
22.8M views•2025-04-26
Related Study Plans & Knowledge Roadmaps
Structured learning paths in Engineering