




![Productos Notables - NIVEL AVANZADO - LAS FIJAS DECO [Academia Plan de Vida]](https://i.ytimg.com/vi/79gHJ5_ARfM/sddefault.jpg)


![[ 2BAC SM ] [ L’Arithmétique - partie 02] [Rappel : Les classes d’équivalences - le groupe quotient]](https://i.ytimg.com/vi_webp/OPE0U0ZSPlE/maxresdefault.webp)






![How Resident Evil Requiem PC Path Tracing Amplifies The Horror [Sponsored]](https://i.ytimg.com/vi_webp/jC98WaHzd4I/maxresdefault.webp)
Ray casting is a fundamental rendering algorithm where rays are cast from the camera through each pixel into the scene, and the first object intersected determines what appears at that pixel; this technique involves solving geometric intersection problems, such as finding where rays intersect with simple shapes like spheres (solving quadratic equations) and planes (solving linear equations), which forms the basis for more complex rendering algorithms like ray tracing that can handle advanced effects like shadows, reflections, and refractions.
Computer Graphics: Intro to Rendering & Ray Casting
Added:Basic Vector Algebra: Proficient understanding of 3D vectors, dot products, cross products, and vector normalization.
Analytical Geometry: Familiarity with the mathematical representations of lines (rays), planes, and spheres in 3D space.
Algebraic Equation Solving: Ability to solve quadratic equations (crucial for finding ray-sphere intersection points) and systems of linear equations.
Introductory Computer Graphics Concepts: Understanding of the virtual camera model, viewports, and how 3D coordinates map to a 2D pixel grid.
Recursive Ray Tracing: Extending ray casting to support reflection, refraction, and shadow rays for more realistic scenes.
Shading and Local Illumination Models: Applying lighting models such as Flat, Gouraud, Phong, or Blinn-Phong to determine pixel color based on intersections.
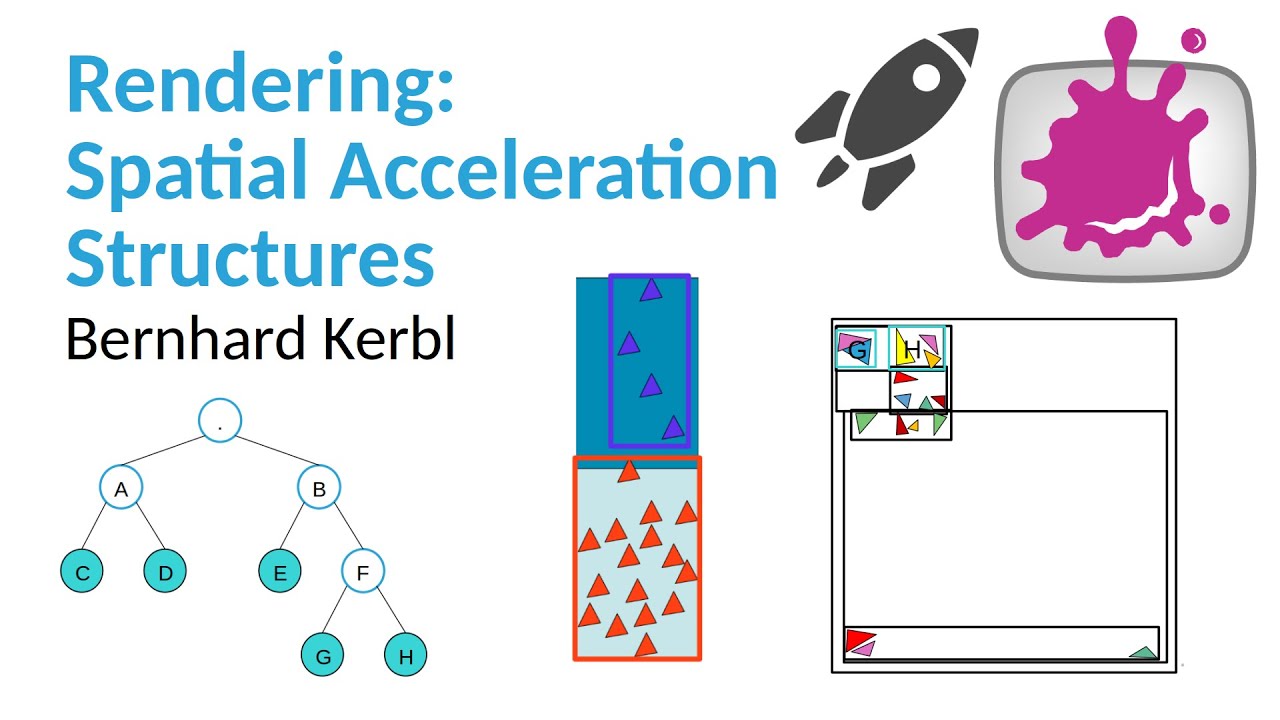
Spatial Acceleration Structures: Implementing Bounding Volume Hierarchies (BVH), Octrees, or KD-Trees to optimize intersection calculations for complex scenes with thousands of polygons.
Global Illumination and Path Tracing: Exploring advanced Monte Carlo rendering algorithms to simulate realistic indirect lighting and soft shadows.
10K views119likes1:02:09Original Release: 2020-12-29
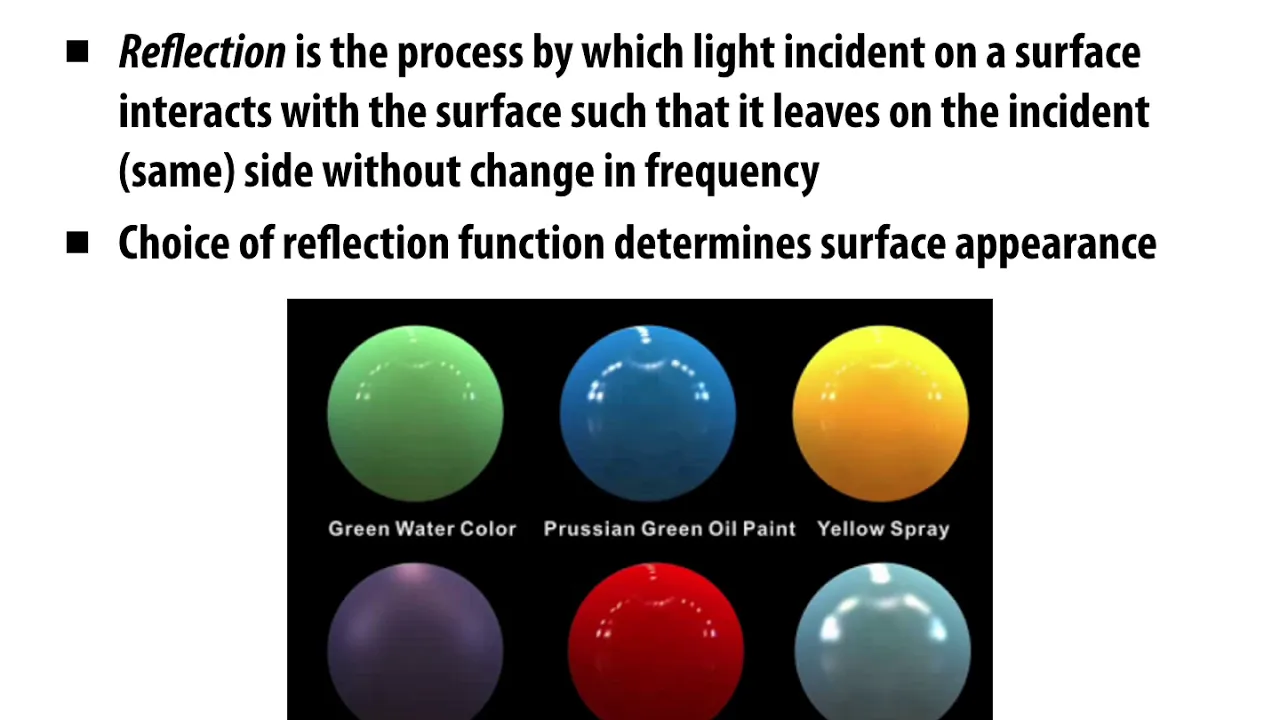
hello everybody and welcome to the next lecture of 6837 uh today we're going to be talking about the beginnings of how to develop algorithms for rendering right actually drawing images on the screen and in particular we're going to talk about a technique called raycasting uh and talk about how we can render some very simple shapes namely spheres and planes so to catch up with the story so far in 6837 as a whole the very first part of our course talked about modeling right this was both modeling the contents of an individual scene using splines you know hierarchical transformations meshes and so on and then we talked about modeling not just the static scene but animating it in time and we talked about a lot of different strategies for that everything from skinning for dealing with characters uh and making their skin deform in response to inner our articulated bone structure to ordinary differential equations or odes which can be used for physically based animation particle systems and even systems of forces that govern the motion of particles using forces that are pretty much just invented or made up by the artists or the computer scientists so in particular in our previous lecture we saw that we can build all kinds of interesting and pretty compelling approximations of physical systems just using networks of springs but of course the challenge was coming up with an ode integrator that can deal with sometimes a pretty stiff uh system to solve in any event we now move on to the next big chunk of 6837 which is now that we've specified a scene and potentially the dynamics and contents of that scene as it changes over time the next thing that we need to do is actually draw it on the computer screen of course generating an image given a scene description is probably the most core topic in the computer graphics universe i think even the most conservative computer graphics purists would agree that this is a topic we should spend a lot of time on in a course like 6837 and indeed we're going to spend many many lectures on developing algorithms for rendering so given a list of the objects in a scene whether they're triangles or splines or hierarchies of transformations applied to other objects how can we actually generate a grid of pixel colors that we can display on our monitor so today we're going to start out pretty easy and talk about some really simple ideas that are going to motivate many of our rendering algorithms and we're going to leave you with a very concrete set of methods for drawing a sphere so this is a very simple uh rendering lecture today to get started we might end a little early i always say that i never managed to actually end early uh and then starting next time we're going to add more and more complexity to our rendered scenes until we get really beautiful images that involve you know reflections and refractions and lighting effects and so on okay so today we're going to focus just on that high level question what does the term rendering mean and we're going to talk about the basics of the ray casting algorithm which is used to draw content on your computer screen and it's kind of a step toward ray tracing which is probably one of the state-of-the-art methods for actually drawing photorealistic content even if it can be a little bit inefficient um at least until some very modern developments in the ray tracing world okay so i think most students in this course are familiar with the term rendering they've probably run into it and you know video games or cad software or whatever just to make sure we're all on the same page the term rendering here refers to the procedure where you take the description of a scene typically in 3d is is usually when we use the word rendering but of course in in vector graphics uh rendering also applies to 2d scenes but in any event rendering takes a scene as a description like all the objects in the scene their colors their materials and so on and converts those into an image on the uh the camera plane so in rendering um in some sense we're converting from this sort of infinite resolution description maybe not infinite if you think of of the triangles of the bunny as somehow the resolution of the geometry um into a very specific grid of values because that's what your screen knows how to display uh at the end of the day and so for each pixel we're going to generate either a color or a grayscale value like rgb we'll talk a little bit more about color spaces much later in this course and that's what is actually going to get sent to your computer monitor for display so i don't think there's a reason to harp on this term i think most of us are familiar with it but it's important to mention it um just to to make sure we all have the same terminology of course when we do our rendering uh the other term that we're probably familiar with is pixel right so i think it's a pixel short for picture element um and essentially uh we can think of it as sort of a formalism so in the basic pinhole camera setup that's the term that i've introduced at the top of the slide here you think of your camera as sitting at some position in space and you think of the image plane like the pixels as like a little square that's sitting in front of your eyeball conveniently i'm looking at the camera that i'm lecturing into so i can kind of simulate it from both sides then what i can do is i can take a point like at the center of my pixel for example uh maybe there's that point and if i draw array from my eyeball or from my camera through that pixel into the universe essentially the color that gets displayed in that pixel is roughly the color of the first object that this ray from my eye into the world uh runs into so this particular model is called the pinhole camera like the little pinhole sitting at the the aperture of the camera uh and indeed um that's going to be sort of the basic motivator for how we talk about the ray casting algorithm what we're going to do is send these rays out from our eyeball into the world figure out the first thing that they run into and then figure out the color that's it it's really it's pretty straightforward of course computing the actual color is its own complicated uh computation right color is determined by the positions of the light the shading and there could even be really complicated effects so for instance one um that we often talk about is subsurface scattering so if you render a material like marble if i hold a light bulb down on a piece of my marble on one side the light will kind of scatter through the material and exit in all kinds of locations which means that the color that i see is the result of light taking a very non-linear and bouncy path to my eye of course that's a very expensive rendering effect okay so to summarize rendering refers to this process that produces color values given a representation of a 3d scene and the pixels roughly correspond to rays right the rays from your eyeball into this kind of screen door structure which is the image plane sitting in front of you there's a little bit of debate there right i mean if you think of drawing the pixel like a little square seeing in front of your eye maybe the color really should be the average color inside of that square we're going to discuss anti-aliasing in a few weeks and that's going to be a really critical consideration when we get to that point but for now assuming that it's just one ray like maybe the pixel is really really small our task is to figure out what object i'm actually seeing in that pixel and then in a second step we're going to compute the color so that first step of saying for each pixel what object is that pixel actually displaying sometimes known as the hidden surface problem uh and and it's already basically a large part of the rendering pipeline now there are two major algorithms for rendering uh there's ray casting which can get extended to ray tracing and then there's rasterization we're going to talk a lot in this course about the distinction between these two techniques we're going to start with ray casting which favors the quality of the image over the efficiency with which it's produced and then in a few lectures we're going to motivate rasterization which at a high level is basically going to just flip the order of two for loops but of course then the ways that we make it faster are completely different and in rasterization this is the algorithm that's typically built into your graphics card for for rendering right so this is the distinction again at a very high in course level between super high quality graphics that can take forever to produce interestingly using an arguably simpler algorithm um which would be ray tracing whereas rasterization uh the bias is toward producing an image quickly and doing so in a really parallel fashion so your graphics card is basically a rasterization machine okay so today we're going to talk about the basics of ray casting we're going to define what that algorithm is and then work out some specific examples of how it can be applied so let's let's get started the raycasting algorithm is super super simple and in fact if you want to implement the world's simplest tool for drawing a 3d scene composed of just a few objects really it's not more than a few lines of code so the basic ray casting algorithm looks like what i've shown you on the slide here on the outside we're going to have a loop over all of the pixels in the image right moving from one square in this grid to the next we're going to see that that loop can easily be parallelized then for each of those grid points we're going to choose a location and draw a ray from our eye through that pixel into the scene and using that ray our task now is going to be to figure out what object the ray hits first right so in this case notice that the ray that i've drawn from my eye actually hits two spheres right it hits this one and it hits that one so what sphere do we render well clearly we should render the sphere that's closer to our our image so how are we going to do that we're going to loop over every possible object in the scene for now again we'll find that there are ways to accelerate this we're going to intersect the ray with that object and if the object is closer to the eye than the current closest thing we'll keep that new object instead so for example maybe i iterate over all the objects in the scene maybe the first one is the cube and i say oh well the ray doesn't hit the cube at all so i know that i don't have to display the cube in that particular pixel and then i find this intersection point with the farther sphere i say aha i found an object so maybe i should render that sphere but then i find a new intersection point with the closest sphere well that point is closer than the previous one i found so actually i will end up rendering this sphere instead that's it that's the raycasting algorithm obviously there are a lot of details uh that we haven't filled in we need to talk about how to construct this ray we need to talk about how to intersect rays and objects and of course there's one additional step which i've omitted which is you have to decide on exactly what color to put at that pixel once you've figured out what object you're shading let's say a few words on this last step which largely i'm going to defer so for now we're just going to give you one really simple model for shading so that we can get started and later on we're going to talk more about different materials that can get different looks in your rendered scene so shading is all about what surfaces look like obviously if you look around you you'll see many different materials with different properties right the way that they react to shining a light bulb on them probably differs pretty drastically so in order to perform shading we typically need a lot of different pieces of information we need the normal to the surface as a bit of review remember that a normal is a vector that points 90 degrees to the surface you need to know where the light is so for example if you have a point light maybe you can just draw a vector pointing directly toward it later we're going to talk about area lights like big lights on the ceiling which are a little bit more complicated maybe you need to know where the camera is as well so for example if i'm looking at a metal object then depending on where i place the camera the color that i observe will be different these are all properties of the scene around the object that you're trying to render in addition to that you need to talk about the material of the object itself and of course there are many different properties there there's the diffuse material so for instance here you see a perfectly diffused sphere diffuse things have no reflective component light just goes in and then gets scattered everywhere there might be a specular component that's like the shininess like what you see on the right hand side and finally you might need positions of the light and so on and we'll see that there's all kinds of different effects that we can add for instance i mentioned subsurface scattering earlier in today's lecture that can create even more interesting shading materials for now we're going to just work with the simplest shading model which is the diffuse model roughly we'll see that that looks like the amount of light that gets bounced off of the surface is proportional to the dot product between the normal to the surface and the light this is sometimes called the lamburtian shading model we're going to see a lot more of that in this course but for now it's just because it's one line of code and can be used to render something so for 10 seconds of intuition on this particular shading model remember that dot products are big when vectors are parallel and that kind of makes sense so like if the sun is shining directly on my surface then my surface should have the most light if the light is just kind of grazing off of the surface then the amount that it reflects off should be a lot smaller and that's essentially all that's going on here so there's one distinction in terminology that i consider to be totally unimportant but everybody should be aware of because it does show up in some technical papers textbooks and so on that's the distinction between ray casting and retracing i'm gonna get this wrong in our lectures because in my mind these are pretty much identical algorithms in some sense ray casting is a special case of ray tracing but in case you run into somebody that's being pedantic about that difference let's talk about it for a minute um and in particular let's think about shadows for a moment so let's say that i'm rendering a scene and i'm looking at you know my scene my eyeballs over here there's a light rendering my scene uh there's and there are two objects a a sphere and a rectangle and now i'm trying to do my shading computation and i want to figure out how to draw the different objects in my scene well of course thanks to shadows um there's going to be a big shadow cast by this rectangular object right look you know follow roughly the region that i've drawn here this is sometimes called a shadow volume we'll talk about that later so in particular should this spherical object be lit no it's not lit because it's sitting in the shadow of the rectangle so here's how we might think about that in the context of ray casting ray tracing so in the raycasting algorithm that i've described for you well i draw a ray from the camera into the scene and i figure out the first object it runs into then the next step in ray casting would be to do a lighting computation so what could i do well i could look at the light look at the normal to the surface take the dot product and say aha these two vectors are close to one another so maybe the surface should be really bright of course if i do that i make a mistake because there's a giant rectangle sitting in between he needs some hair and ears okay so what should i really have done well i should notice that if i drew a ray from the light to the surface of the sphere it gets blocked by the rectangle in between okay so in the ray tracing algorithm what we're going to do is uh kind of sneaky which is okay let's say that i render my sphere so the first thing i'll do is detect this intersection point now i'm going to make a new ray that starts at the intersection point and points toward the light bulb what do i know i know that if that ray reaches the light bulb without hitting anything else then i should shade this point and otherwise that point is in a shadow so in this case i intersect that ray with all the objects in my scene and i say aha there's an intersection point with an object that is closer than the light meaning that i'm in a shadow and i should not be lit by that light so one thing that's really cool here what did i need in order to draw that shadow did i need like a special you know segment of my code for computing shadows well the answer is no right all i need is an abstract piece of code that in my 3d scene takes a ray and then tells you the first thing that it runs into so for example in our first ray casting step i take a ray from my eye into the scene and the first object it runs into is the thing i should draw but then for doing my lighting computation i make a new ray from that intersection point into the scene again and depending on whether it ran into something else i can figure out whether i was in a shadow so that's the basic distinction between ray casting and ray tracing ray casting only involves that first level set of rays namely the rays from your eye into the universe the ray tracing algorithm also allows for secondary rays which can figure out things like shadows uh we'll see that reflection and refraction are handled nicely in this setup and so on the reality is that almost everybody uses the term retracing to refer to both of these things um so i wouldn't get too hung up on the distinction but it is worth knowing uh and and we'll try to be consistent about it in the slides so the thing about ray tracing as an algorithm is that it is extremely extremely powerful this idea the this basic abstraction is the need to intersect array with objects in your scene allows you not only to just render boring diffused spheres but also to do things like reflect reflection um uh so for example here's some reflective spheres here's a reflective teapot this is another uh object in the sort of big cast of computer graphics characters um this utah teapot is a famous model and other effects like caustics you know so here you can see that the light is somehow getting focused through this piece of glass and casting an interesting shadow underneath um in fact there are all kinds of fun lighting and shading effects that you can capture using ray tracing and eventually a technique called global illumination that we'll talk about in a few lectures so not only can you do reflections and shadows you can also deal with you know indirect illumination so for example the white material of the floor might receive a little bit of the red light bouncing off of the wall even though it's diffuse and so on so that's what we're aiming for but today we're going to keep it simple like just drawing spheres and planes and so now let's get into the the nitty gritty details so we've talked a lot about ray tracing ray casting the first question you should ask is what is array and we've already talked about that in our lecture on parametric geometry but just as a reminder let's say that i have a ray uh from some point like an eye into the universe like pointing at some other location then how could i represent this object mathematically of course there are many different representations but uh there's one really simple one that i think we all know and love which is as follows essentially i'm going to think of a ray as a point like an origin maybe call it o for short sorry for my terrible handwriting this laptop is tricky maybe there's another thing like the direction d and i can think of my ray as the points p of t that can be written as the origin plus t times the direction right so for instance when t equals 0 i just get that origin point and as d increases i move farther and farther along in the direction notice that the sign as ign of t actually matters here so if t is negative i'm at some location behind the i but that would mean i'm parameterizing a line rather than a ray so when we talk about array typically we constrain that t is non-negative so when we talk about the ray casting problem now that i've given you a mathematical representation of array we can specify the problem in a bit more precise language so in particular given a description of all the objects in our scene and a particular array for example the array from your eye into the universe the ray casting problem says find me the smallest positive t value so that p of t intersects one of the surfaces so again like let's say i was rendering a box i'd like to find the very first intersection point t that actually hits one of the surfaces that i'm observing the reason that we have to use smallest is that of course if there's another object farther away that's actually irrelevant for shading assuming that it's occluded by the box here now why do we say t is greater than zero well the smallest t could be negative right it could be that there's another box behind my eyeball but that's also irrelevant for shading now the ray casting ray tracing algorithm has a very long and storied history and it actually lasts longer than computer technology itself um so for example in the 16th century artists were using uh essentially ray casting and ray tracing techniques to get the right foreshortening and perspective transformations in uh artistic representations of the world um these are super fun because essentially even in the 16th century people were doing some version of raycasting that looks an awful lot like what we code on our computer today so for example here you see in the back uh there's some point that's kind of like the eyeball and then our man albrecht here has basically drawn a straight line from the eyeball uh into the world uh and figured out the first object that it runs into just using a pulley and a piece of string right so maybe i hold the piece of string at this intersection point and then the pulley tugs down on the string so that it's taut and now the intersection point here with the image plane is what i uh what i draw it's a really sneaky uh sneaky technique and this was useful because of course it's pretty difficult to draw this musical instrument at this crazy angle here um and get the crop the proper foreshortening remember foreshortening is like stuff that that looks uh like it shrinks as it moves away from the camera um and really this is in some sense one of the earliest uh 3d scanners uh in in in history here and uh he experimented with a lot of different techniques that oh we're built on this same basic uh pinhole camera model so uh for instance here rather than holding the string against the object itself that made it hard to have an image plane uh you know nearby so instead maybe you point some device at the object that you're observing and of course wherever it intersects the image plane is is where you should draw um i'm told that real artists don't need to do these sorts of tricks uh but of course uh without them i don't think i would be able to draw any proper depth on a 2d image even with them i really struggle but i'm i'm a terrible artist okay so now we know how to draw arrays so the next thing we have to do in our set up here the first thing is generate the rays that have something to do with the camera pose in the image plane right so we have a representation and now we have to figure out exactly which way to draw so if we return to our ray casting algorithm remember we loop over every pixel we construct a ray from the eye into the universe and then we intersect that ray with every object let's talk about this step here right how do you construct array from your eye through a particular pixel into the scene we have like lots of fun pictures from uh mostly european artists that are trying to capture depth in different ways and you know smoke their their cigarettes okay so the basic model that we've already alluded to a number of times is the pinhole camera model and with many of the techniques that we'll talk about this model has its roots in the physical world rather than just algorithmically um so in the pinhole camera model i'm thinking of my camera like a giant box what i've drawn here and that box has a little tiny hole on its side right there so why do i want just a tiny tiny little hole well essentially what that's going to do is it's only going to let in rays of light that pass through a very small point so what's going to end up happening let's say that i'm rendering this teapot well the rays of light you know maybe the sun is over here somewhere the rays of light hit that teapot they go through this hole and they just keep going until they reach the far plane of the box and that's where the light ends up inside of this pinhole camera and the smaller that the hole is the kind of more perfect your image is you don't end up with blurry um artifacts or depth of field that kind of thing uh the pinhole camera model has been around a long time um so for instance in the uh what the 16th century here uh you could actually build a physical pinhole camera so maybe you construct a room with you know nice uh columns of course you don't want to be an architectural slouch and now you want to capture an image of the outside world indoors one thing you can do is just poke a really really tiny hole in your wall and now you're going to have all the rays of light from the universe go through that point and then cast an image on the back wall of course in reality there's a challenge which is that the smaller that hole is the less light there is and the darker you're seeing us but on the computer we're going to be able to take care of that pretty easily um so for instance i think this room was used to study a solar eclipse in in the the 1500s uh here's another example sometimes this is called the camera obscura effect um i think this was was coined by kepler also in a similar period of time and so you could actually use this technique to help you do your painting right so let's say that i wanted to paint probably this very bright outdoor scene well i could put it adjacent to a very dark room and then use this pinhole camera model to cast it onto the image plane and now rather than doing art all i have to do is trace uh and so this is again a nice clever technique for uh getting foreshortening and all these depth effects correct um without having to just rely on your eyeball and your artist technique uh these are these artists in these 1500s were pretty clever really and the the pinhole camera persists today but largely just in in artistic techniques so for instance this artist who i think is really cool um captures uh pinhole cameras and interesting apartments in like new york and washington dc uh and you actually if you like turn out all the lights and only allow one little pinhole of light into your room you can get a pretty nice image apparently of the outside world uh using this technique so anyway if you guys are bored i i highly recommend checking out his website it's got a lot of really cool content to observe now in our case of course we're not trying to actually simulate this classical technique so we can make a lot of simplifications in particular rather than dealing with like an inverted image plane behind my eyeball i can simulate an image plane sitting in front of my eyeball and not have so many sign mistakes in my code um one thing that's worth noting is that the distance and size of the image plane are totally arbitrary right i would get the same rendered image whether i put the image plane on the left or the image plane on the right what matters is just uh the scale relative to the location of the eye and the color that you see when you trace array from your object through the plane into the real world so in practice when we want to describe a pinhole camera like what i've given you here uh here's a pretty easy way to do it so of course one thing i need to do is keep track of the location of the eye at some point here right so maybe that's e i suppose in the notation of our what third lecture i could put a little tilde above that then we have a vector uh u a vector v and a vector w um which are orthogonal bases that point horizontally up uh and then out into the world uh respectively so uh right and this is enough to keep track of where the camera is and where it's pointing another useful thing that you might want to keep track of is the angle of the field of view right this is like the angle of this frustum as it goes into the eye incidentally notice that i used this word frustum here frustum refers to this prism that starts at your eye and goes outward with this quadrilateral shape when you slice it using the image planes and then finally you might want to keep track of the aspect ratio of the image rectangle so the ratio of its width to its height okay so uh as always in this class we have to deal with many different coordinate systems and translate from one into the other uh quite frequently uh so a very typical thing to do um is to use image coordinates which are essentially just convenience for rendering a scene so a pretty typical thing to do is to just normalize both the x and y coordinates to be between -1 and 1 for the rendered image and this is actually regardless of aspect ratio um this is a controversial decision i don't think everybody does this anymore some of the old versions of opengl kind of mandated it um but it is true that sometimes when people talk about image coordinates uh this is what they're referring to on the other hand these corners can be a little bit tricky to think about because they might distort your scene right like if your image is two times wide as it is tall or something like that okay so we set out to talk about ray generation let's actually do that so let's say that i have um an angle like uh our field of view alpha here and i'm trying to draw a ray into my image plane um we can do a little bit of trigonometry to actually figure this out so let's say that i have a point p and i'm trying to find its coordinates on the image plane well what can i do well i can say what is the uh distance to the screen um so the normalized coordinates are actually one so for instance if i specify just the field of view then i have to kind of figure out how far away i should go before that rectangle right it gets bigger as i move from my eye has the the correct width doing that's just a trigonometry exercise so of course uh notice we have a right triangle here its width is one its depth is d and this lower angle here is alpha over two so if i do a little bit of trig we find that um the the distance where i should put this sort of virtual image plane is one over the tangent of alpha over two also known as the cotangent of alpha over two um so uh with all that information i can figure out that point p uh pretty easily and reverse engineer location i think in practice incidentally people don't always do this um i think an easier representation is you have an eye point e you have a point out there in the universe which is the uh sort of center of your image plane and then you have an up and a right vector from there um that's somehow easier to work with i think that's what we give you in your assignment too um so indeed uh you know that was just a 2d picture 3d is no harder you just kind of flip the picture when you're talking about the y-coordinate computing that d is useful essentially if you're trying to figure out where to put that virtual image plane in order to work in these normalized coordinate systems uh between minus one and one and again doing so is often optional depends on the graphic system you're working with all right so uh that's not the only model for a camera this pinhole camera model that we've been discussing and of course it's important to highlight a few more here's another example which is the uh difference between a perspective and an orthographic camera so orthographic drawing is important and useful in the engineering world in particular so in orthographic drawing um essentially all of your rays rather than coming from an eye into the world you just have a plane all of the rays have identical direction and they move in parallel to one another just starting from different pixels moving outward now as objects move farther and farther away from your camera the pinhole camera model starts to look like the orthographic uh rendering model um but the orthographic camera even if it's not physical can be useful because for instance if you need to measure oops uh measure distances uh that are not parallel to the camera plane the orthographic projection allows you to do that in a fashion that makes a little more sense uh setting up your orthographic camera and producing rays for that model is arguably actually easier than generating rays for the pinhole camera model because of course the direction now is just some constant and the origin is just some shifted uh location where you shift along the two directions of the uh camera here there's a whole universe of different cameras that people use both artistically and uh for different scientific purposes uh so for example uh there's fish eye cameras like what you see on the left omnimax parabolic and so on um and all of these basically just correspond to different ways to generate the directions of rays um in your your universe right so at the end of the day what you need is for each pixel in your scene you have to decide that that pixel corresponds to some ray and that the first thing that that ray runs into is what you're going to shade at that pixel now one of the really fun things um is that you don't even have to have a physical camera uh right we're in the digital universe so maybe we get really creative and invent non-physical cameras that are useful or create cool artistic or visualization effects so one of my favorite examples is a technique called multi-perspective imaging as you can see this is not a particularly physical way to render an elephant you know most elephants i think have four legs um but here's what's going on what i'm gonna do is like let's say that you know i have an elephant so here here he is see he's got four feet and a head and a trunk uh and now i want to render this thing so in the pinhole camera model i would place a camera somewhere and i'd start generating rays like that but again the only thing we have to decide on is like at a particular oops at a particular location in my image the color of that location should correspond to some ray that i generate in the computer right and that procedure for generating rays can be physical like for the pinhole camera but i could also just make it up and have a cool effect like like unraveling my scene here so to do multi-perspective imaging um this was a technique that was invented so that you could try and visualize for example both sides of this elephant uh in one rendered image what they did is they kind of put a camera on a parabolic track around the elephant so if i think of my elephant and now i surround my elephant with a toilet paper tube i can start producing rays that kind of move inward toward the elephant from that toilet paper cube tube and uh i can use that to render uh this object right so this would be kind of like panning a camera around the outside of the elephant and then making like the first column of the final image be the first column from the first pixel the second column image the second column is the second column from the second image and so on and you get this cool effect i would love for somebody to implement multi-perspective imaging as an extra credit on the ray tracing assignment in this course and it really wouldn't be so hard okay so at this point uh remember what's our basic ray casting algorithm we loop over all the pixels for each pixel we generate array into the universe we've now talked about how to do that our next step is to actually figure out what that ray runs into and that's what we're going to spend the rest of our lecture today trying to do in particular we're going to talk about rendering two of the world's least interesting shapes namely planes and spheres okay now the plane ray intersection algorithm is going to be particularly easy i think you guys could all do this at home using the linear algebra that you know and love but it's also worth working out in some detail uh because ray plane intersection is the first step toward ray triangle intersection and of course triangles are the basic building blocks of objects that we tend to render in the graphics universe okay so just to continue to you know put our our lecture in the right place uh remember that our raycasting algorithm generates rays that was what we talked about last and now we're going to talk about intersecting the rays with the objects in our scene okay so let's get started recall the our basic ray representation oops that should be a subscript uh is what i've shown on the screen here right that array you can think of like r naught this would be the origin plus t times rd where t is describing how long along the ray i should move before i run into an object in the terminology of the second lecture of this course i'm afraid you guys are responsible for all the material here uh we would call this an explicit representation of array now that's not referring to the uh the language that we use to describe array um but rather the fact that i have an explicit function that goes from t's to points in space i've parametrized my geometry now how can i describe a plane well there are a lot of different ways i think here's a formula that we all know and love which is that i can define a plane using two pieces of information a single point on my plane p naught and the normal vector to my plane n and now i can write an implicit equation for my plane um here how could i do that well when is a point actually in my plane well one thing that i can do is i can draw a vector from p naught to my point p say that p is equal to x y z and p is in the plane exactly when that vector is orthogonal or 90 degrees to the normal vector okay so in other words what do we know we know that zero is equal to how do we oh sorry i i forgot we check whether two things are orthogonal by taking their dot products and checking if it's zero so in this case zero is equal to n dot well we need this vector from p naught to p right that's what i'm showing you on the right hand side here and that's nothing more than p minus p naught okay so let's expand this so we have zero is equal to n dot p minus n dot p naught now p naught is just some arbitrary point on our plane so this quantity here this is a constant right so in particular we just learned that d in the equation of our plane is minus n dot p not and a b and c you'll recognize this expression here as a dot product right between x y and z and a b and c so in other words a b c had better be the normal vector to our plane because that's what appears in our expression here okay so by the magic of powerpoint uh here we are uh here's our implicit equation of a plane right our plane is the locus of points p that satisfy the relationship that i've written in the box here incidentally if n is a unit vector so in other words if n is normalized uh computing the distance from a point to the plane is as easy as evaluating this function here it's actually a signed distance it can be positive or negative and that just tells you whether you're above the plane or below it with respect to its normal vector uh i'll let you guys work that one out at home for now it's just like kind of a fun fact uh but it's something that you can derive pretty easily using linear algebra machinery so remember our goal here our goal we have our eyeball he or she uh computes a ray into the world and we're trying to figure out if and where that ray runs into our plane now we've got kind of a funny scenario right our ray is described using an explicit equation like parametric geometry and our plane is described using an implicit equation right it's the the locus of all points where the expression i've given you is equal to zero so the question is how do we figure out where our ray intersects the plane well what can we do in some sense our task is to figure out the t along our ray that runs into the plane and of course it runs into the plane exactly when this thing is equal to zero so in other words we want that zero is equal to h of p of t and our goal is to figure out which t this is the case okay so let's expand a little bit so h of p that's equal to n dot p but p of t is r naught plus t r d plus d uh so this entire expression equals zero of course i can expand the dot product here so this is and i'm going to refactor to gather the term next to t right so we have n dot r d times t plus n dot r naught plus d so in other words we have t is equal to minus n dot r naught plus d divided by n dot r d and now that i glance uh up at my slides yes we got the expression right so uh thank you to powerpoint for uh replacing my ugly um handwriting here so here we have the equation of array and the equation of a plane respectively we plug one into the other and solve for t and that's the expression that we get here so again what is this thing telling me it's telling me if i move along my array to parameter t the point that i'll get is in the plane that i'm trying to intersect of course if t is negative then we'll be in some trouble right it'll be behind my eyeball somewhere um whenever you see an expression like this of course you should debug it a little bit and make sure you understand um and you might do a little bit of a sanity check and say well wait a second justin what happens if this value here is equal to zero right then i'm dividing by zero and what's that about that essentially is telling me that my ray doesn't intersect the plane and that can actually happen namely like if the ray is somewhere uh moving parallel to the surface then the two will never actually meet and that corresponds exactly to the case where n dot rd is equal to zero uh there's a little bit of bookkeeping we should do of course when we do ray casting what matters is that the plane is in front of the camera so if t is negative uh then we should probably dispose of it um by the way typically you might want to have a small but positive t min so that stuff that's like right on top of your eyeball doesn't mess with the rendering algorithm we'll talk about that more later a different thing that we should also do in our bookkeeping for the raycasting algorithm is double check that t is less than t current right so in this case there's actually a sphere in the way of that plane so that whole computation ended up being irrelevant of course now that we figured out that the plane is in front of us we may want to render it in order to do that we need the normal vector to the plane and thankfully that's actually built into the equation of the plane so it's pretty easy to get it's just constant there's one bug incidentally that can happen so let's say that i want to draw the plane and it's two-sided like i want one side to be red and one side to be green or something like that then essentially you'll distinguish between the two sides using the normal vector but at the same time for doing your lighting computation you probably want the normal vector that's facing your eye so you may need to flip the sign of the normal vector since this plane doesn't really have like an inside and outside or something like that okay and that's it now we know how to intersect rays with planes we can have the world's least interesting ray tracer that can only draw worlds composed of infinitely long flat objects okay so our next topic is to talk about raycasting spheres and then we're going to be able to render a world compose those spheres on planes uh and so this is largely just as an example of the ray casting algorithm moving from spheres to other algebraic surfaces is pretty straightforward so we're just going to do this as an example later on in this course uh when you see the past exams you'll see that it's a pretty typical topic to ask you to invent a technique for ray casting or ray tracing for a particular weird piece of geometry given by an equation like a sphere okay so how do we represent a sphere for now let's assume your sphere is centered at the origin it's pretty easy to take care of cases where that's not true so what is this a sphere centered at the origin well it's exactly the set of points where the norm of p is equal to r norm is a little bit weird it's not actually differentiable it's kind of like absolute value so pretty typical thing to do might be to square it okay so in other words if i subtract r from both sides i get the expression here right the the norm of p squared minus r squared equals zero and of course the norm of a vector squared is the same thing as the vector dot product with itself so our task now is to figure out the point where a ray starting at your eye intersects the sphere so how are we going to do that well it's pretty similar to the computation we just did for a plane right so we have this explicit expression for a ray right it starts at r naught and it goes in direction our d we now have an implicit equation for the sphere right that p dot p equals r squared so what are we gonna do well we're just gonna plug one into the other and solve for t so let's do that uh in particular we have zero equals p dot p so that's r naught plus t r d dot product with the same thing all that minus r squared so anytime we have an expression like this it should be screaming out at us to expand the square let's do that what are we going to end up with well r naught dot r naught right that's like the uh left terms you know we're doing foil right so first outer inner l last um now let's do the uh outer and inner terms um both of which are going to be 2 t times the dot product r naught dot our d right that's like the product of these two terms and then finally we'll do the dot product of the last terms and we'll get t squared rd dot rde and then we don't want to forget the minus r squared okay so let's uh factor our expression slightly differently so what we're going to do is we're going to factor out all the the different powers of t so the highest power of t is 2. so we'll have r d dot r d t squared right that's this term here plus 2 r naught dot our oops rd t that's this term plus r naught dot r naught minus little r squared okay now let's just make a few definitions let's call this thing a this thing b and this thing c right these are just three constants do you see that there's no um these are just kind of properties of the sphere uh and properties of the ray getting stirred together in different ways so now i can write a t squared plus b t plus c and remember uh if we step back 10 feet and and think about what our task was it was to solve for t okay well all of a sudden you guys should be like super excited how do i solve expressions uh that are given in this form well this is a quadratic equation right so all of you should be like shaking in your boots ready to tell us that it's you know negative b plus or minus the square root of b squared uh minus 4ac all of that over 2a yeah so let's uh unravel that a little bit so here again it's the same expression i had on the previous line remember we're calling this guy a this is b this is c and our task is to solve for t okay um incidentally uh by the way oftentimes oh i'm sorry that should be a subscript um a might be just one if the uh if the direction of our array uh has unit length but you might also not want to assume that i'm noticing that uh in my slides i i kind of said a equals one but this is this is optional you can also do actually just compute rd dot rd and that's probably better like really we we want this might as well have the most general version of the code um b is our d dot r0 uh with a 2 in front of it and c is that difference so how do we solve these problems well you can compute the discriminant and then assuming that the thing inside of the square root is non-negative uh i get the following solutions for t now that's that's exciting this is something we can code it's just a formula but you should be a little bit suspicious right because there are two values for t but at the end of the day the ray can only intersect uh the sphere one time so what's going on here in fact there are a bunch of different cases right when the discriminant is negative i don't get any t value when the discriminant is zero i get one t value and the discriminant is is bigger than zero i get two t values and why is that well here's a sphere in two dimensions um here's a ray with no t values for the intersection if the ray just grazes the side of the sphere then i'll get one t value for the intersection and if it goes through the sphere i'll get two t values for the intersection in fact the discrimination the discriminant actually tells us useful information about our sphere ray intersection problem so i guess i've already answered this question on my slide now we know what these different cases correspond to of course in the context of ray tracing we have to ask which root we actually should choose when we do that intersection and remember the rule we've already introduced you want the closest positive root t because that's the one that corresponds to your eye you have to be a little bit careful here so for example um let's say that i'm actually sitting inside the sphere right because for instance i think it's tempting to just say take the smallest t but that's actually not true right so in this case there will be one negative t and one positive t and i should choose the positive one even though it's the larger of the two roots okay so if we inters uh introduce a ray sphere intersection then we can draw super cool scenes like the one that i'm showing you here which is composed just the spheres and and infinite planes of course really to do this we'll have to do uh some reflection and we'll talk about how to handle that in the coming lectures um right so one additional piece of information we need uh for rendering a sphere is its normal direction that's actually pretty easy to obtain so let's say the q is the intersection point between our sphere and the ray from our i well uh hopefully you all remember that you can get the normal vector by just subtracting q from the center point of the sphere these two vectors are 90 degrees and you probably want to divide this by its length so that it's a unit vector so in other words um if q is this vector starting at zero and pointing toward the intersection point then q divided by its norm is the surface normal okay so here's some more sphere art that you can do with ray tracing there's a huge library of art that people have made just as fierce because it's the easiest thing to raytrace okay so that concludes the basic technical part of our lecture today um you can see that we've covered how to deal with two basic pieces of geometry uh in our rendering system um or really when i say deal i mean at least detect that it's in front of your camera and maybe render it using a simple model like lambertian shading um we've talked about how to get not only uh the intersection point but also the normal direction and some of the subtleties that can point up for example um in intersecting rays with spheres we got multiple intersection points and we have to be quite careful to choose the correct one and that's like a super easy source of bugs in ray tracing code i see it all the time in people's assignments in this course so as a quick recap we covered what rendering means right remember it means taking a description of a scene and outputting the colors of all the pixels in the scene or in the image rather we talked about the basics of ray casting namely intersecting rays with planes and intersecting rays of spheres and finally we talked about how to intersect rays yikes next time rather we're going to talk about how to intersect rays with triangles right that's going to allow us to render meshes which are super important and we'll talk about the ray tracing algorithm like what can we do uh given this piece of code that can just take an arbitrary array and intersect it with the scene um so that when we render an object not only do we render that object we bounce the ray and produce all kinds of secondary rays to get effects like reflection shadows and so on so as promised we've ended a little bit earlier i think today uh this is one of the easier lectures in 6837 and next time we'll pick up with talking about barycentric coordinates and triangles so i'll see you then
Up Next

64:46
Ray Tracing Tutorial: Render a 3D Sphere with Shaders
@DarkoSupe
6.4K views•2020-05-27

87:26
Introduction to Secure Multiparty Computation with Yehuda Lindell
@fhe_org
7.7K views•2021-02-04

4:55
HTTP Requests Explained: GET, POST, PUT, DELETE
@codecademy
103.1K views•2021-10-07

19:25
Enigma Machine Mechanics: WWII Encryption Explained
@JaredOwen
13.2M views•2021-12-11
Related Study Plans & Knowledge Roadmaps
Structured learning paths in Computer Science
computer-science
Container Runtimes: Namespaces, Cgroups & Go
01Linux Systems & Go Programming Foundations
02The Core of Isolation: Chroot and Filesystems
03Linux Namespaces: Process Isolation
+ 3 more learning modules
32h6 modules
Explore Roadmap
computer-science
Building a CHIP-8 Emulator: Rust & CPU Basics
01Computer Architecture Foundations (Bits & Bytes)
02Rust Programming for Systems Development
03CHIP-8 Virtual Hardware Specifications
+ 2 more learning modules
32h5 modules
Explore Roadmap
computer-science
Building BitTorrent: Go, P2P & Concurrency
01Go Fundamentals & Concurrency
02Networking Foundations & P2P Architecture
03Bencode Parsing & Torrent Metadata
+ 3 more learning modules
26h6 modules
Explore Roadmap
computer-science
Actor Models (C++ Concurrency & Lock-Free)
01C++ Multi-Threading Foundations
02Thread Pools and Task Scheduling
03Atomics and Lock-Free Queue Design
+ 3 more learning modules
45h6 modules
Explore Roadmap