














![Dual Nature of Matter Class 12 Physics [ One Shot + PYQs ] AP & TS EAPCET 2025](https://i.ytimg.com/vi/PmZOHKtRMlU/maxresdefault.jpg)


![[EBS 개념완성 물리] 한기덕, 38강. 빛과 물질의 이중성](https://i.ytimg.com/vi/4NKOBZ_-ka8/hqdefault.jpg)


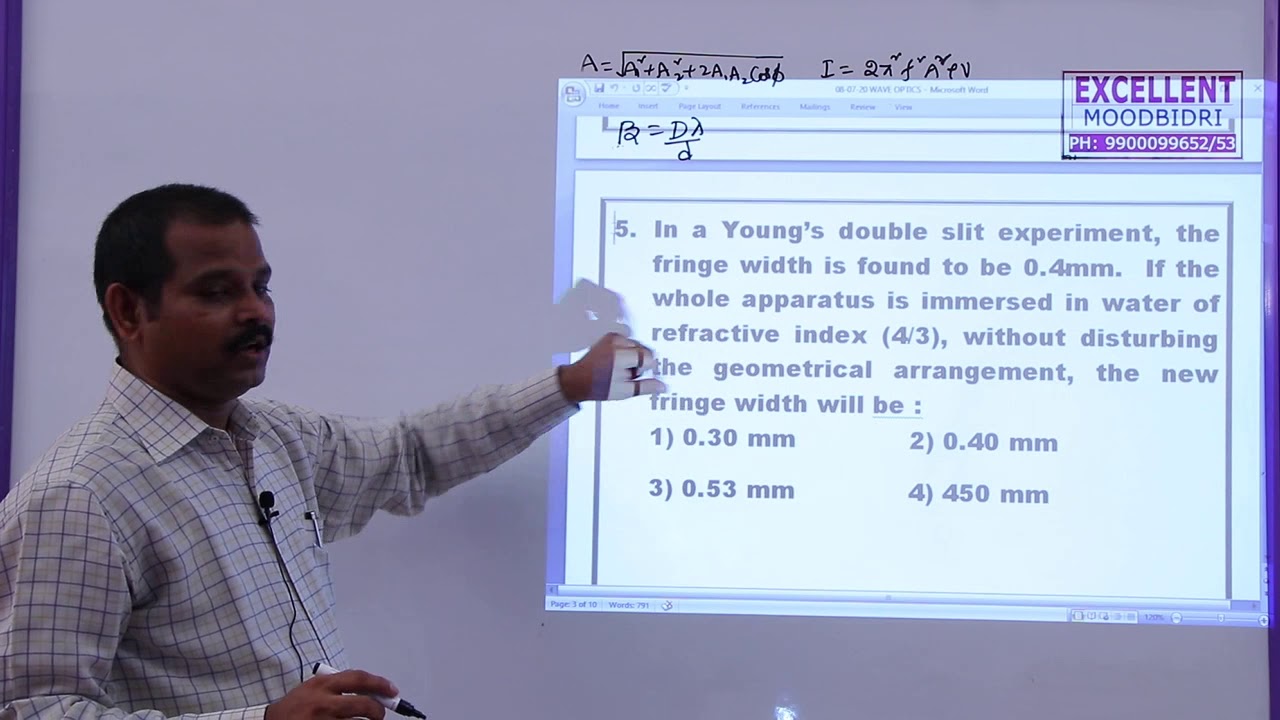

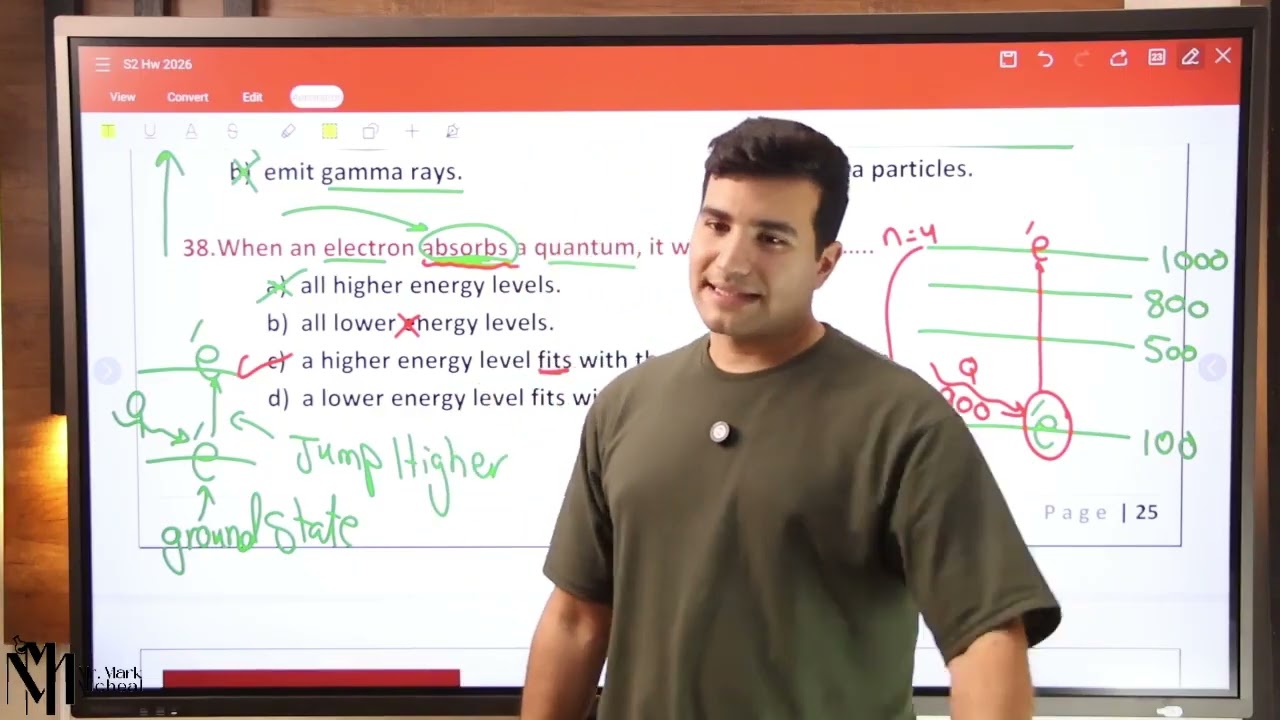


This video covers the wave properties of light including amplitude, frequency, wavelength, longitudinal and transverse waves, refraction, polarization, diffraction, and interference, followed by the particle nature of light demonstrated through electron diffraction (de Broglie wavelength λ = h/p) and the photoelectric effect (hf = φ + ½mv²), illustrating wave-particle duality where light and matter exhibit both wave-like and particle-like behaviors depending on the context.
Edexcel IAL Physics: Waves & Particle Nature of Light
Added:Basic wave parameters and the wave equation (v = fλ), including definitions of frequency, wavelength, amplitude, and phase.
Classical concepts of energy, work, and kinetic energy, specifically how energy is transferred in physical systems.
The electromagnetic spectrum, including the ordering of waves by frequency and the constant speed of light in a vacuum.
Introductory atomic structure, specifically the existence of electrons, protons, and the concept of electric charge.
The de Broglie relation and calculating the wavelength of moving particles (matter waves).
Practical applications of the photoelectric effect, such as solar cells, CCD image sensors, and photomultiplier tubes.
Advanced wave phenomena like polarization, thin-film interference, and the mathematical treatment of Young's double-slit experiment.
Quantum mechanics foundations, including energy level transitions, line spectra, and the concept of quantum states.
94.7K views2Klikes43:45Original Release: 2021-10-25
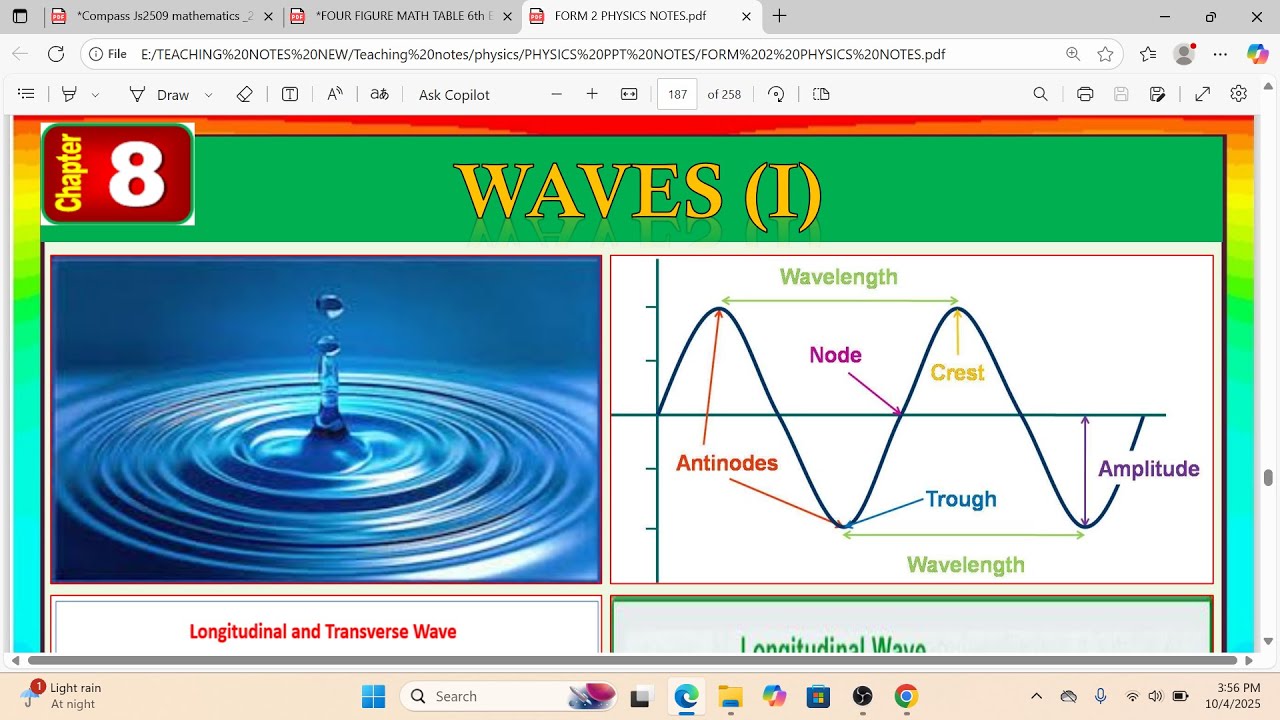
in this video we're going to be looking at waves and the particle nature of light there's going to be a lot of diagrams a lot of information but let's start over here with some of the information that you should be now familiar with when it comes to looking at waves i'm just going to draw a couple of graphs so for the first graph we're going to be looking at the displacement of a particular wave and here we have distance along the x-axis whereas on this graph over here we're going to have time along the bottom and perhaps this is the behavior of one particular particle on a wave and how that changes its displacement with regard to time now these are really useful because what we can do with these is we can actually understand some of the key terms now the first one is the word amplitude so the amplitude is the magnitude of the maximum displacement from the rest position and so on these graphs it would be this distance over here so i'm going to call that a capital a on both of these and that's how far perhaps a particular particle has oscillated away from its rest position we can also think about the frequency and the frequency of a wave is the number of complete wave cycles per second and this is related to the time period which is capital t in actual fact there's an equation that says the frequency is equal to 1 divided by the time period and we measure the time as always because it's an sr unit in seconds and this then gives us our frequency in the unit of hertz so the time period is the time for one complete oscillation of a wave and if we were to look at it on this graph here if we were to maybe look at one complete wave cycle the time period t is the distance between these two peaks potentially that might be the kind of thing that you might measure on an oscilloscope we also have the wave speed v and this is the rate of movement of the wave and this is where we talk about waves being perhaps progressive where they're transferring energy from one place to another so that's how quickly the wave is moving and the other term that you'll be familiar with and often this is from before you started your a-level physics is the wavelength and this wavelength has a greek letter lambda and we can think about the wavelength being the distance from a peak to a peak on this graph over here and indeed when it comes to measuring the wavelength or the time period we can go peak to peak we can go trough to trough or any point to the next similar point on the next part of that wave and both of these graphs here can be used to represent both longitudinal and transverse waves now both of these sorts of waves can be demonstrated in the lab using a slinky that long spring if you have a longitudinal wave we get something that looks a bit like this and for the longitudinal wave the slinky is moving back and forwards and this is also the same direction as the energy is transferred from here to here now examples of longitudinal waves include things like sound ultrasound and these are waves which are mechanical because we have particles which are oscillating in actual fact if we were to look at a sound wave what we might see is that the the air particles are oscillating backwards and forwards and we have particular points where we have more air particles then they become more spaced out then we have a region a bit like this and effectively the distance from this point to this point is going to be equal to the wavelength of that sound wave so when you have sound ultrasound other longitudinal mechanical waves we have um areas of compression and rarefaction and it's not the particles are moving from one place the other the particles are just oscillating but parallel to the direction of energy transfer so that's a longitudinal wave the other kind of category of wave we have is transverse and often if we see it on a sling key this is when you move the slinky side to side rather than back and forwards and what we have now are the oscillations or the wave is moving side to side but here the energy is between being transferred from here to here so now when you have a transverse wave the oscillations are perpendicular to the energy transfer and here the oscillations could be particles which are moving up and down or it could even be the oscillations in electric or magnetic fields and this is when we come on to our electromagnetic radiation now we can do an experiment to actually investigate the speed of sound and air sound being a longitudinal wave and this is one of the core practicals now there are various ways you can actually set this up in the lab but effectively what we have is some kind of loudspeaker and this is going to be emitting a sound wave you then have two different microphones and if you're to measure the diff the distance between them s you can then send a sound wave that gets picked up by this microphone and then by this microphone and the way we actually detect that is using an oscilloscope and what you can do is you can input into the oscilloscope both of these microphones and what you'll then see are two different signals and by lining up the two signals you can then look at the time difference between the wave hitting this microphone to this microphone and then you can just use the equation that says speed is equal to the distance over time to actually work out how quickly that sound is going and it's going to be in the order of 300 to 330 meters per second but again there are various ways of carrying out this practical now with this topic there are going to be a lot of new words these ones here you will be familiar with but we have some other words that you need to understand what they mean and we can actually represent waves in many different ways so sometimes you might draw a ray of light perhaps using a ruler and we can show that that's a straight line as a wave is moving from one place to another the other way we can do it is we can actually draw the wave fronts and this is another way of representing that wave and as we've seen up here we sometimes draw the waves like this now we can maybe think of the wave fronts as being the top down view of the water ripples that you might see in a ripple tank and here that wave front is a position where all of the waves here are in the same phase position so this might be the peak of one wave and at this point here all of those parts of the wave are in phase and again that's going to be the peak of that wave the other thing we can think about is something called coherence and here we can maybe talk about two different wave sources now the waves are going to be coherent if they have the same frequency and also a constant phase difference so that means they're going to have the same wavelength and often they have similar amplitudes and that's really important when you come on to some other work looking at diffraction later on so we've got the same frequency and a constant phase difference but what do we mean by phase difference well it's to do with which part of the wave cycle that wave is in now if you have one complete cycle that's going to be equal to 360 degrees half a wave cycle is going to be equal to 180 and then a quarter of a wave cycle is 90 and so on now often when it comes to physics we don't just use degrees but we also use the radian and you might recall that 360 degrees is equal to 2 pi radians now the other thing we can look at when it comes to waves is the difference between two different waves and how far they've traveled and that's where we have path difference and the path difference is often given in multiples of the wavelength but this is a distance and therefore it's going to be measured in meters so we can maybe compare two different waves they might have traveled a different length and that's our path difference whereas phase difference is really about the difference between which part of the waste cycle two waves are in and because this is um the phase difference it's going to be an angle and then that's going to be measured in either degrees or radians so they sound similar but they're actually quite different and this is important because what we can have is one wave interfering with another wave and this is where we have things like superposition and effectively what we can say is that we add up the individual displacements of those two waves to get the total displacement so for example if we had two waves which are in phase that means that when you add the amplitude of these two waves which are in phase together it's going to sum up to give something bigger than what we originally had so you've got a maximum displacement here maximum displacement here gives a massive maximum displacement when you have the superposition of two waves if however you had waves which had a phase difference of 180 degrees or pi radians then what's going to happen is that the peaks and troughs are going to cancel with each other and that means if you added these two waves together what we'd find is that the two waves cancel out and there's going to be no displacement so this is because waves can interfere with one another and again this is quite important later on when we're going to be looking at the diffraction and interference patterns of waves and as a final thing these two things are related because if you have something where the path difference was equal to lambda 1 wavelength then the phase difference is going to be equal to 360 degrees or 2 pi radians so there is a relationship between the path difference and the phase difference between two waves now so far we have looked at progressive waves which is transferring energy from one place to another but there is another type of wave that we call a standing or a stationary wave and what these do is they store energy now effectively if you had a wave like this and it was moving in one direction it could reflect off something and then that wave would then travel back and what you then have is two waves which are going to be coherent because they'll have the same frequency they'll have a constant phase difference and a similar amplitude and these two waves are then going to interfere and the pattern that they produce we can often demonstrate in the lab perhaps using a string now i'm going to draw a couple of fixed ends over here and what we might see is a pattern where the string goes up and down and back again so that's one wavelength and then a short amount of time later it looks like this now this is what we call a standing or a stationary wave we have a position in the middle where there's no displacement and this is what we call a node and that's going to be in at this time in the center and we also have these positions here where we have our maximum displacement and that's the opposite to a node so that's going to be called our antinode and here the distance between a node at the end and the node here is equal to half the wavelength because one wavelength goes up down and back up again now this is just one of the possible ways that perhaps that vibrating string could be the first one it would be would actually just be having a node at each end at these fixed ends and the antinode in the middle so this is often what we call our first harmonic and as we increase the frequency we get to other certain frequencies where we have these standing waves formed we can also form them in a tube and this is perhaps where we have some air which is oscillating and here we've got our fixed end and the open end and what we find now is that the fixed end is where we have a node that the open end is where we have an anti-node so again one of the possible things could be that you've got a node maybe an antinode here a node here and an antinode there so we'd maybe get something that looks like this and this picture here is really just sketching the maximum displacement of each part of that wave now the other thing about these waves is that if you wanted to work out how quickly they're going especially if you have a string then the speed of that wave v is going to be equal to the square root of t over mu so here t is our tension in that string and here mu is what we call the mass per unit length and this equation is really useful because there again is another chord practical this time it's core practical five and what you can do is set up a vibrating string in the lab often this is done on top of a table you have a vibration generator at one end you maybe have a pulley at the other end and this allows you to vary the tension in that string which runs over that pulley and what you can do is you can look at the things that affect the frequency now the frequency is going to depend on certain things it's going to depend upon the length of that string the tension in the string and also the mass per unit length of that string as well and all of these are going to have an impact on the frequency where we have these standing waves formed i've got another video where i go into that in a bit more detail but this is why you need to know about how standing waves are formed by the interference of coherent waves often when we're looking at waves because they're transferring energy from one place to another we can actually look at the intensity i which is actually equal to the power divided by the area so this is the amount of energy transferred per second and that's the area that that wave is instant on so intensity is equal to power divided by area now another thing we often tend to look at when we're investigating waves is the behavior of light in particular as part of the em spectrum now one thing that light can do is as it goes from one medium to another it can actually change direction and we call this refraction now the standard school practical is that you maybe have a perspex block i'm going to call that medium two and i'm gonna call the air medium one and if we were to shine an array of light i'm just going to draw it here using a ray to represent the direction that it's traveling in as this ray of light meets this block it changes direction and the reason for this is that the speed of light or the speed of this wave in this medium is different to the speed in this medium so what happens is it goes through the block and then it keeps going because it meets this at 90 degrees it keeps going in a straight line now here again this should be revision of what you've covered before a levels is we have the angle of incidence and the angle of refraction r now why does that happen well the reason it happened is often explained better by considering the wavefront way to actually represent waves so if i was to maybe draw this boundary close up like this we have medium one here and medium two even though the wave is traveling in this direction we can consider the wave fronts of light as they approach that surface and if we consider this wave front here some of it's going to meet medium 2 before the other bit and that means it's going to slow down first and as it slows down it changes direction and the same for this one over here because some of that wave front meets the surface before the rest of it some of it slows down first and then as it goes through the medium it's all traveling at the same speed so there's no change in direction we only have the change in direction at the boundary now like all things in physics there's going to be an equation that actually explains this and what we can say is that n 1 sine theta 1 is equal to n 2 sine theta 2.
so here n 1 and n 2 are the refractive indexes of medium 1 and 2. and here this is going to be theta 1 and this is going to be theta 2. and the refractive index n is equal to the speed of light divided by the speed of light in that material and this basically tells us by what factor the light slows down and it's going to depend if you have glass or diamond or perspex different materials slow down that light by a different amount and because it's the ratio of two speeds it has no units and if you wanted to measure this refractive index in the lab what you could do is an experiment a bit like this using some light if you've got values for the angle of instance i and the angle of refraction r what you could then say is that the refractive index is going to be equal to sine i divided by sine r but you do that not just with one data point but you'd maybe look at many values of i and many values of r you can plot this on a graph and actually work out the gradient of sinai and sine r so that's the way that you can actually measure this yourself in the lab now this is a little bit more interesting when we actually think about not light going from maybe air to glass but maybe the light going from the glass back into the air now i'm just going to draw this same perspex block one more time so just a quick sketch now if we sent a ray of light potentially like this and so here is my normal line drawn at 90 degrees to the surface some of that light is going to escape but if i was to increase the angle of incidence here we're going to get to a point where the angle of refraction is equal to 90 degrees so at some critical angle even though the light comes in none of that's going to be escaping out in this direction because this angle here the angle of refraction is going to be equal to 90. and if i just continue that ray of light what happens at this particular angle is that all of that light travels along the boundary of these two things and here this angle c which is what we call the critical angle and what we can say is that one over n is equal to sine c so sine of the critical angle is equal to one over the refractive index now if a ray of light was meeting this particular point at an angle greater than the critical angle like this ray of light here none of it would be escaping in actual fact all of this light would be reflected off that internal wall so here in blue what we have is something called total internal reflection and this is when the angle of incidence is greater than the critical angle excuse all of the smudges here from the ruler so what we have is um if you have light maybe traveling from an optically denser medium to a less dense optically dense medium then at a critical angle none of the light escapes and it's an angle greater than the critical angle we have total internal reflection of that light so you can see we're using lots of different diagrams and models to actually represent what's going on with the light now if we consider a transverse wave we've seen a side view of how the oscillations which are perpendicular to the energy transfer can be displayed but if we were to imagine looking at this head on what we might see is that if this is the wave coming towards us we have oscillations perhaps in this plane so that's going up and down now if you have something like an electromagnetic wave for example not all the oscillations are going to be up and down some of them might be side to side and then some of them might be at all sorts of different angles so i'm just going to represent all of the different planes of oscillation like this so this is what we call unpolarized light but what we can do is we could pass this through a filter and then what that would do it would start to filter out all of the oscillations apart from those in one plane and if you pass this light through that filter what we'd find is that all of the oscillations are in the same plane and we call this polarization and this would now be a polarized wave so this plane polarization only occurs with transverse waves because they're oscillating at 90 degrees to the direction of energy transfer we can actually show it with a couple of filters if i have just one filter all of the light coming through this is now going to be plane polarized in the same orientation if i have another filter that i hold in front of it all of that light is going to continue to go through both filters but if i was to turn this filter through 90 degrees what we can see is that now stops all of the light coming through because we're cutting out all of the oscillations in this direction and also this direction as well whereas if i rotate the filter around we can see that then lets that plane polarized light through yet again so plane polarization only occurs with transverse waves it can occur with light but also things like microwaves and other parts of the em spectrum now something else with waves including light is that when they meet an obstruction or a gap what they do is they as they go through that gap they start to spread out and here i've got the wave fronts and this arrow just shows the direction that they're moving in now here we've got a gap and as the waves go through the ones in the middle are going to keep going in the same direction with the same wavelength but they start to spread out a little bit around the edges and this is the effect of diffraction and what we find is that if the wavelength is approximately equal to the gap that's when we have our maximum diffraction and i'm just going to draw this with these semicircles here trying to keep the same wavelength approximately each time so what we have is when you have the gap equal to the wavelength some of the light is going to or in this case lightrook could be any type of wave is going to go straight through and the rest of it spreads out now that's quite important we're going to be looking at diffraction gratings in a minute but why does it do it well we can actually use something called hoykens construction and this is a model that basically says how the next wave knows where it's going to be so perhaps we have a wave front here what we can consider are multiple points along that wavefront and effectively this is now another source of waves and what we have are these waves spread out as do the ones from this point over here and where all of these waves effectively join up again and interfere with this constructive interference is where the next wavefront is going to be formed in this case it's going to be over here now let's imagine that this was near a gap so perhaps that's the edge of an obstacle like we had over here well from this point this is going to be our source of secondary wavelets so that's going to spread out like that from here we're going to have more spreading out like this and so on you get the rough idea now if we were to join all of these points together what we'd find is that these ones would be in that kind of straight line and around here that would move around the corner and then from this particular point here we then have more wavelets and so on now it gets a bit confusing but effectively what this is hopefully showing is that a wave can spread around the edge of an obstruction and if which again follow this on we would have the main wet part of the wave moving through the center of the gap and at the edges is where it starts to spread out so huygens construction this is a model to explain how light behaves like it does when it gets to an obstruction like this now if you have potentially multiple gaps here what we find is that some waves spread out from this point some waves spread out from the point next to it and then we'd have interference of coherent waves we'd have positions where the wave might constructively interfere and also destructively interfere and a great example of this is something called the diffraction grating now if you were to zoom in on the diffraction grating you'd see multiple slits where the light can come through and this one here there's going to be diffraction and this starts to spread out like so and it's same happens at this position and this position and so on now as the light continues to move forward there's going to be points here which are in phase and therefore we're going to have constructive interference perhaps where peak adds to another peak there's also going to be positions where we have destructive interference where the waves are perfectly out of phase so that's a phase difference of 180 degrees or pi radians and here we're going to have destructive interference now if we're to sort of zoom out of this perhaps this is my diffraction grating and this is a screen which might be several meters away if we were to shine laser light as an example because laser light is coherent it's all exactly the same wavelength and therefore same frequency some of that light is going to go through the diffraction grating it's going to hit the screen and at the middle here we're going to have a bright spot that we observe there's going to be other points where there's destructive interference and then a small distance away there might be another bright spot on each side and then another bright spot and so on and what we see are a series of bright spots especially if you're using laser light with a diffraction grating now this one here is the zeroth order this is our first order and then we've got our second order third order and so on now effectively if we were to think about this there's as we follow this line back over here the angle between the zeroth and the first order is equal to theta and what we can say is that n lambda is equal to d sine theta where n refers to the order of light that we're observing so in this case here we'd have theta and n would be equal to one lambda is due to the wavelength of that light and d is the distance between the gratings on that diffraction grating now for something like this how do you work out theta well you could easily measure the distance from the diffraction grating to the screen you can measure the distance between the bright spots and then use a bit of trigonometry to work out the angle of theta and what you see is that theta's going to change if we're thinking about n equals 2 n equals 3 and so on and this is something that you will be familiar with when you're looking at core practical six and this is looking at how you measure the wavelength of light so if you know n you can work out the distance between the diffraction grating's d you can measure some other lengths to work out the value of theta you can actually use this to work out the wavelength of light which is going to be in the order of nanometers now the final thing when it comes to looking at the wave-like properties is if you had a longitudinal wave perhaps sound or even ultrasound what you can do you can use this using a pulse echo technique to measure the distance to objects now this is often used in scanning in medical uses because it's non-invasive there's no ionizing radiation and you can use it to build up a picture of what's inside a person including a developing fetus now let's think about a maybe a more simple thing to consider maybe we had a length of pipe underground and it's very hard to actually go down and dig it up but maybe there is a crack somewhere in a pipe maybe it's a water paper pipe that's losing water so this is the end of the pipe at each end now if you had some kind of sensor here what you could do is you could send a signal down the pipe and some of that signal is going to be reflected at a change in medium now here we've got a crack so it's going to be the pipe a bit of air and then the pipe again so what's going to happen is at this point here some of that wave perhaps we have an ultrasound wave that's being emitted at this end some of that wave is going to be reflected back here to the receiver and some of it's going to be transmitted through and maybe bounce back off the end of the pipe now what this might look like is you maybe have an initial signal which is your transmitted pulse and then a short time later you receive a partial echo and then a short time later you receive a bit more of an echo so here we have time along this axis here if you were to imagine this on a graph now in this very simple 2d case if you knew the time between the pulse being sent and received and you knew the speed of that wave in that material then you could use these two bits of information to work out the distance to wherever that change in boundary might be now this would then give you the distance the pipe so you know where to dig down and actually mend it if you had lots of information like this you could actually build up a 3d picture of what's going on but really that's limited by perhaps the the wavelength of the waves that you can actually use and also the duration of the pulse so this thing here will give you a good indication of actually how to look inside an object so that's the pulse echo technique using in this case longitudinal mechanical waves so a lot of information here about waves and the way that we can explain the behavior of light in terms of the wave model however we also found that some things which we often thought of as particles like electrons would actually diffract and there are other things where the wave-like model of light couldn't explain the behavior that we can actually see in real life and that's why we're now going to look at the particle nature of light i'm going to run out of paper here so i'm just going to get another piece of paper and the first thing we're going to be looking at is electron diffraction now with electron diffraction this is often carried out in an evacuated glass tube and that means that there's no air particles for the electrons to collide with we have an cathode here at one end and at this cathode we can excite the electrons with a potential difference and then we're going to have an anode over here which actually attracts them so that means we can accelerate electrons in this tube and what we're going to do is at some point over here perhaps we have a piece of graphite now graphite can be very thin and because it has a regular like arrangement of the carbon atoms inside this graphite acts as our diffraction grating and what we found is that when the electrons were accelerated and went through the graphite we found that there was diffraction pattern formed on the screen over here now this is often covered in this phosphor coating and this glows where the electrons hit it um so we'd have like a central like the zeroth order and then we had concentric rings that show that actually the electrons as they pass through this graphite must be behaving like waves because we have positions here where we have constructive interference and destructive interference and the only way that we can explain this electron diffraction pattern is that electrons must be behaving with some wave-like properties in actual fact there's something called the de bruy wavelength and this means that the wavelength of that particle is going to be equal to h over p where p is the momentum and that really depends upon the mass of the particle and how quickly it's moving with its velocity and here we've got planck's constant and planck's constant is equal to 6.626 times 10 to the minus 34. so really what this means is that even though we have the particle-like properties of something where we know it's mass and velocity we can also then relate that to the wave-like properties of that particular particle as it's travelling so if we know the mass of an electron we know how quickly it's traveling that then tells us the electrons wavelength so this is really looking at the wave-like properties of particles but if we think about the particle-like properties of waves a really good example of this is something called the photoelectric effect and here if you have the surface of a metal if you shine light on it then electrons will be emitted from that surface now if you have a certain frequency of light then that will allow these electrons to escape the surface but below that frequency of light nothing will be emitted now this is one bit of evidence which i'm going to come on to about why light must have particle-like properties the first thing i'm going to do though is just put down this equation that says hf is equal to phi so that's a greek letter phi plus a half m v max squared okay so there's a lot to unpack unpacking this the first part here is due to the energy of these uh little packets of light that are incident on the surface so i'm just going to draw a wave with an arrow to show that this is what we call a photon now a photon is a little bundle of energy so this hf here is equal to the energy of a photon and we can say that e is equal to hf now h is planck's constant that we saw over here the energy of the photon really depends upon the frequency the higher the frequency of that light the more energy it's transmitting or transferring now we might know about this already we might have things like infrared which is fairly low energy radiation but as we go up through the em spectrum we might have things like ultraviolet which is more ionizing we then have x-rays and gamma rays and as you have things which are a higher frequency they carry more energy and that means it might be more ionizing and potentially more dangerous to us so this is the energy of the photon of light that is hitting that surface now that energy is going to be absorbed by electrons in the surface of this metal and we have this thing here phi which we call the work function and that's the energy required to take the electron out of that atom and away from the surface of that material now any extra energy that's transferred to that electron is going to be in the form of the kinetic energy of the emitted electrons so the photoelectric effect is evidence for the particle-like nature of light if you have a photon which is above the threshold frequency that one photon absorbed by one electron will be emitted from the surface of that material and any extra energy transferred by that photon is going to end up in the kinetic energy stored by that particle as it moves off this photoelectron now this couldn't be explained just by thinking about the wave-like properties of light otherwise if you had something at a low frequency perhaps red light if you had really intense red light then there should be enough energy being transferred to the surface to emit photoelectrons but it's only above a certain threshold frequency that the photons have enough energy to be absorbed by the electrons and then the electrons to be emitted and we can really bring these two things together when we consider wave particle duality and basically light has wave-like properties and it also has particle-like properties and electrons although we often consider them as particles also have wave-like properties in actual fact the wave model and the particle model are just ways that we represent the behavior of real things in physics in reality they're not perfectly a wave and they're not perfectly a particle they're a little bit of both and light it has wave-like properties which explains things like diffraction and refraction but it also has particle-like properties when we come to explain the photoelectric effect just like electrons have particle-like properties often when we're considering what's going on in chemistry but they also have wave-like properties when they're traveling and that's how they can be diffracted and just as an aside because we're often considering maybe the energy of one electron although usually we measure our energy in joules there's another unit called the electron volt now an electron volt is the energy gained by one electron as it's accelerated through a potential difference of one volt now you might remember that e is equal to qv the energy transferred is equal to the charge times the potential difference and here that charge is going to be equal to 1.60 times 10 to the minus 19 coulombs and if that was accelerated through a volt of exactly one then we can say that one electron volt is equal to 1.6 times 10 to the minus 19 joules so sometimes you'll be given data in joules sometimes you'll be given data in electron volts and it's good to be able to convert from one to the other now the other thing in terms of like the way that photons and electrons can interact with each other is by looking at what actually happens within the different energy levels within an atom now often the electrons around the nucleus they exist in what we call the ground state but an electron could absorb a photon so maybe we have a photon of light or some other sort of em radiation and if it's exactly the right amount the electron can jump up to another shell and when the atom de-excites this is going to jump back down and it's going to emit a photon of energy so effectively one photon absorbed by one electron it jumps up an energy level and then when it de-excites it jumps back down now there are only distinct energy shells where an electron can exist it could be this one or this one or this one now sometimes we call these things like n equals one and equals two three up to the outermost shell which is effectively infinity now the other thing we can do is we can give each of these a value of energy so this one might be at 0.0 electron volts this one here might be minus 1.5 electron volts minus 1.7 electron volts and so on and if you have any data like this will be given to you in the question but this means that we can actually calculate the energy of the photons which are either emitted or absorbed by the electrons in those energy levels now perhaps um an electron was excited to this shell n equals three when it goes back down to the ground state there's a couple of possibilities it could drop like this straight from three to one or it could go from three to two or it could go from two to one and this means that there are three possible photons that could be emitted that can only have a certain discrete amount of energy if we wanted to look at this one here when it goes from three to two it goes from -1.5 to -1.7 and that means the change is equal to 0.2 electron volts now that's the energy of that photon and because you can recall that e is equal to hf up here if we know the energy of that photon we could work out the frequency of light that it would be emitting and what we find are that different types of atoms or compounds have certain distinct energy levels and this means that if we were to look at the wavelengths of light which are emitted by an excited atom we'd have certain frequencies of light which are emitted and we call this or we can actually see it on an emission spectrum and there are certain distinct frequencies of light which were emitted by that particular element that also means that only certain photons of light could be absorbed by this element and what we then have is an absorption spectrum and this absorption spectrum basically shows that only certain colors of light could be absorbed by that particular element and so for a certain element this might be the emission spectrum and this would be the absorption spectrum and that's because the electrons inside can only exist in certain discrete energy levels they don't exist at values between this and that means that only certain frequencies of radiation so certain photons that exactly match the difference in these energy levels can be absorbed and they're going to be the photons which are emitted as well so thank you for watching it is a big topic looking at the behavior of waves the different ways that we can actually represent waves and then as we go into the particle nature of light and also the wave-like nature of particles it gets a little bit more interesting and a little bit more complex thank you for watching goodbye you
Up Next
60:21
Basics of Spectroscopy: Spectrograph Design and Optics Explained
@AAOastro
246 views•2016-07-07

12:53
21cm Hyperfine Transition in Neutral Hydrogen: Radio Astronomy Basics
@AaronRobertParsons
12.4K views•2011-10-13

32:32
NMR Spin Physics I: Zeeman Effect, Resonance Condition & Larmor Frequency
@nptel-indianinstituteofsci8064
2.3K views•2024-01-17

27:14
Entropy and the Second Law of Thermodynamics Explained
@veritasium
27.5M views•2023-07-01
Related Study Plans & Knowledge Roadmaps
Structured learning paths in Physics
physics
Nuclear Physics (Decay, Fission & Reactors)
01Atomic Structure and the Binding Force
02Radioactive Decay and Half-Life
03Nuclear Fission Mechanics and Chain Reactions
+ 2 more learning modules
12h5 modules
Explore Roadmap
physics
Soft Matter (Polymers, Colloids & Rheology)
01Foundations of Soft Matter & Thermal Forces
02Polymer Physics and Macromolecules
03Colloids, Surfactants, and Self-Assembly
+ 2 more learning modules
38h5 modules
Explore Roadmap
physics
Analytical Mechanics: Lagrangian & Hamiltonian
01Mathematical Foundations: Calculus of Variations
02From Newtonian Mechanics to Constraint Dynamics
03The Principle of Least Action & Lagrangian Mechanics
+ 3 more learning modules
28h6 modules
Explore Roadmap
physics
General Relativity (Spacetime & Cosmology)
01Foundations of Relativity: Special Relativity
02The Geometry of Spacetime: Equivalence Principle & Curvature
03Einstein's Field Equations: The Mathematics of Gravity
+ 2 more learning modules
55h5 modules
Explore Roadmap