






![[2편] 초등학생도 가능한 도메인 설정 방법ㅣ워드프레스 애드센스 가이드](https://i.ytimg.com/vi/8_HioF6ACQQ/maxresdefault.jpg)









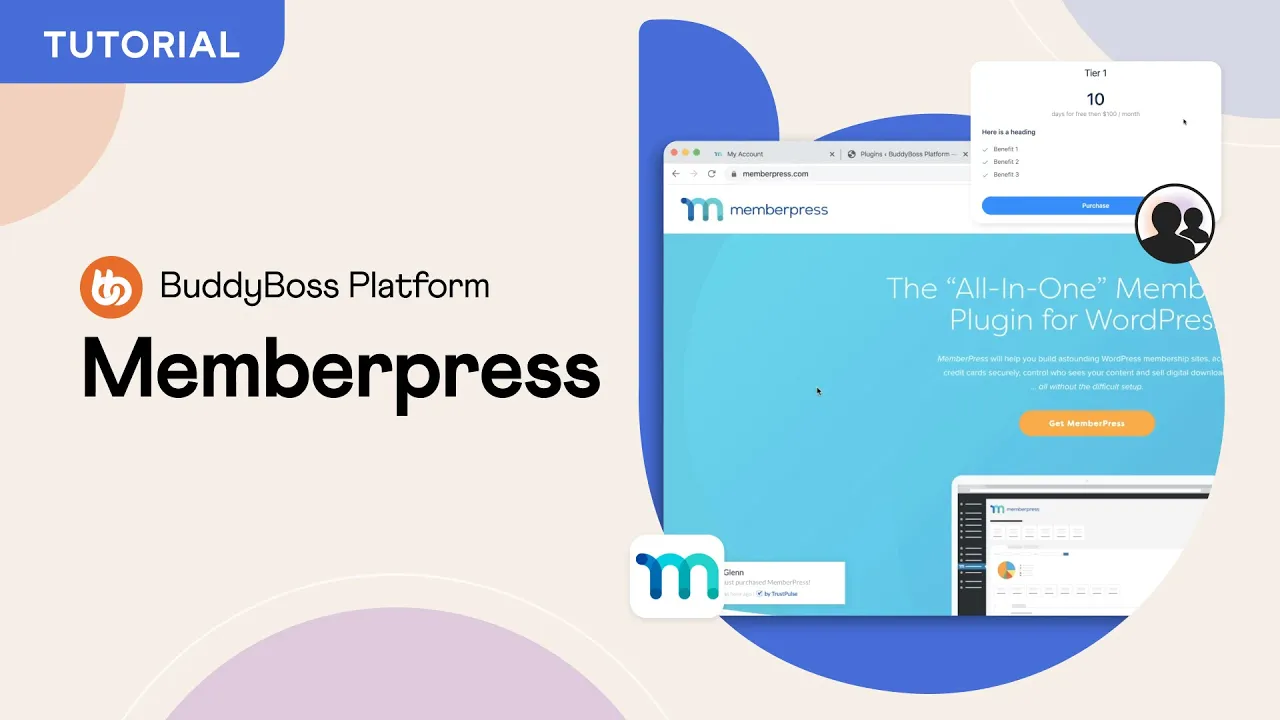







This video tutorial demonstrates how to create a profitable membership website using WordPress and the MemberPress plugin. The process involves setting up hosting and domain, installing WordPress, configuring SSL certificates, selecting and customizing a theme (Astra with Beaver Builder), setting up contact forms, configuring blog pages and permalinks, creating a logo, and most importantly, installing MemberPress to manage membership tiers, payment processing, content protection, and member analytics. The tutorial emphasizes that successful membership sites require proper payment integration, content organization, and ongoing member engagement strategies.
How to Create a Membership Website with WordPress: A Full Guide
Added:Basic WordPress administration, including how to navigate the dashboard, manage themes, and install plugins.
Fundamental concepts of web hosting, domain name system (DNS) configuration, and secure socket layers (SSL) for web security.
An introductory understanding of digital payment gateways (like Stripe and PayPal) and how online transactions are processed.
The concept of website user roles, permissions, and basic content hierarchy.
Advanced subscription management, including handling dunning (failed payments), trial periods, and tier upgrades/downgrades.
Integrating Learning Management Systems (LMS) such as LearnDash or LifterLMS to deliver structured educational courses to members.
Marketing automation strategies, including connecting the membership site to email marketing tools (e.g., ActiveCampaign, Mailchimp) for member onboarding and nurturing.
Analyzing membership business metrics, specifically tracking Monthly Recurring Revenue (MRR), Churn Rate, and Customer Lifetime Value (LTV).
34.4K views578likes1:09:01Original Release: 2019-06-24
this video is brought to you by WP forms WP forms is the most beginner friendly drag-and-drop WordPress forms plug-in on the market just click on the link in the description below to get started the first 200 people to use coupon code WP v IP will get 50% off WP forms does your to-do-list look like this or you have everything set up for your website but you don't have the membership part setup okay grab your favorite beverage mine's water go ahead and turn off all notifications come back here and let's get that set up I'm going to walk you through how to set up your membership site and I'm going to do this from the start to finish creating your website deciding on a domain and then installing your membership site but if you've been following along in the series and you already have your website set up then go ahead and take a look at the description below because I'll have time stamps set up to send you exactly to where you need to go where you can just and start with the installing your membership site so let's take a look this is what we'll be doing many of you if you've been following along you've already done a lot of this but we'll be setting up our hosting we'll get a domain name we're going to install and setup WordPress and then the bulk of the video will be about installing member press remember press is an absolute great plug-in that sets up membership sites and they've thought about practically everything that you can think of in doing a membership site and then we'll also go through the membership area and setting everything up so with all of that let's get started when you're building a website it's very similar to what's happening when you build a house you had the land that you need to use to put the house on that's the same as the hosting provider the hosting provider has servers that all of your files and folders will go on next you have an address and that's so people know where to find you and the address is your domain name or your web address you want to start building your website and your website is your home that's what houses all of your files all of your images the color structure the way that looks the functionality of it via the plugins finally you have your mailbox which is your email address and that's how people can contact you and all the come together to make up your whole website on the web now at wpbeginner we've recommend using Bluehost as your hosting provider they have great customer support they are one of the oldest most established hosting companies out there they're officially recommended by the wordpress.org organization and wpbeginner users can get 60% off and a free domain by using our discount code to get that discount just go - w-w-w-w-wait we also have a link below that you can use as well from here just click on the big green get started button and it'll take you to the select your plan page you can choose your plan here the biggest difference between these two is with this one it's very basic in you're only allowed one website whereas with this one if you have web addresses or multiple websites that you want to set up then this might be the best one for you after you've chosen which setup you want go ahead and sign up with a new domain name that you want since it comes free and click Next from here you want to go ahead and create your account by filling in all of this information and then down here you want to verify the package information I will say that your domain privacy you don't need we normally just turn that off things like backup site and site Locker there are a lot of great plugins and features available within WordPress so you don't need that either once you fill out all the information you see the amount that's being discounted now just fill in your payment information and you'll have your hosting account setup now that we've signed up we'll get a congratulations screen and we'll just need to click on the next screen where we can create our password this password will be used to manage our hosting account once you create the password they will start setting up the account for you one of the great things about Bluehost is now they've made installing WordPress even easier from here you can select a theme that you might like to go with your site since I'll be walking you through the whole process let's go ahead and skip this step and now they automatically set up WordPress for you you no longer have to go into your Bluehost account and install WordPress and go through that process once we get everything set up you can click start building and will be taken to the backend of our WordPress dashboard where we can start customizing it once you log into your dashboard it might look something like this where you have a lot of notifications and things like that what we want to do first is kind of clean everything up there will be some plugins that will install but for now I'll just walk you through how you can remove everything so you can start with a clean slate first so we will head over to our plugins area and when we do that we can scroll down all the way down until we see all of the plugins and we can select them all and click deactivate and you want to click on apply so we're deactivating all of the plugins first then we need to select them all again and then click delete and apply and go ahead and say yes to were sure that we want to remove all those plugins there will be a few of these that we will reinstall but I want to show you that process later so right now we just want to get with a clean slate to start our whole process and you'll see once they're deleted you see them going away and you see the whole process being updated in real time also if you see something like a wordpress update go ahead and click update now and now you have a screen on your dashboard like this and now we can move on ok now we can start building it but really quickly I want to show you that this is what it looks like in action right now it's just a simple coming soon page on the front end but if you'll notice up here it says not secure and that's because we don't have a SSL certificate installed on there making sure that your site has an SSL certificate installed and activated does a couple of things of course it is more secure for your readers or the people who come to your website it's also a slight ranking factor with Google because it tells Google that you are a secure site in the past you used to have to pay like sixty to one hundred and fifty dollars to get a secure certificate installed on your site but now companies like let's encrypt have made this process super easy with our hosting providers like Bluehost what you can do is go back into your dashboard go down to security and then you can ask for a let's encrypt certificate it'll might take a little bit of time for them to set that up but once they do then we can go in and set it up for ourselves once you go there you can request a certificate and you'll see that it is pending and that they're working on it as you can see it can take a little bit of time for them to get that set up once that is done and set up the next thing we can do is go to our WordPress dashboard you'll want to log in with the credentials that you saved before for my dashboard go over to plugins add new and we can type in SSL what we're looking for is this plug-in and it's called really simple SSL what we want to do is we want to install that and then we also want to activate it once we activate it you can see that it's active in the plugins area and then we can go to settings to set it up from here you see some detections we can see that it's not enabled but the SSL certificate is detected on our site so we can go ahead and activate the SSL great now that it's activated you see up here we have HTTPS and everything is active and we also have the little padlock connected so that's a good start and now we can move on to designing the rest of our site okay now that we have some of the technical aspects out of the way let's go ahead and start taking a look at our theme this is the theme and by default I've removed the coming soon plug-in and so you can see what our theme looks like out of the box when WordPress first is installed on your site it comes with a theme already and it's usually set up for the year that it's installed for instance this is the 2019 theme and usually it's pretty good it's nice and clean but it's a little lacking and we're going to fix that next so to show you what thing we have you can go into a peer beam's and you see by default this is the current theme you see it's showing right here and it's the 2019 theme automatically installed by wordpress when you want to install a new theme for your website you can simply go click on the add new and it will go into the WordPress repository or all the free themes that are vetted and proven to be ok for WordPress are here but for this video we're actually going to be using the Astra theme it's a very specific theme it is a great theme to allow you to customize your site exactly how you want it to look we need to install it and we also need to activate it so now this is our theme that is on our site and we'll take a look at it you see it's still pretty bland but we're about to fix that so let's head back over and with the Astra theme what they've done now is they've created what's called starter sites basically what used to happen if you had a theme and you wanted to install it on WordPress you had to go through the documentation and follow along hope that there's good documentation on how to make your site look like the demo that you saw and that you wanted and it was a lot of frustration for a lot of people what Astra has done is they've created these starter sites that make everything look exactly like the demo that you're seeing and the demo site that you want so to get this going we need to install a plugin so let's head over to our plugins area add new and let's type in the Astra starter sites this is the one that we want so let's go ahead and click install now and then once it's installed we also have to make sure that we activate it and now we see this plug-in is active so now we can click on the ready starter sites here and from here we want to select the page builder in this video we'll be using the beaver builder and that is a lite page builder there's also a pro version but for this I'll show you how to work with the Lite page builder so we'll click beaver builder and then let's click Next and now here are all of the starter sites that we can choose from to install on our site and when you see agency that's for a premium version but we can click on the free version and you'll see we even with the free version we still have like 35 sites that we can choose from so you want to just take a minute to go through and see which one of these starter sites do you want to choose to start with like what is it that you're ultimately building what type of blog are you building what type of website are you building is this for a business is this for fitness is this for outdoors do you have a product that you're wanting to sell just go through there and figure out which one you want to do and even if you hover over it it actually also will show you what the homepage will look like and it kind of Scrolls down for you so you can see it all now I've been talking a lot about Gardens so I can look at this one and I think I'm going to use the garden maintenance for this theme so I want to take a look and preview it see it in action and you see it's showing up on my site and it gives me a good idea of what this will look like this is the one I want to use so I'm going to go ahead and click import site now before I do you want to see that these are all the check marks that it's doing and it's letting you know what all is happening and now you can click on the little question mark here and it will tell you everything that it's installing when it imports all this stuff you see that it's going to also install some Astra widgets the beaver builder plug-in lite version we will get the ultimate add-ons for beaver builder lite and then it's also going to install the WP forms Lite plug-in which is a contact form plug-in and that is also our sister site and it's a really great drag-and-drop contact form plug-in aside from that it'll also import some customizer settings and then it will also import some content to make the site look exactly how the demo looks so we're ok with all of that once we review everything let's go ahead and click import site and you see it can take anywhere from two to ten minutes or this set up what I'm going to do is go ahead and speed this up so that you're not having to wait around for this okay in real time that took a little bit longer than a minute to import all of those plugins and all those settings so those are really super fast and now we see that the site is done and we can take a look at it so opening it up in a new tab opening up in a new tab we see this is what our site looks like and I do notice that some of the pages are double but I'll take care of that later it's probably just some glitch but scrolling through and looking at all of this it looks really good all you really need to do is add your actual content put in your information and your site is pretty much good to go that is way faster than what it usually takes for WordPress sites to get going so now that we see what this looks like let me walk you through how you can make some changes to your site one of the first things we want to do is going up at the top you see we have our logo the blog title and things like that we can customize that by clicking on the customize button from here and it will open up this customizer area and now you'll see these little pencil areas and these are the things that we can change so if I click on this you can see I can change my logo here if I want I can also remove it clicking on these other items this will change my site title and so let me change that to something that is more about my blog I'll call it my garden blog and we can decide if we want to display that here or not the same thing with the tagline that's simply what your site is about so you can update that here as well and then we can choose to display the site tagline if you want or not and then when you do the inline logo that will either put it underneath the logo or in line with it we'll keep it in line for now now the little site icon that's this little guy up here and we want to make that change here by default you'll typically want to have something by 512 by 512 their ultimate goal is to have a good clear logo to work with and you want it square if you can but we're going to select this one and you see if it's not square it'll let you crop it which is what I'm going to do here so I'll crop the image and now it's automatically placed up there so that looks pretty good we can click the publish area okay now you see that there are some duplicates that usually shouldn't happen in this case they did but that's okay we can just go in and I'll remove those extra pages so I'm going to go back to the site I'm going to go to pages and I'll remove the duplicates here select all the duplicates and go up to the top and move to trash then I'll also want to make sure I go into the trash area select them all again and I want to delete them permanently it's a two-part process in case you delete something that you don't want to Lily that you can go back in and get it back but we'll keep that deleted and now it looks pretty good I'm in the customizer area so we can do some more customizations you'll also see over here there are other pencil areas and this will let you change up some of these items for instance we can change the menu area here we can edit the menu and we can choose which ones we want on there you can also add an item since this is a blog I want to add a page and right here it will let me add a blog you know create that page on the fly and add that to my menu you see that that is my primary menu if you wanted to you could also add another footer menu and that would go at the bottom but for now we'll just keep it like this now let me click on this area and this will change my header layout you see that these are the different layouts I can have to choose from if I click on them then it will Center my logo or it will put it to the right for this one I just want to keep it you can also disable the menu altogether but then people won't know how to get to you so let's not do that and for this one I want to keep it on the left you see here we can choose what the last item is and this could be changed to having nothing having it a search button or having an actual button this is great if you have a website that you want to get a quote for that you could send them to a quote form if you wanted you could also do something like asking them to sign up for a newsletter or something like that for the button link you that's where you would send them to an actual web address and you would have to know what that web address is for this I'm just going to send them to our contact page so let me open that up so I can grab the URL on I will come back here and paste that URL here now yeah you can also just send them to the contact page but this is just to show you what you can do with this and from here you can choose what type of button to do you can even customize it if you want for this will just keep the theme button and right here you can choose the color and the layout of what you want your theme to look like so you could play with that here if you don't like any other colors that you choose you can just hit clear and it will go back to the default color there are a lot of settings that you can choose from from hover of the text and also the hover of the background color so when you mouse over your button changes colors like you see here right here you can also choose the radius so right now it's pretty square but we can change the button radius and you can start see it starts to round off when I put 10 in there it's really rounded off so you can adjust that as you want you can also see the padding that's how much space on top or bottom that you want to have your button half and the same thing for the horizontal if we make it really big then it would be a really wide button but then that will cause some problems so we'll put it back down so we're pretty happy with that button we'll go ahead and click publish and then we can go back and back and few other things that we can look at let's go ahead and look at typography and let's look at the primary header typography that's for my title and you see when I change the font size it gets really big so if you want that to be a little bit bigger you're going to adjust that here same with the site tagline if you want to make that a little bit bigger you can do that here going back we can look at the base typography that's basically for everything else on the site and you see for this one it's the body and content we can change the font here to any of these there are several several to choose from and you can just play it with the fonts to see which one fits your brand for your site if you also know which one it is that you want you can type that in here to show you what lotto looks like let me just do that and that's pretty good the font variant is for things like italics same thing with the font size that's just how big the text of the body will be and before it used to be like twelve back in the day that's become really difficult to read especially on the larger screens so the typical variation is between 16 and 20 and then you also see the line height that's how much white space is between your words if you do anything that you don't like you can simply click on the little undo and it will revert back to what the default settings are so all that looks pretty good and that's for the body and content area now you can also make changes to your headings area and that are these larger headings on your site you want to choose the fonts that you want for that for this one I will show you what open sans looks like and that changes down here again you can also give the font area if you want and for this one it's semi bold this is also where you can choose the text transform if you want everything in uppercase or if you want it lowercase or capitalized you can do that here we'll just leave that all uppercase for this and that all looks good so we'll head back and you just want to do the same thing for pretty much all of your content go in and change it all out so it looks exactly how you want it to look now that we're done with typography then we can also look at publishing this and then let's make some changes to the actual web page so I can show you how beaver builder works from here I'm logged in to the website but I'm on the front of the website so you see that so you see the toolbar at the top so let's click on beaver builder here and you can get a walk through to go through the whole process since I'll be showing you how this is done I'm going to click no thanks and from here you can just start to make the changes that you want for instance I want to change this whole area out where it's talking about it's time for you to have the garden of your dreams you could highlight this area and then just start typing in what you want it to say and then scrolling down I can also change the description area here and once I start typing it in it starts to fill in the information and you see I can change the alignment here but we want to keep the alignment centered so I'll do that and that looks pretty good under the separator you can choose if you want to have a separator in between like you see here you can change the style where you want to put the separator you can also choose the dash or a different color just pick it from the color wheel like this but we'll choose none so and then under typography this is where you can change a little bit of the font you can also change things like the line height and the style and spacing this is also where the uppercase is and you can change it here to be normal or in uppercase or lowercase under advanced you can also do some things like animation where you can make it slide in from say the left like you see there here I don't want to have this so I can just click on that and just X out of that so I can remove that and you see once you hover over any of these things this is where you can make the changes for instance right here this is the big background image and I can choose to work with this image from here scrolling down for the background photo I can choose to edit this and I can also remove that here if I want to edit this these are the photos that came in with the starter site so I could just go scroll through and find one that I would prefer and that's an image that I like a little bit better so maybe we can use that one instead and scrolling down you can make other changes you see when I scroll it stays put that is called fixed and so for attachment you can also choose to allow it to scroll and that way it will scroll when the web page Scrolls as well like you see that but for this one I think we like it in a fixed setting so we'll put fixed so looking at the overlay you see we also have a black overlay when you're scrolling down and that's that black area we can change this here and you could change it to a different color if you want and so when they're scrolling then that would change that as well we can also choose to just have a color so I'm pretty happy with how that looks and we'll click Save and I see kind of the differences okay I'm going to scroll all the way down because there's a button down here that I want to work on this is the one I want to do so let's click on it once you click on it you have the style area that we can look at and now I want to look at the background color so I can change the background color to what looks better for the site mmm the blue is okay but we'll do something like a green that goes with the garden site that's not bad and if you look down here you can also do the structure of it you can cause it to do full width or you can do a custom length if you want but we'll just go with Auto and that just basically goes by the default and here again you can choose the rounded corners that you want I'm going to give it a tin to show you how it looks with a tin and it's still a little bit less let's do more like a 6 the next thing we want to do is let's go ahead and take a look at the link here's the section for the link and what you can do is you can either type in the URL or over here you can hit select and once you start typing in a page or a post that you have on your site like projects you can see that that pulls up and then it brings in our URL for our site for the page projects we can choose to open it in a new window or do nofollow so let's make sure we click Save Changes and now I like the style of this button so what I want to do is come over here and duplicate it now I have a duplicate button so I'm going to drag it up to a different area on the site where I want it to go that's what I'm going to do I'm going to put it here and I'm going to remove this old read more area and then we'll make this one the new button what I need to do here is change the link for this and change the text of it so I'm going to change that to savory more and then I'm going to change the select for the link and we'll have it go to our blog great and then we'll change that and then we'll save it so now that looks pretty good there what you can also do actually that goes to our about page so I'll change that to our about page so all that looks pretty good scrolling up and you see I actually still want to change these buttons here you know these buttons need to be changed out so we can do the same thing grab this button and we will copy it I'll make a duplicate and then I can drag this up there at the top and drag it up above here so I can replace this button so now I just need to hover over that and remove this button and now I can do the same thing for these others as well so I need to duplicate it and move that over and then I'll just move it over here remove that button because I don't want it anymore and then I'll do it one more time and then I can change it over here and then get rid of that now I like the look of this but there's a little bit of space extra space that I don't really like here and let me show you how you can change the margins for that it's basically held by the margins so click on it let's go to advanced and you see the margins on the top of this are at 50 let's try something like 30 and I like the feel of that a little bit better so the margins is the space around the button so I can just do the same thing with the others and what I could have done is change the spacing on that one before I duplicated but this gives you a good idea of the power of how you can make all of these changes to get your site to look exactly how you want it to look once we're done with that we can save our changes the next thing I want to do is let's take a look at our menu area you see you see up here we have all of these services and all of these pages that were showcasing and our blog is actually not in uppercase whereas all the others are so there's a little bit of work that we need to do with that and we can do that next so to work with menus we will go to the backend of our website from the dashboard you can go to appearance and you can go to menus you can also get to this from customize but I like this one and let me clear out this you see these are all of the pages that are on my menu and there's some that I don't want like projects my site is mostly going to be about blog so I'm going to actually remove projects and services and then I want to left click and drag and rearrange some of these other pages and then finally you see that my blog is in lowercase so to get it looking like the others I'm going to put it all in uppercase letters so I'm going to do that here and now it's a smaller menu section and it feels a lot better for what my site is about you could keep those if you're a small business that would work perfectly for you and if we go to manage locations this is where the main menu is you could also set up a footer menu and that would go at the bottom of the site just to show you some of the power that you have with this so that looks pretty good and we can go and visit our site and see what it looks like and that was a much cleaner setup now let's click on the contact us page because we this form on here and I want to set it up and I want to clear up some of this other stuff to make it look better for my site so let me show you how you can set up a Contact Us page and this is using WP forms light that was installed when Astra installed its starter sites so to do that let's head back over to our WordPress dashboard we need to go to WP forms and let's go to all forms from here you can see the form that it was already set up for us it's called contact us so we can edit this to make it look exactly how we want it to look so this is the WP forms area and this is the form and these are all the fields that we have we can remove them by just clicking on the little trash button and you see here we can click on the your name area and you can either make it first and last or you can make it simple I prefer simple so we'll keep it like that basically it's a very simple form you see in parentheses that's required but we can actually click on the required button to make sure that they don't fill this out without filling out this information so I'm going to do that for all of these fields you see here we can actually enable email confirmation and that just means they need to fill out their email twice to make sure that they fill it out correctly so we can set that up and then finally we'll make the your message required as well okay that looks pretty good now we need to go over to settings because we need to make sure that the notifications are set up properly first under general we can change the form name if we want and that's just for our internal information you could also change what the send button says here and what it says when it is in the process of sending you can change all of that there I would recommend keeping the anti-spam honeypot and that just keeps spammers from spamming your site now going over to notifications this is the notification that you'll get and it's pulling in the email address from your website admin email you can keep that here or you can heart code your own email here as well when you get your email this is what it will say so if you want you can change it maybe add the website name here as well and then these fields will come from the actual form so we want to keep those like that is you could add a notification something that is perfect for if you have a business website you could add multiple notifications so that like the sales team will get it and IT will get it or something like that if you wanted to now let's go to confirmation this is what the user will see when they submit the email and it's a simple message that will pop up on the screen if you want you could also change it and maybe send them to a different URL or say a Thank You page you could set up a Thank You page here if you wanted for this set up I will simply keep it as a message page and I'll just send them this message and that all looks good so let's go ahead and save this and now we need to need to get out of this and we need to head over to our contact page to change that up a little bit and since we're using beaver builder we want to launch the beaver builder plug-in and see when I click on that that's the shortcode that the WP forms comes over as but I don't really want this stuff over here because I'm not a business if you are a business then this would work perfectly for you so we can remove some of these items so now once I've removed everything and I basically have just one big column and then I'll also remove this map area down here since I don't want to showcase my location so that's a much cleaner contact page and you could add a little bit more up here talking about the blog change this out to something that's more pertinent to our website and then this kind of feels really long and I kind of want to make this a little bit better for the user to fill this out so not make it so big so I'm going to change the margins of this so you can do that with the margins and I'll just fill up the left and right margins now you can just clean it up a little bit more see how it all looks that looks pretty good and we'll be done with this so let's click done and publish okay the next thing we want to look at is the blog page basically I want all of my posts to come on to this blog paste and we need to set this up to do that we'll go to customize and there's an area that we need to fix so once we go to customize we want to scroll all the way down to homepage settings and we have the home page is the home page and now we need to select the page where all the posts go so I'll hit blog and so once I have posts all of those will show up here and we're good with that the other thing we want to do is we want to work with the widgets the blog page has sidebar and these are all the widgets that are currently on the sidebar there's some that I don't want so I'm going to expand these widget areas and I'll just remove the ones that I don't want here and now we're set with those three and I'm okay with that so now we can click publish and that should look good to go now I'll just show you real quickly I'm going to go out and create a couple of blog posts so that you can see what this blog page will look like now and I'll speed that up so you can see it okay this is what it looks like with blog posts on the page and I like the look of that over on the right you also see the widgets that are there you've got my search categories and my recent posts and then I can click on the actual post here and this looks okay but you see up here in the web address I have my web address set up and this is the permalinks and it's currently set up to show the month day and year so I don't like that and I'm going to go in and change that to do that let's go over to our dashboard we need to go down to settings and we're looking for permalinks and you see it's currently set up for a day and name and what I like to do is make it much simpler and I usually just do the post name and that's just going to be the title of the article or the title of the blog post to show and that's how I like to set them up it's much simpler and it's easier for Google and it shorter URLs are a little bit better for SEO so let's click Save Changes and now you when I go to a blog post you see it's much simpler URL structure and I like that much better the next thing I want to look at is let's go ahead and take a look at our logo I'll go into the customize area and if you remember we could click on this little pencil area to take a look at the logo okay here is your logo and if you want to change out the logo you can click on it and you see when you just click Change logo you can either choose an image that's already on your site and you see the suggested dimensions here but I want to show you how you can create a logo pretty quickly just by using a free tool there are several free logo maker services and sites out there I'm going to show you how you can do it with something called canva canva is a real easy way to create images for your site and also create a lot of images for things like Facebook and Pinterest Instagram it works for all of that so let's head over to canva you'll want to create a an account for that but it is free once you log in you can scroll down and choose the logos area and then you can see all of these logos designs or logo templates that you can choose from just go through and pick one that you like the look of and then you can customize it from there you can click on them to see what they'll look like over on the right if there's a certain type of logo like I put in garden you can see something like this here so I'm going to use this one as my starter point and I'm going to make some changes here and change the fonts there are a ton of fonts to choose from as you see up here just change the fonts and then you can just find one that's best for your brand also change the name to go with my garden blog you can see I can change the style I can change the size of it that's a pretty good size I like that and I can even change the color here and choose from default colors here or you could also click on the plus area to use a specific color here that looks pretty good and I'm not really happy with this font so I'm going to change it to lotto that looks better and then this icon up here that came with this template logo but we can get rid of that and if you want you can go to elements and from here there are a ton of icons that you can choose from there are several that are free and then there are also that are some that are premium and then you can also just search for an icon that you're looking for and you see here are some to work with I'm gonna pick something simple like that and that's a little too big so we're gonna bring it down and then I just want to decide how I want it do I want it below do I want it on top I think I kind of want it that would be a little bit too big I think I kind of want to move my name over and make it to the left and just keep playing with it until it looks reasonable that's not bad now I want to Center this whole thing to do that easily what you can do is select the whole thing so I'm just left click and dragging to select both items on here and then we can go up and group them and then that way when I move them around they are grouped together and then you see I can move them around so it's centered now that's not bad for a real quick and easy way to do that so we can go over here and click download PNG is suggest that you also would want to do transparent a transparent background means that it would take on the color whatever color you have you would have to do the pro version to do that so we'll just download it and do the PNG version and then we'll just have a white background with this so I want to download this to my desktop and we want to give it a decent name and that was a real quick way to do a logo so now we just need to go to our customize area change the logo and we'll go to upload file and you can just drag that photo up there we can select that from here we could do a little bit of cropping and that's what we did and we can remove this different logo for a Retina device and now that's my new logo and we can choose the width of it and make it just perfect for what we want and now since I have the name in my logo I'm going to remove the title but I'm going to go ahead and keep the tagline and then from here you can kind of play with it to see how it looks I don't really like how the tagline looks underneath it so it looks like I didn't crop enough when I first uploaded it and that's okay I'm just going to quickly make a change on this when I select the logo and hit select then I can crop it again so I'm going to actually go in and crop it a lot more bring the top down bring the bottoms down I'm going to bring in the right and left as well so make it much more compact yeah and I like that a little bit better so that's pretty good I mean that's a super fast way to get a really quick logo on your site no problem so we're going to go ahead and publish that and now I'm gonna look at it on our site you see there's a little bit more issues with the tagline but that's okay if you wanted to you could play with that a little bit more to get it exactly how you want that but that looks really good awesome we have our site set up however we want now the next step we need to do is let's go ahead and install member press plugin and set up our membership area you can check out our top-five membership plugins article if you want to look at different ones but the one that we're recommending is member press it simply knows all the things that you need to do to set up a membership site so head over to member press and go ahead and look at the one that would work best for you I know a lot of people try and get by with not paying for anything but this is actually a really crucial part you're adding payment methods to your site you're adding high value quality items to your site where you just don't want people to be able to break into it and with payment methods you want to make sure that that's done correctly so that's one of the main reasons why we recommend purchasing something like member press where they're doing all the work for you to make sure that everything works right and then when you purchase it you have yearly access to their support team which is great so once you get all of that let's head back over to our WordPress dashboard we've installed plugins before so you should be comfortable with doing that but we're going to go over to plugin add new because we need to upload this plugin since we've already downloaded it from our account let's go to upload plugin and you want to upload that you see it here so now we can click install now once it's installed you also want to make sure that you activate it and then we'll also need to add a license key so let's click activate plugin you see it's asking for a license key you should get that from your Member area so let's go to activation page so that we can add that right click and paste my license key in there and then we can activate it ok you should see something that it's been activated and then we can go to our options page to get everything set up so let's click on options page here ok now we're under member press options and we can set everything up you see they also have a great user manual area here to get you started so you can go through the whole all the configurations as well but I'm going to help you with this as well so what you need to do is reserve different pages from member press these are pages that only member press will be using so we need to create a Thank You page you need to create an account page and we need to create a specific login page I don't have those yet so let's go ahead and do that you probably won't either so I'm going to open up my pages right click and open it in a new tab so I'm going to do that now I'm in pages let's go ahead and click add new and let's just quickly set them up we needed a Thank You page and I'm going to publish that what I said we need we need an account page and a login page let's go ahead and create those as well add new count want to publish that as well and then we want to to a login page okay and we'll go back here I mean refresh so that will go out and grab them so now I can give them a thank-you page and a count page and a login now you'll want to go ahead and keep these page slugs here the same as basically this area appear it's part of the URL structure that member press wants us to keep so I'm going to leave it like that if someone comes to a part of your website and they're not authorized you can either redirect them to a specific URL maybe the area asking them maybe your pricing page area you could do that I'm gonna leave this unchecked and what it will do is it'll still show them that they are an unauthorized to see these pages and then I like that they have a show login form containing unauthorized content a lot of times people will simply forget to log in or they've been logged out some for some reason so when they go to those pages there's a nice prompt that'll let them log in right there and then down here you can see what the default an authorized area is you can fill this in and add more information if you want but this is the default message so you can change that here so we're done with this page let's go ahead and click update options and then the next area we want to do is you want to set up payments that's one of the biggest reasons why we have this going on right so you can click on add a payment by default all three basic levels for member press come with standard PayPal Express Checkout PayPal and stripe and then the higher end tier also comes with authorized.net if you already have a merchant account through authorized on that it might be worth it for you otherwise I would go ahead and just set up your PayPal methods and obviously you could also do offline payment if you're doing a membership site say in your area and you actually see people and you actually want to get a check from them or cash then you can do that as well but we can go ahead and set up standard and you want to say hey pal and you can show the icon and the description all of that you want to add your primary PayPal mail here and then if you're still just playing with it all you can say to use the PayPal sandbox you'll still want to add sandbox in the paypal side otherwise just leave it blank these are the IP ins that you'll want to add you need to have this in your account on PayPal for this to work so once you set up your PayPal account you're ready to start taking payments you can also set up something like stripe if you have a stripe account and that will allow you to take credit cards as well so we're just going to remove that and we'll say update options so now we have a payment feature set up and those are the two main things that we're going to go over a little bit of some of these other tabs just to let you know that some of these default settings are really really great for instance they will disable the WordPress admin area for example when people are logged in to your site they won't see this admin bar up here which is great it gets confusing for some for some people you also want to allow members to cancel their own subscriptions otherwise it's gonna have to all go through you so they recommend doing that you can also keep member members out of the WordPress dashboard they won't see all of this anyway but if they went to log into the dashboard area they would see some stuff so this kind of keeps that out of there and then you can do the registration area choose how you want all of this to be set up for registration you can also do a forcing login and logout if you want so like when people log in do you want to send them to a particular page a lot of people might send them to their account page so you could do that you know usually when you go and log into certain places like WP forms or muster insights as soon as you log in it takes us to our dashboard right so that's the same thing here same thing when people log out then they'll go to a particular page that might be good to just take them to our home page and then this is just a little area that once they log in this will be at the top so you can give like account messages or messages in the account area you can change this however you want so let's go ahead and update those options and fields these are extra fields that you can add in addition to the name and address field that you're already going to get from users this is this if you want something like if you want to get their phone number or their fax number I could add that there we've done payments and under emails these are all of the member notices that can be sent out on your behalf so basically when they first sign up you can send them a welcome email you can do a receipt notice of payment if they're doing a cancel their subscription then they can get that I like it when there's a failed transaction they'll get it that there's a failed transaction that'll allow you to try and recoup their money just get them to try again also if their credit card on file is expiring student this is if you have stripe setup then it'll send them a notice so that they can update their credit card so that you don't get a failed transaction so you can turn these on or off for this whole process you can also go in and edit these so you can open that up and this is great because it's pulling a lot any of these curly brackets you'll want to be careful with kind of keep all of those how they are is it'll be pulling stuff in from the database but other than that you can add your own information even add images if you want hyperlinks if you want and just make it a little bit more personalized if you would like and then under admin email notices these are the emails and notices that you will receive as the admin and they'll go to your account so go to update options and now under marketing there are several ways that you can enable integration into your email service provider like MailChimp or active campaign and things like that or get drip there are a lot of integrations that you can do here under info this is all of your information so you'll want to fill all this out so they know that you're an actual person or a business under general this is just some of the default things that you'll want to showcase in your membership area by default your language code and what of currency the symbols that you want to showcase you need to do it before after the paywall and SEO you'll want to keep this unchecked because when things are behind the paywall and you're not allowing everybody have access to it you don't want Google to index or show these search results in their listings so you'll want to keep that off and you could even go as far as to block the search engine so you don't really have to do that if you want to enable the free paywall then that's something like you see a lot of news sites doing this where they all allow one to five free articles a month and then after that they'll need to sign up so you could do something like that most all of these items you'll want to just leave the default settings that they have here and then taxes they have this set up or you can do taxes I would talk with your CPA to decide if you want to allow that or set that up here or if you just want to do that elsewhere so we can update all options and now that we have our pages and our payments the two really important things then we need to go ahead and set up our actual memberships hopefully you've come up with an idea of how you want the memberships to go do you want to do just one membership for everyone or do you want to have like a tiered membership of like a gold silver and platinum where they get varied levels of access to you you could set that up I think when you're first starting out your best bet is to probably just do one membership and that way you can get kind of a handle on how this all works and then from there maybe see what are your members asking for a lot of times your members will tell you what they're wanting just like when you have a membership site a lot of people will set up a membership site first and then they'll do a course later because they're going to find out real quick from the members what type of courses they want and the same goes with memberships as well you'll find out real quickly what type of access do your members want from you but I would say just in the beginning just set up one membership area and then keep it simple in the beginning and then kind of grow with that throughout this series I have create did a gardening blog so we're going to create the ultimate gardeners membership and then we can give it all the information that we want once you give it a nice description over to the right you see the membership terms and you can choose the pricing here you can also choose the billing type so let's say we want to do I don't know we're gonna do like a $99 price and we're going to have it do recurring you can choose the interval here so you could do monthly yearly quarterly or choose your own custom let's go ahead and make this a 99 recurring yearly plan and we want to give them a 7 day trial period and we're gonna keep it as zero you can also make this a monetary trial period which is great and then this is great for people who just want to keep adding trials but only allow one trial so that's perfect and then scrolling down the membership options and then scrolling down the membership options we can do this as well from here we can send them a custom thank-you page and that would be here otherwise that will send them the thank-you email that we set up earlier you can also do a member specific email here and you can also customize the payments so if you only want to do PayPal for this one or if you have stripe if you only want to allow stripe otherwise I will bring in the default ones and then if we had set up any of those active those extra fields earlier like a phone number or what-have-you then we could pull those in here but pretty much those are all good the permissions we can choose who all can purchase this item we don't want to setup any permissions on this and then with the price box you can choose what kind of price box you want to show and then you can show custom or auto we want to bring in what the actual price is and then you could do a heading text add all the benefits that they're going to get for this for signing up okay click on the plus button really tell them everything that they're getting you see it's coming over here too and then you can choose where to put the button header footer or both if this turns out to be a really long item then you might want to choose both and then under Advanced you can give them membership access URL here or custom login redirects again you'll want to kind of keep everything as simple as possible in the beginning so once we're done with all of that we can click publish great and now we've created a membership site now the next thing we need to do is we need to go ahead and restrict access to do that we only need to set up rules so let's go over to our rules section and we'll add a new rule this is a really in-depth area where you can choose everything that you want to protect so when I click on this you can either choose to protect absolutely all content so you're only a membership site like everything that you have on your site is protected a lot of times I think people they tend to showcase a lot of free information and then they'll gate or they'll put you know even the more premium stuff behind an area and that might be what you'll want to do so you can do by category and so you'll create a category you'll want to create a specific category maybe everything that you write or everything that you create you give it a category of membership and then that way only those items will be behind this paywall and that's an easy way to do it but then you could also and this is red just because I don't have a membership category actually created yet so you'll also want to create that you could also do for all content tagged so if you don't want to deal with categories but you want to deal with tagged items same thing you could even do child pages of a parent page so if I have gardening page than some of the child pages of that gardening page can do that I think our best bet is just to stick with anything that's under the membership category will get protect and then we can choose the membership type how to grant access to the protected content so if they match the membership level of ultimate gardeners membership then that's how they'll get it down here you can also decide if you want to enable drip a lot of times memberships they'll create a membership site people go in they'll like download all the information read all the stuff and then they'll cancel that first week if you're worried about that happening then you can enable drip and then it'll allow them to get certain information over the next few days or the next few weeks you can also enable expiration if you only want them to say you're going through an intense group challenge or something like that and you want everybody to have access to very limited time then you can expire these items as well under authorize then this will just say how it's going to handle people who are unauthorized under the global setting we already have that an authorized area and then gives them a link to the login but if you wanted something different than you could do that here we're going to stick with the global area and let me just real quick go under pose let me open categories on a new page and I'm going to create the membership category just so that that will work refresh and I want to great I want to protect the content any Content that's shown as membership and go back to allow anybody who is the ultimate gardener's member can have access to that so let's save that rule and now we have a rule okay now you just need to start creating some of the content so I'm going to go into my posts area I have a couple of posts here you see we have now have it shows access what everybody has access to based on everything that we've set up so you know we did an extra thing for containers for plants so I want to go in and edit this I want to make this access only for my members so one of the things I'm going to do is go into categories and I'm gonna make it membership and I want to update that so now when I go to my all posts you see who all has access to this so this is a really great way to see who all has access to what and what all do I need to hide behind my membership area and also how much more content do I need to put out for the members to make it worth their while this is a great way to do that so keep doing that add more content that's beneficial to people and once you have a nice set of content available for your members let's go ahead and also set up a pricing page so that people can view it and see it so let's go to member press and we want to create a group and a group is just kind of a it combines like if we have multiple memberships then we can put multiple memberships in this group and add a pricing level set this up for pricing under group options this is the membership area by default if we had more than they would show up here as well and then you could also do like an upgrade path so if you have a lower tiered membership plan and they want to go up to the higher tiered plan then you could give them an upgrade path to do that since we don't have that we're not going to set that up then the same thing with a downgrade path if they're up at a higher one instead of them cancelling all together maybe you can give them a downgrade path to where they're paying something less a year and then but then they have more limited access to resources again it's very powerful and it can be set up however you want it to be so with this this is the pricing area this is how it will show we're gonna leave that here just to make it easy and then let's go ahead and publish this and then we can see what this looks like okay and then you want to play with some of the features here or play with some of the CSS I make it look like how you want it to look for this pricing page but this is a great setup beginning where they can sign up for your membership site and then kind of the cool thing is if you had if you did have multiple memberships then it would show like the three columns for them to choose from and then obviously usually they would pick the middle one because marketing works like that okay the next thing we want to do is we want to go ahead and create a sign up in a user login form so we'll do that next the easiest way to set that up is to do a widget so let's scroll down to appearance widgets area and then on our main sidebar area we can add the member press login area I'm gonna left click and drag this up and now show that and let's click Save and then the other thing we want to do is let's go ahead and go to our menus area so we can add that pricing page to our menu so scrolling down I want to go to groups and we have that one group here so I'm gonna click on that click Add to menu and it says pricing now all of these are in capital letters so I'm gonna go ahead and change that here just so it looks the same you don't have to do that for yours I just want it to look uniform so now we can click Save menu and now I can go to my website and you see have my pricing page up here so then people can see the different memberships that we have and then we also have our login areas see I'm logged in so I'm good to go here but if I wasn't then there would be a login area for me and that just makes it easier for people to log in and get back to the membership area okay so that's the majority of it let's go to the reports area and this would be great once you're building and growing your business your membership part of your business what member press does is they have a great report that will show you all of your members all your active members where all are they going your pending or failed accounts and things like that and then you can also do like a lifetime value of your customer so it's a really great way to keep track of all of your members and where they're at and how they're doing and then one more really cool thing if you watch the video before where we set up affiliate marketing we also set up monster insights where it really helps you see how your traffic is doing using Google Analytics but it brings all the information here let me go down here where I go to insights and reports this is my traffic for my website and that's great once we have member press installed monster insights and member press work really well together where then you can also see enhanced e-commerce tracking for member press and that just gives you a little bit better indication of like the lifetime value of how your members are doing and how everything is working on your site so we'll want to install and then activate the e-commerce tracking feature once we install that you also want to use an enhanced e-commerce and member press has been detected so it's automatically being tracked for you which is great so then when you go to reports you're not going to see much now but once you do then you should start to see conversion rates your revenue your average order value all of these awesome things to help you see how is your membership site growing how is it doing and then how you can improve congratulations how does that feel go ahead and get your to-do list and check off the setting up a membership site because you did it now all you have to do is continue to make the great content that you're doing and like I said before a lot of times people the next thing that they'll do is they'll add a course to their website and that's what we'll do next usually it's the members that are telling you what they want to know next and so it's great that you set up your membership site first so that you find out what these members are wanting from you and then your next step the natural progression in making more money with your website is to create the course that they're asking for so in the next video I'll show you how to set up and create courses on your website so make sure that you click on the subscription below and go ahead and click on the notification bell so you'll know exactly when this comes out and thank you for watching
Up Next

53:35
Online Course Marketing Funnel Strategy: A Case Study with Jacques Hopkins
@CourseCreatorCommunity
252 views•2020-10-05

12:54
Triumph of Orthodoxy Icon: Byzantine Art & History Explained
@BenCallan
2.1K views•2024-08-06

9:49
FastAPI vs Flask vs Django: Choosing the Right Python Web Framework
@TechWithTim
302.5K views•2024-05-26

1:42
Game of Thrones Opening Credits: A Cinematic Analysis
@gameofthrones
46.3M views•2011-04-18
Related Study Plans & Knowledge Roadmaps
Structured learning paths in General & Interdisciplinary Studies
general-studies
Elevator Engineering: History, Physics & Cities
01From Hoists to Safety Brakes: The Dawn of Vertical Lift
02Hydraulic vs. Traction: The Engineering Physics of Elevators
03Modern Speed, Safety, and Algorithms
+ 2 more learning modules
12h5 modules
Explore Roadmap
general-studies
Rubber: Material Science, History & Geopolitics
01Origins of Natural Rubber & Mesoamerican History
02The Chemistry of Natural Rubber & Vulcanization
03The Geopolitics of the Rubber Boom & Colonization
+ 2 more learning modules
12h5 modules
Explore Roadmap
general-studies
Containerization: Evolution, Logistics & Trade
01Ancient Trade & Bulk Cargo: Amphorae to Barrels
02The Industrial Revolution & Cardboard Packaging
03The Containerization Revolution: Malcom McLean
+ 2 more learning modules
12h5 modules
Explore Roadmap
general-studies
Textile Tech: Evolution, Labor & Global Impact
01Pre-Industrial Textiles: Handloom & Cottage Industry
02Mechanization: The Spinning Jenny to the Power Loom
03The Factory System & Global Labor Transformation
+ 2 more learning modules
10h5 modules
Explore Roadmap