





![Realizar Cortes de Caja en SICAR Punto de Venta [v2.2] - SICAR.MX](https://i.ytimg.com/vi_webp/V1FzH_Vh_qM/maxresdefault.webp)


















![How To Add Staff On Your Shopify Store [Shopify Staff Account Tutorial]](https://i.ytimg.com/vi_webp/oOPdJP4dEfY/maxresdefault.webp)



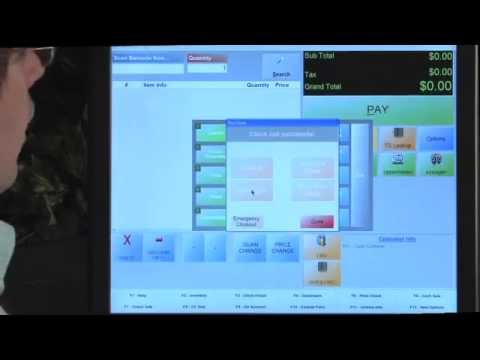
This tutorial demonstrates how to set up Shopify POS for retail stores by configuring a retail location, setting up taxes and duties, adding products with inventory sync, pairing hardware like card readers and receipt printers, adding and training staff with PINs, customizing the Smart Grid for faster checkouts, and running end-to-end system tests to ensure everything works before opening.
Setting Up Shopify POS for Retail: A Step-by-Step Guide
Added:Basic understanding of the core Shopify ecosystem, including how to set up a digital storefront, manage products, and navigate the Shopify Admin interface.
Fundamental concepts of retail operations, such as point of sale (POS) workflows, cash drawer reconciliation, and standard customer checkout procedures.
Basics of hardware connectivity and networking, including Bluetooth pairing, local Wi-Fi configuration, and device-to-device communication.
Core principles of inventory tracking, specifically how SKUs (Stock Keeping Units) are structured and managed across different locations.
Implementing omnichannel retail strategies, such as configuring 'Buy Online, Pick Up In Store' (BOPIS) and unified digital/physical customer profiles.
Analyzing retail performance through Shopify Analytics, including tracking register shifts, sales reports, and staff-specific performance metrics.
Developing advanced staff management workflows, including setting up custom POS roles, permissions, and security PINs for store associates.
Integrating physical-to-digital customer loyalty programs and managing gift card workflows across both online and offline channels.
9.1K views65likes8:20Original Release: 2025-05-30
You're about to turn a tablet and a card reader into a fullyfledged retail command center. And in the next few minutes, I'll show you the exact Shopify POS setup that lets you ring up sales, sync inventory, and print receipts the moment your doors open. My name's Kyle Herbal, and let's get right into this setup tutorial. The first thing you're going to need is a Shopify store, a compatible iPad, iPhone, Android device, poss. And ultimately, you're going to be making the decision. Are you going to run with an included POSOS light for basic checkout or add the POSOS Pro if you want advanced permissions, smart inventory reports, and unlimited omni channel features. Once you've confirmed those prerequisites, you'll install the Shopify POSOS sales channel. Log into your device and designate your retail location because every tax rate, inventory sync, and staff pin you set from this point forward is going to map to that single location, which gives you a super rock solid foundation that you need before pairing hardware or processing your first sale that you make. Now, in order to show you guys how to get started with Shopify, the best way to go about doing it is by using the link down in the description. When you click that link, you should be brought to a page that looks something like this one. As you can see, you can get started with a bunch of different pricing plans that they have available for their POSOS system. We simply hit the get started button where we'll enter in our full name, business email, business phone number, company name, annual revenue, and current retail store locations.
You'll hit the submit button, and just like that, you'll have full access to Shopify's POSOS system. Now, once you're logged in, you can open Shopify's admin in your browser tab. Head over to settings, locations, and enter your store's name and address exactly as it appears on your full business license.
Then you'll go ahead and toggle the fulfill online orders from this location button. And that's specifically if you'll be packing web orders on site and hit the save button. And the moment you hit save, Shopify binds that physical address to a real-time stock count, state or provincial tax rates. and every sale that comes through that application eliminates the manual overrides and kind of awful end of day reconciliation that usually has to happen with these kind of things. Now, go ahead and jump into settings. Taxes and duties verify that Shopify's automatic rate for your store's address is correct and create overrides only for states or provinces with special rules. You could think for instance like Colorado, which has a tag fee or Canadian PST in British Columbia.
But make sure you have this done because once these rates are locked in, every single POS transaction calculates tax almost instantly. It'll print the right breakdown on receipts and spares you the headache of manual edits or audit time surprises. Once you have your taxes sorted, you can go ahead and switch to the products view in your Shopify admin store. Then you'll go ahead and hit the add product button or upload your CSV and make sure that every item you sell in store has an SKU variant names and an accurate onand quantity for the location you just created. Then go ahead and open the POSOS app smart grid. Long press an empty tile. Choose collection and pin quick access groups like best sellers or sales rack or even your new arrivals.
That way your team can add items to the cart with one tap. Quickly scan barcodes with built-in cameras or search by SKU.
Whichever is fastest when a line is forming at the counter. Also, you can pair your hardware before opening time.
In the POS app, tap the settings hamburger menu, setup hardware, and then follow the onscreen prompts to connect your tap and chip reader for your credit cards. A Star MC Print 3 or an Epson TM M30 for receipts and a socket S74 scanner for rapid SKU entry are pretty much what you're going to be looking at.
Once each device shows connected, you can enable Shopify payments in the admin settings and payment settings. That way, every swipe, dip, tap, Apple Pay, or Google Pay transaction routes through Shopify's lowest fee payment processor.
Also, you can even run a 1centent test here to charge to confirm the reader actually works in the first place. The printer will then go ahead and spit out a receipt and the cash drawer will pop open. Proving your checkout lane is fully operational before the first customer walks in the door. The next big step here is adding your frontline team.
In Shopify admin, navigate to the point of sale option. Hit the staff button and then click the add staff button. Once you've done that, you'll enter in each employees name and email. Assign a clear role to them. sales associate for everyday checkout manager for cash drawer access and discounts or just training if they're shadowing and set a unique fourdigit PIN that they'll use to log in on the POS app and then hand each person the device have them enter in their PIN and then go ahead and ring a one item ox sale and then go ahead and sign the printed or emailed receipts that way the system records their first transaction under their profile. This will also go ahead and track commissions completely automatically and proves that every staff member can log into their account, discount within their limits, and close the sale without supervision.
You'll also have the ability to customize the smart grid for speed. In the POS app, press and hold any tile until it starts jiggling. Tap the add tile button and then drop in high velocity products, discount shortcuts, or the new winter 2025 app tiles like your loyalty program or bundles extension. That way, the top of the grid monitors the day's promotions while lower rows host utility actions such as add custom item or end of day cash count. Then you can go ahead and drag these tiles into a logical left to right order, top to bottom flow. Hit the save button, and your layout will go ahead and sync to every device at that location, letting staff pretty much fly through checkout with muscle memory tabs instead of menu dives before your doors even open. Running a full end to-end test can scan a product or tap its smart grid to add to its cart. You can go ahead and apply staff or promo discount to confirm that permissions work in the first place. Go ahead and choose a payment type, chip card, tap wallet, split tender, or cash sale, and complete the sale. Then print or email the receipt. Once you've done all that, you'll open the Shopify admin, verify the order appears under the correct location, check that unhand inventory for that SKU has decreased by at least one unit. And finally, go ahead and refund and restock the test order so your records stay clean in the first place. This gives you absolute confidence that pricing, taxes, hardware, and stock sync are fully dialed in before the first real customer even arrives at your storefront. You can train your team before opening by Shopify's EPOS system. You can go ahead and walk each training associate through a boxill return and exchange practice inventory lookups and customer profile searches. Then close the session with an end of day cash drawer account so everyone knows the exact steps for balancing. And finally, run through a launch day checklist. Hardware powered and paired, receipt paper loaded, spare iPad and POSOS are fully charged, and have your staff pins tested. After you launch your POSOS system, keep your retail engine tuned by running a quick morning cycle every week. Update your device in the Shopify POSOS applications. Spot count a high value collection to catch shrink reprint after fading shelf labels. Review any of yesterday's cash draw reports. and go ahead and explore a daily sales snapshot to Google Sheets. That way, you can track any trends that appear with your offline payments. Make sure to tap to pay expansion and customer meta fields for personalized service. Also, don't forget to turn on untap Shopify bundles now live in winter 2025. That way, your store stays agile and more importantly data driven, letting you completely focus on serving customers while Shopify's POS quietly syncs inventory, reconciles cash, and powers every sale behind the scenes. With your Shopify's POS now fully configured, your staff can feel much more confident about the hardware that they're using. If you guys have questions about how to get started with this whole entire system, make sure to drop them down in the comment section. Also, if you want to get started with Shopify's point of sales system, I'd highly recommend using that link down in the description. Hopefully, you guys enjoyed this video. Make sure to hit that subscribe button and I'll see you guys in the next one.
[Music]
Up Next

4:30
Shopify POS Hardware Setup Guide for Retail Beginners
@TheShopifyAcademy
31.3K views•2024-02-27

12:54
Triumph of Orthodoxy Icon: Byzantine Art & History Explained
@BenCallan
2.1K views•2024-08-06

9:49
FastAPI vs Flask vs Django: Choosing the Right Python Web Framework
@TechWithTim
302.5K views•2024-05-26

1:42
Game of Thrones Opening Credits: A Cinematic Analysis
@gameofthrones
46.3M views•2011-04-18
Related Study Plans & Knowledge Roadmaps
Structured learning paths in General & Interdisciplinary Studies
general-studies
Elevator Engineering: History, Physics & Cities
01From Hoists to Safety Brakes: The Dawn of Vertical Lift
02Hydraulic vs. Traction: The Engineering Physics of Elevators
03Modern Speed, Safety, and Algorithms
+ 2 more learning modules
12h5 modules
Explore Roadmap
general-studies
Rubber: Material Science, History & Geopolitics
01Origins of Natural Rubber & Mesoamerican History
02The Chemistry of Natural Rubber & Vulcanization
03The Geopolitics of the Rubber Boom & Colonization
+ 2 more learning modules
12h5 modules
Explore Roadmap
general-studies
Containerization: Evolution, Logistics & Trade
01Ancient Trade & Bulk Cargo: Amphorae to Barrels
02The Industrial Revolution & Cardboard Packaging
03The Containerization Revolution: Malcom McLean
+ 2 more learning modules
12h5 modules
Explore Roadmap
general-studies
Textile Tech: Evolution, Labor & Global Impact
01Pre-Industrial Textiles: Handloom & Cottage Industry
02Mechanization: The Spinning Jenny to the Power Loom
03The Factory System & Global Labor Transformation
+ 2 more learning modules
10h5 modules
Explore Roadmap