















![⚠️ Vos crypto sont-elles toujours en sécurité dans une LEDGER?! [Charles Guillemet]](https://i.ytimg.com/vi_webp/wy4UwuZfk-w/maxresdefault.webp)
This tutorial demonstrates how to create a Decentralized Identifier (DID) and issue a Verifiable Credential using Dock's no-code app. The process involves creating an issuer profile (such as a university), selecting a credential type (like a degree), entering recipient information including identifiers, dates, and attributes, and then issuing the credential with options to persist it in the system and/or anchor its cryptographic hash on the blockchain for immutability. Recipients can download the credential as a JSON file and import it into their wallet app for secure storage and tamper-proof verification.
How to Create a DID and Issue a Verifiable Credential: A Step-by-Step Guide
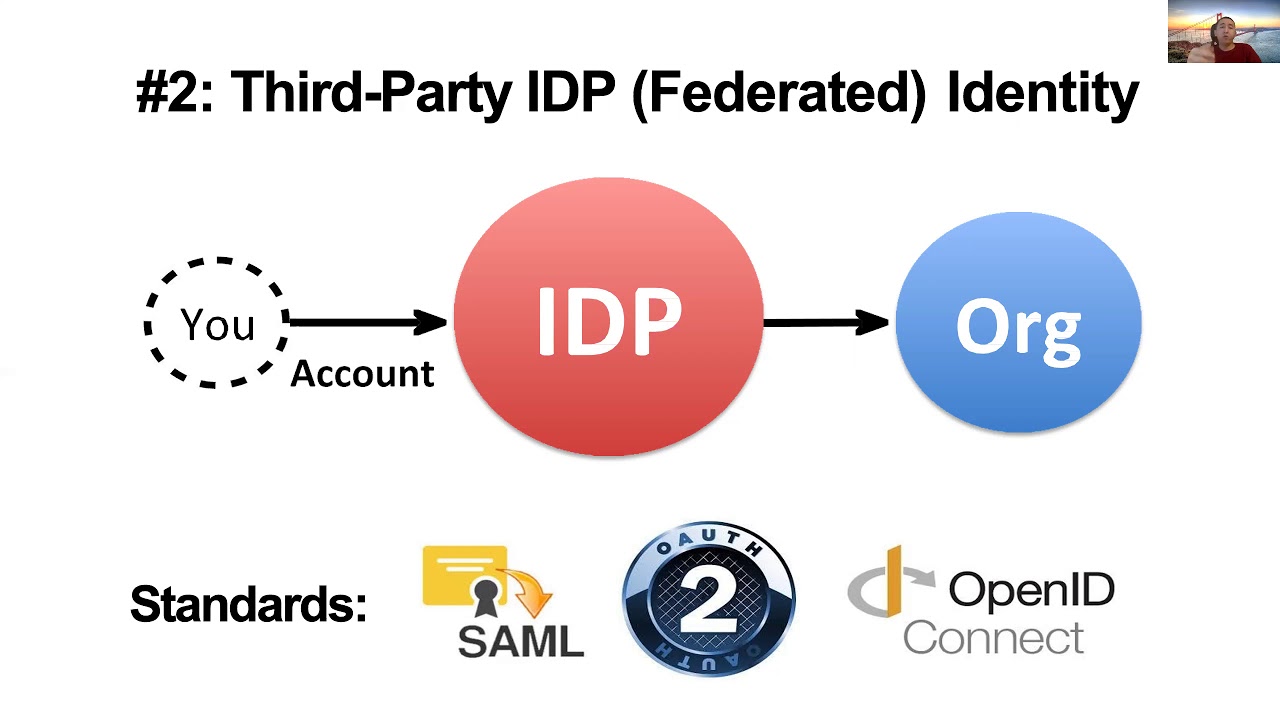
Added:The conceptual foundations of Self-Sovereign Identity (SSI) and how it differs from centralized and federated identity models.
Basic principles of asymmetric cryptography, specifically how public and private key pairs are used for digital signatures and encryption.
The core trust triangle model of Verifiable Credentials, including the distinct roles of the Issuer, Holder, and Verifier.
A foundational understanding of distributed ledger technology (DLT) and its role as a decentralized registry for public keys.
Programmatic creation of DIDs and verifiable credentials using developer SDKs and APIs rather than no-code interfaces.
In-depth study of the W3C DID specification, including DID documents, metadata, and various DID methods (e.g., did:key, did:ion, did:web).
Implementing Zero-Knowledge Proofs (ZKPs) and selective disclosure to enhance user privacy during credential verification.
Designing and deploying decentralised user wallets and exploring secure cryptographic key management systems.
2.8K views15likes7:25Original Release: 2022-06-23
all right so now we're going to go through the process using docsearch which is our no code app for actually issuing your credentials so as you'll see here i'm logged in on our dashboard i'm in test mode which is what the big orange bar at the top says there's a little toggle here on the right that if you click that you'll go into production mode so depending what stage you're at you'll use production obviously for real credentials if you're just trying to learn the system learn what we're doing test mode is probably perfect i'm going to stay in test mode for now so first thing when you're creating a credential you click on the big blue button that says create verifiable credential so the first step it asks for is creating the issuer profile so this is who you are who do you represent so again this would be like your university would fill in here so you can add a logo i'm going to skip that step just for now add a name so we'll say university of dock description you can add or not key type or i'll obviously the default don't worry about that that's again getting to the cryptographic mechanisms we use there's different ways you can do it but just the defaults are fine so again this is creating a decentralized identifier you can think of it here as an issuer profile it's another sort of phrase we use uh fairly regularly for what this is so i click on that and this right now is writing the decentralized identifier part of that to the blockchain so again the issuer is now recorded on the blockchain which is really good and then locally in our system has created that profile so it's stored the logo storage name surgery description and that kind of stuff but that the name logo and description do not go onto the blockchain they are stored in docs systems not on the blockchain and then you have a choice of the type of credential you want to create right now we just have a couple basic defaults um i'll go because i'm going to university here i'll do the degree option uh which issuer do we want to use so again we'll use the one we just created which is the university of dock you see there's a little preview here on the side and as we go forward through this you'll see that previously updates a little bit as we go through it so we'll hit continue now the next thing is who you're giving it to so you can actually add many people here i will just add one and so just quickly add an id uh so this can be unique identifier it could be a decentralized identifier which is a what we recommend if you have it not everyone will have one and here i don't have one at the moment so i'm just going to put in um student number one as my thing i have bachelor's of verifiable credentials here's the degree title that we're doing and the degree type is the bachelor's of science we'll say and we'll just say it was earned today which today is what the 18th oops actually i back dated that that's hilarious anyway it doesn't matter and we'll say it's going to francisco who's date of birth and this is totally not true we'll just pick a random date and what do you think i'll say he was born in 1994 total guess and october 12th sound good sounds good and do we want this credential expire we'll say no degrees don't usually expire so we'll say no to that one issue date is pre-filled all right so we add that recipient so you now see that that information is all there you can see student one if you hover over you can see a little details if we want to do bulk we could also import a csv file again i'm not going to show that right now but you could then just do a comma separated list you know export it from excel or whatever you're using to import that next option down here is called persisting this credential so to persist the credential means that doc will store a copy of the credential on our systems in our database that you could then retrieve later with the url i'm actually not going to do that this time so i'll turn that off i will allow revoking of this credential so this will create a registry on the blockchain that can be revoked and we'll anchor it too so again we'll put that cryptographic hash on the blockchain for this credential so that's all the information that we need and we hit issue credentials and it's going in and doing the work right now putting it together it's creating the replication registry under the blockchain it's storing the the hash as an anchor on the blockchain all right and that is done so now because we didn't persist it we need to download the credential this is very important if you don't persist it and you don't download it you can't get it back so very very recommend strongly recommend you click this download credentials and that downloads a zip file in that zip file there will be two files there's one that's called a json files json which is just is a text file which contains the details of the credential this really is the credential this is what you would share with people and it also has a pdf version which looks much like the preview that we saw but it's really just for display purposes and for you know easy understanding of what it is but it's that json that is really critical so what we'll do is we'll take that downloaded credential i'll email it to francisco he will import it into his wallet and uh that'll be done from this end hi everyone i'm francisca work at doc over at the marketing department and i want to show you how to import a verifiable credential to your doc wallet app so i'm going to open the wallet and i'm going to type in my password please don't look and so we we are now on the first screen where you can see your dock tokens if you have them you can also send manage receive buy dock tokens from here on the second screen you have the list of your credentials third option is to scan a credential so if mike had selected the persistent option the credential would have a qr code and i would be able to import it like that but since it didn't the only way to import the credential is through importing a json file that is sent to me in the last screen we have the settings where you can backup your wallet and remove your wallet so let's go back to the credential screen as i said mike emailed me the json file of the credential that he created i'm gonna go to the plus sign on the top right corner and i have the json file here verifiablecredential.json i click it and it imports to the app now i have my bachelor's of verifiable credentials issued by mike to francisco batista that's me and then the credential is on my wallet it's temper proof and i can present it for verification thank you very much for watching see you next time
Up Next
54:45
Veramo Framework Tutorial: DIDs, VCs & Digital Identity
@decentralized-identity-fdtn
739 views•2023-11-03

12:54
Triumph of Orthodoxy Icon: Byzantine Art & History Explained
@BenCallan
2.1K views•2024-08-06

9:49
FastAPI vs Flask vs Django: Choosing the Right Python Web Framework
@TechWithTim
302.5K views•2024-05-26

1:42
Game of Thrones Opening Credits: A Cinematic Analysis
@gameofthrones
46.3M views•2011-04-18
Related Study Plans & Knowledge Roadmaps
Structured learning paths in General & Interdisciplinary Studies
general-studies
Elevator Engineering: History, Physics & Cities
01From Hoists to Safety Brakes: The Dawn of Vertical Lift
02Hydraulic vs. Traction: The Engineering Physics of Elevators
03Modern Speed, Safety, and Algorithms
+ 2 more learning modules
12h5 modules
Explore Roadmap
general-studies
Rubber: Material Science, History & Geopolitics
01Origins of Natural Rubber & Mesoamerican History
02The Chemistry of Natural Rubber & Vulcanization
03The Geopolitics of the Rubber Boom & Colonization
+ 2 more learning modules
12h5 modules
Explore Roadmap
general-studies
Containerization: Evolution, Logistics & Trade
01Ancient Trade & Bulk Cargo: Amphorae to Barrels
02The Industrial Revolution & Cardboard Packaging
03The Containerization Revolution: Malcom McLean
+ 2 more learning modules
12h5 modules
Explore Roadmap
general-studies
Textile Tech: Evolution, Labor & Global Impact
01Pre-Industrial Textiles: Handloom & Cottage Industry
02Mechanization: The Spinning Jenny to the Power Loom
03The Factory System & Global Labor Transformation
+ 2 more learning modules
10h5 modules
Explore Roadmap