





![26 -1 Spring Boot- Security Introduction - Arabic [بالعربي]](https://i.ytimg.com/vi/xLL8PBPuQg4/maxresdefault.jpg)














![[Webinar] RGPD ET VOUS... Prêt pour le grand défi de la protection des données ?](https://i.ytimg.com/vi/0iQ3wozMU_8/hqdefault.jpg)
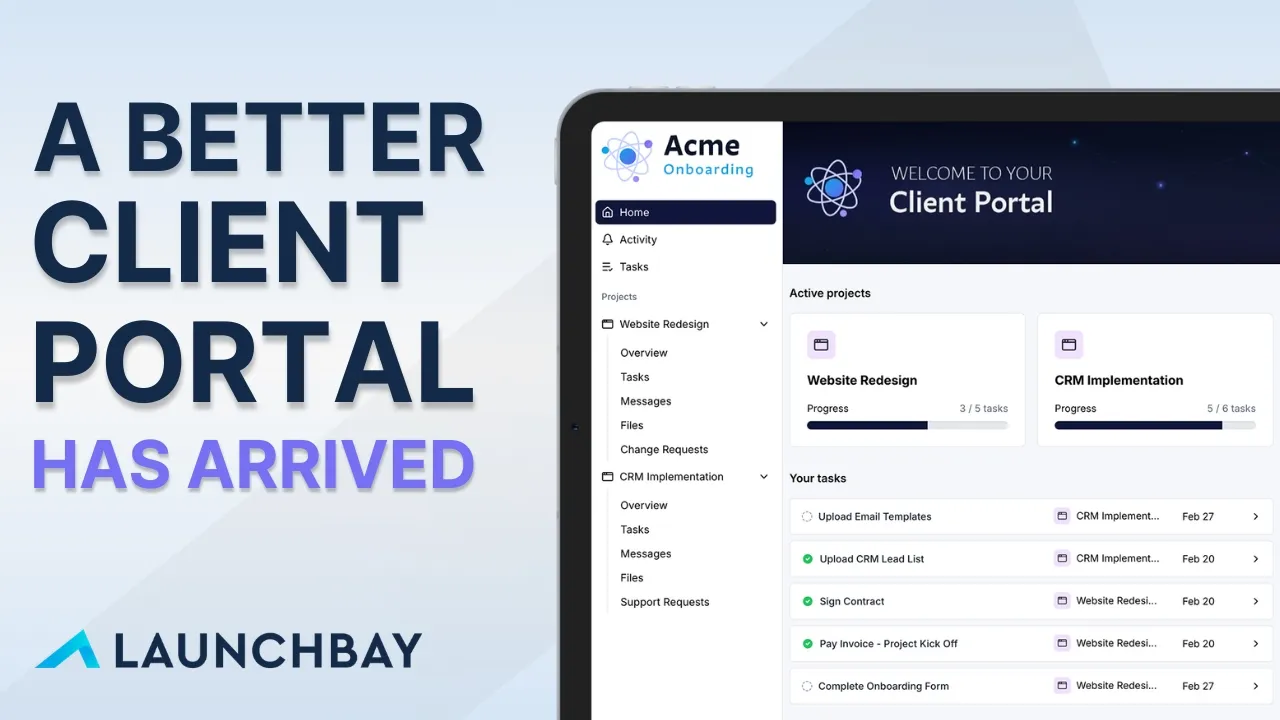


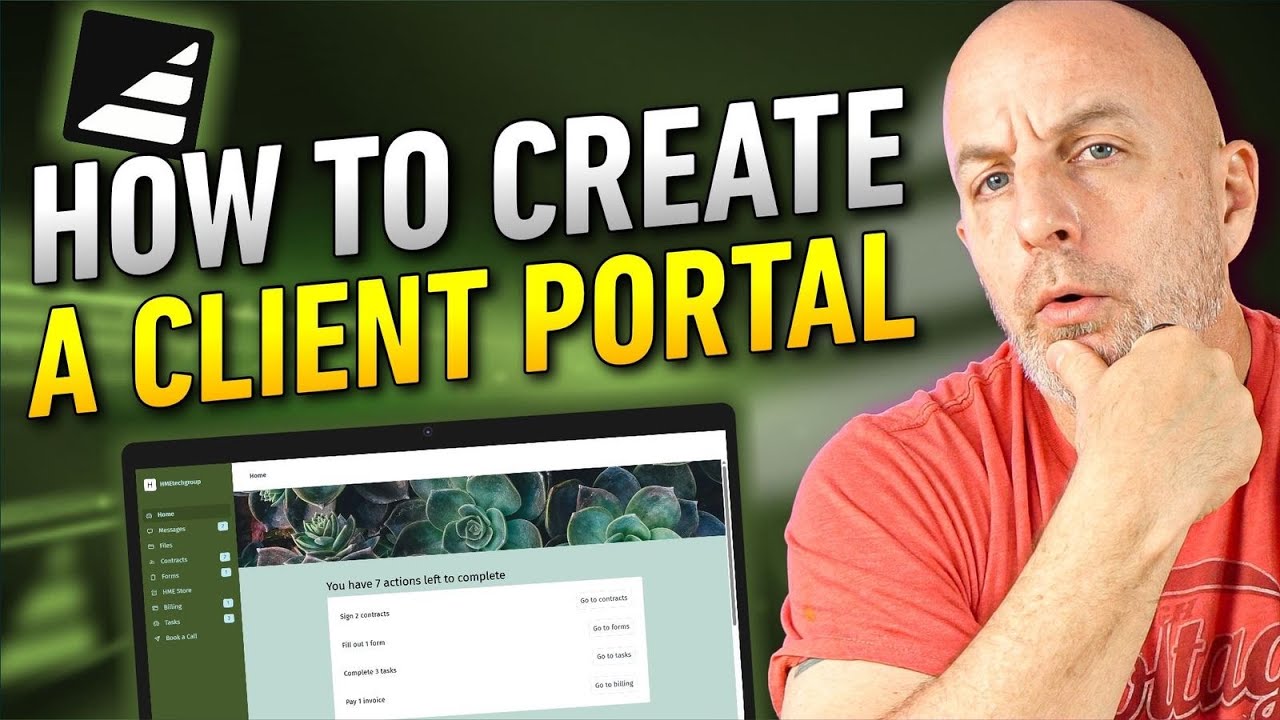
A secure and scalable client portal requires granular access controls, customizable workflows, and integrated tools for communication, file sharing, contracts, billing, and task management; platforms like Assembly (formerly Copilot) provide these capabilities through an app-based architecture that allows businesses to create personalized client experiences while maintaining centralized control and security.
Secure Client Portals with Assembly: Configure with Ease
Added:Understanding the core purpose and business utility of client portals (e.g., secure file sharing, messaging, and collaborative workspaces).
Basic knowledge of web security concepts, including user authentication, role-based access control, and data encryption.
Familiarity with the general administration and configuration logic of SaaS (Software as a Service) dashboards.
Fundamental concepts of client relationship management (CRM) and standard client onboarding workflows.
Integrating the Assembly portal with external business systems (such as CRMs, payment processors, and project management tools) using APIs and webhooks.
Configuring custom domains, SSL certificates, and white-label branding to establish a cohesive brand identity for clients.
Implementing data privacy and compliance frameworks (such as GDPR, HIPAA, or SOC 2) to audit and secure client data storage.
Analyzing client portal engagement metrics and feedback to iteratively optimize the user experience (UX) and interface design.
3.1K views0likes58:17Original Release: 2025-03-04
if we want to build a sustainable business we need to deliver an exceptional experience and one way we can do that is through custom client portals one seamless organized space where we can manage all of our project communication resources and tasks now if you've been following this channel for a while you know we're big fans of notion over here I think it's an incredibly powerful tool you can use to build your entire operating system but we need to talk about the elephant in the room yeah we see you buddy right now notion doesn't offer granular database permissions this means that you can't have one single Master task database and use that to share information with all of your different clients securely especially if they need the ability to upload their own data into their portal now you can build a secure portal with notion I've created a number of videos and templates showing you how you can do this but it does require a little bit more manual work and having worked with a number of growing teams now as a business process consultant it's clear to see that it's not always the most viable or efficient solution a tool should work for you not the other way around that's where today's sponsor co-pilot comes in co-pilot is an easyto ous all-in-one client management solution that directly solves Notions biggest challenge offering a secure your branded and scalable client portal solution perfect for businesses that need more control over client access and interactions if you love having your entire system in notion that is amazing but if you are running into some of these frustrations co-pilot might be a better fit for you we're going to start with a quick overview of co-pilot so you can see what it's capable of but then we're going to go step by step and build out an entire client management system together so by the end of this video you'll be all set up and ready to launch today when you first log into co-pilot you'll see your sidebar navigation on the left and here's what's great you can manage all of your clients directly from here click on your CRM to create a company and then you can add all of the clients or individuals associated with that company now not only is this helpful for organization but it also gives you more control when sending messages sharing files assign in fors or set in sidebar permissions you can do all of this at either company level or client level click into any company or client to see everything related to them messages files contracts it's all here this is an internal CRM so only you and your team can access it and even then you can control which team members have access to which clients the notification tab underneath provides a singular typ timeline of all activity within your company and under that we have automations allowing you to set out simple two-step automations within your co-pilot account now this might seem very basic but you can also connect with zappier make or make use of web hooks if you're comfortable with more advanced automations as well speaking of tools if we look at this middle section in our navigation we'll see apps apps are essentially the Builder blocks that make up your client portal experience by default co-pilot have created apps in here that most of us will need to deliver a great client experience but we can always take this a step further by integrating our own tools as additional apps and the best part is that granular permissions apply to apps too you can decide which clients have access to which apps this means that every client gets a customized experience and you keep everything centralized in one place this is where co-pilot really stands out with granular permissions automations and full customization options you have the flexibility to build a client portal that works exactly as you need it to now if you've made it this far and you're thinking yes this is exactly what I've been looking for then I invite you to take a moment grab your favorite drink do a big old death stretch and click the link in the description to sign sign up for a free 14-day trial because now what we're going to do is build this out from scratch together so that by the end of this video you could be all set up and ready to launch today now most people on this channel are not business process Consultants but a lot of you are website designers and most of us are service providers in some capacity so I'm going to set this up as a website design agency so that I can make it as relevant as possible and as a bonus everything that I use to build out this client portal so everything from my brand assessment to my web design contract and the various messages I sent I've included those all in a co-pilot starter kit that you can access in the description just to help you execute this with as much ease as possible okay let's get started to begin we're going to go to co-pilot and start a trial we can then create our account by signing in with Google or our work email so I'm going to choose work email we can then follow the guided on boarding sequence answering each question as we go when you first log in you'll see your sidebar navigation on the left on the right you'll see a welcome message you're onboard in steps and what's great here is that just by completing these steps you're going to receive $100 Credit Now underneath that you'll see that you do get some workspace analytics once you've added 10 clients and then scroll rolling down you also have access to a number of resources now before we go ahead and create a test client we're just going to select settings in our sidebar and make sure that our workspace is set up correctly at the top we have our personal profile settings you can add an image if you like you can adjust your notification preferences and then under workspace settings we have this General Tab and if we go through this we've got our company name country and region and then we have our portal set settings so here you can select whether you want to send clients email notifications in an Uninvited status meaning you've added them into your CRM but you haven't invited them into the portal you still want to be able to send them an invoice contract Sher file Etc so I'm going to turn this on allow client users to directly sign up so on your portal page you can either have it so only current clients that you have added into your system can log in or you can allow Cent cents to create an account for themselves now I'm going to turn this on and we'll see why later in the video we then have some options for enabling companies and the default channels for clients with companies clients is kind of the individuals within the company so you can choose if you add this on and then your CRM will be broken down into companies and then clients see which tab you want to show first I'm going to select company channels and I'll show you what that looks like like in a second and then whether you want to allow client users to invite team members you could toggle this on or off I'm just going to keep it as it is just now whenever you make a change make sure you select update in the top right hand corner scrolling down you can choose whether you want to allow sign in through Google so I've marked this as on and then we have some more authentication steps if you want to take further steps to protect the security of you and your clients and their accounts and then we can add our Google analytics I'm not going to go through that step in today's video but you could add your ID in here and track those metrics under domains you'll see here I've got my co-pilot domain but I can also add my own custom domain so here you would just add in your main domain URL select your registar because that's going to give you instructions on how to do this and then you can choose what you want your subdomain to be so I think mine's is Portal business op. now I'm not going to walk through that in a lot of detail in today's video but if you want me to create a separate one let me know in the comments and I'll go ahead and do that then under team as you can see with the advanced plan you can add team members so I'm going to select invite user and we'll add our team member in we'll call her Anna apprentice and if we look at roll there's this little information tab that shows you the difference between an admin roll where they have access to pretty much everything or if they have a staff role which means that they cannot see any clients unless we've assigned them so I'm going to change this to staff here select invite right now she has full access if we click on these three dots when we have an advanced plan we could change client access to limited now I'm going to show you what that looks like in my official co-pilot account just so you've got an idea see here I'm in my co-pilot account and here I can click on Anna change client access and change this to limited and then I could specify the clients or companies that Anna has access to then I would just hit save and we'll go back on over to our trial site then if we select payout account we can then connect our bank to ensure we can get paid now one thing to note here is the currency of your bank account will be used for billing clients so for me I typically charge in US dollar but when I'm connect to my bank and co-pilot it means that I have to charge in British Pounds not too big a deal the client can pay in whatever their native currency this connects through stripe but that's just something to take note of especially if you're like me and you work with multiple currencies then if we select API again this is an advanced feature but if you're comfortable using API keys and web hooks that is Poss possible with co-pilot and then plans is payment plans now I've got a whole section on this at the end so we're going to skip over this for now I'll leave a timestamp in the description if you want to access that first now that we're back in the main dashboard we're going to select customization and this is where we can brand our portal so under brand name this doesn't have to be our legal business name it's also the name that appears at the top of the portal mine is quite long so I'm going to change this to just a design portal we can then upload our image assets what's really nice is co-pilot have included the image Dimensions so if you're using something like canva you can just input those in and ensure it's the right size so I'm going to upload my Square icon to begin then I'll upload my logo this Square login image is what you see when you go to sign into the portal and you'll see here you can always crop it if needed and I'll just add my social sharing image in as well scrolling down I'll add my brand color so I've made made my sidebar background this sort of beige off white color my text is off black and then I have this sort of tan color for my accent for fonts I'm going to change this to manro so I'll just search for M there we go and then for metadata this is if we want our portal to be surfaced in search changing results so I'll just add in my title and description there and then if we scroll down you can always enable client branding so if they want to upload their own logo and brand name and make the portal feel their own you can select this on I'm going to keep it off for now and as you see at the bottom here if you want a white label solution you can achieve that with co-pilot's Advanced payment plan so we'll select update confirm and once everything looks good we can start building out our CRM we are now in our company CRM and because we have enable companies turned on we have two different tabs views so this first one we've got a list of all of our companies and when they were created and then under clients we have a list of all the individuals that belong to those companies their current status and when they were added into our system and once again this is not only helpful for organization purposes but it becomes useful when we're sending messages or sharing files we can distinguish whether we want to send a message to only Jane do or if we want to send a message to the entire company at Rocket rides it becomes a sort of filter and we can add more of those in our CRM by adding in custom properties so if we click on Jane do just now you'll see this brings up all of the messages files contracts forms and invoices associated with Jane on the right we can see her user details so we've got her image her name email address when she joined how much she has spent so so lifetime value her last login and we have this property section a payment information if she's got payments methods on file and then any active subscriptions now these are collapsible toggles we want to pay attention to this properties section right now we only have company here but we can always add additional properties in as well and these again become useful when we want to set granular permissions so I'm going to go ahead and add a few different custom properties because this is a website design company I might want to access their website URL login and password for easy reference so for URL I'm just going to select this property call this website and that has added that property in and I'm going to add another one this time I'm going to select text and we'll call this login and then another one again using text we'll call this password and hit save now this is more for tracking important information and making it really easy for me to access their website when I need to but thinking about those granular permissions I'm going to use tags for those properties so this is an option at the bottom here and the first one I'm going to do is stage so what stage they're at in their customer Journey I'll hit save and then all I have to do is add some different tags in so the first one I'm going to add is community and hit create now if you want to change the colors or the labels of any of these all you have to do is click the three dots and you've got a few colors to choose from you can change the label or delete any that you don't need I'll add a few more in so now I have Community lead onboarding active offboarding and past client I'm also going to add another to tag the service that or services that this client has signed up for and here I have onepage website custom website Commerce website and then maintenance which is an ongoing subscription now I might want to add a couple of others such as Tex stack the other one I like to add is lead Source not so much for filtering but just for being able to track where leads are coming from or offer incentives to pay it forward now I have all my custom properties set up and as we go through this build you'll see where those come into play when it comes to set in permissions so I'm going to come back out of that for now now we're going to go ahead and set up our first test client we have some examples here but we can't log into those accounts to experience the client portal so by adding a test client we could see exactly what they're experiencing to do that we'll hit create and you'll see here you can create a company or a client we're going to create a company I'll call this last minute supplies and then under clients I'm going to select to create a new client so we've got just in case here and I'll hit save and then select create create there's two ways that we can invite Justin to our portal we can either share the invite link if we copy this and paste it in a new window this is what Justin is going to see and he could set a password and activate an account this way or we can send an email invitation if we're not quite ready to invite Justin in yet we can always close this out and if we go to clients we'll see that Justin is in here but he's not invited to change this at any time we would click on the three dots here invite client and you'll see here it brings up this popup again so this time we will send the email invitation and this is what Justin is going to see all he has to do is click accept invite and again he'll be prompted to set a password and activate his account so we'll select activate Justin is now in our client portal that we've branded out for him there's this basic welcome message that he'll see and we can customize this a little bit later on and then he has access to all of these different apps that deid so we've got messages files contracts forms filling and our help desk if Justin clicks on settings he'll also be able to go through and customize his account add his team if we've set that up for him to do so if not he's just going to be able to view his team and he can also set a payment method as well now if we look at the internal side of our CRM we can now see that Justin is now an active client in our portal now this is how you manually add clients but you can also import clients in bulk via a CSV file to do that you would export a CSV from your current CRM whether it's notion air table wherever and then under this create button under the drop- down you would select import and it will ask you to import your data it will aim to map each of the properties you can also manually do that or edit that by clicking in here if you have the direct sign up option turned on you can also click down here copy this invite and it will take people to this sign up page we'll use this method later in the video to offer a free lead magnet and potentially upsell them to paying clients all within our portal for now our CRM is configured so let's move on to app configuration let's start with our default apps and then we'll have some fun customizing our own Edition the messages app offers one inbox for all client Communications you'll see here we have some company threads with our welcome messages but we can always add a new message by clicking on the three dots at the top here and you'll see here we can create a new channel or we can send a direct message now I have sent Justin this message at company level which means any member of that company is going to receive the same welcome message I can click in here here and create a channel just for Justin so I'll select Justin here hit create now I have a message thread one onone with Justin and I could click in here and say hi Justin how's it going hit send now if we log into Justin's account you'll see here has there's one notification next to the messages tab he can now click in and respond directly and we can go back and forth through our messages Channel and here's what's great let's say that I send Justin a message but he isn't signed into to his portal at this time Justin is going to receive that email and instead of having to log into his portal he can respond directly from here so we get to have one inbox for all of our Communications without going in and out of email but we're still meeting our clients where they're at so they can respond through their inbox or within their client portal now let's say we want to send a mass message out to a few of our clients we can click the three dots select Mass direct message and then here we would select who we want to send this message to so we can select all or we can select individual companies again all clients of that company will receive the message or we can select individual clients so I'm going to say select all and maybe the message I write is quick note to say we'll be out of office between these dates feel free to continue sending messages we'll make sure to catch up on our return now if I select send we can see it's gone out to each company and of course the companies and clients can respond accordingly now with all of these apps you will want to customize the settings to do that we're going to locate app setup under preferences select this find the app that we want to customize in this case messages so we'll select edit and here we can customize our messages app we can rename it to something else like chat conversations we can change up the icon you'll see here this is where we can set whether we send email notifications or not if we turn this off then users will have to log in to view message contents so I like to keep this on and then we can also customize a welcome message so you saw that M welcome message that we sent to Justin we can always turn this off or we can customize it further you can also choose who the sender Is Now by default it's going to say hello and the person's first name here we can paste in our own message so I've just said we're glad you're here use the navigation on the left for quick and easy access if you have any questions feel free to send a message now if we scroll down this is where it gets really interesting we can set the visibility of this app so we can decide who sees this app in their sidebar right now it's visible to all clients but if I select edit I can customize this either to show it to everyone to show it to no clients so if this was an internal app that's where that would be useful or we could select custom visibility so if we select custom visibility now you'll see that we can say show if client is and we can select specific clients we can also select by company but you'll see here these custom properties that we set up in our CRM now come into play and we can set granular permissions based on set criteria so we could say that stage is or stage includes we can select the tags that apply so if I didn't want to show this option to everyone I could always just customize it to certain criteria and you'll see here you could select multiple tags if you want and you can do includes or does not include you can also add our rules so this is where you can really customize which apps you're showing to which clients for now I'm just going to leave the invisibility to everyone I always want everyone to have access to messaging me hit save and now our messages app is configured and when we're customiz in any application this is where we'd come app set up you'll see here you can hover over you can change the order now this order doesn't change on your sidebar but it does change in your client's portal so now we have messages configured let's move on to files your files app lets you upload folders files and links similar to the messages app you can set these file channels up at either company level or client level if you click the three dots you'll see here you can create a channel so again we might want to create a channel just with Justin here now we have that oneon-one file Channel created and here I can click new to upload a file folder or link if we log in to the portal from Justin's perspective you'll see that he can also now add new file folder or link so again let's use the example of Justin being our copywriter we might want to share a website content planning guide as a free resource with Justin we don't need to send it to the entire company because only Justin is going to be writing the copy so what we can do is add new upload our website copy guide and you'll see that is now added in Justin's File channel when when he logs in he'll be able to see that in his files Channel and he can always download or preview the file now instances where a company share might be relevant include when we're sending off our final deliverables in that instance we might want to upload the entire folder full of their deliverables so to do that we'd click plus new create folder or upload folder this time I'm going to create a folder we'll call this final deliverables and I can can always click in and I can add various resources to keep everything organized now because Justin is part of last minute Supplies company again when he clicks into the company Channel he'll also be able to access those final deliverables now let's say we want to do a mass file share maybe we want to share our updated Services pricing terms and conditions or maybe we want to share a free resource like a source and images guide what we can do is click the three dots select Mass file share choose who we want to send it to in this case I'm just going to select all again and then I would just upload the folder or file once that's uploaded I'm just going to select share and you'll see that has been sent to all companies in my CRM again we would want to come into app setup files select edit and customize our file settings so here we can change the name the icon and then choose our preferences should clients be able to add files delete files or update folders you can select these toggles on or off for visibility I'm going to select edit and instead of visible to everyone I'm going to select custom visibility this time and I'm going to say show if and this time I'm going to say stage does not include Community or lead so I only want to show this to active clients I'll hit save and now my files app is configured if I ever want to delete an app I can always select disable but we're going to keep this one for now and move on to contracts you can send contracts to clients directly within your portal to do this you would just select add new contract and then here you would upload a PDF file to begin now the way I did this was creating a Google doc first and then leaving spaces where I needed to input signatures and dates Etc so this is a template I will rename it to simple website design contract now scrolling down you'll see that this is just a template created for the purposes of this video if it was a contract I would send in with clients in real life I would change things like company name to my specific business name but for the purposes of this it works so you'll see here we've got this is an agreement between company name and the client so here I want to pop in the client's company name and the way I can do that is by coming over to my inputs on the sidebar and we have client inputs my inputs then under Advanced we have these autofill Fields so I want to grab the client's company name and drag it over to this space here and I'll adjust the size just a little bit so it fits and so now that's going to populate with the client's company name now if we scroll down you'll see under project scope our scope of work and deliverables have this blank space and that's because it's going to vary depending on client so again I'd come over to my right I'd scroll all the way down and then under variable inputs I'm going to grab the text we have to give it a label so I'm going to add this as scope of work I'll make it a little bit bigger and I'm going to do the exact same thing for deliverables grab the text drag it in here call it deliverables and add again I'm going to make the a bit bigger now this is variable inputs which means you're going to be prompted to fill this in every time you send a new contract which is a little bit different from having just regular text inputs where you can prepopulate that information if we scroll down a bit further now and when we reach the agreement acceptance again we would want to add the client's company name in here make it a little bit smaller to fit the line and then at the bottom we would add add our inputs in again so for the client their name I'm going to grab their full name here I'll make this a bit longer we want to grab their company name we'll go to date under client inputs and we'll add the in here so they can add the date in and then for Signature we want to go to client inputs and grab the signature block and we'll add that in here and this is where they're going to be able to sign this document now for our of things we want to do the same thing for our name we'll select text here I would add my actual name for company I'd do the same I'd grab the text under my inputs and add it in here do at Choy farbs k for now just so there's a variance and then for date I'm going to go to variable inputs and grab the date block and select this in here call it date because the date will change depending on who this is being sent to and when and then for signature again I'm going to come up to my inputs go to Signature add that in here you'll see I can add my name to create the signature and you could say I agree to be legally Bound by this document I would add my signature in and then hit create template now when it's time to share this contract with a client I would just click on the three dots hit share select who I'm sharing this with in this case Justin I would then add in the variable details so the scope of work and then I would add the deliverables here and then I would select SCT the date to send this contract and if I hit send contract it's now sent we can now see we are waiting for submission from Justin if we log into Justin's portal we'll see under contracts he has that notification he will also receive an email and now he can review this contract so he can go through this contract before signing it you'll see it's now populated with last minute supplies we haven't added any details I just added add scope of work and deliverables here but those would add in here and then if we scroll down you'll see we've got all of that key information and all Justin has to do is add in today's date and signature so he can select start signing add a date so we'll insert that and then he will add his name agree to be legally Bound by this document hit insert finish and send once it's completed Justin can view this in here and he can always click to download it for his files as well on our side you'll see we've got a notification now to say that a contract has been signed we've got a timeline of that information and we can also download the contract if we go to our contracts app you'll see we have one submission in request here and we can see that Justin has signed it and when it was sent and we can reuse this contract for other people now so we can hit share and send it to another client and one thing to know is I used variable input so if we click on this and we edit the template every time it's going to ask us for the scope of work all of the deliverables I could set this up as a standardized template with all of that information prepopulated and where that comes in handy is if we were using automations so let's say every time we change the stage in our CRM it automatically sends them a contract to sign and that way we wouldn't be required to input any information it's just going to automatically send to the client as always we would want to come into app set app go to contracts select edit and here you can choose if you want to send email notifications with the PDF attachments I would recommend especially because it's a contract and again I'm going to come down to visibility select edit and I'm going to say custom visibility stage does not include and here I'm going to say community so we do want to be able to send it to leads before they sign on but I don't want to send it to my community before I have qualified that person as a lead so I'm going to hit save and now contracts is only going to be shown to anyone whose stage is basically lead our onwards forms are helpful for collecting client data most of us are using forums in some capacity in our business we've got an example intake form if I click on the three dots here I can view the details John do has completed this if I click in you'll see that he has added all of his answers to this intake form we could see if we're waiting for responses from anyone we're waiting for a response from Jane do if we need to cancel that request we can just hit cancel it will ask if we're sure we can select delete and she will no longer see that pending Farm request in her client portal there's a few ways we can use Farms we could do intakes or inquiry forms we can set up brand assessments customer surveys or testimonial forms so we're going to go ahead and build an inquiry farm from scratch together so you can see exactly how it works to do this we'll click add new form we'll give it a title so I'm going to call this project inquiry form we can add a description if we want I'm going to skip this for now and then under form visibility I could choose if all clients see the form or if clients only see it when I send it to them for an inquiry form I'm going to select clients can only see it when I send it to them an example where I'd want all clients to see the form is if I was doing a survey or if I was creating that testimonial form then I'd want all clients to have access to it for now I am just going to select this option and then we're going to start building out our form to do that we're going to click this big plus button and you'll see you have a number of options to choose from we're going to start with a title card I've just added a title and a description and then I'm going to go ahead and add in my questions so click the plus icon Again full name and here you can see if it's required or not we're going to need email will be required too we'll add current website so let's make this a short answer now this one isn't required because they might not have a website right now team size as single select and here we can add our choices so we'll do it's just me and we'll just assume we're working for small businesses so we'll keep it at that select required and then we'll do a long answer for briefly describing your business and I've added a multi select asking if leads know which design experience they're interested in and they could choose more than one option here and then we'll just add a few more questions so I've got what do you hope to achieve with your new website do you have a deadline for your project and any additional comments and questions if I want to preview this I can click this toggle at the top for preview and you'll see I've got a full preview of the farm and the little asteris symbolized es the required questions here I can then hit create and now if I go to Farms I'll see this is my custom project inquiry form and once again to send it to any lead I would click the three dots share form and I can either share the farm link with a specific clients or I could select all clients if I was send in a survey I would select all clients here for now I'm going to stick with my project inquiry and we'll move on to billing billing is where you can send invoices streamline payments and automate recurring Revenue here it's broken down into products invoices and subscriptions to create a product you just click on this button here we can give it a name I'm going to call this onepage website design we can add a description and an image we can also set a price I'm going to select £2500 I could select if it's one time or if it's recurring if it was recurring I can also select the billing frequency if you're setting up subscription plans this is a great way to do it I'm going to select one time and what's nice about this is let's say you offer tiers for example a really simple one-page website for a m and pop business is a little bit different from a larger organization you can select multiple prices here and just add it in or if you offer a payment plan you could select one as recur and a payment plan for onetime purchase then under invoices this is where you can send an invoice so you would create an invoice you would choose who you were sending it to and again you could choose company level or client so I could send this to last minute supplies when I go to items I would select the items it would be onepage website and you'll see here I've got the price again I can add a new price if it's specific to this client or company hit save and you can see here I can add multiple items I can add tax and then under payment we could choose whether we automatically charge the client if they have a payment method on a file or we can notify the client to pay manually I always prefer this option and I usually do due after 7 days then under manage payment preferences I can decide who pays the fee on the credit cards now if you are selecting client here make sure that you include that in your contract so that it's not a nasty surprise for them I usually just cover it in my fees I'll hit save I can add a memo here I can upload any attachments and I can always preview this before sending the invo so this is what it's going to look like on checkout this is what it will look like on the invite and this is what it's going to look like when Justin receives that email and he can just click to pay the invite now because I'm working in a trial account I have not connected my payout account if I hop on over to my official portal I've selected the recipient as this IG cfk and then I'm just going to select this test product that I've set up as a pound and then underneath that we can automatically charge the client because she just so happened to upload her payment method again we're going to select this option change it to 7 Days make sure that it is set to us and I'm just going to go ahead and hit send so again this is what the invoice is going to look like when received through email I can select pay invoice now when cfk comes into her portal she'll see that she has this open invoice she can select pay and pay the invoice once that's completed you'll see this paid status now you'll also notice that I have this recurring one set up as a test and again it just shows this little recurrence symbol to let you know that this is an ongoing subscription and if I click in you'll see here it's a test subscription and it's build monthly so for subscriptions it works the same way we can go into products create a product this time we'll do monthly maintenance add in a description and an image for now we'll say this is 500 but this time it's recurring monthly I'll hit create product is now created again I could create tiers by adding additional prices for now we're going to go to subscript options create subscription select who we want to set this up for so we'll do last minute supplies under items you'll see here I can add a new item but I've already set it up as monthly maintenance so it's going to add all that information in for me I can hit save and then under billing schedule you have some flexibility on the start and the end date I'm going to select to notify the client change this to 7 days and I can again preview it and it works the same way they would be sent the invoice and they could just pay that and their subscription would be activated the client can then download their invoice or their receipt now as with all of these apps we would want to go to app setup select edit and make sure we're happy with our settings I'm going to change this out so it's only visible to anyone that is not a Community member in other words active leads and clients the final default app that we're going to look at is help desk so this is a builtin support center for your clients you'll see here you can add articles and this works a lot like a blog post you would give the article a title you can add tags and then it's a case of just typing out your article if we select forward slash we get our commands so here you can format your text upload files embed files or link out to different places I've just added an example article and I've embedded a YouTube video we do have some links in here as well so I would just hit create and now that article appears in here a lot like a built-in blog if Justin decides to go to our help desk he'll be able to click in and he can see that article and all the tags down the side if he Clicks in he'll be able to view that from here now I'm actually going to turn this one off so to just aable any app you would go to app setup scroll down to the application so in this case help desk select edit and here I'm going to select disable now that we have all of our core apps configured it's time to take things a step further by adding in a few of our own custom applications so if we go to app setup we'll select addin app scroll down and the first app that I want to add is this tasks app that allows me to assign tasks to clients and my team so we'll select that we'll select install we'll change our sidebar icon so maybe I select this list option and then under visibility I'm going to select edit and this one I'm going to do custom visibility and here we'll do stage does not include Community lead or pass client so essentially I just want it to be for active clients we'll hit save and now we can see we have tasks under our apps this is going to help us keep projects structured by allowing us to create an assigned task to team members clients or entire companies so to begin we're going to hit create task at the top here we'll give a task a name so let's say it is uh complete brand assessment we can add the details in here so this is a to-do item I'm going to assign this to last minute Supply so the whole company and then due dat I'm going to set for Monday I'll hit create now you'll see here no tasks are found that's because at the top we're under the my tasks tab we've got my tasks my team's tasks client tasks which is where we are seeing that complete brand assessment and then a view of all tasks we can adjust the display on the right either a list view or a board View and we could choose if if we want to show archive tasks or we want to turn that off so here under all tasks or client tasks we're seeing that complete brand assessment when we come in here we can see a full timeline of activity and anybody that has been marked as assigned can leave a comment now I've set this at company level but I'm going to change this to Justin and you'll see here that timeline automatically updates if we come into Justin's portal now he can then see his to-do list he can click in he can add comments change this to in progress and then when it's complete he would just mark it as done that task notification will disappear and on our side we can now see that has been completed now it is a strip down really basic task application but for most of us that is all we need we can set up templates by clicking the three dots selecting manage templates and here you would select create template it works very similarly you would add a name description choose the default status and then hit create and then when you apply it you would just set an assig and a due date the next app that I want to add if I scroll down is this client home app so I'm going to select install we'll call it home we'll change the icon we'll do a little house for this one select edit and for for this one will do does not include Community or lead so again any client does have access to this anyone who's not a client does not we'll select add now if we click on this you'll see what this does is creates a homepage that we can customize for every client by using these autofill fields and at the top we have this widget here a dynamic widget that is going to change depending on the client looking at it it's going to show them any actions that are outstanding for them to complete now we can go ahead and customize this I'm going to start by adding my own Banner going to select this one for now I'll change out the background display actions is this little widget so we can customize it to show what we want to enable I want to show everything here and I want that to be turned on now I'm going to go ahead and customize the page itself so under this displays actions have this call out here I just want to take this out you just do forward slash to bring up your various content blocks that you can add I am going to add a welcome message I've customized this to say this is our support hours Monday to Thursday Friday to Sunday unavailable and then for this I'm going to click on this drop down and remove this roll and then down here I'm going to change this to how to use your portal and I'm not really an emoji girly so I've just kept this this to Simple Text we've got our messages tasks files forms contracts Billings and you'll see here we've got two that we have yet to add so that's coming up next I'm going to hit save changes so if we go to preview mode and we'll view this as Jane do we can see that Jane has one action left to complete this is all customized for Jane here and she can select go to farms and complete that farm if we go to Justin he's completed all his task so nothing is is outstanding at the top here now I mentioned tutorials here so we're going to go to app set up add an app scroll down until I can find YouTube which is client face in here I'll select install I'll call this tutorials choose an icon we'll choose the lightning bolt for now under setup type you can set this up as automatic or manual automatic means all clients see the same content in this case I'm sharing YouTube Tut tutorial videos so it makes sense that all clients would see that but let's say we were connecting figma to share wireframes that would be a good example where we'd want to manually connect that content so we can share individual wireframes with each client under view type you can either connect it as an embed which means you're bringing the content into your portal or you can add a link which is just an external link that appears on the portal but when they click on it it will click out in a new browser tab so I'm going to connect as an embed and here you can see it could be a public URL or iframe for YouTube we're going to share the playlist URL that automatically is added I can select auto size embed and that will resize it again I can adjust the visibility for now I'm happy for everyone to see this so I'm going to select add and again that's going to appear on my sidebar now and just can access this too you can go through the entire playlist and choose the videos he would like to watch now I mentioned that you could create a testimonial form in FS but I use Sanja to collect testimonials so I'm going to add an app and this time I'm going to select embeds and links call it testimonials and I'm happy for all clients to see the same thing I want to connect as an embed come into my sja account hit share on my Squarespace starter kit and select embed un Style just copy the snippet come back to co-pilot I will paste this in I can take a look at the preview here and I can select add coming into Justin's portal to see how this looks I'm very happy with that now we're moving into the more advanced section let's say that I want to share a lead magnet through my portal and encourage direct signups with the aim of converting those signups into active leads one thing I can do is add another application here this time I'm going to select canva I've called this free guide and now I need to embed the code so I'm going to go to canva here we have my lead magnet I'm going to click on share and then see all select embed mark this as embed copy the code or the embed link I'm going to copy the code I'm going to scroll down make sure I'm happy with the preview and then under visibility it is only for those that are either a Community member or a lead hit save now if we go into Justin's portal we'll see that he cannot see this free guide because he is an active client now we have our free guide but I also want to add my services and pricing guide and an option to book an inquiry call so that I can try and upsell those signups so again I'm going to come to app setup add an app and this time I'm going to select Google Drive now I have included this services and pricing guide template for you to use I'm just using Google drive to show you another variation so the first thing we're going to do is make sure our file under share is set to anyone with the link can view then what we're going to do is copy the link link open it up in a new tab click on the three dots and here you can embed the item so again you would just copy the code here paste it in make sure you're happy with how it looks under visibility I'm going to select community and leads and the final app that I'm going to add is a link to book a project inquir call with me so I'm going to go to cal.com that's the platform I use I'm going to paste my inquiry call calendar in here so it's just a simple link and again I'm going to Mark the stage as Community or lead so I'm going to hit save and the next thing I'm going to do is just come into settings and go to General and ensure that I allow client user direct sign up because we want clients to sign up and be able to access this so I'm just going to copy this link and I've just created a really simple landing page and this button links out to my portal sign up now the final step in this process is to add in a couple automations we can set up simple two-step automations in co- pilot to do that you click the automations tab here and then select create a workflow now you'll see here we have some quick start options we're going to start from scratch and for our triggers we're going to say client logs in for the first time and under client creation method we're going to change this to direct sign up so we're specifically looking at anyone who first signs up through our website and then we're going to add an action and that is going to be to update the client and here we want to update the stage and here you can replace with or add I'm going to select add and I'm going to mark it as community so we'll hit publish now and we can see that is now active now we can also add a secondary workflow here that says start from scratch when the client is updated so when the client is then updated to a community member we can then send them a message so here we're going to send a message thank you for signing up you can access your free guide on the sidebar you'll also find our pricing guide and a link to book our inquiry call so I'm going to hit publish and so now we have everything set up to offer our free lead magnet now I could get creative with these automations there's lots of different options so I could actually assign a form to them I could have them marked as lead magnet as the lead Source I could do all kinds of creative stuff this is just one way we can use automations and it will allow us to test our free lead magnet so now we're going to come back to the sign up page I'm going to sign up to select next it's going to ask for my fill name and the company is optional so we'll do Ella and Rising Solutions hit sign up now you'll see here Ella's client portal experience is a little bit different we have her welcome message here her free guide that she can go through our pricing guide a link to book an inquiry call an option to share a testimonial and she can view all of our YouTube tutorials as well that was Ella's portal now if we come back into Justin's portal you'll see it looks quite different because Justin is an active client he does not have the free lead magnet but he does have access to home messages files contracts forms billing tutorials and share a testimonial and this is the magic of co-pilot you can create one portal that delivers a completely unique experience to each individual client or potential client at this point in the video we have a fully functioning client management system with everything that we need to streamline our interactions automate our workflows delegate workout when needed and create this seamless customized experience for our various clients we can do it in this one easy to manage space and with co-pilots built in security measures we can feel confident that our data and client information is secure the final step is adding in your real clients and selecting a co-pilot plan that best suits your needs to select a plan we'll head to settings plans and then check out the options available to us now co-pilot doesn't offer a free tier they do offer a free trial and pricing varies based on team size scalability needs and whether you want a white label solution now whenever I'm deciding if any tool is a good fit for me I like to remind my myself that I have two key priorities in business to sign you clients and to manage clients perfectly ultimately the question that I'm asking is does this tool help me accomplish that if you have a client management solution that is working for you that is amazing but if you've reached this point in the video there's a good chance you're running into some of those friction points and limitations Co pilot might be the secure scalable and customizable client portal solution for you and the free trial is a great way to test this out to help you get started we do have that free co-pilot starter kit you can access that through the link in the description if you have any questions tutorial requests or feedback feel free to leave a comment I'll meet you there i' love to help where I can and thank you again to co-pilot for sponsoring today's video
Up Next
3:44
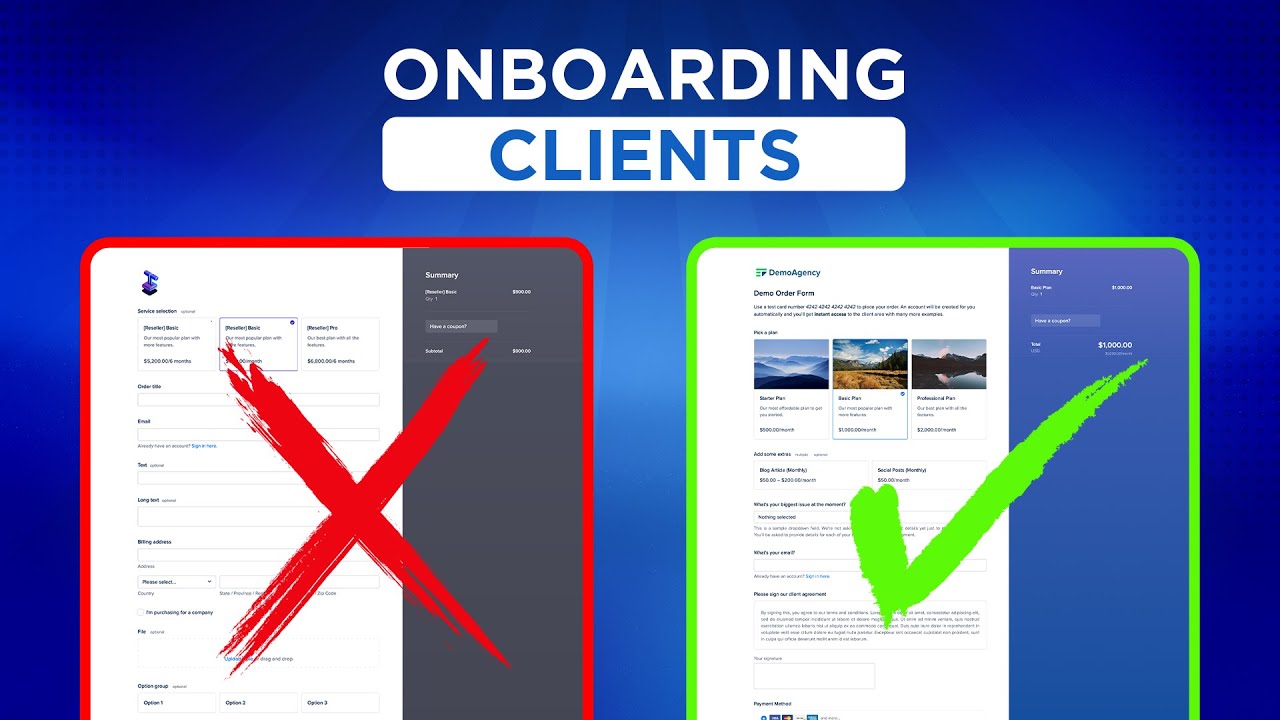
Optimizing Agency Client Onboarding Processes: A Practical Walkthrough
@WayfrontHQ
430 views•2024-03-13

12:54
Triumph of Orthodoxy Icon: Byzantine Art & History Explained
@BenCallan
2.1K views•2024-08-06

9:49
FastAPI vs Flask vs Django: Choosing the Right Python Web Framework
@TechWithTim
302.5K views•2024-05-26

1:42
Game of Thrones Opening Credits: A Cinematic Analysis
@gameofthrones
46.3M views•2011-04-18
Related Study Plans & Knowledge Roadmaps
Structured learning paths in General & Interdisciplinary Studies
general-studies
Elevator Engineering: History, Physics & Cities
01From Hoists to Safety Brakes: The Dawn of Vertical Lift
02Hydraulic vs. Traction: The Engineering Physics of Elevators
03Modern Speed, Safety, and Algorithms
+ 2 more learning modules
12h5 modules
Explore Roadmap
general-studies
Rubber: Material Science, History & Geopolitics
01Origins of Natural Rubber & Mesoamerican History
02The Chemistry of Natural Rubber & Vulcanization
03The Geopolitics of the Rubber Boom & Colonization
+ 2 more learning modules
12h5 modules
Explore Roadmap
general-studies
Containerization: Evolution, Logistics & Trade
01Ancient Trade & Bulk Cargo: Amphorae to Barrels
02The Industrial Revolution & Cardboard Packaging
03The Containerization Revolution: Malcom McLean
+ 2 more learning modules
12h5 modules
Explore Roadmap
general-studies
Textile Tech: Evolution, Labor & Global Impact
01Pre-Industrial Textiles: Handloom & Cottage Industry
02Mechanization: The Spinning Jenny to the Power Loom
03The Factory System & Global Labor Transformation
+ 2 more learning modules
10h5 modules
Explore Roadmap