



















![Guarda y cargar datos en Unity [método fácil] ( Json )](https://i.ytimg.com/vi/n8giZTfEBkg/maxresdefault.jpg)
![[UNITY] Сохранение и загрузка данных в игре. JSON.](https://i.ytimg.com/vi_webp/EWtdnO4d5B0/maxresdefault.webp)


![Unity Mobile Game - Saving - 5 - Android & iOS [C#][Tutorial]](https://i.ytimg.com/vi_webp/LBs6qOgCDOY/maxresdefault.webp)

![A la découverte du nouveau système d'inputs ! [Tutoriel 🇫🇷 Unity/C#]](https://i.ytimg.com/vi/m5ePVtQq-zo/maxresdefault.jpg)
This tutorial provides a comprehensive two-hour overview of Unity engine basics for beginners, covering essential concepts including mouse controls (left for selection, right for panning/menus, middle for zoom), Transform component for position, rotation, and scale manipulation, Inspector panel for viewing and modifying object components, Hierarchy panel for managing scene organization, basic C# scripting with coroutines for timed operations, and core systems like cameras, materials, lighting, and physics. The course emphasizes practical skills such as using keyboard shortcuts (Ctrl+D for duplication, F for focus), understanding game objects and their components, and building foundational knowledge to create interactive game experiences.
Unity 3D Fundamentals: Complete 2-Hour Beginners Guide to Engine Setup and Game Development
Added:Basic understanding of programming logic, such as variables, conditional statements (if/else), and loops.
Familiarity with fundamental Object-Oriented Programming (OOP) concepts like classes, objects, and methods.
Foundational knowledge of 3D mathematics, specifically Cartesian coordinate systems (X, Y, and Z axes) and vector math.
Basic computer literacy, including file management and navigating operating system directories.
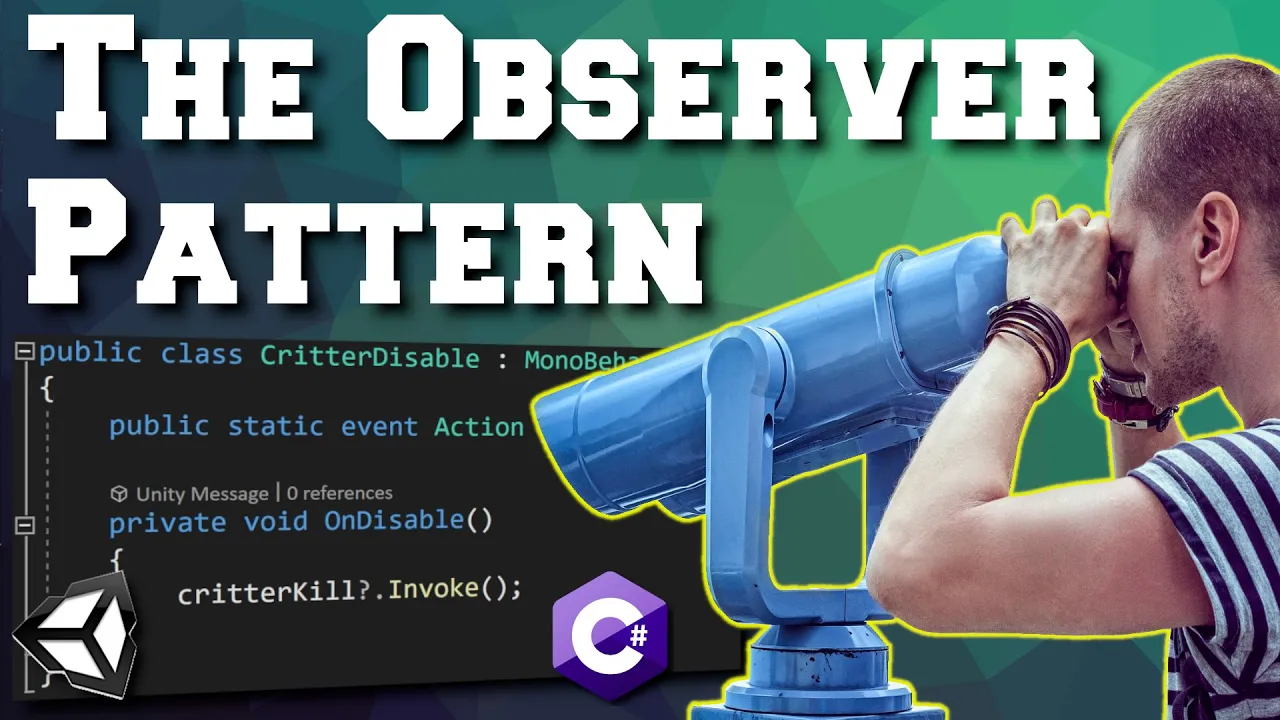
Advanced C# programming in Unity, including the use of ScriptableObjects, delegates, events, and design patterns like Singletons.
Performance optimization techniques, such as utilizing the Unity Profiler, object pooling, and optimizing draw calls.
Creating advanced visual effects using Unity's Universal Render Pipeline (URP), Shader Graph, and post-processing stacks.
Implementing data persistence, including saving and loading game states using JSON serialization or PlayerPrefs.
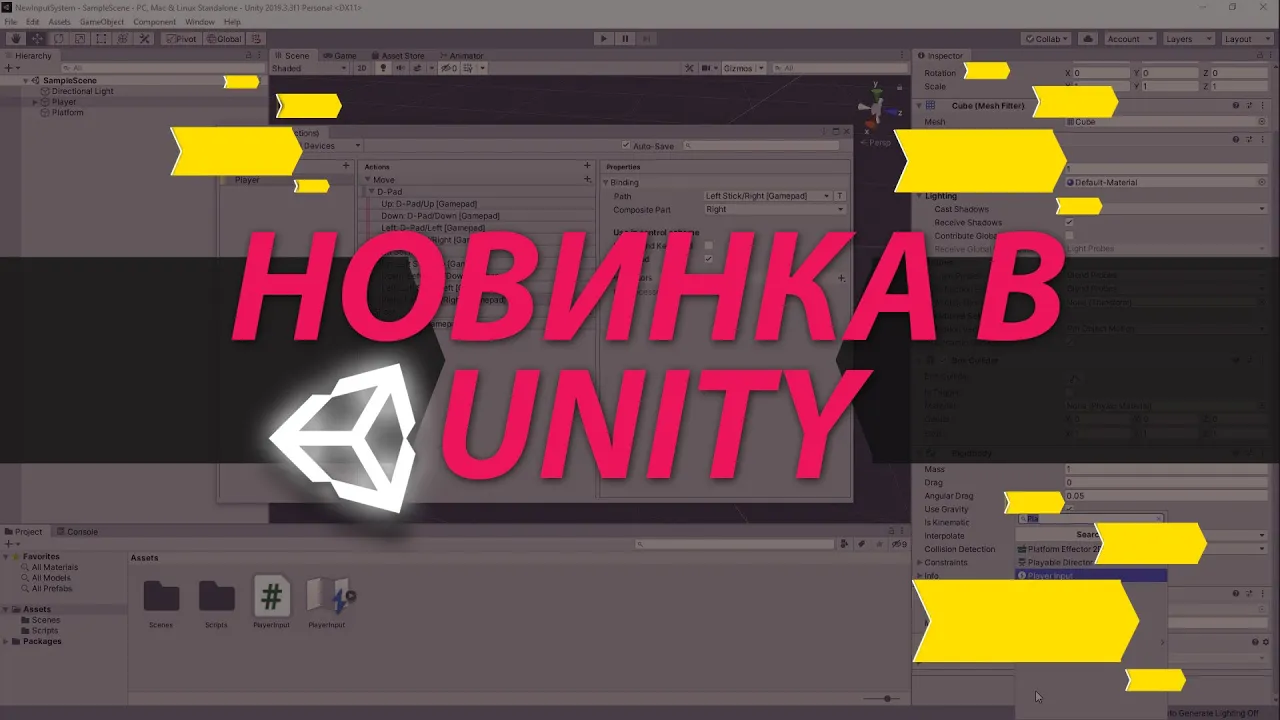
Mastering the New Input System to support multi-platform controls (keyboard, gamepad, and touch screens).
13.5K views382likes1:52:37Original Release: 2019-05-19
hey guys Jimmy Vegas here and welcome to this two-hour overview course for new users to unity on how to use the engine from the basics and the functionality all the way to coding and things like physics as well or condensed into two hours let's learn how the mouse buttons work in unity real simple so as you would expect we have three button sets that we have left middle and right the middle being a scroll wheel this is generally how all Mouse's are so we're able to use the left mouse button to basically select anything we want as it would in pretty much any operating system we have now this is where it gets a little bit interesting because the right mouse button does different things depending on where we are as you can see so if we use the right mouse button within the scene view we were able to pan around you'll notice the little eye icon appears so we're hauling it down and looking around pivoting on the spot however if we're in a different section of the engine we're able to right-click and get the menu so just keep in mind that there are two functions to the right mouse button next thing to take a look at is the middle mouse button if we were to select here in the middle we can scroll zoom in and out if we hold down the middle mouse wheel we can actually get the little hand tool and we're able to move our spot where we are located nice and simple easy as pie remember you can combine certain aspects of the mouse for example we're able to drag and drop as you would expect to see in Windows or in the operating system as well so we can select something here and we can drag it anywhere we want as long as we're holding down the mouse button so to see this in action we could drag this onto this object right here you just have to remember that the mouse can be used in many different ways and here's a good example we can scroll the mouse all the way across the scene and bring it back again to show you how that actually works we could change the rotation of this particular object by holding down the left mouse button and we can continually move the mouse left and you will see them Mouse constantly scroll across the screen from one side to the other and it also works in both directions as can see controlling the mouse is pretty much the same as you would expect in any other engine for example CryEngine unity as we've got right here it's also pretty much the same how it works within a 3d modeling engine so guys I hope that helps you on how to use your mouse within unity and I'm going to show you what different types of objects that we can have within unity by default so if we go to our menu up here game object we're able to select a multitude of objects so let's stick to our 3d objects first considering this is a 3d development engine we can select cube and as you expect this is a simple cube if we go to game object 3d objects and sphere again we have a sphere exactly what we've clicked you're saying Jimmy I know this this is just obvious yes it may be however we can manipulate these objects to be whatever we want them to be so a cube doesn't always have to stay as a cube a cube could be manipulated to be an oblong a rectangle a wall a floor anything at all as long as you rotate it in the right direction and actually change the scale of the object it can be anything you want let's take this sphere for example we can manipulate in the transform the size going upwards and we can change it from being essentially a sphere to a kind of an egg shape so again yes--it's sphere but it is also manipulatable we can change that through whatever we want and if we just rotate simply on the Z we can change this to like that now it looks like a football well at least the American football the sphere would actually look like a soccer ball so let's keep that clear so you can see how different objects can be manipulated within unity and it's not just fears and cubes with a plenty of other objects that we can deal with if we go to a capsule you get a similar sort of feel to what we have with the sphere however the capsule can be manipulated to a different degree you can change this and get a different kind of feel and look we have what could essentially be a coin right there speaking of coins and another type of object that we could is a cylinder and once again we can change how this looks and once again we have a bit of a coin in its original form of one by one by one it could be a silo it could be a railing it could be anything literally anything and if we take a look at what else we've got there's tons of other things to look from it's also worth noting that not every 3d object is actually something we see on screen it's worth keeping in mind something like a wind zone is not something you see on Steam it's only something you see with its effects in a 3d world so there are many different types of objects that we can have and they include things like effects a particle system they include things like lights directional light they include so many different things almost everything you deal with in unity is classed as a game object and they can also be defined as a game object within coding so guys I hope that helps your understanding a little bit more of what game objects actually are and how they can be used in a scene and let's take a look at some of the keyboard shortcuts that we can use in the Unity engine which really help our game development and quicken things rather than going through many menus or selecting different tools so let's say we are in the scene view right here we can use the arrow keys to move our scene around quickly and easily as you would expect the Alt key will zoom in to whatever position we're looking at the down key will zoom out from whatever position we are left would take us left and right would takers right arrow keys they are absolutely essential in the scene view the next handy one that we can take a look at is the F key let's zoom all the way out and let's have this cube selected now let's press the F key we'll be able to focus on whatever object we have selected so if we have the camera selected here press F we'll be able to Center on that back to our cube now another way of looking at this is going to the hierarchy so if we have this selected and let's imagine there are many many more objects within the hierarchy right here we can also press f and it will highlight yellow whatever objects we currently have selected it's just a handy little tool that we can use when we really get into deep development and we have a lot of objects within the scene so another hand we want to use is recreating this object or duplicating and we can do that by making sure we have the object selected right here and then hold ctrl and press D and this will literally create a duplicate of that object and it makes things a lot easier in the long run because rather than use their control-c control-v which you can do in unity control-c control-v you can see we've created duplicate that way however it is much more easier to use the ctrl d function to duplicate any object and you can go on and on and on with this another one obviously what I'm gonna cover it anyway is delete get rid of an object what more can I say now a handy little shortcut that people don't realize is actually in unity rather than have to go to our menus to get an empty game object we can always hold down ctrl hold down shift and press N and that will create an empty game object lenta game objects can be used for absolutely anything some more handy keyboard shortcuts that we can get to grips with are all these tools here if we were to hold a press Q we can get the hand tool so we can pan around nice and easy press W we get the move and we can do whatever we want next if we press E you can see where this is going we've got the rotate so we can rotate an object and whatever else we need to long as it's selected and next we have the R which is yep scale the next one along and you will expect and the last one I'm actually going to deal with at this point is the rect tool and we can press T to do that now there is a different tutorial where we can explore what these are all for however these are just the keyboard shortcuts that you're most likely to use there are many many more but these are the ones you'll use more than anything else when developing in unity hey guys Jimmy Vegas here and let's take a look at the transform component so what exactly is the transform component well in simple terms it's a way of determining and modifying an object position rotation and size every object will have this in unity so if we take this school right here that I have in the scene over here in the inspector panel we can see this thing called transform this is the transform component and as I said it dictates the position the rotation and the scale of any object in unity so ideally every object at least a 3d environment should be based upon x y and z coordinates as we can see dictated by these three lines right here so if we were for example to change the position of this skull on the X which is across as we can see here we could manually type the position right here so let's type 14 and we can see it's moved that way but you'll notice as we press 1 to go to 14 it will automatically move to 1 before we type 4 for 14 another way of changing this is hovering your mouse over the X and you can see highlight blue and then if you hold down the left mouse button you can move the position of the skull quite easily and this applies to every single aspect so Y and Zed as well forwards and backwards and you can always still type no problem so there are the two ways that you can change and it's same for the rotation as well we can change the rotation on X same with the Y and the same with the Z it's as easy as that and finally the size which is the scale so size of scale are the same sort of thing within unity in this case we can change it to 2 by 2 by 2 so keeping everything relative makes the school look how it should do but two times bigger however if we were to change the scale to 4 by 1 by 4 it would look massively distorted so ideally you need to keep the scale relative to the actual size of the object but you can still do the same you can see you have a if we had thing going on there and you can easily reset everything by zeroing everything out back to its original size except the scale because you can see the scale here if we have zero it basically disappears because zero means that there is no size at all resetting to one by one by one and then you have your skull or whatever object you have back to its normal size so it's kind of easy to keep track of the basic attributes of any object using this transform and always remember to see the transform we just click here on an object or we can click it in the scene and it'll usually be this first component within the inspector panel easy as that let's take a look at what the inspector panel is for so with the inspector panel is where all components of objects within unity here in your scene are stored so a component is a way of containing information about a specific object for example how it looks whether you can walk through it or not whether it can animate or even scripts so it has many many components but not all objects will be relative to the same component for example if we have a cube which is just going to be a trigger for example then that will have quite the same components as what this bed that we have in our scene does and the same applies to this direction of light right here so let's start with the directional light and we can see here that we have the default transform component which we already know about hopefully the next one down is a light component so we can add multiple components to one single object even if they're not necessarily relative to that object we would just need to click Add component right here and you would end up with a list like this and we can select the different type of component we're looking for so for example if we wanted our light to contain a Collider in whatever way we could go to physics and select one of the colliders if we wanted to now it would be a little bit silly to attach a Collider to a light no point however we could also go back and if we didn't really know where things were located we could actually search for a specific component for example animation or animator so we can type it here and it will search as you type whatever you're looking for so you'll see this is how a component looks and it's dictated by this little arrow here and we can collapse it up and it just becomes nice and easy to see and as I said earlier each component is going to be different to each object for example if we take this bed there is no component other than a transform attached to this bed the reason being is that this object of bed is an empty game object and it contains two other objects so let's take this mattress right here this specific object contains quite a few components first one if they're being transformed the second one is the mesh and the mesh is just basically to make it look what it is and same with a mesh renderer that's obviously what is it does exactly what it says there it renders the mesh which hence the reason why we have the material right here now the material is a slightly different style of component as we can see because anything that has something attached to it visually should have a material but we could always attach something else here so add component and let's go to physics and let's tick let's go for a box Collider and you can see we've just added that component so adding components is as simple as just doing all these various things and we could add a rigidbody if we wanted to probably not necessary in this case but we can still add that so components are as simple as that and you can also drag-and-drop for example a script onto this object here and that would create its own component alternatively you'll be able to click add component and you can also create a new script and do it that way by adding a component if your inspector panel looks a little bit odd not quite how you would expect it to look in this case it may be that you have accidentally entered debug to get out of that you would just click this menu up here and you can see that we have debug and normal right here if we click on debug you can see it does look a little bit different this contains a little bit more information than what the standard inspector panel does each component however it's not entirely necessary to be in this look so most people would stick to normal so again if it does look a little bit different so you respect a panel it's because you baby in debug mode so remember if you want any information on an object you'll always find it within the inspector panel and within its certain component so quickly reiterating once again if we wanted some effects like a halo or lens flare again he is not really necessary on this mattress but you would be able to add in those specific components and remember components are what make objects work let's take a look at the file menu and build settings so at the file menu as you will expect to find is pretty self-explanatory new scene open scene save scene save scene as new project open projects say projects these are all relatively simple and we should understand them quite simply the two which we're going to take a look at specifically are these two right here the build settings and build and run so if we go to the build settings right here you'll be presented with this little window and this little window may seem daunting and confusing at first however it's not as complicated as you would think so this section at the top scenes in build this represents the scenes within unity and by default scene zero will always be the first scene to load when we add more scenes here they'll be given a specific unique number so the next one will be one then two then three and four and it makes it easy to reference these scenes in coding and you can easily add scenes just by clicking add open scenes now if I click it now it won't do anything because I'm already in this sample scene here and it's already added if we did have another scene we would just click Add open scenes and it would add it and give it its unique number the platform section right here this dictates what platform you are building for by default it's going to be PC Mac and Linux standalone this means it will develop or create an executable file when we build the game if you want to develop for iOS Android whatever you can all you would need to do is click on sweet 2 platform key thing to note here the sooner you switch platform basically if your project becomes too big it may take longer than you would expect if you switch platform right at the beginning he'll do it no time at all it's pretty good like that also as we go down list you'll see Xbox one ps3 to ps4 it's worth noting especially for the PlayStation ones that you would need a specific installation which requires a license as it says it gives you a little bit of animation your Lions does not cover ps4 publishing you need to upgrade however it's up to you whether you want to but generally most people would want to develop for mobile games or PC so it's worth you know remembering that I would say and as always if you started down going one supports PC you would just click on switch platform well it is definitely vital to do it sooner rather than later but you can do it even when you've got a complete massive game you can still do it don't ever worry about that obviously we have the target platform with that specific to the PC if we go to iOS it's not there Android is not there it's just because these two are combined to get the PC Mac and Linux obviously Mac isn't there because I'm not using a Mac I'm using Windows so that's the reason why it's not there architecture pretty self-explanatory everything else as you would expect development build is a key one if you want this to be a development build ie a watermark on the edges to say development build and you would take that so clicking build or build and run first time will prompt you to save your actual game so you can see you can save it there after that you'll be able to just click build or if we go back to our file menu you'll be able to click build and run and it would do it straight away so it's just a case of getting use of this little window but this is the vital one of where you build and run your game so guys I hope that's helped you and help you understand what this build settings is really for it's quite important I would say hey guys Jimmy Vegas here and let's take a look at cameras so what is a camera exactly and how does it work in unity well but simply it is a way of rendering our game and outputting via this camera so basically what the camera sees is also what the player sees and you can swap cameras in and out change them and modify them in many different ways by default you will have the main camera right here and you also get this little camera preview down here so if we were to press play what the camera sees is what we would see right here despite the fact we are looking at this in the scene view now if we go back to our game we can see absolutely nothing however if we press play and we can then change this camera and it works in the same ways pretty much any other object we can move it around our scene bring it closer bring it further away rotate and basically you just need to align your camera and bring it into a position where you can see and you can see what I'm doing here I'm pivoting around the scene and getting into a place where the camera will be relative and can see something now you'll notice at this point nothing is still seen in here cameras can be a little bit tricky sometimes to work with good way of getting around this is if we drag this main camera on to the school right here we can zero out the position of the camera and then pull that camera outwards and upwards it's also worth noting that the camera is sensitive to many different factors ie lighting within unity so if we were to go to window rendering light settings and change the skybox back to something normal we would be able to see exactly what's going on so let's press play and we can see how this camera is now rendering and the reason the mattress has fallen there is just because of gravity but I'm just going to turn that off just for the purposes of this video by removing that component speaking of components the camera component obviously is attached to the camera and this contains many things by default it's pretty standard and pretty decent to deal with the one thing you may want to is the field of view and if we change this field of view here you'll see it change in this camera preview it's kind of like a zooming thing well again it's up to you so let's see how we can swap cameras in and out to create a different effect so if we go good coming up my words out there if we go to game object and then go down to camera it will add a brand new camera to the scene with a brand new camera preview so I want to bring this camera over this way bring it to here and I'm going to leave it there and then I'm going to press play now you'll notice the camera which renders is this one that we've added in so whatever is the latest camera will be the one that renders so I'm going to bring these two cameras next to each other and then I'm going to press play so what we can do is we could turn off this camera by ticking this little box up here and it would automatically switch to the next active camera in this case main camera so you can see just by changing like that we can change the camera angle relatively easily and you can actually change the camera during the game so if we turn this camera off go to our main camera we could rotate our camera in-game however just like any other object when you change it in-game and press the play button to stop it changes back to what it initially should be so multiple cams can be used in one scene and you can use codes to switch between the two basically what we did when we were turning it on and off that was basically all you need to do in the code you can turn the cameras off and you can add animations to cameras you can add effects to cameras like post-processing you can really customize a camera but they are absolutely essential and vital in any game in unity not just 3d games but 2d as well because as I said earlier whatever the camera sees is what is projected and rendered so the player can see it too it basically is a way of feeding onto your screen and like I say you have many many cameras all doing different things so just one quick last example I'm going to change this camera so there and then I'm going to hold control press D to do click once again and then I'm going to bring this camera over here and then just make it look this way so now we have three cameras in our scene there we go so we can turn the cameras on and off modify change do whatever we want see change like that the last thing you're going to talk about is this you may get this error no cameras rendering if all cameras are off and what that essentially means is exactly what it says there are no cameras that can render anything in the scene and if we were to change anything for example the skull you wouldn't see it rendering at all you just wouldn't see anything at all until you turn the camera back on now we can see there the effects have changed even though they would have changed in scene view they won't change in the game view because the camera isn't rendering so we can turn that off and you get the same error so if you ever have this error you just need to make sure that at least one of your cameras is rendering basically is it turned on hey guys Jimmy Vegas here and let's take a look at materials and textures so within unity the way you can actually make an object look like something is by applying a material to it and then applying a texture to that material it's worth pointing out that a texture does not get applied directly to an actual object it has to go through that phase of going to a material and then going to the object but that's not to say that you can't drag and drop a texture onto an object because you can and that is the first way of creating a material so if we take this texture and bring it onto this object you would basically have that texture on this object however if we were to click on that object you would see down here in the inspector panel the material and that material is created in this folder right here so when we apply a texture to an object it automatically creates its own material within this folder right here or any subfolders that you may have textures further down so how do we use this material well let's take a look at what we can and can't do we can either play around with it here in the inspector panel or we can click the material itself and play around with it directly here so the albedo right here this is the main part this is what dictates whatever texture is attached to the material which then feeds onto a game object we can also change the kind of tint of the game objects as well as we can see here by default white means its original color well we can tint it let's say a greenish kind of color by just doing that it's as simple as that so the next thing that you would want to take a look at is the metallic if we move the slider we can see just how much that changes and depending on your game world you would want it to be really metallic or not very metallic at all and same applies for the smoothness these two you can play around with quite a bit to get a different effect the next one down is changing the source so you can either change the albedo alpha or metallic alpha you see you won't be able to see much of a difference at least with a simple object but you would see it more within more quality objects we could say but in simple development that's not going to matter too much I generally like to have it as albedo alpha I feel like that gives me a little more control normal map is something we'll also deal with quite a bit because normal map allows you to have some bumps or it looks like bumps with on the object so it gives it a bit more of a 3d look rather than a flat look that it has right now so to create a normal map you would take your original texture Thank You Malwarebytes and he would hold ctrl and press D to duplicate it so create a new one and up here in the texture type you can change that to a normal map and you can either click create from grayscale or not we'll use both right now just to show you how it looks so let's click on apply and with a we think created right here a normal map as simple as that so if we click on this object now and let's edit this in the inspector panel on the actual object we can drag and drop this normal map right here and you should notice a change see how it looks now it looks completely different but we can also change the intensity of that normal map right here just by moving across easing so you can manually set this number or you can hover your mouse here to change let's set it back to 1 let's click on the normal map again and then let's click on create from grayscale and this will change in real time when we press apply so you can see it gives you a different kind of look and this look definitely gives you more of a feeling of there's actually a bit more depth to this object rather than it just being flat and that is evident just by looking at it right now but you can still apply that change there and the normal map looks a little bit crazy probably not the best thing to do well maybe one isn't quite right and you might want to reduce it slightly so you could have point five just to give it a little bit of texture but you can see how this is applied nicely now all the others won't really matter too much within this because it's not massively important to understand what a lot of the things do here things like height map height map is away essentially another way of making it look three-dimensional rather than the 2d flat kind of thing and things like tiling you can dictate how many times you want it to repeat on each face of the object and generally you can play around with a lot of these settings and you know see what you can come up with things like shader as well you can change the shader for example two particles and go additive and you will see what kind of effect it has shaders are something which are again vital in materials and you can get a lot of custom shaders generally for at least simple game development there is a lot of things that you can play around with to make them look kind of cool and you can see how this looks now we've made it look a little bit like a box nice and simple well again it's all about how you want to create your own game and how you want to deal with your own objects I would recommend playing around with the materials as much as possible but there is another way to create a material we don't necessarily have to drag and drop every time we can right-click create and guess what we have it right there a material and it's created the exact same way so instead of the albedo being already there we would just need to drag and drop the albedo straight onto there and yeah you can just drag the material onto a game object like so studies how materials work that's the flow that you use to go from a texture to a material to a game object and that is basically how we still remember textures aren't applied directly to the object it's always the material that covers the object so guys I hope that helps a little bit when it comes to texturing and materials and we're going to explore the snap settings so what are snaps settings well easiest way to explain is a way of moving objects around the scene in certain movements for example if we would take this cube and just hold our left mouse button and move we can see in the transform over here how it changes so it's a massively intricate kind of affair going on here and we can see the numbers change quite drastically what snap will do is allow you to move this object in any direction in a specified amount so if I set this back to where it should be at zero zero zero I can hold control and then I can move this object on the same axis and you'll see it snap into position so I currently have it set to move at half each time so you'll see this go from 1.5 to 2 so how do we access these snap settings well if we go to edit and down the bottom three numbers you're going to be most concerned with is this move X move Y move Zed now you can set these as very intricate numbers so two decimal places however I would always recommend setting them to something either whole or half so we have for example one by one by one and if we close that we can then move this cube one at a time so you'll see this number change to one there we go and now zero and now what we can do because we've done that is we can snap these two cubes together and it technically makes them look like one object because they're flush against each other so holding control and bring it together there we go we have these two objects together and going back to snap settings I did say you can have it as a whole number or half number I would recommend it's entirely up to you what you want to snap them together as but as I say that's my recommendation you could if you wanted to have a quarter as well so point two five 0.25 0.25 it would then allow you to move the cube after quarter each time so four movements of this way holding ctrl will bring this to 0 so 1 2 3 4 the snap settings are vital in a lot of games because they really help you bring objects flush against each other and kind of eliminate that seamless effect though what you can slightly see through a wall or something because they're not flushed together that is what snap settings are extremely helpful for so I would recommend them to anyone they're easy to use it's just all about holding control and they're moving in any direction as we can see not just on the zed so if we set it back to same as I had it when I started I played five point five point five it's as simple as that and then we can move like so easy so guys I hope snap settings or something that'll be useful for you I hope you use them and if you want to know any more leave a comment below hey guys Jimmy Vegas here and let's talk about the hierarchy so what is the hierarchy exactly well it's a vital piece of unity and essentially it is a way for us to see whatever is in this scene right here in a text format and we're able to use that hierarchy to manipulate control select and change objects real time within our scene or even our game view however when we're in our game view they revert back to normal status when you come back to seem you so let's take a look at what we've got here now every object here has its own individual name some can actually be duplicated for example we now have two objects called cube that's probably not good practice so it is always wise to have things named you know at least uniquely so to change something in hierarchy we could literally right-click and we could change its name just by clicking rename or we could duplicate like so and then that reacts and it's visible in the scene view so something else to note within the hierarchy is something called parent and child and what that is is a way of displaying which objects are coupled together and that's dictated by an arrow so if we wanted to attach all these blocks together we could take all these extra cubes that we've created by holding ctrl and clicking on them in the hierarchy and then we can drag and drop them into this object in the hierarchy and you can see it's selected by the light blue and now we have that arrow that arrow means that all those objects are now a child object of this cube so they all fit together nicely and they can be moved all together just by having this one object in the hierarchy selected so there's a way of also creating objects within the hierarchy clicking right here and you can create absolutely anything you want that you normally would say so you've got a cylinder real easy and again right click and you can still create so like I say the main purpose of the hierarchy is to see visually or textually if that's a word what is in the scene and it helps a lot especially when you're dragging and dropping you know you need to drag for example a texture onto an object you can't quite see it in the scene you can find it in the hierarchy and drag and drop straight there no problem and that is the beauty of how the hierarchy works a lot of people get a little bit confused to how it is in fact some people probably don't use the hierarchy as much as they should but it is a vital piece of unity so guys I hope that's cleared up the hierarchy just a little bit hey guys Jimmy Vegas here and let's take a look at some simple and how we can animate objects in unity so what we really need to do is have a specific tab called the animation tab and we can get this by clicking anywhere in one of these little menus you could have it here if you wanted you could have it here if you want it but I generally like to have it here at the bottom so we click little menu here click on add tab and then click on animation I'll bring this up now in its simplest form animation is incredibly easy to do so we could do something like change the position the rotation the size the Alpha all kinds of different things so let's take this object right here so we need to make sure we have an object selected as it says here no animatable object selected so let's select this one right here it gives us the option to create an animation so let's do so and we can call this absolutely anything we want let's call it my annum and say and you'll be presented with something like this if you're using a very old version of unity the record button right here may already be selected if not you just need to press this right here we're doing this in 60 frames a second and we can see that dictated here by samples this right here is a frame number frame 0 is our very first keyframe so we would want to set the keyframe of what this is right here as it is so let's rotate this constantly so what we could do is let's take a look at the rotation here and let's rotate on the Y so we want to make sure the y axis in its first keyframe is set as 0 and to do that we would go up here to our transform component we could type 1 or 2 or 3 or whatever but then set it back to 0 and you can see that this is now red this means a frame is being set so we have that keyframe set now let's say we want to rotate by 90 degrees by the time we get to the sixtieth frame which is one second so we could go here and type in six zero hit return and it would take us to the sixtieth frame you can see here the white line is now at the sixtieth frame so we could then set this to 90 and what that means is that during the course of zero frames and 60 frames it will rotate 90 degrees and it will animate itself you don't need to set each frame it will do it automatically so it just has to move from this frame to this frame and it knows how to get it there so let's say by the 180th frame hit return we want it to rotate to I don't know 118 so it rotates quickly then slowly and then let's have it rotate really fast so let's say by frame which we have 210 we've rotated to 217 and then let's say another second so 270 and it rotates back to 0 however we would want to set this as three six zero hit return so it's rotated 360 degrees now what should happen if we press the record button it will stop that animation and that animation is now saved so if we go to our project we can see that two files have been created the one is the play icon that is the animation itself the other one is called a controller the controller holds all the animations that you create for one specific object so if we click on the object itself we can see here it has the animator component and the controller is right there and that houses all of these animations so if we bring our camera well we should be able to see it because you can see in our preview right there but what I'm going to do is I'm going to drag this camera onto cube 4 0 it out and then drag the camera back out and then reposition it so we can see the animation in action so let's press play and we should see that animation work no problem awesome so that's how we can control animations but there's different things you can do you can mix and match animations so we've clicked on animation and it's disappeared that's because we're not set on the right object so let's click on our object and now let's change the scale so because we're making modifications in this animation we can click on the record button to go back into edit mode and let's say we want the scale to be 1 by 1 by 1 when we start so let's change to 0 0 0 and then just reset to 1 1 1 remember this is the first keyframe we're setting its original position and we need this to be red to show that it's set so let's go to frame 60 and let's save my frame 60 we want it to be half the size so let's set to 0.5 0.5 and 0.5 now let's go to frame 180 which is this one right here and let's say we want to make it double size so 2 by 2 by 2 and now let's go to frame 210 which is the next frame and you can see all these frames up here are set because all the options here are turned red so let's bring it back to one by one by one and we'll keep it as one that whole time so let's press the record button to save that animation and now when we press play we should see that updated animation awesome so you can see how the animations can work nice and easily and it's not just objects that you can animate you can animate anything you can animate a camera you could animate a light you can animate particle system absolutely anything it just depends what you want to do with an object and you can see how this is reacting it's kind of cool now but it's an endless animation last thing to take a look at is the animation itself we could always on take loot time so as it only plays the once this is handy for things like attacking animation and there we go it's just bite once and let's take a look how we can import assets real easy into unity so the basic idea of importing assets has always been the whole drag-and-drop thing we could literally take anything drag-and-drop into unity now there is one drawback to this you may not be able to do it with certain assets why because they're in a zipped folder now it's worth definitely pointing out that you can not drag and drop anything from as if folder into unity you have to unzip it first so let's go into that folder we have just imported and it is literally a case of now dragging and dropping into our scene it's literally as simple as that to import assets into unity as we can see we've just brought in this axe no problem whatsoever so it's basically saying anything whether it's textures whether it's objects whether it's scripts even you know anything at all you just drag and drop into this section down here in unity and if you've put it in the wrong place by mistake you can always use that old drag and drop so just drag and drop something into its correct folder as simple as that the other way to import assets is through the asset store and I've covered the asset store in different videos and it's something I definitely would recommend exploring and you can see what generally this is not the whole drag-and-drop this is searching for an asset and then clicking import it really is as simple as that so if we search for a skybox for example it is a case of going to that actual asset and then you'll click download or import depending if you bought the asset before but that's how you would import it from the asset store external assets drag and drop down here in your project window easy simple convenient perfect and that's what you need in unity and let's talk about scenes so what exactly is a scene in unity well best way to describe it is what we see here literally in the scene view now we have to remember a scene and the scene view are two separate things however the scene view is where we're able to see what we're building in that scene so the scene itself is dictated by this little icon here and it is classed as an asset so we were able to see any scene just by clicking this asset and you can see already I have this sample scene here and obviously you can save scenes load scenes remember all this kind of thing is in the file menu and obviously new scene would generate a brand new scene you're able to save the scenes and I've said scenes a lot but generally in the older versions of unity you would save your scenes in the default assets window in the newer versions of unity ie 2018 onwards you save them in a specific folder here called scenes the main thing to remember is that it's an asset it's always going to be an asset so even if you create an entire scene it's still going to be an asset think of it as like a prefab a top-level prefab and that contains every sub item obviously here we'd see them in a hierarchy but like I say it's a prefab that contains everything else including your scripts that's the best way of looking at it and you build anything in the scenes whether it's 3d or whether it's 2d so they are vital to development so guys I hope that clears up what exactly a scene is and how we use them and remember click on the subscribe button comma Bell icon as well and you can stay up to date with everything I have on this channel because there is so much content for you guys to learn on let's take a look at the input settings so the two big questions we need to ask are what are the input settings and where are the input settings well if we go to edit and down here we go to project settings or we can click on input so what are these input settings these impulse items are a way of unity understanding what key we are pressing what button we're clicking what our mouse movement is all that kind of thing for example if we go to this one right here fire one we can click it and it gives us a lot of options so the name should really be unique but it doesn't necessarily have to be if there are multiple buttons that you could press more than two for example then you could have the same one duplicated further down as it is here in this case the positive button would be left control key on the keyboard or the mouse zero and mouse zero is actually the left mouse button so if we change and have a look at something like submit we can see here that in this case we just have returned and we just have joystick button zero so return obviously the Enter key that would be submitting something when we come to something like let's go to horizontal we have left right a D so the positive button is right so we want to move right so we go that way and we press the right key or if you're using West you would use the D key so that's the positive button to go right the negative would be a or left and that would take you left so there's no point in having four different directions when you can just use horizontal and vertical same principle applies them up and down S&W so I'm going to collapse all those up now and you can actually add your own if you wanted to for example if we wanted to set up something for the e key we could go up here add one to our size and it would duplicate whatever is last in that list and speaking of whichever one is last it's cancel and we all know cancel escape as simple as that at this point when we've created the new input we will just need to name it for example e key and the positive button would be e we wouldn't need any other positive and we wouldn't need any negative buns because there's gonna be no alternative it's just the iki that's all there is to it things like the dead zone and the sensitivity relate to mouse movement and you can change the type down here to Mouse movement if you wanted to so for example if we go to Mouse X we can see that that is based on the x axis of the mouse so ie moving it this way and the same will apply for the mouse Y now the same will apply from our scroll wheel so like I say you can add your own input settings here to kind of customize your own game it's up to you how you want to deal with it you can have one for the rkt y g j b whatever you know it's entirely up to you and you can do it all here in the input settings and you just have to remember that these input settings are what unity uses to register what you are doing with your hands basically and we're gonna take a look at a couple of options on the toolbar so the toolbar is dictated by pretty much this at the top of the screen now I'm not gonna go into absolutely everything because generally not everything is required for absolute beginners where you will come to understand these naturally as you go through so firstly we have the hand tool and the hand tool is a way of changing what we can see in the scene so we can move things around easily within the scene this isn't the way you select objects within the scene it also doesn't stop you looking around like so you'll notice that as I hold the right mouse button down in a toolbar that icon turns to the eye and then turns back to the hand whenever I deselect the next one along right here is the move tool and this is the way you can select objects within your scene to move around it's nice and easy but it still doesn't stop you with that right click next one here is the rotate tool and yep you guessed it this is how you can quickly and easily rotate objects within unity nice and simple instead of having to change things all the time it's up to you whether you wanna use the keyboard shortcuts but sometimes it's nice and easy to use these things here we have the scale tool and yet you've guessed it you can change the scale of any object now this axe looks pretty crazy because we're changing the scale nice and easily and you can tell when you're in the scale view because you can see these little cubes at the end of the axes simple the next one we have is the wreck tool now I specifically use the wreck tool for you I more than anything not specifically game objects but you can kind of change the shape and everything at least in a 2d environment nice and simply a 3d environment you can only change it on two axis it's a bit difficult to change it on three axis but either way you can still use it and this one is basically just combination of everything together just make things a little bit easier if you're trying to get something very refined you can just use this little one here which is the combination then you have things like if you hover over it also gives you a little you know hints of what you can do but these things aren't 100% necessaries up to how you want to change them you know you've got your global and your local global is always gonna be the world local is always close here you've got your cloud settings your account and you got your layers everything here layers are something but you can deal with in other ways right here in the inspector panel layout you can select your layout whatever you want an account obviously what you want to login with let's talk about lighting so in unity there are many different types of lighting and depending on what scenario or scene you're trained to create different type of lighting may be required the most basic type of lighting that we have or the default one that we have is this direction of light and what directional light does is it will illuminate the entire scene in the given color that you have so you could literally change the color to a kind of red color and you can see the tint here changes it to red changing the rotation as well also changes how the light looks if you have very minimal rotation you're not going to get much light as you can see right here you get a dark eerie kind of look however full light you can see right here that red can be changed to yellow change to blue you've always got back tint in the direction of life as I say this illuminate the entire scene so I'm going to turn that one off and then I'm going to go to game object light and there let's try point light point light illuminates a given area for example if we double click point light here you can see it's surrounded by this yellow sphere this yellow sphere is dictated by the range which can be set right here if we set this to 20 you'll see it doubles in size obviously the higher the range the further this light will reach the intensity is also important in any lighting really because if we have this as high intensity you can see just how it changes here lighting also helps with making the quality of a scene better but getting the right light is always important so it's important to know what type of light you need for your scene so if I set this back to say 2 and then zoom in we can see how this is having an impact on the scene so we move it over here we can see the light moves with wherever we have as long as it's within this range obviously the further away we get the dimmer it would get on any given object and the closer you can see just how much it illuminates this as opposed to everywhere else so the next light that we can take a look at is spotlight spotlight is exactly what it is if we take it out we can see how much of an impact this has on this area we could see it illuminating very slightly here however we can change the range to be quite high and also change the intensity quite high and you can see how it illuminates an actual spot a given area this can also be changed in color like we've done previously so it's up to you what you want to deal with there you can see how it changes and once again the range can be changed spot angle is what makes this a little bit different because you could change how the spot angle is all the way from 1 to 179 so if you want a very refined spot you could have it just so-so with lighting they are the three that you would probably experience more than anything area lighting is something a little different because generally it's something that isn't necessarily used in the same way that we would use the other three this is more for baked lighting and baked lighting is something where we can think of it as a way of predicting what the lighting is going to be we can set that rather than render in real time it's not something I really deal with too much because I prefer the other types of lighting as we can see the last thing I want to touch on is reflection and Light Pro now something like a reflection probe is quite useful because it gives a bit more reflection and depth to a game but it's not something a lot of people do use within unity and I guess you know for good reason it depends on what style of game they want to aim for you can see here changing the intensity is quite drastic lighting is something that people spend you know hours days weeks months perfecting in again before they're even happy because lighting makes or breaks a game sometimes also worth noting that if we have all these lights on at once it's probably not a good idea having too many light sources in a game may slow down your gaming experience especially if they're all done in real time right here if we were to do it baked then that's a little different I'm gonna quickly touch on shadows because you can set shadows obviously things in the normal world do have shadows so you need to have hard or soft shadows in mana game-development it doesn't really matter too much but I generally like to go for soft shadows I feel it just adds a little bit more depth found a hard shadow wood you don't get to see too much of an impact here just because of the amount I have in the scene is not a lot what we should be able to see if I move that up and down we do have shadows roughly around here so I would recommend experimenting with lighting more than anything seen what you can come up with and seeing how different types of light these three that we've discussed mainly how these three different types of light will reflect your scene and how each one of them may make the scene look different so guys I hope that's helped a little bit with lighting I know it can be tough and there is a lot more to it than what I've covered here but once you've got these basics down you can do kind of run with it and really experiment and go mad with it let's take a look at some c-sharp coding so there is this kind of perception in video game development that coding is incredibly difficult and I personally don't think it is because it's all about understanding the logic and flow of the code if you take the time to actually think about what you're coding how you put it together build small then build big it makes so much more sense so to create a script it's as simple as right clicking create and c-sharp script and it's important what we call this script we have to make a note of what we call it just in case we need to change anything in the future I'm gonna call this J V script nice and simple and then we'll open it off in a program called Visual Studio now you can use monodevelop if you have that or any other editing software usually I like to go for Visual Studio because it's simple and straight to the point now remember I said earlier we have to remember the name of the script here we have the public class as jb script the class has to be the exact same as a script name itself it has to be otherwise the script will not work so keeping that in mind we've skipped ahead because we've missed three lines of code up here what are these up here these up here are the namespace this is where we can declare within the script certain items we could call them that the script would need to use for example if we were dealing with AI elements we would need to have using unity engine AI if we were using GUI elements we'd have using unity engine UI it's just a way of the script recognizing where it needs to pull information from for the public class so as I said the public class this is where all of our actions happen where we declare things and where we code so everything we write is usually going to be within this public class these things here are called methods so voice start void update these are methods and this is where all the actions are performed within the script so if you need the script to do something there done within a method these right here are annotations these green lines these aren't lines of code which are executed these are just notes a way of making quick and simple notes of what different things do these the parenthesis here open closed bracket these are used to contain information for example if we need to have an extra variable as it were like Collider for example then we would have it in here which references inside that method speaking of variables we can declare variables after the public class up here or with inside the method it doesn't really matter too much but if you declare a variable inside the method only that method could use it so if we had a variable inside the void start we couldn't use it inside Floyd update we'd have to have it inside the public class curly brackets these are what contained the code itself so methods always start with an open curly bracket and finish with the close curly bracket and like I say all of the bits of code go inside so let's write some code to actually do something what I'm going to do is I'm going to delete the void update method and these two annotations in green because we're not going to use them right now we may as well not have code in there that we're not going to use so let's declare a variable now when declaring a variable it doesn't matter whether you have the word public or not at the beginning I like to have public because I like to see my variables within the inspector panel within the unity engine but we'll see that as we get further on anyway so firstly let's go public and then we need to declare the type of variable so let's start with just a simple game object and a game object can refer to absolutely any object that is in the hierarchy inside the unity engine now this is where we call it something whatever we want so we're going to call this the axe and now we finish the line with a semicolon why do we do that it's a way of the script realizing that that is the end of the line there is no further code after that semicolon so therefore we can then move to the next line of code speaking of the next line of code let's have a different variable let's have a float so public float now you'll probably notice at this point things have started highlighting differently generally you can see if you hover over why they're highlighted they mean different things but as long as they're not Wonder lined like this right here then it's generally good you've done the right thing so what is a float exactly a float is a decimal number it's not a whole number but it can be a whole number so a float can be one it can be one point two it could be one point three we one point four or any number really so I'm going to call this my number semicolon you've probably noticed at this point why some things are capitalized and some aren't well that's just the way the script is used and just the way unity recognizes or rather the code is actually used like this if we were to have this as lowercase G this wouldn't work it has to be an uppercase G so just keep an eye on your capitalization when scripting it is important so next let's have an integer what is an integer we can define that by int an integer is a whole number and it cannot be a decimal number it can only ever be a whole number like I said a float can be a decimal but it also can be a whole number but an integer only a whole number so let's have this called my integer and a semicolon cause we've ended that line and next let's have one more variable and let's have this a true or false possibility so this variable can only have two outcomes as true or false and that is known as a bool so public and let's have bool lowercase B and let's just call this true or false and then semicolon because we've ended it right there now let's create a few lines of code to see how these scripts work nicely so within this avoid star method let's make the axe appear on screen so I'm going to go back to unity and I want to click this axe and I'm going to turn it off so when we press play this axe won't appear but we're going to have this script make it appear as if by magic and to do that we can use something real simple and if you're using a visual studio you'll be able to see that it's kind of predicting what you're going to do and it makes things a lot easier so if we take the axe because that's the one we want to deal with you can see here it's giving you what it thinks you're trying to do which yep that's fine next we need to have dot because we need to do the next action and the next action is going to be to set active so if we type set active you'll see it's done it right there a we can just have it do that nice and simple now the next thing we have to do is inside the curly brackets or not calebrek is the normal brackets the parentheses and we can either give a true or false and then you'll see the little note here is giving saying a bool value remember bool is true or false so we can either set this as true or false within these brackets and what should we do let's have it set active as true simply because it's off and we want to turn it on so close bracket and semicolon remember that is the end of that line of code so we can move on to the next line at this point let's set that float to a random number so my number equals and let's make it equal to one point seven because why not now you'll notice at this point we can't have one point seven semicolon because it's still underlines it says it's wrong in c-sharp we always have to put an F after any decimal number so as it recognizes that it is a decimal number it's just one of the little quirks that you eventually get used to so don't worry if it confuses you right now you just have to remember that yep that's all there is to it next let's set the integer to six so my integer and you'll see it's already predicts it for us equals six semicolon it's as simple as that and finally let's set our bool as true I think my default is probably going to be false but we'll see so true or false you can see it's right there so we can hit return on that and we'll put equals true semicolon and then save the script so whole control press s I'll go to file and save so what now well let's head back into unity we've written the script but how do we actually apply this script to this scene it can be done very very easily I'm going to go to game object and click on create empty just create an empty game object now this script can be attached to this game object nice and easy and you'll see over here we now have this as a component within the object and we can see the four variables that we created that's why we use the word public so we can physically see them right here so the axe says non game object my number and my integer right there and the true or false is dictated by a tick box or a blank box so what we can do now the axe we need to define this axe right there just a case of drag and dropping from the hierarchy that's object over here and there we go so when we press play now the axe will appear my number will go to one point seven my integer will change to six and this will become ticked because that's what we've told the game to do in our script there we go and the axe is right there simple as that so that is the basics of how you can actually code in unity and building small like this and building off from that really makes the difference don't try and start building massive scripts if you've got absolutely no experience with coding whatsoever start small like this build your way up have that goal there'll be more of coding tutorials on my channel there's literally hundreds of toriel's that I have with coding on there and I recommend checking them out because you could learn something new something you didn't know previously we're gonna learn how we can solve errors using the console for c-sharp code so in this scene that I have I've kind of modified the scripts that we created in the last tutorial of this little series and if we click on console we can see these errors right here best thing to do when you start off is just quickly click clear just to make sure you get rid of anything which isn't a persistent error and we can see here this first error that is given us is within this script which is in assets scripts JV script 1010 and it's given us an error code and what it's expecting so we can see here this is the script and we have a couple of different things wrong if you can already see the errors that we have here because there is one two three four errors so if you can see all four now you're a great coder so what we can do is if we double click this right here it will take us to the line of code or rather where it thinks it's falling over so you can see here is highlighted this line of code the reason being is it's having trouble executing this line of code you can see here 10 that's the line and we can see here this why it's referring to 10 it's referring to line number 10 right there and it's like say having trouble executing this line of code so we need to look at this line of code itself we can't see anything wrong with it so then we backtrack to the line previous and we can see here that there is an error it's highlighting the little red there so what's missing here what is missing it's just a semicolon so if we place a semicolon resave head back to unity it will recompile the script quickly and it will give us this error as well so we can see here this error is saying line 20 and once again we can double click and it will take us to where it thinks there's an error and it thinks that's an error realistically yes it is an error although it's a just closed curly bracket there is nothing it's actually relating to that's why it's underlining so this close curly bracket relates to this open once or then too late you click on it it will highlight sing but this one this one closes the class this one opens it so this one has no real purpose so we can delete it and save head back to unity where it will quickly recompile and you'll see yes we have another error this one a little bit longer but we can see that line 14 is where we need to deal with it so rather than double click we could just go to line 14 again we can see here it actually tells us what the problem is so rather fix it itself it tells you what you need to do so you can see here literal of type double can not implicit X cannot be implicitly converted to type float and suffix F to create a literal of this type so if we double click it will take us to that line of code and all we can see I said it in the last little tutorial we did we just need to put that F in there there we go done so let's save that script simple as that head back to unity it will compile and we have nothing console is now clear so when you have errors in your game the console is your best friend it will tell you more than you actually realize because double clicking like I showed you will take you - roughly where the error is you leave to take you to the line where there is an error or it will take you to a line of code it's having trouble executing mainly because of that line or the previous line itself so definitely afraid to use the console and you probably will create errors as you code it's just something that happens you know if you have a massive code you get confused and what not then it's just one of those things now one thing to be careful of here as well if I press play the code itself won't actually do anything because there is one last little thing that we have done wrong so if we click on here you can see this little component says there's something wrong it's not appeared in the console however assaulting doesn't work in game always try looking at your inspector panel where the script is now usually this error is something simple which I did discuss last time so notice that we have JV script as a script name however the class is called JV scripts with the S at the end so that's the reason why the script isn't working doesn't give any errors it doesn't have a problem with the game but that is an error in itself so you just need to be mindful that is why calling the class name is vital to same as the script name so if we get rid of that s resave head back into unity we may need to reapply the script oh no it's already done sorry we don't need to reapply it but there we go it's refreshed itself it's recompiled press play and the script now works so they are the different ways that you can check for errors and how to fix them in unity but definitely always use the console because the console would give you more information than you could ever want so guys I hope that helps with fixing errors within your C shop coding hey guys Jimmy Vegas here and let's take a look at some UI so you eyes also referred to as GUI or HUD hood it could be either of these things any of those things but it's all the same thing so what is it exactly well if we go to game object and then go down here to UI and let's select the first one in the list text it will create two extra game objects as well one being the canvas or one being an event system the event system doesn't really matter too much because you can pretty much create an entire game without ever even touching the event system but it's something that you can get into in more advanced tutorials let's take a look at the canvas first off what is the canvas well it is a way of actually containing all of these UI elements and if we double click the canvas we can see it's dictated by this white box here everything inside of it is visible on the screen anything outside of it will not be visible on the screen at all so to put that into perspective let's take this text here now let's change this text to say this is my text and let's let the rect tool to make it a little bit bigger maybe so we could bring it like that let's make the font size let's say no 30 and font you could change the font if you want to font size a style you could change it to bold if you wanted to italic whatever you've obviously got the usual alignments the wrap you know if you want it to overflow whatever and you've also got the color so generally text is as you would normally expect to change things so we can see this is our text however if we press play now we won't see it on our screen we just see this hmm fair enough so how do we get this on the screen well we can see here we have this little icon here and this is called an anchor we can select certain positions on the screen that we would want items to appear so we've got top left top center top right middle left center middle right you know you've got all them you've also got the stretch ones here something like text won't really matter too much but let's have this set as the bottom right it won't change here but we do need to change everything within the transform so if we select 0 and 0 it will disappear from this screen right here however double-click and we can see it right there we can then use that rect tool to kind of move it into position let's say about there and you can see as I'm doing that there is a blue line across the screen going upwards that's telling us that we are dead center of where we need to be in the screen so if we press play now we should see this is my text in the bottom center of our screen there we are excellent that's what I'm happy to see so it's not just text that you can do that with let's go to game object let's go to UI and let's try a raw image now a raw image we can attach a texture to it now we did say a couple of tutorials ago within this short series that textures aren't applied directly to game objects in the case of raw image that is the one exception because it doesn't actually need to be a material you can affect material but you may as well just attach texture and there you go so let's set this anchoring - I don't top right let's set 0 0 and let's double click on that raw image and we can just move it into position there and if we press play now that should appear at the top as well as this is my text so all aspects of UI are pretty much the same there's not too much difference between them they all work the same kind of way we select something like a button we have the button created let's have this Center already set so 0 0 and we press play there we go the button is right there for us in the middle of the screen so remember this canvas overlays whatever we see on top so if we were to turn the canvas off all of the UI elements would disappear but can't they all reappear a UI element can only exist within the canvas like this as we see it now if we were to move the text out of the canvas it would disappear back in it would reappear so remember something like this has to be inside the canvas so it's up to you what kind of UI elements you want to create but never be afraid to kind of work with things something like a panel if you press play you can see here that the panel will cover the entire screen it literally does look like a panel however we can no longer click that button the reason being is that the order of the canvas all this UI is dictated by its order within the hierarchy so if we bring the panel to the top and press play we can see that everything that we have now can be used so this is clearer because it's not behind the panel and this button is clickable because it's also not behind the panel you just have to keep that in mind finally you can also create different effects with using UI for example if we go to UI and go to raw image we could select stretch right here and then zero out everything in the transform and let's change it to black and we would literally have a complete black screen remember what I said about the order of things if we change the order we would have that button on top simple so like I said UI is remembering the order of things what it could be used for and different ways you can do it you can even animate things you can even animate this black raw image to be a fade screen if you wanted to so understanding UI can be difficult but you just have to kind of persevere with it and experiment and see what kind of things you can create so you can create weird effects at times with UI for example if I turn off that raw image go to our text and press play I'm going to rotate the text on the x-axis and you can see it looks like it's actually shrinking now that's a strange effect that you can have but in reality if we go to our scene view and take a look here we can see that it's not actually shrinking it's actually rotating so that is an effect that you can create simply with UI so guys I hope that's helped a little bit with how UI works how you can create it and what you can do with it if you want to know any more please leave a comment below and we're going to take a look at how we can change a script within a different object than the one it's attached to so linking objects and linking code it's a cool process that can be used specifically for saving and altering things throughout the game world and throughout different scenes so let me quickly turn the canvas off so we can get a clearer view of what we are doing here now I want to go on to this cube right here and this is basically our ground and we have that script that we had attached to the scene a couple of tutorials ago which brings up that axe and whatnot so what I'm going to do is I'm going to attach another script to another object and to do that I want to create another script so how do we do that exactly well let's go to our scripts folder and let's right-click and create another C sharp script and let us call this linked code now the idea of linking is all done via one little word at certain points within the code and that's the word static so I'm going to delete that and delete this and just have void update and what I'm going to do is I'm going to have public and then have the word static and then we'll have this as an integer so int and we'll just call this something simple like linked number semicolon and one thing I always like to do when dealing with static is have the same variable but without the word static and I'll explain why in just second so if we take public int and then just have internal number semicolon they are going to be the same number and we can make them the same by going to the void update method and typing internal number equals linked number semicolon and let's save that script so let's attach that script to a game object within our scene so I'm going to create another game object so empty and I want to just right click and rename a call this linked and then I'm going to attach that script on to it now it's worth noting at this point that we only have one variable visible that's the reason why we have that internal variable so having the word static makes it disappear from here it's still there it's still accessible it just isn't visible here but we still want to see what it is so that's why I have that right there so going back to our JV script what we can do is if we click here change now we're going to use this script to do something else as well and to do that I'm going to have another method I and I have a void update open close bracket doesn't need to be private that's fine generally I like to have things as they are we don't need the word private for void update it's fine Z's and all we're going to do here is we're going to reference that script so we're going to link to that script to change a variable within that so we can type linked code and you can see it's predicted it and then the variable name so dot and then remember what the variable name was it was linked number it has to be the static one so linked number equals and then we'll make it equal to my integer so my integer semicolon and save so now if we head back to unity no lot is going to happen as we see it however when we press play this link is code script should change its number to six so let's check that out there we go so we've just linked one code from one object to another piece of code on another object and it all works real time so if we go to our game object right here if we change the integer to let's say 74 and then go back to our link script you'll see it's linked already it links it every frame that's what date is for it will update every frame to make sure that link is right there and this kind of thing can be so useful in game development it may not be useful in minor game development well when you create a massive game create no static variables to link different things is absolutely necessary and we can see here this is amazing how it can work it literally instant and just to a point let's put it as zero linked back to zero so guys that is how you can link code with game objects using the word static it's a little work but it's so important so I hope that's helped a little bit gives you some ideas on what you can do within your code and let's try and understand time and time scale within unity so what is time scale well unity runs real time and that number that it runs at is classed as one so real time in unity is defined as 1 therefore double time in unity is to find us to halftime unity is defined as 0.5 we can manipulate time scale if we want to but it has different effects on the game depending on what you do also time scale of zero means that unity is frozen however not everything will freeze in unity it just depends if you reference time scale within your game so let's put this to the test and go to create a c-sharp script just to rotate this little green cube right here so I'm going to call it rotate and all I'm going to do is in void update I'm going to have trance form dot rotate and in brackets I'm gonna have this as 0 so rotate zero on the X comma one so I'm going to rotate it on the y axis comma zero comma space dot world now it's a very simple script it literally just that one line of code inside the void update method so I'm gonna save that script and then attach it to this object simple as that now when we press play this will rotate just normally so keep in mind it's rotating based on the current time scale of 1 within unity now this may shock you a little bit what happens at this point but we'll soon see so if we right click and we create another script c-sharp script and let's have this as change time now what we can do here is change unity itself now I'm gonna get rid of this again but I'm gonna have a variable and have it as a float so public float and we'll have unity time scale and I'm going to make it equal to 1 by default and semicolon now what we can do is time dot time scale equals unity time scale semicolon and save so what's gonna happen at this point well when the script runs it will automatically set the time scale as 1 and 1 is the default anyway so we're not going to experience any difference whatsoever however when we do change it things will happen but like I said not everything will have an effect so firstly let's attach that script to a game object so we have it in scene so change time on there and now we have the ability to change it right here so let's press play now this is live linked to the Unity time scale if we were to press 0 nothing is going to happen do you know why I'm hoping you guys do or at least some of you may have cotton done of course we know why so it doesn't matter at this point whatever the UNC time scale is whether it's 1 2 3 4 0 doesn't matter this cube and its rotation are not linked to the time scale so if we go to the rotate what we would need to do is have whatever the number is here multiplied by time dot time scale and save so now we're understanding how we can use time scale to proactively change what's happening in unity so pressing play once again we won't have any change the cube will rotate however if we change this to 0 it will stop that is because the time scale in unity is frozen it's it's literally frozen if we change it to 0.1 it will run it at 1/10 of what it normally would so you can see here changing the time scale is relative to all objects which reference that time scale so when using movement within unity if you ever need to pause the game it's always vital to reference that time scale I cannot stress enough how important time scale is but remember I said earlier 1 is default 2 will be double you can see how it changes we can just go looking crazy if we have 42 speed so it's running currently 42 times normal real time speed and that's why it looks a little bit crazy I guess you could use this for effects if you wanted to again it's all down to time scale how we can create these kind of effects but this sort of thing you could effectively create this and then slow an object right down obviously we're in minor speed there but you can see what kind of effects you can have when dealing the time scale so it's something you should probably get used to especially if you're trying to create a pause menu because a pause menu would mean that the Unity time scale would be zero and that's how you can manipulate it so guys if you all know any more about controlling time within unity and understanding the time scale then please leave a comment below let's understand what colliders are for so a collider is pretty much an object which is basically it stops it going through other objects so if we take this green cube up here for example we could see if we zoom in we actually have a green outline a quite a prominent green outline underneath the orange selection whole line and this green outline is known as the Collider and that is a component right here if we were to untick the box Collider the green line would remain but it'd be a faint green line and all this means is that if we had a character of example we'd be able to pass through this particular object now if we re enable the collider and tich is trigger the same would occur now a trigger on a Collider basically means that we're able to kinda pass through it when we do pass through it's of AIT's a trigger and that's where coding comes in so it's just worth keeping in mind that a trigger is just that so the collider can come in many different forms and if we click on add component and go to physics we could add a mesh Collider we could add a capsule Collider generally it's worth noting that adding a mesh Collider and taking convex may put extra strain on the game itself simply because the mesh Collider will try and attach one face of a Collider which is basically that right there it will try and attach one face of a Collider to every try that is within your object and what is a try exactly well if we go to our axe right here and zoom in now originally this is several objects kind of pieced together but the object itself has a different shape than just cube so for example if we go to add component go to physics down here and click on mesh Collider and then take convex you can see just how this is changing how it looks you can see there's many many different ways of having a Collider on there it's doing it all different kind of ways now that is unpractical with such an object like this there is no point to it so you mate or remove it and add just a simple box Collider it gives the exact same effect just less work for unity to do and as I said there are different types of colliders that you can have and just depending on what type of object it is you would have all of those colliders so colliders are also used for physics as well and physics are kind of important within unity but that's something for another tutorial so whether you're working with a simple object like a cube or whether you're working with a more complex object like this X for example you would have to determine what kind of collider you would want to go for rather than just sticking with a box or rather just sticking with a mesh Collider it's definitely worth looking into which one is going to be the most proactive for your game so colliders simple and what people think and if you want to know any more guys please leave a comment below and let's understand rigidbody and physics so less tutorial we spoke a little bit about how physics and colliders can all mix together to do different things if we take a look at this scene we have right here we just have this floating box that's not really real is it you would expect it to fall down and this is where rigidbody comes into play so if we take that cube right here click on add component click physics and then click on rigidbody it will basically give it real time gravity a little bit of physics going on so you have the obvious settings here your mass gravity whatever and this kind of thing is by default is pretty decent it will serve its purpose when you get into deep developments like really advanced stuff and this is probably gonna be really refined for you would take the time to actually change these things and make sure everything is right well to kind of get the basics down now is all we really need now we've applied this rigid body and if you press play this will just kind of fall and plunk on the floor great that's exactly what we'd expect it to do however if we were let's say to change this on the Z it won't just fall and just kind of stick as it is it will write itself as you would expect it to do with physics so it will just learn like that it'll correct itself like that and that's where the rigid body comes into play and the rigid body can be attached with pretty much anything but it works well with a Collider if we were to turn that Collider off and press play though we've got a rigid body it would just fall through the floor because there is nothing for it to collide with even though gravity is attached to it there's still nothing for it to collide with so that Collider does need to be on so let's take a look at what else we can actually do here if we go to game object 3d object and create a sphere let's try and keep this as real as we will expect I'm now going to delete the cube and then just attach that material on to here and let's attach that rigidbody so this is gonna look a little bit unreal to be honest it's gonna look fake because it's just kind of plunked on the floor it looks like a ball looks like it should bounce so although we've actually got a rigidbody attached and we actually have got some physics going on this is where the rigid body and the collider kind of work together because what we can do is select a specific material so let's select bouncy and you can get this bouncy physics material from the old what they called standard assets you can get them from that on the asset store or you can create your own or you know find them somewhere else so all it would be basically be a case of is we've attached even more physics to this object now and if we press play because the collider has this it should bounce as we would expect to see so it gives it just a little bit more realism you have to be careful about something like this because if we set this to two it's gonna look a little bit silly because it'll bounce and it's not 100% realistic there is it because it's supposed to lose a little bit of pass as it comes down but it's not really so you need to just keep an eye we've set it to one book either way have it higher than probably about 0.5 is a little bit silly because it would give less realism and a lot of people in games want to go for realism but either way that is how the rigid body and the box Collider will all play a part in creating physics for you so guys I hope that helps a little bit more with physics and rigid body because there is a lot more to it but once you have the basics down that understand why these things happen then you can probably learn a lot more on your own and we're going to understand how to use co-routines and what they are in c-sharp coding so firstly let's actually create a new script because co-routines are absolutely important when you want to deal with waiting and time and space within unity and they are well widely used so let's just call this script 2 because why not so within Visual Studio we have to initially create that Co routine so what I would like a co routine to do is basically wait for let's say 10 seconds and then we can do something the reason we can't do that in a normal method here is it just doesn't like it basically it has to be a Co routine and the co routine is always started by I and numerator and we can call this anything we want to literally anything we want so let's call it ball code because we're going to deal with that bouncing ball that we had from the last tutorial and then oppa pose bracket so you got your parentheses and open curly bracket and hit return so initially it will underlined in red reason being is because it's expecting to kind of wait at some point or yield as it were so why don't we do that first off yield and then we want to return a new and then we tell it what we want to do so wait for seconds and then in brackets the amount of time we want to wait for so let's say 10 seconds close bracket semicolon so after 10 seconds what we want to do because this does work in the same way as a method we just have more options available to us for example if we take this line of code here put it in void start it wouldn't actually work see already you can see it doesn't like that so that method wouldn't work so that's why we do need the ienumerator so after let's say 10 seconds we want that ball to just disappear so what we can do is let's set it as a variable and variables work the same way in co-routines you can still call a variable so public game object and let's have this called the ball semicolon so much like we would in a mat in a normal method the ball dot set active false semicolon so let's say after another I don't know 3 seconds the ball reappears so we can copy and paste that line of code again and let's change it to 3 seconds and let's have the ball dot set active and let's say true obviously we want it back so using co-routines gives you the ability to kind of create a sequence of events so here we're creating that sequence of where we're waiting 10 seconds turning off waiting 3 turning it back on so how do we get this co-routine to start because if we attach this to our scene now this co-routine won't even begin so I'm gonna get rid of void update and do this in void start if you're just instantly calling a code routine you would do it in void start not void update reason being is because you wouldn't want this co-routine to be called every single frame you want to be called just once and that's it and we can it by typing start co-routine and in brackets type the name of it so all code in this case open closed bracket close bracket again and semicolon and save the script so here all we're doing is when the game starts we're instantly calling this co-routine and running this sequence so let's attach that to a game object it's pretty to attach it onto there and we just need to attach it here spear over there so now when we press play it should play as normal for 10 seconds and then it will turn itself off so let's just see the sequence in action there we go 3 seconds comes back on and there we go so that is created the sequence of events and I guess we could do that even more because we could go a little bit further into this co-routine and type while and let's say bounces ball is less than 10 then we do the following so we can do that now it's until I bounce this ball there because we haven't set it so that means public int bounces ball semicolon and what we can do in this is this will loop inside the co-routine until it meets this condition so what we can do is come here and then we say yield return new wait for seconds and in brackets let's have 0.5 F F because it's a float remember semicolon and then after half a second we could use that line of code turn it off then we can copy that line of code and then this one here to turn it back on and then obviously the final thing to do within something like a wire loop is to increase this because we want this to happen 10 times so we would have bounces all plus equals 1 semicolon so what that would do is add 1 to whatever the value of bounces ball is and save so this Cobra team is going to run through it quite nicely now so let's go back press play and let's see this entire routine play out so we should have this for 10 seconds and then it should turn off or set inactive as it were and there we go and now on for 3 seconds and there we go you can see there we go so it's doing that whole 10 thing right there 9 10 and there we go like co-routine has stopped and it carries on as normal so guys that is how you can use routine or co-routines I should say within unity remember they are important for when you want to control something like time it's not just wait for seconds that you could do you can do a lot of other things as well but whenever you're dealing with waiting you will need to use a co routine and remember starting the co routine is done as simply as that so let's finally take a look at those player settings so if we go to edit and go down to project settings and click on player we get as you would expect the play settings now these are not the actual player as in your third-person controller your FirstBest controller these are not the settings for that when it says player it actually means the kind of package that's playing so for example it's the executable file on a PC and it will be the mobile apk file for Android whatever so these play settings refers to the actual device mechanism not the player in the game so obviously you would have your company name right here your product name so for example company name would be GV unity and product name would be how to use unity you'd have your icon and cursor if you require it generally when I do it I'm not really someone who uses the cursor I obviously do have an icon these options here this one PC this one I pad iPhone whatever and this one is for Android each of these will reflect every possible platform so if you set something here then you would obviously have it further down the line however you can override if by clicking that basically whatever you have as your default icon will be placed all the way down here unless you want to manually override everything here is pretty self-explanatory there's nothing drastically confusing or anything like that but you would choose your resolution right here so you can set everything what you would need to do generally default settings are pretty decent splash image is actually the image which refers to the executable file when we start up unity not the splash screen that you would have perhaps your company name displayed on it's just the image on a little box when you build your game things like the settings and XR which is basically VR so you've got Mac App Store options right there because don't forget this is for PC standalone not entirely sure why would ask for Mac there because there is a little thing with Mac devices you can't build it unless you're on a Mac but that doesn't mean to say that you know you can't just take this as it is over onto Mac so that probably explains why that is there XR is basically VR support as you would expect obviously going across to Apple devices you can see everything is pretty much the same nice and easy again it's all self-explanatory and finally if we go to Android you also have the options of creating you know whatever else you can have your ads added in this way but ads is something for another time because that's not really basic unity stuff but either way what I would recommend doing is once you have the basics in things like your name game name I can't splash image check your resolution make sure everything's all right portrait or landscape whatever so you know you can obviously rotate if you want to but your game isn't rotational you can turn it off here so obviously the last thing and I'm going to mention in this is the publishing settings this is where you have to create the basically the key so you're able to publish it on Google Play now there are a lot of other settings that you can deal with something like graphics and quality the quality settings is something I'm going to quickly explain as well because this is how you can set how much quality is available in your game for example you can have very low low medium how these are all the default ones but you can actually customize and create your own just by changing the settings here again by default unity does them pretty well so you don't really need to modify these too much unless you want to change your name here and there but the main thing you'll be dealing with or rather the last thing you should probably be dealing with when you're creating your game is that player settings because most the time you're just creating once you're done you can set everything right here and when you build your final product it will be related to everything that you have right here so guys I hope that's been helpful I hope this entire series has been helpful I have plenty more tutorials on the channel so hit subscribe click the better icon you can stay up to date with everything and there is hundreds and hundreds of different things and more advanced things for you to learn on my channel and if you've enjoyed this short two-hour series I feel like supporting a good cause please feel free to check out my patreon where you'll get things like early access exclusive content free project files and much much more and with that guys thank you very much for sticking with me for the past two hours see you around
Up Next

7:36
Deploy Smart Contracts with Remix & Sepolia Testnet | Web3 Tutorial
@ApplisoTech
1.1K views•2025-06-17

12:54
Triumph of Orthodoxy Icon: Byzantine Art & History Explained
@BenCallan
2.1K views•2024-08-06

9:49
FastAPI vs Flask vs Django: Choosing the Right Python Web Framework
@TechWithTim
302.5K views•2024-05-26

1:42
Game of Thrones Opening Credits: A Cinematic Analysis
@gameofthrones
46.3M views•2011-04-18
Related Study Plans & Knowledge Roadmaps
Structured learning paths in General & Interdisciplinary Studies
general-studies
Elevator Engineering: History, Physics & Cities
01From Hoists to Safety Brakes: The Dawn of Vertical Lift
02Hydraulic vs. Traction: The Engineering Physics of Elevators
03Modern Speed, Safety, and Algorithms
+ 2 more learning modules
12h5 modules
Explore Roadmap
general-studies
Rubber: Material Science, History & Geopolitics
01Origins of Natural Rubber & Mesoamerican History
02The Chemistry of Natural Rubber & Vulcanization
03The Geopolitics of the Rubber Boom & Colonization
+ 2 more learning modules
12h5 modules
Explore Roadmap
general-studies
Containerization: Evolution, Logistics & Trade
01Ancient Trade & Bulk Cargo: Amphorae to Barrels
02The Industrial Revolution & Cardboard Packaging
03The Containerization Revolution: Malcom McLean
+ 2 more learning modules
12h5 modules
Explore Roadmap
general-studies
Textile Tech: Evolution, Labor & Global Impact
01Pre-Industrial Textiles: Handloom & Cottage Industry
02Mechanization: The Spinning Jenny to the Power Loom
03The Factory System & Global Labor Transformation
+ 2 more learning modules
10h5 modules
Explore Roadmap