












![Three-Dimensional Mid-Air Acoustic Manipulation [Acoustic Levitation] (2014-)](https://i.ytimg.com/vi/odJxJRAxdFU/maxresdefault.jpg)
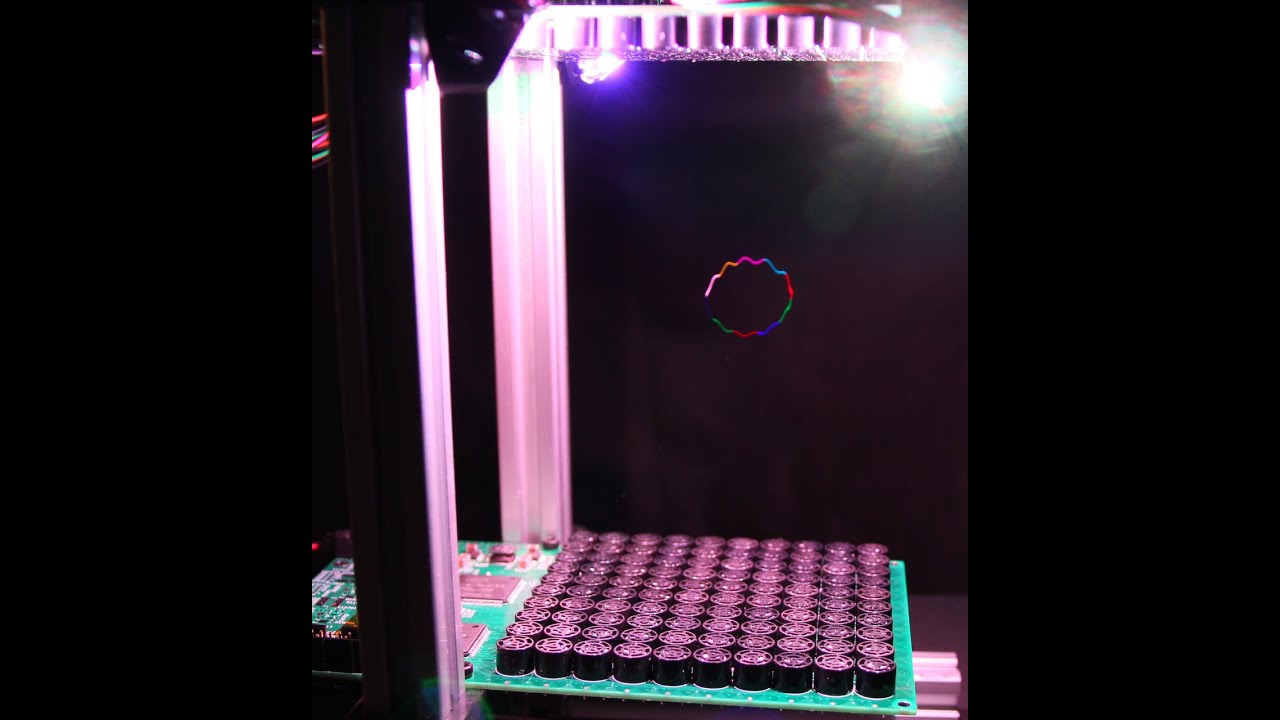



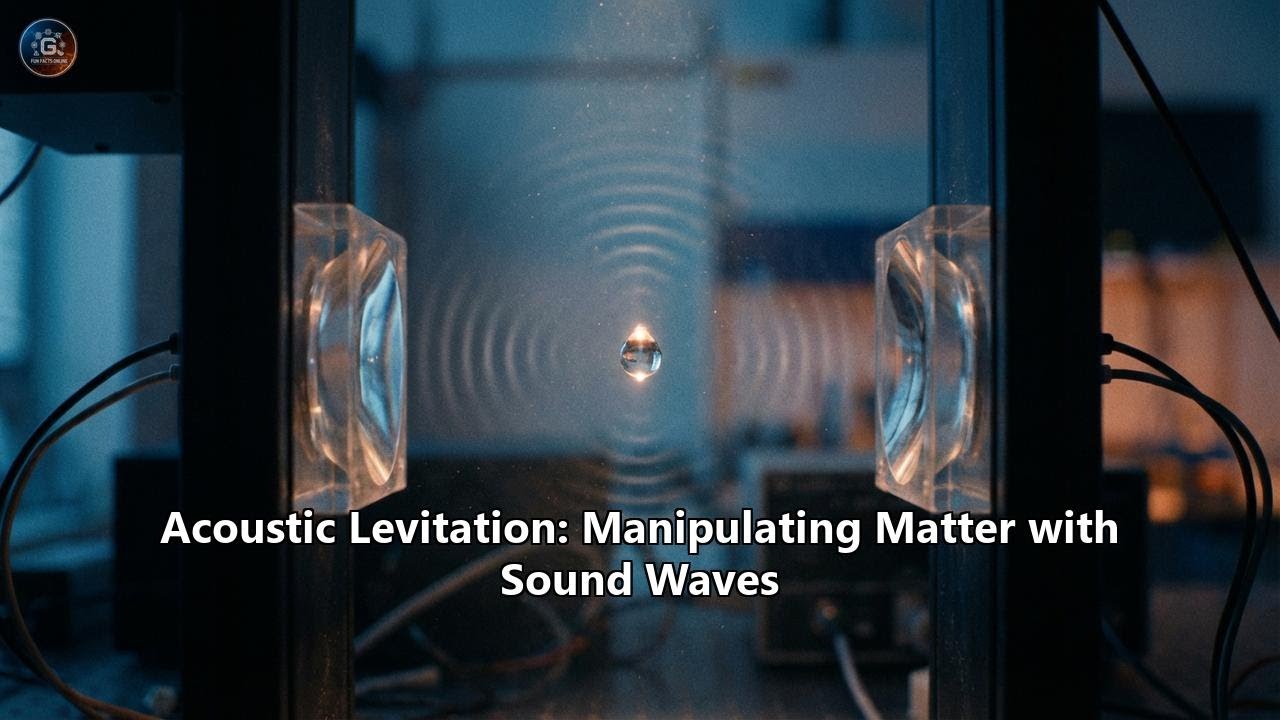


Acoustic levitation works by creating standing sound waves between an ultrasonic transducer and a reflector, forming alternating regions of high and low pressure called nodes and antinodes; particles levitate at different points depending on their size—smaller particles (less than ~10 wavelengths) are pushed to antinodes by the ponderomotive force, while larger particles settle at nodes due to acoustic radiation pressure, which is why the phenomenon isn't as straightforward as commonly explained.
Acoustic Levitation Physics: Standing Waves and Pressure Nodes Explained
Added:Basic properties of sound waves, including frequency, wavelength, and speed of sound in different media.
The principle of wave superposition and the differences between constructive and destructive interference.
The formation of standing waves, specifically understanding the physical meaning of nodes and antinodes.
The relationship between pressure, force, and fluid dynamics (specifically Bernouilli's principle or basic pressure differentials).
Mathematical modeling of the acoustic radiation force and the Gor'kov potential field.
Phased array transducers and the manipulation of levitated objects in three-dimensional space.
Real-world applications of acoustic levitation, such as containerless chemical reactions, pharmaceutical crystallization, and microgravity simulation.
A comparative study of other levitation physics, including optical tweezers (radiation pressure of light) and magnetic/electrostatic levitation.
306.5K views12.8Klikes8:50Original Release: 2022-03-11
hey everyone today i'm going to be showing you how acoustic levitation really works and why it's probably not as straightforward as it's usually explained so if you take an ultrasonic transducer like this and you put a surface above it for it to reflect the sound wave off you can actually create a standing wave pattern in there and if you take some small pieces of things like pieces of paper or small pieces of styrofoam you can stick them in there and they actually levitate in the standing wave what's really cool about this setup that i have here is normally if you have a flat transducer you have to get the reflector almost the perfect distance away from it if it's not a multiple of a half a wavelength away from the transducer then you won't be able to get the standing wave but in my case pretty much wherever i set my reflector it's able to set up a standing wave pattern that's because the transducer is a little bit parabolic and so it can easily set up a standing wave even if you're not an exact multiple away from it so it's really easy to set up the standing wave pattern with these transducers also instead of a reflector we could just put a second transducer up top of it playing the same wave and if we do that we get a little bit stronger levitation okay let's see how many we can fit in here one two three four look how cool that is you can even pop them up to the other nodes [Music] now let's prove that this is actually sound waves generating this levitation let's put it in my vacuum chamber and see how low of pressure we can get before we don't get any levitation okay now i've got it set up in my vacuum chamber the wires are connected to here and here i'm just gonna power it up let's see what it looks like in air and then see what happens as i lower the pressure okay it seems a little bit unstable in there it might be echoing off of the vacuum chamber wall so it makes the pressure waves a little more unstable okay let's turn on the vacuum pump we're at one bar so one bar is about one atmosphere so we can see what happens is the pressure drops three two one [Music] 0.8 bar it's actually getting more stable [Applause] about a half an atmosphere 0.3 0.2 oh we lost one and gone so with this vacuum chamber experiment we know that it's sound waves that's causing these particles to levitate but the question is how are they levitating there why would they levitate at that specific point and are they levitating at the node or the anti-node of the standing wave in there now to understand how this is working first we have to know that sound is a wave but it's not the wave that you're normally used to so this is called a transverse wave and that's not what sound does but rather sound is something called a longitudinal wave and a longitudinal wave is shown on this end here you can see that when i turn this these n sticks get grouped together and then they get stretched apart because sound is generated by vibrating things let's say you have some drum and you move it it pushes the air close together and then when it moves back it stretches that air out so it has regions of high and low pressure so a good way to mimic a sound wave is with a slinky so instead of waving a slinky back and forth like this to create a sound wave you have to push the slinky and pull it back so you can see that when i give this a push you can see a wave travel to the end and come back so you can see on this slinky system here when i push it and then pull it back the rings of the slinky can get squished together and you can see that squished together part move ricochet off the end and then move backwards this is what a pressure wave or a sound wave looks like traveling through the air so now let's try to set up something in which we had our transducer at the bottom creating the sound and reflector at the top well if i vibrate my slinky at just the right frequency you'll notice that we don't just see waves traveling back and forth but we actually get something called a standing wave and a standing wave occurs when the reflection is coming back at just the right time when you're sending another wave and so it creates an alternating region of high and low pressure or in the case of the slinky it creates an alternating region of squished together rings and stretched apart wings the places where the slinky rings are getting squished together and then stretched apart is called the antinode and the places where the slinky rings are about the same distance apart always is called the node the nodes are right in between the antinodes so the antinodes have alternating positive and negative pressure and the nodes have a constant pressure but you'll notice that right in the middle of the anti-node is actually the place where there's least movement of the slinky rings and right in the middle of the note is where there's maximum movement of the slinky rings so this is where the question arises if we were to put a particle in this moving slinky which way would it be forced to move would it go to the region where there's alternating high and low pressure but no movement of the slinky or would it go to the region where there's maximum movement of the slinky but about average pressure for example if i stick a ball in this portion of the slinky you could argue that the slinky's moving back and forth really fast and so it's going to hit that particle and push it towards the regions that's not moving very fast this is called the ponderomotive force now this argument makes fundamental sense and it's the way in which you can trap particles with the electromagnetic force in ion traps so if this were the case we would expect that we're actually trapping the particles in the antinodes of the pressure waves on our acoustic setup but when we actually measure the standing pressure wave that's created in this setup you'll find that the particles actually settle in the nodes of the pressure waves not in the antinodes and the reason this happens is due to something else called the acoustic radiation pressure so the other argument that we can make is that the anti-node of the pressure wave you'll notice that there's a pressure gradient for example look at this slinky set up here this is the high pressure and this is the low pressure so there's going to be a pressure force on this side of the particle pushing it this way and then when the anti-node switches it's going to have a pressure pushing it the other way so overall the driving force is going to push it towards the pressure node here so the reason that our particles are settling in the nodes of the standing pressure wave as opposed to the antinodes is because of the acoustic pressure pushing it towards the node but what about the ponderomotive force that we talked about earlier what about how fast those particles are moving in the node well it turns out that if your particle is smaller than around 10 of the wavelength it's actually going to get pushed towards the anti-node the ponderomotive force is going to be stronger than the radiation pressure pushing it towards the node so what this means is that for really small particles they're going to settle in the antinodes but for large particles they're going to settle in the nodes so you have this balancing act between the air molecules vibrating back and forth in this standing wave and also the pressure that's created in those standing waves and depending on how big your particle is if it's larger the pressure is going to play a larger effect but if it's smaller the tiny movement of those air molecules is going to play a larger role before we continue with this experiment i'd like to thank the sponsor for this video clima it's clear that our climate is changing have you ever wondered how much you're having an impact on climate change well with a monthly subscription with klima you can plant trees and promote green energy projects and even improve lives around the globe with klima's app you can calculate your carbon footprint in just three minutes so i produce a little bit less than the average american but way more than the average person in the world and then you can fund climate projects that capture or reduce the same emissions elsewhere and you can even learn how to reduce your footprint further one lifestyle change at a time and also you can share the app with your friends so you can see how your influence multiplies with others so come and join me and go carbon neutral with klima today just click the link in my description and download the app and after you've calculated your carbon footprint type in the code action lab 10 and you'll get 10 extra trees planted in your name and thanks again for watching another episode of the action lab and we'll see you next time
Up Next
32:35
Build an Ultrasonic Levitator: A Step-by-Step Physics & Electronics Guide
@Science.Buddies
15.4K views•2025-07-31

12:53
21cm Hyperfine Transition in Neutral Hydrogen: Radio Astronomy Basics
@AaronRobertParsons
12.4K views•2011-10-13
6:43
Detecting Ionizing Radiation in a Cloud Chamber: Electron Beam Visualization
@TheActionLab
279.8K views•2021-08-19

27:14
Entropy and the Second Law of Thermodynamics Explained
@veritasium
27.5M views•2023-07-01
Related Study Plans & Knowledge Roadmaps
Structured learning paths in Physics
physics
Nuclear Physics (Decay, Fission & Reactors)
01Atomic Structure and the Binding Force
02Radioactive Decay and Half-Life
03Nuclear Fission Mechanics and Chain Reactions
+ 2 more learning modules
12h5 modules
Explore Roadmap
physics
Soft Matter (Polymers, Colloids & Rheology)
01Foundations of Soft Matter & Thermal Forces
02Polymer Physics and Macromolecules
03Colloids, Surfactants, and Self-Assembly
+ 2 more learning modules
38h5 modules
Explore Roadmap
physics
Analytical Mechanics: Lagrangian & Hamiltonian
01Mathematical Foundations: Calculus of Variations
02From Newtonian Mechanics to Constraint Dynamics
03The Principle of Least Action & Lagrangian Mechanics
+ 3 more learning modules
28h6 modules
Explore Roadmap
physics
General Relativity (Spacetime & Cosmology)
01Foundations of Relativity: Special Relativity
02The Geometry of Spacetime: Equivalence Principle & Curvature
03Einstein's Field Equations: The Mathematics of Gravity
+ 2 more learning modules
55h5 modules
Explore Roadmap