




![PLATINEN BESTÜCKEN ★ DIE IBOM (INTERAKTIVE BILL OF MATERIAL) [Fellpower/2K/Elektronik]](https://i.ytimg.com/vi/-nA7id8bGxg/maxresdefault.jpg)


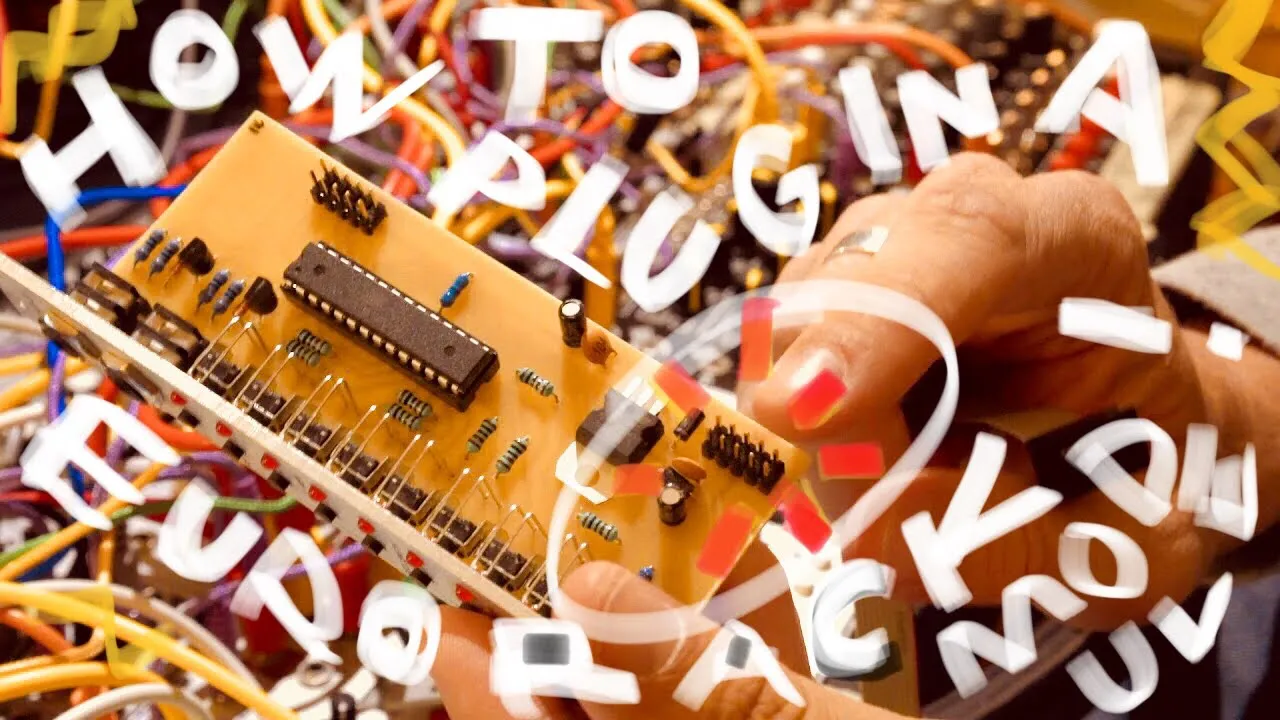




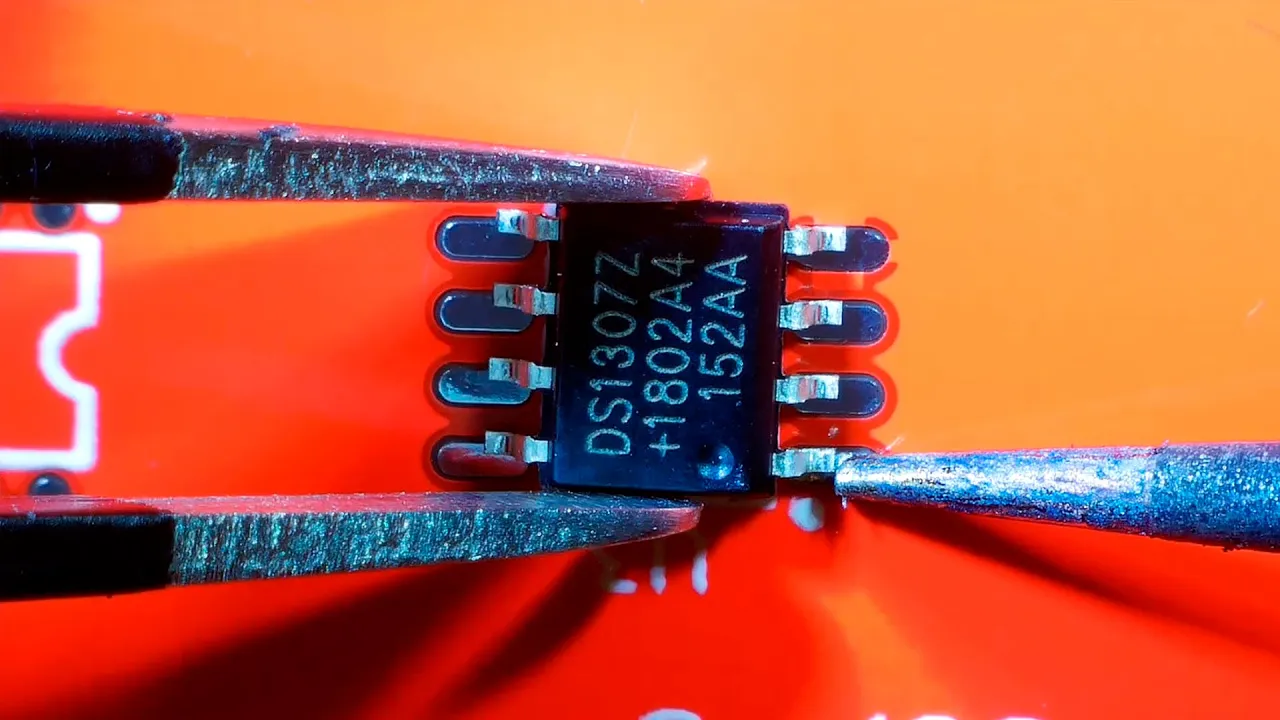









This video provides a beginner-friendly introduction to soldering both through-hole and surface mount components for Eurorack kits, demonstrating that soldering is accessible to everyone with minimal equipment including a basic soldering iron, rosin-core solder, safety goggles, and a small fan for ventilation; the key techniques involve heating the pad first before adding solder to create shiny, volcano-shaped joints for through-hole components, and pre-tinning pads before placing surface mount components to ensure proper adhesion.
A Comprehensive Guide to Soldering Eurorack Kits: Through-Hole and Surface Mount
Added:Basic understanding of electronic components (resistors, capacitors, diodes, and integrated circuits) and their polarities.
Familiarity with workshop safety protocols, including lead safety, proper ventilation, and handling high-temperature tools.
Ability to read a Bill of Materials (BOM) and match component values to markings on a Printed Circuit Board (PCB) silkscreen.
Fundamental knowledge of Eurorack synthesizer standards, specifically power connector orientation and voltage rails (+12V, -12V, and 5V).
Advanced troubleshooting and debugging techniques for DIY electronics, such as using a multimeter, audio probe, or oscilloscope to locate cold joints and short circuits.
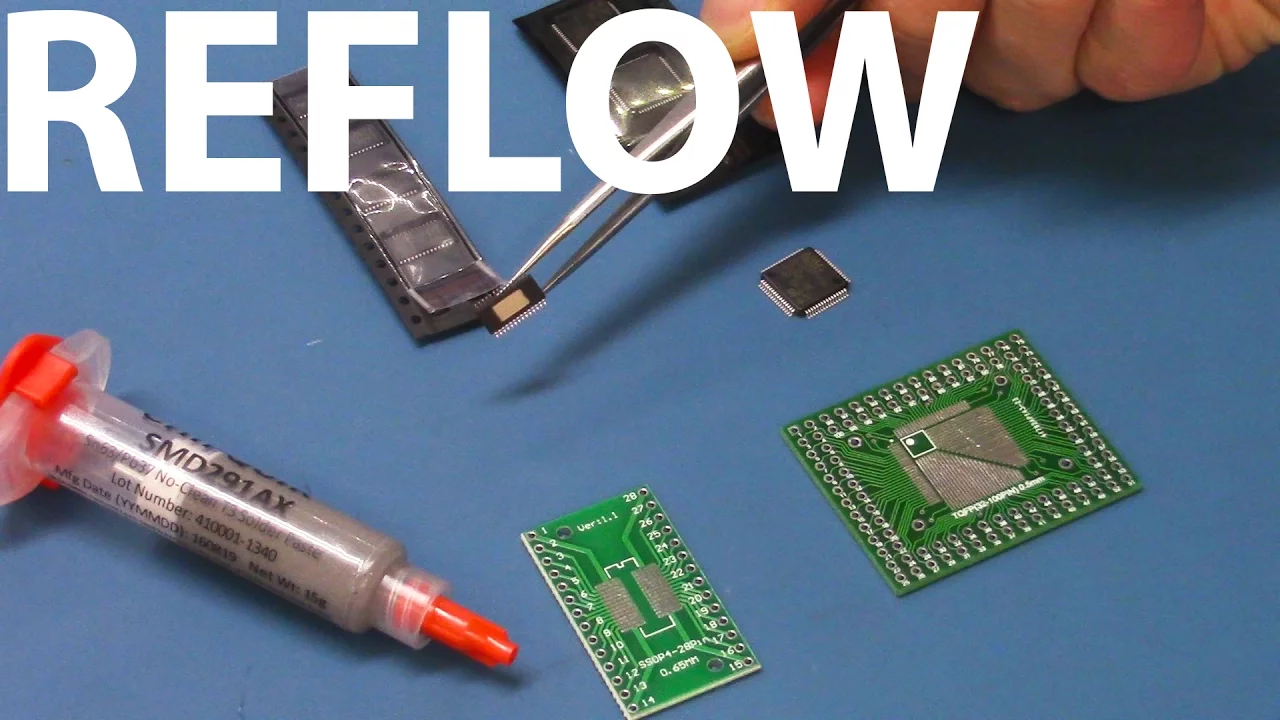
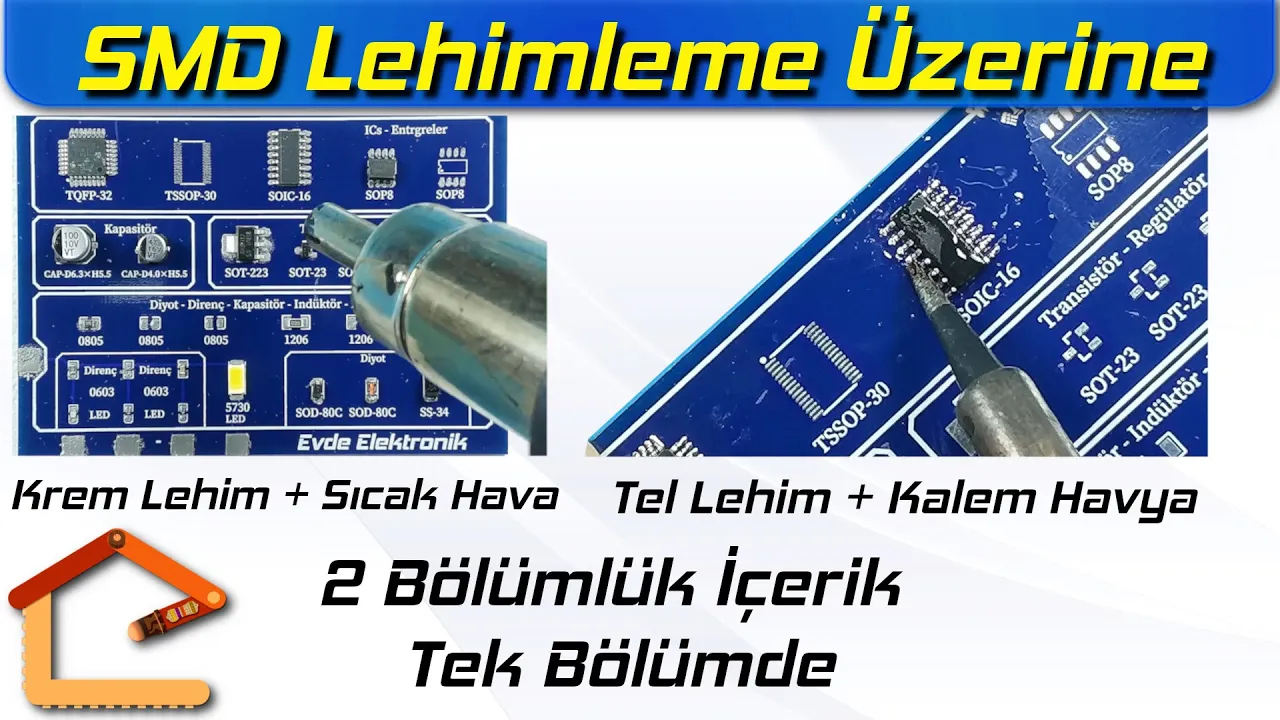
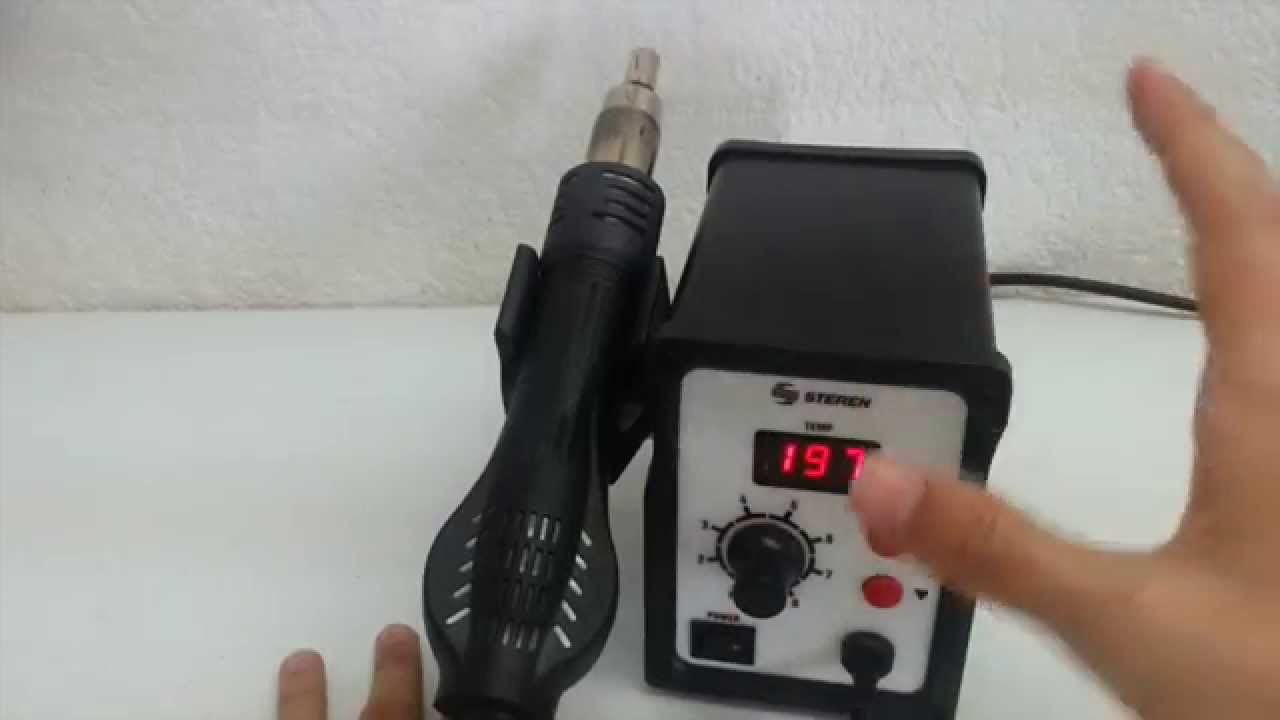
Reflow soldering techniques for high-density surface-mount devices (SMD) using hot air stations, solder paste, and stencils.
Calibration procedures for analog synthesizer modules, including tuning Voltage Controlled Oscillators (VCOs) and adjusting filter trim pots.
Custom PCB design and schematic capture using EDA software (like KiCad) to transition from building kits to designing original Eurorack modules.
7.3K views313likes52:50Original Release: 2020-09-23
hello i'm robin vincent and welcome to molten modular diy you find me stuffed into my little diy corner and i wanted today just to bring you the simplest guide to soldering eurorack kits both through hole and surface mount i know that's a bit scary but don't worry this is going to be simple just a little bit of guidance before my big diy week which i've got coming up in about a week i thought it'd be good if we just started off in a position where we know what we're gonna do and have the barest amount of gear the barest amount of skills in order to attempt a little bit of soldiering because i believe soldiering should be for everyone too often we see barriers to entry whether it's expensive equipment or high levels of sort of education skills required no no not that i'm saying any old idiot can do this it takes thought and it takes a little bit of preparation but there shouldn't be any reason why you can't pick up a soldiering iron by the right end and achieve something in regards to building a little eurorack kit like this one so this is my simplest guide to soldering the things you need how to do it a bit of an example of how you do that with both through hole which is the simple stuff and surface mount which is the crazy bonker stuff but that can also be simple too it won't be particularly structured it will be waffly and a little bit all over the place but hopefully if you just sit back grab a coffee let me talk you through what it is we need to have together in order to do a bit of soldiering now i'm not i should stress i'm not an electrical engineer i'm just some bloke so i'm like having to go enjoying building kits i've now built several and during that time i've received an awful lot of advice from very lovely people telling me exactly where i'm going wrong and what i should be doing and all the gear that i should be getting now i'm kind of paring that down i'm kind of navigating my way through that to try to give you the essential stuff so that you don't get overwhelmed because any sort of overwhelmingness it just makes it harder and then the barrier to entry starts getting higher and you can't get in you go oh sorry i just i'm just not going gonna bother and you should bother because soldiering is awesome it's awesome it's the most fun you can have in a tiny little corner of your shed somewhere [Music] so let's kick off with the gear then that seems to be the stuff that you need to think about first and foremost what do you need to do soldering you need a soldering iron yes you do soldering iron here we go here's a soldering iron now anyone that you see doing videos online with soldering is going to have a proper posh soldering iron the one i've got here the heico fx888d is a superb soldering iron it costs about 100 odd quid and i bought it because i was doing a lot of soldering now there's no reason for you to have to get a posh soldering iron you can get any old bit of rubbish for instance before i got my posh one i was using this now this cost uh 20 quid from amazon it's just a it's just a soldier line you plug it into the wall it heats up and you solder with it so what's the difference between this and the posh one well simply put the difference is that that one heats up really quick really quick it heats up it has a temperature gauge on it so you can tell it what temperature you want it to be and it's just made of a higher quality bits and pieces along the way there's no reason why you can't use a 20 quid soldier iron from amazon to solder the sort of things we're going to be doing that is absolutely fine if you're going to make a massive hobby of this going to do it a lot then get a better soldier line you know that makes some kind of sense because this one is you know will break eventually the other thing is it's not i mean this does this particular one does actually have a little temperature dial on it but i wouldn't believe a word it says so you don't have a whole lot of control over the heat that this is putting out does that matter no i mean soldier irons are designed and built to do stuff with solder and so it's going to get hot enough that has to be the way doesn't it but it may mean that you take longer with a lower quality soldering iron you might have to hold it on the components longer for the heat to transfer because there might not be quite so much heat inside so those are the considerations but just a soldering iron a 20 quid soldering iron from any old electrical shop or from amazon will do you fine hopefully it will come with some kind of holder because you don't want it sitting on your desk because it gets hot yeah and ideally it will come with a little sponge which i'll show you in a moment so i'm going to bring in my super duper super duper soldering iron like so you see that you see now this one comes with a little holder which is great see if i can just put it in there and don't have to worry about setting it down somewhere it also has a sponge here sponge and it has some brass stuff here now those two things are helpful because they help keep your soldering iron clean if the end of your soldering iron is not clean now i must remember that this one is on and it's already hot if you don't keep it clean it's not going to do very well now this at the moment if i put it under my under here this i haven't used it for a little while and so it's not looking that great it's not looking that great at all so i might have to do something about that before i start so let me show you what the sponge and brass thing is all about they are just cleaning things simple things so i get a little bit of water put it on my sponge like that it draws it in it's just water onto a sponge it's that simple and then when you put your soldering iron into it it'll fizz just a little bit but that if you like what that does is it it sort of instantly cools the solder that's on the end and helps you sort of wipe it off and now you can already see under here that i have a more of a silvery end yeah that's good that's cleaner now with the brass stuff which is in here i've also got one of these things these are very cool because they look awesome like little robots they look great let's just sort of brass wire like steel wool in there and you just jam your soldering iron in and that scrapes off the excess solder and again this is now looking under here nice and shiny much shinier the next thing you want to do is probably tin the end of the soldering iron now that's a weird that's not a weird term at all it's a it's a posh it's a proper engineering term tinning things which is when you just put a little bit of solder on it so i'll put this under here again so you can see and all i'm doing is applying a little bit of solder to the soldering iron you can see that it melts and once i've done that and then going to give it another clean and that's now looking fantastic so next up we should probably talk about the solder now there are two types of solder there is leaded solder and there's lead free solder leaded solder poisonous lead-free not so poisonous now leaded solder is what we've been using for for donkey years as long as there's been electronics there's been leaded solder because it works really really well it's just brilliant it it flows it melts it it connects things together brilliantly and that's why people who build electronics generally love leaded solder now the the poisoning bit we don't like that particularly but unless you're you're doing soldering for a living really the chances of poisoning yourself are low however if you're handling leaded solder then wash your hands before you eat yeah so your other option is lead free solder now should you get lead free or should you get leaded those are the questions now the simple answer that i came up with through my use of both i started off with lead free because that's what i had and then i moved to leaded and went oh my goodness this is so much better so that that is if you like is the reaction one gets between lead free and leaded now lead free is fine and as far as i understand it lead free solder these days is getting better all the time it it works better it flows better it melts better but generally speaking you have to run your soldering iron much hotter to melt lead-free solder and it doesn't look as shiny it's a bit more globby and it just doesn't quite work as well that's all i can say really but it also depends on your solder you can get crap solder on both sides i'm sure and this is the sort of solder that i use this one this has become my favorite now i haven't tried out loads and loads of different types of solder but i got this one in particular because it says world's finest solder on the bottom you know therefore it's got to be good but i think what's important when you're buying solder is that it has a rosin core it has flux in the core what does that mean it just means that you've got your metal right and up the middle of the metal they've stuck this stuff called flux now flux is this is this chemical this material that makes the solder flow really well and it cleans as it goes so it kind of cleans oxidization out of the way so that the solder has a better chance of sticking and conducting properly so a solder with a core of rosin or flux whatever name you wish to use is what you want it makes soldiering a whole lot easier now you may have noticed when i was thinning my soldering iron like so that there was there was smoke what is the smoke is it molten lead it's molten lead is it steep lead steam lead steam is what people like to make you think that is no no it's not you can't really take a metal to boiling point with a soldier iron what that is is the flux there's the rosin that comes from the center of the of of the multi cord cord rosin cord solder so it's not it's not metal in a gas form however it is still toxic it is full of all sorts of chemicals that are not going to do you any good and if you spend all day soldering breathing in that stuff you're not going to feel well it's not going to do you do you any favors so it's good to not breathe that stuff in how'd you do that well i've got a little fan over here can you see that yeah you can see that so i turn this fan on it's just a little fan a little usb fan and that's now blowing across my soldering area and hopefully moving the flux out of my way so let's put this here see now it could be blowing it directly into me [Laughter] i might need to angle it a little bit more but you know that's the idea the idea is that it blows away because i'm going to be sitting in here a bit more and it's going to go that way so that's going to work so i would recommend a fan you don't need some kind of carbon capturing device or a hood ventilation systems you know just keep the window open try not to breathe the fumes if you've got a little fan to blow it out of your way fantastic do that that's enough i think that's enough to keep you safe while we're talking about safety the other thing i would recommend is some safety spectacles they're not sexy i suppose particularly but they are they are good to the point of being vital the reason being is that solder can spit when you're soldering you tend to start leaning in and get closer to it as you're doing small work and the solder can spit you're heating it up it could spit and if you get a bit of solder in your eye that's that's it for your eye really and it's not worth it it's it's absolutely worth feeling silly and a little bit uncomfortable in safety specs in order to save your eyes from being destroyed i would say so those are good and of course you'll forget to wear them and such like but you know you've got to do do what you can to mitigate the risks yeah so highly recommend a pair of safety specs so with a soldering iron your safety specs and some solder you're kind of good to go but there are a couple of other things that would be useful to have a pair of wire cutters these snippers type things here for snipping off legs and other bits and pieces they are it's they're not for grabbing and pulling they're for snipping so those are very very good spring-loaded yeah spring-loaded dying doing those are good pair of regular sort of needle nose pliers those are useful useful not essential but useful the other thing would be a solder sucker sold a sucker this is a particularly posh solder sucker that i got from funk and it is the best solder sucker i have ever had without a doubt what does it do sucks solder clue is in the name now what this is for is taking excess solder off a board if you've stuck a whole load of stuff on and it's all gone globally you use this to suck that solder away or if you're trying to desolder something so you're trying to pull a resistor out of something that you put it in by accident you can use this now other people use stuff called wick this stuff super wick i don't i don't really understand it i got some thinking i need that and then i don't know solder sucker works every time for me this stuff i don't know i don't know i think you're supposed to put it you put it on the sole solder in it i don't i don't really know in the comments you can tell us all about it yeah but i don't quite get that stuff but maybe i'll use it at some point who knows but otherwise for me solder sucking seems to be working really well this is another little tool that i found it's an ic straightener now when you get an ic and integrated circuit which is oh i don't have one to hand but you know that black stuff with all the legs on black chunk legs on when you get that the legs tend to be splayed a little bit just enough so that you can't actually fit it in the flipping socket and so what you can do you can take it and then you sort of roll it gently in order to straighten the legs and you know and that's good that's good but this little device here you just pop the ic in you squeeze it together and it straightens all the legs just brilliant brilliant what a useful little piece of plastic that is what's it called i don't know i see i see leg straightener i don't know again if in the comments if you know what this is then stick us a link in that'd be great the other thing is is this now this is a complete waste of time but people recommended it to me over and over and over again and it's a resistor leg bender the idea is you take your resistor and you put it across here across the end of this and then you can bend the legs down like that like that you see and now i've got my resistor with its legs bent i have yet to find a circuit board that this is the right size for that it's bending resistors to the right size it's never to the right size so you're still having to bend it you're still having to manipulate it and honestly the fuss with putting this in here and trying to get it right and then bending the legs takes more time than it does to simply go oh look there's a resistor and i've bent the legs waste of time complete waste of time that's don't get one okay so so this is all covered in cobwebs right this is one of those things that you're supposed to get it's called a helping hand thing i think helping hands could be i don't know the idea being that you you set it you set it down you put it down see i'm gonna ham this up now because i don't like these and you you just clip on your pcb like so like that you see and you've even got a magnifying glass and if you can get it exactly right you could potentially use the magnifying glass at the same time i got that in there and then you take your your solder and your stuff and you uh and you solder things and just falls and it yeah what i'm saying is is that people use these uh i bought one i can never get it tight enough i can never get it to hold the thing in the position that i want to hold it in i find them annoying frustrating the magnifying glass can be useful at times for for looking at stuff so that's why i keep it around but otherwise the spiders are playing on it and they're having a lovely time so use one of these if you like if you find that useful personally what happens with me is i tend to push too hard on the pcbs i just do i seem to be somewhere in my brain it says if i push really hard the heat will go in harder or something i don't know but this is is just not strong enough to hold something that i'm trying to solder and i push it all over the place and it just gets annoying so i don't tend to use one of those the other thing you can get is a vise a little vise that holds it and that seems like a better idea to me but i haven't i've just never got around to it so what do i do i use anything that's knocking around bits of old crap like um sponge or something that came out of the uh out of the kit and i tend to you know lay it down on things and solder it i tend to just lay it down balance it on things so soldier it that's what i do yeah so that that's just my way man i mean it's simple and i'll show you in a minute because i think we should probably solder something at this point but before we get that far there's just i think one more which is this which is a pair of tweezers now this pair of tweezers is for surface mount well i'll do some surface mount at the end because i think that it's something that should be more talked about because i'm just trying to get the ends of that just to meet up properly uh because people tend to be afraid of service mount there's no need to be afraid of it i've really got stuck into it and i think that's actually all right he says it's tricky absolutely but it's not it's not impossible and certainly from a simple basic point of view a pair of tweezers and a soldier and iron you can do it now i know people talk about ovens they talk about heat guns and i don't know trays of sand that you bake stuff in and then you set fire to it i don't i can't really comment on any of that kind of stuff but surface mount with a component pair of tweezers soldering iron you can do it by hand you can you don't have to be a pick and place computer generated something or other and you don't need an oven you can just do it by hand if you're doing tons then yeah sure whatever get the right equipment but if you're doing a eurorack module which has a little bit of surface mount then you can do it you can do it with a pair of tweezers and perhaps something like this because that's always good you do need magnification if you're doing surface mount particularly with somebody of my age with my eyes i need to be able to to really look in because those pcbs can get small those components can get smaller the writing on it can get small so again use a magnifying glass if you like but getting something like this or a lupe something which you know like a jeweler's little thing that comes in here or goes in your eye yeah use that anything which is going to give you some magnification because otherwise it can be quite a strain [Music] but we'll come on to surface mount in a bit i want to have a go first and foremost with this little kit here now this is the swerve from serial instruments it's a switch it just allows you to switch some things from somewhere thing to somewhere else it just comes with a bunch of patch points and a knob it's passive it knows it takes no power and it's just a router put something in turn a switch and it goes to a different destination that's it very simple great place to start but before i do the actual kit i'm going to attempt to poorly solder a resistor to this board now there's no resistors on this board at all so this is kind of nonsense but i thought i would just do it as an example of because you're going to be doing a lot of resistors so let's solder the resistor to the board and then let's desolder it yeah do that process that sounds exciting wow this is great television so got me board got my resistor now of course resistors have uh have bands on it which tell you exactly what it is and hopefully in your in your bit of materials it will tell you what they are and what they should be so i'm going to put this through a pair of holes that i'm pretending that it's going to be soldered through now of course you know if i was using my helping hands it would be held up in the sky and i could then solder it but i'm just turning it over and putting it down like so now when you put a resistor in you can splay out the the legs i mean if you want to to to see me doing this on on larger kits on proper kits and talking you through it then i have a lot of videos in the channel that show you exactly how to do that starting with a touring machine which was the very first thing that i've made i've now got a good dozen projects that are on my youtube channel that you can watch me build and comment on and talk about and see how i developed as a soldiering person along the way so i've put that in i've splayed the leg so that it doesn't fall out and i'm going to put it there now the solder that i use is only 0.7 millimeters in diameter it's quite thin but i've found that that really works for me because it melts quickly and i can always use lots of it rather than using less of something that's thicker that takes longer to melt yeah so that's what i'm after so i'm going to put a load of solder on this and then we're going to de-solder it so what do you do how do you do it what's the plan do you stick solder onto the iron no you certainly do not what you do is you put the iron onto the pad behind the leg you're trying to heat up the leg and the pad really so the pad is the is the the gold coppery silvery stuff that's already on the pcb so i'm pressing on that um maybe i press hard because i'm trying to keep the thing still maybe that's it and then i'm going to bring the solder up to the other side and with a bit of luck that should melt as you see and i'm pushing it in you remove the solder first then the iron then we can have a look that looks pretty good that looks pretty good now what you're after is like a small volcano like a hill you want it to be shiny you want it to be around all the sides all the way around and it needs to go needs to go up like a spot like a mosquito bite like a volcano like a zit that's what you're after and i sort of silver zit that's cool that's not going anywhere now if i was going to finish this off i would take my clippers and i'll clip off the leg remembering to put my safety goggles on i've always got my safety goggles on so let's try the other leg so again same idea i put the soldering iron on first i mean the type of tip that i'm using is very much a pointy tip but it's not necessarily the end of the soldering iron you're trying to trying to use you're trying to use as much of that as possible because the more contact you have the more heat you've got so you're kind of placing the tip in there but you're also sort of leaning it in trying to get as much contact as possible and after a moment it should have heated up stick the solder in i'm going to put a whole load in this time like so took the solder away took the iron away and there you have a pretty over soldered resistor now that's too much i've put too much on there and it's probably if i'm not careful going to perhaps touch on the component next to it that's not good you don't want that so i want to take that out and i want to remove the whole resistor anyway because that's not what this project is about now removing stuff is difficult particularly if you're doing it sort of loose and free like this as opposed to having it in a vise because you're going to need to pull against it in order to get it out so the first thing we need to do is use our solder sucker now all this is doing is is you're hitting a button it's got a spring and it's just literally sucking air through this end here and this end on this particular solder sucker is is really good and i can and i can push this right up against the component because it's not going to melt because it's made from some kind of unmeltable something or other so you push it down and it comes out so down here somewhere i'm going to need to heat up the solder and once it's bubbling i want to get the solder sucker in there and press the button and hopefully that would have taken a whole load of the solder out and as i push this down again it comes out at the end there we go all that solder i took out fantastic do it on the other one as well heat that up okay i've taken a lot of the solder out but it's still not actually going to release the resistor for me because it's still stuck to stuff so i can try a little bit of sucking on this side i think would be good now i'm sure people watching this again no i think mate if you'd use the uh the braid stuff use the wick it'll be done by now oh well maybe there we go that one's empty now i mean par if you are trying to undo something it is a massive undertaking and a bit of a faff and if you're not careful you'll find yourself burning either the pcb or components because you don't want to be holding the soldering iron onto things for too long right so that is still stuck so what i'm going to need to start to do is start getting aggressive with it with a pair of pliers so i'm going to have to try to work out a way of pulling on this while heating up on the other side so i can start to move that through maybe if i put it on something then i could push it down a bit so holding it melting it there we go there we go and this one all right so that's some success on one side pull that all the way out so now just got to pull on this one so let me try to do the same thing again there we go see that was easy are you still with me yeah i think so so there we go so i i soldered something in and then i desoldered it fantastic now let's just do this little project and then we'll do a little bit of surface mount okay [Music] so this is the cereal instruments swerve which way round of things go so all it's got right is this great big pot and a bunch of these patch things so i think i can very easily see i think where it goes can i i don't know so here's the pcb this is a very very simple one but on most pcbs you will have printed on it a representation a graphic if you like of where everything goes so little pictures of resistors and diodes and bits and pieces but on here all we've got is these patch sockets and so it shows us that it needs to go exactly there and it really is that simple i mean with a more complex build you follow a bill of materials a bomb a bom bit of materials and that lists every single component and its number and those numbers are ordinarily printed on the board like these are printed as j1 j2 j3 that kind of thing and that refers to the document which tells you what these are now this is so simple that you don't really need to refer to it you just follow the the picture on the board but the combination of using the bomb of using the what's printed on the pcb and also the instructions that hopefully the manufacturer has given you those are the things that allow you to place the components in the right bit is it easy to go wrong sure it just takes a little bit of concentration and thought i mean i haven't thought about this too much but that just seems to work putting them in like that yeah now of course when i'm going to go to solder these when i turn it upside down they're all going to fall out so that's not what i want i don't want that so i'm going to have to be clever now i can take them down this is the other piece of useful thing you can use is masking tape to tape things down that's definitely a possibility but on this occasion i'm going to use this piece of plastic i've got knocking around it's just a piece of plastic i think it came off one of my lights and i'm going to stick it down like that turn the whole lot upside down keep applying the old pressure and there it is this is all it's all good it's all good it's all there give it a little bit of a bit of movement to make sure that it's more or less level soldier line solder get to it you can start anywhere it doesn't really matter as long as you all do it now these are particularly large sort of holes that are going to take a little bit of solder to fill so let's start at this end heat up at one side present the solder remove the solder remove the iron and we have jets flying overhead today that's nice in order to help with the stability of the board if i then do something up the other side up here then that will help or stop it from rocking about the place so you sort of do opposite corners if you like do you see that see how easy that was so i'm going to go back over here now so i put this in here to heat up this particular bit and i stick solder in it and it just does it the fan is blowing away the flux it's just flowing onto there and producing this lovely sort of volcano type look [Music] so a little bit of heat add the solder take the solder off take the iron off that's what you're after now you can see the end of my soldier line is starting to get a little bit black in places so i need to jam it into my brass stuff to get it nice and silvery again or into the water or a bit of both and then it heats up quicker and better every time now another rule of thumb when dealing with uh placement of components and such like is just to say that start with the lowest stuff first by which i mean the stuff that's closest to the board because if you're putting components in and then turning the board over to solder which is what you normally do then if you want it to rest do the do the stuff that's lower down first if i do for instance if i had done is this i've got everything on there i've still got a couple of spots to do if i put this on first i could have done that that would be that would be great but when i came to doing these i wouldn't be able to lie them down flat because this was sticking out so generally speaking you start with the resistors which are the smallest thing then the capacitors and then the bigger bits like this otherwise you'll be turning something over and it'll probably be falling out but that's where your masking tape comes in there's always a work around but those are all looking pretty good you know physically try them out that's also good so those are all in that's exciting relatively straight then the only other thing is this fella here which way up does it go i do not know it says the switch only fits to the pcb in the correct orientation with rounded section at the top rounded section this bit at the top okay of course i really stuff that all up with my resistor soldering okay pushes in nice so in order to stand that up to solder it that will work just like that but otherwise a little bit of support to keep it straight you know is no bad thing but that's in there nicely so i'm not going to worry about that so again i'm going to do one here and then one on the other end see now it's falling over in order just to get opposite corners are helpful in keeping things straight and then you can do the rest see if i take this away that would also be better because it's a bit more grippy on the green stuff now my green mat in case you're interested in that it's just an anti-static mat that i've got knocking around from when i was building computers it's not special or anything it melts if you lean on it too hard it just seemed like a good thing to have rather than just varnish on a workbench right that's all done i think now at this point you can get out your magnifying glass and just check things a bit closer oh i got one i missed see i didn't see that i got one i completely missed so it's always important to check always good so now i've got this thing here which does which does that so the front panel then goes on like that now it says in my little instructions here i mean the instructions for this this this much this much instructions not a whole lot but it says leave one of the switches nuts under the pcb and one on top you can see that it's got two nuts on and it's kind of making it too high so we take that off and do one of the nuts put that on top that's much flatter much much flatter so i need the bits from here i put the nut on tighten that up sort of finger tight really doesn't need to be incredible i mean the front panel on this is just a bit of pcb so it's not going to survive if you try to uh try to do it too hard now these little nuts on the top of here that'll hold everything together they do have a couple of little nicks in them which allows you to get a bit of purchase if you want to do them up but always have those sticking out the top super then i've just got a knob there seems to be three positions so i've got a screw on it yes it has see it's got a little screw on the side for tightening it up so once i've put it on because it's just going to spin round i want to set it to the position i want it to be on then i need to find a little screwdriver that's probably too big and you can turn that until it's nice and tight and that should give you a perfectly working little knob so that's a nice little thing look at that it's passive as i say doesn't require any power it's just going to sit there and change directions of things i don't know i don't know exactly i think you've got three switches you put something into the top two two lots of it and on switch one it goes out that way switch two it goes out that way switch three it goes out that way easy a interesting three-way two-pole rotary performance switch nice now i will be doing a whole load of different kits during diy week i mean i've got a whole back catalogue of kits and videos on that you can watch but for diy week i'm going to be doing a couple of kits live on live streaming right from here doing it live so that you can follow along and do it exactly the same time and we'll see where we get it may take hours we just don't know we don't know yet because we haven't done it we don't know so if you're interested in following along you can get the kits from thunk i'm doing the frequency central stasis leak and the robo 3pt doing two of them but of course you might be watching this after the event and that's fine it's all going to be available in the youtube channel so do go and seek them out but in building those hopefully it will it will demonstrate more of how i do things how i solder things whether that's right or wrong i don't know i'll just be taking you through it because it often you know when you see someone do a kit on video it's always edited down or it's speeded up all those sorts of things and you perhaps get the impression that it's dead easy and nothing bad ever happens that's not my experience bad things happen all the time and we're going to be doing that together so that's going to be like an unedited real live streaming of a kit build interesting now onto the surface mount now i'm just going to do one or two just to sort of demonstrate that it's possible to do but i'll be doing a lot more of that um soon i mean if you want to watch me do surface mount stuff then then check out my videos on the decal stream there's a whole load of that and i'll be doing a live stream of some decade dream building as well during diy week so there'll be more videos out there of me doing surface mountain and i have talked about this before and it is one of those things that people go i can't believe he's doing this what an idiot why doesn't he use a heat gun because i have no i have no clue how to use a heat gun i have no idea and i found a way of doing surface mount which just seems straightforward to me and so i'm going with that that's what i'm doing it's easier if you're doing all surface mount components to i'm sure it's easier to stick all the the solder paste on or something and then heat it with a gun and it all just goes beautifully but i'm doing these things just just one by one just you know just bubbling along man so for this little little tiny demonstration i'm only going to do a couple of bits i'm going to be using the uh infinite machinery adsr which has a lot of surface mount on it i'll do a full video on this at another point but for the moment i just want to do a couple of surface mount components i'm going to need to find the build guide you need to find the build guide for this so i'm not trying to say by any means that surface mount is easy it's not easy it's tricky particularly when you're dealing with surface mount integrated circuits like these ones here those are different i'm not going to do that right now you can see how i did that when you have a look at the video for this kit in its entirety what i'm interested in in this particular instance is just a couple a couple of these just to show you how i approach it now the bits that i need are in here somewhere these are tiny tiny things you get into a little bit of a problem with your fan your fan can blow these things away so it's important that you look after them and make sure that they don't disappear because if they go off your desk onto the floor then then that's it that's it really they're gone at that point so let's see if i can find the first bits that i'm after i want c one two and three now often if you're doing a big surface mount project like the decals dream you will get these these little weeny little buggers you'll get them on a reel and you have to sort of strip them off and they all come falling out all over your desk that's not quite what we're doing here i've got like it's like an individual one all by itself in a little packet so i need to find where this is on the board there's c3 there's c1 there's c2 okay so they're all on this little spot here so the method that i use i think because sometimes it changes yeah i'll try to keep it consistent is i heat one of the pads so this pad here you can see that this is going to be c3 i'm going to heat the pad and then i'm just going to put a blob of solder on it now it's remarkable how well this works in as much as you heat the pad you put solder on it and the solder goes on that pad and it tends to just go where you put it it doesn't tend to go other places because you kind of think i'm going to be shorting this out all the time that doesn't seem to be what happens it just flows beautifully here's c1 and c2 so i'm going to heat the pad add a blob of solder to it heat the pad add a blob of solder to it so that's half the job that's half the job done already and i haven't even got them out of the packet now i'm going to use my special super glass things here to just get in close to make sure that's right yeah i think it seems to be so what happens next well you need your tweezers you've got your tweezers let's get out number one which is this one here all right there she is okay it's on the floor it's there can you see that it's smaller than anything you could possibly imagine right so with this particular one there's no orientation required it doesn't matter which way around it goes with some others because there's some diodes on here they do matter and i'll worry about those when i get to it so you're just going to pick this up to see i picked it up picked it up this tiny weeny little thing and the plan is i need the glasses on for this [Music] is you put it next to it you heat up that same pad again and you just push the little thing in that's it that's it i mean i can hold it again just heat that up a bit more just to make sure that made complete contact yeah perfect so you heat up the pad where the solder is you've already put so that that liquefies you push the tiny little component into it and then release release the soldiering line and it's there and it's stuck so i'll do all three before we solder the other side so i'm just gonna pick up the tiniest thing placing it down heating the pad pushing it in taking the soldering iron off and releasing it might stand up a little bit so i'm just putting this the tweezers down on top giving it a little bit more heat again just to push it down that's all right it's not particularly straight that one but it's good enough take some of the solder off my iron because it's very easy to put solder onto it when you're just dealing with these little pads pick up this one put it down heat the pad push it in release put the tweezers on top push it in and it's down just awesome awesome that is totally awesome now i need to put the tweezers down and bring some more solder into this now i might turn the whole thing round did you know you can turn pcbs around it took me ages to work that out i was just doing it all cackhanded before so now we need to put solder on the other side of the capacitor so all you do is get your soldering iron in there as best you can because it's tiny heat the pad add some solder like so heat the pad there's a little bit of solder now you your soldering iron might be too thick too fat to uh to get in there i mean this isn't there's no special end on this it's just the the one that it came with i'm not using anything particularly narrow at the end and so it is a little bit tricky but if you can just make contact with that pad and the end of that capacitor there will be enough to do it just like that just like that [Music] i just think that's brilliant see that looks like it's done i think that's i think that's good i think that's pretty good there you go that's surface mount components soldered on there by hand oh yes so i'll come back to the infinite machinery adsr eg1 later on in the week and that will be a serious surface mount project because there's all sorts of ics and diodes and bits and bits i've not done surface mount before so that's quite exciting so that'll do i think that is a long-winded introduction to soldering if you've made it all the way through to the end congratulations well done you should give yourself a bit of an achievement badge or some kind of leveling up but there you are so this is what's going to be happening over diy week i'm going to be sitting here doing kits some of it live streamed some of it done beforehand like this is done so i can edit it down and make it a little bit more contained but tons and tons hopefully of good interesting kit making content if you can join me for the live streams that'd be great i'll be publishing a schedule very soon but it's a week from the 27th of september a sunday night through to the following sunday i think and almost every night i'll be doing a live stream of some kind of kit including as i say the frequency central stasis leak the robo 3pt i'll be doing a decal dream i'll be doing a chat with steve from thunk funk is this fantastic shop down in brighton that provides lots and lots of kits it's the best kit shop in the uk i think and i'm also embarking on a project called cosmo which is cosmo format eurorack which is a bigger form of eurorack that's been championed by sam battle of look mom no computer i'm hoping to start off a bit of a project on that as well which should be quite good fun so that's that's the rough plan for the week there was something else as well i can't remember what that was but i don't know we'll work that out as we go but anyway i hope that was helpful i hope that was a good way to get us focused on doing that i hope that you can see that both through-hole and surface mount are completely achievable by some idiot with a soldering iron and you don't need a whole load of gear you just need a little bit of space some ventilation some safety goggles and some time that's what it's all about i hope that's helpful in the meantime go make some tunes
Up Next

34:06
Through-Hole Soldering Techniques: EEVblog Tutorial Guide
@EEVblog
958.6K views•2011-07-01

12:54
Triumph of Orthodoxy Icon: Byzantine Art & History Explained
@BenCallan
2.1K views•2024-08-06

9:49
FastAPI vs Flask vs Django: Choosing the Right Python Web Framework
@TechWithTim
302.5K views•2024-05-26

1:42
Game of Thrones Opening Credits: A Cinematic Analysis
@gameofthrones
46.3M views•2011-04-18
Related Study Plans & Knowledge Roadmaps
Structured learning paths in General & Interdisciplinary Studies
general-studies
Elevator Engineering: History, Physics & Cities
01From Hoists to Safety Brakes: The Dawn of Vertical Lift
02Hydraulic vs. Traction: The Engineering Physics of Elevators
03Modern Speed, Safety, and Algorithms
+ 2 more learning modules
12h5 modules
Explore Roadmap
general-studies
Rubber: Material Science, History & Geopolitics
01Origins of Natural Rubber & Mesoamerican History
02The Chemistry of Natural Rubber & Vulcanization
03The Geopolitics of the Rubber Boom & Colonization
+ 2 more learning modules
12h5 modules
Explore Roadmap
general-studies
Containerization: Evolution, Logistics & Trade
01Ancient Trade & Bulk Cargo: Amphorae to Barrels
02The Industrial Revolution & Cardboard Packaging
03The Containerization Revolution: Malcom McLean
+ 2 more learning modules
12h5 modules
Explore Roadmap
general-studies
Textile Tech: Evolution, Labor & Global Impact
01Pre-Industrial Textiles: Handloom & Cottage Industry
02Mechanization: The Spinning Jenny to the Power Loom
03The Factory System & Global Labor Transformation
+ 2 more learning modules
10h5 modules
Explore Roadmap