











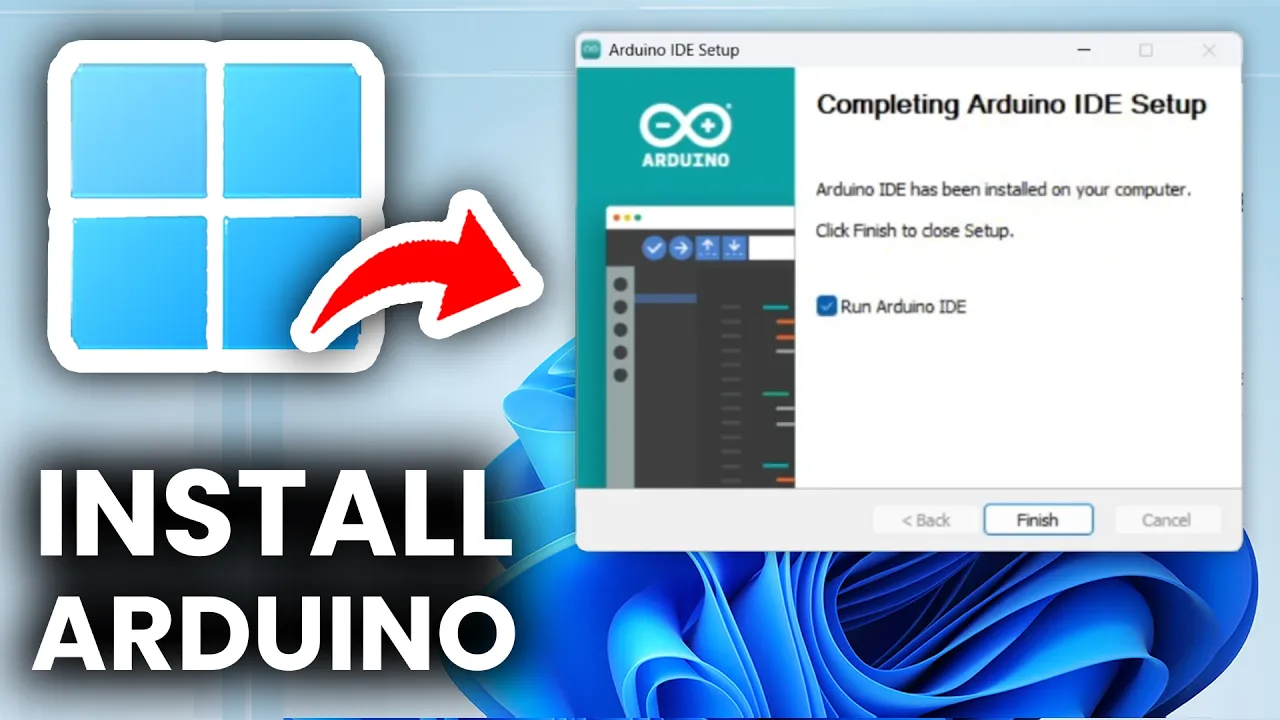













Arduino is an open-source microcontroller platform that simplifies electronics programming by providing a user-friendly environment based on the Atmel ATmega microcontroller. The Arduino programming environment (IDE) requires two essential functions: void setup() for initialization that runs once when the board powers on, and void loop() for continuous execution that repeats indefinitely. To control digital outputs like LEDs, you use pinMode() to configure pins as inputs or outputs, and digitalWrite() to set pins HIGH (on) or LOW (off). The delay() function pauses execution for a specified number of milliseconds. A complete Arduino program to blink the onboard LED involves defining the LED pin as a constant, configuring it as an output in setup(), then in the loop() turning the LED on with digitalWrite(ledPin, HIGH), waiting 1000ms, turning it off with digitalWrite(ledPin, LOW), and waiting another 1000ms before repeating.
Getting Started with Arduino: Complete Beginner's Tutorial
Added:[Music] [Music] [Applause] [Music] hey everyone Jeremy Blum you know I'm really excited to bring you this new tutorial series we're gonna a lot of fun with it the Arduino is an awesome open source platform microcontroller that you use for doing electronics projects automating things it does it inputs and outputs interrupts things like that we're gonna go through all that in this tutorial series I'm gonna be releasing one video every week each Monday the first one might actually be a little bit early but after that it'll be every Monday and yeah it should be a lot of fun if whether you're a beginner who's never used electronics before or if you're a veteran who's been working with microcontrollers remember but I've never used the Arduino platform this is going to be a great video series the first few are gonna start off pretty simple getting you intro to the basics of the Arduino how it works getting software installed making simple circuits that blink LEDs and stuff like that and then we'll get a little more complicated later on and it should be a lot of fun so let's get started here's a few of the things that you're gonna need to run through these tutorials and work with an Arduino platform of course you first need the actual Arduino you'll need a USB cable for that Arduino so you can program it that also powers the other we know while it's bugging to the computer if you want to use the Arduino not plugging the computer once you finish programming it you'll need a power supply of some kind you will also need a breadboard breadboards are extremely useful for prototyping out your electronic circuits will be running through several different types of circuits that you can use to light LEDs run speakers use motors things like that you're gonna need LEDs and resistors for a lot of tests will be running you might want a speaker or two so you can make sounds with the Arduino a motor DC motors will be using servo motors will be using we might get time to use a stepper motor and then if you have a sensor says we run down the line and I'll be telling you what those are as we get closer to those tutorials but as a preview we're probably using some flex sensors some force sensors and some light sensors you can see a couple of the Arduino projects that I've done myself you can click on each one and then link you to the the YouTube video that's associated with it these are just a few examples of the many many things you can do with Arduino and hopefully you'll find these interesting and maybe will give you some inspiration for projects that you want to pursue on your own once we've gone through the processes of using an Arduino in this tutorial series so what is Arduino Arduino is this open-source Hardware prototyping platform that's based around the atmel atmega series of microcontrollers and you can program those on your own using something called an ISP programmer and you program those in C code which is something I've done for several projects in my research lab at school but and that's really nice you can do a lot of really cool things with them but for the average person C code is annoying and cumbersome and it can make it difficult to do the really exciting things that you may want to do the microcontroller so what Arduino does is it extracts away that extra information you gives you the Arduino programming environment which is a lot simpler than C and the way it does that is there's a special piece of firmware loaded on here the Arduino firmware is loaded on to this atmega chip that comes pre-loaded on Arduino boards and then you program it in the Arduino programming language which we'll walk through in this tutorial series so basically this is the Arduino Uno this is probably we're gonna use the most in tutorial series but you're welcome to use many of the different kinds of Arduino Arduino is open source hardware which means you don't actually have to get an Arduino branded Arduino they release the schematics openly and you can build it your own using parts you have lying around or that you want to buy and you can install the firmware onto it with an isp program if you want to do that yourself there's a lot of ways to use an Arduino microcontroller but we're probably to stick to the you know this is the easiest one to get you can go grab it at element14.com it has a USB port for programming a DC power jack the power regulator for that you can power this thing via a battery or you can power it via a DC power source that plug into the wall we have reset button ISP programmer the actual atmega chip itself and then a bunch of ports for plugging in your inputs and outputs and that's basically the are do we not you know in a nutshell so let's now take a look at how you get your computer set up to be able to program your Arduino start by navigating to our deluna's website in order to download the open-source Arduino programming environment its Arduino dot CC click on the download button scroll down download the version for whatever operating system you're running on I'm on Windows right now and that's just a zip file you don't actually have to install anything so just download it to your desktop or wherever you want to put it and then download it wait for it to extract and that's it you're ready to run the program so what you then do is just open up the program we now have the automated programming environment open for the first time let's always start by saving our file first so we don't lose it I want to say on the desktop right now demo are do we know programs are always saved in a folder with the same name as the sketch the sketch is what Arduino it calls the program it's called the sketch the next thing you want to do is make sure your step to program the right type of Arduino so if you go to tools and board you want to make sure you have the right one selected we're using the Arduino Uno so you'll select that one if using a different or lino make sure you select the appropriate thing from the drop-down menu we're now ready to program our re window to get us started let's walk through making a very simple Arduino program all this program is gonna do is gonna blink the onboard led on and off all Arduinos have an LED connected to pin 13 so we only have to hook up any external circuitry we're just going to make the built-in LED blink on and off so it was a good idea to start by commenting your code in are doing then you just either with a double slash for a single line comment or a slash star for multi-line comment and we'll call this Jeremy's first program it's awesome so it's a good idea to defined constants at the top of your program so let's do that int led n equals 13 so for those of you haven't done much programming before all this is doing is saying that there's an integer 13 an integer is just a whole number and this constant is or this variable is defining what pin on the Arduino the LED is hooked up to it's pin 13 all Arduino programs have to have two methods in them the first one is void setup which looks like that and the content of that is going to go inside these brackets the second part of in every Arduino program it can be empty if you want but it has to be there is a void loop and what these two parts of the program are doing is the first one is setting up things that will run once at the beginning of the program when the Arduino is turned on and the loop part of the program is setting up things that will run continuously in a loop forever as long as the Arduino is on and this is something that you very commonly want to achieve with the microcontroller you want to have it do something forever until you turn it off in the setup program making sure we comment everything we're going to initialize the digital pins as outputs all the pins on the Arduino can be used as both inputs and outputs and we'll talk a little bit more about how you actually do that but for right now if we're outputting to an LED we're turning an LED on or off we want to make sure that LED pin 13 that we said before is that as an output and the Arduino programming environment you said that with the command pin mode so pin mode the are there are two arguments that pin mode takes the actual pin that you want to set in this case it's LED pin and whether you want it to be an input or output and we want it to be an output and you always terminate every line with a semicolon now we're going to write our loop so the loop is very simple all it's going to do is the LED hi or on wait a little bit turn it off and then wait a little bit and then it'll repeat and keep looking the heli D on and off so to set the value for a digital pin you use the command called digital right once again it takes two arguments the first one is which one you want to write - oh yeah that's gonna be LED pin and whether you want to set it high or low high means on low means off so we're gonna start by sitting at high now we want to stay high before it does the next thing so we'll put a delay in there the delay takes an argument in milliseconds so a thousand milliseconds is one second so we'll put in a thousand that'll keep the LED on for one second until we do the next command digital right LED pin low and that will turn it back off again and then we want to stay low for a second delay 1000 and then I'll keep it off for a second and then at the end here in a loop from the last thing it did back up to the beginning of the loop where I'll turn it on again so this will cause the led to blink on or off holding for one second each time and that's our first Arduino program that's all there is to it now we're gonna take our USB cable and plug it into the computer and the Arduino Arduino kind of lights up there so if you're on Windows which I am you're gonna have a problem with the Arduino Uno not installing the driver properly this is because a change that they made to the USB interface on the uno board from the older version of the Arduino boards if you have an older version it should just install automatically if you have the uno though you'll have to follow these steps so you're gonna click on the Start menu go to the control panel navigate to system and security if you are viewing by category and you're gonna click on system now go to device manager okay and now you'll see the arduino uno over here click on that and go to the update driver software option and we're going to browse the computer for the driver software and the driver was already downloaded when we downloaded the arduino software for a Windows computer so we're going to navigate to that folder which is on our desktop and in the drivers folder you just click on the drivers folder right here hit OK hit next it's gonna say it can't verify the publisher that's fine still the software anyway ok we're all done you can close close those windows that was that and we're ready to program our Arduino and to do that all you have to do is hit this little upload button right here it'll compile it and send it over to the Arduino board you have to make sure you have the right comport selected it'll say it's done uploading and now we can take a look at our Arduino board and as you can see the LED is flashing once in every second so congratulations you've just written your very first Arduino program okay that's all the technical stuff happy this week I didn't want to get too crazy just want to make sure you guys had system setup make sure you got and get an Arduino Uno or another Arduino if you prefer and breadboard and wires and resistors and LEDs and stuff so you can start experimenting with it all right you can pick up a kit of this stuff where you can get stuff from element - 14 comm or a few other places start working on your Arduino projects if you've used Arduino before or if you're new to it start brainstorming ideas we're going to be sponsoring contests on element 14 you'll be able to submit your Arduino projects both as a video response to one of the videos that I'm left loading as well as you'll have to post it on the element 14 forums and they'll get voted on by other users of the community and the person with the most votes is going to win a prize I don't know exactly what the prize is gonna be yet but should be pretty cool so start working on your projects put some videos together and it should be a lot of fun and I can't wait to see all your guys projects so if you have any comments on the way I'm structuring these videos or anything like that please feel free to let me know remember you can always leave a comment on the video or visit my website Jeremy Blum comm contact me through the contact form in there or post a comment on the blog post whatever alright great that's it I look forward to hearing some response from you guys seeing the projects that you guys are working on and next week we're gonna get into using some inputs and outputs and doing some more fun complicated stuff with the Arduino and it should be an awesome time alright thanks for listening guys thanks to element14 for helping me to sponsor this video series they were kind enough to provide a lot of the materials that I'll be using to create these tutorials feel free to go visit their website at element14.com check out their community which is a great place to talk to you about electronics the Arduino and basically anything else engineering related and they also have a store where you can buy a lot of the parts that we'll be using in these videos
Up Next

DIY EMG Servo Control: MyoWare Muscle Sensor with Arduino UNO
@Frank-yb4zd
63.9K views•2016-01-30

Triumph of Orthodoxy Icon: Byzantine Art & History Explained
@BenCallan
2.1K views•2024-08-06
Analog Inputs with Arduino: Voltage Dividers, Sensors, and Mapping
@sciguy14
682.4K views•2011-01-24

Game of Thrones Opening Credits: A Cinematic Analysis
@gameofthrones
46.3M views•2011-04-18
Related Study Plans & Knowledge Roadmaps
Structured learning paths in General & Interdisciplinary Studies