





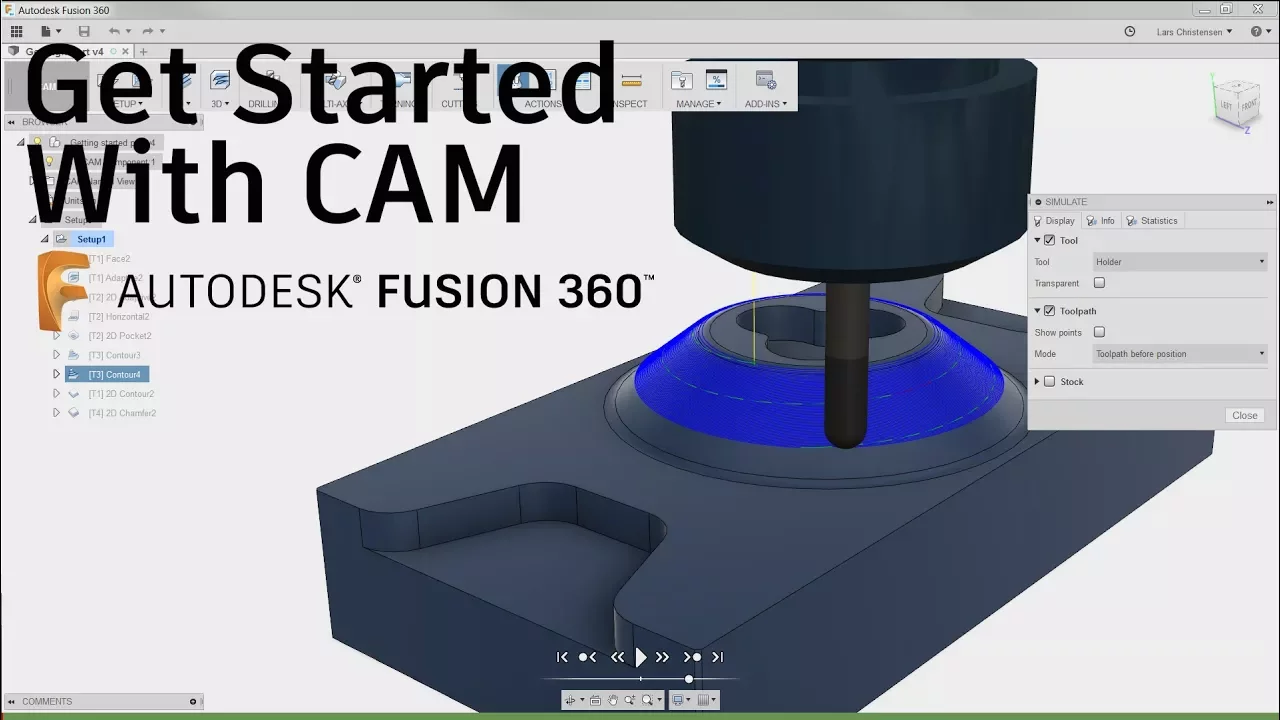
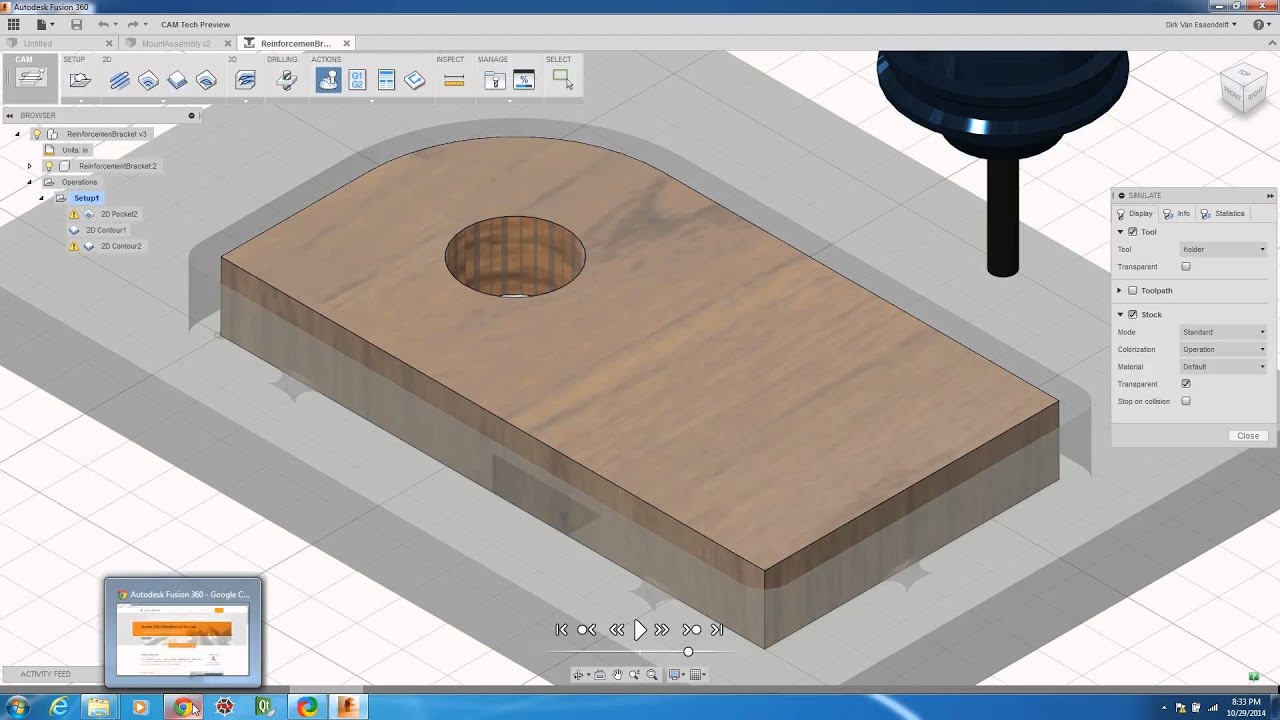







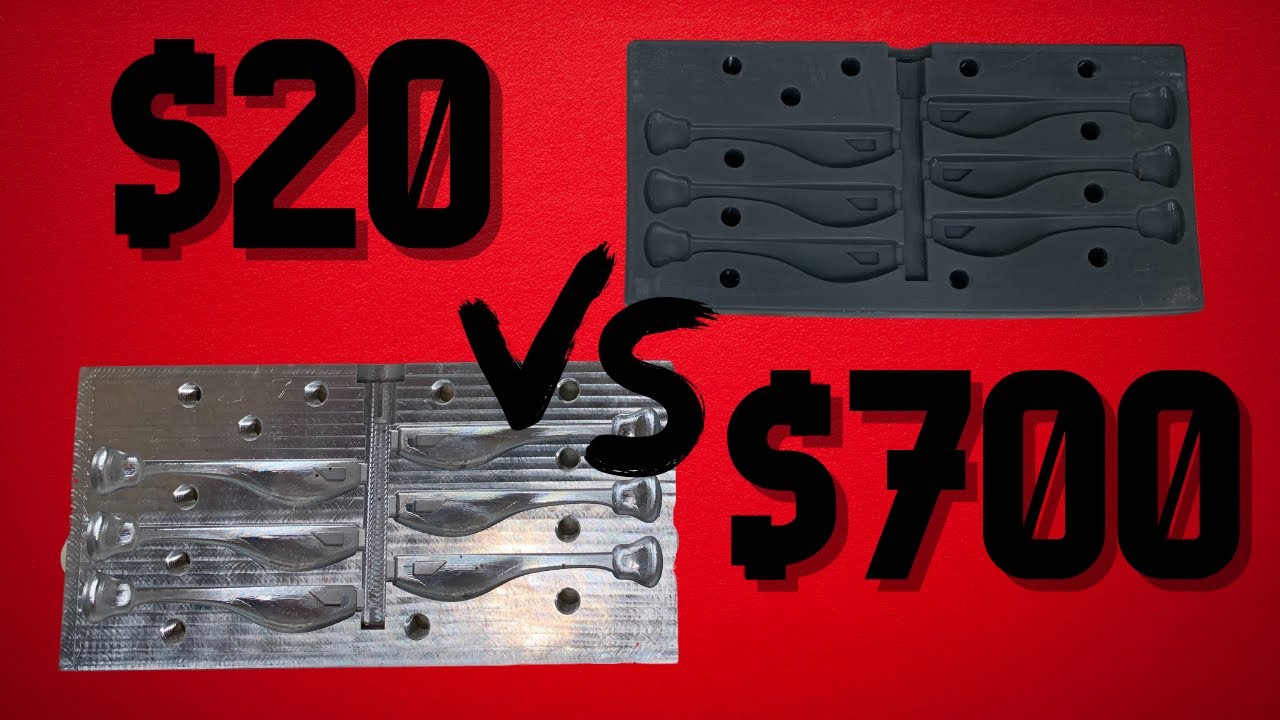
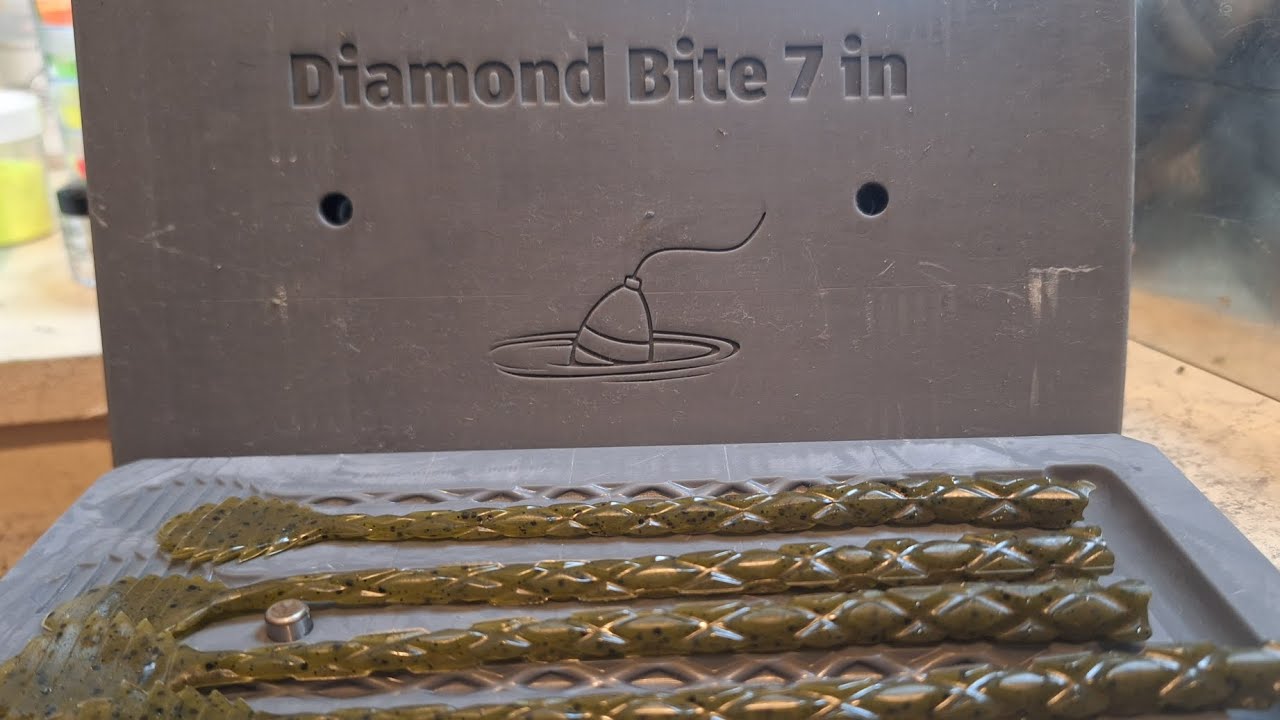


This tutorial demonstrates how to design injection molds for soft plastic fishing lures in Fusion 360 by first creating a 2D sketch of the lure shape, then using the Form tool to extrude and shape a 3D form, followed by creating a mold cavity by extruding boxes on both sides of the part and using the Combine tool to cut out the mold shape; the process concludes with setting up CNC machining operations including adaptive clearing for roughing and parallel passes for finishing, with attention to configuring tool parameters, stock offsets, and machining boundaries to produce functional injection molds.
Designing an Injection Mold for Soft Plastic Fishing Lures in Fusion 360
Added:Basic proficiency in Fusion 360, including 2D sketching, extrusions, and boolean operations (combine/cut).
Fundamental principles of mold design, such as establishing parting lines, draft angles, and preventing undercuts.
Introductory knowledge of CNC machining, including how subtractive manufacturing works and the function of basic cutting tools like endmills.
An understanding of soft plastic (plastisol) characteristics, including pouring temperatures, curing times, and material shrinkage.
Advanced CAM toolpath generation in Fusion 360, including high-speed machining (HSM) and fine surface finishing techniques for high-quality molds.
Design of multi-cavity molds incorporating runners, gates, and air vents to ensure complete material fill and prevent air pockets.
Practical execution of the injection molding process, focusing on heat management, safety protocols, and manual injection techniques using liquid plastisol.
Exploring alternative mold materials, such as aluminum vs. high-temperature 3D printed resins, and testing lure behavior in water based on geometry and density.
22K views363likes48:35Original Release: 2021-04-06
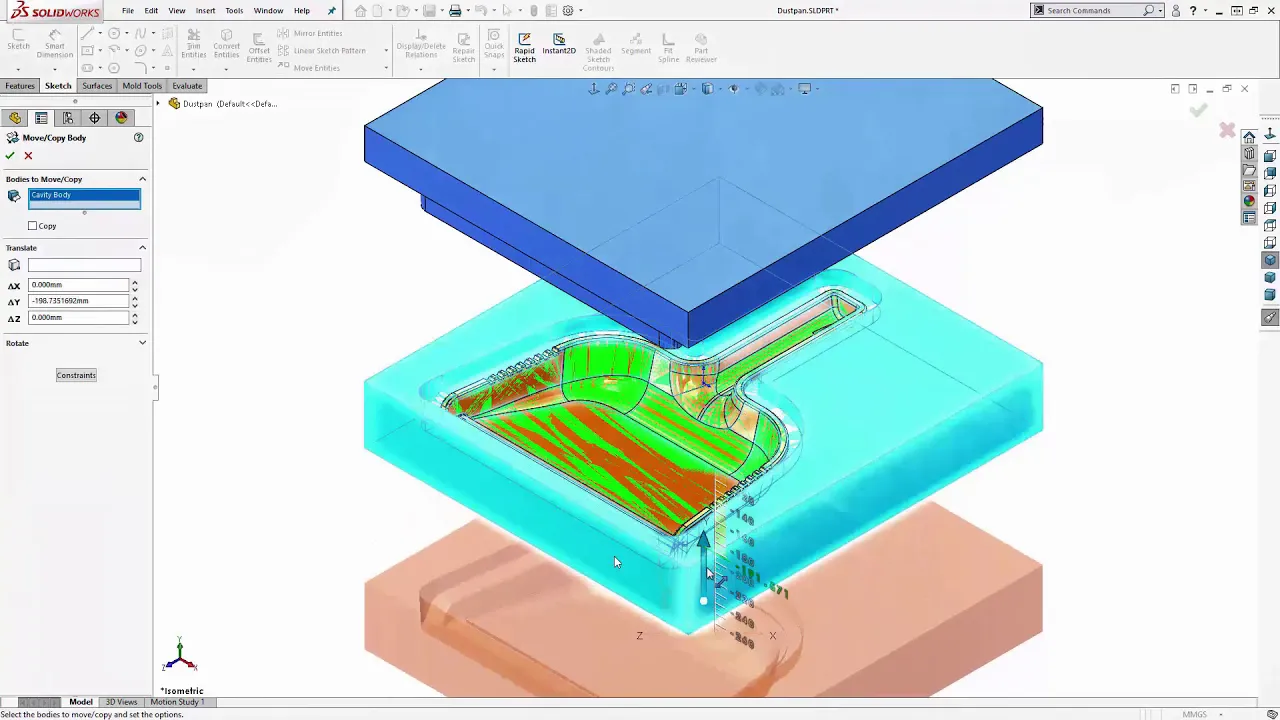
hey everyone so today is going to be quite a long video so uh if you want to learn how to design some type of injection mold or anything really into fusion 360 that would require injection molding i actually create my own fishing lures and injection mold them in the garage and go out fishing with them i like to do this because i can change little aspects here and there for one example you know just kind of showing you you know what we end up modeling within the system is something like this and i won't go into this type of crazy detail because it does take quite a while but i at least want to show you the basics and get you started so we'll go ahead and start with a brand new uh drawing and just going to move the mic here so um first off we just want to create some type of sketch a lot of times too is if you have a hand sketch drawing or anything of that nature this is the time to kind of upload it you do that through the insert and you click on canvas and what you could do is just kind of draw and sketch over it for this case in particular we're just going to go ahead and create a blank sketch right now is when you want to look at your coordinate system for my mill my z is coming out of plane so i want to go ahead and sketch it on the x y plane you can notice up here the x and y and z is sticking out that's where i make sure that i'm good so we'll go ahead here click to the front and just for all intensive purposes this is where you kind of can create like i said your sketch so for this case we'll start with a one inch circle and just to make it very simplistic we'll create some type of line here we'll have a straight back and then i want some type of taper down for a tail and then we'll say a nice little paddle tail something of this nature come back here to the sweep and then trim this up real quick and then i want a big old belly on it so we're just gonna do a fit spline and say that should be good okay so once you have this kind of set up this is my general sketch again if you draw it by hand it's it's pretty easy to just you know overlay that uh and you would have to skip this part altogether it's not really pertinent to the design uh we'll hit here finish sketch and this is where the fun you know comes into play like i said i like to draw these sketches so at least i get something to you know reference off of because this next step is really much uh artistic it's uh creating a form and it's as simple as that you create the form click here on box real quick and we're going to create a two point box is fine we're going to select right now it's asking us what plane do we want to select on so i'm going to draw it the same plane as that and switch back here to front and i'm going to just create a two profile plane or a box and basically just kind of get around my part um we'll actually level out the top to match and then we'll just reform that uh that tail to make it higher because i want the back to be somewhat straight for this one so you can see here this creates a um this box this uh kind of like a forum box and this is where you can kind of design you know is it you know how wide is it how many slices you have on your box a lot of times the length faces that's what you need to change um if you wanted more detail or more pull points you can make it 10 uh for this case let's say just five for right now i'm gonna move that so it doesn't crinkle sorry if you're hearing weird noises in the background all right so five faces the height was about right and you do want to make sure that your symmetry is clicked on and wherever this green line is means that's your mirror line so if you had let's say you wanted the width uh that would be this green line so anything changed on this side would change on the bottom and then length is really anything you know changing in there we don't want length we don't want width we definitely want height though because we want the symmetrical on both sides and we'll say it's a new body once you're done with this uh that's basically it you you're just going to be pressing and pulling and clearing from there so let's let's just change this to six i think that might give us a little extra okay click okay here and this is now the i think it's called that's the fun part but what you're going to do is select lines as you um as you can to kind of shape and mold this box into something that looks like that sketch that you had so this is very simple like i said you're going to come up here click on modify and this is where you're going to select your lines so i'm holding shift right now and all i'm doing is selecting all of these lines and i'm going to go ahead and drag this back i want a little bit more facets in the back here um you can see that you know we need to kind of have a facet to make the tail properly so just shifting these kind of towards the back end uh just gives us that more play in the center i want it kind of really evenly curved so i'm going to kind of line up these um edges with the main you know harsh points that i created so in this case we'll kind of line that up with the end of the belly just kind of keep pulling it again you can click on the front here it's easier to see and line that up uh this one in the middle what we're gonna do is uh try to clicked on the point so be careful you do wanna see the line not the uh not the points we don't want to get there yet and then click on this one so this is going to be kind of my center point again it's kind of kind of shift things so we might have to shift that back but we'll say that's pretty much good for right now and then i want that sweep to come up to the nose so i'm going to go ahead and move this facet or this edge i'm going to move that more towards the front and you can kind of see here that kind of matches up there again it's just going to be playing around with this that'll be good for for all intents and purposes today so now we're going to start grabbing some lines and we're just going to start shifting uh sorry my phone's vibrating right next to the microphone so my apologies um we're just going to start grabbing lines and shifting and kind of matching this form and you'll see here you know if you grab just one line and pull up you know it's going to start matching all of that and then we're going to come over here just to this bottom line shift this up to where we wanted it you can see how the shape is kind of just taking form we're going to pull the belly down just a little bit more take a look okay we can come up on this front just a little bit and i won't focus too much on this uh you know we'll just get the general shape but you know this is kind of your base point this is where you're gonna start shooting from and then like i said we're gonna get a little bit crazier in the tail just to kind of give it some shape but this was probably the hardest thing that i you know had to do trying to figure out how to create you know something i'm used to not like the parametric modeling system in autocad i'm used to just drawing it by hand or you know and then trying to revolve the problem with that is when you get into your uh making it 3d uh like when you're actually doing your tool paths that's when things get a little kind of crazy and so i i don't recommend you know really doing that method i would just say more or less you know do it this way uh so yeah we're going to keep just kind of pulling when you click on points versus lines it's going to shift you know that point but it's going to change kind of your model so you know just be cognizant of that you can click on really anything if you need to shift anything around for this one we're going to grab like this face and this face uh together and this is how we're gonna start making that tail grabbing you know these two points right here and kind of squishing them in you know just trying to form you know a paddle tail itself uh and then grab this point we can grab that and pull that up you can see it didn't grab that point so we'll kind of grab that one and down accordingly um but yeah this is this is basically you know that's the hardest part just keep kind of massaging this take a look at your forms you are going to be you know cutting this in half so just make sure that you know you're cognizant of that we're going to make the belly kind of bulged out just a little bit give it a little bit of roundness and yeah that looks kind of you know for this case that looks kind of good you can keep playing around you're just again you're just clicking on points uh don't over complicate this by any means just you know you're just basically just trying to make that shape that you you know sketched out but for this case i i think this is fine for for the tutorial so once you're done here we're going to go ahead finish form and we can go ahead and click off our sketch what i like to do then right now is kind of make sure my model is well within the origin so i'm going to draw one more sketch and create a line you know basically down the middle so then i can line up you know top-down view where i need to shift this part um i should have done a plane offset or something of that nature but this is fine so we'll go finish sketch turn sketches back on and i will click on this and all we want to do is move it so we're just kind of moving it um to the middle you can see it's not uh it's not super hard to do it because how we drew this box um you know it's just by i and most the time actually the snaps if you just zoom in you can get you know tighter snaps with autocad but that's about center for me so now we're going to go ahead and build our material so basically our mold uh what is the end goal of this so i'm gonna go ahead and place a box and let's say it's six inches so that's not long enough we apparently made this nine inches long so say we're going 10 inches and we made it about four inches tall hit okay and so we draw our box and then what we're going to do is extrude this box on both sides so we're going to go ahead and click here we're going to drag this out what i like to do is at least know my material so when i'm making the part so for this case we're extruding it out an inch just to cover the part you want to make sure you don't cut it you just want this as a new body for right now and click ok and then we're going to come on to this side extrude click on that uh and don't do that that that was uh that was bad we want to kind of view our sketch again the box and we can turn off bodies if we want and we know we extruded that other surface uh one inch so we're going to come back this way one inch uh it's yelling at me because i turned bodies off for right now new body that's fine and click ok so now we have two uh squares it's splitting our part this is kind of where the magic happens now is we're gonna go and start doing uh the cutting of our operation i guess where we're gonna hollow out the blocks with our model in it so i'm gonna go here to combine and i'm gonna change this to a cut operation i'm going to keep the tool because i'm going to cut the fish out of both parts so my target body let's say this back one for right now our tool body is going to be our fish so body one we're going to just click on body one and we're gonna say cut and keep tool now we're gonna do that one more time except on the other face so i'm gonna click this body i'm gonna make sure my cutting tool is the fish and i'm to keep my tool just so i have it and click ok now what that did is it just made a indentation in these two parts and we will go ahead and move click on bodies we're going to move this body and we're going to swing it around like a book and click ok so there is our molds that we just created you can kind of see they're both hollowed out uh exactly how we wanted the fish to be done and this is where you know what about the injection ports what about the air holes all that stuff so this is where i like to do it because this is the hard part is just getting the the main mold figured out these two parts separated and uh you know separate bodies now the nice thing with fusion 360 is i just go back in time before i made that operation so we're back in time and i'm going to come back to just the fish so just body one excuse me so this is where you know we just moved it we got the plane all this stuff is after the fact this is where fusion 360 excels i'm going to create a new sketch here i'm going to draw a circle basically so we're going to go top down create a circle for this case let's say 0.5 because that's my injection and we're going to go extrude that sketch turn sketches back on i just don't need to see really sketch one two or three right now and we're gonna extrude this circle and we're gonna overshoot it because we just want it cut out of the part click ok and then i'm going to create another sketch on this face we're going to go ahead and view it from this angle i'm going to just kind of eyeball it but right there it looks about right and finish sketch and we're going to extrude this into the part this one again is going to be a new body click ok and i'm going to just press pull this end so it's in there and then what i'm going to do is press pull oops click ok and i'm going to press pull one more time on this face and zoom you know get it kind of closer all right so that's my injection if you were going to be you know using a different size hole let's say your injector has you know half inch hole and then a quarter inch actual shaft that's where you would be modeling this out you know with your dimensions no dimensions of of where the circle needs to be um that's kind of you know the overall plan of what you should be doing um and then one more thing real quick um we will go ahead and draw in a circle for uh the air vent and we're gonna put one really tiny let's say 0.125 and we'll put one more up here 0.125 okay finish sketch now those did draw on the opposite plane over here so just an fyi when we extrude these can go ahead and just pull them back just kind of saying before we'll just say new body and direction we will start it on an offset and let's just say offset's going to be negative 8 inches the other way positive 8. there we go i just brought it over you know and i don't see any of those sticking out just right out the part which is what we wanted click ok so this is where you want to join everything together because we want that one single body one to have all of these features so what i do is i like to use the combine tool select my model select all my attributes and instead of cut we will say join and we don't want to keep the tool this time we want all of those merged into body one and click ok so that's all been merged back into body one and all i'm gonna do is drag this over cool part is turn off body one and you can see everything got cut out automatically in our mold uh exactly kind of what we were looking for like i said before if you have an injection port let's just go ahead and do that real quick what i like to do is i'll create a sketch and pick this plane one of two options either we roll back before we moved uh that item so we'll go ahead back to here where we can see it again sorry create a sketch we'll just pick the surface as our sketching plane we'll pick the center of the hole and let's say we have a one inch diameter port that's where i would do this operation it's just easier to remember and then we'll finish sketch extrude it click on here come down 0.3 just for the sake and we'll say cut click ok and we'll scoot over to the right so if that if you've ever bought an injection mold for fishing lures that kind of would look familiar right everything should look familiar sometimes you do need extra um because of the volume of your mold sometimes you do need to make this hole a lot larger or you need some type of reservoir in here for this plastic to suck in any internal plastic so you know just keep that in mind when you're doing this it uh you might have to play with that that's why it's pretty much once you start learning how to do this you might have to create like a larger you know circle within there and just an fyi so let's go ahead and get into the machining operation because this is also another fun little item that you know it took me a while to figure it out so i would hope someone would actually show me how to do it back in the day so what i'm gonna do is just machine one at a time so i'm gonna turn off body three and we're gonna just focus on this body right here so i'm gonna come up and turn off my sketches so i'm just left with a blank slate that's what i want to mill so i'm going to go to from design tab i'm going to go here to manufacture now this is where a couple things start we have to set up our material that's that's you know one of the first items but something that you should probably do you know right away is manager tool library um your tool library is where all of your um tools are saved so just get very used to coming in and just grabbing you know tool libraries accordingly um i've got them set up for my machine this is just a test one that's why you see these two and i've got a couple of these end mills already kind of in there so for this case just make sure you kind of come in here you're going to click either on your local library and click the blue plus sign and then this is where you're going to add your tool if you are doing an engraving feature just an fyi something else i just learned was chamfer mill is your engraving tool that's if you have like a v carve bit and you need to do fine detail you just pick chamfer mill and you can you know put in the parameters there and the engrave feature in fusion 360 actually works quite well but only if you choose chamfer all right so we can have a whole discussion about that one so i'm gonna go ahead here and close this out and i'm gonna mill this out so i'm gonna click on i like 3d adaptive clearing especially uh with my cnc it's it's one of the easier operations sometimes people get it and because they draw their parts not using that form tool uh they get a lot of faceting and the machine like for example fusion 360 has got to think about how is it going to perform that operation so just an fyi if you're getting some weird issues or whatever i would say keep refining your form tool uh and getting that kind of you know to the liking of that you you know are seeking for um but yeah so adaptive tooling we're gonna click uh our tool this is where we're gonna start with like a flat end mill and then our finishing operation we're gonna switch to a ball end mill but we're just gonna go ahead flat first what i like to do is kind of see the geometry and you know what i already skipped a step that i said don't skip we have to go here to setup we're going to create our setup now just kind of note [Music] when you're doing your setups fusion 360 initially defaults to adding extra material to your box and this can make or break any of your models so just an fyi you know you're going to have to you know be very clear i want to zero off all of these items i always just do the relative size box but you can say fix size box and just type it in yourself or relative size box just make sure you change your stock offsets unless you're planning to do a facing operation um then leave the stock offset so you can get a nice flat surface but in this case my material is already flat so i'm going to just hug that right up to the machine itself um once that's there the next thing to do is determine where your stock is you know like what's your zero what's your origin so i'm going to pick this upper left corner because that one makes it easier for my machine and i'm looking at it my z-axis x and y are flipped so the easiest way to do this is actually just click the z that's exactly the direction my z needs to go but my x needs to go the other way so i'm going to just go ahead and click that my y is in the positive direction for my machine so that's where i'm going to set my coordinate point you could pick the point down there if your machine's going bottom left i always do mine off top left because i have more space once your x y and z is set up your box is set up everything's good go ahead click ok and that saves in your setup now let's go back to 3d adaptive clearing once 3d adaptive clearing is selected we're going to select our tool like i said before we're going to click our flat end mill and any of these settings you know really doesn't matter your surface speed is is probably you know you're cutting feed rates that's that's going to matter the most is your cutting feed rate everything else will change uh you know determined you know from your inches per minute that you're running if you're running any faster um let's say 100 inches per minute you know it's telling you your feed per tooth and that's that's kind of very important if you're getting into this and you don't know when you're setting up your tool start looking at your feed per tooth and that's telling you what your chip load is so just kind of pay attention 0.006 for that small of a mill actually i believe it should be smaller to be honest with you so we'll say 150 inches per minute and that actually brought ours up so let's drop that down to a hundred inches per minute um let's say 75 0.005 that's that's fine um the only way other to change your feed your chip rate is to change your spindle speed uh so if you did like 6000 rpm that should have changed oh here this one 6000 rpm now it's dropping it so when you get into small bits you know just kind of pay attention each tool manufacturer has a recommended setting uh for your you know your tooth uh how much material you're taking off per tooth and the smaller the bit the smaller that number normally gets and when you get a little bit larger you can get a little bit more aggressive or if your machine allows you to get aggressive so just play around with the spindle speed and you'll figure out your surface uh your cutting feed rates you know accordingly obviously if your machine can't do 6000 rpm you setting it here is not going to make your spindle go 6000 rpm unless you have it set up to your computer but again that's more of a you know a more advanced machine this is where they're setting their rpms from this menu from the machine itself like when they run their g-code it'll automatically set their spindle 6000 if your spindle is like mine and not hooked up in its manual it won't matter [Music] so let's go here to geometry and this is where we're gonna try to you know get the machine to do what we wanted to do a lot of times people just keep select you know stock contours and things will work out perfect uh sometimes uh you'll have to come in and select items accordingly and it does get a little daunting but always start off with you know the regular settings first and then see what happens i will just leave everything selected as is we'll go to heights and make sure that our heights are all set up fine retract height 0.2 inches clearance height is 0.6 you know it's a little high for um for travel so we'll just set that down to 0.2 it's our clearance height because it's basing it off of the retract heights but any more vertical movement if your machine's got a slow z axis that movement's going to take forever to happen so just an fyi this is where you're setting those retract rates and you know the longer and higher they are the longer your cut's going to take because it's going to be moving more than in the material so a lot of people set these really low i just like to keep a nice distance just in case something happened during the operation and then we'll go to passes and we really won't change anything the only thing we're gonna really look at is the um there should be a material stock to leave so this is the one thing to look at it's going to leave.02 and that's leaving it for the finishing operation that's a standard autocad fusion 360 option so just an fyi stock to leave is going to be picked up in our final you know finishing passes go ahead and click ok and let's see how this does so you can see right now it's generating the tool path it's about 50 complete it's clearing quite a bit of material and you can see it got everything but these final you know air air vents which is perfectly fine because we'll try to capture those in the finishing pass so that's just getting you know rough material out you can see it's a spiral path it gets to the middle and then it works its way out and then works its way up so that's a pretty efficient you know path i don't like how this is jumping back and forth so to remediate that we're gonna go back in here real quick right click on adaptive go to edit now back to the geometry instead of saying our stock contours we're going to select you know the actual contour that we want it to machine around so we're going to click here and you're going to click one more time and that brings up this crazy menu that's nowhere else in autocad and you'll see it's got this plus sign and the minus sign and we're going to go around and we're going to click you know roughly the large items of our part and i'm going to go ahead and click in here because i want this all kind of machined at the same time and that should be enough to hopefully have fusion auto connect all that so we'll hit accept and you'll see it selected everything including these out but we know it won't machine it so let's click ok and it's going to stay in that bound so this hopefully should just calculate going inside and because it was going to the outside over here that's why it picked up this so we're going to go back in here one more time and this happened so you know don't be discouraged we're going to click back into here click off of this i'm just going to click and click one more time i'm going to go in and i'm going to physically select the edges so it does not try to go outside of these bounds and we'll come in here and click on every edge that i don't want it to machine and for this case i'm going to try to force this to uh just stay within the fish click accept the contours there we go and click machining boundary i'm going to say the selection that we just did that's our selection all right we're gonna say our tools inside the boundary i guess i should have done it this way don't mind the stock contours delete that redo this uh sorry with the selection i'm having a monday same thing as before we're going to click on there again we're going to just delete all this clear this back out click on the item click it one more time manually select all of our faces normally you don't have to select into here but i'm just doing it just to be on the safe side go around the fish and click all these edges there we go and there should be that one more click accept now you can see it's got our fish that's what we were looking for we'll keep the tool uh centered on boundary we don't want it drifting off anywhere else and go ahead and click ok and let's see how this does looks perfect keeps the you know moves nice and clean all within here and then what we can do is we can worry about the shaft later this is the hardest part is basically getting this adaptive clear to just select the model portion that you want as for the second one we'll go ahead and create another adaptive clear and this one we can actually just leave all of that we'll say rust machining what it's going to do is hopefully remember what we machined out and it's going to take care of the rest so let's hit ok and let's make sure that it doesn't start trying to carve out the fish nope and it did so we're going to go back in here and we're just going to select that geometry machining boundary selection we're going to click on here we're going to click this long and click these and we're just tracing the part this is kind of a trick that i learned and i'll hit accept and you see how it auto closed i didn't have to click everything just the general outline the computer figures it out from there click ok and there it is it just does it all by itself all right so our part shaping up we roughed it out you can see all these different steps but we left that point zero two so it's going to leave that let's go back here and start doing some finishing operations the easiest way that i can tell you to finish something in a mill or any type of cnc is doing parallel passes and doing really tight um the reason why is it the tool path is nice fluid even it'll catch all the corners you don't have to start doing if you want to get really crazy like spiral for example or even this morphed spiral you end up with these machining marks at the end so if you can kind of see how it's you know kind of all over the place those are great but sometimes you're left with those tool marks so if you're okay with that tool mark being left on your project then that's fine but um i don't so i just like doing something very simple parallel it's a little bit longer but to be honest with you it comes out with great great finishing so i'm going to select my tool i'm going to change this to the ball end mill and so ball end mills use them for your finishing operation we're going to go ahead geometry we're going to just say bounding box i guess is fine or actually we'll just keep it silhouette for right now let's see what it comes up with rest machining we'll click that actually we won't click that we'll just let this bad boy finish make sure stock to leave is unchecked which it naturally does because this is a finishing operation and we'll click ok and let's see what happens here so what it did was it actually started surface finishing the top of the part so we'll go ahead here edit again and go back into geometry and i'm going to change it to selection again and i'm going to pick just the outlines that i really want it to focus on so i'm going to click on these lines right here sometimes you do have to wiggle your mouse over it so the computer actually catches what you're trying to do and then i'm gonna actually just try to do the same thing again and uh accept that and there that that grabbed that and i'm gonna want it to go back and forth left to right so since we saw it was going left to right we don't have to change the angle yet but we're gonna change the angle for this slot up here gonna go ahead here and click ok and there it is that's now you know coming right in here but here's my issue you can see the tool needs to get a lot smaller you know closer together to get that nice surface finish so that's where we go here into passes and this is where you change your step over so my step over right now is.0625 don't know why that just closed out on me but we're going to change this to like.002 and click ok what that's going to do is make a nice tight path and you can see you know it's very nice and tight along here it's going to leave us a nice surface finish when we zoom out you don't see any of those facets anymore that's how you're going to get a tight you know contour tool path uh and you can see there's really not much tool lift you know these yellow lines are the tool lifting off the part so it's doing majority of its time in the part then what we're going to do is do the same thing to this except i'm going to change it going vertically because it's a little easier and we won't care about it having a million steps because it's not a finishing pass this you won't see this this is just for the injection itself so i will go here to say 3d parallel make sure my ball is selected do selection i'm going to click here i'm going to kind of rough outline i need this hard edge and then i'm going to select that if you can hear beeping in the background my apologies my neighbor's house caught fire behind us but anyway so that should be good click accept that's exactly what we need to do and remember how i said it's gonna go left to right well we wanted to go up and down so this is where we're gonna change our orientation so the pass direction which is right above step over we're going to go ahead and change that to 90 degrees and go ahead and click ok and now what that should do is yep cleaned it right up ran these and like i said we don't need the step over to be massive here because we're not going to see it so why not save the machine time it's just for an injection port at that point so who really cares we don't need it to be 100 perfect and there you go that's basically how i design this now if you're wondering how to export this just go ahead and click the nc program what that's going to do is give you this nice screen you can change your post mine's mach3 inside here is gerbil marlin any type of post-processor that you have for my case i'm using mach3 so we'll leave it there operations i'm gonna fusion 360 actually for whatever reason took away tool changes which is very simple to program yourself you just it takes you a couple extra steps we're gonna select these two click enter i'm gonna overwrite because fusion 360 likes to just save things as the same name view nc code and there's my g code ready to go using my flat end mill tool number one if you named them different tools and establish it this is where you could combine the files set up tool number two you know and fusion you know again removing something that uh yeah rapid moves is reduced to match the feed rate of cutting uh so if you do a faster rapid move um they've already kind of pushed it in here unfortunately you have to buy fusion 360 to get unrestricted rapid moves which absolutely crazy oh fusion you could set up a very simple program to just actually look uh after z moves and and change things if you really wanted to um but it's fine it's not the end of the world in these this is why i'm setting up these tool paths to have the least amount of rapids that you can also uh g54 something to note that's your fixture so if you've set up your fixture as ge56 uh fusion auto sets it to g54 but on my mill i like to set you know g54 as one of my tool holders uh another tool holder if i'm doing like a double uh clamp on the bench uh setting it up g54 g55 i believe you get all the way up to g58 with mach um those are just your offsets your tool offsets so make sure that you change that if you uh don't forget to do if you forget to do that then you could really mess up your part um and then i will go here and just run a quick simulate just to make sure that we didn't miss anything we will leave the stock i deselected tool path and click ok so you can see it's coming in here doing an adaptive clear coming over here starting to do that adaptive clear we'll speed this up once you get done with the simulation this is kind of the other neat part is you can look at your statistics how long is it going to take uh with the speeds and feeds that you've actually set based upon your machining so we're going to just kind of speed this up as fast as possible at this point because there's a lot of passes a lot of times i i'll i'll change this so it doesn't run that much but something you're looking for in here is any of any yellow warnings or anything that could pop up and that's just meaning like your tools run into something or you know any type of issue whatsoever we're going to go ahead and skip to the end here and hopefully it just processes that and this is where we get into statistics so if i ran this part right now with the speeds in the speeds that i'd set you know i think it was 100 inches per minute or 75 inches per minute it's going to take two hours and 29 minutes uh to actually do this and the machining distance you know it's 557 feet uh worth of travel left right you know um so just something to keep in mind when you're doing your operations you do want to you know kind of look at your machining time try to optimize your tool paths as best as possible you know and go from there so hopefully that gives you a good insight i wish someone showed me this back in the day like i said this is something that i've created you know on the side it's really like a test piece again using all that i did draw some sketches and project uh scales onto this fish as well as built you know some extra planes in here and built some fins as well as kind of free shaped some gills on this and i will show you the manufacturer uh of this part i did it in one mold so i could just do a one pass put some known indexing points on the mold itself we'll go ahead here and turn off that fish model so we'll turn off i believe body nine yep and i set it up so i could just put this in the machine it'll cut out both parts and then what i did was i just took the band saw and cut this right in half my indexing points automatically lined up both sides because they're obviously positioned the same and i was able to get one mold in one shot and you can see all my extra air vents all the extra details and then as well as the entrance uh one thing that i did have to do is is widen this out and make because the bait is so large i did have to create some type of reservoir in here so when the inside or the outside cooled and the inside was still molten it could pull in extra material so i did have to widen up the mouth this was too small and i had to make it quite larger and then as well as increase the shaft diameter to kind of hold more liquid plastic so when this cooled it actually sucked it in but that's trial and error you know with worms and small stuff you know curlicue worms or anything of that nature it's it's fairly straightforward you don't need that reservoir it's when you start getting into larger injection molds that's when you have to start worrying about it especially with like a plastisol or plastisol type soft plastic so again hopefully that helped you and have any questions comments uh please you know leave it in the video below and like i said i'm sorry if this was a long video but hopefully you learned something today and catch you on the next one thanks for watching you
Up Next

13:51
DIY PneuFlex Actuator Production: Step-by-Step Silicone Fabrication Guide
@rboTUBerlin
51.9K views•2013-03-04

12:54
Triumph of Orthodoxy Icon: Byzantine Art & History Explained
@BenCallan
2.1K views•2024-08-06

9:49
FastAPI vs Flask vs Django: Choosing the Right Python Web Framework
@TechWithTim
302.5K views•2024-05-26

1:42
Game of Thrones Opening Credits: A Cinematic Analysis
@gameofthrones
46.3M views•2011-04-18
Related Study Plans & Knowledge Roadmaps
Structured learning paths in General & Interdisciplinary Studies
general-studies
Elevator Engineering: History, Physics & Cities
01From Hoists to Safety Brakes: The Dawn of Vertical Lift
02Hydraulic vs. Traction: The Engineering Physics of Elevators
03Modern Speed, Safety, and Algorithms
+ 2 more learning modules
12h5 modules
Explore Roadmap
general-studies
Rubber: Material Science, History & Geopolitics
01Origins of Natural Rubber & Mesoamerican History
02The Chemistry of Natural Rubber & Vulcanization
03The Geopolitics of the Rubber Boom & Colonization
+ 2 more learning modules
12h5 modules
Explore Roadmap
general-studies
Containerization: Evolution, Logistics & Trade
01Ancient Trade & Bulk Cargo: Amphorae to Barrels
02The Industrial Revolution & Cardboard Packaging
03The Containerization Revolution: Malcom McLean
+ 2 more learning modules
12h5 modules
Explore Roadmap
general-studies
Textile Tech: Evolution, Labor & Global Impact
01Pre-Industrial Textiles: Handloom & Cottage Industry
02Mechanization: The Spinning Jenny to the Power Loom
03The Factory System & Global Labor Transformation
+ 2 more learning modules
10h5 modules
Explore Roadmap