













This tutorial demonstrates how to build a simple poll application using Cosmos SDK, covering the complete development workflow from scaffolding with Starport CLI to implementing core features like poll creation, voting, and token-based payments. The session explains the Cosmos SDK architecture including types, handlers, keepers, and persistent storage, while also introducing smart contract support through CosmosWasm for extending application functionality after deployment.
Building Your First Cosmos SDK App: A Beginner's Guide
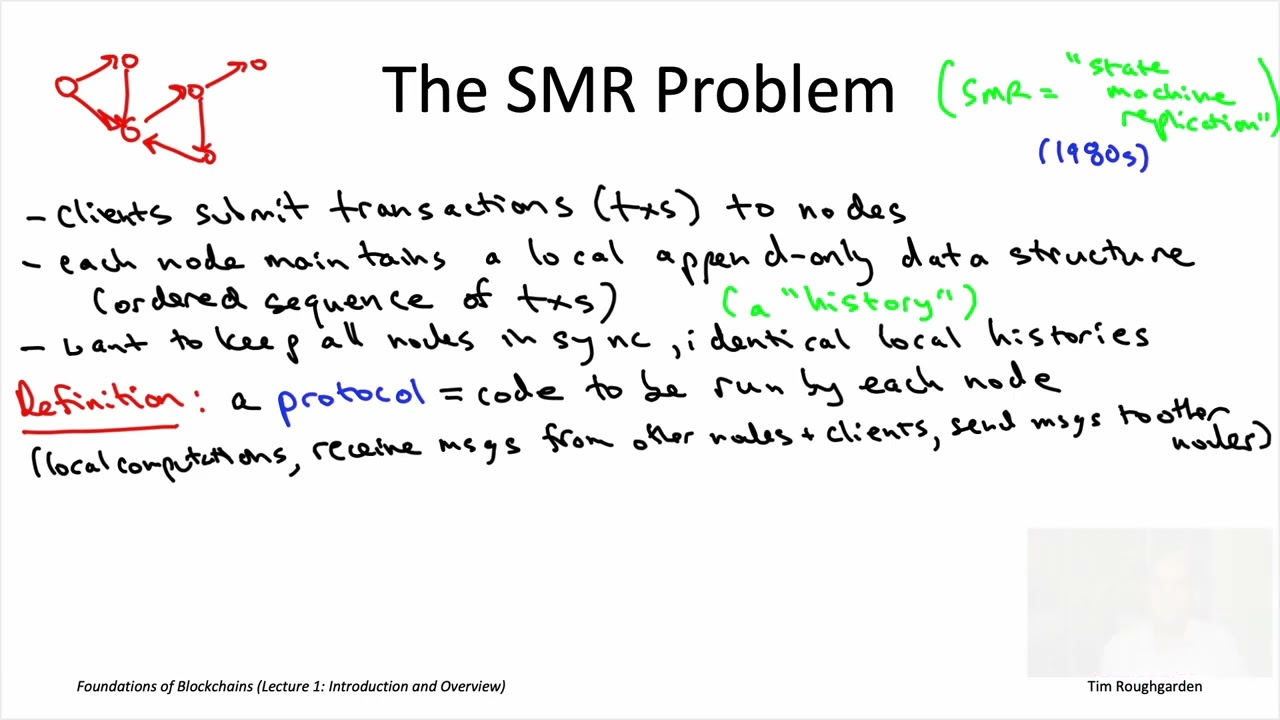
Added:Fundamental blockchain concepts such as state machine replication, consensus mechanisms (like Proof of Stake), and cryptographic public/private key pairs.
Intermediate proficiency in the Go (Golang) programming language, which is the native language of the Cosmos SDK.
Basic front-end web development concepts, particularly the Vue.js framework and how client applications communicate with APIs.
Familiarity with command-line tools, terminal navigation, and package managers like npm or yarn.
The Inter-Blockchain Communication (IBC) protocol to connect your custom blockchain with other chains in the Cosmos ecosystem.
Advanced Cosmos SDK module design, including custom keepers, message routing, end-blocker operations, and state-upgrade migrations.
In-depth study of Tendermint (CometBFT) consensus engine, node validation, and securing a decentralized network.
Integrating CosmWasm to enable secure, multi-chain WebAssembly smart contracts on top of your Cosmos SDK chain.
Tokenomics design, governance mechanisms, and the processes involved in launching a public testnet or mainnet.
12.4K views143likes1:39:08Original Release: 2020-08-10
uh hey everyone uh today we'll look at how to build uh your very first cosmos application from scratch the session is aimed at people who may not be that familiar with cosmos or even go so we'll look at into what parts constitute hospice application how they interact with each other and try to build something useful so the application that we'll be building is a simple voting application so you have a form to create your poll then you have buttons to make your choice and the choices registered and also add a feature to charge people for creating polls for this you will need go installed as well as node.js for the for the front front for the front uh we'll be using starboard tool to generate to scaffold and serve our application so if you haven't installed it by now uh please do at github.com tendermint starter so let's start i have starboard already installed so let's let's begin first of all let's scaffold the boilerplate code for our application we use starboard app and a path and we'll call this application a poll so we can see that it has generated a directory called pull for us and let's explore what has been generated so this is a very simple um almost empty application which contains only a few directories app directory contains app.go which is the main file of our application and it ties together all the modules we use and all permissions we won't be looking at it right now but it helps to know that everything ties together in this file then we have a cmd directory uh with uh two directories for cli command and d command so you would after building your application you would see uh two new binaries in our case pulse cli and pole d pol d is used to launch our node and pulse mostly and pulse cli is used for interacting with our application so most of the commands that you will issue will be with pulse cli front end is a directory scaffolded for us by starport and it contains a web based view client of course you're not limited to vue you can use any framework you want or no framework at all but we're using vue just for convenience and there's an x directory which contains custom modules that you build in our case that's only poll which will contain all the logic we'll go through the files later on so after we've scaffolded our application let's try to run it we run starboard serve and it installs all dependencies builds the application then it will initialize the chain create users for us and launch a simple welcome screen so yeah we can already see that tendermint consensus engine is running as well as the back end of our application if we go there we see that it's running also the user interface has loaded up by now so this user interface uh what we see is served from the front-end directory okay it's pretty much empty right now because we haven't added any features let's let's do something about it going back to our application we see that it's it has a poll entity so we need poles and we'll need votes let's start with polls so using start work we can also generate types data types to be precise type poll the first argument is the name of the type in our case it's poll and then goes a list of fields a list of properties so a poll will have a title so we want our poll to be named right and we will have a list of options so if we open x directory right now we'll see that we it has generated several files for us first of all handler it generated a type for our poll and it modified our client keeper to understand how it works together let's look at the first of all what has been generated on the web client so we run starbucks server again to rebuild the r application it takes a while before it compiles everything and now we can see that it's running so after we've scaffolded our type we get this new form so for each type you scaffold you get the form you can not use it but it's useful to to get understanding what happens so if for example we take one of the mnemonics from from from a user that has been generated for us and sign in we'll see that this user has 1000 tokens and now we can actually create something so say hey starboard we're live so yeah what happened is we signed in so we signed in into our account inside our browser and we get a public and private key to sign our messages our transactions and then we created a transaction that contained a message to create a poll and then we requested a list of polls back so if we try that again but with inspector open we might see it a little bit better so let's say but let's make the request so we can see that several things several requests has been made uh first we go into our account to to see how many tokens we have in case our operation costs tokens and by the way the request was made to localhost 8080 but in our proxy we we redirect this request to localhost 1317 our backend so after we got our information about the about the account we make requests to poll slash poll and the request is a post request we are sending the data that we want to be included into our transaction which is a title and options and what we get in return is a list a standard transaction standard non-signed transaction that is formed the way the blockchain application expects to receive it so the data that we have passed um was formatted this way then what we do is we sign this transaction that we got from our backend and we broadcast it using the slash txs endpoint after it has successfully been broadcasted we request a list of polls by making a get request and we get requests back so if we use our backend we'll see that we actually have to actually have this available for us so obviously we can use any kind of front end to to fetch this data back graphically it looks something like this so again from the browser we make post request to our endpoint it creates an unsigned transaction with messages sends it back then we sign it then we post the signed transaction back to slash txs this transaction contains messages as well as signatures so your application back-end application can verify that it's actually you who did sign this transaction messages yeah i have a request from moody he said he's unable to access the application on his a0 port and he had an arrow one serving and the error is in initializing the chain and he asks you to please check dot slash init dot dot s h okay um let's let's debug this problem um if you have a problem error okay that might be um let's see what happens if you run make in it should i go to the channel where was this question asked um it was as privately i can just um post it okay i think we had a similar type of question in our issues okay one of the one of the problem might be that um um do you have go installed properly like after after you scaffold your application and you go into okay yeah i i can see it in zoom chat right now a message from nick the problem is that you don't have the application installed so after you run make what it does it is it compiles the application that you're building and it installs two binaries in our case uh block d i mean in our case pol d and pulse cli but in your case it's block d so uh to verify that it installed it correctly uh you run which block d no actually git has nothing to do with it it's just again i'm answering the question from slack from uh zoom uh it uses git for versioning but this error doesn't affect anything so make sure that you have um go in your path so that's one of the things that people often fail to do properly when installing go so you need to have go bin inside your path uh for more instructions you would want to um to go to go website and actually read how to install it um it depends on your operating system but go lane install yeah it will tell you to to export your path so if if for example you're building a blog application and after you type which blog d or blog cli it tells you like something is not found then your application was not installed so you need to make sure that you have go bin inside your path otherwise you won't be able to run your application so you can also you can build your application manually with make command and if you go into the make file you can actually see what it does so yeah the answer is please make sure that you have a go bin inside your path okay we'll just wait for confirmation from um people who got this arrow to make sure that um okay even after setting the path make still doesn't run okay let's see what's that all about uh mate doesn't run when you run make does it give you any errors like it should spit out a bunch of text but you shouldn't see errors at the end uh you can just type it in zoom chat i'll i'll see it immediately okay okay cool modding is back on track okay it was the path yeah we are we're aware of the fact that it's sometimes confusing to install go so we'll try to kind of include it in starboard um information about how do you how to do it properly and like catch errors before uh people actually encounter them because we've seen a bunch of errors that are not actually starboard but are related to go back from nick also nick are you okay is everything okay for you okay no okay add the path by still having error can you pass the error here in the chat nick so we can see it yeah so if if you've uh if you've successfully added a path um to check that everything's working you run make it builds the application and installs it after this uh did you source uh profile after adding the path yes either you should um if if you do it in your terminal like you've uh manually added a path uh go to your path then you should source your profile or you can do it permanently in bachelor c or any config file so yeah i would say you you should um you should source it so yeah following the instructions on go lane website you see that they you actually can modify your dot profile uh to be shell independent and just add this line and then source uh your profile or restart your shell we'll make sure to add all these details in um um in the docs just to make sure everyone is following that okay we have it's from nick here yeah this is the same error uh so it tells it tells us uh blog d no such file or directory so it can't find the block d uh binary if you're on which block d let's go install problems yeah i mean um it's not related to star wars per se because it's just go but uh it still helps to yeah just a link to to how to install go and maybe uh but yeah i just want nick to kind of install it um how can we help oh i see the problem okay now i think we can move on okay let us know if anything else comes along on the way and we'll make sure to stop okay back to you then uh yeah well so going back to the transaction life cycle um so we send the post request with our data to to our endpoint we get that transactions with messages then we sign this transaction using the key inside our browser then we send back a transaction to be broadcasted on using the slash dxs endpoint this transaction includes messages that are handled by a thing called base app within cosm sdk and it end up ends up in handlers and after it is handled by handlers you can think of it similar to um if you if you're familiar with building web applications they have like http handlers all that's something similar but for messages and then it's passed to a keeper which is a part of your application that is responsible for writing the data into persistent storage if we map this this diagram here we would see that for the blog slash post or in our case it's paul but we have a rest directory and it has end points so you can see it has like get post endpoint methods you can use uh to make requests and tx whole actually accepts the arguments that we have provided and creates a standard transaction that gets returned back to the browser so the first step happens inside the rest directory when it comes back to the browser you sign it and then you post it to slash dxs which is not in our directory and then the messages each message you can have many messages that get routed to different handlers so after you've broadcasted a signed message assigned transaction uh your messages are handled by handlers which are here so in our case there's a handle message create poll so after creating a poll we we send this type of message and it's handled and then it's passed to a keeper so we're calling a keeper method called create poll which which lives inside the keeper directory and what this does is it basically writes the data into persistent storage and you can think of persistent storage as being this one giant key value store that is ordered and you have keys which are strings and you can have values which can be anything you want so we we take a poll prefix which is just string poll dash and we use poll id which is just a unique generated id and we um we take the whole object and store it as a value so in the end you would see if it was encoded in json you would see like poll then you would see a unique number and you would get an object which which contains title options right now string and so on so that's how it would be stored inside that's how easy to think how it's stored inside persistent storage okay now let's go back to our application so we've scaffolded this thing but it doesn't really look like what we wanted to achieve in the android the first difference is that we have a string for options whereas we would like it to be a list of strings so you could add options so to do that we need to make some modifications to to our application so first of all we go inside type poll file which describes our poll that we're creating and we'll be replacing a string with slices so our application will expect us to pass an array of strings from our client each message is created using using constructor right and we need to tell our constructor that we're expecting a slice of strength instead of string for options and we need to go into our rest directory because we will we are building web clients so and we need to replace string slice strings as well so three modifications in these files and also uh without um you can interact with your application not only from a web client but also from a cli tool so we have as well as a rest client we we have we have some files that describe behavior of your cli and your cli client will the way you will interact with your application is you will use pulse cli and you can read about how to use it using help but it has a tx sub command which also has a pole sub command and if we ask for help we'll see that we have a create poll command so create poll and then we pass arguments in our case we pass some title and some option but as strings instead of this we want an array actually let's try let's try using it before we change um yeah we'll we'll just change it right now so inside uh tx poll uh we have a part of our application that parses command line strings uh command line arguments and right now it just takes the second argument which is in our case is an option now let's replace it with um with something else so what we want is we want a title and then we want r1 r2 and each arg is is an option like in this case it's the name of soft drinks so what we will do is we will actually take our arguments and then we will take everything except the first one okay so to recap we modified our we modified our type we modified a file that was responsible for generating messages and rest in cli clients now let's rebuild our application to see whether it's working we also use star processor for that so yeah again it takes a while before it does so now let's refresh the page of course the ui hasn't changed because we didn't make any modifications to our front end but it all builds so let's let's move on actually to our front end so we use view but you can also use any any framework you want and let's start our application again so that we can make life changes to our front end index file uh describes everything you see on this page so we have a wallet if we uh if we make changes we'll actually see that it's updating live and uh typelist is just a scaffolded forms for our types that we've created using starboard uh we uncomment that right now because we don't need uh we'll create our own and we will create a poll form component it doesn't exist right now but we'll create it inside our components directory will create a file called full form and what this file will do is describe both the template and the javascript that we need for this to work so this form component will have an input so we're using a built-in component called app input uh it will also judging by the by the screenshot so it will have a list of inputs for options so let's say we have input for our options so this will be a placeholder i mean this will be a title so we're using placeholder to tell its title and this will be an input called options we also have two buttons one for creating an option and one for submitting the poll it says add option and create poll okay now we have two inputs um nothing works because we haven't added any logic to this so let's add some javascript so we'll have a title and options so let's describe it in data have a title options will be an array so this is just the data that our application uses locally and we use the model to tell that this input is responsible for the title and we'll loop through an array of options to display our inputs so v4 each option in options and we'll pass a v model it'll be an option title so for each option option title this input will be responsible for option title now when we add an option we we want to handle the click we'll just say it's add and when we submit we also want to handle this so now uh what is left to do is describe the method methods that we're using add and submit first i'll add so what add does is it takes a list of options and it spreads the existing options and it adds a new one with a title and we have a submit method so submit method would will do several things it will first submit our transaction and then we'll fetch back the data that we've created so for this we're using ux and we dispatch a message called entity submit you can read you can look up the definition the the code in inside src store index and we'll pass the payload which will contain our he's discussing a comment here yeah that's that's a good catch um well we we didn't add unique ids to uh so yeah the question was uh not the question but you can add key option to v4 that's actually not not a terribly terrible error it will still work but it's it's a good idea for each entity to have unique id so you could say key option dot id but we don't have ids we could generate it but we won't do it now but yeah that's that's a fair comment so after submitting uh our entity we will fetch back all transactions now we need to define the payload so payload is just same data that we we have so it has a body with title this title so it's the same title here the same title entire insider template and a list of options but we just need a list of strings so we just map every item and we pull out the title and since this is a very generic operation we need to also pass what type it is in our case it's a poll okay let's try it out options work and if we passed say text editors poll first one in max yes code them okay cannot read property get months of no that's interesting uh it's actually not very interesting because uh we forgot to sign in so right now it doesn't really handle errors but if it did it would tell you that you probably should sign in we use one of the passwords one of the accounts that was created for us and now we'll try again and we can see that has probably succeeded but we have no real confirmation in our ui because we haven't coded that yet but we see that we have sent a transaction create pull transaction and now if we go back to our backend we would see that in fact it did create an entry for us so instead of uh kind of coding uh the front end i'll just copy it from from my tutorial to save us some time and go through it so we what we need to do is we need to add this list of list of polls basically right so you can vote so we've created a poll form component now we need poll list component to list them all and let's see what it does so it goes through the list of poles which we pull from our back end and it creates buttons for everyone for every for every entry and we can submit our choice and we'll dispatch dispatch message so if we look back sign in operating systems okay linux requests oh yeah we forgot to add it to our index yeah now we can see that um we have we have a ui except when we when we actually try to vote it tells us that it can't because we haven't provided a vote type so we now we need to go back to our go application and actually add one more type which will be the vote so let's again use starboard type to generate the vote type and it will have poll id because we need it to be connected to the poll hint will have a value which is just a string value of the item that you have selected okay now we can see that it added files similar to what we had before so it had handles uh createfold messages and it also added type load now if we use starboard to serve our application sign in yeah make sure to copy it correctly because if you don't then it won't sign in properly and you have frameworks so yeah one more thing we should probably add is we need to request after we submit a form uh we didn't do it properly because it doesn't wait for us to submit a form it just immediately requests back the list so we should probably wait for it so now let's say test poll option one so it takes a while before it processes that's interesting yeah again i haven't signed in pull one and awesome yeah so that's now it's better don't forget i think you get the op sorry i think i'm hearing um someone's talking in chat okay um now the only thing that's left for us to do is to to make it possible to uh vote now if we if we vote the vote actually gets registered because every time we click on a button according to our poll list component it submits a create vote but then say we we decide ruby on rails now we can see that it actually registers two votes for us which is not something we want uh we would like a vote to be just changed and to fix that we need to go back to our application and see how it how our application records the data that we send it so if you go back to the keeper i remember keeper is a part of your application that is responsible for writing data to storage and we'll see that again this is a large key value store and the way we store it right now is we uh the way we store votes is we have a vote prefix and then vote id so every time you click the application actually creates a new vote what we want to do instead is we want a different key so every time you cast the vote it should overwrite the existing key so we're interested in this line and instead of just adding vote id we'll add poll id then we'll add a dash to differentiate between our tokens and we'll add a creator which contains an address okay now it automatically rebuilds our application and let's see okay refresh the page cleared our state so now if we sign in say languages chess go trust and we cast vote for chairs and then we decide that we're interested in go yeah so it replaces the value instead of counting it twice so that makes sure that you can't cast two votes okay that's pretty close to what we had in mind originally but um we would like to add one more feature and it is to charge users for creating polls so let's see how we can do that so one of the benefits of cosmos sdk as a framework is that it's built on top of a blockchain and you have certain features like tokens built in so that's an advantage over something like ruby and rails or django or any other framework so let's use that so what we want is we want to charge a user before the poll is created so as you remember messages are handled in handlers and then they are passed to them then agreeable method is called so we want to charge a person before create poll is issued so to do that we will transfer funds from the user's account from a user's account to a module account so each module can have a wallet so to speak like an account for itself where you can store tokens so let's say module account and it will it will have an address so we are using sdk hack address function to create an address for our module and it will i'll using crypto package to hash the name of our module so what this does is it uses our um it uses sdk several functions from the sdk to create a create a hash of our module name and then create an address for it so now we have an account for a module i mean the address of the account and now we need to actually provide payment information and let's say it costs 200 tokens now if this operation succeeds then we just proceed and if it doesn't we just exit with an error so we're using coinkeeper to send coins let's see what arguments it expects yeah it requires a context from address to address and an amount so we're passing context then from address is poll creator we have that information inside our message and we're sending it to our module account and we're sending the payment and we return now and there so we've saved before um so we made a mistake and we saved and our starter application actually stopped rebuilding because the binary you know i mean the code no longer made sense so we just need to make sure that our front end is killed as well okay um we might be ready right now to build our application again again we're using one of the passwords provided for us poll test option so we see that we have like a thousand tokens right now create a poll and we refresh the page sign in uh see right now we have 800 tokens of course you can you can modify your um front end to request the information about tokens automatically but you can see that we've uh 200 tokens were deducted from our account so in production you might approach this differently but for demo purposes this works so you can see that it's pretty easy to add payments to an existing application so overall it looks very much like a web framework for building a back end of your application um it of course it's very different under the hood and one of one of the one of the main differences also is that uh you're using public key cryptography to sign messages right you have public and private accounts up public and private keys and we're using a mnemonic to generate them and to sign transactions using the private key inside your browser okay this is a poll application now uh the difference between not the difference but the way you build your application is by modifying this poll module and when you build and actually deploy it it becomes not immutable but it's you can't really redeploy it every day without upgrading and the upgrade process um is a bit more involved than what you might see in non-blockchain applications so using cosmos sdk you can actually build um a part of your application that is like constant the features that you really want in your app in your blog your blockchain to have uh maybe the rules of the game so to speak so it's very good tool for that but say after launch you you want to extend the features of your application and for that there's a there's a tool that complements customs sdk and we'll talk about it but before we do um do you have any questions so far okay time for questions okay well i'll feel free to interrupt me if you if you do have any questions so we've looked out how to build an application with uh cosmos sdk and when you compile it it becomes part of your blockchain and you can't really change it uh immediately after the fact but alongside cosmos sdk we we can add support for smart contracts which you can update and it might be very useful for for you to have this option to extend the feature set up your application after you've launched okay i see a question in chat i ran into another error while trying to please check make file okay if you run into any kind of errors while building make sure to just run make and it will build your application and if it could if it can't it will tell you what kind of errors so you might have uh forgot to add a coma comma or misspell the word and you will see errors in your terminal so just run make and it should tell you what's wrong and after you fix there an error also make sure that your front end is is also uh restarted so just kill note processes and one more question uh why you've chosen view over react is a view cosmos better combo no absolutely not so for the front end we use u just because it's a bit simpler than react for for many people like it's it's a bit more friendly version of a javascript framework uh of course that's just an opinion but um we're under the hood we're using uh cosm.js library so you can if you go into store you'll see where we're importing from kos and js and of course it works with any framework and even without a framework and it helps you to sign transactions create a wallet from mnemonic and broadcast transactions so this is just an example of how you might build your front end you don't have to build it like that but it might be a good starting point for people who are not familiar with javascript development they need a framework to start with and we think that vue is a pretty good choice for that okay going back so we we have an option to build our application using cosmos sdk uh and we also have an option to use smart contracts and the difference is is that we with sdk you build your application and go and it gets compiled to the binary that represents the node of your application so it's everything is hard coded into the binary whereas with smart contracts what you do is you write your contract script essentially and then you upload it to the chain so we have a transaction to upload the code then you instantiate it and you can use it and you can update i mean you can create new versions of your contract so that's a useful complimentary feature of of of cosmos sdk so let's let's add support for uh smart contracts right now uh we're using cosm wasn't library and we will be adding it to our existing application that we're building so again using starboard you type starboard add wasm let's let's first do git init and just add all files to see what has changed or what will change after we had wasm start board add volume and you can see it modified app.go so it import blossom uh instantiated the module um and did some bit of housekeeping as well as modified our pulse cli command to import wasn't specific commands so you can use starboard at wasm for that alternatively you can follow a guide adding cosmos and support manually just see what what has changed okay now after we've done that um i'm just following my own tutorial so that won't forget what what needs to be done for this section you actually need trust cargo package manager and docker installed let's run docker right now docker is used to build your contract locally and optimize it to be uploaded to the chain because if you build your contract regularly you would have a two megabyte file which is very inconvenient because every piece of um every byte counts on your chain so you wouldn't want to upload two megabytes uh to the chain so after we've added support to to our application we can run start for surf to make sure that everything works okay you can see that it's working now right here we're using contract cli but in our case it's full cli and let's see what commands have been added if we just type wholesale itx we see that a new sub command appeared called wasm let's see what it offers us uh we might have a question chat okay well let's let's answer this question uh would you say starboard is heading towards a framework such as ruby on rails or django uh no it is not uh it is it is using cosmos sdk it will be using cosmos dtk as well as cosmology so it's a very helpful tool a companion tool for the sdk the plans for star port include much better front-end generation so for people who are familiar with blockchain development uh they would get benefit from starboard by having all the components they need to actually build their application without uh going deep into front-end development and for web developers uh we'll be automating like we do right now automating uh certain operations like adding uh support to causing wasm right so if you had to do this manually you would have to make sure that you like don't make any mistakes here and you know actually how to do it and adding a type is also a pretty uh kind of routine but it a rooting operation that takes it takes a while to create all these files so we were with starboard we're providing value by automating things that you shouldn't be doing manually and yeah we have a lot of features planned for starboard uh including restarting your application initializing your application so making it easier to use is our priority next question is can you post that notion blog post in chat please yes sure absolutely so um we have a couple of tutorials uh here i'll just paste the link in chat we'll also be publishing them on our website at tutorials.com network when we kind of uh make some changes to the phrasing dot uh all eyes across all t's okay going back to what we have we we see that we have a couple of uh new commands um under our wasm sub command and one of them is store to upload wasm binary and to we won't be writing a contract right now because it's a topic on its own i think there already was video about smart contracts this is just uh uh 101 on how to get started with contracts so we'll use an existing one by cosmos and team uh we'll use cargo to clone this contract it's called the counter it's basic counter application where it increments an integer and we can see that it has created a counter directory for us let's go into this directory and the source code is contained inside the src directory we have contracts file we have messages and we have state so developing smart contracts in cosmos world is actually somewhat similar to to the sdk because you also have messages for example right very familiar concept to cosmos sdk developers like every transaction has messages and you handle them so right now the application is is already complete we don't need to add anything the only thing we need to do is to build it so we're using this command you can actually find it in developing.md so we'll use that to build it inside docker so it takes quite a while before it builds everything okay interesting error could not compile cosm calls okay let's say cargo build to check that we have our lock file yeah we do i think the problem might be that they have updated um already for the newest version of the sdk and we're using version 38 and not launchpad but let's see if that's the case yeah that's probably it so what we can do is we can basically go into starboard check out the development version you wouldn't need to do that when it's released but let's make the latest version of starboard actually uninstall stop board just just to install it from from our develop branch so yes rebuilding stopper and now let's create an application specifically for for our contracts and we'll use starboard to add walls okay we got a question uh hey great workshop things uh can you share some good resources to get to know cosmos and tendermint better for a blockchain dev migrating from another platform some things that cover the theory and protocol nuances as well as development basics well we do have very good documentation so if you go to docs cosmos network you could actually have a very good introduction uh into how it all fits together um also doc's tenderman if you want to read more about the consensus tension we have two tutorials uh so these tutorials that i've i've demo today will be added here as well uh very soon so yeah uh in the chat another question in chat um stoyan will it be better to have also docker better tests um well you can install stormport in docker but i don't think it it adds anything if we bundled as it is an image so yeah right now starboard is a standalone binary and you can you can run it inside docker if if that's your thing but um yeah uh i mean it's useful maybe maybe we should provide uh provide a an image with go already installed uh where you can and starboard already installed i don't think that will be like the the main way of using starboard similar to how if you're coming from web development you have like view create or react create app you don't bundle them inside docker containers but that's something you can do definitely i think he asks more about the form um the form of the code to be similar with the other steps as well like docker run and starboard and cosmosome yeah again it's it's bundle that uh it's it's distributed as a standalone binary and i don't think it really makes sense to to to packaging as an image but is ibc relayer setup in the broken yes definitely we are looking forward to idc and modifying starboard default templates to to take ibc into account uh so right now you can you can think of starboard as a general purpose companion tool for cosmos so um yeah we will be probably scaffolding relayers or at least uh taking abc into account for uh for the application that you for the application that you scaffold with stockport okay let's try again and use stockport add wasm it should be rebuilding our application okay we we've run that twice uh we've added we've added wasm twice let's retry that now let's download the application again and try rebuilding it so first build with uh without docker just generate cargo cargo lock file get rust takes quite a bit of time to to compile compares to go okay seems like we still have this error um yeah it's probably still the version mismatch so it's still under highway development and let's see if we can we can upload the uh the binary that we've we've built with without docker oh you know what let's let's actually go uh since we can't since for some reason um this command maybe they've changed something with their image uh or with the binary let's see if we if they have if they have the binary itself available so we can just use that yeah they actually don't provide a binary okay that's a shame uh something in cosmos land has changed and yeah their command no longer builds let's see if they've added something to developing yeah seems like they're using a newer version of rust optimizer that was the problem let's do that again so they've updated their rust optimizer and i should probably update my tutorial as well so again it's under heavy development and breaking changes something you should expect so yeah it will take a bit of time before it downloads a new image because i have um 0.8 installed uh downloaded but i don't have 0.9 so meanwhile we can just look into the messages so it's the difference between cosmos and sdk development aside from rust and go differences obviously uh is that you have much less code to worry about like that's the only code you use that's that's all the code you need and the logic is contained in the contracts.rs and messages with messages file you can actually see how to use this application of yours so um init message describes the initial parameters and you pass just a counter an integer and it has two operations two actions you can increment or you can reset it's a very simple application and yeah eventually it will build our contract the reason why it's building inside docker i mentioned that it's optimizing the binary the by the bytecode i mean but it also uh make sure that you build it locally so you don't have to trust anyone to to build it for you in the same environment as any other contract a question from chat is there going to be an official documentation site you mean for starboard or for cosmosin for uh cosmos and they do have um documentation website uh so it's very interesting read highly recommend forced carport worth just starting from a readme right now but i don't think it will warrant a whole website dedicated to just for starboard documentation but we'll will work we're working on the ui that will have help so if if you ever get stuck with something then you'll be able to get help from the ui uh similar to what you have we have right now with just just the welcome screen but it will be uh something closer to like few death tools if you're a front-end developer just a set of tools that help you to work on your blockchain okay seems like we've compiled we've built our contract and it's inside uh it's it's a contract that wasn't filed so if we look how it's only 100 kilobytes which which is not much better than uh we would have like two megabytes uh before now let's go through the through the process of actually using it so first step is to actually the to upload the code of your contract onto the chain so we'll use the same uh in our case block cli command tx wasn't and we we've seen that it has a store sub command right we use store sub command we pass the contract file and we need to make sure that we tell which user to which user sign signs the science transaction by default we have user1 user c right now and we pass enough gas so that it succeeds let's restart unknown address that's interesting okay let's let's check it out block cli okay let's check why we don't have this account anymore off accounts interesting let's just delete so the the um the data files are contained inside your home directory uh inside blog d directory in this case and block cli i'll just remove them and restart in case we had some mix up with keys because it should provide us with two users okay block block cli keys list account does not exist for some reason it didn't provide us with uh coins at the inlet step so we've we we might have two accounts but there are no coins there that's very interesting okay let's make sure that we um we don't have yeah we have a previous application still running and we don't want that we want clean slate so if something goes wrong just kill everything and restart so um we just had a zombie process that didn't get killed now if we go back and try this once again yeah uh so now we have user one and it takes the bytecode of our contract and sends it to our application to our blockchain so after we do that we should see we should see this code being uploaded so we're using blog cli wasm it has list code command we might have passed not enough gas for this to work let's try it again hmm okay for some reason we don't have it didn't upload the contract okay let's see that's it's got 100 kilobytes that's good again probably something has changed in cosmos land because it should list um it should list our code log out of gas wounded yeah that's clearly not enough gas okay let's again clear well for some reason it doesn't want to upload the code um i guess they haven't released this their first version uh yet so it's to be expected something clearly has changed because um as you can see it's they're using a different image for building this maybe maybe they haven't updated the the wasm library but if we use the previous version it would be uh much simpler i mean after you've uploaded the contract you would initial instantiate it with with an argument five and your counter will start from five and then you will issues issue transactions that will actually increment uh the counter so the point here is not to shot the clearly pre-release version of of the software but to make sure that people are aware that there are multiple ways of developing cosmos applications of course there is like a very stable and production ready cosmis sdk which is the preferred way of building applications right now but the smart contract support is is coming soon um after yeah after the bugs are fixed obviously so um both ways to build applications are valid and sometimes you want to have this flexibility of uploading code after um after your blockchain has launched and in this case uh cosmoline can be the tool for you uh so yeah that's that's pretty much it i guess now it's time to answer questions any questions adriana i have no questions on my end here for now uh there was a comment from nick i don't know if you have seen it in the chat he says um i think starboard could be improved greatly to the user and the developer if there was a docker compose file linking a bunch of docker files maybe he just wants your opinion on this okay yeah that's a valid point but then again you would have a docker as a dependency so you wouldn't be able to use starboard without docker i i can see this being useful but uh i can't see this as a main way of distributing an application because not everyone wants to have docker installed so yeah again one more question this column wasn't the same as cosmos sdk just for rust or do they more work together so yeah they uh they work together um so you you can build the same application um uh in in cosmos sdk and then cosmos but the approach is different in that um to me like it's a very subjective uh matter but to me it feels like cosmos sdk is like a framework uh where you have everything um set up for you you have handlers you have keepers like the structure is very defined and you have more files to work with but there are more conventions so it's like closer to ruby on rails whereas cosm wasn't is more like sinatra or express.js where you want this piece of functionality you handle you want to handle certain messages and you want to add it after the chain has launched so the way i see it and the way i see it is you might want to build your application using cosmos sdk provide all the necessary features there but you would extend your application later down the road with cosmosome and you might allow your users to deploy their own contracts so that wouldn't be really possible with just cosmic cosmos sdk um so it's it's like a scripting language for for your blockchain uh for now of course i wouldn't be using cosm wasn't right now to build the whole application uh just because it's it's in a very it's a state of active development but i see that it's i expect it to become like a staple in cosmic cosmos world because it's just so um useful to have this ability to deploy new functionality after the chain has launched without going through the upgrade process and also uh one more point uh that cosmosome team is actually planning on adding uh other languages so you would be able to write your contract in assembly script i think so it's much later down the line but it's something on their roadmap i think which should be much more familiar to javascript developers than rust is okay before uh i just wanted to continue kind of one one thing about cosmology is that you can actually call um cosmic sdk uh so it uses cosmos decay under the hood so you it it is it is a complementary tool that's all okay last questions before we wrap up no more questions here dennis any any other questions on your end um no no nothing in zoom chat okay cool well i think uh it's safe to say that we can conclude this workshop um thank you so much dennis for uh joining us and for presenting starport to the cosmos community um for everyone who has uh watched the workshop and things that they might want to see it again we'll be posting a recording uh very shortly uh tomorrow or the day after tomorrow um we also have a playlist on youtube uh under call with us workshops in case people who haven't joined our sessions before want to catch up with what we have done during those sessions um we also have co with us on the cosmos dot network website you can find it on cosmos dot network slash series slash go with us i have posted a link in the chat here above so please make sure to follow up on on the website also um we'll be posting all our future workshops there um we have another one coming up on the 4th of august it's about experimenting with cross chain nfts minting and roadtrip gx with cosmos ipc it is presented by the team from free flicks media and cosmic compass and i hope to hope to see you in in the workshop as well in the meantime if you have questions if you need resources if you think that you want to ask us something regarding this workshop or maybe something from the previous workshops we have a dedicated channel on discord uh under initiatives it's called uh co with us so please post your questions there and we'll make sure that we will answer them and for everyone who wants to join for future workshops make sure you sign up uh to the uh co with us newsletter um we'll be you'll be receiving all our future workshops and whenever we post a new workshop you'll receive a notification in your calendar so make sure to follow that one and hope to see everyone next time
Up Next
21:43
Local Interchain: Cosmos IBC Testnet Environment Tutorial
@Reecepbcups
242 views•2024-03-15

12:54
Triumph of Orthodoxy Icon: Byzantine Art & History Explained
@BenCallan
2.1K views•2024-08-06

9:49
FastAPI vs Flask vs Django: Choosing the Right Python Web Framework
@TechWithTim
302.5K views•2024-05-26

1:42
Game of Thrones Opening Credits: A Cinematic Analysis
@gameofthrones
46.3M views•2011-04-18
Related Study Plans & Knowledge Roadmaps
Structured learning paths in General & Interdisciplinary Studies
general-studies
Elevator Engineering: History, Physics & Cities
01From Hoists to Safety Brakes: The Dawn of Vertical Lift
02Hydraulic vs. Traction: The Engineering Physics of Elevators
03Modern Speed, Safety, and Algorithms
+ 2 more learning modules
12h5 modules
Explore Roadmap
general-studies
Rubber: Material Science, History & Geopolitics
01Origins of Natural Rubber & Mesoamerican History
02The Chemistry of Natural Rubber & Vulcanization
03The Geopolitics of the Rubber Boom & Colonization
+ 2 more learning modules
12h5 modules
Explore Roadmap
general-studies
Containerization: Evolution, Logistics & Trade
01Ancient Trade & Bulk Cargo: Amphorae to Barrels
02The Industrial Revolution & Cardboard Packaging
03The Containerization Revolution: Malcom McLean
+ 2 more learning modules
12h5 modules
Explore Roadmap
general-studies
Textile Tech: Evolution, Labor & Global Impact
01Pre-Industrial Textiles: Handloom & Cottage Industry
02Mechanization: The Spinning Jenny to the Power Loom
03The Factory System & Global Labor Transformation
+ 2 more learning modules
10h5 modules
Explore Roadmap