



![Setup your system for Machine Learning | Python for Beginners in Hindi [Lecture 4]](https://i.ytimg.com/vi_webp/vid8jDSR1jU/maxresdefault.webp)

![What is a robot? [engineer explains]](https://i.ytimg.com/vi/_VxqJuFoGz4/maxresdefault.jpg)





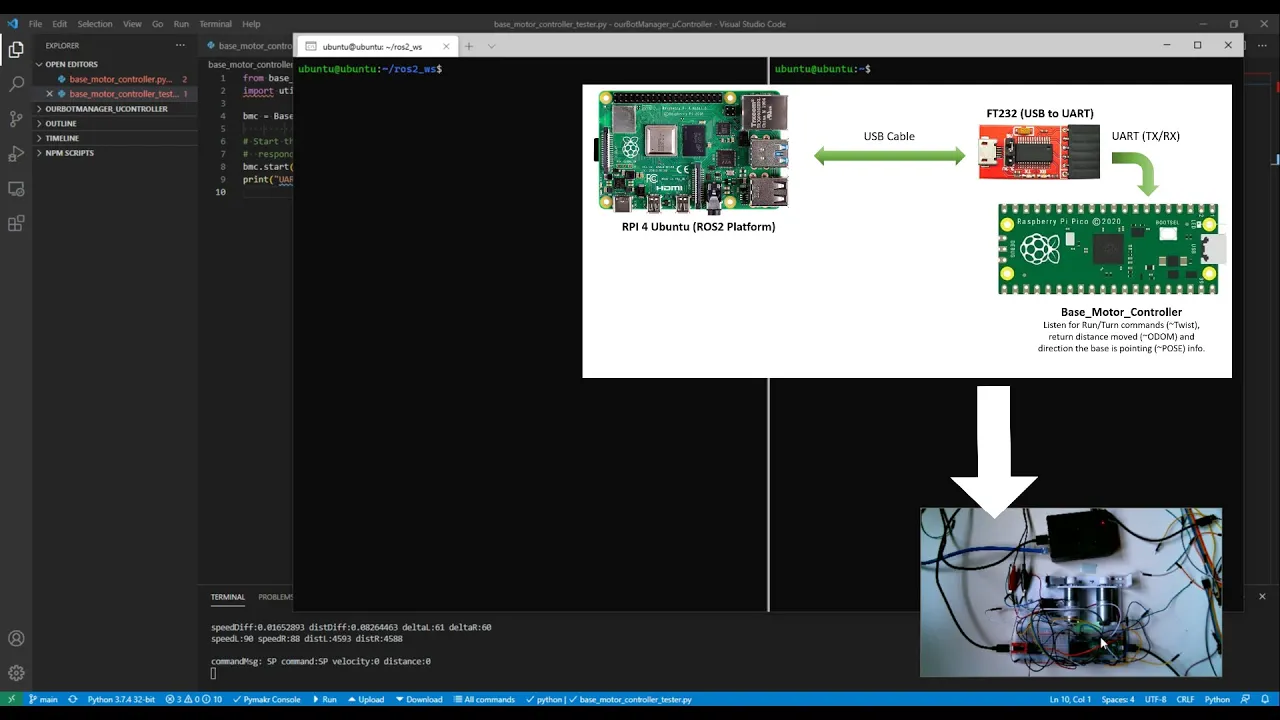



![What is OpenCV with Python🐍 | Complete Tutorial [Hindi]🔥](https://i.ytimg.com/vi_webp/ur8IHlbs3oM/maxresdefault.webp)


![[Làm quen với Gazebo - Python] - Di chuyển robot trong môi trường Gazebo - HowKteam.com #howkteam](https://i.ytimg.com/vi/Rv-IxODQSUo/maxresdefault.jpg)


This lesson covers essential Python programming concepts tailored for robotics applications, including variable and data type handling (numbers, strings, lists, 2D lists, tuples, dictionaries), control structures (if statements, while loops, for loops, nested loops), object-oriented programming (classes and inheritance), file operations, modules, and error handling with try-except blocks, all demonstrated through practical robotics examples such as robot arm control, sensor data processing, and obstacle avoidance algorithms.
Python Basics for Robotics: Prerequisite Guide
Added:Basic computer literacy, including how to navigate the command line or terminal and install programming environments.
High-school level algebra and an introduction to linear algebra concepts, specifically vectors and matrices, which are essential for NumPy.
A foundational conceptual understanding of robotics, including the basic roles of sensors, actuators, and controllers.
Developing robotic applications using ROS 2 (Robot Operating System) with Python (rclpy).
Applying NumPy to compute robot kinematics, including coordinate transformations and forward/inverse kinematics.
Implementing basic feedback control loops, such as a PID controller, in Python to regulate robot movement.
Integrating computer vision libraries like OpenCV with Python for visual sensing, object detection, and tracking.
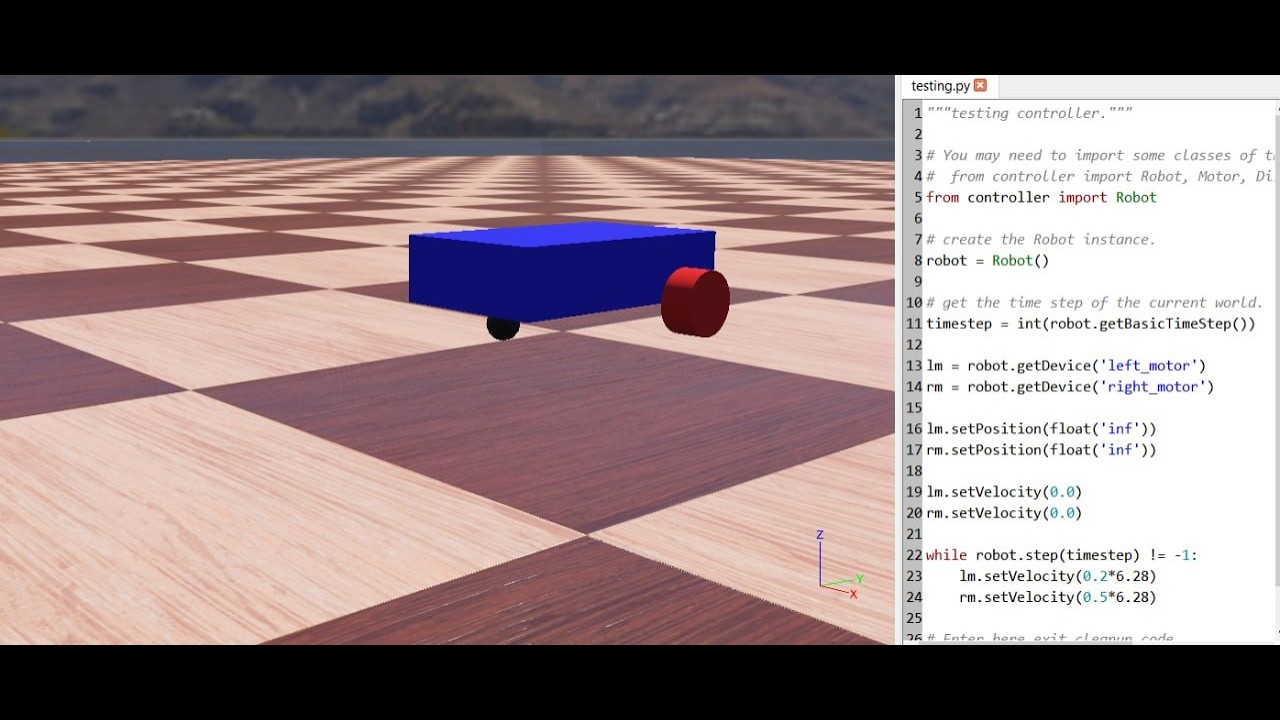
Creating and controlling virtual robot models in simulation environments like PyBullet, Webots, or Gazebo using Python scripting.
3.9K views71likes1:09:45Original Release: 2023-08-29
this lesson will refresh your knowledge of Python Programming particularly as it relates to robotics applications due to the fact that we will use Python to program our robot arm I thought it would be nice if you refreshed your memory about the topic from a robotics perspective so let's get started python is one of the most popular programming languages because it's easy to use and beginner friendly Python's core functionality can be extended with packages that can be downloaded installed and imported therefore it's highly extensible through packages giving the user instant gratification since we will be using Ubuntu 22.44 to run average 2 and to code then first we make sure that we have Ubuntu on our computer you should have been installed that by now if not refer to the first lab then we need a code Editor to write our python programs in the past people were using just text editors to write their programs but thanks to the current code editors we can get the most of their debugging properties these code editors are called Ides or integrated development environments there are different Ides and some are specially designed for python in this class we are going to use Visual Studio code editor from Microsoft and it has the advantage that you can organize your codes in different languages in one place and it's the most widely used code editor among programmers other options are quite charm and spider that we wouldn't use them but you can take a look at them if you're interested here are the steps to install vs code and python in Ubuntu 22.04 first you should open a terminal and by now you should know that you can open a terminal by Ctrl alt T then type this command into a terminal and click enter this is this is the same as going to the software Center and typing Visual Studio code and then installing it now head over to all apps and add the vs code to your favorites Now open up the VS code then go to the extensions Tab and search for Python and get the recommended python extension click on the gear icon then extension settings then configure it as you want like setting your desired paths for things like condo virtual environments now if you don't know a virtual environment is like the constructs in the movie Matrix where Morpheus train Neo and the reason to use them is that some packages that you may have developed for different projects have conflicting dependencies for instance if you want to work on a machine learning project using Python 3 and the web development project on python 2 this is not possible since the system can have only one default python in this case you will need to install a virtual environment if you have a tutorial on Mech Rhythm that teaches you how to install virtual environments if you've ever needed in your projects you can also install a cc plus extension and if you need to program in those languages as well or if you want to use raws packages that use C plus plus now write your very first program and test your IDE for this open a new folder give it a name I named it for example intro to python then create a new python file and name it hello world now you can write your first code we will type print and then hello world between two quotation marks and then you will see that if you execute this program you will see that hello world will be printed on the console and the place that you see the code is printed is called the console the first line that starts with a sharp sign is just for human users to understand the code and it's called the comment two quotation marks is used for Strings print will print anything that you pass to it onto the console congrats you have written your first code in Python now let's go to the next part to learn about variables and data types in Python a variable is like a container that stores data it can be a number a text or more complex data types in most programming languages like C plus plus you need to declare a variable before using it but in Python you just give it a name and assign a value to it and that's it different data types that can be stored in variables in Python are numbers which can be different types like integers and floats Boolean value which are either true or false strings which are just plain texts lists tuples and dictionaries that we're gonna talk about them in the lesson [Music] let's first talk about the simplest data types in Python numbers and strings suppose we want to create a variable and assign a value of 10 to it so we will write the name of the variable which I named it num int and then assign the value of 10 to it or we can also assign a float number to a variable like we can create the name of the variable and then assign a float number to it we can do basic arithmetic like addition subtraction division multiplication parentheses or we can use the power with numbers for instance this will print out the result of addition of the the first integer that we created with a float number and then multiplying it to the integer number that we created we can find the remainder of the division using the modulus operator this will print out the result of the division of our integer number which was 10.
by number three which will be one third different Mass functions that we can use on our numbers uh if you don't know about Mass functions there are collections of code that we are running can perform a basic operation functions can either modify our data or give us some information about the data for example Max will give us the larger of the two numbers that we give to it Min is the opposite for example this will print out the maximum between our integer number which was 10 and 9 in this case it should print out 10.
ABS finds the absolute value of a number so the result of this print would be just a number end because I passed the negative of it into abs and it will give me the absolute value of the number uh pow which stands for power gets the first number to the power of the second number so this will get the first number to the power of 2 and print out the result which is 100.
round will allow us to round the number either round down or up it depends on the number after the DOT sign if it's less than five it will round down if it's more than five it will round up there are some other math functions that should be imported to get access to them the mass library is a module and we can have access to those functions inside the math by importing that we can write from math import start this means that you can now access all of the functions in the mass Library without having to prefix them with Mass DOT now if I comment out this import Mass Library you can see that I cannot access to specific math functions as you see it will spit out an error for me because I didn't import maths library to access that specific function now let's import that Library again and run the code again this time you'll see that it's executed floor will chop up the decimal point of the number so the decimal point for the number 0.5 is 0 and for 1.5 is 1. and cl will round the number off for example because our number is 0.5 CL will round it up to the number one sqrt you probably knows the square root of the number for example the square root of our integer number which is 10 is around 3.2 if you write just import math then to access the functions inside the mass module you need to for example say math dot that function to access that function within the math Library you can also import a library as a preferred name for Simplicity and of course if you're lazy for example if I write import math as M then from that time I can use m in order to access the mass Library now let's combine strings and numbers this is how we can do it the first round that I executed you see that I got an error because I didn't convert the numbers to Strings because using a plus sign is for concatenating the strings and not numbers with the strings so if I want to use the plus sign to concatenate the strings I should first convert my number to string so the SDR function creates a string version of the object passed as an argument to it so an object is any python data type here we used it to convert the number into a string the output of this code is there are 10 arm robots in the factory half of them are broken you also see that I add some spaces to get the correct output note that here we concatenate the different strings meaning that we added different strings together strings can be put between two quotation marks and they can be concatenated with each other using a plus sign there is also another way to do it and this time you don't need to just convert the numbers to Strings by using apostrophes between the strings and the numbers so typing this will exactly give the same result slash and we'll create a new line inside the string we can also assign a string to a variable for example we can do this by the name of the variable and then the string between two quotation marks note that here you don't need to use the SDR function since the factory name variable is already of the data type string so we don't need to do the conversion by bracket notation you can access different characters in a string for example the first character in the factory name can be accessed by a variable name bracket 0 and 2 refers to the third character you know that indexes and python start from zero so you see that the first character is a and the third character is C now we can also use different functions with a string for example the lower function can make the factory name all lower with is lower function we can check to see if it's all lower and the output should be true because we lowered all the characters on The Factory name note here that in order to get the true value for the output of the is lower function we should assign the new value which is the lowercase letters to the variable Factory name we can do similar with upper and is upper functions you can also combine different functions for example you can say Factory name Dot Upper that is upper this will first convert a phrase to uppercase and then you will get a True Value because it will check that if it's an uppercase and there is alt is true we can figure out the lengths of the string using Len function we can also access individual characters using the bracket notations for example here I want to access several characters so this will show the characters from the first character up to one to the last character to know where a specific character is we use the index function and we can pass it a parameter for example in order to know what the index of the a character is and we can write it like this we can get a replace function two parameters the first one what you want to replace and the second one the thing that you wanted to be replaced with for instance I want to replace ABC with Def and then I will use the replace function this is pretty much about numbers and strings like you can access the whole code of a section that I wrote here in the GitHub page of this lesson [Music] a list is a data structure that allows you to store a collection of values lists are one of the most commonly used data structures in Python and they're very versatile you can use list to store numbers strings objects or any other type of data lists are created using square brackets the items in a list are separated by commas for example here I want to create a list of robot manufacturers and their number in the factory so first I create a robot Brands variable and assign some robot manufacturers as the items on a list and I separate them by commas because they are strings I use two apostrophes I can access the items in a list using their index the index of the first item in a list is zero we know that indexes in Python start from zero the index of the second item is one and so on for example in order to access the second item in the robot Brands list we would write print robot Brands and one in the brackets you can see that Kuka is printed out because the second item in the list is the Kuka brand you can also use the slices to access a range of items in a list for example this code prints the first three items in the list robot Brands which are ABB coupon fan add items to a list using the append method for example if you want to add another manufacturer with the number of robots to have a robot Brands list we would just write robot Brands dot append and the name of the manufacturer that we want to add to the list then you will print out again the robot Brands list and you you'll see that the universal robots is added to the robot Brands list you can remove items from a list using the remove method for example this code will remove the manufacturer that we just added so it will remove the universal robots manufacturer from the robot Brands list you can pass the index where you want to insert another item using the insert function for example if I want to add Universal robot manufacturer to the second index of the robot Brands list I would write robot brands that insert and then I will pass the index of the second manufacturer which is one and then the manufacturer that I want to insert in that index you can sort a list using the sort method the sort method sorts the list and it's sending order for example if betrayed robotfriends.sort it will sort the robot brand list any sending order you can reverse the order of a list using the reverse method the reverse method reverses the order of the list in place you can find the links of a list using the Len function that we saw before also the function stand will allow us to get a list and append another list to it for example if we want to extend the robot Brands list with another list and add two more manufacturers to the robot brand list we would do it using the extend function the function pop gets rid of the last element in the list for example robot brands that pop will get rid of the last manufacturer in the robot Brands list now you want to check if a certain values in the list and also get the index of the value so if I write robot brands.index and the name of the manufacturer they want to check if it's in the list it will first checks if it's in the list and if it is it will give me the index of the manufacturer in the list we can also count the number of times a values repeated for example if I want to understand how many times the ABB manufacturer is repeated in the list I would do it by robot brands that count and I will pass ABB to it the copy function as you may guess makes a copy of a list and you can put the items in another list you can iterate through a list using a for Loop the for Loop will iterate through the list and it will assign each item in the list to the variable that you specify for example here I want to iterate through the robot Brands list and print each item clear function will removes everything you can see that by writing robot Brands the clear it will remove everything lists are a very powerful data structure and they can be used to store a wide variety of data you can access the whole code that I wrote here in the GitHub page of the lesson the list that we talked here are all one-dimensional lists but in Python we can also create 2D lists that is the topic of the next section done a 2d list also known as a nested list or a list inside another list the list that contains other lists as its elements it allows you to create a grid like structure where each element represents a value in a row and column format to create a 2d list in Python you can use the syntax here Matrix is the name of the 2D list you can choose any valid variable name you prefer element 1 2 3 Etc these are the individual elements within the 2D list it can be any valid python data type such as numbers strings or even other lists so now let's create a 2d list representing a three by three period this creates a 2d list called Matrix with three rows and three columns you can access individual elements within a 2d list using the row and column indices the indices start from zero so the element in the first row and First Column can be accessed as Matrix bracket 0 bracket zero so it means that it's the first row and the First Column of The Matrix the element in the second row and third column is Matrix bracket one bracket two one is the second row and two is the third column and so on and so forth 2D lists are useful for representing grids tables and matrices in Python they provide a flexible and convenient way to store and manipulate data in a tabular format the whole code that I wrote here is again an average GitHub page of this lesson let's now go to the next section and talk about another data type in Python which is a tuple another data type that you can store it in a variable is a tuple in Python a tuple is an ordered collection of values tuples are similar to lists but they are immutable which means that they cannot be changed once they are created tuples are created by enclosing a comma separated list of values and parentheses for example robot Engineers the top of robotic engineers in a factory tuples can be indexed and sliced just like lists for example robotic Engineers one is the second value in the Tuple couples can also be unpacked into multiple variables for instance in this code we unpack the Tuple into the variable E1 E2 E3 and E4 and we can print out each item in the consoles tuples can be used to store any type of data including strings numbers lists and other tuples they are often used to store data that doesn't need to be changed such as the names of people in a group or the coordinates of a point on a map if you try to change anything inside the Tuple we'll definitely get an error it's also possible to make a list of tuples for example robotic Partners is a list that contains multiple tuples you can print out each Tuple by its index the whole code that I wrote here is again on the GitHub page of our lesson in the next section I will talk about another data type in Python which is called dictionaries the other data type is dictionaries a dictionary is a data structure that stores data and key value pairs we can create these pairs and when we want to access the info we can refer to it by its key keys are unique and they cannot be repeated they are case sensitive and they can be any immutable type such as strings numbers or tuples values can be of any data type you can access the values via their keys here to create a dictionary in Python we must enclose a sequence of elements inside curly brackets and separate them with commands here we want to see an example a robot arm is trying to sort the objects in its environment based on color we want to make a dictionary that Maps the name of the object to its color first we create a dictionary that Maps the name of the object to its Square responding color and then we can access to those object colors using their keys in the dictionary here you see that a used get function to retrieve the value associated with a key if the values found in the dictionary it Returns the corresponding value however if the key is not found in the dictionary which in this case it's not in the dictionary it Returns the default value provided as the second argument to the get function which is no such subject as another example we want to create a dictionary for a robot arm with three revolute joints and this dictionary has three keys corresponding to the three joints in a robot arm each key had three values the minimum angle the maximum angle and the default angle the minimum and maximum angles Define the range of motion for each joint while the default angle is the angle that the joint is set to when the robot arm is first turned on so arm digs is a dictionary that Maps robot arm joins to their corresponding minimum maximum and default joint angles we can also access the keys and values in this dictionary so here's an example of how we can access the value of the key joint 1 in this dictionary this code will give the same result but with one difference if you type the key incorrect it will spit out not valid instead of like crushing the program you can also access to individual angles within each joint in the dictionary this code gives the maximum angle of join 2.
we can also print for example the minimum angle of joint 3 and you can just print out every information from the dictionary that you're interested in so these were the most commentator types in python in the next section we'll talk about functions and the return statement a function is a block of code that performs a specific task it can be used to group related code together make code more reusable and make code easier to read and understand the return statement is used to exit a function and return a value to the color the value that is returned can be any python object such as a number string list or dictionary after the return no code will be executed because when python sees the return keyword it will break out of the code functions can be passed data in two ways the first one is arguments and arguments are passed to a function when it's called they can be any type of value such as numbers strings lists or dictionaries or they can be passed parameters parameters are variables that are declared in the function definition they are used to store the values of the arguments that are passed to the function as a very basic example we want to write a function that gets two numbers and returns their sum a function in Python is defined by the keyword Def and then we can give it a name pass it its variables and then return what we want it to be returned in this case the sum of two numbers here A and B are parameters because they are declared in the function definition so this add function takes two numbers as input and returns their sum then we want to call the function we pass arguments to it we can call this function by passing arguments to it and storing it in a variable and then printing that variable in the console let's see another example suppose that we want to write a function that gets the radius of the wheel of the robot and Returns the real area because we would use Pi in the calculation of the area of the wheel then we should import the math library because other than that we cannot access to that so here we will pass the parameter radius to the calc wheel area function and then the function will return the area of the wheel which we all know that it's pi times radius is squared in order to call this function we should pass the real radius argument to it and print out the area of the wheel in the next section we'll talk about if a statement in in Python the if a statement is used for conditional execution it allows you to execute certain blocks of code based on whether specified condition is true or false so if a statement syntax is like this we would write if condition and if this condition is true then the code under this line will be executed and when we say else the code under the else will be executed if the condition is false here note that else's statement is optional so it's possible that your if a statement doesn't have this else statement with if a statement you can compare Boolean values or numeric or string values let's see an example let's say you have a robot arm with two joints and you want to control the movement of the Arm based on the input from a joystick if the joystick is tilted to the right the first join should rotate in a positive direction based on the right hand rule and if the joystick is tilted to the left the first joint should move in a negative Direction based on the right hand rule similarly tilting the joystick up means moving the second joint in the positive direction and tilting the joystick down means moving the second joint in the negative Direction in order to write the code for this we should first get the joystick input if the joystick input is right then the first join should be moved in positive direction and if the joystick input is left then the first join should be moving in the negative Direction and so on and so forth like for the up the second joint should be moving in positive direction and for the down the second joint is moving in the negative Direction and if none of these is true then um the joystick is a neutral position so there is no movement note that this is an imaginary situation and in a real situation you should read from the joystick input data and input the real data to the program and then command the join Motors to rotate accordingly let's see another example let's consider a mobile robot that's equipped with two proximity sensors that detect obstacles if any of the sensors detect an obstacle within a certain range the robot should stop and display a warning message otherwise it should continue moving forward in order to implement this for an actual scenario we should read from our sensor data and then command the motors to do the action that you want the robot to do but here we would suppose that we have read the sensor data and we also defined the threshold distance for considering an obstacle in meters so if it's less than that then we know that the sensors detect the obstacle the condition here is that if at least one sensor detects an obstacle for example its reading is less than the safe distance or the threshold distance the code block under the if a statement is a executed and it will print the warning message and performs additional actions to stop the robot if none of the sensors detect an obstacles the code block under the else statement as executed and it will print out moving forward and Performing additional actions for the robot to move forward let's also see a general example we want to write a python code that gives us the minimum number that we pass to it in this example we want to write a function that gives us the minimum number of three numbers that we pass to it the Boolean table for this looks something like this it means that if a is smaller then the minimum function should give us a if B is smaller it should give us B if the C is smaller then the minimum function should give us C if all of them are equal then the minimum function should spit out equal so here's how we can implement this we would Define a mean number function and we will pass three parameters to it a b and c and we will exactly implement the Boolean table so if a is the smaller number then it should return the smaller number which is a here and so on and so forth until all the Boolean people is implemented we can call the function by writing its name and passing three arguments to it here I also added some descriptive text to have a nicer output the next section will talk about while Loops in Python a while loop is a control flow statement that allows you to repeatedly execute a block of code as long as a certain condition is true the general syntax of a white Loop in Python is something like this so to summarize how a while loop works we can say the condition is first evaluated if it's true the code block inside the loop is executed if it's false the loop is exited and the program continues with the next statement after the loop after executing the code block the condition is checked again if the condition is still true the code block is executed again the process continues until the condition becomes false it's important to be cautious while working with while Loops to avoid infinite Loops an infinite Loop occurs when the condition always remains true causing the loop to execute indefinitely to avoid this ensure that the condition eventually becomes false while Loops are very flexible and can be used in various situations they are particularly useful when the number of iterations is unknown or dependent on a certain condition as an illustrative example suppose that we have a robot that will move forward until it encounters an obstacle so this is a good situation that we can use a while loop here first we write the move robot function that simulates the robot's movement so the robot moves forward until it encounters an obstacle so we should simulate the time it takes for the robot to move forward by giving some delay we will import the library time and then we will use sleep from that library to give robot some delay then we will print that the robot has moved a certain distance units note that if apostrophe is used to create formatted strings also known as FS strains it's introduced in Python's 3.6 and allows you to embed Expressions inside strings here you see that I embedded the distance inside the string and I don't need to change it to a string when I'm executing the code now we should write a function for obstacle detection here we use the random libraries so we should import it and the random.choice function is part of the random module in Python it allows you to select the random element from a sequence such as a list Tuple or string because we are simulating the situation here and we don't have real obstacles we randomly choose whenever an obstacle is present here we get the robot's initial position and we start from the zero position and we will keep moving the robot until an obstacle is detected so here we will use a while loop for this and we should generate a random distance to move forward because we are simulating and it's not a real scenario then we should call the move robot function to move the robot forward by the randomly generated distance now we should add this distance that the robot is travel to the initial position of the robot and we should update the position of the robot here note that here the while loop continues to execute as long as the detect obstacle function returns false meaning that there is no obstacle if it becomes true then it means that there is an obstacle and the loop is exited and a message will print showing that there is an obstacle then an obstacle is detected in a real scenario the control system of the robot should take action accordingly and should command the actuators to stop the robot so when the obstacle is detected the robot should be stopped and here we also print the final position of the robot keep in mind that in this example obstacle detection and robot movement are simulated for illustration purposes in a real robotic application you would have actual sensors and control mechanisms to detect obstacles and move the robot accordingly next section is about for Loops in Python a four Loop is a control flow statement used for iterative execution it allows you to iterate over a sequence of elements such as list Tuple string or any other iterable object the basic syntax of a for Loop in Python is like this here element is a variable that tapes the value of the next item in the itra ball for each iteration you can choose any valid variable name you prefer iterable is a sequence of elements that can be iterated over it can be a less topple string range or any other iterable object the code block under the for Loop is indented and executed repeatedly for each element in the each robot the loop continues until all elements in the itra ball have been processed it's important to note that you can combine four loops with conditional statements such as if else and other control flow statements to create more complex logic within the loop let's see some simple examples to get the idea it is possible to use for loop with strings for instance if we say for leather in robotics print leather it will go ahead and print all the letters in the word robotics we can also use for loops with other data types like lists if I create a list of robotics engineers and then I say four robotics engineer in robotics engineer list print robotics engineer then it will go ahead and print the names of their robotics engineers in the robotics engineers list so this is basically iterates over the robotics engineers list and print out each robotics engineer name and the console here I want to use for loop with the indexes here we used for Loop to iterate over the indices of a list called robotics engineers it prints both the index and the corresponding element in that list you can also Loop through a series of numbers or range of numbers here we use the for Loop to iterate over a range of numbers from 3 to 9. note that the range function in Python generates a sequence of numbers starting from the first argument and ending at one less than the second argument so the number generated will be from 3 to 9. we also have nested Loops or Loops inside Loops that is the topic of the next section a nested Loop means Loops inside the loops you can iterate over the elements of a 2d list using nested Loops the outer loop iterates over the rows and the inner loop it trades over the columns this allows you to perform operations and each element of the grid let's see an example that demonstrates its trading over a 2d list here we first Define the three by three Matrix which is a list of lists and then use nested for Loops to iterate through each row in The Matrix and within each row we iterated through each element and then printing each element on a separate line so to put it another way in this example the outer loop iterates over each row of the Matrix and the inner loop iterates over each element in the current row and then prints its value in the next section we will start talking about classes and objects in Python in previous sections we saw different data types in Python like numbers strings and Boolean values and structures like lists or dictionaries that can store our data but there are lots of other things that cannot be represented by these data types like a person a computer a robot Etc these cannot be covered by the data types that we have in Python classes and objects we can create our own data types for anything we want for instance a robot data type represents a robot we can store all the information that we want to know about the robot inside that data type and python will create a class for it in Python classes and objects are the fundamental concepts of object-oriented programming or oop classes Define the blueprint or template for creating objects and objects or instances of those classes let's start by understanding the basics of classes and objects a class is a user defined blueprint or prototype that defines the attributes or data and methods or functions that an object of that class can have it serves as a template for creating objects in Python a class is defined using the class keyboard with class we can Define our own data type an object on the other hand is an instance of a class it's created using the class as a template and has its own unique set of attributes and can perform actions defining the classes methods once an object is created you can access its attributes and call it methods using the dot notation objects created from the same class can have different attribute values while sharing the same methods defined in the class class is an objects allow you to organize and encapsulate data and functionality in a structured manner making code more modular reusable and easier to maintain let's define a simplified robot arm class that has the attributes of name length weight color and position we want to Define two methods in this class move that moves the robot's position by certain angles and display info that displays information about the robot including its new position first we Define a python class called robot arm this class represents a robotic arm and it has the attributes of name length weight color and position it also has methods like in it that initializes the attributes of the robot arm object when it's created now let's create an object of the robot arm class and utilizes attributes and methods so here we create a new instance of the robot arm class with the attributes of name which we call it arm row and the length is 50 centimeter the weight is 10 kilograms and its color is black and it started from the initial position zero degrees after this we can call the move method to update the arms position by 45 degrees and display its information using the display info method I again want to call move method to further change the arm's position by minus 15 degrees and display the updated information note that we can also access to everything in the class from outside of the class using Imports function let's take a look at the robot arm class that we created again so in the python environment we can import that class by using the import function and all of the objects can access the methods in it so we would write from robot arm import robot arm here the first robot arm refers to robot arm.pi that I created and I named my python on file as robot armed up pi and the second refers to the class name and after importing robot arm any object that is created here can access to the attributes and methods of robot arm class as you can see we can access the methods inside the class by importing it and again the arm one object can access all the functions inside the robot arm class so this was an introduction about classes and object in Python which is the basis of object-oriented programming in Python the next section is about inheritance inheritance is a fundamental Concept in object-oriented programming that allows classes to inherit attributes and methods from other classes it enables code reuse promotes modularity and facilitates the creation of hierarchies and relationships between classes in Python you can create a new class by driving it from an existing class the existing class is called the parent or base class and the new class is called the child or derived Class A Child class inherits all the attributes and methods of the parent class and can also add its own unique attributes and methods inheritance allows the child class to reuse the code and behavior defining the pair parent class while extending or modifying it to suit its own specific needs it promotes code reusability reduces redundancy and allows for more flexible and modular code organization in other words we can define a bunch of attributes and functions inside the class and then we can create another class and we can inherit all of those attributes we can basically have one class that has all the functionality of another class without having to physically write out any of the same methods and attributes let's explore the concept of inheritance with an example suppose we want to create a program to simulate different types of robots we can start by creating a base class called robot that defines common characteristics and behaviors of robots here's an example here we created a class named robot this class has attributes to store the robot's name and the number of degrees of freedom it has it also includes methods for introducing the robot and indicating that it can move as we talked about this before init initializes the object to the name and the number of degrees of freedom these attributes are stored as self.name and cells.dofs the method introduced print an introduction message stating the robot's name and the number of the Trees of Freedom it has the method move prints a message indicating that the robot can move now let's say we want to create specific types of robots such as a wheeled robot and a flying robot that inherits from the base robot class we can Define these classes in separate python files for example for the Wheeled robot we can write this code here we created the class wheeled robot that inherits from a base class robot this inheritance allows with robot to inherit properties and methods from the robot class the real robot class has its own Constructor or in it which initializes the num Wheels attribute and it also overrides the move method to provide a specific behavior for wheeled robots so in this code first we imported the robot class then we Define the wield robot class that inherits from the robot class in the Constructor or initial build robot it takes three parameters name dofs and number of Wheels it calls the Constructor of the base class or the robot class using super dot in its name and dofs to inherit the name and the uf's properties from the base class or the parent class it initializes its own number of bills property with the provided num Wheels parameter the move method of build robot is defined which overwrites the move method from the base class in this new move method it first prints a message specific to build robots indicating the number of Wheels then it called the move method from The Base Class using super dub move this code is a good example of using inheritance and Method overriding an object-oriented programming now we want to create another specific type of robot like a flying robot that will inherit again from the robot class so we will create another class and call it flying robots which also inherits from the robot class similar to the build robot class the flying robot class has its own Constructor and it overwrites the move method from the base class or the parent class this allows you to create flying robots with a specific attributes and behavior so again be first import the parent class or the robot class and then Define the flying robot class which also inherits from the robot class in the Constructor or init of flying robot it takes three parameters name dofs and Max altitude it calls the Constructor of the Base Class using super dutt init name and do apps to inherit name and uf's properties it initializes its own Max altitude property with the provided Max altitude parameter the move method of line robot is defined which overwrites the move method from the base class in this new move method it first prints a message specific to Flying robots indicating the maximum altitude then it calls the move method from The Base Class using super dub move this example also follows the same pattern of inheritance and Method overriding as the field robot class let's now create some instances of these classes and see how they behave so here we are creating instances of both field robot and flying robot and calling the introduce and move methods in them the robot class has an introduce method which both wheeled robot and flying robot inherit and each subclass build robot and flying robot classes has its own implementation of the move method in addition to inheriting the move method from the parent robot class so we first import the two wield robot and flying robot classes from their respective modules then we create an instance of yield robot and we call it robot one with the attributes rubber which is its name and it has three degrees of freedom and um four which is the number of wheels of this robot and we will call the introduce method on robot one then uh we will call move method on robot one robot 2 is an instance of flying robot class with the attributes thronex which is its name with six degrees of freedom and 100 which is the max altitude then we again call the introduce method on robot 2 and then we call the move method on robot so here we saw that the instance is a wheeled robot and flying robot inherit the introduce and move methods from the robot based class they also have their own specialized implementations of the move method specific to them here you saw that by using inheritance we can easily extend and customize classes to represent different types of robots while reusing common code from the base class or the parent class in the next section we will read from files reading external files like a text file or a CSV file in Python is a common task when working with data or text files let's say you have a file called sensor data.txt that contains readings from a temperature sensor in different time stamps each line of the file represents a timestamp temperature reading for instance here's the example content of the sensor data.txt file now we want to read data from this file that we call sensor data.txt this line of code opens the specified file which is sensor data.txt and it will read from it with statement ensures that the file is properly closed after the block is executed then we will E-Trade over each line in the open file the line variable here represents the current line being processed after that since our file contains chains lines and each line in the file contains a Time step and temperature separated by a comma and a space we want to split those so we want to split the current line which is read from the file into two parts using the comma and a space as the separator a strip method removes any leading or trailing white space character so that's for that then we would print the extracted Times tab and the temperature so to summarize in this example we first open the file using the open function with the file name sensor data.txt and if the mode is R for reading the width statement ensures that the file is properly closed after it finished reading inside the loop each line is split using the split method with comma as the separator this separates the timestamp and temperature values the strip method removes any leading or trailing white space from the line you can then process the data as per your requirements in this exam sample we simply print the time 7 temperature for each line here make sure that the sensor data.txt file is in the same directory as your python script or provide the full path to the file if it's located elsewhere in your system they're also writing and appending modes onto files in Python that have less applications forever cases and Robotics so if you like to learn them you can learn them on your own in the next section we will talk about modules and pip commands in Python a module is a file containing python definitions statements and functions that can be imported and used in other python programs it provides a way to organize and reuse code making your programs more modular and easier to manage modules are an essential Concept in Python Programming and are used extensively in large projects here's a breakdown of the key aspects of modules in Python the first aspect is creating a module a module is simply a python file with a DOT Pi extension to create a module you can start by writing your python code in a file and save it with a meaningful name and the dot Pi extension for example if you create a module called like my module.pi it can be imported into other python programs the other key aspect of modules in Python is importing modules to use a module in your program you need to import you can import an entire module or just a specific objects like functions classes and variables from it the important statement is used for importing modules for example if we say import my module it will import this module into your python code the other aspect is accessing module objects once a module is imported you can access its objects using dot notation if you have a module named my module and it has a function called my function then to access that function within the module you will write my module dot my function the other aspect of modules is module aliases you can assign an alias to a module to provide a shorter or more convenient name aliases are created using the as keyword during the import statement for example you can import my module as mm and then from that moment you can use mm instead of the module name for example if you want to use the my function from it you would just say mm dot my function the other aspects of modules is importing specific objects if you only need certain objects from a module you can import them directly rather than importing the entire module this approach can save memory and improve code readability for example you created a my module and then you would say from my module import my function my variable so you only import my function I'm my variables certain objects from that module you can create your own modules to create your own module you can Define functions classes and variables within a python file you can use these modules in other python programs by importing them it's good practice to include a brief description of the module's purpose using duct strings to provide documentation for users a text string is a string at the beginning of a module or function that gives extra information about it and it's for just human users to understand what the module or the function does python also has a standard Library modules it comes with a vast standard library that provides many modules for common tasks these modules offer functionalities such as file input output mathematical operations we use Mass library before networking regular expressions and more you can import and use these modules in your program times without any additional installation and we did it in previous sections there are also third-party modules in addition to the standard Library python has a rich ecosystem of third-party modules available for variable purposes these modules are created by the python community and can be installed using package managers like pip there are also some popular third-party modules an example is numpy which is for numerical computations and it's very common in robotics in the next section we'll talk about python interpreter and getting input from users python interpreter is a little environment that we can use to execute python commands to use the python interpreter you should first open the command prompt that for Ubuntu it is Ctrl alt T so first open the terminal then type python3 to see the latest version version of Python 3 and getting into the python interpreter but typing python3 you will get into the environment of python interpreter now you can write quick python code and quick test it for example we want to get the user's name and age and then create them using this information we take information from the user first in Python using the input command and then the pass prompt to it then we store it in the variable name and age and then we can do some operations with those variables like printing the greeting message Etc this environment is really good for a quick testing this environment isn't for development so it's just for quick testing and when you want to just Quick Test something to see what the output is it this is very very useful environment let's go to the next section which is try and accept statements in Python the try and accept statements in Python are used to handle exceptions an exception is an error that occurs during the execution of a program if an exception is not handled the program will crash the try block contains the code that you want to run and that might throw an exception they accept block contains the code that you want to run if an exception occurs let's here divide by zero example we first Define a function name divide numbers and we pass two parameters to it X and Y then we will use try accept block to handle the case where the division by zero occurs here if we call the function and write like print divide numbers 10 and 2 this should result in a successful division since 10 divided by 2 is equal to 5 and it's not divided by zero so no exception is raised so the result of the division 5 will be printed but when we try to divide 10 by 0 this should result in a zero division error since division by zero and not allowed in mathematics when this exception occurs the code inside except zero division error block is executed which prints the division by zero error message to summarize this code the divide numbers function takes two numbers as input and Returns the result of dividing them the try block tries to divide the two numbers if the denominator is zero a zero division error exception will be thrown they accept blood catches the zero division error exception and prints a message the first line of output is the result of calling divide numbers with 10 and 2 as input the second line of output is the result of calling divide numbers with 10 and 0 as inputs the zero division error exception is caught by the accept block and the message division by zero is printed then on at the end is the result of the second printer statement this is because the divide numbers function doesn't have a return statement for the case where a zero division error occurs in Python a function that doesn't explicitly return a value implicitly returns none so we should instead of print inside the function we should use return statement in order to handle other exceptions we can use more accept blocks for instance here we also handle the invalid input error as well the first except zero division error block specifically handles the case when a division by zero occurs returning the string division by zero error the second accept blocks the catch for any other exceptions that may occur it returns then string invalid so here the updated function effectively handles both the specific case of division by zero and any other unspecified errors by providing appropriate error messages this approach allows for better error handling and communication of issues um that might occur during the functions execution let's now go to the next section and talk about a specific library in Python named numpy that we are really interested in robotics numpy is a powerful python Library used for numerical Computing it provides efficient array operations and mathematical functions making it widely used on robotics for tasks such as data processing simulation and control in order to use numpy we should first install it first open up a terminal in Ubuntu by pressing Ctrl alt T update the system as usual and then install pip if it's not already installed remember that pip is for installing packages in Python you can do so by typing sudo apt install Python 3 and then Dash pip enter the password and wait for the PIP to be installed check to see if pip is installed properly by typing pip version now you can install numpy by typing pip3 installed numpy type Python 3 to enter the python interpreter environment and then test to see if the numpy is installed properly by creating an array using the numpy library now that the numpy library is installed and we check to see if it's working properly let's see how we can use it in our vs code IDE we first begin by importing the numpy library and giving it an ads NP then we created two numpy arrays V1 and V2 and we gave them some values now we want to do some basic element wise Vector operations here we want to print the value of the array B2 and the result of adding V1 and E2 together element wise now let's show the element wise multiplication of the arrays V1 and V2 the shape attribute of the numpy arrays is used to display their Dimensions initially when we check the shape of V1 is 6 by nothing indicating a one-dimensional array with six elements to make the column Vector it's reshaped to have dimensions of 6x1 using double square brackets now I'm going to show how to perform matrix multiplication using the math mod function inside the numpy Library we can achieve this by matrix multiplication between V1 and the transpose of V2 which results in a 6x6 Matrix that t attribute is used to obtain the transpose of a matrix the shape of V2 transposed is 1 by 6 indicating a row Vector in Python 3.5 and later the add operator can be used for matrix multiplication so here we want to show a matrix multiplication using this operator we see that the matrix multiplication of the transpose of V1 and V2 is a one by one Matrix essentially a scalar now we want to create a two by six Matrix using numpy we create a matrix as a numpy array and we call it X this array is constructed using nested lists where each sublist represents a column of the Matrix The Matrix is created with two columns and six rows again we use the dot shape attribute of the numpy array X to display the dimensions of the Matrix the result of x dot shape is 2x6 indicating that the Matrix has two rows and six columns as we initially decided to do so foreign
Up Next
18:41
Neural Networks Explained: Math, Layers, and Learning Fundamentals
@3blue1brown
21.9M views•2017-10-05

57:48
Secure Multiparty Computation (MPC): Foundations & Challenges
@SimonsInstitute
7.3K views•2015-05-28

13:03
Bypassing Tor Censorship: Bridges and Pluggable Transport Guide
@Coding_ForEveryone
397 views•2024-06-11
20:33
Gradient Descent Explained for Neural Network Learning
@3blue1brown
8.6M views•2017-10-16
Related Study Plans & Knowledge Roadmaps
Structured learning paths in Artificial Intelligence
artificial-intelligence
Aligning LLMs: DPO, TRL & Custom Datasets
01Foundations of Python & Machine Learning
02Transformers and Large Language Models (LLMs)
03Aligning LLMs: SFT and RLHF
+ 3 more learning modules
24h6 modules
Explore Roadmap
artificial-intelligence
Federated Learning: PyTorch, Flower & Privacy
01Python & Machine Learning Foundations
02Deep Learning Basics with PyTorch
03Introduction to Federated Learning
+ 2 more learning modules
35h5 modules
Explore Roadmap
artificial-intelligence
Securing LLMs: Guardrails AI & NeMo Gateway
01Introduction to LLMs, Python, and APIs
02Understanding LLM Vulnerabilities & Threats
03Defending LLMs with Guardrails AI
+ 2 more learning modules
15h5 modules
Explore Roadmap
artificial-intelligence
Building Recommenders: Two-Tower & Vector DBs
01Foundations of Python & Machine Learning Basics
02Introduction to Recommender Systems
03Deep Learning & Representation Learning
+ 3 more learning modules
75h6 modules
Explore Roadmap