





![¿Conoces las 17 Partes de la Guitarra Eléctrica? [+Cómo Funciona]](https://i.ytimg.com/vi_webp/8TMyGk66OeM/maxresdefault.webp)











![🧮 Spannung in Zugstab aus zwei Elementen mit Einzellast [Finite Elemente Methode - FEM]](https://i.ytimg.com/vi/ZR-mFjsH8zE/maxresdefault.jpg)





This video demonstrates how to construct a bronze guitar by melting 50 pounds of copper wire and adding 10% tin by weight to create bronze, which paradoxically becomes harder and stronger than pure copper despite tin being softer; the process involves creating sand molds using Petron (a clay-sand-oil mixture), casting the metal, and machining the resulting pieces, though the final instrument weighs nearly 40 pounds and requires significant post-casting work including fret slot cutting and polishing.
Casting a Bronze Guitar from 50 Pounds of Copper Wire: Metallurgy & Luthier Techniques
Added:Basic metallurgy of copper-alloys, specifically the composition, melting points, and properties of bronze (copper combined with tin or other elements).
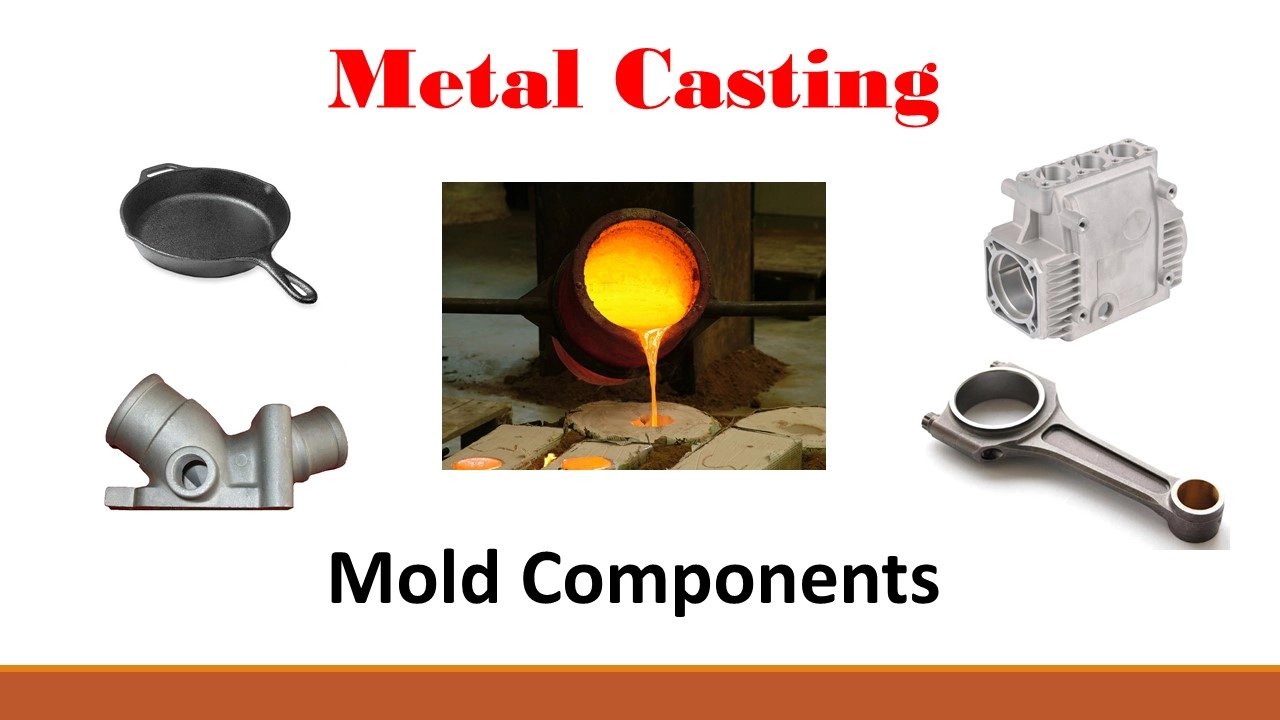
Fundamental principles of metal casting, including mold preparation (sand or investment), gating systems, and metal shrinkage during cooling.
An understanding of basic electric guitar anatomy and functionality, including how the body, bridge, and pickups interact to produce sound.
Safety protocols associated with high-temperature foundry operations, such as handling molten metals and avoiding steam-explosion hazards.
Advanced post-casting metal finishing techniques, including CNC machining, precision drilling, fretwork integration, and chemical patination.
Acoustic physics and vibrational analysis comparing how metal bodies (aluminum, bronze) transfer kinetic energy compared to traditional tonewoods.
Structural engineering concepts like Finite Element Analysis (FEA) to calculate stress distribution from high string tension on metal instrument necks.
Exploring alternative non-ferrous casting methods, such as vacuum-assisted casting or lost-wax casting, for high-precision artistic objects.
3.4M views37.4Klikes21:56Original Release: 2024-06-07
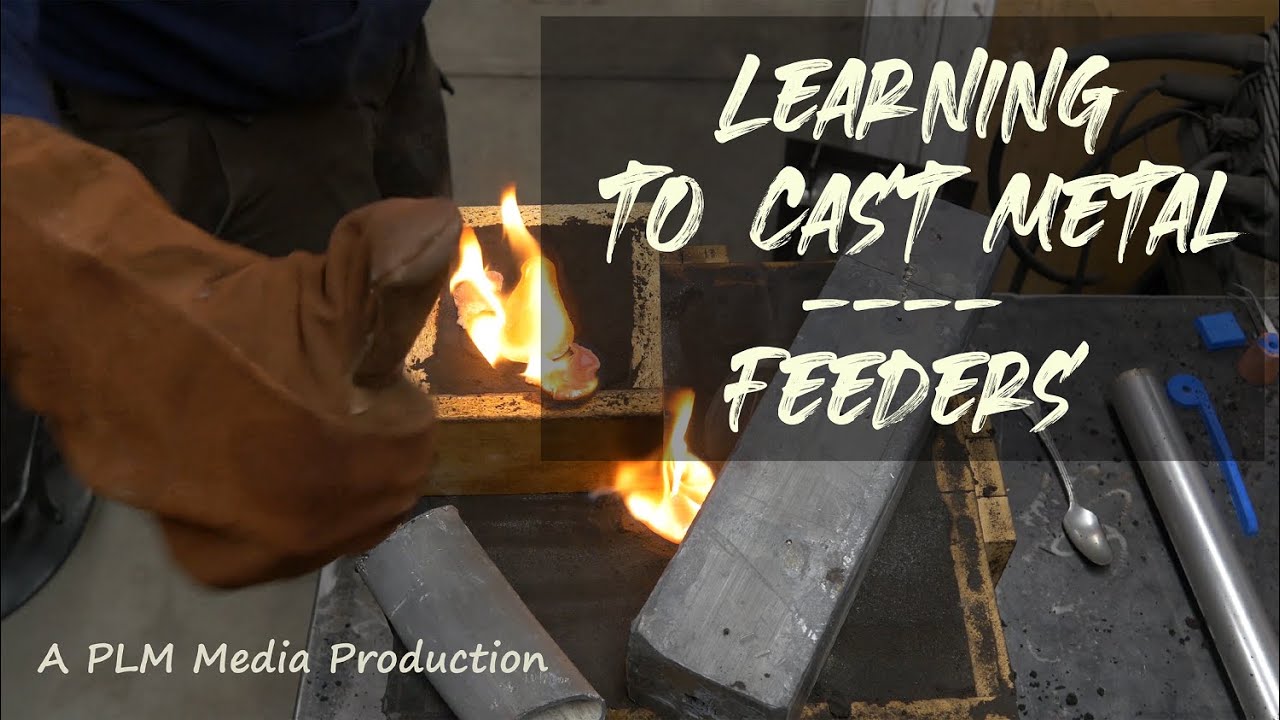
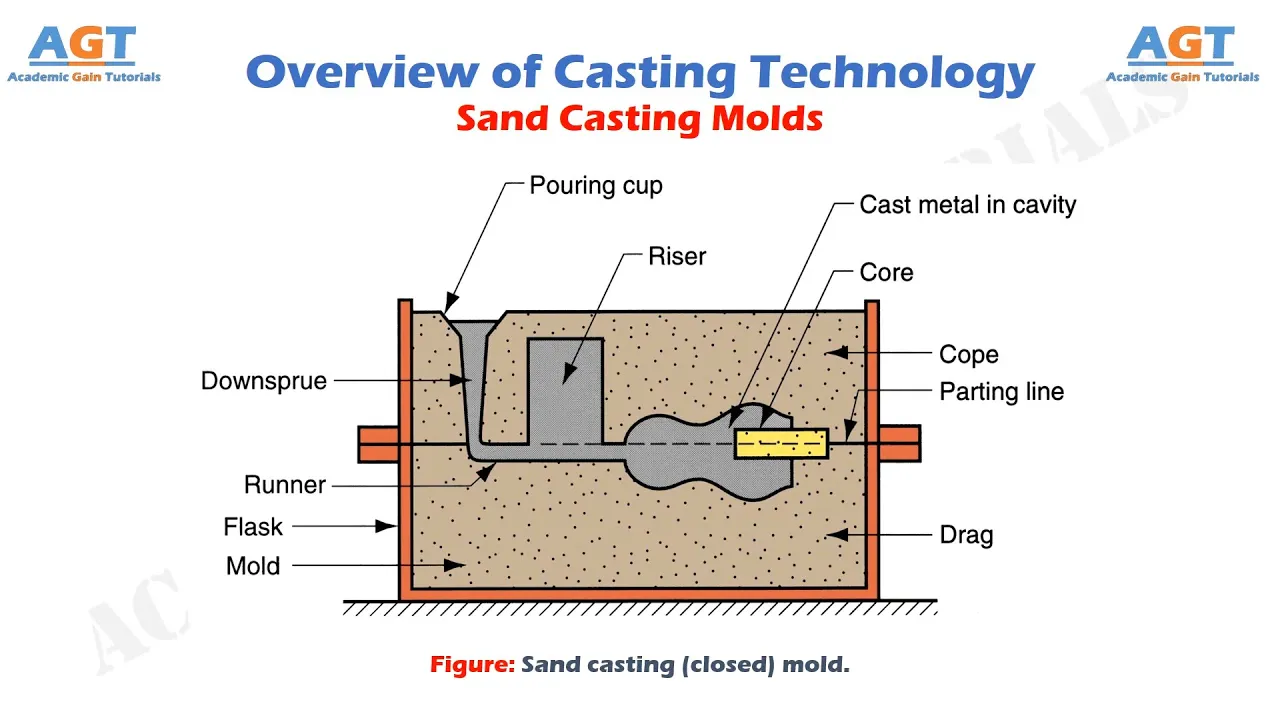
this might actually be my craziest idea yet and it's probably well certainly going to be the most impractical guitar build I've ever done which is saying a lot considering I built a guitar out of himilayan salt in the past so for this one I'm doing copper specifically using copper wire to Source the material and I bought the wire for I think $4 a pound clean and strip and I used 50 lbs of copper total for this project so $200 worth of copper wire I'm starting with the neck on this project mainly because it's an easier shape to cast than the body and considering I've never cast copper before I figured this would be the right thing to start out with and experiment if needed what I'm doing here is creating a sand mold that I can cast The Copper into and turn it into a neck for this guitar for this I'm using Petron which is just a mix of clay sand in oil which gives kind of a sticky formable sand that's used to make molds for casting metal the way this mold works is really simple it's a two-piece mold I use a wooden frame to support the mold and once the plug which in this case is the neck is encased in the sand I can build another layer of sand on top of it to sandwich the plug in the middle I use baby powder to act as a barrier between the two sand layers this is the POR spout or sprew which is where the molten copper is going to get poured into and I've found it works well if I build a little funnel around this just to give a larger Target to pour at then I can remove the top of the mold and cut out all of my Gates that lead into the mold these risers on the side of the neck are there mainly just to give the air and steam created an exit Port but they can also help with metal shrinkage to some extent and then I can yank the plug out do a little touchup around the mold and blow out any sand that came loose inside of the mold top goes back on and that's pretty much it for making a sand mold although whether or not it's going to work depends on a lot of variables than just the mold this is a neck that I built last year out of aluminum cans and I built it using the same exact plug that I'm using for this one so this is kind of the desired result but just in Copper this time and it's attached to an aluminum body I used 1,000 aluminum cans to build this just for reference that aluminum neck weighs 3 and 1/2 lb and copper is roughly 3.3 times heavier than aluminum so we're looking at 12 lb copper neck and if you think that's heavy just wait to see what the body is going to boy shut the furnace down looks like we've got some weather coming in so I'm going to hold off on this and try it again in the morning it's the next morning clear skies so I'm going to fire this thing up and try to get that neck poured [Music] [Music] most okay so now we've got a neck for the guitar and it's time to get started on the body now this pour came out terrible looks kind of cool but obviously had some flow issues as well as a lot of turbulence I think I've also got to pour the copper faster on the next try so I'm going to chop this thing up and make another mold I was curious as to how strong this was going to be because copper is a relatively soft metal so I took it against the shop table and apped some pressure on it and sure enough I was able to bend it pretty good needless to say this was a bit concerning and got me thinking so I remade a new sand mold for the neck chopped up the old one and threw it in The Crucible with a few more new pieces of copper wire just to make sure I had more than enough [Music] metal I set this mold up on a slight tilt so hopefully this helps the bronze float at the end of the mold better this is a 2 lb bar of tin and I'm going to add it to the roughly 20 lbs of copper in The Crucible which should melt down into bronze that little bit of tin just 10% by weight will change the properties of the metal basically the tin will melt throughout the molten copper and the larger tin atoms will restrict the movement of the copper atoms in turn making it a harder and stronger material it's kind of crazy because tin is even softer than copper so adding a little bit of a softer metal to an or soft metal creates a hard metal just kind of difficult to wrap my brain around that but that's apparent how it works that's all I got all right so maybe the first bronze guitar neck ever created it looks pretty good to me there is some aeration in the metal you can see all the little divots and surface imperfections but overall this looks like it'll do now for the body of the guitar I took a thin Maple blank and traced a Telly pattern onto it got that cut out on the band saw and then shaped I think this is going to be too big considering how heavy copper and bronze is I'm not even sure that my Crucible will even hold enough metal for this so I'm going to cut cut it around the perimeter a bit on this line make it kind of a slightly mini siiz Telly body this is another roughly 30 lbs of copper that I'm going to use for the body in addition to whatever bronze I have left over from the neck I considered trying to do an atypical body style with cutouts or cavities to reduce the weight but when I started doing the math for it I realized that the guitar is still going to weigh in excess of 20 lb no matter what shape or style I made so I ultimately resorted to just doing a normal shaped guitar and embracing the weight that's going to come with it I believe I am making the heaviest guitar in the world sand mold for the body and this was done pretty much in the same exact fashion as the mold for the neck there's a few new elements to this mold but I'll talk about those when we get to them that slight reduction in the size of the body that I made should reduce the weight of the body by close to 8 lb which sounds like a lot but considering this thing is going to weigh probably 30 plus lb it's actually not a giant percentage but I mean at this point I guess every pound counts this idea sounded pretty good in my head initially and it wasn't until I felt how heavy that bronze neck is that it truly said in that I was making something that probably just should not exist I mean there's a reason guitars aren't made out of copper so I'm really riding on the hope that it'll will at least turn out looking pretty cool because I don't think this is going to be a guitar that you just pick up and play for the feeders I went with two gates into the mold just to give it more volume to keep the molten metal flowing and give it the best chance to actually fill up since I don't want to route or machine the body afterwards I made sand plugs for all the cavities I just use my different cavity patterns which I surface plane to the correct height pack sand in them and then level them off with a piece of aluminum and then I can just kind of gently caress them out this one broke apart slightly but I was able to pack it back together since bronze is heavier than sand I was worried about the plugs floating inside the mold when I poured the molten Bronze in so I actually ended up super gluing the plugs down to the bottom of the mold which worked surprisingly well top of the mold goes back on and I was now ready to pour the body this is some of the leftover bronze I had from the neck poure almost 42 lbs of metal the good thing about bronze is that it also seems to flow better than just pure copper which makes a huge difference when casting these giant pieces got three more lounds of tin to account for the 30 lb of new copper wire in The Crucible for reference that Crucible full of Molton bronze weighs somewhere in the neighborhood of 60 lb so making sure all of my equipment was in working order was super important and generally just being very diligent throughout this whole process but especially on that Crucible transfer [Music] Bron's body it's got a few issues though the bottom of the neck pocket didn't completely fill in could maybe get it to work but that's not the biggest issue here the main problem is that I put the control cavity on the wrong side of the body so that's supposed to be over here I think the only move here is to chop it up and give it another go this could have been a burls art first going with a left-handed guitar but the horns aren't oriented for a lefty setup plus the neck pocket would need some figuring out so I just decided to chop it up and make another mold new mold here got the control cavity on the correct side this time on the last one I I put the pores spout entering from the front of the body on this one I put it on the side which mainly gives the metal a shorter distance to travel and I'm hoping that it'll help fill in that neck pocket more got the body chopped up and in The Crucible along with 6 or seven lbs of new copper wire just to compensate for any metal I may have lost on the last attempt this piece didn't fit in so I'll add it once the metal is molden every now and then I make a really stupid mistake on Project this one happened to be just placing the control cavity on the wrong side which to be fair is kind of easy to do since everything in a mold is backwards and I don't really work with a ton of molds so dumb mistake but the nice thing about this type of build is that I can remelt the metal until I get it right my rule of thumb with castings is that if I can get the piece to function the way I want it to I won't recast it there's always imperfections on every casting I've done and if I keep going over and over to get the perfect casting I could be doing this whole process for weeks if not months with no real guarantee that I'm going to get a perfect piece so chasing perfection in my castings is just not something I'm willing to do this pour looked like it was going really well until major blowout on the side of the mold right behind the POR spout it's not ideal that's the result of a blowout all that bronze looking at this again but sped up you can actually see the the mold expand and kind of blo right before the blowout happened and so I'm kind of wondering whether that was just a result of trying to force too much bronze into the mold by continuing to fill my por spout or if that was hot air expanding in the mold not sure and I didn't notice this until editing pulled this thing apart earlier than I would have because I thought I was going to have to redo this thing and I'm kind of shocked by this but it looks like it actually filled in all the way so I'm going to let it cool down then clean it up and see what we've got all right attempt number two got the control cavity in the right spot this time the neck pocket still didn't completely fill in but I think it's enough to where I can work with it I also noticed that the back side of the body had a fairly significant bow to it and I thought it could have been caused by warping but the top was completely flat so I was a little confused by that it's more like a slight hump on the back and I didn't really realize what it was until I looked at the video of the pore and noticed that the mold was expanding near the end of the poure so regardless of what caused that I now realize that it did overfill with bronze and create a slight hump on the back I was really surprised at how difficult bronze is to work with I knew it was harder than copper or aluminum but to me it's almost like working with steel and just making any kind of progress in shaping or sanding this thing takes a lot of elbow grease so for the neck bolts I can put these two in Fairly normal positions then this one a little bit further down and and lastly this one right on the corner here I don't think it's worth messing with this little tab I'm just going to keep it there for support and maybe a slight reminder that this body was indeed cast I'm not worried about the strength of the neck pocket or the connection to the neck just because bronze is so strong and bronze to bronze held together by four bolts will be plenty strong for this purpose thinning down the headstock was the first real challenge in shaping the guitar and I used a combination of cutting wheels and the band saw to get it roughly cut down to thickness Bron's overheated so much from that cut that it's starting to change colors it changes color because of surface oxidation it'll actually change different colors depending on how hot it gets I knew this was the case with copper but apparently bronze does it as well which makes sense considering it's like 90% copper now to cut the Fret slots this was probably the most tedious task in the entire build when I built the aluminum neck that I showed earlier I had used a mini hacksaw to cut the Fret slots and it was pretty easy to do and I tried using that saw and being that bronze is so much harder than aluminum I was making literally no progress so I just put a little cutting wheel on the Dremel and used a steady hand to freehand the slots I couldn't really come up with a better solution to this with the tools and equipment I've got in my shop but luckily it turned out working pretty well now to sand the radius into the fretboard I almost considered skipping this step and just going with a flat fretboard but in the end I I just couldn't get myself to go that route this was the longest I've ever worked on one specific task probably ever in any project I've ever done three full days of work just sanding this radius in people often wonder why I don't post more frequently and that's a perfect example of why got the fretboard sanded and Polished up so it's ready for the Frets and you can kind of see all the voids and air bubbles that are on the fretboard and I think if I had access to a mill to kind of surface plain these parts down prior to working on them that would fix a lot of the issues as far as imperfections go it kind of gives a sort of Steampunk vibe to the whole thing the fretting was pretty challenging as well the main thing here is that there's just no give with metal especially bronze so where you can create Impressions and wood and force Frets into a slot with bronze that just doesn't work out so I pretty much had to glue every fret and press it while the glue clears and then I had to do a ton of leveling and recrowning to get the Frets all lined up correctly I had to get creative with drilling all the ports going from one cavity to another I tried using a drill at first but it was making incredibly slow progress So eventually I just figured out a way to to get the body mounted on my drill press table and that sped things up tapping little threaded holes for the pickup Rings always a little nervous doing this but surprisingly I didn't have any issues tapping into bronze I used my belt sander to try and level out that hump on the back of the body I mentioned earlier and this does work but again just incredibly slow all right got it significantly flatter now but you can see all of these air pockets throughout the back looking a lot better now but really no matter how much I take off like these air pockets are throughout so I think at this point they're just going to be part of the guitar I mentioned it earlier but I think if I had access to a Mill and was able to Mill these parts like a 16th or an eighth of an inch off of each face I'd have a way better surface quality to work with but unfortunately I don't have access to a Mill and with the tools in my shop it's just not something I'm able to do with my time frame it's so at this point everything is pretty much shaped how I want it and I entered into the never- ending phase of sanding all the tooling marks out of the bronze I decided to wet sand up to 3000 grit and Polished with a felt wheel to get a mirror-like finish I considered going with a more dull finish kind of like a brush finish that you'd find on aluminum or brass and that camouflages the voids more so than a high gloss finish but I generally like shiny things and shiny finishes on my guitars so I ultimately decided on polishing it up to a high gloss which does make make the voids much more apparent since the headstock was cut down roughly 38 of an inch you'll notice that there's very few voids or imperfections on it and this just goes with what I was saying earlier about Milling the pieces prior to working on them I didn't want to leave the bronze unfinished where it would continue to oxidize so I use a specific finish that's made to cover polished Metals you just brush it on with a foam pad and it self- levels and creates a thin barrier over the metal that's supposed to be quite durable most spray finishes will slightly dle a Polish finish which is why I turned to using a specific finish made for polished Metals then all I had to do was get the hardware installed and the electronics wired up and my bronze guitar was complete [Music] [Music] [Music] [Applause] [Music] [Music] full bronze guitar I'll get to the demo here in a minute but I wanted to address a few things on this guitar mainly the weight I don't know how much it weighs yet but I do know just by holding this thing if it's going to hang on a wall hanger it better be a super sturdy one and it better be bolted to a stud this uh adjustable guitar stand can't even withstand the weight of this guitar y yep that'll happen totally unreasonable and I I didn't even put strap buttons on it because I didn't want to risk the strap breaking and it just absolutely crushing my foot just under 40 lb not that bad it's kind of a shock to the mine because visually it's such a small guitar and honestly playing it it feels like it starts to cut the circulation on my leg after like a couple minutes although it does function like a normal guitar and if it weren't for the weight I'd say it actually plays pretty well probably the first and last of its kind um but it does look cool so I'll give it that last metal guitar I built I got bered for not playing any metal on it and it's mainly just because I don't play metal and I don't really know how to never have but just to appease those folks I faked a metal Riff on it to start out the demo that's it thanks for watching [Music] [Music] p [Music] [Music]
Up Next
19:52
From Stone to Copper: Crafting Humanity's First Metal Tools
@htme
732.6K views•2019-08-31

12:54
Triumph of Orthodoxy Icon: Byzantine Art & History Explained
@BenCallan
2.1K views•2024-08-06

9:49
FastAPI vs Flask vs Django: Choosing the Right Python Web Framework
@TechWithTim
302.5K views•2024-05-26

1:42
Game of Thrones Opening Credits: A Cinematic Analysis
@gameofthrones
46.3M views•2011-04-18
Related Study Plans & Knowledge Roadmaps
Structured learning paths in General & Interdisciplinary Studies
general-studies
Elevator Engineering: History, Physics & Cities
01From Hoists to Safety Brakes: The Dawn of Vertical Lift
02Hydraulic vs. Traction: The Engineering Physics of Elevators
03Modern Speed, Safety, and Algorithms
+ 2 more learning modules
12h5 modules
Explore Roadmap
general-studies
Rubber: Material Science, History & Geopolitics
01Origins of Natural Rubber & Mesoamerican History
02The Chemistry of Natural Rubber & Vulcanization
03The Geopolitics of the Rubber Boom & Colonization
+ 2 more learning modules
12h5 modules
Explore Roadmap
general-studies
Containerization: Evolution, Logistics & Trade
01Ancient Trade & Bulk Cargo: Amphorae to Barrels
02The Industrial Revolution & Cardboard Packaging
03The Containerization Revolution: Malcom McLean
+ 2 more learning modules
12h5 modules
Explore Roadmap
general-studies
Textile Tech: Evolution, Labor & Global Impact
01Pre-Industrial Textiles: Handloom & Cottage Industry
02Mechanization: The Spinning Jenny to the Power Loom
03The Factory System & Global Labor Transformation
+ 2 more learning modules
10h5 modules
Explore Roadmap