

















In astrophotography, achieving sharp focus is critical because light from celestial objects is extremely dim, and concentrating photons into fewer pixels improves signal-to-noise ratio. The critical focus zone is the range of focus positions that produce acceptable image quality, calculated using the formula: Critical Focus Zone = 2.4 microns × f-number. For example, an f/7 telescope has a critical focus zone of approximately 120 microns, while an f/2 telescope (like Hyperstar) has only 9.6 microns, making focusing much more challenging. This zone is important because it defines how precisely you need to focus to avoid image degradation while accounting for practical limitations like mechanical backlash, temperature changes, and atmospheric turbulence.
Mastering Astrophotography Focus: Techniques & Automation | Ken Daly Insights
Added:[Music] uh come on alex is the intro over yeah weren't you watching but i'm not seeing it apparently hi everybody this is alex and i'm now starting the show because i for some reason missed out on what was supposed to be happening there okay we've been having a particularly raucous pre-session here getting ready for this and um so it's time that we got to focusing here and uh so ken luckily is fairly sane compared to the rest of us we were being goofy and he will be um telling us about his experience with auto focusing and so we're going to do that in a little bit here but first i'm going to make sure that we all um hear about some things that were going on in the astro imaging channel that you all need to know about i should be presenting to everybody and here you can see everybody waiting to present and if you go to the website you will find out that we have a lot of things going on next week brandon here by the way brandon i forgot to ask before the show you're still here and uh before ken starts to talk i'm going to ask you what you're going to talk about a little bit next week so just you know prepare yourself a 30-second spiel or something to tell people what we're going to be talking about and after bran brandon is here next week and then we're going to have some other stuff coming up and then on 4th of july we're going to take the day off and you'll notice that on july 11th it's open and that's been our next open date for like ever and uh i suppose it's time for us all to get to work and when i say us all yeah obviously the guys that are sitting here at the meeting now um have to get to work and arrange some more presentations but you also got to get to work out there you have to um you have to sign on to present some stuff remember the people who are presenting here are amateur astro imagers just like you are they are not particularly fancy people are not particularly experienced people they're people that have learned some things that they think that they can share with other people they pull out their powerpoint or their google slides program or whatever it is that they use and they put together their thoughts and um they're right most of the time they're wrong some of the times they're a lot more sane than some of the websites you could be reading and you can interact with them here on the astro imaging channel and you can be one of them so i strongly encourage you to go over to our contact sheet here and just tell us what your first name is your last name is give us your email and tell us what you'd like to see a program about we know that we need certain one nice program would be how do you select images what how do you select targets for a night of imaging what programs do you use what resources do you use and things like that another one that we've got a frequent request for is free processing software and i always think of deep sky stacker and when i think of that but um maybe there's deep sky stacker or maybe there's i don't know see because that's what i always think about because i'm old and that's the way i was brought up to think that way but things change and if you have been using or you did use extensively um some software programs that's common free source and things like that that people can get a hold of we really could use a show about that we like shows about observatory building we like shows about what you've learned in your first few years of astro imaging we like all sorts of shows so please if you think you've got something to offer do so the next thing that we think is important i want to tell you about is gorgeous galaxies i i know i said gorgeous galaxies when i meant oh god not another gang galaxy i mean i've been taking pictures of galaxies for the last two months or something like that i'm getting a little tired of it uh i do get to see all of your galaxies we must have like 50 or 60 of them already and we've still got what six weeks seven weeks until june 30th which is the official end date and you know how we always do things exactly on time so if you're taking uh an image of a galaxy and processing it up uh please click below to submit and it'll go into your email system and you just tell us a little bit about who you are what you took a picture of why you took that picture anything you want just visit with me for a while or don't just send me the freaking picture that'd be that make me happy okay and then we do have people already volunteered that will help us um put those together into a slideshow like we saw with neo-wise on parade or with orion time we hope to make another 10-minute slideshow and i don't know how we're going to do it this time because the way i'm looking at it we're going to have like way too many pictures so um we'll figure out a way to do it maybe we'll just have two of them um you know there's a lot of dang galaxies out there as i've been finding out over the last couple of months anyway send me something big enough uh at taic shots uh by clicking on that button 1080 pixels on the side is a good way to think about it that means it's not going to pixelate when we turn it into a um a powerpoint movie there's other things to point out there's the spreadsheets here where you can go and you can get a uh you can get a whole spreadsheet of all the programs that we've done so far and wanda's been doing a wonderful job of keeping us keeping it updated we could use some help with other people helping us update it i also want to remind you that while we're talking here hey stop talking i'm hearing me talk while i shouldn't there we go um and we've got lots of people already joining us and uh we're up to 10.7 million subscribers oh that's a thousand well it's still pretty good for us okay uh so um if you aren't a subscriber yet please subscribe and as always um unless we do a poopy job like the like the channel it helps okay it helps in the long run it gives us more uh ability to get the word out to other people uh be sure to ask your questions around here uh type in the big red question mark so we can pick it off and know that you've got a question to ask and the question you will be asking will you will be asking of ken here and ken is sitting there saying okay alex that's enough for you let's hear from ken so ken i'm gonna stop sharing and it's your turn all right so i've turned my mic on and i'm hitting present now entire screen and i'm clicking share candy is presenting okay and here's my presentation right and i'm going to go into uh slideshow mode um yeah all right so so you should see one thing can you can down at the bottom where it says um stop sharing you can click right you know don't stop you hide okay and that way that little box isn't there and um don't forget everybody ask the questions and we'll interrupt now and then and do what we need to do in order to to get the questions to ken and share your experiences and make it a really good contribution okay thanks go ahead ken okay so um one correction to what alex said um i'm not gonna think about the automatic focusing i'm going to kind of review my personal experience with focusing which started off with the dslr and at this point i am doing a stepper motor for focusing okay so um i think and more or less i've just said this um uh also i'll talk about baton off mask and uh hopefully at this time i'll be out to talk a little bit about atmospheric turbulence okay so this is me i'm image partly from my backyard and i go out to the riverside astronomical society site gmars which is where i met alex and i move my scope around which is a royal nuisance but i enjoy it okay and see i'm a recently retired aerospace engineer i didn't do any optics but i do have a lot of background in the electronic software test and integration i started ap using a dslr on an ioptron star tracker and since we have some australians here i'll mention that reason i started doing this is in in 2012 my work took me to australia to out the outback um and i was so impressed with the stars i was very sad that i didn't bring a camera with me and then the it happened i had another opportunity the following year in 2013.
so i rushed and bought a canon t3i and this star tracker and i brought it with me and that's when i started taking photographs and i'll soon be showing my one of my first milky way show to photographs which is from australia i then uh started buying more advanced equipment because i wanted to do deep sky objects and um let's see uh i don't have a website but um if someone does want to reach me eventually um i go by ken d on cloudy nights and i check cloudy nights a couple of times a week okay and just example some recent photos i like this triangulum there's a lot of hours put into this the trifid is something i did in in just an hour about a week about i know two two weeks ago uh it was early in the morning just before the sun was coming up and i had some time to fill so i spent an hour on it and for only an hour i'm pretty pleased with how that came out okay um all right so let me get into the the real topic here so why am i talking about focusing well part of the reason is that when i started doing this i had a lot of trouble with focusing um one one gets so used to using dslrs with automated focusing that you you're you are surprised that it's not easy to focus on a star first of all sometimes you can't even see any stars and you're doing it in the dark so you can't see the controls on the camera and you may be using a tripod but you can't see the legs of the tripod so you may kick the tripod and then you're going to be pointing somewhere that isn't where you want to point so anyway i started off having lots of little problems with focusing but i got through it so i thought it would be a good topic for this presentation and um you know given my technical background i actually see focusing as a as a fairly big subject you can get into all kinds of things geometric optics including the aberrations of lenses um diffraction and atmospheric turbulence to say the least um and i'm going to try to talk a little bit about all these things and then also if really if all you want is pretty pictures personally i think understanding the technology can be really helpful because it it helps you to set realistic expectations and maybe identify how to proceed to get better images and then um another point about focusing is you know we know that to get a sharp image you need to be in focus but when you're dealing with with uh astrophotography you're often dealing with signature noise problems there's so little light so few photons that you really want to get the photons concentrated into as few pixels as you can to improve your signal of the noise so you're much likely to see various dim objects and nebulosity if you're if you have good focus okay so um i hope this doesn't get too academic but but uh anyway i'm a bit of a technologist so you have to bear with me um so this is the basic basics of what focusing is so i'm showing here let's let's start with this on-axis star in the middle so you got light originating at the star that spreads out in all directions and eventually reaches your lens so here here's this light coming into the lens at the lens and of course i'm talking about refractors because i use a refractor um reflector is a little different but a lot of the principles are really the same so the light arrives at the lens with a plane wave front which is what i'm showing by this dashed line the lens spends the light and it converges at a focal point and after it's bent you can see there's a spherical wavefront coming out the lens and by focusing we just move we move the lens back and forth or maybe you move the camera back and forth um so that the focal plane is at the focus point so here here's the i'm sorry the sensor in the camera so i'm trying to represent the sensor by this blue line so we move the sensor back and forth so it's sitting at the focal point of the lens and also included in this i've drawn an off-axis star so off axis star is very similar but um i've tried to indicate here that the focal point for an authexic star is not necessarily on the same plane and so i'll come back to that in a little bit so um it's very helpful to know how critical you need to achieve this distance and that's the subject of this chart the critical focus zone so if you really zoom in right near that focal point here's here's the light converging same spherical wave front converging at the point f but in reality it doesn't really converge the point f um that's true in the simplest optics geometrical optics but as soon as you start taking into account the wave nature of light you get diffraction effects and that manifests itself as as the airy disc and i have the little formula here for the for the airy disc lambda is the wavelength d is the aperture the size of your telescope and f is the focal length so that's the size that's the physical size of the airy disc on the sensor and there's a convention that if you just extend that airy disk forward and backwards until it intersects the light cone coming down here which is what i'm trying to draw here it's just a matter of geometry you get this formula down here for the critical focus on 2.4 microns times the f number of the scope it's kind of amazing to me that it's such a simple little formula so i think this is a very important result and um say what's my next chart okay so here's some here's some examples of the value of that uh formula i'm currently using a f7 so that gives me a critical focus zone of about 120 microns just fairly big now before the show um uh and next week um i think brendan brandon is his name he's going to be talking about hyperstar imaging with an f2 and and that's quite a small critical focus zone um 9.6 microns which is less than a thousandth of an inch so it's pretty challenging to focus in that situation for my current refractor just to get a feel for how big these numbers are what i do is i i i've counted the ridges on my fine focus knob here and there there are 40 little ridges around the circumference and when i turn the knob one complete turn the draw tube moves a centimeter so that means one ridge here going from one ridge to the next ridge is about 250 microns or a 10 mil so that that distance is larger or you might say comparable to the critical focus zone so that gives you a feel um if you're focusing manually turning this knob how precisely one needs to set focus to be within the critical focus on and just as a little aside what might be interesting in this at the bottom here i have the little plastic cover that focuses often come with and i did not fully appreciate the value of this cover of course it keeps the dirt out that's kind of obvious but what i didn't know is that the fine focus knob has a fairly thin steel rod that's extending from it and if you bump this knob you can bend that steel rod and um and once it's bent it doesn't feel very nice it feels kind of bumpy when you turn it so i ended up having my focus of repaired after bumping it the stellar view people were very nice to with a very small charge to fix that for me okay um all right so i said a little bit about i mentioned the airy disc now people some people may kind of poo poo the airy disk because you don't actually ever see it or hardly ever see it in an image and there are a lot of good reasons why you don't see it in particular seeing uh if you're seeing this poor you're never going to see the airy disk it also can be much smaller than your pixels so it's not going to be resolved and of course we usually don't image in monochromatic light we have a mixture of different wavelengths and the location of these dark rings depend upon wavelengths so when you have a mixture of different wavelengths the bright rings and the dark rings will overlap and everything will average out but it is there and um you can see it so this this is actually a photograph i took um with my scope of the arie disc and um i did this kind of uh kind of a trick i put a little aperture mask over the scope so instead of i have i usually use a four inch refractor so with the aperture mask i reduced it to one inch which makes the uh the airy disc four times larger and it was just barely resolvable okay all right and then um again maybe a little too academic but bear with me for a while what what what is diffraction so i've got a little diagram here a b is supposed to be the uh objective lens the big lens the front of the telescope extends across here and c is an on-axis point along the optical axis so at each point along the lens you have light coming out and if you consider two points on a diameter that are equally spaced from the center the distance from a to c and the distance from b to c is the same so that when you have a wave that's oscillating traveling down here and the same another way of traveling down here if they're in phase in other words the you have a planar wave front in front they're going to be in phase at sea so the the crests the crests of the wave align and you'll end up with a bright spot right at point c and then if you consider an off-axis point such as d again you've got rays of light originating from a and b but you notice that the path lines b d and a d are different a d is longer so that when the light reaches d these two paths are going to be at a different phase and you're not going to get as bright a spot in a certain angle as you move down here at a certain angle the crest and the trowel of the wave will align and in fact they'll cancel out and you'll get a dark spot and that's true if you all the way around so you you actually get a ring of dark spots so um all this was figured out that the exact mathematical formula was first obtained by sir george airy i always knew it was the airy disc but when i looked this up i didn't realize that he was actually the english astronomer royal in 1835.
our source is going to write that that george area the physicist figured this out but he was actually an astronomer all right so um on to my dslr efforts i already told you a little bit about this but this was this is the the system i took with me to australia and here's my first milky way image um this was um i think it's a single it was a single exposure about 30 seconds so how do you focus with a dslr well first of all you need to use manual mode because the light just isn't enough to use automatic focus select some bright source it could be a bright star or maybe a distant street lamp if you're in some urban area you use live view to get continuous feedback and then digital zoom zoom in as much as you can on that bright source and then of course you adjust the lens to get get that image as small as possible and then some of the problems i've had is that once i've adjusted it at least the lenses i have which aren't the most expensive ones the focus rings seem kind of loose and even though i adjusted it seems like they have ways of moving away from my position so you got to be very careful when you move it move the camera back to whatever you want to photograph that you don't tweak the focus and then another problem i ran into is dew i live near the coast in california and we get we get a lot of fog and dew at night and so um because of all these difficulties it helps a lot to practice in daylight before you go out in the dark and start doing this okay so so after doing some constellations and milky way photos i got interested in doing some deep sky objects i was beginning having a lot of trouble um i started using a 300 millimeter lens and i remember trying to take a picture of m31 and i spent more time trying to uh target trying to get that galaxy in my camera than than anything else so i got i got sick of doing that and i decided i've got to get a amount and i bought both a mount and the telescope on cloudy nights around 200 and 2015.
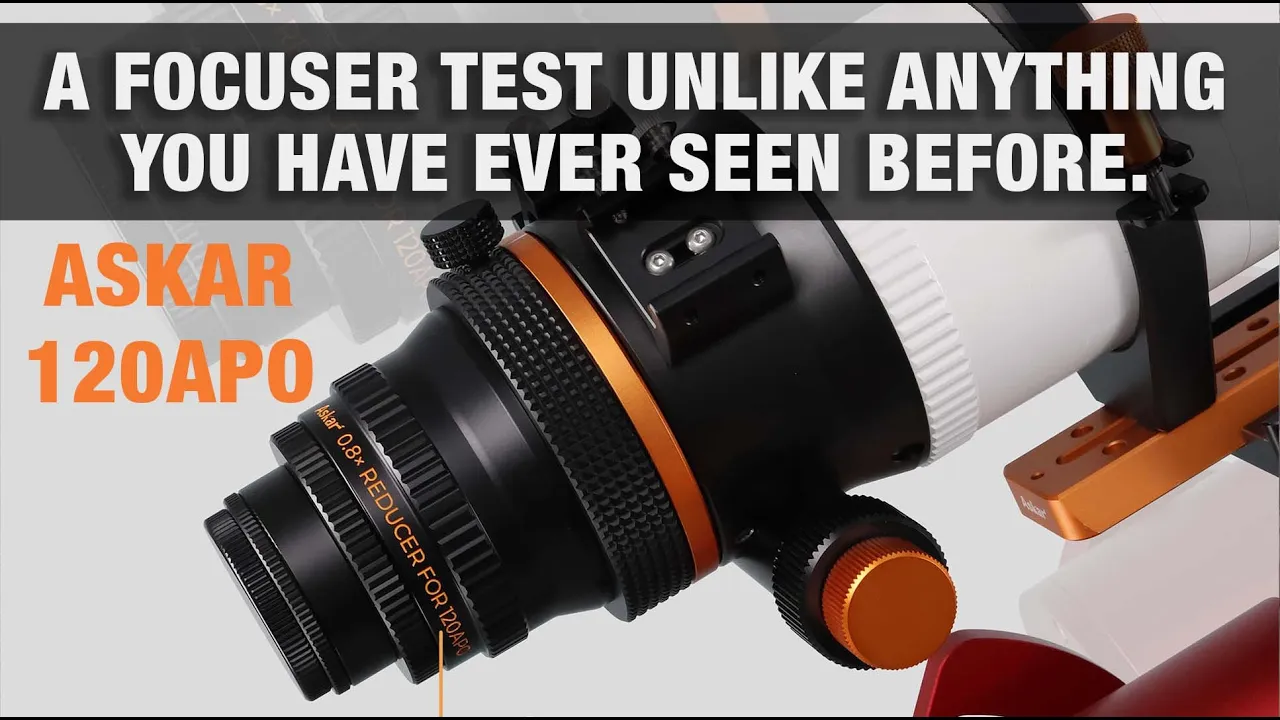
um and you can see here the back end of this so this is the orion edt carbon fiber here's my dslr sitting here and at some point soon after that i added a guide scope and so that's what this is up here all right so um focusing with the with with the dslr on the orion this is basically exactly the same thing as focusing on the star trackers same process it was a very smooth transition for me it was a little hard initially using the star tracker but once i got that down pretty well it was easy to move to the dslr and telescope but i then began to become disappointed with the performance of the canon camera it's a very nice camera and i know people sometimes modify the cameras to improve the sensitivity the red light but i like the camera i used it for other purposes so i didn't want to modify it and i decided to go and buy a ccd camera and so now you see the ccd camera sitting down here at the back of the scope and again this focusing scheme is pretty much the same at least for me initially you got a slew to a bright star and then turn the focus knob to make that star as small as possible the complication with with one of these older ccd cameras is that it's much slower than dslr there isn't any kind of video mode in fact this particular camera um for the highest resolution it takes about 10 seconds to download an image so you're sitting there uh you know you tweak your focus knob you wait 10 seconds an image comes in you turn the focus knob you wait another 10 seconds so it takes it takes a lot of patience to try to focus this there is a region of interest feature so you can narrow down the size of the frame and so that will greatly speed up the download time but it's still still quite painful to be focusing this way and i'm also mentioning here a couple of other issues i had when i started to use the dsl sorry the ccd camera that it's it was it's considerably heavier than the canon three and a half pounds versus one pound now three and a half pounds includes the uh filter wheel right here and look at that the um focuser started slipping so once i went to the trouble of focusing i discovered oh a few hours later uh the draw tube had slipped and i wasn't in focus anymore and then another issue is i think i was spinning in beginning to have a certain amount of sag on the draw tube from the weight of the camera all right so um i'm now going to talk a little bit more about the field flattener so when i when i bought that orion scope i was kind of lucky because i really didn't know what i was doing i just wanted to get a telescope and the guy i bought it from he provided it with a field flattener and also the um t-ring adapter to the dslr so that was that was very helpful for me but it introduced me to this concept of back focus so what i'm showing here is the back end of the orion actually this is not the orion this is my current scope it doesn't matter this is the back end showing the this is the compression ring that holds the feel flattener to the scope this section here is the field flattener then there's a little spacer here the filter wheel and the camera so by design you need to get usually it's 55 millimeters from the back edge of the field flattener to the sensor which is inside the camera and when i started doing this i i had three different extenders here i had a 5 10 and 25 millimeter piece that's a little kit that orion sells when i calculated the distance i disfigured it should be about 18 so i put together the 5 and 10 and started using it even though i knew it was a little short and it seemed to work pretty well but even at 15 but it always bothered me that i wasn't at exactly 50 exactly the 18 millimeters i calculated so after doing that for a while i decided what the heck i'm gonna i'm gonna try putting in these little um thin plastic spaces to see if i could tweak the distance up to the number that i thought it should be and i was kind of surprised that i never saw a dramatic change so it seems like it's not particularly sensitive i've never i've never seen any theory any simple expression that tells you how sensitive this setting is if anyone has anyone knows about that i'd love to hear about it um but just just as a as an experiment to see if i could deliberately make it bad um about a month ago i took out those uh two the five plus 10 millimeter extension tubes and i put in the 25 millimeter tube and very much to my surprise rather than getting worse it actually got a little bit better um so i'm i'm rather confused about that but at the moment i still have my 25 millimeter extension tube in there and it still seems to be working what i did notice um is that there was a bit more vignetting that around the edges of the image it was a bit darker that's not really a problem since that can be corrected by with flat flames um so let's see what i have here oh okay and if you don't believe me um here's here are two images that i took with the with the two different extension tubes 15 millimeters and 25 millimeters so this is this is uh using a tool and pics inside called the aberration spotter it takes an image and it breaks it up into sub panels so you could easily compare the center with the edges so you can see here with the 15 millimeter extension i got reasonably small stars out to the edges about the same as in the center so it's a reasonably flat field and when it went to 25 well it's kind of the same story i don't really see an enormous change now maybe i'm just not sensitive enough and maybe if i went in there and i did a lot of pixel peeking i'd see a little effect but it certainly seems like it's pretty small right then i also started mentioning the first i had with the focuser when i went to a heavier ccd camera so um what i've done here this is a picture of the crayfit focuser that comes with the orion scope it's it's rated for six pounds according to the um the advertisement for it and i bought it used and i've used it for many years now and maybe if i've i've abused it a little bit but at this point it certainly doesn't support six pounds um i took it apart to see if there's anything obviously wrong with it because at some point it got really bad and i did discover um that well first let me describe what is a crayfish focuser um so uh the way i look at it is is there's a little you can't see it here there's a little screw that comes in from underneath and that screw normally pushes against this little teflon spacer the teflon spacer has a groove across the top that kind of cups the axle so when you tighten the screw it pushes the axle up a little bit and the axle pushes down against this metal plate on the bottom of the draw tube so when you tighten the screw it pushes the axle pushes the draw tube and then the draw tube pushes against four roller bearings you can kind of see one here and maybe the other one here so when i took this apart much to my surprise i found the housing of one of these roller bearings was cracked that may be that i gradually was increasing the tension more and more to prevent the focus tube from sliding and ended up cracking the roller bearing so i i replaced the bearing that was it was very easy to do i also contacted orion i was wondering if they would give me another piece of teflon because i think over the years the teflon had gotten distorted but i discovered that ryan doesn't seem to want to deal with people who buy used equipment they wanted the original purchase receipt and so they wouldn't supply any spare parts i know some people end up replacing this focus over the moonlight focuser and i may end up doing that eventually but for many reasons i ended up just going to a different scope with a heftier focuser all right after after struggling with the focus of slipping and having so much trouble with that i decided well let me try a baton off mask because after reading about this i learned that if you use it optimally i felt that i could probably achieve focus much faster and i'll describe how that's done so the the baton off mask this particular one is a 3d printed mask and it was a presentation a couple of weeks ago on 3d printing this this is based on diffraction on the right is the image of a star that you get when the the maternal mass is placed at the top of the scope the lower half of the mask is responsible for the spike through the middle here and then the the right side is responsible for the spike down like this you can see the spikes are always perpendicular to the slots and then we have this spike perpendicular to these slots so the way this works at least the way i think it works is up at the top of the scope the spike caused by these slots is is as shown here kind of at the bottom of the converging light cone and the spikes caused by these slots are at the top the vertical you know the upper side of the vert converging light cone but then as the as the light approaches the focal plane the top and bottom come together and when you're exactly in focus these spikes converge and they look like this and then when you go beyond focus the spike from here starts moving to the top side of the now it's the diverging light cone so to focus you basically adjust your focus your focus knob and put this horizontal spike right in the middle here and um i also want to point out on off to the side photograph you can see these these little dimmer stars so this is a a very bright star and if you want to see these spikes um with a reasonably short exposure you have to use a bright star otherwise you just get these little things and that doesn't help very much all right so i'll just uh kind of repeat some of what i said this this how do you focus with a batten on mask well first you got a smooth to a bright star um you have to remember to place the mask over the scope you got to take many many short exposures turning your focus knob into the horizontal spike is right between the diagonal spikes one nice thing about this is that you don't there's no need to go beyond optimal focus so if you're if you're doing it this by just eyeballing the size of the image i know i have a tendency to to make the image small and then go a little bit further see it start growing again and then backing up to make sure i got the smallest star but with the baton off mask you know when you're in the center you know that when that horizontal spike is right between the two diagonal ones so there's no need to go beyond focus then once you do focus of course you got to remember to take the mask off and then slew back to the target now there's a software tool called the baton off grabber which which helps quantify if you're into that exactly how accurately you're focused so i have i have on the left side here this is the little uh standalone version of the baton off grabber the way this works is you take your image and you put your mouse at the center and kind of drag outward and the little square appears over the image and it seems like this guy then does a screen capture and it reproduces your photograph in its own window and at that point it finds the spikes and will attempts to calculate how accurately your focus though so in this case it's claiming i'm off by 21 microns and i'm well within the critical focus zone for my scope um okay now i i began to wonder how how how do they how does this thing calculate that 21 microns from a screen capture because it seemed to me that there was um there's some extra parameter that's that you don't enter to use it you enter the scope aperture focal length and pixel size they're up they're up at the upper left here you can see focal length aperture and pixel size but when you do a screen screen capture or you can expand this image arbitrarily it seemed like you know how does it know what the scale here is so um let's see i'm going to jump ahead a little bit so what i did is um now that i i have a stepper motor on my focuser i use the stepper motor to move in and out a precise amount and i um for each of these four different positions i wrote down what the baton off grabber was reporting as the you know how far out of focus i was um both of these scales are are effectively in microns this comes right off the baton off grabber software this is actually the stepper position for my focus motor but it turns out that this is essentially in microns too so when you do this graph you'd expect a slope of one that one micron here should be one micron there but it turns out i got.22 so it looks like there's a some kind of scaling error on that piece of software that it's not one micron to one micron but nevertheless you know i do find it very useful um and with a little practice you see i misspelled practice here with a little practice if you orient the baton off mass consistently what i do is i kind of point the v's toward the counterweights on the scope it turns out that the that horizontal spike will be consistently above or below the others depending whether your focus is above or below the focal plane so you can tell at a glance which direction you need to turn the focuser and then also because the position of that horizontal spike is proportional to how out of focus you are you begin to get a sense of how much you need to turn the focus knob to bring it into focus so i i found with some practice that um with only maybe two or three twists in my focus knob as long as i was close to begin with um i could bring it into focus so i i'm i'm a pretty you know pretty much an advocate of these patent off base they seem to work really well uh ken do you have time for a couple of questions absolutely okay let me just see uh why did you not use the apt betinoff focus tool okay so um in fact i did when i when i started i didn't i didn't mention this but when i started um using the um the orion scope with with the dsl camera i started looking for software and apt is a free data acquisition program and i i started using that and i had had a lot of good experience with it and i did use the embedded baton off tool in it i was always a little puzzled what the number meant my recollection is it's not really identified it shows that distance it wasn't clear whether it's pixels or microns that it's reporting i did send an inquiry to the author of apt but i never got a response back but nevertheless you know apt i found to be a very useful tool the reason i'm not showing it here is that um i recently moved to a different data acquisition program i'm now using sequence generator pro and i wanted to continue to have the ability to use the baton off mask and to use the baton off grabber so i was able to find a standalone version of it i'm guessing that the author of apt has integrated this same software into apt but i i don't really know that's the case so here's another question uh okay do you have any comments on sampling you know arc seconds per pixel on the effect of the focuser on the focus on the effect of the focuser um the best best focus well i'm hoping to spend a little time talking about uh you know seeing a bit later but um my my experience has always been in in sites that have relatively poor seeing um like three plus arcseconds um this the scope i'm using right now is about one and a half arc seconds per pixel so i get about two um [Music] two pixels on a star if i'm bending one by one um and that seems to be pretty good i get i get some pretty good images i i can't say i've explored you know it it seems to me be pretty hard to uh explore a range of of um you know arc seconds per pixel unless you change your hardware a lot and that gets really expensive so um least at the scale the image scale that i use i get some really sharp little stars i don't know if that answers the question i have one more question you're you have a fairly short focal length telescope but if you have a longer focal length telescope it's really worthwhile to calculate exactly how many steps are within your critical focus zone so you don't spend a lot of time trying to get more and more focus when you're well within the critical focus zones yes those kind of steps yes i i completely agree in fact i i should have made that point one of the one of the values of knowing that critical focus zone is so you have a sense of how hard you should you know focus it's clearly you know diminishing returns right if you're if you're you don't need to be exactly in the center and you know unless that's your nature and you know the benefit is pretty minor if you're if or the the loss of focus is it degrades gradually as you move away from the absolute form and we always have to deal with the fact that imaging changes and isn't perfect even at that moment that you're doing the focus so trying to keep tweaking and tweaking and tweaking when you're basically right around the critical focus zone it can be a waste of time if you're doing it like you know the way you described yes yes yes uh the reason i i brought up the tweaking problem i think it turned out to be the mechanical problems with the focuser that uh i focus and then it seemed to move and i focus again and it would move so i found myself tweaking but yeah i think i agree with you completely that there's diminishing returns i think that's all we got for now go ahead okay um all right so i'm going to move on to now uh the stepper motor so um a few months ago i finally bought myself a stepper motor and um that is quite a luxury it's just wonderful i i didn't buy this originally because i figured ah i don't know how how serious i am about all this it's not that much trouble to get up and turn the focus knob and sit back down again but once you start imaging overnight and slewing to multiple targets overnight it's really pretty and practical to uh to do this manually i know i started getting lazy i ended up focusing only a couple of times even though i was running all night and then you worry about well are you just are your images all ruined because their focus is drifting so once you get into imaging that way i kind of feel that motorizing your focuser is absolutely necessary um then of course you know the filters may not be perfectly parfocal i i do um you know mono it's a mono camera so i i rotate through different filters and they're pretty close but it's nice to be able to refocus when you go into another filter and of course with the camera with a motor like this you don't need to add and remove the batting off mask so there's no need to get up or get down and it focuses on the entire image i'll be explaining that shortly and you don't need to slew to a bright star which is also really nice because it takes time you know you're you're pointing out your target you want to refocus you need to smooth or some nearby bright star even with plate solving it it takes a little time to do this and then come back again um so with with with this motor on there um i'm almost at the point where i can ignore focusing it's it's just wonderful although every once in a while i get a surprise um when i was out this past weekend and i started running it it didn't focus and i realized oh i know you you got to initially get at least the course focus it was enough for a temperature change from the previous night and i didn't restore my initial setting it was uh trying to focus when it was way off and so that's no good so i went back to my back baton off mask and set a nice reasonable focus fairly quickly and then what they let the algorithm refine it uh ken i'm sorry to interrupt you again but the question came up and it's buzzing around my head i think you just got to it uh you're using sequence generator pro as your focus tool yes yes okay that's uh i think that's answers the question yeah so this this is here it is sequence generator pro so this is um on the right is um the data that sequence generator pro takes when it focuses so um the graph here on the vertical scale this is half flux radius so it's basically the size size of the star and then on the x on the horizontal axis you got the the position of the focuser so it takes a variable number of points when you're out of focus you have large stars as you approach the critical focus zone down here where there's a range of positions which have only minimal improvement in your focus and then as you go too far the stars start getting large again the software works by you know taking these points and then fitting a curve it looks like a parabola fits a parabola through it finds the minimum and then it goes in and takes a confirmation point you can see this one diamond shape point so after taking these seven points and figuring out where the focus should be it sets the focuser here and it takes one more point and makes sure that it's it's consistent with the you know the overall pattern of points um so i think i've described that pretty well i'll move on here um so to to get the automatic focusing the work um as i said for you you need to have a good starting point so there's a one-time manual focus maybe at the beginning of the night and maybe you don't even have to do it at the beginning of the night if if you haven't changed your optical train or moved your focus a large number of times the other parameters are are all adjustable in the software i think sdp recommends using seven points which is what i do you can use more but then of course that takes more time and i'd rather spend my time imaging than focusing so i end up spending about two minutes to acquire those points and and refocus and then the other parameter is the interval between points so um this is another use for the critical focus on once you know your critical focus zone you kind of know how far you need to move the focuser to change focus so in my case i have 120 microns and i step the focus about 200 microns so the distance between points here along the x-axis each of these are separated by 200 microns and then the other parameter is exposure so you have to take a long enough exposure so that even when you're out of focus you get a reasonable number of stars [Music] i put the number 10 in here i'm not sure how correct that is but i i sometimes see about 10 stars at the extreme points on that curve and i use about 8 seconds exposure for rgb and four seconds for luminance and if you go to narrowband filters it takes much longer and there's a fix for that which i'll mention shortly and i also use two by two binning because you know the focal position really doesn't depend upon the binning um and that seems to work fine for me so by using two two by two binning you get better signal of the noise um you're more likely to get an accurate star size and there's also a region of interest feature so you don't have to use the full frame you can cut out the border and i typically use 80 to 90 percent of the frame for focusing um and then the other aspect of this is focus strategy um because as i said you want to minimize your focus time and you want to maximize your imaging time so how often do you want to focus um perhaps when filters change if they're not par focal suddenly when there's a large temperature change because the scope the uh optical tube shrinks and and in fact the lens itself changes the curvature of the lens changes and even the index of refraction of the lens changes so the focal distance changes during the night um since i i image out in the desert here 10 degrees c or roughly 20 degrees fahrenheit change in temperature overnight is quite common and it makes a big difference to refocus okay yeah i end up um the last bullet here i end up focusing maybe 10 10 to 15 times per night which means i'm spending about 95 percent of the time imaging um and then over here oh i wanted to mention these graphs that i'm showing um i didn't really create these graphs there's a piece of software um and i i have it referenced on my last chart um it's a it'll read the sequence generator pro log files and pull out this data so if you're interested in this level of detail it's very easy to extract the detailed values from overnight run so this this graph is a little messy because it combines um the focus position versus temperature for several different filters so you can see that the blue dots are a blue filter the red dots are a red filter uh green is green and the blacks are luminance so this this is um i think this is about four hours this was done in my backyard this wasn't out and this was just about a four or four degree change and this little tool will then calculate for you the temperature compensation coefficient so you can one of the parameters in sequence generator pro is to set a value that will automatically change the focus position as temperature changes so you can use a thermometer some sort of temperature sensor and then use that temperature to calculate where your focus should be and what let the software just track temperature changes so i also do that but even with that i tend to refocus whenever i put in a new filter i know some people sort of worry that reading on cloudy nights some people seem to worry about where are they getting the temperature from so that that motor that i bought from optic has a integrated temperature sensor so that's convenient and i just use that i also have i have a second temperature sensor associated with a pegasus power box um that i put out near my dew heaters and so you certainly don't want to use a temperature sensor near your dew heaters for focusing because uh you know i'm sure the temperature out by the dew heaters goes up and down as the heaters operate another point is that the absolute value of the temperature i don't think really matters very much what matters is the change in temperature so as long as that the ambient temperature is not changing very extremely rapidly and it doesn't change that rapidly any thermometer as long as it's not near do heater will kind of track the change in temperature and you could use that value to determine the change in focus point you're not going to be able to predict the absolute focus point but you should be able to track the changes in focus all right and then some issues with automated focusing so if you go to narrowband filters it takes a really long time because there's so little light getting through them but there is an offset um so if you if you focus with one of the narrowband filters once and you determine the difference between its position its focus position and the luminance filter that value can be set in sgp and then you would do your focusing with the luminous filter and the software will then adjust the focus position so your narrow band filter is in focus this this saves a lot of time then another problem people have is is backlash i i have not seen any backlash with the equipment i have and it may be that because the step size is so small that that motor has a one micron roughly one micron per step so i have lots of resolution so it is a mechanical system i'm sure there's some backlash in the gears but because of such high resolution the backlash doesn't seem to be significant i've had i have had some failures with automated focusing and in high wind because if the wind is really bad it's not worth imaging anyway but what seems to happen is is fewer stars are detected and maybe the width of the stars is not measured very accurately so you tend to get a lot of scatter on the curve so here here's an example of a of a curve with with scatter of the points you can see that in this case the algorithm still worked here's the confirmation point pretty much right at the bottom of the curve but this is right on the edge of being acceptable this stp has this quality factor of that it defaults to 90 so if if it decides the quality of the fit is worse than 90 percent it won't accept it and it'll try multiple times to focus um i've experienced up to three attempts and at that point it gives up and just restores the previous focus and proceeds with the imaging plan all right um i realize it's it's already 7 30. um i i don't know if i should keep going or not i probably have another 10 or 15 minutes of charts well it's somewhat up to you we start losing our audience about now at some point here we can we can easily handle another 10 or 15 minutes before we do that though earlier i promise it could um say something about what's coming up next week brandon would you like to do that um take a minute now if you need to go yeah thanks alex um so i will actually be talking about the ross a to row ackerman schmidt astrograph um and just tagging along to what ken is talking about critical focus zone is incredibly important when you're shooting at f2 so i will hint on it not nearly to the depth that ken's been talking um but this is very important in any circumstance and i'll talk about a lot of other things regarding the rasa 8 and my uh journey through astrophotography over the last uh year and a half so hope to see you guys next week okay i'm sorry to have kept you waiting there but i just uh i get a little scatter brained as you probably all know by now um now um thank you very much ken as far as your answer goes again i gave you a few minutes to think about what you want to do if you've got another 10 or 15 minutes go for it it's not going to be any longer than we usually do if you've got another half hour hey schedule us up for again later um well what i'll do is i'll go through this um at an accelerated pace to make sure i i get through it okay and and if and if you get enough questions between now and then we can have you back we can always reschedule people okay so go ahead okay so um at the center of the critical focus zone you get this blurry blurry star you don't see the airy disc because of atmospheric turbulence and so i want to i wanted to talk a little bit about that the the pictures here on the right um this upper one was generated by pix insight this is what a star looks like um you know we're used to looking at pictures and we see the brightness of the star but you can also represent the brightness um as a number plotted vertically above the focal plane so that's what this is the stars are these very sharp little cones that stick up above the noise level you can see other fairly dim little bumps here those are relatively dim stars if you if you happen to image an even brighter star the top of this cone will be flat because you've saturated the pixels but assuming you haven't saturated a pixel you can then also on fix inside you can ask it what is the full width half maximum of this so this is another representation of a star here we're looking at a cross section through this cone and indicated here is the full width half maximum it's the full width of the curve at half the maximum and so you see here 2.39 pixels that's fairly typical of what what i see at 1.5 arc seconds per pixel so you can see that's maybe three and a half 3.6 arc seconds so one one way of measuring seeing which i'm starting to pay more attention to is to take a one second image you don't want to do a very long image because then you start getting tracking and vibration problems so you kind of want to do it fairly short and then just do this curve fit and you at least get some data to see what you're what you're seeing actually is on a particular night okay and um i'd like to show probably people have seen twinkling stars but um just for the relevant i i took my guide scope and i put it on my main scope um my god my i saw my guide camera and i put it on my main scope the guide camera is a video it's much faster than the ccd so i hope i hope that video is coming through you can see the the star dancing around so this is what stars really do they aren't these bright spots they're they're these scattered little dots of light that dance left and right all over the place these um these this was taken at about um five milliseconds per per exposure so it's a very bright star i think it's serious actually um i'll try to try to see if i can stop that and let me minimize that and then go back to slideshow okay so that's what we look like and those those um the brighter dots are known as speckles where there was a talk uh several months ago on the astro imaging channel about speckle interferometry i think that takes advantage of those little bright starts to to measure the spacing between double stars um and i like i like this little quote but in short because we're short on time i'm not going to read it now this is a very busy chart but i think it's a very nice chart and it kind of shows what's going on why do the stars dance around like that if you recall um one of my first charts i showed a plane wavefront approaching the telescope and so that's what we have here but when you pass through the atmosphere there are these regions of low temperature and high temperature or high density and low density atmosphere which means that the index of refraction of the atmosphere is is changing and the atmosphere in itself looks acts kind of like a lens but it's a very strange lens the lens that's always changing and bending and tilting and what it does to the wave front is it creates this very complicated shape down here some small sections of the wave front are aligned and so the light rays come together and form these bright spots which are speckles when you create an image you're across your averaging over all this stuff and you just get that blob if you happen to have a small scope that's what this is illustrating here a small aperture you don't see all these features you see a limited amount of variation in a small scope you may actually see the airy disc and of course the airy disc itself is larger when the aperture is smaller but as you get to a larger aperture you're going to pick up more and more of this variation in the wavefront and you're going to see that speckle pattern that i showed um also interesting down here um there's this chart of of seeing versus um this is from a model of turbulence in the atmosphere um r zero this is maybe getting rather technical r r0 is called the freed parameter the spatial coherence length it's the distance over which there's a significant change in the wavefront so if the if if the free parameter is smaller than the diameter of your scope you're in a situation like this where you're going to see an airy disc or your your stars will be diffraction limited but once once your centimeter since i'm using a 100 centimeter scope all seems to tie together and make sense i should not see an airy disc i should see this dancing star okay so i'm getting very close to finishing here um i kind of have a concluding chart that um when i think about all this it sort of amazes me that we can take photographs at all that you got this extremely bright star out there the light travels through you know trillions of miles thousands of light years we collect such a tiny tiny fraction of the original light the light gets doppler shifted it gets distorted by the earth's atmosphere we collect it with an imperfect lens uh which further distorts it with all kinds of optical aberrations which of course a good lens minimizes but they're still there it then gets converted to electrons in the ccd by the photoelectric effect we have software that presents it to our eye after it's been stretched and processed and then our mind somehow interprets what we see so that's a lot going on and when telescopes were first invented interpreting what the scene was actually very controversial there was a lot of argument about what galileo saw in his telescope and what it meant but in spite of all that um it's still possible for us to take pretty images and sometimes images of scientific value and i think i have a lot of fun doing it so that's it anyone home yeah yeah we're here yeah that was that was awesome i like the uh bringing in some of the more scientific side effects i think that um the mechanics of it uh kind of eludes people so uh thanks for laying that out yeah i have showing if someone is interested um this last chart has some links to where i got some of this information thank you ken and by the way for those of you who are watching out there um we all sit here without our microphones and cameras on because it just cuts down on the bandwidth and things like that and so if somebody asks us a question right out there it takes us a second to drop everything reach up click on the um click on the microphone so that we can speak and things like that so that's where we are we are actually here we just it takes we're slow to get back to everybody eric how are we doing on questions have we gotten through everybody i think we got to everyone's question there's been a lot of back and forth discussion about filter offsets or individual uh filters and i think that we've all come to conclusions that we're correct even if we disagree uh it was interesting comment that you made ken about shooting through the atmosphere i do a little uh lucky imaging with a 5 000 millimeter scope and i can tell you that you get you get lots of turbulence no matter what even with very long focal lengths and very small areas if you look and if you look at the sun and doing a live image it is jumping all over the place even under the best of conditions so i've i've yet to ever see where the stars are perfectly steady or any image is perfectly steady regardless of focal length but i'm waiting for that day yeah okay ken i'd like to share a few points um you said you had 10 second downloads i'd kill for that mine's somewhere in the 37 to 40 second download per frames on my old stl but you can crop it which will speed things up dramatically and use and use offsets as well i'm a very big advocate for offsets with the temperature probes um what i had done in the past with a very fast focal length telescope is i put a temperature probe inside of a sleeve so if i slewed directions in the sky i wouldn't pick up huge temperature changes because if it's under the scope or on top of the scope it'll be quite a it could be quite a different temperature and i use temperature as the dictator when i determine the focus change so for every degree of temperature change my scope my scope changed its length enough to knock it out of critical focus so i would use that purely as a dictator of uh when i should do the next focus run might be something to consider the scope i have now that doesn't do but back then a very short focal length instrument that was a big that was a big difference yeah i i do i do that also i mean i have that uh temperature compensation number set in uh sequence generator pro so it's also a tracking temperature change yeah i only use it as a predictor when to focus yeah because it's not linear on a temperature yep so no telescope is actually linear with temperature change it's there's different too many different materials well again my limited experience um it seems to be sufficiently linear that i stay within the critical focus on okay and there you mentioned about placing a filter i tried finding it i'm sorry but i failed but i had a pin diagram that when you're trying to put a corrector in your imaging train and you look at the astigmatisms on the corners they would change to say a horizontal to a vertical shape you could actually and you could actually use that to determine where the corrector should be placed it would find inside or outside i couldn't find the photo i'm sorry yes i have seen that also in fact i at one point i tried to measure it that way by um you know moving back and forth and trying to see that but for whatever reason um i don't really see much sense you know much change um even as i was trying to say even if i go way outside so i'm either doing something wrong or in my particular configuration it's just a very big window of acceptable distance it could be a size a chip perhaps like on a very large uh ccd chip that yeah it is would be terrible yeah yeah yeah well this is uh what is it the 8300 the kaf 8300 so it's four thirds yeah big difference between that and a large chip there's a yeah okay cool and can ken could you stop sharing your screen so we can see you when you talk oh sure sorry yeah well it's okay it happens um yeah there was some discussion about which which program has the world's best um uh focusing routines i think that uh there's that discussion has been going on for quite some time so um i don't know if it ever will get a an official answer but plenty of people have been using various focusing routines and they're quite serviceable whatever they are but getting the electronic focuser as you said the stepper motor focuser that you you talked about is certainly an advantage um because it allows so much more automation of what you want to do so um have we got everything uh eric are you looking at all the questions over there yeah again there's a lot of back and forth i think you know trying to decide which focusing routine is best or whether the off axis guider or the separate guide scope or the on axis guider i think that discussion and argument will never end okay so that's going to wrap up for tonight and we're getting ready for brandon for next week and he'll show you why it as as was pointed out earlier the critical focus on zone changes dramatically when you change um focal ratio and ken here was talking about what was the 6.7 or whatever your focal ratio was uh for his uh stellar view scope but when you put it on a rasa or other hyper hyperstar type camera you're going to be talking about f2 and that critical focus zone shrinks dramatically everything has to be done better so with that in mind i think it's about time to turn it back to molly molly you ready to take over all righty i will take us out uh thanks again ken and uh see everybody next week good night good night
Up Next
The Telescope: 400 Years of Cosmic Discovery | Full Documentary Film
@ESOobservatory
77.1K views•2019-04-23

Triumph of Orthodoxy Icon: Byzantine Art & History Explained
@BenCallan
2.1K views•2024-08-06

FastAPI vs Flask vs Django: Choosing the Right Python Web Framework
@TechWithTim
302.5K views•2024-05-26

Game of Thrones Opening Credits: A Cinematic Analysis
@gameofthrones
46.3M views•2011-04-18
Related Study Plans & Knowledge Roadmaps
Structured learning paths in General & Interdisciplinary Studies