


![[GHW Open Source] Getting started with ROS 2 for Open Source projects](https://i.ytimg.com/vi/8pZYK6qACH0/maxresdefault.jpg)
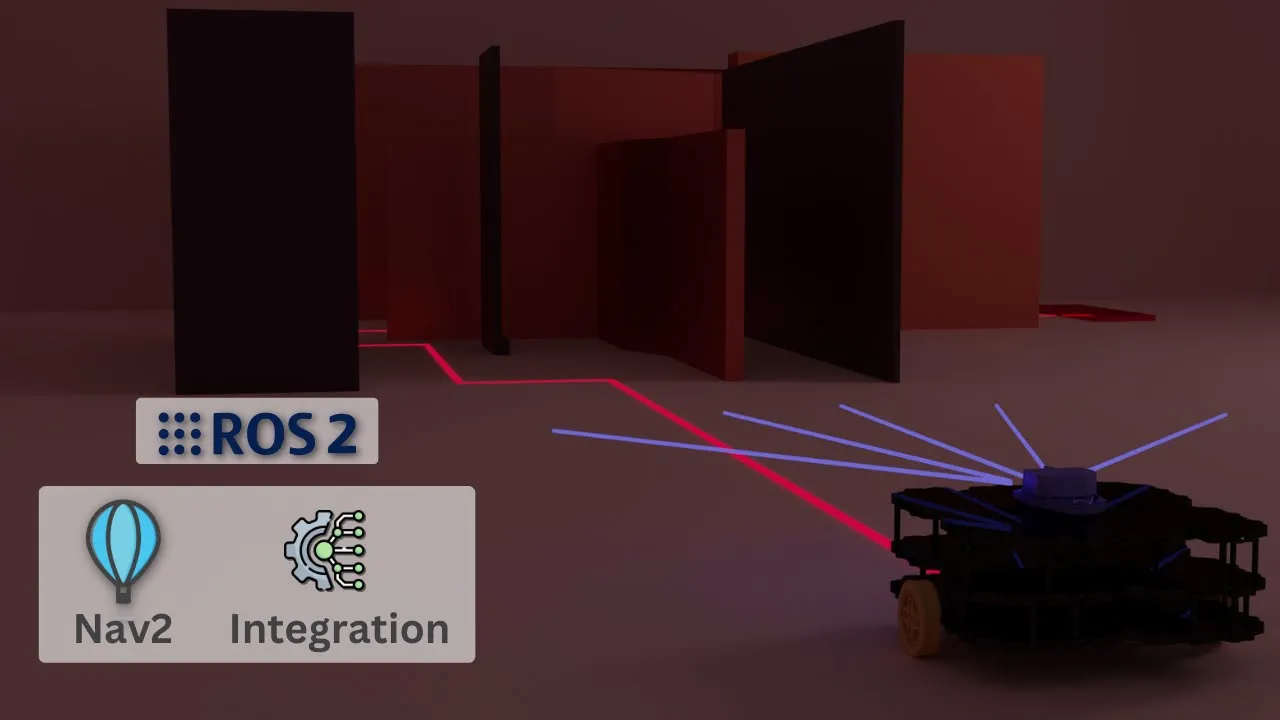


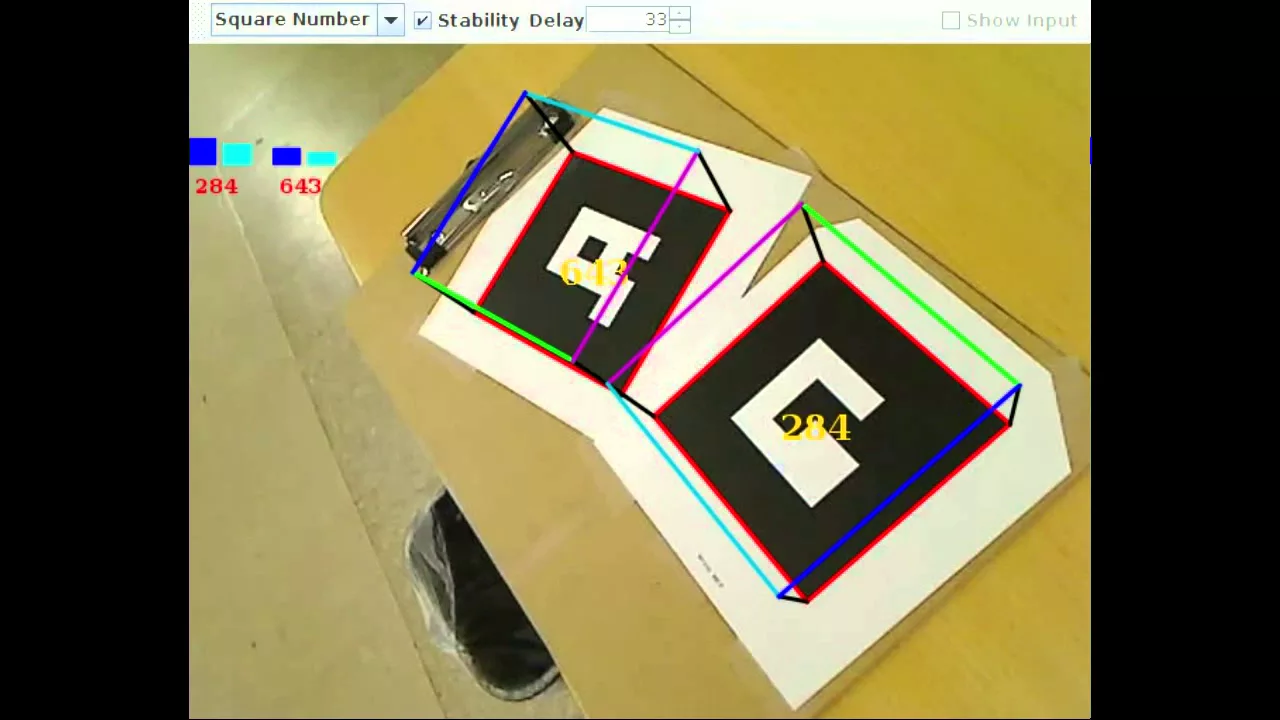









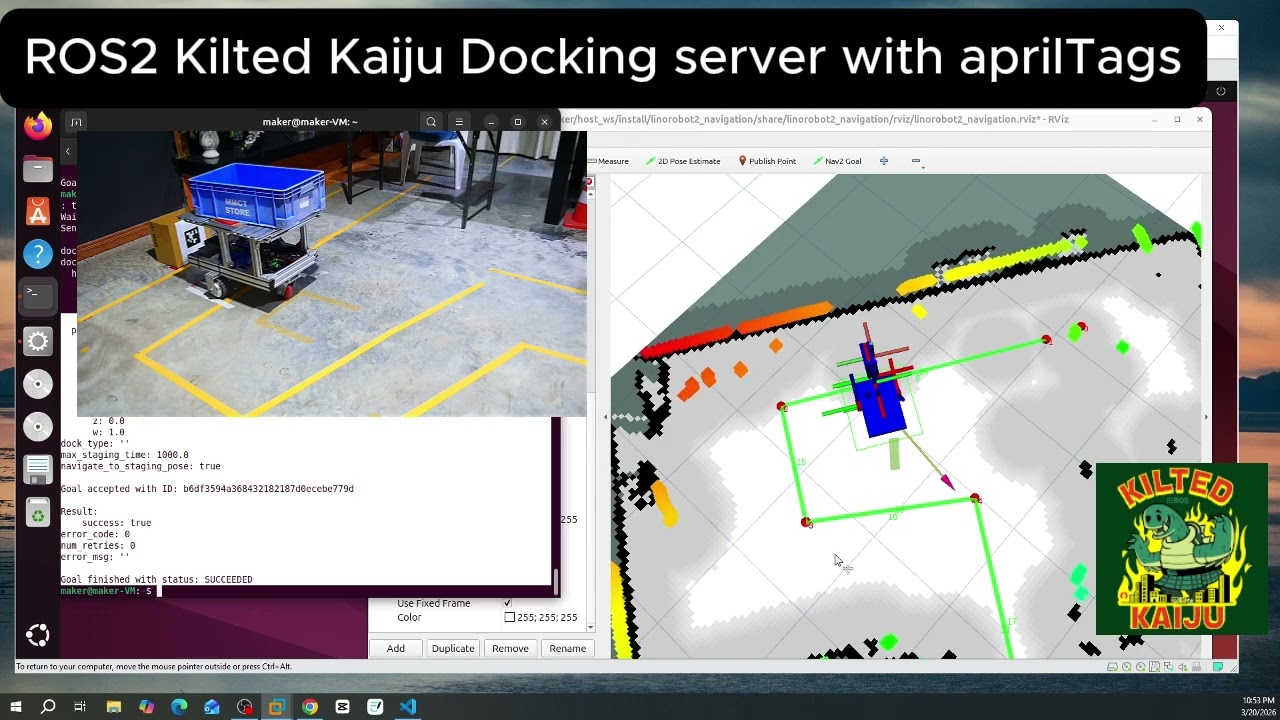


This tutorial demonstrates how to implement autonomous docking for mobile robots using AprilTags and the Nav2 Docking Server in ROS 2 Jazzy. The system works by mounting an AprilTag near the docking station, processing raw camera images into rectified images to correct lens distortion, detecting the AprilTag using the apriltag_ros package, and publishing the detected pose as a geometry_msgs/PoseStamped message that the Nav2 Docking Server uses to guide the robot to dock precisely. The complete pipeline includes creating a custom ROS 2 package, configuring the camera URDF for proper frame publishing, adding AprilTags to the Gazebo world, setting up a dock database file, and launching the integrated docking system. The tutorial covers both the theoretical foundations of AprilTags versus ArUco markers and the practical implementation steps for simulation-based autonomous docking.
ROS 2 Jazzy: Autonomous Docking with AprilTags and Nav2
Added:Automatic Addison. Precise docking is a key capability for autonomous mobile robots. While Nav 2 excels at general path planning and obstacle avoidance, docking often requires more accurate position information than standard navigation provides. This is where April tags come in. They're visual markers that help robots determine their exact position and orientation relative to a docking station. In this tutorial, we'll implement automated docking by combining Nav 2's docking server with April tag detection. We'll mount an April tag near our docking station and configure a robot to use it as a visual reference point. The Nav 2 docking server will handle the approach and final alignment using the April tags position data to guide the robot into the dock. April tags are visual markers designed specifically for robotics and computer vision applications. These tags appear as small black and white squares with unique patterns inside. Their primary purpose is to help robots and cameras quickly determine their position and orientation in space. When a robot's camera spots an April tag, it can instantly calculate how far away the tag is, what angle it's viewing the tag from, and which specific tag it's looking at. As each tag has unique identifier, April tags offer several advantages. One, they're inexpensive to produce and can be quickly printed on a plain sheet of white paper. They perform well in various lighting conditions.
They also allow for fast detection, an important feature for realtime applications. You may have heard of another type of visual tag used in robotics called aruka markers. Aruka markers are similar to April tags. They look like small black and white squares with patterns inside, much like April tags. However, April tags have some important advantages. First, better in difficult situations. April tags work better when lighting is not perfect or when part of the tag is hidden. Number two, more accurate. April tags give robots a more precise idea of where they are, especially when viewed far away or at odd angles. Faster to identify.
Number three, robots can usually find and read April tags more quickly than with the RUA markers, which is important when things need to happen fast. And then finally, fewer mistakes. April tags are less likely to be confused with other objects or misread. Okay, let's get into it. Open a terminal window and let's launch the robot. Remember, I have a alias called nav, which launches the robot in a gazebo environment with RV viz. So, I'm going to write the nav command in AV and wait for everything to come up.
Okay.
And let's set the pose just to make sure. All good. Looking good. The logs have stopped. Okay. And let's begin by opening a new terminal window and typing this command. Ross 2 topic list grep cam_1.
So here we can see all of the different topics which are related to the camera and our depth camera. We can see the depth colored points 3D point cloud right there. We can see color image raw camera info is published here. And let's see if we can see the image in a tool called image view. So we need to install it now. going to do pseudoapp get install ross hyphen and so that we don't have to type jazzy or humble you can just do this so do the dollar sign and then capital r o s d i s t r o okay the Ross distribution hyphen image hyphen view so install it this is a very good tool to view images. Okay, it says, do you want to continue? Y and then enter. Let that install. Clear. And now to run the image viewer, we're going to do Ross 2 run image view and then do image view and then do hyphen hyphen Rossy args spacey r image and then the assignment operator like that and then cam_1 slashcolor slashimage raw Enter.
[Music] Okay. So, this is the screen that pops up. And now, let's move the robot to some area where it can see something cuz right now it's just a gray image. Not super exciting. But let's click nav 2.
And shall we just look at the file cabinet? Let's go and do that now over here.
do it to an area that's just in front of the file cabinet. So, robot moving. And here is our actually this is a cafe. So, it's probably just an area for holding food. Okay. And our robot is turned and looking at it now. Bunch of shelves.
Okay, let's twist it a little bit so you can see see what the camera sees. All right, so our robot is looking at this compartment that has a lot of shelves.
Let's go over to Arv and we can see here in RV with the image viewer that it's we're now seeing the camera what the camera sees and looking at that same compartment with shelves. So that's looking through the front camera, only camera really of the Yaboom Rossmaster X3. So this camera image is very important because it's going to be useful for April tag detection. And we're going to need to process them through a package called, and let's bring this up. I'll show you here. Do Google. It's going to need to use a image_p ocs 2 package. It's called image proc. Here's the big Ross 2 wiki on it. Okay. It sees all you can see the different information that it subscribes to and that it publishes to. So the image proc passage package which we're going to use it's going to subscribe to this topic. Let's go back to Ross 2 topic list. Let's do that. Grep gp again. Ross 2 topic list. Do that. And then let's do gp cam_1. Okay. So the image proc package which we are going to uh deal with in a little bit is going to subscribe okay to the image raw data and the camera info right here. All right. And then we're going to publish a image wrecked. I'll show you here. Let's go over here. Image wrecked. Right there. We're going to do cam one color image wctck is what we really want. A rectified image. Okay, that's that's the goal.
That's the end goal. Now, why do we need this step? Why do we need a rectified image? Why can't we just use the raw image? Well, for April tag detection, we need to rectif use rectified images which remove camera lens distortion. the camera lens naturally bends the image a bit like looking through a curved glass which can make the square tags look slightly warped. So the rectification right here fixes this so that the tags are easier to detect. And with our rectified image is ready we will use the CPUbased uh April tag Ross package. So let's go take a look at that April tag Ross package.
And you can see it takes as input this rectified image. Okay, which takes out all the camera lens distortion. And that's what we need as input to the April tag 2 Ross package. Okay. And this subscribes to the rectified image and the camera info.
And it's going to publish uh transform and uh tag detections. Okay. And the tag detections are specific message type. I'll show you here. April tag messages message. April tag detection array.
This message type right here is going to be published by the April tag Ross package. That's our goal. The detections and the transforms as well. Okay. And if you don't want to use if you want to use a GPU accelerated April tag Ross package, you can use the Isaac Ross April tag package right here, which is GPU accelerated.
But we're not going to be using that in this because we're using a virtual machine. So we're not using this. But for a production application, you might consider this. Okay. You can see the different subscriptions and publishing that it does. All right. So once we've got the detections, we are going to use the Nav 2 docking server. Let's go to Nav 2 docking server. Okay. And let's see here. It's got some good documentation on the Nav 2 docking server right here. All right. And what this is going to do, it's going to uh subscribe subscribe to the detected docking pose. Okay, the current pose of the dock. And that's that's what it's going to what it's going to use to be able to navigate your robot to the docking station.
So that is what we're going to do.
That's the whole pipeline. All right. So once we've got now that we've got all of that theory out of the way, we need to create a new package. Let's do that now. Okay. Let's create the new package. Going to CD to the workspace source Yaboom Rossmaster. And let's create the package. You are going to put this command here.
Ross 2 package create hyphen build type A cmake hyphen license BSD 3 clause and then maintainer name Abuntu and then maintainer email and then automatic Addison at todo.com and then yaboom rossmaster docking enter. Okay, we've created our package and now let's edit the package XML file. Oh, we have to go into it first.
That would help. Get it package XML. and let's take a look at here and see what we need to update. So, let's go over and have a look. So, the first thing we need to do now that you've got that open is you need to add a good description. And you can add pretty much whatever you want, but I'm going to say here contains the core files related to docking using April tags and nav 2. Save it. And down below under the build tool, let's add our dependencies. So I'm going to put that here. And we've got different dependencies. is the April tag Ross April tag messages image proc image view nav 2 simple commander save it. Now let's head over to the cmake list and let's you need to make it make sure that this package has the dependencies as well that you're going to need. So I want you to see this area that says find dependencies and put this here. Put all this block this block right here. Amen CM make commit see me Python all the way down to TF2 Ross.
Make sure you have that there. And once you've done that, save it. Close it.
Go over to the meta package cd dot and let's do cd yaboom rossm master. Let's get it cmake. Uh actually no, let's do get it package first. Okay, we've got make sure you've got this docking piece right in here.
Yaboom Rossmaster description. Yaboom Rossmaster docking. Make sure you have that in the package XML. Just have a look at cmake and see if we're Yeah. Okay, that's fine. Keep cmake list as it is. Now build your workspace. So cd Let's open up a terminal to do the building. cd Ross 2 Ross dep install hyphen from paths src hyphen ignore hyphen source hyphen R and then hyphen Y. Okay, all my required dependencies are already installed, but you might have a prompt that prompts you to install the April tag Ross package or image proc. Just type in your password, press enter, and then you'll also get this message as well. This all required raw steps installed. Now, before we move forward, I just want to make sure that your ROSS 2 uh camera data, your gazebo camera data is published to the to the correct topic, the correct image frame ID.
Sorry. So we're going to go to CD Yaboom Rossmaster description clear CD URDF CD sensors and let's have a look at our RGBD camera. Okay, so we can see that we are not publishing the data to the correct frame. So let's go over to what's currently on GitHub.
correct on GitHub. I always have the latest code over there. And let's go to the latest URDF. And let's make that correction. So, I'm going to highlight all of this. We want the camera image data to go to the optical frame, the camera optical frame by convention. So, I'm going to copy all this and let's controlV in there and save. So, we fix that. Close out everything. Now we need to make sure you add the April tag to your cafe world. So let's do that now. Your cafe gazebo world. So cd Ross 2 cd dot dot cd dot dot cd yaboom rossmaster gazebo. Let's go into the models folder and type dur. And if you go to the very top, we can see our April tag model right there.
There it is. April tag 3611 and then five zeros. Remember that name cuz this is where your system is going to look for. And this folder is where your system is going to look for all of the models including the April tag model.
Now let's have a look at our world. So CD worlds. Okay. And then let's have a look at the cafe world to make sure that the April tag is there. It is in fact there.
And the model name matches what we had in the models folder. Okay. You have the name that you put the position orientation. So this is X, Y, and Z location in the world. The roll, pitch, and yaw. That's rotation around X, rotation around Y, and rotation around Z. And then if the model is static or not. Static means the model does not move in the environment and the April tag will just remain in the same location. So that's what we want. Save the file and close it. Let's have a look at it. So type this command right here. I'm going to copy and paste it cuz it's kind of long.
So that's it. Export the Gazebo sim resource path. The path to the models folder. Put that in your terminal. And when you're ready, press enter. This tells Gazebo where are your models located. And now let's have a look at the cafe world. So gz sim and then cafe.world. Let's have a look. Bring it up. And I love how quickly Gazebo moves when you're not running anything. So let's go over here and let's zoom in. Pretty cool. So there we have right there.
our Able Tag in all its glory. And remember, you can adjust the pose as you needed to ensure it's visible and correctly placed in your specific world layout. And in a real robotics project, you'd actually just print it out and place it on a wall. Let's close it. Ctrl + C. Okay. Now, let's create a launch file. So, what we need to do in this section is we need to convert the raw camera image images into rectified images. These are images without curvature. It's like the ideal camera image. And so we're going to create a launch file that's going to have a node that's going to subscribe to the camera information, the raw image, and output the rectified image. So that's the goal in this section. So we're going to go to CD uh let's go to dot dot cd dot dot. Okay. And then cd yaboomsmaster docking. We're in here right now. And let's do make dur la la la la la la la la la la la la la la la la la la la la la la la la la la la la la la la la la la la la la la la la launch. And while we're at it, let's do make dur config.
This is where our configuration parameters for our April tag will go. Okay. And let's add a launch file inside the launch folder. Let's do get it. April tag doc posepublisher.la spell it correctly. So, April tag docpose publisher publisher.py. Open it up. Go to my GitHub. I've got it cloned here into my downloads folder. Let's have a look.
Launch. Open this puppy. Crl+ arr c. And then v. And let's comment out right now anything we don't need. So, we're not going to be using the detected post publisher just yet. Anything else? Think we're good. Everything's good. Let's save and close. Okay, so we have that. And we need to edit our cmake list.txt txt for the Yaboom Rossmaster docking package. Okay. And we added two new folders. So, let's add that just below this piece. So, we've got config and launch. Okay. Okay. And while we're at it, let's add the configuration parameters. We're going to cover that in a bit, but I want to show you how to do that. So, let's go to downloads. Gaboom.
Rossmaster docking config. We need to add this folder. So, I'm just going to add it directly.
Just create these folders. Ross 2 source yaboom rossmaster docking config.
And let's just copy this and let's paste it over into where we want it to go right in here. So, yaboom rossmaster docking config. And here's our YAML file parameters for the able tag. Don't worry about what all the that is right now.
I'll cover that in a bit. Let's close it. Okay. And save everything.
Everything's good. Let's open up a new terminal window. And we need to build. So I've got the build alias. Okay. And let's just show you that now cuz we're going to run this again and again. So the build alias CDs into your workspace, runs colon build, and then sources the bash all in one line. And so I'm going to do build to build everything. Now we close everything here. Let's launch the robot. Let everything come up.
Okay. And let's set the post. Good post. Open a terminal window.
And let's launch that April doc pose publisher uh launch file. So Ross to launch yaboom Ross master docking April tag. Nope, not that April tag doc post publisher. April tag doc post publisher. Why aren't you launching several April tag dot quote publisher? Let's have a look see what's going on Ross 2 source Ross master docking launch April tag doc pose publisher oops we made a mistake it's launch.py pi.
Okay.py. So, we've got to close everything. Sorry about that, folks. Actually, oh, no, actually, I don't think we do. Let's just build build again. Okay, because we've already got the robot open. Let's try running it again. So, Ross 2 launch yaboom Rossmaster docking. Okay. And then April tag uh underscore doc let's see source the bash. Okay. Ross to launch yaboom Rossmaster docking and then April tag doc pose publisher launch.py Pi not working. All right. So, let's go back here. Go to Ross 2 source. Yaboom Ross master. Docking launch April tag doc pose publisher.launch.py. Looking good to me. Looking good to me.
How about we just clean everything out?
So, remove RF build. Be very careful with this. Install and then log. Okay. And let's build it all again from scratch.
All because of my fat finger mistake and not putting.py. So, robot is still in the navigation mode. Let's give it a shot.
And if that's not, I'm going to close everything down and restart everything.
This is part of robotics, folks. Showing everything doesn't always work on the first try. We try try again. And we never give up. That's how we do.
Let it build. Build, baby. Build.
Everything is complete. Let's try it now. Ross 2 launch. Yaboom. Rossmaster docking. Okay. And then April tag. April tag.
doc still not going. Maybe I have something wrong with my CMake. Let's check that out. cd Yaboom Rossmaster CD Yoom Rossmaster docking. CD launch. Let's get it.
CMake. Got the launch in there. That is fine.
Uh CD launch. Oh, see the issue. Another fat finger mistake. So let's do move April tag dopost publisher to April tag doc pose publisher publisher.launch.py pi. Okay, build again, folks. That's why slow is smooth. Smooth is fast. When you move slowly, you make fewer mistakes.
Now, okay, we've got navigation running.
Let's try it. Maybe third times a charm.
So, Ross 2 launch. Yaboom. Rossmaster docking.
And please run this launch file. Okay, there we go. Run it.
That's what we want. That is what we want. And let's check a look at the rectified image. So we do Ross 2 run image view image view hypheny Rossy args space hyphen r image assignment cam_1 slashcolor slashimage_rect Okay, there we go. This is our rectified image. And now let's take a look at the raw image. Let's go over here. We're going to continue image raw. So, we're going to do Ross to run image view image view ROSS args and then image raw. And here you should see so we've got image raw and image wctck. Okay, let's minimize all that. So, image raw and then our rectified image right here. So, if everything is working properly with your system, okay, we launched navigation and then we ran the launch file that we created. Okay, and we had a little trouble cuz we had the wrong name. So, it's going to be image wrecked and image raw. There you go. All right, that's how you know everything is working. And let's do Ross 2 topic list and then this pipe symbol and then GP cam_1. And here we go with the topics. All right. And you should have a topic cam 1 detections. We're going to get to that a little later. But the important part of this section is that you have this rectified image. Make sure you've got cam 1 color image wrecked.
Make sure you have that topic published. If you've done that, you've successfully completed this section.
Now press Ctrl C to close everything down and close the terminal window. Let's make sure everything's closed first before you close it. Okay.
Crl + C and close. Okay. We will now use the April tag ROSS package to publish the pose of the April tag with respect to the camera's optical frame. Specifically, we will detect our tag ID ID zero. uh from the family 36H11 in the rectified camera image and then publish the following coordinate transformation. I'll show you here. So we're going to do this. We're going to do parent frame is going to be cam one depth. You don't need to type this optical frame. That's our parent frame. Okay, that's the parent frame.
And we are going to do the transform to the child frame which is going to be tag 36H 11 and then zero. That's the April tag frame. Okay. So it's the tag the April tag family which is 36H11 then a colon and the tag ID. So we're we want to get that transformed so we know where is the April tag with respect to the camera optical frame. the coordinate frame of the camera. So let's start by doing the configuration file cd Ross 2 source yaboom rossmaster yaboom Rossmaster docking. Okay. And let's go check this out here. cd config. All right. Let's do get it April tag. And here is our YAML configuration file right there.
Okay, that is what you need. So, make sure you have that. Now, go cd dot and do get it cmakelist.txt and we've got the config and the launch folders. Let's close it. Let's open up a new terminal window.
Now let's cd to the workspace. Let me run a coalcon build and source bash rc. All right. And clear. Now let's run nav. Nav la la la la la la la la la la la la la la la la la la la la la la la la la la la la la la la la la la la la la la la la launches the robot. Start that now.
Let your robot get up and running.
Okay. And let's set the pose and open up a new terminal window and let's launch this. So, Ross to launch yaboom rossmaster docking and then April tag doc pose publisher.launch.py. Start running it, baby. Run it. Run it. Don't worry about these warnings right here. It's all good. All good.
All right, let's see. Now, let's navigate to where our April tag is. Our April tag is over here against the wall.
So, let's go zoom in. Zoom. Zoom.
Zoom. Let's do nav to goal. And somewhere around here. Let's have it going this way to the left. Robot is going to move. Watch it move. God, I love I absolutely love the movement of mechanum wheeled robots. They just glide so smoothly. I just love that sideways movement. So cool. Okay, actually that was a pretty pretty good. Pretty good. I think it should be in the camera. Okay, let's see if we're actually getting detections.
Okay, let's go into a here. Let's clear this.
And I want to see what the camera sees.
So to do that, we need to use the command to see the camera. So let's take a look at that. I'm going to do Ross 2 run image view image view Rossy args hyphen r and then image and then assignment slashcam_1 slashcolor slashimage_rect.
Okay, we can see we can see the April tag. I want to try to get it in the center center here of the frame. Let's see if we can do that. See if we can do that. Let's use this and turn it just a little bit left.
Just a little bit left. Let's see how it looks now. That's perfect. right in the center of the frame, right at the bottom. All right. So, go here and control C. You can close that. So, what should we do now? How about we check the April tag detections data. So, I'm going to clear here. I'm going to do a Ross 2 topic echo slashcam_1/detections. Okay, here are detections. Okay, and these will pop out whenever your robot camera sees the April tag. So these messages include the information about the tags ID, position, and detection confidence. So let's take a look at it now.
There we go. So, we've got the camera one depth optical frame. We've got the tag family, the ID, confidence, so for some other good information. All right. And let's take a look at our coordinate frames. So, I'm going to do CD downloads. Let's remove RF frames.
Okay, let's clear. Let's do Ross 2 run and then TF2 tools and then view frames. Okay. And let's do events frames that PDF so we can see the coordinate frames. And when we expand this out, you can see the April tag right here. Okay. And you can see it is a child of the cam one depth optical frame. So this is a very very good coordinate transformation because now we can actually calculate where the April tag is with respect to the camera's optical frame. you. Not only that, we can determine where the tag is with respect to any coordinate frame using mathematics. Powerful tool that's why I love TF really cool, really cool tool. And let's run it now. Let's see if we can see what is the position of the April tag. Okay, with respect to the camera one depth optical frame. So let's do ROSS 2 run TF2 ROSS and then TF2_ECHO and then cam_1 depth optical frame and then space tag 36 H11 colon 0. Here we go. So, what we're looking at right now is we are seeing the orientation and the position. So, the position and the orientation of the April tag relative to the camera's optical frame updating in real time. In real time. So, let me explain what this data means. Let's just control C so it's not rolling. Let's explain what this data means. So the camera optical frame, okay, the camera optical frame. Remember from our very first lesson, okay, the camera optical frame uh is such that the Xaxis. So imagine we're we're in front of the camera. So let's go here. Let's open up the Yaboom.
Yaboom.
Yaboom. Rossmaster. X3. X2. Not X2.
X3. All right. Let's press enter. Uh, open image. Open link in new tab. Okay, you can see that. See the camera in the front. Although our camera is a little bit different.
So imagine, you have to imagine this because I don't have the coordinate f frames drawn on here, but this is the camera's optical frame. We're in front of the camera looking directly, we're in front of the robot, looking directly at the robot, looking directly at the camera. So the camera optical frames X axis okay the X axis points this direction to the left to the left you know to our left as looking here the robot's right side our left side points this way starting here and then pushing outwards to the left that's the X- axis to the side the Zaxis points outwards from the camera lens kind of towards us outwards from the camera lens. The positive Z points outward from the camera lens. Okay? And the Y positive Yaxis points downwards to the ground. Downwards like that.
Remember the right- hand rule. Okay? And maybe you can draw this.
So Y points down, X points out to the side, and then Z points out of the camera frame. Okay?
So, just it's good to get out some paper and write that down. Now, let's go over to the April tag. Okay. Uh, it's better to just look at go back to gazebo.
So, let's go here. So, here here is the April tag.
Trying to zoom in so you can see it.
Nice.
Okay. So, for the April tag, the April tag also has its own coordinate frames.
And we're looking directly at the tag.
Okay. Right here against the wall. And let's look dead on at it right there. So, the Z-axis for this April tag points towards the camera, towards us, towards Gus, towards the robot as towards us. Z points out of that tag, away from the wall. The X-axis points to the right of the tag, the right of the tag. Okay, so again, use the right hand rule. Okay, the right hand rule. So the Z points outwards. Okay. So, take your thumb points outwards out from the wall. The X-axis points to the right of the tag. The right points this way. The right actually our right the tags left.
So, Xaxis points this way from left to right as we're looking on here. Left to right. Positive positive X-axis along the wall. Okay. in the y ais points up along the tag towards the ceiling up along the tag towards the ceiling along the wall. Okay, remember right-hand rule right-hand rule so you can visualize this. Okay, so now that you've gotten the coordinate frames, you understand the coordinate frames for the optical frame and the April tag.
Okay, we need to go back to the terminal so I can interpret these values. So, what does this mean? Okay, what does this mean? This tells us the tags position, the April tag's position relative to the camera optical frame.
Okay, assume we are looking through the c camera lens at the April tag. We're looking through the camera lens at the April tag. Okay, so let's just start with something simple. We see that X is equal to zero. Okay, what does that mean? What does that mean? That means that the tag, the April tag is slightly slightly left of the camera's center. So again, let's go back over here and let's start uh let's go here and let's visualize visualize the camera again. All right, let's I'm going to bring up that camera image again so you can see so we can just walk through this slowly. There's no rush, guys. We're just going through this slow and smoothly. So, I'm going to open up a new terminal window. And let's do Ross 2 run image view image views args r image then the assignment operator and then cam_1 slashcolor slashimage raw.
Okay, this is the image. All right. And let's put this side by side so you can see it.
Okay. So, uh here so you can see here that the we have the position of the April tag with respect to the camera optical frame. We're looking through the camera lens right here. So, we're looking we're looking right down right right down the the l camera lens and outwards towards the wall. So, this is zero. Okay, this is zero. X is zero. So, that's what we expect because the April tag is right in the center of the frame. Okay, where x is equal to zero. Now, let's go to the second value. Okay, so y the y. So remember the positive y-axis of the camera depth optical frame points downwards from the camera towards the ground. So increasing y as you go down and that's exactly what we expect. We see that the April tag is in the bottom of the camera frame which is what we expect because we're going down positive y direction. Okay. And then Z right here is going outward from the camera frame. So we're 76 m away from the April tag. The robot is 76 the camera depth optical frame. The camera is 76 m away from the April tag which is on the wall. And you can see here that's about right in our viz. By the way, each of these squares is one meter. Each of these squares is one square meter. So we can see it's about.7 m away from the wall the robot or 7 m away. And that corresponds to this corresponds to that.
Okay. So hopefully you understand that.
Hopefully this is this is making sense to you uh right now. You can also see the values right here uh which represent the roll the pitch and the yaw values. Roll pitch and yaw.
Okay. And this large value of roll indicates that the tag is mounted vertically on the wall.
Okay. So, I won't go into the details of how we get these rotations and so forth, but uh that's how we get it. So, you're you're rotating the camera optical frame parent to align with the child tag and then you're calculating it like that.
So, that's that's you're rotating 154 degrees to get to there. But you don't need to go into the details. More important is the the position.
Okay. So, let's go here. Let's close everything down. I really want to hammer this topic again. Uh, let's go to Yaboom. I want us you to see the URDF. This would have been better to explain you. So, let's take away let's put add the robot model. Let's show you the coordinate frame. Let's go down here and let's just add the camera depth optical frame. Okay, so here is the camera depth optical frame. As I said, the X goes out to the side. X-axis goes to the side. This is what you should have written down.
Y-axis, the green goes downwards. And the blue this blue this blue Z-axis points outward from the optical frame.
So positive Z indicates that the April tag is somewhere somewhere out here.
It's we're measuring from along the Z-axis outwards. Okay. So that's why we had the 76 m. And then we have x0. So this is the x-axis. Positive x going from the origin outwards. So x equals 0 means it's in the the April tag is in the center of the camera frame. And then this green line right here is the yaxis. So increasing values down here increasingly positive. And I think what did we have?
We had 339 right there. 339 for y. So that's why we had the April tag was at the bottom of the camper frame because we go down.3 here. It's at the bottom of the camera frame. So know that folks. So remember that. That's that's how you can sanity check the values of your April tag detection. It's very important you understand that intuitively um because you're going to need it to uh for setting up any kind of docking uh solution, okay, for your robot. That's it for this section. In the next section, we're going to talk about how to make our docking system work with April tags. Now, to make our docking system work with April tags, we need to create a node that will listen to the TF topic, the transform topic for the transform between the camera depth optical frame, the parent frame, and the tag 36H110 frame, the child frame. So events frames just kind of explain here what we need to do. So our node will listen to this transformation. Okay. And then it will take that information and then publish this information as a geometry message pose stamp message. So I'll show you here. So, geometry messages pose stamped which is a timestamped pose position orientation right here. So, listen to the TF and then republish it as a pose. Okay, because that's what the dock docking server needs. It needs that geometry messages pose stamped message type.
So that is what we're going to do in this section. So that is very important because without it the docking system will not be able to locate and approach the dock accurately. This is what the Nav 2 docking server needs. It needs it. All right. So to do that we are going to open a terminal window. Let's go cd. Let's go cd Ross 2 source. Yaboom Rossmaster. Yaboom Rossmaster docking.
Uh, and then source. Okay. And let's create our node our node. So, we're going to go get it uh detected underscore doc pose_publisher.cpp. So, get it detected doc posepublisher.cpp. Open it up. Okay. And let's look for the code.
Go to my GitHub repository. Docking source. Open this puppy up. And here it is. Ctrl + C. And let's go over here to get it. Crl + V. So that's what it does.
Publishes the pose of an AP tag which is located on or near a docking station. Okay.
So we're subscribing to the transformations published by the April tag detection system between the optical frame and the detected tags frame and then republishing these transform as pose stamp messages because that's what the Nav 2 docking system needs to compute the actual docking pose so the robot can dock automatically to the charging station. So save it, close, close. And as we always do, when we add a node, we need to update cmake list.txt. So let's do cd dot clear. Get it. CMake list.txt. And we need to add our node. Let's add it now. so that the system will be able to detect it. And so underneath the find package section, I want you to add this detected.publisher source detected.post publisher.cpp detected.post publisher and then the dependencies. Add this block right now. Pause the video. I'll wait a little bit. Give you a chance to add it.
Okay. And now that you've added it, I want you to save. Now we need to update our launch file. So we do cd launch. Go to get it April tag.post publisher.aunch.py. And let's look for anything we need to uncomment here. Detected doc post publisher. This guy. This guy. So let's uncomment this action below the detected doc post publisher whose sole role is to publish the pose of the docking station. Okay. The April tag that's above the docking station. read that transform and publish it in the right message type. That's all it does.
Okay, now we need to build. So, let's clear run build. All right, let's clear. Okay, now what we need to do is we need to edit the launch file. So, uh I'm in Ross 2 source Yaboom Rossmaster.
Yaboom Rossmaster bring up launch and this is the main launch file we need to edit. So, get it Rossmaster X3.launch.py Pi and let's go to the very top because we want to be able to launch all this docking stuff automatically. So on line 42, I'm going to uncomment this package share docking. Let's just go from the top.
Let's go through slow is smooth. Smooth is fast.
line 51. Let's uncomment that just going through this is the same launch file from the GitHub. Let's uncomment this line 254. the start April tag doc. This is what we want to start. Looking good. Looking good.
Everything's good. Let's uncomment this April tag doc. Okay, I think we're good here. Save it and close. Okay, let's go over here and build and clear.
Okay, now let's try to run everything. Oops. Looks like we got a quick error in here. Cloud exception and launch. Live executor docking does not exist.
Okay, let's just check and see our CMake lists. Maybe we've got some issues. Yaboom Rossmaster. Yaboom Rossmaster docking. Get it.
CMake. And let's have a look. Okay, we've got our executable added. Emit target dependencies. Oh, I see the issue. I forgot to add the install target. So install, make sure you add this folks.
Open parenthesis targets and then next line. And then we need detected doc pose publisher. Okay. And then destination destination destination lib slash dollar sign curly braces and then project name curly braces and then go down here close parenthesis. So install targets detected doc pose publisher and then destination lib project name. All right. So that should do it.
Let's save it. Let's build again. Let's build over here. All right. Let's clear and let's try to run again. Looking much better.
So that install target needs to be there. So the executable's being built but wasn't installed in the correct location. That's why we had to add that.
Wait for everything to come up.
Okay, looks like everything's up. So, let's go over here to the terminal.
Let's set the pose. Set a pose. Okay. And once we have set the pose, let's move the robot around to the dock. So, I'm going to click the nav to go button and let's set this to look at it. Go over here.
Let's turn this around.
zoom in and let's angle it a little bit more so we can actually detect the dock. Okay, so we should be able to see the dock now. All right, so I'm just going to clear that. Uh let's do let's do this just to verify. I just want to verify that the tag is in the image. So I'm going to do Ross 2 run image view image view spacey Ross hyphen args spacey r image and then assignment and then cam_1 color image_rect. Yep. Right in the center.
Absolute perfection. Right in the middle. I love it. Okay, so let's clear and let's have a look at the detected post topic. We should see a publisher and a subscriber.
So, Ross 2 topic info detected detected docose spacey v. And we should have a publisher, which we do, and a subscriber, which we do.
And let's have a look at the detected doc pose. Ross 2 topic echo detected doc pose. Yes, my friends. My friends, we have it. And the and the position information even makes sense because the position right at zero. Okay. Relative to the camera optical frame because the tag is right in the middle of the camera frame.
Y0. So y z we should expect the tag in the bottom of the camera frame which is correct in the positive y direction which is down. Okay increasing as we go down so 2 m down that's correct and then the wall is about half a meter away from the camera optical frame which we can confirm by looking at the ariz. Yep. About half a meter here.
about half a meter right there. Okay?
Because each of these squares is one square meter. So one meter between here.
So that's about half a meter. So the pose information is correct. And if we go here just c uh we so we got 0 0.2 and 0.5 0.2 and 0.5 for xyz.
Let's see if this matches with the transform data. So Ross 2 run TF2 Ross and TF2_Echo and then we do cam one depth cam 1 depth optical frame and then tag 36 H 11 and then zero. Oh uh misspelled. Okay. So cam one depth optical frame. There we go. We have zero 0.2 and.5 which matches up perfectly with the information we had in the pose. So we are all good there.
Close everything down with control C. Now that we have the data set up, it is time to configure the docking server for NAV 2. The docking action in Nav 2 guides your robot from its current position to a successful connection with the charging dock. Here's a high-level overview of how it works. First, the action server receives a request to dock. either specifying a doc ID from a known database or providing explicit dock pose information. Next, if the robot isn't already near the dock, it uses NAV 2 to navigate to a predefined staging pose near the charging station. Once at the staging pose, the robot begins to search for and detect the April tag associated with the dock.
Then using visual feedback from the April tag, the robot enters a precision control loop, carefully maneuvering to align itself with the dock. The robot continues its approach until it detects contact with the dock or confirms that charging has begun. If the docking attempt fails, the system can retry the process a configurable number of times.
Then finally throughout the process, the action server provides feedback on the current state and elapse time. This structured approach allows for reliable docking across various robot types and environments with the flexibility to handle different dock designs and detection methods. The undocking action in Nav 2 guides your robot from a dock position to a safe staging pose away from the charging station. Here's a high-level overview of how it works.
First, the action server receives a request to undock, optionally including the dock type if not already known from a previous docking operation. Then, the system verifies the dock type and current docking status, ensuring the robot is actually docked. Next, for charging docks, the system first attempts to disable charging before any physical movement begins. Then once charging is disabled, the robot calculates its staging pose based on its current position relative to the dock. Using a precision control loop, the robot carefully maneuvers to the staging pose while maintaining specified linear and angular tolerances.
The system monitors both position and charging status only considering that undocking successful when the robot has reached the staging pose and charging has completely stopped. Throughout the process, the system enforces timeout limits and can respond to cancellation requests for safety. Now, this structured approach allows for reliable undocking that works across different robot platforms and dock types while maintaining the safety and integrity of both the robot and the charging equipment. To use the Nav2 docking server, you'll need to create a database of known docking stations in your environment. This database will tell your robot where docs are located and what type they are. Here's how to set it up. We'll store our files in the Yaboom Rossmaster docking package. And by the way, just while I'm at it, let's go to Google here. And I want to show you uh let's go to Nav to Nav2 docking GitHub.
And I just want to show you this Nav 2 docking. So you got a complete guide here. Your complete guide. Look how beautiful that is docking. Way to go, Steve McKenzie. He's the developer of this navigation stack. But here is your full guide about how to set up the docs, how to get the whole environment, databases, and docs set up.
But we're going to walk through the process now just step by step for a simple doc at the April tag. Okay. So we've got a terminal window open and let's go cd source cd yaboom rossmaster and then cd yaboom rossmaster docking. Okay.
Clear. Let's do cd config. All right. And let's add our let's do touch doc database.yaml touchdoc database.yaml. So do get it doc database.yaml. And let's go over to our repository to see what we need to put in there. Docking config. And let's open this puppy up. Okay. Crl + arr c. Okay. And remember, follow along with me. Click by click, keystroke by keystroke. So here are our lines. So we got the type of the doc, the frame, and the pose, and then save and close. So in this file that YAML file that we have let's do let's do cat.d database.yaml. So in this file we have the unique identifier which is doc zero. The type of the dock okay the pose position in xy and then the theta position. Okay, pose of the doc and then the coordinate frame in which the pose is located. So that's how you create the doc database file. And for more instructions, you can go to the GitHub. But this is just for a single simple doc. Okay. Now let's clear cd dot dot cd dot dot cd yaboom ross master navigation. We need to configure the docking station now with our navigation parameters. So, cd config get it Rossmaster and uh let's see where we need to go here. Go down to the docking server right here which is down on line 411. Okay. And here are parameters.
And I'm going to go to Google so you can have an understanding. So docking server nav 2 parameter parameter guide so you can see what all the parameters are and stand for you go to this URL and that'll give you a complete description of what the parameters mean but we're going to just do it. So docking server parameters and our navigation file and I think everything is already set up. Only thing we need to uncomment here is this line on line 448, the doc database which we just added. Let's see if we need to uncomment anything else. I think everything else is fine. So this tells navigation where your doc is located, defines the type of the doc. Okay. And then the doc database contains the information about the doc.
So let's see. Okay, I think everything is okay.
Okay. So, save the file and close.
That's all good. Let's close and let's build. All righty.
Okay. Okay. And now let's send the robot to the dock using RV viz. So I am going to build once more. Clear and launch navigation NAV.
Okay. And let's set the pose. Okay. Now, let's take a look at the right panel. This is what we're going to use the docking plugin for Arv. All right. And you can see it right here. And in the doc ID field, we're going to type doc zero. Just like that. Do zero.
This is the ID of the docking station. And next to the dock type, click Rossmaster X3.
Okay. And then once that's done, click doc robot. And now we're navigating to the staging pose right there. Can see nav to staging pose. And we're now active. We're waiting for reached. You can see the state controlling initial perception.
Okay. And now it says reached. And if you look in the terminal, we can see all of the different logs right here. So it attempted tried to it failed for a second there and then returned to the staging pose. Attempted again various attempts. Okay. And then it failed. And then it tried several retries and then it finally on the last attempt it made contact with the dock and then said waiting for charge to start. And then robot is charging. Okay. And I just created simulation of of charging. All right. And let's go over to the gazebo to see where the robot is. Let's turn it around.
Okay. And let's zoom in. Let's see how we're doing over here. Zoom in. Oh, isn't that beautiful? Right at the charging dock. Right at the charging dock. Right in front of the Aruko marker. Man, that is gorgeous. Perfection in docking.
Right at it.
So, by the way, instead of instead of using the RV viz plugin, another way to have docked would have been to use this command. Okay. And take a look at that command there. You could have you could have also typed this in the terminal.
So, Ross 2 action send goal. Okay. To the doc robot action server. the message type, the action type, and then all the information we need. So, use doc ID, add the doc ID, the doc type, the staging time, and then navigate to pose.
Navigate to staging pose first. True. We set it to true because we want the robot uh to use Ross to navigation to navigate to a staging pose that is directly in front of the dock. So, we could have used that. So, just remember that command. Okay. Now we've got RV viz and Gazeboa open. And by the way, sometimes over here in the state you might have a state that says wait for charge. That's totally fine as well. Uh where it says reached, but just make sure it says reached. Okay, when it gets to the charging dock. And now to undock the robot, we need to open a terminal window. You could use the button on RV, but I find it a bit finicky. Uh it doesn't always work that well.
So let's go and do this. Here is the command. So let's go here. And by the way, I should just mention, so when I when you run this command to undock the robot, all right, uh you can put this to 30 seconds to give it 30 seconds to dock undock. But I had a lot of issues with that. I really did. I think this is this is still a very new package, this docking server, and I had uh quick abort aborts um when I tried to undock. So what I like to do is shorten the max undocking time to 2 seconds. I had better results with this.
So let the action abort. So you set it to 2 seconds, let the undocking action abort, and then send a regular navigation goal after that. So again, this package is fairly new and it definitely needs a little more work to be ready for prime time. So let's go here and show everything. By the way, I want to show you the robot. Let's go over here into Gazebo and zoom in. Look at that beautiful docking.
Okay, so robots at the dock and we can see it on RV viz. And now let's do the undocking. I want you to see the terminal and RV viz at the same time. So watch this and watch this and press enter in the terminal.
Okay, goal accepted and goal aborted really quickly. That's what we expected.
So, all we did was just move off the charging dock and it aborted really, really quickly and then you can send a navigation go to wherever you want. Now, the robot's going to go out.
That's how I found the best way to deal with that is to just let it abort, push it off the dock using the undocking action server and then send a regular navigation goal. Again, folks, the docking server is new and if you want, you can hire me.
I can help you do simple commander API to develop a custom docking node and undocking node which will enable cancellation in the middle and you have a lot more control over what's going on.
But this is the this is how I how you would do it use the Nav 2 docking server. There'll be a time in the future when I'm sure this is ready for prime time, but it's very finicky now. Um yeah, I try to dock the robot again.
Let's see what happens. Just give it a redock. Let's see what happens if it gets to the dock. See if she finds it. She should come in any moment here in Arvis. Okay. And it thinks it's at the dock, but it's a long way from the dock. And that is the issue.
So that's the finickiness of it. The redocking is not so clean. And I see yeah it says it robots charging but clearly we are not charging. We're a long way from the charging station. So again everything up until really the uh April tag detection detecting the pose and getting the detected dock pose everything translates uh to your own application. It's the actual process of docking uh the docking server uh which I I really like to use my own custom node for that rather than the Nav 2 built-in docking server which is again very news of Ross 2 Jazzy maybe it was added in Iron I don't remember but it's it's new within the last as of the date of this video uh it's news of the Ross 2 recent distributions so uh I always use my own custom node for my own real world robots but that's it for this tutorial.
We've covered a lot of ground. You now know how to dock and undock uh in Nav 2.
Thank you for watching and keep building.
Up Next

ROS Navigation Stack Tuning: Key Parameters for Mobile Robot Performance
@michaelmuldoon4932
4.8K views•2021-02-26

Triumph of Orthodoxy Icon: Byzantine Art & History Explained
@BenCallan
2.1K views•2024-08-06

FastAPI vs Flask vs Django: Choosing the Right Python Web Framework
@TechWithTim
302.5K views•2024-05-26

Game of Thrones Opening Credits: A Cinematic Analysis
@gameofthrones
46.3M views•2011-04-18
Related Study Plans & Knowledge Roadmaps
Structured learning paths in General & Interdisciplinary Studies