







![INTRODUCCIÓN - [Curso Básico de la librería NumPy de Python]](https://i.ytimg.com/vi/nN_TYjT_KiI/maxresdefault.jpg)


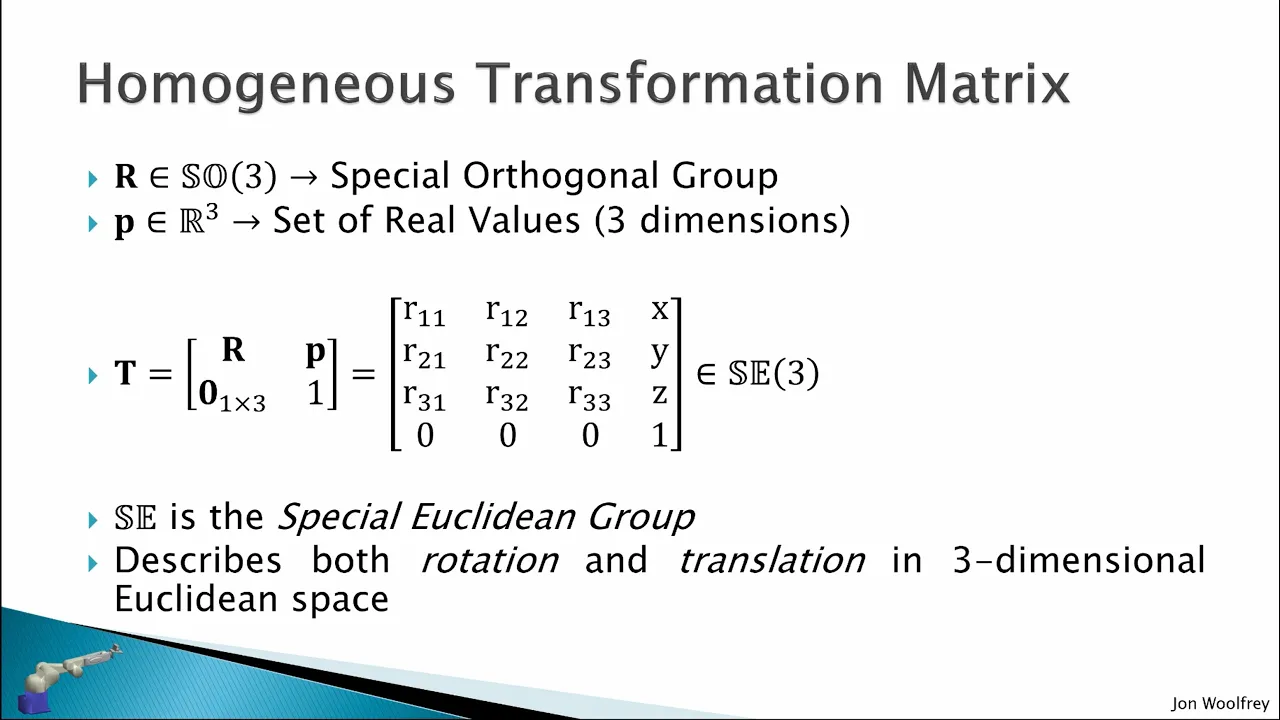













This video demonstrates how to compute rotation matrices for robotic manipulators in Python using numpy, where each rotation matrix represents the orientation of a frame relative to another, and the matrix columns indicate the projections of the new frame's axes onto the original frame's axes; the code imports numpy, defines joint angles in degrees converted to radians, constructs individual rotation matrices R01 and R12 using trigonometric functions, multiplies them using numpy's dot function to get the composite rotation matrix R02, and validates the results by interpreting the matrix columns as projections that show how the end-effector frame's axes align with the base frame's axes for different joint angle configurations.
Rotation Matrices in Python | Robotics Kinematics Computation
Added:Basic Linear Algebra: Understanding vectors, matrices, matrix multiplication, and the concept of transpose and inverse operations.
Coordinate Reference Frames: Familiarity with 2D and 3D Cartesian coordinate systems and how vectors are projected onto different axes.
Trigonometry Fundamentals: Solid understanding of sine and cosine functions, as they form the algebraic basis of rotation matrices.
Introductory Python and NumPy: Basic familiarity with Python programming and array manipulation using the NumPy library.
Homogeneous Transformation Matrices: Learning how to combine both rotation and translation into 4x4 matrices to represent full 3D rigid body motions.
Alternative Orientation Representations: Studying Euler angles, Fixed angles, and Quaternions, including the phenomenon of gimbal lock.
Forward Kinematics and DH Parameters: Applying transformation matrices using Denavit-Hartenberg convention to determine the end-effector position of a multi-joint robotic arm.
Inverse Kinematics: Understanding how to calculate joint angles given a target position and orientation in 3D space.
Implementation in ROS (Robot Operating System): Utilizing the 'tf' (transform) library in ROS to manage coordinate frame transformations in real-world robotic systems.
58.6K views587likes17:01Original Release: 2017-06-11
Last time we learned that we could make one complete rotation matrix that represents any number of rotations made in sequence by multiplying together the individual rotation matrices representing each individual rotation that was made. Now we can multiply these matrices together by hand if we want to. But as our manipulators become bigger with more joints, this will become more difficult to multiply these matrices by hand. In practice, we would typically stop at this point and write our rotation matrices into our code. And today, I'm going to show you how to do that in Python. We'll look at the output of our rotation matrices and make sure that we understand the meaning of the numbers in the rotation matrix. Start by opening up Python idle and the Python shell will open up as I'm showing here. Click on file and choose new file. This will give you a script file that we can use to write our code.
Now, we learned in a previous video that Python has a package called numpy that will allow us to do different kinds of mathematical functions including things like signs and cosiness. We know that for our rotation matrices, we're going to need to use these trigonometric functions. So the first thing we'll put into our code is import numpy as np. numpy is the name of the package that we want to import so that we can use the functions that are defined there. The as np part of this just allows us to have a shorter name that we can use to reference these functions.
Once we've imported numpy as np, we can now use the form np dot and the name of the function to call these functions.
For example, if we want to take the sign of an angle, we can do NP do sign and then the angle in radians here in parentheses. Okay, let's start building our code to calculate rotation matrices.
The first thing we need is some variables to represent the two angles theta 1 and theta 2.
I'm going to call those angles T1 and T2 just so that they're shorter. I'm also going to make some comments on the line so that I remember what it is that I'm doing. In Python, you create comments using the hashtag symbol.
I want to define these two angles in units of degrees just because it's easier for me to think about angles in in units of degrees. We'll convert the angles to radians in a bit. Now let's convert these two angles to radians.
We can convert to radians from degrees by dividing by 180 and then multiplying by pi. So since I want to multiply by pi here, I could just start typing in pi.
But numpy, which we're now representing as np, has a built-in constant np.py pi that is pi. Let's take a look at what that number looks like over here in the shell. Let's do import numpy as np and then hit enter. Then let's do print np.py. So np.py Pi is a defined constant that allows me to not have to type out all of these numbers for pi all the time. Now I want to do the same thing for T2. So, I'm just going to copy this line and paste it. There we go. Now that we have those two angles defined, let's type out the rotation matrix 01 and 1 2 in Python. Here's how we create a matrix. Let's suppose I want to have a matrix A that looks like this. 1 2 3 and then on the next row 4 5 6 and on the next row 7 8 9. I enclose the entire matrix in square brackets. Then I'll enclose each row in square brackets also. And I'll put a comma between each number. So 1 2 3, that's my first row. Then I put a comma. 4 5 6 is my second row. And then 7 8 9 would be my third row.
Now, when we print out a matrix A that we've created, it doesn't display it in a way that's very easy to understand as a matrix. Luckily, numpy has some functions that help us out here. Also, try this.
There we go. That looks much more like a matrix. The function matrix which is defined in numpy displays a matrix in a way that's easier for us to see. Okay, let's go back to our code now and try to use what we just learned about defining matrices in Python to define our rotation matrix R01.
I'll create square brackets around the entire matrix and then I'll create another set of square brackets for row one. Row one starts with the cosine of theta 1. So we'll do np do cos t1.
Then we'll do the second element in row one. The second element in row one is negative sine of theta1. So we'll do negative np do sin t1. And the third element is zero. So we'll just put zero. Now comma a new set of square brackets. And here we'll put row two. Row two goes sin theta 1 cossine theta 1 0. So we'll do np do sin theta 1 comma np cosine theta 1 comma 0. All right. On to row three. Row three is just 0001. Next, we want to do our R12. R12 is very similar to R01. So, I'll start by copying R01.
The difference here is that R12 uses theta 2 instead of theta 1. So I'll go and change these variables to theta 2. All right. Now what we really want to see is R 02 that is the rotation matrix all the way from the base frame to the end of vector frame. We get that by multiplying together R01 * R12. It turns out that numpy has a function for this also. The function is called dot because what we're doing with these two matrices is what's known as the dot product. This function takes as input two matrices that we want to dotproduct together. The two things we want to multiply are R01 and R12. Lastly, we want to print R02 so that we can look at the output.
Click on run then run module. You will be forced to save this file before it can be run. Go ahead and find some place that you'd like to save this. Give it a name and we can take a look at the output here. Does this output look correct? Let's think for a minute about what this output is telling us. This rotation matrix which is R02 is telling us the projection of X2 in the first column on X0 in the first row, Y0 in the second row and Z0 in the third row. The second column is the projection of Y2 on X0, Y 0 and Z0. And the third column is the projection of Z2 on X0, Y 0 and Z0. You might notice that this matrix is the identity matrix. This is telling us that when theta 1 is 0 and theta 2 is also zero, there is no rotation between frame 0 and frame 2. Is that true? Let's take a look at our kinematic diagram.
Here we can see that this is true. When theta 1 and theta 2 have not rotated at all, the 2 frame is in exactly the same orientation as the zero frame.
Let's do another test. We previously drew the kinematic diagram when theta 1 is 90. Let's run the code for this case. These numbers might look big and crazy, but notice that some of these numbers are extremely small. They're just numerical error around the number 0. So this matrix is telling us that r 02 in this case with theta 1 being 90 is 0 1 0 -1 0 0 1. Is this true? Let's take a look at the kinematic diagram. when theta 1 is 90. This first column is telling us that the projection of x2 on y 0 is 1. In other words, x2 is in exactly the same direction as y0. Is that true? We can see here that it is. x2 and y0 are in the same direction.
Column 2 is telling us that the projection of y2 on x0 is -1. Is that true? We see here that that is also true. Y2 is in the exact same direction as x0.
Finally, this third column is telling us that the projection of Z2 on Z0 is 1. In other words, Z2 is in exactly the same direction as Z 0. Is that true? It is. We knew that that would be true since this is a rotation around Z. The Z direction stays the same. So, it looks like our calculations are working so far. Let's do one more test. We also drew the kinematic diagram previously to show what the manipulator would look like when theta 1 is 0 and theta 2 is 90. Let's run this case.
Okay, here our output is saying the exact same output as before. It says that the projection of x2 on y0 is 1. Is that true? It is. And the projection of y2 on x0 is -1. That is also true. and the projection of Z2 on Z0 is one. And that is also true. So it looks like our code here is working well. Now, all of the examples we've done so far involve rotation matrices that have only zeros and ones. But of course, if we make our angles any arbitrary number of degrees, we can get all kinds of different results.
Let's try a couple of different options. You can put in any combination of theta 1 and theta 2. And the matrix that you're given as the output for R02 always means the same thing. It's telling you the projection of X2, Y2, Z2 on X0, Y 0, and Z0. If you understand what this matrix means, this can help you understand what direction your endeector is pointing in.
for any combination of angles theta 1 and theta 2. Go ahead and play around with these angles as much as you want and think through the meaning of the matrix that you get as the output. In the next video, I'll be giving a bunch of examples of finding the rotation matrix all the way from the base frame to the endector frame as we did here for the five standard three degree of freedom manipulator types that we drew the kinematic diagrams for previously.
Up Next

8:12
Control of Mobile Robots | Differential Drive Kinematics & Unicycle Model
@mouhknowsbest
112.8K views•2013-02-14

58:25
MathWorks Virtual RoboSub Simulation Environment | Webinar 2026
@RoboNationInc
209 views•2026-03-10
20:38
Camera to World Coordinate Mapping | Robotics Vision Tutorial
@asodemann3
6.4K views•2017-10-04

25:22
Micromouse: The Fastest Maze-Solving Robots on Earth
@veritasium
23.5M views•2023-05-24
Related Study Plans & Knowledge Roadmaps
Structured learning paths in Robotics
robotics
Building Delta Robots: Kinematics & Pico
01Foundations of Delta Robots & Mechanical Design
02Electronics and Microcontroller Setup with Pi Pico
03Delta Robot Kinematics and Coordinate Math
+ 3 more learning modules
65h6 modules
Explore Roadmap
robotics
Building Ballbots: Dynamics, Kalman & LQR
01Embedded Electronics & Omniwheel Actuation
02Ballbot Kinematics & Rigid Body Dynamics
03IMU Sensors & Kalman Filter State Estimation
+ 2 more learning modules
42h5 modules
Explore Roadmap
robotics
Micromouse: Hardware, PID Control & Flood-Fill
01Electronics & Teensy Microcontroller Basics
02Sensors and Actuators: Motors, Encoders & IR
03Precision Movement: Implementing PID Control
+ 2 more learning modules
35h5 modules
Explore Roadmap
robotics
CDPR: Kinematics, Arduino & Winch Control
01Foundations of Arduino & Basic Electronics
02Stepper Motors and Winch Mechanics
03Kinematics of 2D Cable-Driven Robots
+ 2 more learning modules
28h5 modules
Explore Roadmap