










![AAVSO How to [Think About Transformation]](https://i.ytimg.com/vi/urgkBDkiUEE/maxresdefault.jpg)




![Transit eines Exoplaneten nachweisen mit Lichtkurven in Siril [kostenlos]](https://i.ytimg.com/vi/1PSKRbr4zH4/maxresdefault.jpg)
Stellar photometry transforms pixel data into meaningful astronomical measurements through systematic image analysis. The process involves defining three key regions: an aperture containing most stellar light, a gap preventing contamination from extended halos, and an annulus measuring sky background. The software identifies star centers by balancing pixel moments around the centroid, then applies soft aperture techniques with partial pixel weighting to capture complete stellar profiles. Background subtraction involves sorting annulus pixels and discarding outliers before computing instrumental magnitudes using the formula m = -2.5 × log₁₀(signal) + Z, where Z is a zero-point constant calibrated against standard stars. The curve of growth analysis helps optimize aperture sizes for maximum signal-to-noise ratio. This computational approach enables amateur astronomers to achieve professional-quality photometric results comparable to decades of established research.
Inside Stellar Photometry: How Star Magnitudes Are Computed
Added:superstar astronomers is a members-only broadcast which features talks from the world's leading astronomers coming up later this month we will be hearing from dr emily levick about a bird that mimicked a black hole and a telescope that got shot are you curious what on earth that's about because i am if you are just like me please visit our website to register for the webinar and find out about it for yourself also new this year our very own sebastian otero is hosting a very exciting webinar series in spanish so if you or one of your astronomy friends speak spanish please feel free to join us the links to learn more about each of these webinar series are up there on the screen finally we would like to thank and acknowledge our sponsors voice astro and chroma technology the voice research initiative and education foundation provides online astronomy education observatory resources and research experiences to students student teams and schools in order to learn how to perform observations conduct research and publish their results in scientific journals such as the journal of the aavso please do check out their webpage to learn more about their work founded in 1991 as a 100 employee-owned company chroma technology is a leading manufacturer and oem supplier of highly precise optical filters using thin film coating technology their reputation is built on dedicated customer service including free technical and application support they remain committed to serving both the scientific and technical communities in their pursuit of the scientific endeavor chroma's product portfolio provides solutions for industries ranging from the life sciences and agriculture to manufacturing inspection security and aerospace this broad array of applications serve includes fluorescence microscopy flow cytometry biomedical instrumentation and surgical devices machine vision multi-spectral imaging and of course our favorite astronomy okay now with that out of the way allow me to introduce your instructor for today it is my great pleasure to welcome back to this webinar series richard berry mr berry has been a frequent presenter at past aavso meetings and webinars and it's really not hard to see why he has over 30 years of expertise in a wide variety of fields from telescope making to observatory building to photometry which he's been practicing ever since the days of photo multiplier tubes as if that weren't enough he's also a software developer and the author behind the software astronomical image processing for windows also known as aip for win between his observational experience and his experience literally writing the tools that the rest of us use he's come to be quite an expert on the topic of photometry not only how the data is recorded but also how it's handled behind the scenes today he's here with us to give us a glimpse into the nuts and bolts of photometry and how with a little bit of math a bunch of pixels can be transformed into scientific discovery without further ado please allow me to introduce richard berry welcome back mr berry hi lauren so um what i'm gonna do today um is take you on a tour inside the computer um inside the way it works and i will be using aip for windows as my demonstration tool but basically all photometry all aperture photometry works pretty much the same way so what i will tell you will probably apply reasonably well to almost any software you may be using so i'm going to share my screen and if we've done this right um we should be there looks great okay and okay so and i'm using the presenter mode and if everything's working right you guys are still seeing the the title slide yep looks great on full screen and everything we practice and we're perfect okay thank you um wait a minute oh it's a very windowsy thing it locks out my screen okay so aip for windows is is free and that's by accident uh my publisher went out of business and left my software orphaned uh on the web i did some quick hacks in it um and created a groups io called aip for win user community and you can download the software from there it's free it's open to everybody and with all honesty it does have some bugs because it was a quick and dirty job so let's begin the software um i'm i'm going to be working with today uh two images of m67 which is a cluster that's used for standardizing filters and cameras because it's got a lot of stars whose standard magnitudes are well known and i will be demonstrating today with the very simplest photometry tool in aip for windows which is a single star photometry tool this is basically written as a learning tool for beginners and i'm demonstrating with it because it's it's not complicated it's easy to explain so we click on that link the tool comes up you can you can see it let me get my laser pointer there we go so there's the tool very simple tool and we go out and we click on a star and the magnitude comes up aha it's magic okay so what i'm going to be talking about today is how does that happen and we're going to be moving in close and getting really up close and personal with the pixels and the star images now this image is a four second exposure using a eevee scope by unisteller um it's it's basic way of taking pictures is it shoots a lot of four second exposures and then stacks them the other image i'll be working with is a stacked image that's made um with 900 frame four second frames and when you do that you get a beautiful textbook star image i mean this is there's the star it's nice and well sampled you've got pretty clean there's not much many background stars in it and you can see because we're working in m67 it's a very crowded field um this kind of field kind of gives photometers connections because if you go click and you want to do something with this star you're going to have some competition with that star but we'll talk about how that kind of stuff works so here's here's the the basic piece of information that everybody does photometry aperture photometry needs to understand this is how we slice and dice the image of a star okay um in the middle closely surrounding the star is what's called the aperture aperture is the latin word for window okay and it contains most or all of the light in the in the star image then we have a gap and the reason we have a gap is that the star image usually has some extension there's light out here and it turns out this is interesting that the most efficient photometry actually does not quite use all of the star's light as we begin to add more pixels to try to get all the starlight we're adding noise from this guy background and then finally we have the annulus a donut or a bagel you can call it either one if you want to which we're going to use to determine how much light is coming from the star that is adding to the light in the star so the definitions this is the aperture radius from centered out this is the inner annulus radius and this is the outer annulus radius and because we're going to be talking about software code and if you're if you don't do software programming uh i'm not gonna get technical um but you will see code don't let your eyes glaze over um it's to make a pun it's basic okay so it's basic software um we call any given pixel um the the terminology we use is fp is an array of floating point values and xy is its xy coordinates so x and y axes so the image itself is x fp it's a mean this notation means it's an array and x y tells us which pixel it is and we'll also be looking at another way of looking at the star image which is to create a profile okay and in the profile what we do is here's here's our aperture inner and annulus inner and outer annually and these in this graph we're moving radially outward and plotting each pixel so this pixel here which is at about radius of two gets plotted here okay so if you look at the lines it'll be like one and a half or something like that so and then a pixel out here which is quite far from the the center of the star image it will get plotted out here somewhere and you can see then that the star has a profile okay and that profile is characteristic of every image in the star and you can see out here that the annulus it's clean as a whistle this is absolutely beautiful we love it when there's no other stars hanging out here to mess up our measurement of the background sky and you'll notice if you look carefully that there's still a little bit of starlight out here in the gap okay and you can see that too you can see these gray pixels so we will be using the profile as a diagnostic for whether we're getting good photometry so i'm going to start out okay if you do photometry you've all seen this kind of stuff okay here's your four second exposure and there's a star and here we have integrated for 900 seconds and now you can see yeah the star is really there okay and you can see that the other stars in the four second exposure these guys look pretty solid and the 900 second exposures these guys are really really solid because we've averaged so many photons together to create this image you can see the sky background is almost noise free it's really really nice can we if you can integrate for long periods of time and then i'm going to show you a couple more cases of how star images develop um okay here's here's a comparison of a four second exposure and a 900 second exposure um okay this guy here which is nice and solid in 15 seconds it's you can't be sure it's really there you look at something like this and you say what's that well that could be a cosmic ray it could be a a hot pixel it could be anything when we look at it after 900 seconds exposure it's not there but this image here which is probably this little cluster of pixels is there okay and we can see another faint star and how it develops it's useful in learning photometry to play around and compare what kind of images you get with different kinds of exposures so you get to to know at a sort of a gut level what good photometry looks like so here is a 13th magnitude star here's a 14 and a half magnitude star here's what the star looks like as we're getting down to 15th and here we are down halfway down 15th magnitude with this little telescope which is has an aperture of 114 millimeters you can work reasonably well to 15th magnitude and in a pinch you could be going down to 16th magnitude so we we've looked at some stars now and i'm going to talk about the the facts of life when it comes to talking about star images this is the birds and bees of stars okay star and this will sound maybe a little overly academic but when you're a computer programmer you don't look at the stock at the image and say that's a star okay it's a cluster of pixels that are brighter than the average of the sky that's all they are and remember pixels are just numbers in an array and that's how we're going to treat them um non-stellar artifacts can look a whole lot like star images you always have to be aware that there's cosmic rays um that there's beyonds flowing off of the cover glass on your ccd there's all kinds of of things that can make things that look a lot like a faint star image every pixel is noisy okay because it's not just a magic number that happens it happens because photons flowing in randomly vary and it the variation is is um uh uncertain by approximately the square root of the number of photons that happen so if you have 10 000 photons coming in it's going to be 10 000 plus and minus 100 square root of 10 000.
okay the sky background light is added to the star light okay the sky background itself is noisy it's again photon shot noise um and when you look at these images you always see those that randomly look if we bring a movie of a series of frames like that it would look all swarmy it would look varying up and down crazy the sky background always contains faint hard to see stars okay there's always parasitic stars in your background and what they do is they make the background brighter now you can say well on the average there's going to be a faint star underneath your bright star which is perfectly true but you're going to be every time you do photometry on that star you're going to include that faint star in it what we don't want is to have the light of the sky background included every single time okay all-star images blend gradually into this guy they do not have hard edges okay they they fade away and if you do a really long exposure you can find star pixels out 10 20 pixels away from the center in any given image all star images have the same profile okay this is contrary to what your visual uh uh the way you see it visually it looks like bright stars are big faint stars are little they all have the same profile in other words a bright star spreads out quite some distance so do the faint stars bright star images are not bigger than your dim stars and when you're doing photometry shoot your dark shoot your flats calibrate your images because you would like at least to get your pixels all normalized to the same sensitivity and you'd like to get rid of hot pixels so i'm going to you know beat on this a little bit this is star image profile constancy in other words here's my four second exposure here's my 900 second exposure and i've got this little trio of of stars and they begin to show you how you work with the profile too okay so here's your profile it comes down in the four second exposure it looks like this in the 900 second exposure it looks like that it's exactly the same we're picking up here in the annulus you can now see we're picking up light from this star okay and this happens the takeaway lesson here is that whether it's a four second exposure or a 900 second exposure the profiles are the same now that's a bright star for a medium bright star once again the profile is here the profile is here and now this guy he's picking up that guy and you can see the annulus is um highly compromised it's got a lot of background starlight but if you look at it that star is only maybe 10 [Music] of the total amount of light that's coming into the annulus if we can figure out some way to get rid of those we'll have an accurate level background level that we can subtract now here's here's our our gap again coming in handy and you can see that there's some light in that gap but look at this carefully and you can see aha we have chosen our aperture radius so we get very very little parasitic light and that's what we want to do um and it should be perhaps obvious by now a corollary is of this is you're going to shoot your bright stars and your faint stars you're going to shoot everything with the same aperture radius and annulus radii if you want consistency because if you change this you're going to be getting more or less light from that star and you're being more or less light from a parasitic uh sources and then look at this this faint star okay well here is your profile again okay here it is in the four second exposure it's messy and here it is the 900 second exposure and you can see now you got the the parasitic light from this guy and you've got the parasitic light from this guy and you can say well but that profile is there and this is why you want to keep that constant because you're trying to make your photometry the same regardless of the exposure [Music] because even though it doesn't look that way when you analyze it technically it turns out to be that way so we're going to click on it we're going to walk through the process now of what happens when you click on the star so i've i've talked about stars and i hope that you will you will bring up your star images and blow them up to 800 or 1000 or 1600 percent and look at your stars carefully uh so you begin to understand it's down at the pixel level that photometry happens so we're going to click on a star and in computer lingo my click generates an event in gui type programming it's called mouse up it all actually it creates a mouse down and then a mouse hold and a mouse up event okay we're going to trigger on the mouse up event and the mouse in the mouse up event we grab the xy location of where you clicked now we're going to dive into the software and bingo you click there click okay here's the star you want a photometer but you know your hand shook a little bit or the software which is looking at 500 images in a row and the stars are moving around a little bit or your tracking wasn't perfect you're going to have to follow that star so the software thought in the 399th image that the star was here but in the 400th image the star had moved over to there okay so this was your starting point you went click and here's what happened the software figured out where the darn star went well this is really handy because you know you try to put your your mouse on the right spot and click there you can do that pretty well but you can't do it at 100 typically uh you really do need to magnify it the way we've done it here okay now we're going to dive into computer code and i've done a this very slightly kludgy stuff here because uh the code i'm showing you and the code that was generated that image is not exactly the same um okay but okay if if you're allergic to computer programming you know i'm sorry but this is the this is like lifting the hood and looking at the carburetor and the distributor and the battery and the radiator and all that that stuff that's under the hood so this is the code that generates this is my click and we get an x and y value and we then run code that determines where the center of light is and it draws the circles so it draws a white circle and two yellow circles okay so there's the white circle and there's the two yellow circles then the the code here says okay i've just figured out where the center of the star is and then it runs it again okay this time on this on the result that has come out of this first centroid effort so now we run it again now we're centered and it draws them again so this is your first time that piece of code runs right it just draws the circles for the click then when you get that second one it zeros in on this guy now where i've clued a little bit is in this drawing i don't show it but we sneakily are going to change we change change the aperture so the aperture is actually here it's smaller we're looking at a smaller area okay so now introduce another programming concept if you're not familiar with code and that's called a function okay and that's what we did here this we we called in the current document we called the function star centroid and the code is here and the first thing it does it says okay these are the things that i'm going to put into my computation first of all i'm going to put the image in then i'm going to put in diaphragm radius that is the aperture radius because we use okay and i'm also going to put in my click value for the centroid and then remember we the software does not know where that click came from okay it doesn't know whether there's even a star there because we don't use the centroid function only in this instance we may be using it in some sort of automatic tracking routine so the first thing we want to do is we want to define an area that runs from the first x y to the last x y and we also want to make a check that the area that we're going to analyze actually lies inside the image okay so the image is runs from x max to y max i mean x x max xmax ymax to ymac x uh from [Music] it goes from sorry let's get this right um it goes from x min to x max and so forth in other words it's inside the image that's a check it's a necessary check because if you don't do it right you can get horrible things like divide by zero and boom the software crashes so my click was here the code runs and it defines this region from fpfirstx to fplastx now i've sized this region to be bigger by a small amount by in this case 2 pixels than the aperture that i'm going to be looking inside okay and this is where my this is where my click went in okay and it's useful you don't for this to work well the initial click does not have to be accurate that's why we're doing the centroid stuff because we when we're going to do the photometry we really want to know exactly where the star image is so the next thing we do let me back up a little bit okay whenever you see a structure like this for x equals first to last and you'll notice this for for x equals and then there's a next x this is a loop so the software is going to go around and around and around and it's going to do this routine inside for each one of those so what it's doing is it's scanning down the image and checking and it's doing a calculation is this pixel inside or outside if it's inside we're going to add its value to the total and we're going to add the number of pixels we're going to we're going to increment that by 1.
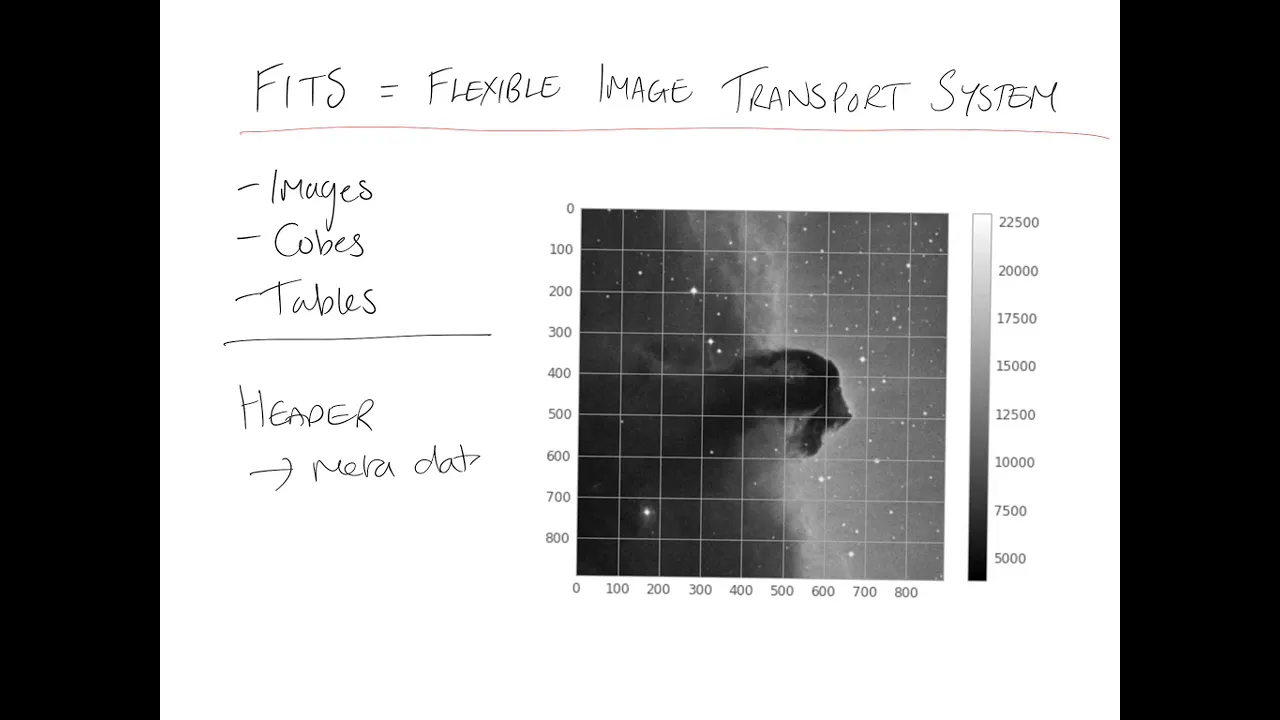
so what i'm doing is i'm computing the total the average value of this of the background the star sum divided by the number of pixels and then i'm going to compute a threshold value something that's a little bigger than the background it might be 20 percent brighter than the background or you know two percent brighter in the background this is something that the programmer determines by trial and error what gives good results so this is a secret number that's hidden inside the code so we're going to get a background and we're going to get threshold so that's what this routine does it did it produces these two values okay now programmers in the audience you're going to say like wait a minute you know you have this loop again and again and again that's very inefficient way to code this kind of work and the answer is this code was written to be very easy to explain to myself so i could be sure as i when i was writing this that it actually did what i wanted it to do and you say wait a minute you're writing it you should know what it does ah that's called bugs okay it's very easy to get clever and end up doing something like computing a background or a threshold that are not right every programmer knows that they don't like to admit it you make mistakes so this code which is very easy to explain to myself is also relatively easy to explain to non-programmers so i'm doing something that's redundant and slow and my excuse is there's like 250 pixels here it did that in in you know literally microseconds you know the human being's time scale is the tenth of a second so you don't see the fact that i've written very very innova in inefficient code okay so what i've done here just to clarify what what's going on if a pixel exceeds the threshold i've called it red okay so here's the star image remember him okay and you'll see that there's a bunch of other pixels that exceed that value and here's what here's what the centroid value was so i've scanned this whole region i've found these guys that are bigger the threshold and now you know where we're going we're going to take an average of these ones that exceed the threshold and say well that's where the real center of the star is but these guys that are out here hanging around they're going to throw my value off by quite a bit they're going to move it somewhere in this direction i don't want that to happen so i'm going to apply a test which is called the neighbor test which is how many other pixels in the star image does each pixel touch okay well these guys are above value so okay and here's here's what that looks like once again we're going to scan through the whole thing we're actually going to do that test again okay so we got a computer standpoint you know we've got a lot more numbers to crunch but again computers are so fast today and for each pixel we're gonna check and see how many neighbors it has so we're going to look at pixel x y and we're going to look at the pixel below it above it to the left to the right diagonally and we're going to see say if it has more than three neighbors count it in okay measure two things one is it's it's um it's distance and it's value its pixel value so this is where we do that and we're subtracting the background skylight off so if a pixel can pass the neighborhood neighbor test it's going to be in this cluster remember i said star image is a cluster of pixels okay and what we've done is we've said aha these guys are here these guys do not pass and i i added a couple samples here to show you each one of these guys has two neighbors um they don't count they're not part of the star image now in aperture photometry we find the centroid by balancing by moments that is you multiply the weight of the pixel its pixel value times its radial distance from the center and from that you can solve where is this balance point okay that's what we're going to be doing here so we're going to take the moment divide it by the sum and that will give me x centroid my y centroid and we're going to set the value of the function star centroid is true if it's not true we're going to jump out of the thing and say yeah we failed and if there was an error called we're going to exit the function too what the centroid is doing is it's telling us the coordinates of the light of the of the center of the light in the cluster of pixels that represented the star so here we go this is the center of the light okay um and it won't be a whole number pixel it'll be some kind of fraction a good centroid routine will find the center of the light even in a mess like this to better than a tenth of a pixel so we're going back to this this um routine and saying well where are we now because we're distrustful we're going to run the centroid routine a second time to make sure that we got it right the first time okay and we're going if if that works if that if the photonic if the centroid was okay then we're going to go and we're going to now try to do photometry so this is what a routine called soft aperture photometry does the reason i call it soft is we're using an algorithm that uses partial pixels to try to find out where the edge is if you think about that the star image is not smooth and continuous um as as we would like to think um okay see it's all broken into it's a cluster of pixels so there's going to be pixels at the edge which have starlight in them which can be either in or out okay there's a paper in monthly notices the royal astronomical society back in 1998 that i picked up and used for this and when we define this function these are the values that are going in we're going to put all these values back out again this is the way we wrote this particular code so here we are again okay here's our first and last and we're ready to scan this and i've for this demo for this talk i've i've used the um much better quality image rather than the the ratty looking one so once again we don't know where that centroid came from we don't know there's really a star there so the first thing we do is we define the region we're going to be looking we set the value of the of the uh function to true because we hope it's going to be true and we make sure that it's inside the image now in our test remember we have said well okay we're going to look at this pixel and we're going to say is it inside the sim limit or is it outside this limit or is it on the on the fence well it's com it's it's going to have to make a decision so when we look at pixels that are out here in the annulus we're going to have to make a choice we're going to end up with jaggy edges we're going to end up with pixelated edges and we don't want to do that here in the aperture we want to be able to say well if it's inside here we'll count the whole thing and if it's outside here we're going to not count it at all and if it's here we're going to count part of it so here's where that happens we we defined some radii the inside and aperture radius and then here's where that happens if it's entirely inside it gets a weight of one if it's entirely outside it gets a weight of zero if it's in between it gets an interpolated value and then we're going to add to star sum we're going to add the weight times that pixel value and we're going to add a an amount of a pixel plus its weight so you can have a pixel that counts fifty percent you can have a pixel that counts ten percent depending on its radial distance in the center okay and then this similar routine and what we're doing here we're not going to bother with with getting nice tidy edges because we typically have 200 to 500 star pixels in the outside we can afford to lose one or two in inside or outside so we're summing them up and we're going to put these not into a sum but we're going to put them into an array okay so we have an array called annulus um and its index is sky pixels we determine it from counting how many star pixels we're going to have and we're counting the number that go into that now here's the graphic that shows what we're talking about so here we have we have the soft aperture and we've i've i colored these in by hand which is really tedious but you can see we have basically it follows quite well and i hope you can see it that we have jaggies here right jaggy jaggy jaggy okay we don't have to worry we we could do that i mean you know but it really isn't going to give us a better result whereas here it's going to make a big difference now you say well that's big enough you know a few pixels inside and out it actually probably is not necessary with the radius of six which is the value used in these tests or five rather its it's valuable but if you have really small star images really tight star images um as we did actually when we're early in the days of testing avs or net we were using very sharp little refractors we're using a radii of two and three pixels and it really made a difference as to what was included now there's one more thing that's going to happen here we got background star images here this one you can see pretty well um if i crank up and this one is just beginning to impinge here how do we deal with these extra stars okay they can in this case they don't but sometimes they add a lot of value to the average sky brightness and what we're going to do is we're going to sort the array of pixels and then we're going to throw away the brightest 20 and the dimmest 20 okay now there's been over the years a lot of argument as to how you do this people take the the median they take the mean they take various statistical measures um this one we're simply throwing away 20 the brightest 20 in order to balance that we throw off the bottom 20 percent you know it's you can you can put a lot of effort into trying to improve this and you probably really the best answer is don't work with stars that have significant uh other stars near them okay if you can't avoid that we're taking something that is pretty effective at getting rid of that extra starlight and then as we did before as we uh exit this routine if there's if we didn't find any star pixels and if we didn't find any sky pixels then the soft aperture photometry is zero and get out of this function and return a value false it didn't work okay having done this though when this when we get a value of true for this function we now have all the information we need to compute the total light in the star that is the star plus the sky the average sky background minus impinging stars subtract the average background from the light and the aperture okay compute the instrumental magnitude of the starlight and assess the errors in these determinations got all these all these values that come out of here and so now we're going to call a couple okay if photometry is okay so we've gone through this routine we checked we we did a quick check on can we get a good centroid yes can we get another good centroid yes can we do photometry and get it okay and if that's okay okay now compute the magnitude okay and routines like this they really hate it when you pass zeros and stuff into them because they crash so here's the magnitude equation i'm not going to go into this a whole lot you i i hope if you're doing photometry you understand how magnitudes are computed okay here's the magnitude minus log base there should be minus 2.5 oh that's a bug in the in the presentation so it's minus 2.5 log base 10 the signal in photons plus an arbitrary constant z okay z is the fudge factor because um it allows us to go from um photons to magnitudes and z will typically end up being a value like 22 magnitudes so in other words you just run this this equation as it looks um you'll end up with a minus eight magnitude star which is not so you're going to add um um or yeah you're going to add 22 and so you're going to come out with a reasonable magnitude like oh it's a 13th magnitude star and in the in the single star photometry it's important to assess z carefully you do that by clicking on a star setting the value of z to give you the right result then when you click on other stars you get the right result so z is your scaling factor it's your fudge factor and okay carefully denote i will change this it's minus 2.5 log 10. that's just the definition of what a magnitude is okay so here's the soft aperture magnitude we're doing the calculation uh it's basically doing just see and we actually have 2.5 log 10 it's it's there and we divide we normalize this by the integration time [Music] and then we're also going to compute the noise this i won't get into the equations for doing this there in the handbook of astronomical image processing [Music] you'll find a professional reference in steve howell's book the handbook of ccds astronomy cambridge university press um everybody is using this it's called the the um ccd equation okay so we we calculate these values so on the single star photometry tool then okay here's here's where the settings here's your radii 5 8 and 15 which i've been using my integration time which is important the single star photometry tool is a relatively dumb tool so you have to manually set the integration time you also are setting the gain which is the number of electrons per adu remember 80us are the pixel values the readout noise because these are all making your the dark current and finally the zero point so these are key values you're going to set then the result what you get out of this thing is it gives you all the values that it computed okay so this is your complete readout of the analysis and then this is the the um oops another bug in the in the presentation um the front and the back of the uh of the this is my settings i should have had a result uh panel there we'll fix that up and we'll probably do something like um i'll at some point post um a pdf file of the of the talk with the bugs corrected there's always bugs anything you do okay um now we've talked about the star profile a number of times i'm this is the software or the the code that produces the arrays that we're going to plot in the star profile so we simply find the radial distance outward and we produce two arrays one is the radius array and the other is the value pixel value array and we're going to plot those like this and you've seen this a bunch of times already now there's one other thing that comes out a very useful tool [Music] and this is the curve of growth okay those of you who've been looking at this thing several times wait a minute he's hiding something from us now i'm going to tell you about that the curve of growth is the curve that says well i'm going to if i set the aperture to a different value say i set the aperture to 4 what magnitude would i have got well here's the magnitudes you would have gotten and here they are okay well if you have the aperture set for two and a half you can see you would have left out most of the light you would have left out four tenths of a magnitude too dim if you'd set it for a radius of three you would have had about two tenths of a magnitude faint set it for magnitude of three and a half it would have been um a tenth of a magnitude too bright and so forth so here's value of five okay and then you'll notice if you keep making the aperture bigger you're going to get more light okay until you and it just keeps on going up and it typically does but at some point remember every star has the same profile okay which means that every star you do this to the curve of growth should look the same for every star it'll be noisy they'll go up and down now one of the things you can't see in this graph because they're too small is that there's a little red error bar now the error bars are small at the smaller values but as this gets bigger you're now picking up more sky pixels but you're not picking up much starlight you can see the scar is not getting brighter but the error bars start to grow and what you do is you make a judgment call really that 5 is the value just before it's going asymptotic okay you know this will keep going up forever potentially so you're going to pick this value now there's in some of the other photometry tools in aip for wind we also have a signal and waste ratio plot and i don't have that the simple in this in the single star photometry tool but what you typically see is the signal noise ratio rises and then falls so if you doing more sophisticated photometry you might tune for the highest signal noise ratio now what's scary about that is the highest signal ratio typically appears uh at 70 or 80 percent of the value where you it tends to go asymptotic um most people including me i go for a slightly lower signal noise ratio in order to be assured that i'm going to always get all of the starlight so that's basically what i have to say this is the uh abstract written for it and um [Music] uh we've reached the end of the formal presentation i hope i haven't run too far over time and i think we're open for questions now so there's lauren okay thank you so much mr berry that was a fantastic talk i really am kind of in awe at the amount of uh hard to find out information that was just shared um before we move on to the questions and we have quite a few here i want to go ahead and um make a a small announcement because i did receive a question from or a comment from someone in the audience who's uh brand new to photometry and said this is all very intimidating so i want to make a point that what you just showed is a behind the scenes of software aimed at programmers but it's not how you actually do the photometry when you just have an image and you're like i'm going to go find out what magnitude this star is that procedure is a lot simpler so don't worry if you're a beginner in the audience i'd recommend that you go back and look at our uh past webinars like we had one by bob buckheim on uh getting started with ccd photometry that showed how you would um walk around in a software like mr berry's and um very simply perform the operation of getting your magnitudes for that person let me go back to the very very beginning which is when i introduced it it takes a while to get back there click click click click click click okay remember i said okay you pick the tool you have the the tool comes up and then here's the tool up i've got the the uh radio showing and you take your mouse you over and you click on the star and a number pops up that's the outside view of what you do when you do photometry okay right it's it's like it's i mean it's really fun okay when i was doing this thing with m67 um i could go click click click click click i get a magnitude for each star that's that's the video game part of astronomy and you don't have to know how this stuff works however part of what i hoped you learned was that if you go and you click on this star you're in trouble because it's sitting right next to that star um so it really does it's really not normally that complicated [Music] right this is the easy part this is the fun part all right thank you um so now moving on to some of the questions let's see let's let's take some of the non-programming ones first so this one comes from joe fragola who asks if using an ev scope how do you access the dark frame data in order to do your calibration and also i don't think that ev scopes can capture flats just dark frames do you know anything about that they cannot capture flats and it's very frustrating to me um however the optics are very very simple you have a paraboloid focusing on a um on the sensor and there's really nothing else in there there's no diaphragms or anything that might cause vignetting so yeah flats are an issue um okay to with the ev scope what you do is you write to um unistellar support okay first of all you'll notice that you can upload your images okay so first thing you do is you go upload your images and it's an automatic function ev scope software then you write to the support people and say i just uploaded a bunch of images from ev scope blah blah blah blah which has a it's it's serial number and um please send me a link to my images two days later you get back a a link which is like 200 characters long it's got some and you download five gigabytes of data which will consist of typically two or three thousand fits images and it's very nicely organized you have the individual images and for each time you did a live stack they stack all those images together for you so that's what i was using when i showed the 900 second exposures um that was okay this is this is one of their their uh 900 well what was it um 250 some images averaged together to get that i am told that they expect to make it so that you can automatically log on give a password and download your data which will be much nicer than having to write to support but i have to give support um great credit at this point they know me they go like okay here's here's your link the biggest problem is you always you take your good data thursday night by the time the link gets to the mids friday evening and they take the weekend off so they don't get to send your link until monday that's why i say it takes two days to get your data back typically but i would like to see i i think they will automate that at some point you'll be able to get your data back that would be great okay the next question here comes from guy stringfellow who says hello and thank you very much for the presentation can you please explain exactly what encompasses stacking images compared to um for example median combining a set of images uh and this i think what um well stacking is simply adding them together or taking an average um and either way works you can add them or you can take an average uh if you are working with integer software you add them if you're working with software that uses floating point data you would average them so that you would have partial pixels or you know you wouldn't have you wouldn't have integer values you'd have floating point values um afp for windows averages although there's actually an option to add them you can use the the the other routines that he mentioned um compare the pixel in each successive image um with the images all say you have 100 images okay for any given pixel you've got 100 different values in theory they should be the same okay but a satellite an airplane went through so two of those values are just wildly big okay if you use a median you simply exclude those extreme values if you use k sigma what you do is you compute the median value and then you throw away the ends which are contaminated by passing airplanes and satellites and and starlinks right okay thank you and um next question here while we're on the topic of stacking jeff myers asked if there's any reason to measure ten one minute frames separately versus averaging them together and then analyzing the final stack um my preference is actually to have to to measure the 10 of them and and average and not only average but also compute the standard deviation of the result um because the stan okay when you just stack the images together and get a magnitude you don't know how good that magnitude is but if you measure the individual ones and you compute the standard deviation then you can say ah the magnitude i get is for you know 11.25 plus or minus point zero zero three well that would be awfully good uh point zero three realistically about three percent error and and you know with ordinary photometry you're typically looking at a two percent error or actually not error uncertainty in the magnitude you know and i believe avso basically would like you not to stack the images but when you get down to really really faint stars you're starting to deal with can you get a good centroid and stuff like that so stack them will give you a better centroid um but it makes it harder to assess whether or not you know the cytometry is good you simply have a magnitude with no real sense of how good that value is and as an exercise for yourself do it both ways um and then compare compare okay the the average the average magnitude by averaging the 10 and the magnitude of the stack should be the same and of course they won't be they'll be slightly different that does sound like a good experiment always be willing to do experiments people for instance will ask things like well you know the images of my my telescope are a little bit soft on one side a tiny bit of coma because it's a newtonian um how does that affect my photometry and my answer is don't don't go on the cloudy nights and ask someone for for an expert opinion pick something like m67 and take a picture with a group of star you selected in the upper left in the middle in the upper right you know boom boom boom boom boom boom boom boom boom and then do the photometry on them and find out if there's no problems with the netting and stuff you should get the same result wherever the star is in the field and if it doesn't now you know that you've got to pay more attention to your flat feeling or something like that to to get that problem out and again the assumption here and the assumption we try to make is that the profile of the star will be the same everywhere in the image um reality differs slightly um for good photometry you really don't want to have your your program star in the center of the field and your your comp stars often the extreme edges right okay um the next question here comes from michael gardner who asks can i do useful photometry in an urban environment oh yeah um uh stars in in you know bright city lights and stuff like that fx stars very very little compared to how they affect um uh nebulae and galaxies and stuff like that um [Music] so uh you know i mean i live near a small town i have about a portal five sky and [Music] you know i'm reaching 16th magnitude with a small scope so you can easily do decent photometry 12th 13th 14th 15th magnitude well maybe not 15th but you know 12th 13th 14th magnitude in a bright sky with no trouble and if you have a big scope um you know again the magnitude scale just goes lower and you've seen from the images that i showed um you know the we're gonna we're gonna subtract off the sky background that's part of what we do okay we make it go away the sky background adds noise okay because of the that random uh fluctuation in the in the signal but if you can see something you can get photometry off of it great thank you okay um next question here from george smythe or smith who asks um are professional cameras significantly better of course they are um i'm not sure quite what you mean by professional um if you're talking about astronomical ccd cameras um if if possible you're looking for well okay it's going to be a choice of the the chip quality whether or not the chip has more hot pixels or less hot pixels in a professional camera they would probably be using the class a8 chips or something like that the chips that have no defective columns fewer hot pixels and so forth the quality of the amplifier and how whether they break the signal into 12 or 14 or 16 bits but if if well if you buy a if you buy a camera today your camera is so much better than the camera you would have bought 20 years ago that um you know you you're going to be able to do good photometry with no problem because even a cheap um cmos camera if you use it well if you stay within the limits of what it does well uh you're going to get good results yeah that's so true i mean the key things are don't saturate um the ev scope for instance really can't do good photometry brighter than 11th magnitude because the stars are saturated um and below 15th magnitude it starts to run into um you know the results are just too noisy if you push it with a 15 minute exposure you can do 16th magnitude stars but in the four second exposure you probably limited to about 14th okay thank you um so just one or two more questions on the topic of general photometry and then we're gonna get to the ones about programming but uh real quick here's one from wayne clark who asks can you do accurate photometry with elongated star images um you can actually uh and that is because the the profile of every star in an image is is is the same or at least you know very close to the same this will go back years and years and years um when we were writing our first code in in um uh in basic i think um i got in touch with phil sullivan and he sent me a bunch of images that would have been the old days when you would have mailed a floppy disk in a mailer to another person uh a photometry of of some star and his mount wasn't tracking well and the stars were severely comatic and they were trail okay so here's here's phil's images and the star goes like boop boop boop boop and then he resets the mountain it goes so it's trailing along like crazy and it was i think it was an eclipsing star okay so you're going to get a light crystal something i ran the photometry on it tried a bunch of stuff and i was amazed these horrible star images the centroid routine is really good at finding the center of light of the star image okay remember it's a comparison okay you're going to be a comp star and you're variable okay and they're going to be affected equally by the trailing and so what came out was a very nice eclipse um and i went like wow i wouldn't have thought it would work so well um and uh the that uh plot actually shows up in a handbook of astronomical image processing now i would um not recommend you use trailed images but if that's what you got and you can't improve it uh remember the other thing um people do people do is they say well i tried to get my focus absolutely perfect well if you think about getting your focus absolutely perfect that means you're putting as much light into the smallest thing you can and you're likely to be getting saturated pixels in the centers of brighter stars so [Music] tom a lot of photometry with small telescopes is done with the telescope slightly out of focus because then the star image like this one on the screen covers more pixels and you don't have a saturated core you have a kind of a flat top thing and with dslrs it's commonly recommended to be slightly out of focus um there because the pixel grid instead of being pixels of equal sensitivity is red green blue matrix and so you want to make sure that you have the red green and blue matrices equally sampled okay uh thank you and you actually just touched on one of our next questions which was about how um aip for win handles defocus stars is it just the same way as in focus same way yeah the the the um centroid routine uh actually um works very very nicely on planet images too um there's a aap has a planet stacking algorithm and it just uses a gigantic aperture 300 pixels in diameter and it centers an image of mars or something like that to the nearest tenth of a pixel i mean what's amazing is you will you can centroid it and then center it again center it you keep getting the same result and in the series of like 200 images of boom boom boom it will they'll you you then make a movie out of it and mars does not go like this mars sits there and jiggles a tiny bit that's great okay thank you and while we're on the topic of pixels and how they're handled um sid sidhu asked how does the pixel size affect the end result um you want enough you want enough pixels in your star image um [Music] that you're not getting down to using a really really tiny aperture um because because then you you start to get into that the business of of um square edges and is is any particular pixel included or not um i'm not sure exactly what is behind the question um uh if he's thinking okay well let's put it this way in the old days all all cameras had nine micron pixels accepting professional cameras which had 25 micron pixels or 15 micron pixels or 12 micron pixels or 9 micron pixels typically nowadays we're dealing with 3.75 micron pixels and we're rapidly moving into an era of two and a half micron pixels the key is are you sampling the star images adequately these images are very well sampled we've got lots and lots of pixels there's like 100 100 and some pixels in this little box and again if you're if the brightest pixel value in the image is greater than typically like 70 or 80 percent of the peak value you're running a a risk of saturating that pixel when the pixel saturates you lose light from the total image um and that's what happens with with the uh um with the uh ev scope on bright stars it's it keeps on recording them because you're looking at this you're looking at the light from the outer edges but this few pixels in the center will be greater than 65 000 and you'll be losing light out of those and when you actually plot that i actually did a plot let me let's see if we can get all the way back to the back end here um [Music] doesn't go real fast does it had a couple of extra things here okay this here here is a plot for m67 which i did using the single pixel tool okay and this is the v magnitude the official standard v magnitude and this is the raw instrumental magnitude from the ev scope and you can see like oh these follow up so beautifully and then the curve necks over and because you're losing light now from the ev scope and so it's producing values that are a little low now you say wait a minute what are all these guys these this is m67 is so crowded that it's you often will get light from an adjacent star as you get fainter um jumping into it and see the raw instrumental magnitude will be too bright you'll notice it never happens the other way it's always this way so um i mean with apologies to visual observers i tried visual observing and i never could convince myself that when i looked at a star that i could say that is 12.3 i'd look at it and say that's 12-ish okay i look at this and say without even you know very very you can't you can't do worse than a tenth of a magnitude um with photometry um although people do manage to but if you're careful you can you should be able to somebody with a good system should be doing um 10 millimeter or better on stars that are not crowded together typically and um i know two or three would be two or three million two two or three hundredths of a magnitude 20 or 30 millimeters um would be pretty typical that's great okay um we have one more question before we get to the programming questions and this one comes from paul norris who asks uh will the results of your photometry be different depending on whether you use fits format images or jpeg images um yes because jpeg is a a lossy compression routine um and um it jpeg images are carefully designed to look good to the human eye okay but they they throw away data because it's obvious they throw away data because your image is the tenth as big as a as a tiff image of the same size [Music] if you can't avoid using jpeg then um you know fine but but um it's best not to um on on the other hand um i i'm i i like to play an experiment and i mean one of the things i'd like to do here would be to take my color image that came out of ev scope and do the same kind of photometry on that now that data has been very non-linearly scaled okay because it's been designed to well it's been processed to look pretty to the human eye so it would probably be a horrible curve that do something like this be scattered all over the place fits images by design give you back what the sensor saw jpeg images give you back what is small and easy to email yeah okay uh thank you now going back over here to some of the questions about aip for win and programming okay um first of all we have had a couple questions about what programming language are you using the the program was written in in visual basic six which was the last version of visual basic that was not fully oop okay object-oriented it was kind of a mix of somewhat uh somewhat object oriented somewhat procedural it was designed by my microsoft to be very easy to program prototype software it dates back to about 1995 1996.
um [Music] its problem nowadays is that it's 32-bit code which means that the program can access about two gigabytes of data now by the time its runtime libraries and stuff are loaded [Music] vb6 can access only about 1.3 gigabytes of memory and we use 32-bit floating point data throughout okay so when you have a color image um we have 96 um 96 bytes per pixel is that right yeah no uh yeah um and you have a 10 megapixel image you can suddenly see you're using um a good fraction of the memory that's available to you so um eip for wind can work very nicely with six megapixel dslr images um somewhere around eight or or 8 to 10 megapixels you start to have to be very careful how you use your you know anytime you if you have three images up on the screen you're fine add the fourth image and you run out of memory so um the the on the other hand i just the other day i loaded a um a monochrome image okay which has takes this much from a qh qhy 600 camera which is a 61 megapixels um so it only takes 180 megs in memory that's easy because we got 1.3 gigs so i can do almost anything i want with these huge or 61 megapixel images from the qhy but um you know a much much smaller uh color image from a dslr will will leave me with too little memory to work with i see okay um on that topic wayne clark had a question um he said when william wilman bell was in business there was a list of dslr cameras that would work with aip for win um is that list still available because his dslr wasn't on the list you'd like to see the list um no when wildendale went down they went down really quickly because of of health issues that um uh perry and pat uh rematchless who were the owners had and um i don't know exactly what happened but um [Music] i was not able to get access to some of that stuff and um uh in september 2020 um we lost our house um in the bt creek wildfire in oregon which is why [Music] which is why the version of aip for win is 2.4.10 because i lost the code to 2.4.8 which was a very very stable beta that had been running forever that computer was burned up i had a another computer a newer one that had all the subsequent development work that i done and so the lowest value i had a good backup for was 2.4.10.
so i stripped out the registration code and that's what we put up on the on the um groups io website um [Music] thank you for doing that it's it's one of those things you know we came you know that far from from losing the source code entirely um wow now um to develop i i when we when i realized that the software would have no support unless we did something about it um i called up my buddy jim burnell who was the co-author of the book and and worked with me for years on the software and he had an old um windows 7 machine that he was using to make the um distribution packages so he shipped that to me by fedex i set it up and that's how we built the the distribution for the new code and 2.4.10 had in it a bunch of diagnostic code for me as a programmer so everybody who runs this thing they run into these things where it get you get these development messages um and i did not have time to find them all so there's some residual bugs in the software that's available to people um and what um the groups i o people do which is i totally appreciate the community there um they will answer a lot of questions that come in from new users um and i'm you know dealing right now with a question that's up on the on the site of um the guy who has installed it and it's running just fine on his computer but he has a couple of students and it won't run properly on their computer i wrote them and i said i think what's going on is they have school computers and the the there's software on the school computers that says if something doesn't say microsoft you can't you can't run it or something like that so we're every time you have to diagnose a problem in a an individual's computer you're dealing with a computer that's like no computer i own because and by the way i've just installed aip for windows on windows 11 and it runs just fine and allegedly windows 11 fixes a lot of problems that windows 10 had okay hopefully probably my computer's going to update without my will one night and i'll find out then no you can tell it not to [Music] so um [Music] oh where did the next question go i've got quite a cue here um okay oh yes so on on the topic um of development of aip for win we had a couple of related questions one was will the existing aip for win bugs be corrected in sometime in the near future and the other was more generally what is the what is the future of aip for wind look like right now um what i want the future of aip for wind b is to move into a different programming platform um and um that supports 64-bit code okay then we the the limitations will go away um i see absolutely no sense in playing around with code that makes pretty pictures anymore there's already lots of other expensive wear out there for handling dslr pictures and it's getting you know i mean even photoshop um and some of the other uh software out there is doing a great job with pretty pictures so i intend to focus on science applications and [Music] we are looking at you know greatly improving [Music] its handling of astrometry in the visual basic six routine my last working version was 2.4.50 okay so i had done a a long a long time past where we had gotten to with with 10 okay but 10 10 is completely compatible with eight um so if you have a working version of 2.4.8 and you simply take the executable um 2.4.8 you can have the two executables consist side by side in the same directory and windows doesn't know which one of them is running so you can you can you can fake out windows the major difference between the two things was that eight requires registration ten does not um and that um well i keep saying no registered new card but you pay a price um the number of complaints of stuff that doesn't work have actually been amazingly small mostly you have to mostly have to put up with windows that every time you save an image it says it just goes through a bunch of checks that i put in to make sure i was saving properly for example right okay um next question here um about when you were showing the procedure where it was calculating the magnitude and just displaying it um you were showing how simple it can be in video game like uh we had a question come in then that said uh wow so the target star magnitude is computed without needing to select a comparison star ah okay um yes and no okay there are six i think it's six photometry tools and aip for wind what i was showing you was the single star photometry tool okay um when we wrote the software and we wrote the book the we were thinking of educators a lot okay and a single star photography tool is nice because you can go into an image like the one of m67 and you can click on different stars and you get magnitudes but then you have to realize you have to set that zero point so you go to something like m67 and you have the list of magnitudes of all the stars and you click on a star with a known magnitude and then you go into the settings tab which would be here and you set the value of z to be a value that gives you back the catalog value now you go click on other stars and bingo they give you back the catalog values with small uncertainties okay now this was to show you in terms of an educational thing it showed you that raw instrumental magnitude is a magnitude that is unanchored because z is something that you choose okay the next is the single image photometry tool okay and here it expects you to click on three stars it expects you to go over and you click on the variable and this will then turn up it will say yes click on your comp star and it will click on the composite and put a c next to it then click on your check star and we'll put a k next to it and then you enter the standard well okay then you enter the comp star's magnitude okay so it's a you know 11.25 magnitude you put this number in when you click um uh rather yeah as soon as you finish that it will give you back okay the star minus magnitude star minus sky and instrumental magnitude so there's your magnitude and then it will measure the give you the measured magnitude and now it's making a comparison between the comp and the variable and it will also tell you what the computed magnitude for your checkstar is so you should get when you click on that um those three stars you'll get back the magnitude of the the unknown magnitude and you also get back the magnitude of the check okay and then visually you go like okay the check start matches the book value i'm okay and this is again thought of as a teaching tool okay so you can have students and they can go through and they can begin to understand that all magnitude calculations are differential between a known comp and an unknown and then you've got to check because who knows that the standard that your comp star might be a variable itself okay so it's it's it's intended for teaching great the multi-image photometry tool does almost exactly the same thing as the single image photometry tool it expects you to pick three stars um but you can put in a list of like 500 stars and you select on the first one and you click click click use the stars i want and then you click do it and it loads each one of those 500 images and runs the photometer out of bang bang bang bang bang and it's really cool because it'd be going like two or three images a second that's great if you think about doing that manually basically yeah by the time it was done right um and when it and and it's now i consider it out of date however it works really well and we have observers who've been using it for years and to keep their results consistent they keep using it so that there's no changes in their techniques okay so that's internal consistency of your work okay and it does things it does nice things like it computes the julian date and stuff like that so it's producing a much more valuable output the next tool is the one that i want people to use because it is the most sophisticated and this is this is designed for production photometry so i can fill in for instance my observer value my latitude my longitude all the values that i need to produce a complete report and avso report is one of the formats center for backyard astrophysics is another format and there's there's also a dump every bit of data you ever get uh format but so my observer i set my observer and it loads my observer thing i can recall that um i can save that and i can also recall my observer format for my old house where the byyy was the same but it was in a different location okay or if somebody sends me some files to look at i can load in that observer's stuff then there's the instrument thing which lets me put in the telescope data then i can make a list of the images then i pick my aperture then i can pick up all the stuff for a star like you know i can have dozens and dozens of little star files and they will fill in all the data i need for the check and multiple comps and then i can do different and then finally we have the execute thing which also has a a star that um you're now dealing with things like asteroids that are moving through the field of view but you have to keep the star you know it's designed for heavy-duty production stuff and then finally there's a magnitude extraction tool which is designed to find every photometric star in the image and i've done some uh stuff with with globular clusters where i've gotten 8 000 stars out of the red green and blue images then you can plot an hr diagram whoa that sounds really cool so i mean you know as as years went by we developed these different tools to do different jobs and the magnitude extraction tool um you know after after spending like three days manually doing m67 okay with the single star uh i went into the magnetic extraction tool and um like in three seconds it did all the stars wow that's wonderful okay i'm definitely going to be looking into that um next question here comes from arie sequeria who asked if there is an updated tutorial available for aip for windows um arie says that they have the book the original cds and version 2.4.10 running okay but appendix c tutorial does not always seem to match up with the actual software um no it doesn't as a as a programmer and a book author and stuff i have to say that programming is very fast compared to documenting okay and keeping a book which gets printed every two or three years and keeping software which you can go through in the earlier days of aip for windows i tried to release a new update every two or three months um because we kept getting we we kept getting user requests we kept getting bug fixes and so we just kept the software moving forward [Music] after after my partner in crime jim vernell got a promotion at work and suddenly got more pay and more work and less time in his life um i didn't have enough time to keep up all of the stuff that should have been done then of course after after your house burns down you don't have you're doing things like we're buying chairs and beds and realizing you don't own any books anymore at all oh man so yeah you don't want to do this in your life if you if you want to simplify your life burning down your house does not do it um but as you can see i now have a a nice office and over there in the corner is my eevee scope which for quite some time was the only telescope i had because all my other ones burned up oh no gosh i can't even imagine um you get to do some interesting things with with um the insurance company because you have to list everything that burned up oh wow yeah yeah what do you do uh the the inter i i had some interesting negotiations with the the people because the insurance people because i said well you know i have about i had about four huge library style bookcases covered with books and they were most most of them are big academic books and you know this is the kind of book that cost between 60 and 120 dollar book 120 and we agreed to make it simple to compute that um we would we would put a value of like 500 on each shelf foot of books now we just calculated shelf feet so i didn't have to give all the titles but yeah it's crazy yeah for sure wow okay um so our our next question actually we have um two questions here which are related to something you were talking about earlier the uh zero point um first we had a question asking if you could say y is the zero point in the magnitude equation uh important and the other question asked if you don't set the zero point then does aip for wind just use a fixed zero point for each frame it uses a default value of 25 i think um and 25 for back when we wrote the software 25 gave you something that was within typically within a magnitude or so of of of the right answer um it's very important to understand that magnitudes magnitudes are always comparisons between a standard in the sky and your unknown okay and all we do all zero all the value all that z is doing is taking that value and cranking it down to something which is realistic um now as they've developed the science um [Music] there's a number of different ways of doing magnitudes and if if you want to if you want to get really confused uh you can go out you can google how are magnitudes determined and then look for the more the university level lecture series uh you'll find powerpoints out there describing vegamags and a b mags and different magnitude systems and they're all based on a standard or group of standards in the avso universe we use [Music] magnitudes in the landau system where arlo lando who passed away recently determined not sure how many there are there's something like 60 standard fields located around the the celestial equator each one of these things has a bunch of stars those stars were very carefully and meticulously standardized against the master list of 10 stars that were used to standardize the johnson um the johnson cousins ubv system okay it was originally the johnson system john maria then it was expanded to johnson cousins and they added the r and the i filters so the landlord fields are your primary well they're actually secondary standards but people use them as as the primary standards so if you want to calibrate your system you go and you do photometry on landau fields and you get to [Music] and then we have things like m67 uh let me oops yeah here's here's okay and this is this is a standard chart m67 i hope it's big enough for people c but a lot of stars and there's a visual magnitude or a star number for each one of those then there's a list of there's about 250 stars there and you can get ubvri magnitudes for every one of those stars those have been meticulously done and that's how i i plotted this when i wanted to check so um m67 is is now you know near the meridian at midnight now so you know shoot a picture of m67 or a bunch of pictures 767 get the standard chart and you know start doing start figuring out how photometry works with standards now the the what the chart team does at avso is that they go to the field of your of your um star you want a photometer and they've create they've standardized comp stars okay so your field will have comp stars in it that have been carefully standardized against landlord standards and standards like this okay so your comp stars um are basically an extension of the standard magnitude system but you know there's a lot of work that goes into into this um from the chart teams and stuff like that and then arnie henden's apas thing where he automated the entire sky it was an avso project typically to about 20 millimags accuracy and apas i think the whole database is available online i'm not i'm not sure but basically you can get yeah i think what you can do is you on the avso website i can't give you a link but you can ask for all the a pass stars within a given distance of any spot on the sky and with a few tiny holes um it will give you back the magnitudes that their system has determined that's a great resource good to know thank you avso website has many many secrets hidden away not the world's best interface and if you can find them there is really good stuff there you do have to search the biggest problem i think with the website is you have to know what you're looking for before you can search for it yeah okay if you know what you're looking for you can find it if you don't know what you're looking for you can't figure out what the keyword is yeah yeah we've been discussing better ways to structure it but it's because there's so much good stuff on the website it's going to have to be a big effort you know it's a it's a huge it's a huge job and there it is a very very rich resource yeah okay um next question here this one comes from actually multiple attendees have asked about this one the basic question is um since there's been a change up in the availability of photometric filters and the new ones have slightly different uh spectral responses do you know um if the avso has published any information about how suitable these filters are and can can we use these new filters for photometry um the answer is complicated um i've been involved with some of the discussion groups about this stuff and basically kovit slowed down and complicated everything with with getting filters the classic bessel filters which are made by dyed glass are complicated and labor-intensive and i suspect but i don't know it for a fact that it became hard to get those types of glass from corning and shot this is especially specialty stuff and i've made filters using this you have to the raw blanks that come from the companies that make them are not flat okay so first you have to put them in a polishing machine and polish the surfaces flat um then they have to be um right if you want a circular filter or a square filter it has to be cut sized the edges then they have to put it in coding machine probably and and get it clean um then because they're round you have to cut them out with with abrasive and then you have to assemble them into a little filter and glue them together and stuff they however um interference filters um which you i mean in a simple way they put the they put the the substrate glass into a machine a series of coatings are put onto it according to a formula and then the interference filter has the right spectral shape again that stuff was probably delayed a because everybody wants to buy narrow band filters okay for for pretty picture photometry and only a fairly small number of people are looking for filters for doing photometry so you know if you're manufactured and you have a choice between making something that a lot of people want making something a few people want you make the stuff that people okay but they are um companies have become very very serious now about picking up now that the covet era is looking like it's ramping down um and i know that at least one company and probably many companies um are working on getting their formulas made so that the pass band shape of the interference filters matches the classic glass dyed glass filter profiles um and the the reason is not that you don't get good photometry okay with the the the argument is that the the it's let's put it this way it's the the people that make these filters are very good at making what are called band pass filters that is they transmit nothing then the filter comes on they transmit it's close to 100 then they're flat topped and they come back down again so you have a transmission band which is sharply defined and for almost every technical purpose this is what people who buy filters want accepting astronomers and astronomers want in order to maximize the value of you know 75 years of photometry done with dyed glass filters which have these sloppy band passes they can make them but you have to it's only now that they're beginning to realize that it's critical that the photometry we do now matches the photometry that's been done for the last 75 years so we're in a transition period um i expect expecting okay the other thing is that photometry done with the square filters can be transformed into the standard system but it's an extra step okay now ideally okay because the band passes is right it's centered on the right thing and it's it's but it's it's shape is different and for a nice ordinary sun type star you're going to get the same result basically with the um with the the dye glass v filter and the square band pass v filter if the star is really really red okay and remember b minus v for red stars that became multiple magnitudes then this sloppy band pass is going to pick up extra red light at this end and your star is going to come out too bright okay but if you know the color of the star you can then transform by applying a small correction that takes that extra bit out and that's what transformation does it takes the raw results you get with your instrumental filters and force fits it back to being the standard things and again what you do then is you take your filters and you do photometry on an object like m67 and then you run this through the right math and it says oh this star comes out your you be your bvr magnitudes can be crunched over by applying this math to them to produce a standard bvr filter there should probably be a webinar on on doing transformation if there hasn't been already i have some great news um yes we've actually just scheduled a webinar all about uh doing transformations that one will be uh the june how to hour and tom calderwood will be the presenter for that one oh very good i i know tom he's another oregonian um and um the standardization is is the key right now something like 10 percent of the people doing submitting photometry are not doing transforms because you know you have to spend a couple nights figuring out the transform coefficients you know you think wait a minute i only get so many clear nights i just want to shoot my my stars and send in my results untransformed so tom i think we'll probably make an excellent plea to learn how to do transformations and do them because then your your filter types become much less critical because whatever fills you you're starting with you should be able to produce standardized results so it'll be less but i i think the message is good good new matching filters are in the pipeline and i think arnie handen has filters network right now which he is testing to verify that they work correctly great okay so um we still have probably about a dozen open questions but we are now at the uh two hour mark i want to give you an option on whether you want to try and answer a couple of the last questions or if you want to go ahead and start uh winding things down um real quick what what kind of questions are they um we have um another question about filters one about the 245 cookbook camera one about the difference between ccd cameras or cmos cameras one about the ev scope one about astro image j so it's kind of all over the map here um they're like i'm going to stop sharing because it doesn't sound like any of those needs sharing why don't we [Music] try to get pretty quick answers for them all right then yeah we'll we'll just sort of whip through them and see if we can't um okay so um one quick comment here was uh submitted by mark botteroff who um he had a a reference for a paper on transformations from johnson magnitude to sloan magnitudes in case you have those sloan filters i'm gonna copy his comment over to the chat and um all right next question let's go to um how about george smith's question on uh how accurate in terms of percentage of intensity can you measure a star's brightness with amateur quality cameras he gave an example of a 10th magnitude star with an 8-inch f10 scope and one minute exposure um you should be able to get um about five million eggs under good conditions um it you know any scope is a it's a quite decent sized scope um a 10th magnitude star is in you know today's universe a really bright star um and uh yeah you should be able to do you know um at at that level let's put it this way you may you when you look it up on the photometry table you'll probably find that the comp stars are give a magnitude of like 10. you know five zero zero plus or minus 20 millimags okay you may be able to get a differential magnitude that's good to 5 millimags but your result is going to be constrained by the fact that your comp stars are not known well now the avso reporting format when you report the the that nine character uh star number if we get more accurate values for that your your data submission can be recomputed to be as accurate as the new comp star magnitude is known okay thank you they were thinking ahead when they did that yeah all right uh next question here does aip for win take the average or the median of the background pixels when it's sampling using the outer annulus and if it does take the average does it perform any outlier tests on the pixels from that outer annulus it does not perform a test what it does it takes the average but then it discards it basically it takes what i call the mean of the median half in other words we take the middle 60 percent of the stars and we average them so you might have missed it in the in the what the software does is sorts them from bright to dim then throws away the brightest throws away the dimmest and averages the middle one so it's basically does the same thing as a k sigma or a median um but it's actually more violent because it throws away uh the top 20 percent so if you have a star impinging on your star that fills more than 20 of that radius you'll begin to get parasitic light but it it um it's it's actually very efficient [Music] in getting rid of parasitic light from nearby stars great good to know um next question is about is there a quantitative criteria for deciding how big your photometry uh annualized should be the radius for the star and the sky background um if you you if you use the profile tool and you you can set it you want to set it so that the star is almost going level but not quite because your highest signal noise ratio will occur when you're cutting off about 20 of the star's light um [Music] if you go strictly by the highest signal noise ratio it will make you nervous because you're cutting off more you're cutting off a bunch of light and you're going like can i really get away with this the answer is yes you can but it makes me nervous right okay thank you um next question if your cameras gain uh is 16 electrons per adu but your camera is a 12 bit your software saving the image is 16 bit do do you need to um divide the gain at 12 bits by 16 so that's the conversion from 12 bit to 16 bit and then just set the input parameter gain at one electron per adu i think that's true yes okay okay handling questions like this verbally i know um it's in the case but i think i think he's right okay okay uh thank you is there some sort of um set procedure i assume the numbers 16 and 12 aren't too special there what's the what's the goal of that conversion there oh well um the the gain is simply the the number of electrons in each adu when the camera is actually taking 12-bit data but then you just multiply everything by 16 to make it into 16 bit data you've you've diluted that by a factor of 16 and then the number of electrons per adu would drop uh-oh uh can you still hear me mr barry you froze up oh i'm sorry um oh now we now you're back great okay oh it says my internet connection is unstable okay well all the more reason for a blitz round i guess okay so so um just be all right if you as long as you got it i think he's what he said is correct i think it's one electron per adu okay and i understand more now because of what you said about why you're doing that division um because you're trying to get back to the 188 mark okay so um next question here uh oh this one's a little bit ironic and i'll say why in just a moment um ron d'ulio has asked if you can comment on astro image j and its photometric applications for photometry of exoplanets specifically and um before you answer that one i'm going to say the reason i said it was ironic is because it appears directly above a question from dennis conte who is our resident expert on using astra mache for exoplanet photometry and he did have a webinar on that last year so ron i would recommend that you go look at that and then mr berry um if you want to add anything well i i i know both ron and and and dennis um so i could let them duke it out uh for for for for doing um exoplanet stuff astro image j is a great source uh great um uh you know it's it's probably the way to go because it so many people are using it as a standard um in terms of putting together this talk um you know i don't have an inside line on how astro image j does its computations i think it's i think it's i think the code is publicly available um but i wanted to talk about something where i knew exactly how the thing works right but as i said at the beginning you know there's only so many ways to do this i mean you're going to have to slice and dice the image certain ways you're going to have to do certain things no matter what you're going to try to try to capture what's in the central area you're going to try to accurately handle the sky and you know you can debate from now until you know doomsday as to what is the exact best way one of the things that aip for wind has in it is the ability to make synthetic star images okay it's it's one of those relatively i think it's in the edit menu but you can make a synthetic star that you know has exactly 10 000 adus in it and then you can run your photometry on it and this is how i validated the routines that i have i paid i built artificial stars and then tested against the artificial stars now you say well wait a minute maybe you made errors in writing that code um that's true um but you know how do you validate stuff um you you test and then you test it against what you think is working right and to go back again this this particular code the way that i showed you is not efficiently written code it was written to be very clear very testable okay you can look at that code and you can in your mind say how does that work is he is it doing exactly what i think it does when as a programmer when you're you like to be clever okay you like to do things very efficiently all that thing where we go through and we sort through the the individual pixels we do the same thing over and over and over again you don't have to do it all over again we could have stripped these these things out we could have put them into other arrays we could have cut the amount of computation but when you figure that your computer is capable of doing like a million operations a second um of this sort you still you still can't see usually between the time you hit the click and the time it appears on the screen you can't see those processes happen yeah all right thank you um let's go to the question from dennis conte which was um since the eb scope uses an alt-azimuth mount um and there's therefore image rotation uh are there significant systematics introduced from this image rotation when you're doing long stacks with evscope um i have not done a careful test of that um it's a good question [Music] as but what i've let's put it this way what i've done with the ev scope is um uh i i am using their stacked images here for illustration purposes when i've done photometry i've gone back to the individual frames um and done done the photometry on them and my code knows how to okay not not in the not in the single star photometry tool but in the other it has what i call a track star or a guide star you designate the guide star actually two guide stars and it will follow and as the frames rotate it will centroid and follow these stars of interest so uh but i mean [Music] i i could i could pull up a photometry run i did on um star xx cigna for example um we're shooting one frame maybe four seconds for for four hours um you get 3600 data points and it's noisy data because they're short the star was fairly damp but um i don't see any systematic things happening what the what the weirdest the trick with the av scope is it's a bayer array filter okay so it's already it's a color it's a color camera in the images i've shown i have debayered them using equal weights on the red green and blue channels [Music] i haven't yet done the thing where i've split the images into red green and blue images and then carried out photometry separately on them i remember dr harris talked about that method in her dslr talk last year yeah i mean this this stuff gets complicated if let's put it this way if you can you want to use a monochrome filter i mean a monochrome camera with filters if you have the ev scope as the scope you've got you you know being a curious person you figure out what the heck the thing can do i've been surprised at how good it is okay um we have time for just a couple more questions probably about five minutes or so so let's try and okay um let's do these so one of these is um are you self-taught in programming and if so what learning material did you use and or would you recommend uh i'm so old that i learned how to program with algol 60 on a mainframe computer okay so an algol 60 is remarkably similar to basic or at least at the level i i understood it um i got ms basic 5 for a cpm computer and that was my first experiences writing well actually actually learn my first computing with a mini computer with 4k of memory 4k of memory was a hewlett packard i think it was 11 000 or something it had 4k of memory used a teletypewriter and i wrote software for reducing photometric results done with the photomultiplier tube and yet teletype terminal to communicate with the machine then there was a program called turbo pascal and it was the first structured programming i did and so i bought turbo pascal for 80 bucks or whatever it cost and learned how to program in you know in turbo pascal then microsoft introduced quick basic which was structured basic so we went back to basic then i switched into visual basic for dos and i wrote a lot of software for doing photometry and image sharpening and stuff like that and visual basic for dos um [Music] and the first stuff i did with photometry was probably done in that code and um i think people like phil sullivan probably were relatively early adopters of um photomat and astromet which were programs for doing photometry with images that goes way back so i i think the answer is yeah i'm self-taught there was no classes in programming back then wow that's that's an impressive history for sure um if you'll allow me to put in a little bit of a plug here at the end of this year we have scheduled four how-to hours which will be focused on uh teaching people how to program in python for the purposes of manipulating astronomy data so to the person who asked that question make sure that you come back later this year we're going to be starting with the basics and going up through some really cool data visualization stuff using python as a language yeah and i think um if if i were going to do one thing probably in a new clean release of aip would be to put out um csv files instead of of photometry so that you would be able to run your photometry um in in aip but then do your analysis any way you wanted to by using pandas to suck in the data and then doing the photometry writing the code yeah yeah that would be convenient to have it be portable in that way okay um we have time for exactly one more question uh we're going to take this one from mark butteriff who asked is there a way to use aip for win to get the numerical pixel values in a subset of an image the scenario is that if i have a star on the background of a nebula or maybe a active galactic nuclei and a galaxy i'm going to need to be able to do some additional math in order to get a good um psf on the point like object um i'm trying to remember whether it's an export function for for for putting out array values um i don't think so but i'm not 100 sure there's stuff buried in the code that is um you know try every every um [Music] dig into the menus and see if you can find it it should be there it would have been there in the earlier code um as a as a teaching tool and basically you know in this box dump the data into um you know an excel type format right but we might have eliminated that at some point because nobody used it right it is a little bit of an edge case um i will say to mark as well that um that would be something that would be very simple to do with python so i suggest you look into using python and then a package called astropy with just a couple short lines um using astro pi you can load an image and then export the pixel values for a subset of that image um and so look into it yourself and then uh if you'd like to learn some more about astro pi we'll be covering that at the end of the year yeah you can probably find stuff i i think astro pi has a very good documentation and there's probably a jupiter notebook or jupiter notebook um with examples already written in it yeah i i believe so okay um now most of what's left in the q a box is comments from people saying wow thanks so much for this uh wonderful presentation like this person said um it's inspiring me to try to do some photometry so i want to i want to second that and i want to say thank you for such a wonderful and informative presentation and q a thank you for staying on extra for that oh you're welcome and i have to remember i have there's several bugs in the in the uh in the uh things there i got to fix that that minus 2.5 remember that that that is important okay um i'm going to go ahead and put up our closing slideshow okay there we go this is just the one closing slide okay so um to begin our closing announcements i want to go ahead and thank again our sponsors voice astro and chroma technology the voice research initiative and education foundation provides online astronomy education observatory resources and research experiences to students student teams and schools in order to learn how to perform observations conduct research and publish the results in scientific journals such as the journal of the aavso founded in 1991 as a 100 employee-owned company chroma technology is a leading manufacturer and oem supplier of highly precise optical filters using thin film coating technology as we talked about this afternoon their reputation is built on dedicated customer service including free technical and application support they remain committed to serving the scientific and technical communities in their pursuit of the scientific endeavor their product portfolio provides solutions for industries ranging from the life sciences and agriculture to manufacturing inspection security and aerospace the broad array of applications served includes fluorescence microscopy flow cytometry biomedical instrumentation surgical devices machine vision multi-spectral imaging and of course astronomy
Up Next
Aperture Photometry in AstroImageJ: A Step-by-Step Tutorial
@robertharmon936
7.7K views•2020-05-27
First Billion Years of the Universe with the Square Kilometre Array
@iaaudc
121 views•2022-05-26
Python Variable Star Frequency Analysis with Pyriod
@AAVSOHQ
2.7K views•2022-10-12
Gamma-Ray Bursts: Cosmic Snipers Explained | Astronomy
@kurzgesagt
15M views•2016-07-31
Related Study Plans & Knowledge Roadmaps
Structured learning paths in Astronomy