










![Plaque Assay: Assay for estimating viral titre or viral concentration [plaque forming units / mL]](https://i.ytimg.com/vi_webp/zFqyaoLQbxQ/maxresdefault.webp)







![Isolation and enumeration of bacteriophages/coliphages from sewage water [Urdu]](https://i.ytimg.com/vi/nvJGOjYVJQI/sddefault.jpg)
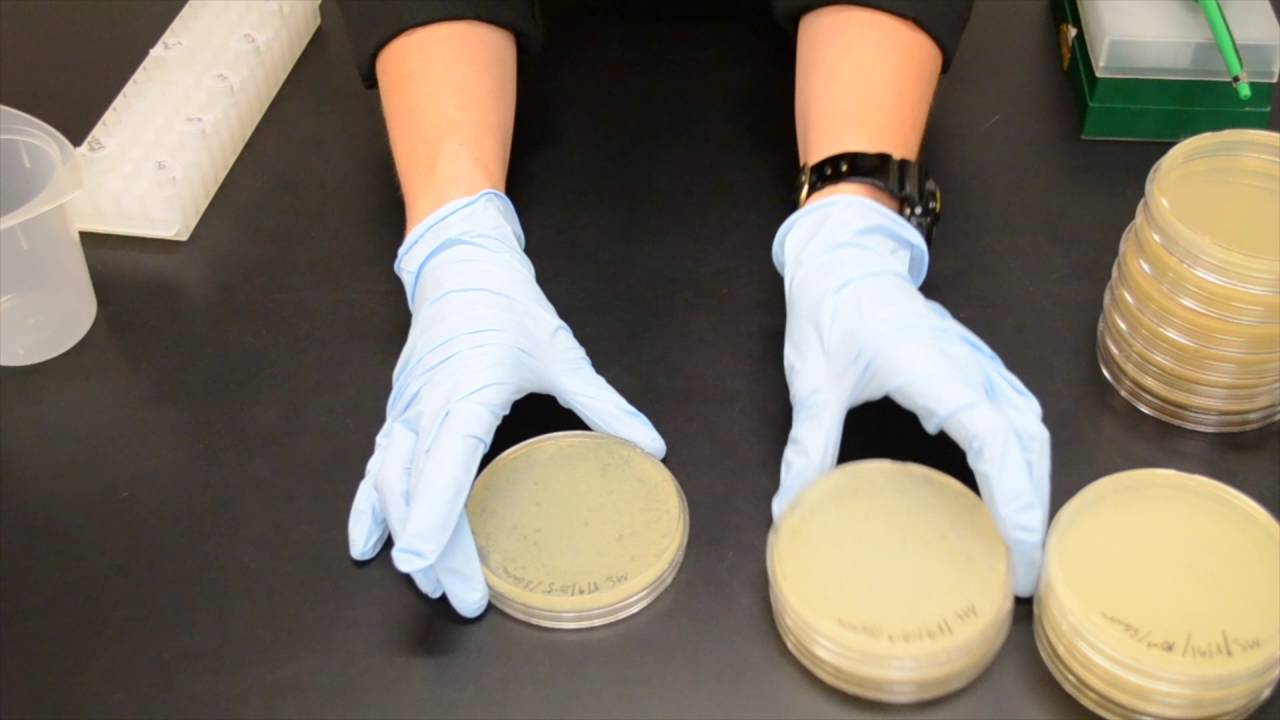



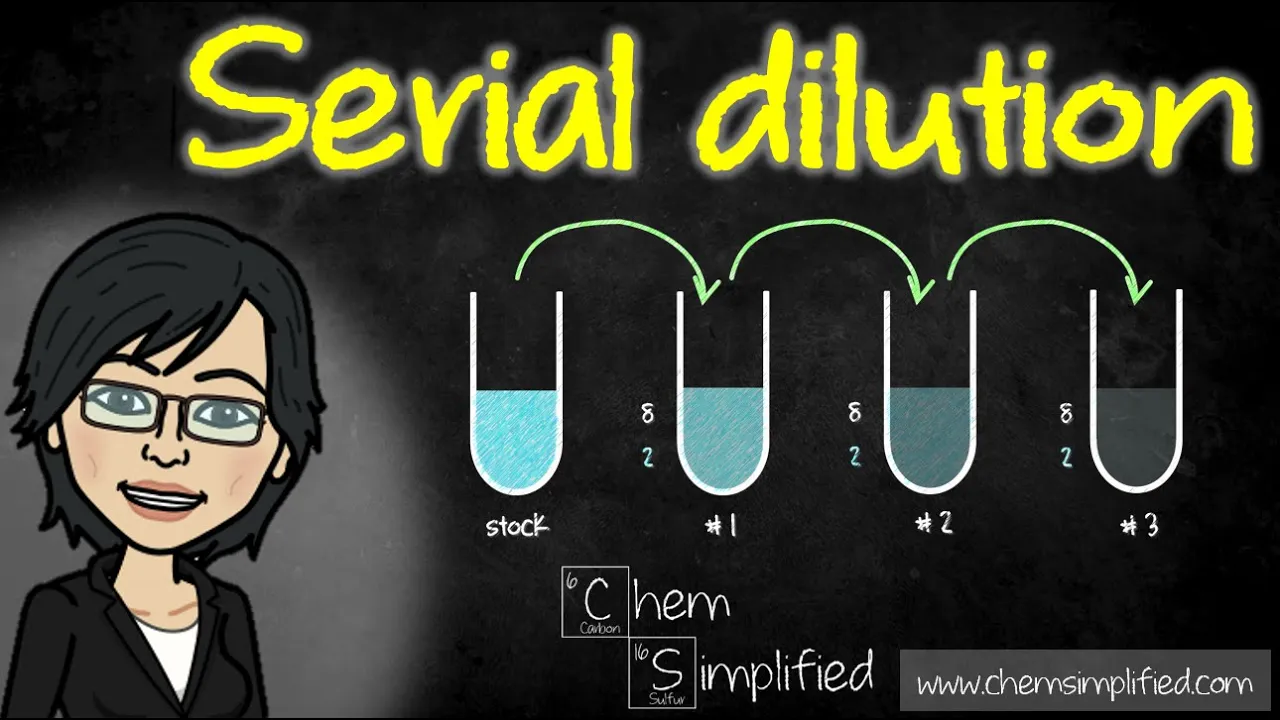
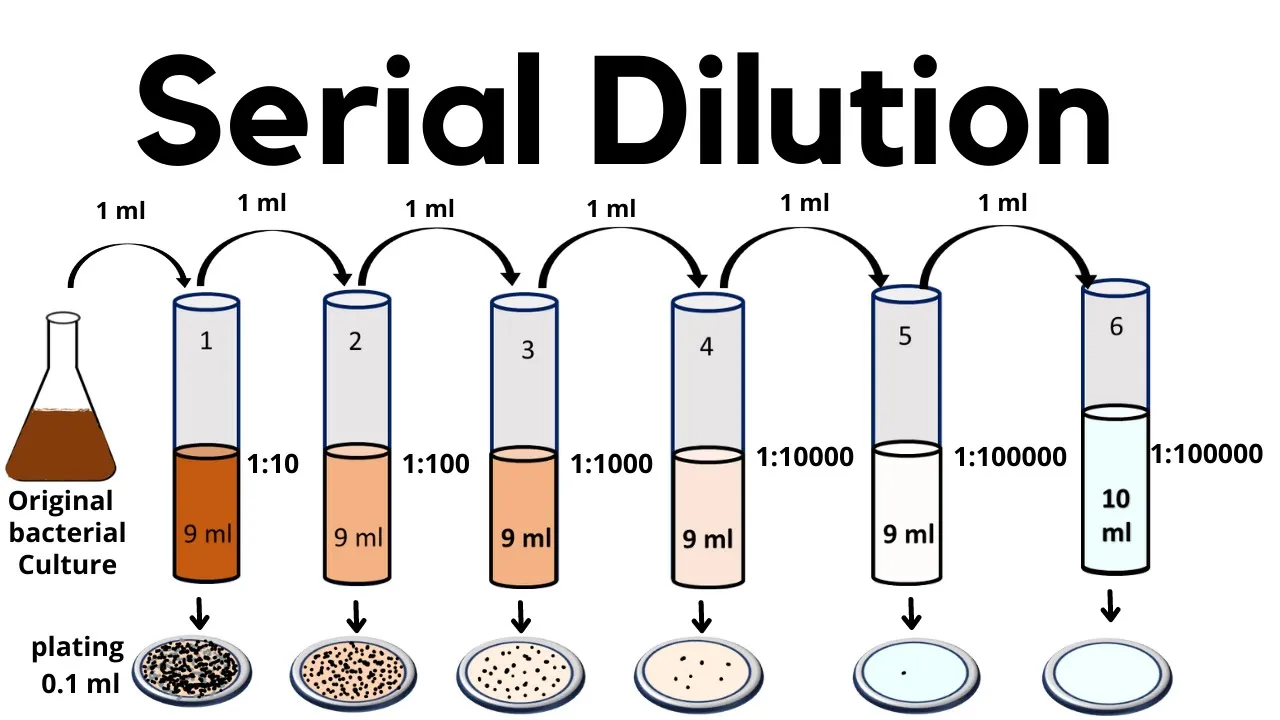
Phage titering determines the concentration of infectious phage particles in a sample by serially diluting the phage stock and plating it onto bacterial lawns; two primary methods exist: spot titers apply small aliquots to a pre-formed lawn for quick data collection but sacrifice accuracy due to diffusion delays and smaller volumes, while whole plate titers mix phages with cells first to enable pre-absorption, producing more uniform and accurate plaque formation; results are calculated using the formula: Titer = (Number of plaques / Volume plated) × Dilution factor, with optimal plates showing 30-300 countable plaques.
Phage Titering Methods: Spot and Whole Plate Assays
Added:Basic biology of bacteriophages, including their structure, life cycles (lytic vs. lysogenic), and how they infect host bacteria.
The mathematical concept of serial dilutions, including calculating dilution factors (e.g., 10-fold dilutions) and final concentrations.
Standard microbiology laboratory practices, such as aseptic technique, preparation of agar plates, and growing a bacterial lawn.
The biological concept of a 'plaque' as a visible zone of clearing on a bacterial lawn resulting from localized viral lysis.
How to calculate Plaque Forming Units per milliliter (PFU/mL) using data obtained from spot and whole-plate assays.
Understanding and calculating Multiplicity of Infection (MOI) for controlled downstream experimental infections.
Advanced phage isolation, purification, and clonal propagation techniques (e.g., picking a single plaque to create a pure clonal stock).
Applications of phage titering in biotechnology and medicine, such as standardizing dosages for phage therapy or validating biocontrol agents in food safety.
13.2K views318likes19:54Original Release: 2021-04-30
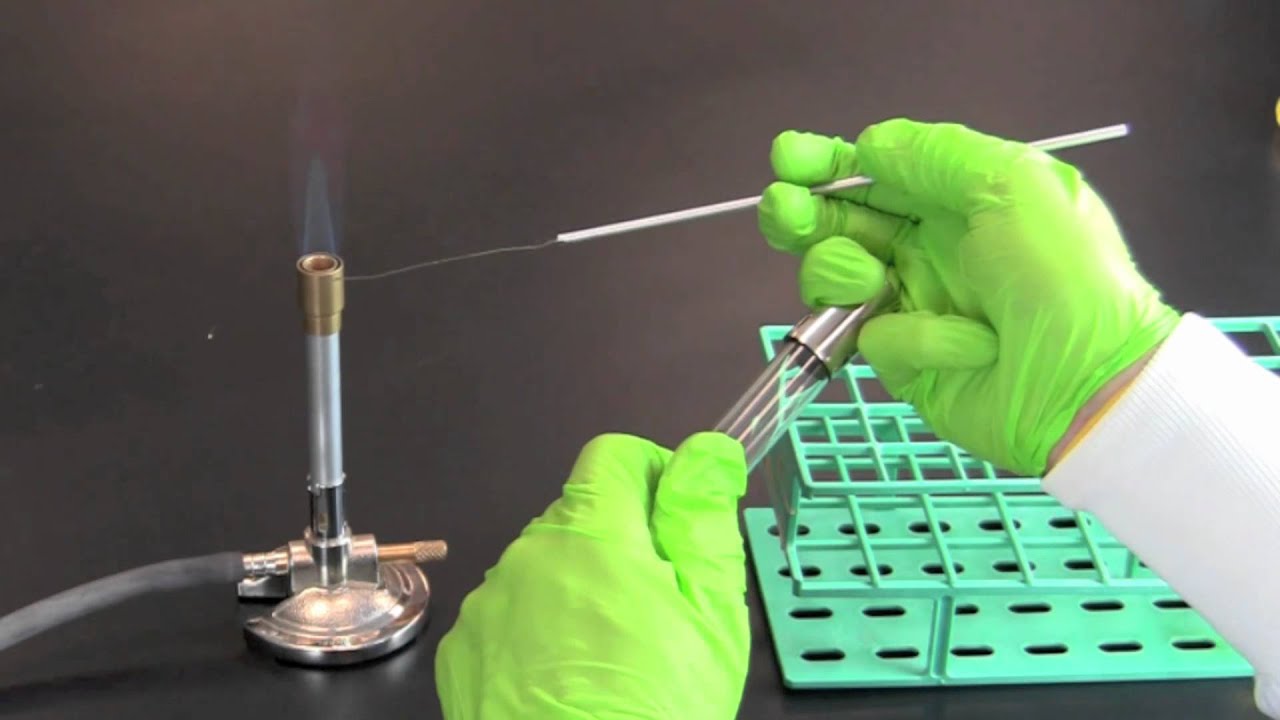
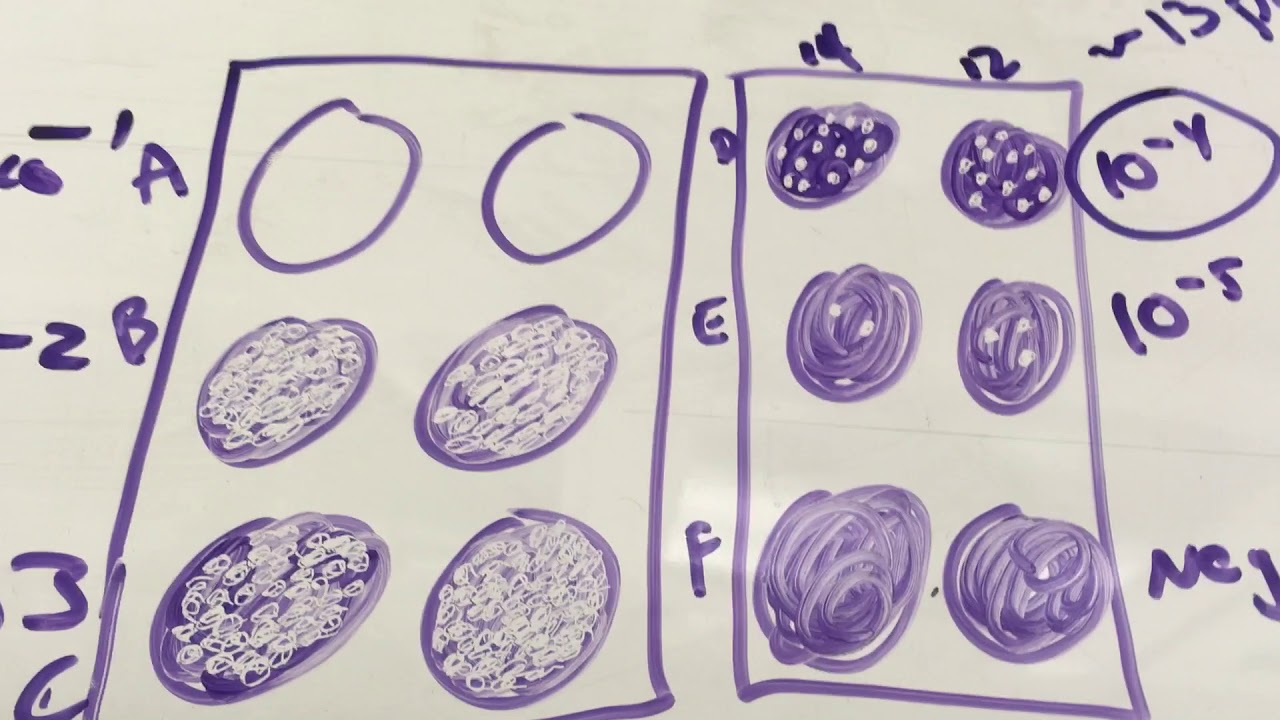
[Music] so today we're going to do a titration of phages this is another very common technique used throughout phage labs the world over one of the most standard techniques that you'll use if you studied uh basic microbiology you may have done titering of bacterial cells it's the exact same logic what we do is we take defined aliquots of buffer and we serially dilute our sample of phage from very high tita down to a much lower titer such that the defined aliquot that we use either for a spot tighter or a whole plate titer which i will explain soon the the aliquot that we spot or plate out will give separated plaques on the plate which can then be counted then you have your number of plaques you know the aliquot that you use to get that number of plaques and you know the dilution factor from your serial dilutions and those three things come together to enable you to calculate the tighter of your fade stock so the first thing that we do in all of this is we'll prepare our cereal dilutions so the first thing we have to do for that is to actually prepare our aliquots each dilution will be a one in ten so in this case we're going to do 900 microliters of our buffer which is lambda dill and then we will have 100 microliters of fade into each tube so my work area has been sterilized turn my flame on as always making sure that it's not going to catch anything on fire working in my sterile zone i will take in this case i'm going to do eight zero dilutions so i take eight tubes my pipetta is set to 900 microliters and as always we make sure that we know that the first shoulder we hit that's the actual volume that we require and then if we push through that that's to eject and to make sure that we eject the complete amount of material that's in the tip but i will show you two different techniques for doing this process the first is standard pipetting so we push the plunger down to that first stop stick the tip just into the top of the liquid not too far down bring up our 900 microliters pump it into the tube and then push through to that bottom shoulder an alternative method which is very very handy when you're doing multiple of the exact same aliquot is to push completely through to the bottom shoulder pull up that excess volume and then each time i will just push down to the first shoulder leaving that little bit of extra volume in the tu in the tip and then we just repeat and eight don't need that tip any longer close all of the caps and then we'll label each tube in this case i'm just going to label with the dilution so minus one through minus eight but if you want to keep the tubes for another experiment or another day then make sure that you put full labeling convention on your tubes and that's it our aliquots are now ready to carry out our serial dilutions okay so we have our aliquots ready we have a phage sample ready to go and what i like to do is i keep all my tubes together but i have a little space to the left so as i complete each cereal dilution i will move the tube over to the left that means that i'm always clear where i am if i ever get distracted if i'm working with multiple serial dilutions it's just a good idea to keep yourself focused and to know what you're doing i have my pipetta set to 100 microliters and as always we make sure that we know that there's the two shoulders there's this the first shoulder here where we actually that's the correct volume and then the push through there is just rejection so just making sure that we use our pipettor correctly i will take this is my undiluted phage sample we'll take out 100 microliters place it into my 10 to the minus 1 tube and notice i pumped up and down a couple of times to make sure that i washed the the pipette tip then i will just uh briefly vortex and a couple of inversions and again i place that tube now to the left that's the first serial dilution done the second serial dilution comes from the first serial dilution in exactly the same way again pumping up and down a couple of times and then pushing through to that bottom shoulder to eject the full volume quick vortex and that's the second serial dilution done and we just continue in the exact same way all the way through and eight and that is our serial dilutions complete okay so as i mentioned at the beginning we're going to do two different methods of of titration we're going to do spot plates we're going to do hole plate titers spot plates are nice in that they are rough and ready they allow you to put multiple uh aliquots onto the same plate so it gives you tighter data much more quickly the this comes at the cost of the fact that uh they're inherently less accurate spot titers whole plate titers will take a larger aliquot and then they pre-mix that aliquot of phages with the cells that's added to the lawn and then overlaid on a single plate together hence the name whole plate titers hoplite titers are more accurate because they allow the phages to be pre-adsorbed onto the their host cells which means that there's the plaques are all starting at the exact same time when the lawn is made so you'll tend to see more plaques more uniform plaques the trouble when you do spot tighters is that your lawn is already formed and you're placing an aliquot onto the lawn so it's going to take a little bit of time for the phages to diffuse through the lawn and and absorb to their house and begin the formation of a plaque so you can have you know that different timing can mean that some plaques will be much smaller than others possibly even invisible what you also have uh is the the simple fact with the spot tighter the area of each spot is much smaller than the whole surface area of a whole plate so you've got more spots in a smaller area which makes them harder to count and also just inherently spot tighters use smaller volumes and smaller aliquots are inherently less accurate than larger aliquots using the you know even when using the same pipettor okay so the first method that we're going to do is the spot spot tighter plate method of course my work zone is sterile turn my flame on take my plate and the first thing to do is to label my plate using the class naming convention and then we take the grid that has been provided to you and we use the grid just to mark out quadrants on the plate just so as that you know to keep your spots nice and separated because if one spot runs into another that will completely invalidate the data that you get from both of the spots i mark my quadrants and then in each quadrant i'm going to mark which dilution will go into that quadrant but i will also make sure to have one control spot and the control spot will just be buffer with no phages and obviously the reason for that is that if we see any plaques in the buffer then we know that our buffer was contaminated and our results need to are invalidated and must be repeated so then i'll just mark the dilution minus one minus two and so on and then i'll put a c for control and my plate is now ready to go so now we're ready we will pour our lawn so i have my perpetua set to 100 microliters or whatever the required volume would be for your cells i have four mils of molten top agar that's uh in the hot block at 55 degrees take my aliquot of cells add it to my top agar vortex on a low speed you don't want to introduce a lot of bubbles because bubbles will look like plaques and flame the top of the tube and then carefully slowly but in one movement dump those cells onto the lawn onto the plate give it a swell as before and we'll let it set so our lawn is set and ready to go um it might be a good idea sometimes to place something white underneath it just as you can see your spots as you place them onto the lawn in this case i'm going to do 10 microliter spots and uh we work in the reverse order that we create the serial dilutions the first spot that we will lay down will be our control spot with no phages then we will do our minus eight and so on through to our minus one the reason that we do that is that there's more chance of taking contamination from the high concentration into a lower concentration but if you take contamination from a lower to a higher concentration it's unlikely to make a statistical difference to your results so my control spot and this is where the real technique lies move the lid over to the edge of the plate then resting your elbow on the edge of your bench or however is comfortable and take your hand and place it on the bench so you've got a nice guide now i can push the end of the pet tip till there's a tiny little blab of liquid that i can now just touch against the correct place i touch it against the surface of the agar and then i pump the remaining volume into that into that little uh bubble that i've made on the plate i can eject my tip and take my minus eight dilution and we do the exact same thing again push till there's a tiny little bleb of liquid in the tip attach that little bleb to the surface of the agar and then pump the rest into that bed and then we just keep doing the same thing all the way down push the little blab out pump into it and so on using this technique it can actually be done i don't advise this in class but ongoing in your professional careers you can actually use the same tip as long as you make sure you're running from most uh most dilute to most concentrated if you have any moment where you think you may possibly have contaminated your tip always just dump it and start with a new one but i will do the rest of these with the same tip and the last one minus one now we just leave the plate close to the flame with the lid cracked open we just need to wait until those uh those spots have absorbed into the into the medium this is important because the plates will then be incubated inverted and so if you turn the plates over while there's still liquid moisture on the surface of the agar it's going to run together but at the same time you don't want to leave them out open for more than a few minutes because what can happen is the agar will actually start to dry and it will make your plaque smaller or even invisible so we just let it let it dry for a few minutes and then it'll be ready to incubate and that's our spot tight is done so after incubation what you should hopefully end up is going to be something a little bit like this or perhaps this would be the easier way to look at it what we have here this is actually a different plate not the one i prepared but you can see what we have is our serial dilutions running in this direction confluent confluent lysis you can start seeing we're getting we're getting to the point of individual plaques but this is still uncountable and here in this uh what's this the -6 dilution we have nice separate countable plaques and also we have no other spots in our in our other dilution so we know our buffers clear and our data are good okay so the next process i'm going to show you is the whole plate titers and it's like definitely a very different process but it's pretty straightforward i'm just going to show you the one but in most cases you're going to be doing several different dilutions because of course you don't know the title up front so you don't know which plate is going to give you the isolated plaques that you're looking for first thing we do is we take our plate we start our flame obviously as always making sure that it's safely located and our working zone has been sterilized we will take a 1.5 mil tube that we will set up each reaction in and as i say normally you'd be doing several different dilutions at the same time but in this case i would just demonstrate with one so i take a single tube i'm going to do i'm going to whole plate tighter just this set minus 5 10 to the minus 5 dilution so in which case i take my 100 microliter per peta i take 100 microliters of my cells or whatever the required volume is for your protocol and 100 microliters of my dilution and it doesn't have to be 100 microliters it can be 50 microliters or 150 microliters or whatever as long as it's a defined volume and you record that volume so that you can use it in your calculations cells and phages have been mixed but give it a little tap to ensure they're properly mixed and then we want to let that sit and incubate on the bench for about five to fifteen minutes it's very important that you don't go too short because you want to allow the phages to absorb to the host you don't want to go too long because you don't want progeny phages to be produced which will obviously completely invalidate your calculations and then while that's well that's incubating i'll just take the time to label up my plate so our cells and hosts have incubated long enough together my plate is labeled class naming convention and also the dilution that i'm about to use if you are working you know if you perhaps are using some different volumes of aliquot then you can mark that also here so that you know for each plate exactly what you've done this is my phage and host reaction i will now set my propeller to 200 microliters but it doesn't really matter here because we've accurately aliquoted in the first place so i just need to make sure i get all of this material aspirate full volume take our aliquot of molten top agar eject into there again vortex on low speed just like before without introducing any bubbles pour your lawn swirl it let it set and the difference here is that this is now done this doesn't have to set with the lid crack because i'm not going to put any liquid on top of it as soon as that lawn is set we can invert the plate and incubate it so after incubation we're ready to read our results i'm going to show you plates that were prepared by my colleague jay clark and he actually performed a proper an actual experiment so we have a whole dilution series to show you when you have far too many pfu on the plate you'll get a plate that looks something like this as you can see there's basically no plaques there's is actually confluently lies and what all of this growth is is all resistant bacterial colonies that are growing over the surface so this will be marked as uncountable or too numerous to count and that was the 10 to the minus 3 dilution here 10 to the minus 4 dilution it's got the exact same problem all just resistant colonies as we get down to the 10 to the minus 4 5 dilution now we're starting to get to separate plaques but if you notice a lot of them are running together there's too many plaques on this plate to be counted in a statistically meaningful way because too many plaques are running together so this would be labeled as tntc too numerous to count then our next plate is our goldilocks plate this is the 10 to the minus 6 dilution and as you can see you have nice separated plaques all over the plate and we have a number greater than 30 plaques to count less than 300 which is typically the numbers that we use to say as low and the 30 is too few and over 300 is too numerous to count this is the plate that we would use to extract our data and then to show you this is the 10 to the minus 7 dilution and as you can see there's only a sort of five or six plaques on there there's too few to count your data will be statistically quite meaningless so we take our a plate that we want our ten to the minus six plate and then all we will do is we'll count and we'll use a sharpie and each time we count one we'll just mark it with a sharpie so as we know it's counted it doesn't get counted twice record that data now we have our plaques you know your serial dilution your dilution factor and you know the aliquot that you spotted out now you have your results you
Up Next

61:22
Genome Annotation in Bioinformatics: Gene Prediction Explained
@nathanieljue2315
7.7K views•2020-04-22

50:12
Bacterial Communication: Quorum Sensing and Biofilm Formation Explained
@JHUAAP
12.6K views•2011-06-28

5:35
Enteric Nervous System Explained: The Gut's Brain | Neurobiology Lecture
@alumniu6029
438 views•2018-09-12

7:08
Bacteriophages: Earth's Deadliest Killers and Future Antibiotics
@kurzgesagt
34.6M views•2018-05-13
Related Study Plans & Knowledge Roadmaps
Structured learning paths in Biology
biology
RNAi: Biogenesis, RISC & Gene Silencing
01Molecular Biology Foundations: DNA to Protein
02Introduction to RNA Interference (RNAi)
03Molecular Biogenesis of miRNA and siRNA
+ 2 more learning modules
10h5 modules
Explore Roadmap
biology
Mycorrhizae: Signaling, Biophysics & Ecology
01Foundations of Mycorrhizal Symbiosis
02Molecular Signaling and Root Colonization
03Biophysics and Bioenergetics of Nutrient Exchange
+ 1 more learning modules
11h4 modules
Explore Roadmap
biology
Circadian Clocks: TTFL, SCN & Periphery
01Foundations of Molecular Biology & Gene Expression
02Introduction to Chronobiology and Actograms
03The Core TTFL: Molecular Architecture of the Clock
+ 3 more learning modules
14h6 modules
Explore Roadmap
biology
Population Genetics: Math, Drift & Selection
01Genetic & Probability Foundations
02The Hardy-Weinberg Principle and Baseline Models
03Mathematical Modeling of Natural Selection
+ 3 more learning modules
18h6 modules
Explore Roadmap