






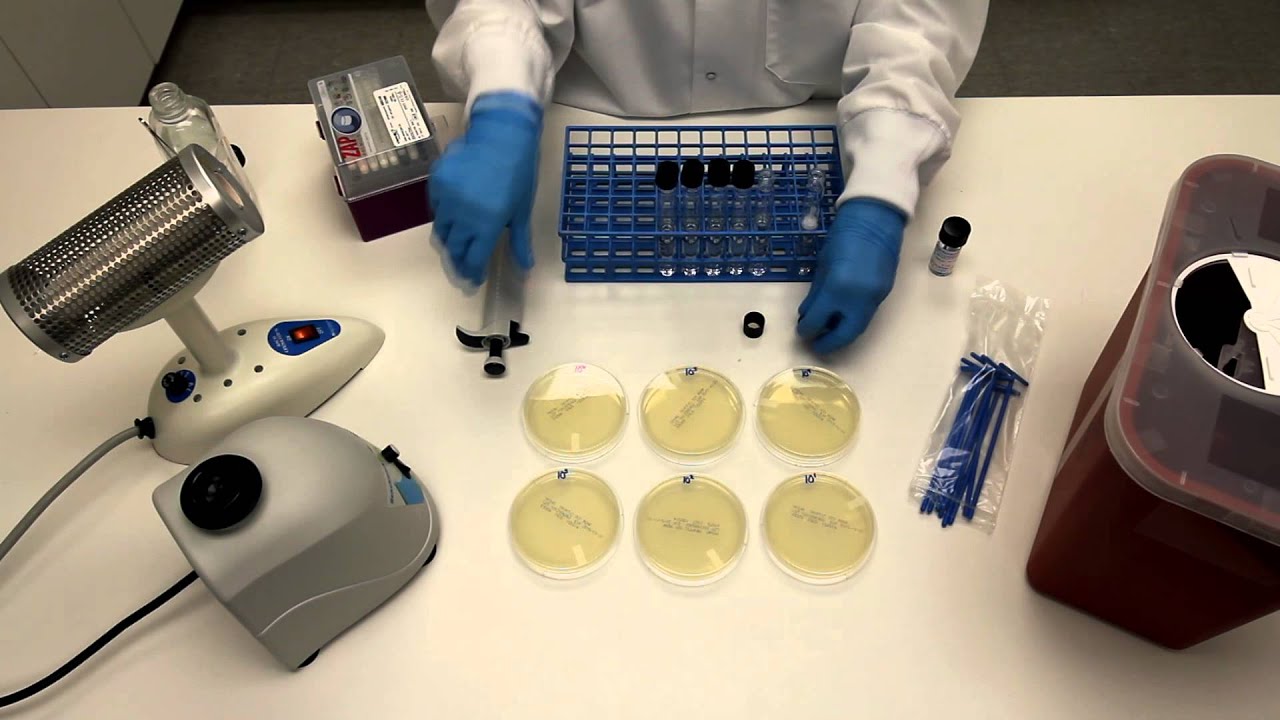




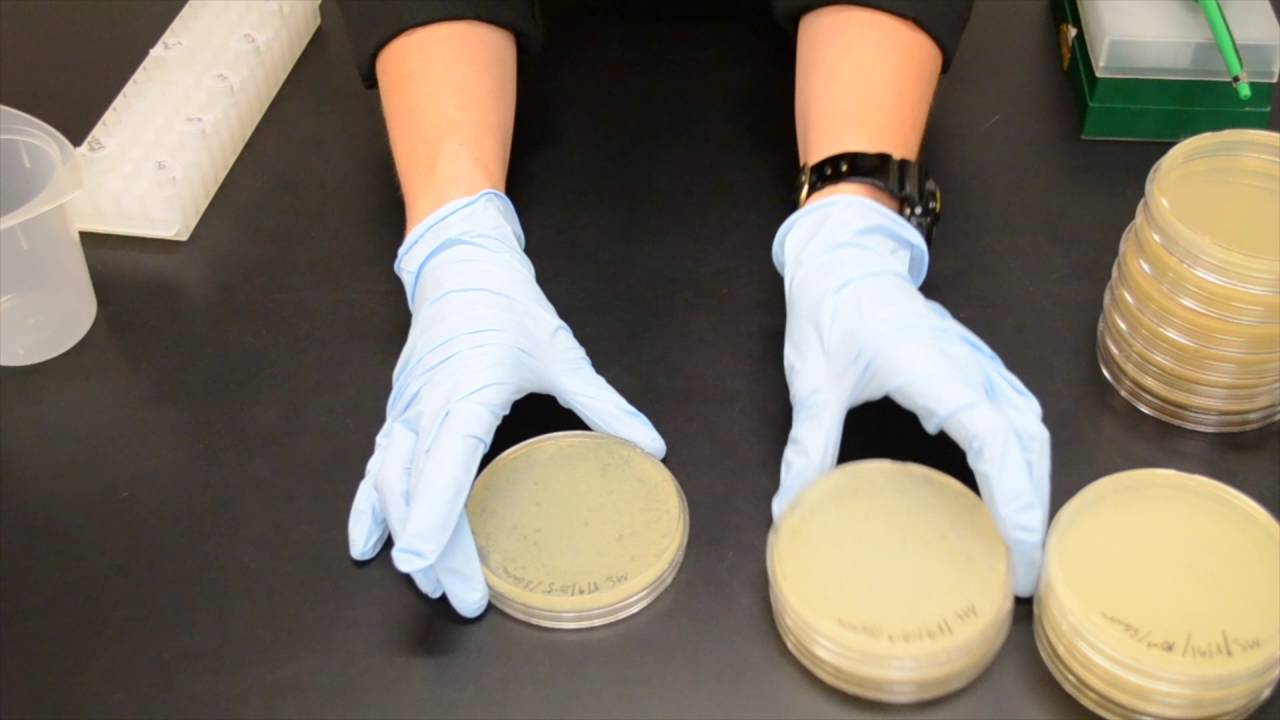
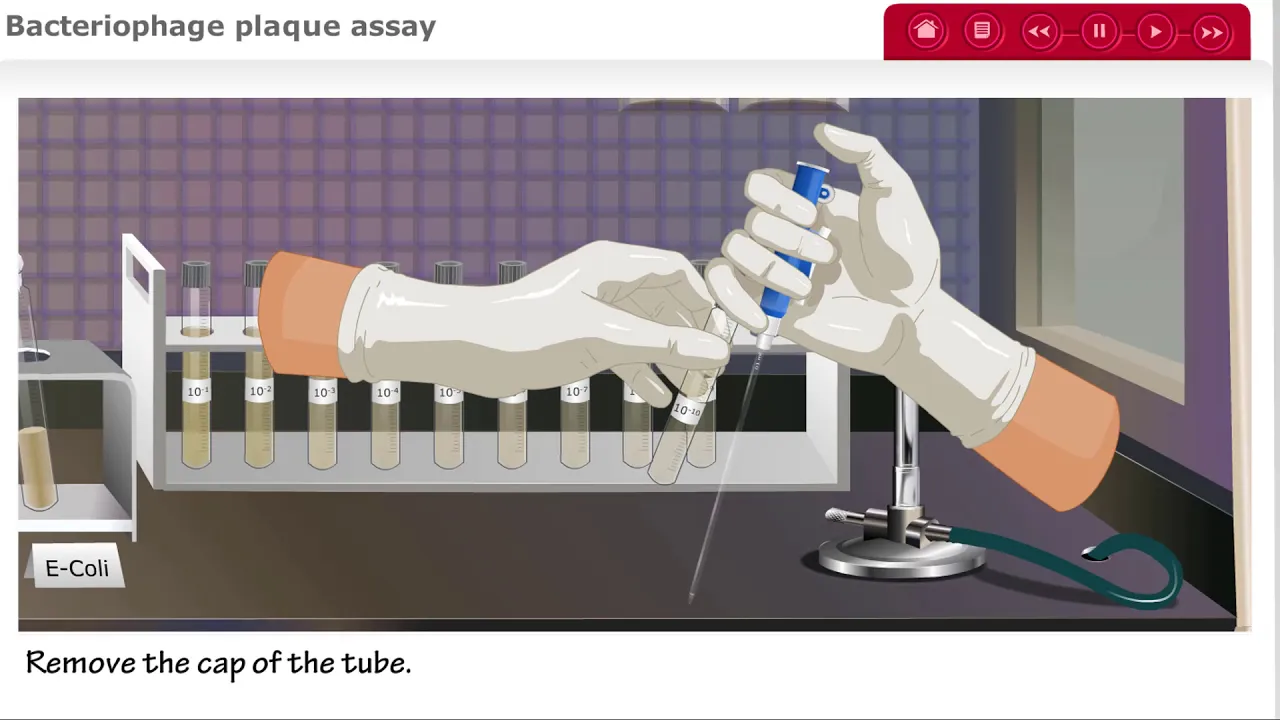








Direct isolation is a rapid method to detect phages from environmental samples by breaking electrostatic interactions through shaking, filtering to remove bacteria, and immediately plating with host bacteria to visualize plaques, whereas enriched isolation amplifies phages through multiple infection cycles but reduces diversity; the protocol involves adding media to soil samples, shaking at 250 RPM for one hour, centrifuging to settle soil, filtering the supernatant through 0.22 µm filters to remove bacteria, and performing a plaque assay by mixing filtrate with host bacteria (Gordonia terrae), adding warm molten top agar, and pouring onto agar plates to visualize plaques as evidence of phage presence.
Direct Isolation & Plaque Assay Protocol for Phage Isolation
Added:Basic biology of bacteriophages, including the fundamental differences between the lytic and lysogenic life cycles.
Fundamental microbiological aseptic techniques and sterile handling practices to prevent environmental contamination.
The concept and mathematical calculation of serial dilutions, which are critical for achieving countable plaques.
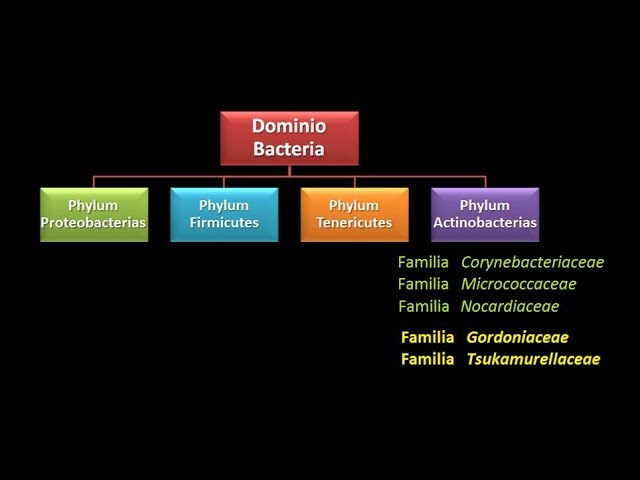
An understanding of bacterial hosts, specifically actinobacteria like Gordonia terrae, and the concept of host-specificity in viral infection.
Protocols for phage purification (plaque purification) and the preparation of high-titer phage lysates.
Phage characterization techniques, including structural visualization using Transmission Electron Microscopy (TEM).
Phage genomic DNA extraction, sequencing, and the use of bioinformatics tools for genome annotation and comparative genomics.
The therapeutic and industrial applications of isolated phages, such as phage therapy to combat antibiotic-resistant bacteria and phage biocontrol in food safety.
817 views22likes28:25Original Release: 2021-05-27
Mary Sagatelova: Hello SEA-PHAGERS Welcome to direct isolation and plaque assay, I'm going to be walking you through the direct isolation and plaque assay protocol.
Mary Sagatelova: Some of the mentalities behind it. Why we do what we do. And also, like physically how we're going to do it if you want to follow along. This is going to be in your lab manual pages 24 to 32 Mary Sagatelova: And 35 to 37 take notes, things like that. Okay, so let's get into it.
Mary Sagatelova: So one. Let's talk about what we're trying to accomplish. Right, we're trying to understand different methods to isolate a phage, there's more than one from a soil sample.
Mary Sagatelova: We're trying to get more practice with proper aseptic technique. Make sure you understanding when to use it, how to use it appropriately, things like that. So we can Mary Sagatelova: Directly isolate from our environmental sample. And then again, we're going to be building on our pipetting techniques, knowing when to use which pipettes and basically aseptic technique.
Mary Sagatelova: So let's start with what is direct isolation? Thats what we're going to be doing in lab. It's protocol 5.2 Mary Sagatelova: So, what is it, right. So it's essentially a really quick method that we can use to detect the presence of phages from an environmental sample. So we want to be able to know if there are phages in our soil that we're collecting Mary Sagatelova: It provides a snapshot of all phages that can infect your host, which is going to be in our case gordonia terrea Mary Sagatelova: Okay, so phages typically are, number one - they're everywhere anywhere there's bacteria there's going to be phages Mary Sagatelova: But when we're talking specifically with soil. They interact, such as they form these electrostatic interactions with soil particles.
Mary Sagatelova: So part of our direct isolation procedure is to break up those interactions. We're going to be shaking our sample of some liquid media for an hour.
Mary Sagatelova: And that's going to work to break up those electrostatic interactions, so that eventually we're going to get a solution on top in our tubes.
Mary Sagatelova: That's going to have our phage in solution with the dirt kind of settled to the bottom that we're going to filter that and we're going to produce something called a filtrate which we will then be using to conduct a plaque assay.
Mary Sagatelova: So basically, a direct isolation gives us the ability to detect multiple different types of phages that can infect our host, very important, THAT CAN INFECT OUR HOST.
Mary Sagatelova: That are in our soil sample. So, this varies from enriched isolation. So while we're not going to be doing this directly or you're not doing this directly in the lab. It's importantly you know the difference between the two.
Mary Sagatelova: Okay. So essentially, they start off very similar, an enriched isolation compared to a direct isolation.
Mary Sagatelova: We get a filtrate that we produce from our environmental sample, but with a direct isolation, we immediately plate that sample and try to see what phages we have Mary Sagatelova: With an enriched isolation, what we do is we seed that phage filter it with a culture of our host bacteria and let it incubate for a couple days.
Mary Sagatelova: So what happens is that the bacteria is going through, replication. The phages are going through several cycles of infection and lysis.
Mary Sagatelova: Such that the culture that you produce after those couple of days or through is a sample that has a really high concentration of phages are very specific to our host.
Mary Sagatelova: When you compare it to your initial sample, so you can see on the right figure like a before and after you can see significantly more phages, these little orange guys, Mary Sagatelova: In the "after". Right so what it does. What an enriched isolation is, it is an essentially a method used to amplify the number of phages from your environmental sample.
Mary Sagatelova: Before you start plating and trying to identify those. Okay.
Mary Sagatelova: One of the drawbacks, is that you get less diversity, so you can consider in these, when you're doing an enriched isolation usually one, maybe sometimes two types of phages and I say types. I mean like species.
Mary Sagatelova: species of phage will be able to outcompete other ones, right they can infect better, they can replicate faster, and they can lyse.
Mary Sagatelova: A lot quicker than some other ones. So what's going to happen is they will outcompete those other phages for bacteria.
Mary Sagatelova: Such that towards the end of your incubation period, you're probably only going to have one or two different types of Mary Sagatelova: phage within that solution right so versus a direct isolation, you might get several types of phages able to affect your bacteria to you get more diversity.
Mary Sagatelova: In phages when you do direct isolation but you are getting a higher chance of actually seeing something on your plate when it's an indirect sample, just because you have a higher concentration of phages that you know infect that host Mary Sagatelova: So little some drawbacks with both but important for you know the difference. Okay.
Mary Sagatelova: So this is just a visualization. So, we can have a clear in our head both processes start exactly the same as they start with the soil.
Mary Sagatelova: We incubated with media break up those electrostatic interactions we filter that solution till we get something called filtrate that just just solution with phage in it Mary Sagatelova: And then they can go two routes, one direct isolation, which you will be doing, we just add some bacteria. Some top agar and we immediately plate it to get Mary Sagatelova: Try to visualize those phages. With enriched we let that bacteriophage and bacteria incubate for a couple days until there is a high concentration of phage, and then we plate it.
Mary Sagatelova: Okay, if you need a visualization or visual learner. Here is a great figure for that. Okay, let's get into the protocol. Right. What we will be physically doing in the lab. OK.
Mary Sagatelova: So number one, when you're first coming until up some things that you should be doing each time. But since this is your first time I'll just run through them. Okay.
Mary Sagatelova: So number one, find an empty lab bench to sit at, again, we're going to be using two different rooms 330 and 336 so if you see that 330 is full, there's only one person per lab bench.
Mary Sagatelova: Just move into 336. Okay. Some days you might be in one someday you might be in the other just depends on the schedule. Okay.
Mary Sagatelova: Put on your lab coat. So if you brought your own lab coat one from home or when you bought or or you have used for different class, you can just put it on right Mary Sagatelova: If you are borrowing one you can navigate to an area where we're going to have a bunch of lab coats for you to borrow Mary Sagatelova: So find one go through them find one that fits. Again, these have to go below your hip and they have to be able to zip up Mary Sagatelova: Or button up depending on on the lab coat. So make sure it can do that for you claim it as yours. This is going to be one, you're going to be using for the whole semester. Okay, so find a good one.
Mary Sagatelova: We most likely will have there's going to be a lot from people to borrow from but if you're coming in to some of the later labs and you're worried about not being able to get one, you can always just bounce I purchase one Mary Sagatelova: So, what you should be doing every time you're coming into lab is washing your hands and then wiping down your lab area.
Mary Sagatelova: This is very good, given the COVID situation, but the main idea behind that is that you're not bringing in any sort of germs.
Mary Sagatelova: With you to lab that could contaminate your work and making sure that anything that's left over from the previous class or previous section is also cleaned off from your area. Okay.
Mary Sagatelova: Every time we're going to have a protocol at the back of the lab room there's going to have all the materials that you're going to need for your procedure. So navigating back there getting what you need at the time is good. The best tactics to okay and then you can begin your protocol.
Mary Sagatelova: So let's start off with our soil samples. So you guys should be bringing into lab three different soil samples with you.
Mary Sagatelova: To be extracting your phage samples from right. So, these should correspond making me labeled however you want as long as you're able to Mary Sagatelova: Understand the differences between them and it can correspond to some way in your lab notebooks. So in your lab notebooks, make sure again that you have the following information per soil sample.
Mary Sagatelova: That's going to be date and time collected the location, the physical GPS coordinates. If you have an address, you can put that address into Mary Sagatelova: A variety of apps and you can get GPS coordinates produced at the end. Okay. The depth at which you got got so from Mary Sagatelova: The moisture content again was it muddy? was it dry? sandy? things like that, the temperature outside when you collected it and then anything novel anything defining about it.
Mary Sagatelova: Was it next anything like next to a zoo was next to a field of manure like something like that, something novel about it or just interesting importantly you have that Mary Sagatelova: So for each Mary Sagatelova: soil sample, you're going to transfer some of it into a test tube until it's approximately one third of the way full. Okay. Make sure that your test tubes are very, very well label.
Mary Sagatelova: And they should correspond to your soil sample somehow. So for example, if you label them one, two, and three, then you should label your tubes with your name, the date and then Mary Sagatelova: However, you are going to stay with that. So, so I would say since my initial or MS. I will put MS. 1/21, and Soil Sample 1 Mary Sagatelova: or something like that. Okay. When you're transferring soil into your test tubes.
Mary Sagatelova: Avoid adding adding anything like debris wise like pieces of wood.
Mary Sagatelova: Because they're going to float to the top in our solution. And let's kind of interfere with some some aspects of our experiment. So try not to.
Mary Sagatelova: Incorporate any like chunky debris, just let us go for dirt. Okay, so you can be doing this for each soil sample. So you should have three test tube at the end, you're not putting them all in one three separate test tubes all very appropriately labeled. Okay.
Mary Sagatelova: And then asceptically you're going to add some PYCA media to your test tube with your soil. Okay, you're going to add it until it's about two to three milliliters submerged in that media. Okay, you're going to be using a serological pipette for this.
Mary Sagatelova: Just because this is everyone's first lap. I'm going to walk you through which pipettes to us.
Mary Sagatelova: But once you're moving forward. This should be something you should be understanding yourself right if you know the measurement of what you're adding, you should be able to critically think Mary Sagatelova: Okay, this is the type of pipette I need to use. Okay, but you're going to use the serological one. Because that is the type of pipette that measures and milliliters, you're adding milliliters Mary Sagatelova: But an important aspect to remember is that you are adding enough Mary Sagatelova: Media until it's submerge beneath two to three millimeters, you're not adding two to three millimeters, you're adding until it's submerged. So typically, that's going to be around seven to 10 mL. That's usually the sweet spot for people Mary Sagatelova: Until it's about two to three submerged, okay but it all depends on the type of soil you have. So don't be blindly adding it at a pretty slowly.
Mary Sagatelova: Okay, once you get your media into your samples just invert them a couple times to get it mixed thoroughly and then give it to your TA and we're going to put that into a shaking incubator. Okay.
Mary Sagatelova: The samples are going to stay in the incubator for about an hour, depending on how quickly we can get everyone's in but we're shooting for about an hour.
Mary Sagatelova: And at 250 RPM. So they're going to be shaking the whole time. Kinda again to break up those electrostatic interactions.
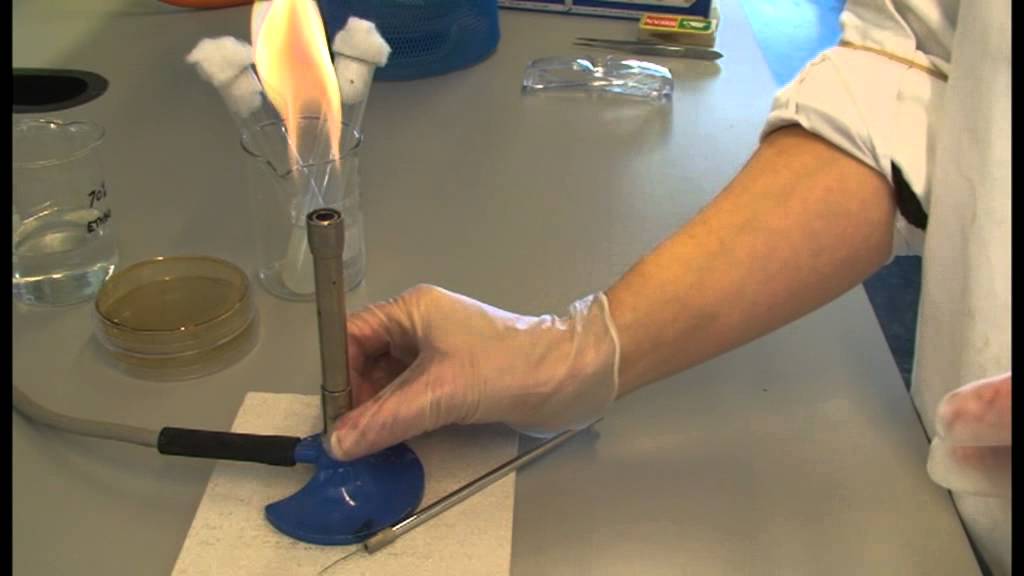
Mary Sagatelova: So during this time period where you can do is a) turn off your flame, you're not going to be needing it for an hour, so why waste bath and I'll just turn it off. Just put the cap on, turn it off.
Mary Sagatelova: And then you can do a bunch of different things you can prepare materials for the following step, which I'll explain through Mary Sagatelova: You can start labeling things, things like that. And you can work on your lab notebook what you just did some steps. Write that down somewhere.
Mary Sagatelova: So what goes in your lab notebook. Right. There's a whole other PowerPoint that I'm sure your TA shared with you about what goes into a lab notebook.
Mary Sagatelova: But just we're all on the same page, you're going to have the date in the title of your protocol, the purpose and the aims of that particular protocol before doing Mary Sagatelova: The procedure where you actually did and not what's already in your lab manual you notice, hopefully at this point that there are certain things that we are doing that very little bit different, very little bit differently from your lab manuals. Right.
Mary Sagatelova: So what we actually did.
Mary Sagatelova: And then the results analysis and future plans. This is not something you can do this week because they're dependent on your results, but next week when you get results you can include photos of your results you can interpret them.
Mary Sagatelova: And then you can talk about what you're doing next. Okay. So all you need for this particular week is going to be your title right "direct isolation plaque assay" Mary Sagatelova: The purpose of that protocol "to extract features particles from an environmental sample, soil sample, and then visualize the presence of those phages in your sample of the phage, they're able to in fact gordonia terrae" Mary Sagatelova: And then results. Again, you get those next week.
Mary Sagatelova: So after that hour, 45 minutes to an hour period of time, we are going to spin our samples to settle the soil the bottom and that liquid Mary Sagatelova: settle up on top. Okay, we're not going to let it sit on our lab benches for 10 minutes we're going to just spend every five minutes at 2000 G in centrifuge, to be able to get those two to separate out. Okay.
Mary Sagatelova: And we will just do this for you.
Mary Sagatelova: So once this is done, we are moving away from incubation into the filtration steps. So this is all going to be done asceptically, very important, especially because we're going to be working with Mary Sagatelova: Individual samples and some communal materials so working aseptically is very important here. Okay.
Mary Sagatelova: So you are going to take a syringe. This is going to be a sterile syringe. So don't remove it from the packaging until you have absolutely ready for it and you're gonna be working within your aseptic zone.
Mary Sagatelova: You're going to take your syringe and you're going to extract from this top liquid here. Just place your syringe and extract up about two milliliters of your liquid. Okay.
Mary Sagatelova: And again, if there's any floating debris on top. Anything that you might have accidentally added in avoid that as much as possible, right. Don't try to suck that up if you can avoid it.
Mary Sagatelova: Once you've sucked that liquid off you're going to attach a 0.22µm filter to your syringe kind of a here here on the left.
Mary Sagatelova: So this filter is sterile, just like the syringe, so don't take the filter out of the packaging until you absolutely ready to use it.
Mary Sagatelova: Okay, a tip that I give students is that you'll notice on the packaging it comes a little container and a little Mary Sagatelova: Later, you can like slide off. You can take the lid off and just leave it really close to your burner, not to close that burns, but close.
Mary Sagatelova: And then when you're ready, you can just screw it on. OK. So the reason that we use a filter is to filter out any bacteria.
Mary Sagatelova: Bacteria on average is about point five to five µm in length.
Mary Sagatelova: So all bacteria in our sample should be filtered out when we use a 0.22 µm filter right they're too big. They won't pass through but phages. There are a lot smaller. They will filter through Mary Sagatelova: The reason that we are trying to using the Filter and Filter out bacteria is because we only want the features to in fact one type of bacteria that's going to be gordonia terrae, if we are not filtering out other bacteria.
Mary Sagatelova: We have no way of knowing if the phages that we are growing our infecting the bacteria that we wanted to have gordonia or something else, right, we're trying to control any sort of contamination.
Mary Sagatelova: So you're going to attach the filter, its a tscrew on really simple and then you're going to release the liquid into a microcentrifuge tube.
Mary Sagatelova: And this is going to be a labeled microcentrifuge and this is now going to be called your filtrate.
Mary Sagatelova: Okay, you'll notice that when you're pushing through the filter there's gonna be a little bit of resistance which is normal.
Mary Sagatelova: But if you're feeling a lot of resistance, then what's happening is likely there's some sort of blockage usually something with foil, sorry soil.
Mary Sagatelova: Some, like a chunk from debris got stuck in your in your filter and you won't be able to push it through. It's best to just stop.
Mary Sagatelova: Remove the filter, get a new one. Attach it and then push through into your microcentrifuge tube okay. Don't try to push through too much resistance because it will just like explode out, which we don't want Mary Sagatelova: So you're going to be doing this per sample right so this will be per sample. So for every single soil sample you have, you're going to get Mary Sagatelova: A new syringe, a new microcentrifuges tube, a new filter. Okay, so at the end you have three microcentrifuges tubes filled with approximately two milliliters of Mary Sagatelova: Of your liquid of your phage solutions. All of them are going to be labeled appropriately. Very important. Right.
Mary Sagatelova: If I come over and mix your three tubes around. You need to know which ones are which okay if you drop them on accident and you pick them up them, you need to know which ones which all of these things have happened. Okay, so let's watch all that together.
Direct isolation. Use aseptic technique and work close to a flame while performing this protocol.
You will need your environmental sample.
And liquid media.
Add media to your environmental sample.
Until the sample is submerged between two to three milliliters of liquid Cap the tube.
mix thoroughly.
Then incubate sample with vigorous shaking After shaking allow the sample test set undisturbed until most of the particulate matter has settled.
Mary Sagatelova: You may use a centrifuge to hasten this step. using a syringe draw up some of the superintendent.
Attach the syringe to a clean filter.
And collect the filtrate in a clean microcentrifuge tube.
This is your filtered direct isolation sample.
Mary Sagatelova: So that is the that is exactly what you guys will be doing. The only exception is you're going to be doing it.
Mary Sagatelova: With an ethanol burner on all within aseptic field. Okay, but the protocols, the same the tools you can be using exactly the same. So we watched a video, I've linked it below if you want to just watch it a couple times get familiar with the protocol, but very simple Mary Sagatelova: Hopefully we got that. OK. So now that we've done that. That was our direct isolation. Right.
Mary Sagatelova: We have isolated some phages into a solution from our environmental samples. Now we have to visualize those phages, which is where the plaque assay comes in.
Mary Sagatelova: So what a plaque assay does,what it allows you to do is visually confirm if there are any phages presence in your sample in your environmental sample.
Mary Sagatelova: Right, you can't looking at your little centrifuge tube. There's no way to know if there's actually phages. We can't without human eyes see little tiny microscopic phages.
Mary Sagatelova: So we have to do that other step. Right. So we do is we mix our host bacteria, Gordonia terrae with our filtrate and we grow it on a lawn, on agar.
Mary Sagatelova: And if phages are present and they can infect bacteria that we are giving it Mary Sagatelova: They'll replicate. They'll kill the host and then it'll produce something called a plaque. A plaque is a visible clearing, it's usually a perfect circle.
Mary Sagatelova: On the bacterial lawn, very noticeable. Each plaque is the result of a single phage particle infecting and killing that bacteria. Okay.
Mary Sagatelova: This is not something you will see this week. It takes a couple days for these things to grow. So you'll see them next week as a way to confirm if you do or don't have phages in your sample. Okay.
Mary Sagatelova: So what's broken down. How are we doing us so everything you can we doing here is going to be aseptic very important. So you are going to take a micropipette, you are going to transfer 500, all asceptically, 500 µl of your filterate into a Mary Sagatelova: New culture to begin to label it. Then you're going to add 250 µl, via micropipette of your Gordonia terrae bacteria. Make sure that when you're grabbing your bacteria.
Mary Sagatelova: And before you're putting it and allocating it into your culture tube, you shake the tube up a bit. The reason for that is sometimes the bacteria settles.
Mary Sagatelova: So if you don't shake it, you might not actually be getting bacteria in there. So make sure you're giving it a good shake until everything is incorporated usually you'll be able to tell Mary Sagatelova: If there's any separation, because there's a little pellet at the bottom of the tube. It's just a quick shake and it'll be good.
Mary Sagatelova: So you can be adding that to your culture to just a quick pipette up or down or just a quick little swirl.
Mary Sagatelova: To just mix it up a bit and then you're going to leave that alone for 10 minutes. This is your inoculation step what happens here, you're essentially giving a 10 minutes for the phages to attach to your bacteria. Okay.
Mary Sagatelova: Longer you do this to 10 minutes, the more chance of this of them actually catching and something growing is going to occur. Okay, so make sure that you weren't changing tips between each sample right Mary Sagatelova: You should not be using the same tip for your filter in your bacteria use different tips between solutions and between samples. Okay, so you can be doing this three times for three different soil samples. All of which are going to be labeled Mary Sagatelova: So after you that time inoculation period, we're going to add top agar, okay top agar is molten so it has stay a water bath.
Mary Sagatelova: 55 degrees Celsius until it's ready to be used because the second you take it out of that water bath. It's going to start solidifying which is not what we want.
Mary Sagatelova: So don't get it out while you're waiting for your thing to finish inoculating get it out when it's done. When you're absolutely ready to use it.
Mary Sagatelova: Okay, so you're going to be using a serological pipette for this again because this is a milliliters, not microliters.
Mary Sagatelova: You're going to transfer three milliliters of the top agar into that inoculated solution.
Mary Sagatelova: Okay, make sure that when you're getting the agar out of the water bath. It's not too hot. When I say too hot. If you can touch it and pick it up, then it's not too hot. Right.
Mary Sagatelova: But if you touch it and it's like, oh, that's kind of hot. I don't want to want to pick it up. If that's too hot. And I think you could probably understand why we don't want something that's too hot added to a solution of microorganisms. That's because they will immediately kill it.
Mary Sagatelova: If you have something that's way too hot for you touch to something the bacteria and phages, you're going to kill them.
Mary Sagatelova: But again, if you are able to physically pick it up and hold it. It's not too hot, it's important to work quickly with this again because it's going to start solidifying Mary Sagatelova: So as soon as you add it into your culture tube don't let it sit for any amount of time, right, there's no waiting period you're immediately pouring it onto a petri dish.
Mary Sagatelova: Okay, it's gonna be a labeled petri dish. Also make sure we're doing that we're labeling the agar side and you're pouring Mary Sagatelova: The solution into the agar side and I'll show you a little picture right after the side to make sure we're getting that you're going to pour your Mary Sagatelova: Top agar/innoculate solution into your Petri dish, you're going to give us a gentle swirl to make sure we're spreading all the agar around doesn't have to be too aggressive very gentle.
Mary Sagatelova: When you're going to let it sit until that solution is solid depends between people sometimes that can be five minutes and 15 minutes we just best thing is just don't touch it. Okay, so we're going to be doing per sample for total three different plates.
Mary Sagatelova: Are which are going to be labeled Mary Sagatelova: So labeling is very important, again, I mentioned this in my previous video, but just as a refresher, we're going to have our name and initials.
Mary Sagatelova: Just we can recognize you. Or you can recognize your own plate. The date, and then the contents. Right, so like soil sample one plaque assay would be a really good way to label the contents for this particular petri dish. OK.
Mary Sagatelova: So the agar side is the bottom here, and this is the lid and you can see that a little bit better here agar side where you can see this like media here and lid Mary Sagatelova: You're gonna be labeling on the agar side. Okay. This is also how we store them when they're solid if we start them with the lid up versus the agar side up.
Mary Sagatelova: The lid, there's condensation that forms. So if we store it with the lid side up the condensation Mary Sagatelova: drips down into your agar, onto your bacteria lawn and interferes with how that lawn grows, it's going to interfere with your results. So make sure once they're solid you flip them and they store agar side up.
Mary Sagatelova: You're going to take them together. Once they're solid, but also, again, you really try to emphasize this, you're going to be pouring your agar/ inoculate solution on to the agar side here. Okay.
Mary Sagatelova: Not on the lid. I can't tell you how often this happens just lift the lid really quickly. Never put the lid down on to your contaminated lab bench. Hold it.
Mary Sagatelova: Pour it on to it. Give a little swirl. Close the lid and leave it alone. Okay. Pay close attention to make sure you're not accidentally pouring your solution onto the lid.
Mary Sagatelova: Let's again let's watch that happen.
plaque assay. Use aseptic technique and work close to a flame while performing this protocol.
Began by setting up an infection.
You will need an aliquot of hosts bacteria.
And a sample containing phage Transfer a small volume of your sample containing phages Mary Sagatelova: Into the tube containing your host bacteria. Notice how he's not putting the cap down Mix by flicking the tube.
Mary Sagatelova: Or rotating the tube at an angle. Don't inverted it because it will come out of the cap, just a gentle tilt. allow the sample to incubate Once the sample has been incubated Transfer warm molten top agar to the sample.
Then transfer the entire mixture onto an agar plate.
Tilt the plate to spread the mixture evenly.
Allow the top agar to solidify before moving the plate.
Mary Sagatelova: So that's it. So one of the key differences here is that again he didn't do this aseptically. just for visualizations, you will be doing this all asceptically Mary Sagatelova: Another one is that he used the serological pipettes to pour that top agar.
Mary Sagatelova: inoculation solution back into the petri dish. You can do that or you can just pour it both ways work really well. I always encourage pourage because a little bit faster than students figuring out the serological pipettes situation, especially for the first time. So either. Okay.
Mary Sagatelova: So that's it for protocol, what exactly you're going to be doing. Obviously, if there are aspects that you didn't really follow along while you're watching this Mary Sagatelova: Go back to the slides. Go back to the parts where I was explaining things and just re watch them until you really get a good grasp on this.
Mary Sagatelova: This lab will take two hours, but it's very fast pace right to stay on time with everything, especially given the block of inoculation time. I'm sorry incubation time Mary Sagatelova: It's very important that you are able to do this really quickly. So that means coming into lab prepared.
Mary Sagatelova: So again, if you're struggling with certain concepts. You can read the manual. You can rewatch videos.
Mary Sagatelova: Or you can just look at the slides until you get it. Okay. You can also reach out to me or your TA and we can clarify anything for you.
Mary Sagatelova: Make sure that you if you are not already that you are signed up for an open lab session to make sure that you're able to come in.
Mary Sagatelova: There's any issues with you have any sign up or any other things, contact your as soon as possible, so we can try to figure this out for you.
Mary Sagatelova: Okay, hope everyone has a great first lab, super prepared and excited about isolating and very own phage samples and hopefully I will see some of you there.
Up Next

4:45
Spot Test Protocol 5.6 | Phage Isolation Lab Demo
@melodyscrudato
18.8K views•2016-08-10
50:12
Bacterial Communication: Quorum Sensing and Biofilm Formation Explained
@JHUAAP
12.6K views•2011-06-28

5:35
Enteric Nervous System Explained: The Gut's Brain | Neurobiology Lecture
@alumniu6029
438 views•2018-09-12

7:08
Bacteriophages: Earth's Deadliest Killers and Future Antibiotics
@kurzgesagt
34.6M views•2018-05-13
Related Study Plans & Knowledge Roadmaps
Structured learning paths in Biology
biology
RNAi: Biogenesis, RISC & Gene Silencing
01Molecular Biology Foundations: DNA to Protein
02Introduction to RNA Interference (RNAi)
03Molecular Biogenesis of miRNA and siRNA
+ 2 more learning modules
10h5 modules
Explore Roadmap
biology
Mycorrhizae: Signaling, Biophysics & Ecology
01Foundations of Mycorrhizal Symbiosis
02Molecular Signaling and Root Colonization
03Biophysics and Bioenergetics of Nutrient Exchange
+ 1 more learning modules
11h4 modules
Explore Roadmap
biology
Circadian Clocks: TTFL, SCN & Periphery
01Foundations of Molecular Biology & Gene Expression
02Introduction to Chronobiology and Actograms
03The Core TTFL: Molecular Architecture of the Clock
+ 3 more learning modules
14h6 modules
Explore Roadmap
biology
Population Genetics: Math, Drift & Selection
01Genetic & Probability Foundations
02The Hardy-Weinberg Principle and Baseline Models
03Mathematical Modeling of Natural Selection
+ 3 more learning modules
18h6 modules
Explore Roadmap