























This tutorial demonstrates how to fine-tune a pre-trained RoBERTa model using PyTorch Lightning for multi-label classification on the Unhealthy Comment Corpus dataset, which contains 45,000 comments annotated for attributes like antagonism, hostility, and sarcasm. The process involves creating a custom PyTorch dataset with tokenization, building a PyTorch Lightning data module for training and validation data loaders, adding a randomly initialized classification head to the pre-trained RoBERTa model, and training with AdamW optimizer and cosine learning rate scheduler. The model achieves improved ROC-AUC scores compared to the baseline BERT implementation presented in the original research paper, demonstrating that fine-tuning transformer models on domain-specific datasets can yield better performance for detecting nuanced conversational attributes.
Finetuning RoBERTa for Multi-Label Toxic Comment Classification with PyTorch
Added:[Music] hey everyone today we have another video in the hugging face practical guide series today we're actually going to be taking one of the pre-trained hunger face models and fine tuning on our own downstream task uh if you don't know what the hunger face library is then check out my last video on the basics of the library and if you guys have any questions or you don't understand anything as we're going along then please leave me a question in the comment section down below all right let's jump in today we're going to be looking at a multi-label classification challenge in the nlp domain particularly we're going to be looking at the unhealthy comment corpus this is a data set of around 45 000 comments which have been manually annotated for attributes such as antagonism hostility and sarcasm in this guide we're going to break it down into five steps firstly we're going to import and inspect the unhealthy comment corpus we're then going to create a simple pi torch data set which can load comments from the corpus tokenize them using the hugging face tokenizer we're then going to create a simple pi torch lightning data module which is going to help us create our training and validation data loaders we're then going to create a model which is going to be based off a pre-trained roberto model from the hugging face library and a randomly initialized classification head the classification head is going to help us classify each of our labels in the unhealthy common corpus again we're going to be using the pi torch and the pi torch lightning framework we're then going to train a model and evaluate its performance and we're then going to put compare our model to that presented in the unhealthy comment corpus paper a google colab session this is basically a jupiter notebook hosted by google the great thing about colab is that you can if you go up to runtime change runtime type you can actually change your hardware accelerator to a gpu which will massively speed up training i've also got color pro so i can have high ram run type but even on the free version you'll be able to get access to a gpu which will massively speed up your training time so you can go off and once you're connected if you actually type in nvidia smi this will actually run the command to figure out what gpu you have access to so i've been given a tesla p100 16 gigabytes so i've written out our loose plan that we've already discussed setting up importing the packages we need loading the data set creating a python data set going through the pi torch data module and then training the model and inspecting its performance i've created all these subheadings here so we can sort of go forward and be a bit more organized so the first step really is going to be installing some packages that we're going to need so what we're going to need is so i'm going to do something capture this just gets rid of any of the installation dialogue which i can find can clutter up the screen so we're going to use pip install so the python package manager and we're going to install the transformers module and we're also going to install the pi torch lightning library uh i spell that right there we go okay so that will go off and that will install both the transformers library and the pytorch lightning library in the meantime what we can do we can go to the unhealthy unhealthy comment corpus github and let's just have a little look here so it's called the unhealthy conversations by conversation ai gives a rundown of what the corpus actually contains 44 000 comments the data etc so if we go to the corpus there's a test a training and a validation csv so grab those and you can either upload them directly into your instance or alternatively you can mount them in you can mount your google drive and then just pull them in directly and the reason why that's slightly preferable is that it means that if you disconnect from your runtime you don't need to re-upload your files again so i am going to import google colab and then i'm going to import drive and what else do we need that's basically well what we'll also do is we'll import matplotlib just for any graphs that we need there we go that's plt right great so let's run that and let's then upload or mount our drive so mine is mounted content drive so i'm going to do it and then i'm going to force the room out equals false okay so that should go off it should give you this notebook access to your google files and i'm gonna just allow it um they used to have this api key thing which was rather annoying but i think they've changed that now to this better system so now i've mounted my drive so what you'll be able to see now on your far browser is this drive and in here you can see all the things you have in your google drive so i'm just going to import or write down my training path uh which i've got over here and then also my validation path and so these are just the csvs directly from the github so once we've just got those paths then we can actually open them open them up as a pandas data frame so i'm going to import pandas spd and then i am going to import them so i'm going to go pd read csv and then i'm going to go frame path so that should work and now let's just have a quick look at what our train data contains right so we have an id for each comment the comment is a long string of text and then what else do we have well we have these labels at the top antagonized condescending dismissive generalization healthy sarcastic etc and we have a confidence score for all of them the confidence score um as per the paper is basically a mixture of how many of the judges agreed on that label being true or false the majority wins but obviously some disagree with one another then the confidence score goes down additionally the judges actually had a trustworthiness score as well but i won't go too much into that detail now so what we could also then do so now basically we've got our data uh loaded so why don't we now inspect our data so let's just first of all uh we'll go train data and what we're going to need to actually do is copy these attributes up here so antagonize condescending because we need to index into them so i've written these all out already to save some time so here we go we've got antagonized condescending dismissive generalization unfair generalization hostile sarcastic and unhealthy now we can simply index straight into the pandas data frame and then i'm going to create a plot which is going to be a bar plot that is going to show us uh yes so in a second so what have we got here well we've got our 35 000 comments and however many times they are positive this adds it to the sum so we can see that we have very few examples for things like hostility and sarcasm basically all of the labels apart from healthy and this is a little bit odd that they've provided the data set like this because it's called the unhealthy common corpus but they've provided healthy as the positive class and it's the only majority class in here so what we're actually going to do is we're going to swap around healthy to being an unhealthy attribute so wherever it's healthy it's not going to be negative and unhealthy is going to be positive so we're going to have to create a new column in our data frame called unhealthy and this is going to be using numpy which we're also going to need to import but what we're going to do is we're going to index into healthy and then when that equals 1 as in when that's positive we're gonna make it zero otherwise we're going to make it one so this is basically just going to flip this column so we need a few things here i'll put this above here and then i will also import numpy so we're going to import numpy as mp right let's give this another go aha yeah and we're still indexing into healthy because we've not actually done anything with the healthy column we have just made a new column called unhealthy so that's a little bit better now all of our attributes are in a much similar scale as in we're trying to predict the minority class for all of the attributes remember we have 35 000 rows of comments and you know health unhealthiest or our largest class but it's still only less than 10 of the data so now that's slightly better because when we go to look at some metrics and things like that it's more or less on the same scale and now we're dealing entirely with a minority classification class a classification task and we're working with imbalanced data right now let's move on to the data set and the data set is quite simple it's going to be the um i'm going to be using a pie torch dataset and these things are really powerful and i'd recommend learning how to use them if you're going to be doing any sort of machine learning work at all get to know pytorch a bit better and especially this dataset class is really handy so we're going to create a new class called the ucc dataset and this is going to subclass the pi torch data set this is how you're meant to use it so we're going to create our own initialization function method and what do we need okay well we're going to need a path to our data so let's call that data path we're going to need a tokenizer and if you guys don't know what a tokenizer is i'd recommend going back to my home face basics tutorial and having a look at what the tokenizer is doing essentially we're going to take the string comment which is just text we're going to break it up into sub tokens and tokens of words which are then actually going to be vectors they're going to be numbers that the machine learning model that we're going to use is actually going to be able to work with so we've got our tokenizer and what else do we need well we need our attributes that we're going to need to index into just like we've done above and we're going to need a max token length and the reason we're going to need a max token length is because everything on a batch has to be the same size and so we need to decide how long that size is going to be and because we know we're working with short online comments 128 works well the other thing that we have already seen is that we're working on an imbalanced data class problem and so it might actually be helpful helpful to take a sample of our majority class and then take all of our minority class and there that way we're not doing loads of needless computation computation uh when we're training our classifier it's always better to work on a balanced data set if possible this isn't probably the best method and you can come up with your own solution to try and balance these classes but now it means that we're sampling 5000 comments from the healthy class and you know we're taking all of the unhealthy comments well that will be the plan anyway right so let's just create all of these variables here right so we store all of our variables now what we're going to do is we're going to call a private method and we're going to prepare data and this is going to set up the data in the format that we want so copy this so it's going to be a method of this class and now we're going to have data and this is going to read the csv just like we've done before as a primary data frame but we're going to pass in now the data path that is passed into the class we are then going to do exactly what we've done up here now we're going to flip the healthy class to create an unhealthy column then what do we need to do well if self.sample is not none so we set it defaultly to 5000 realistically we maybe should have set this default to none but the thing is that when we're training we want to try and train on a balanced class however when we do our validation we don't want to mess with the data at all we want to leave our validation set completely untouched because that's how it's actually going to be running at inference time so we need to see if it's actually doing any any good so we're only going to do the sampling for the training data set so when the sample is not num then we are going to create a subset of the data and this is going to be where the attributes sum of the row is more than zero so this is basically saying anything that's unhealthy is where there's any attribute that is positive and this is why it was also useful to flip that healthy and unhealthy so now we're going to do the same but this is the healthy data and this is now just going to be equal equal to zero then we can create a new variable called sub.data which is going to concatenate the unhealthy because we want all of that and the healthy however we are then going to take a sample and we're going to call in self.sample and then we're going to make sure that every time we run this we're going to have the same so we're gonna set the random say to whatever number you like right so that's what we want for our training set however for our validation set what we're gonna want to do is just call self slot data is equal to data because we don't want to take this unhealthy and healthy partition as i've already explained right we need two more methods for this dataset class this is the length method and this is just going to allow the data set to figure out how large the laser actually is and this is just going to be equal to self.data and then our last method which is going to be the most interesting of the lot is going to be called get item and this is going to take the index as a parameter to the method and what this is going to do is every time the data set is called and it wants to collect an item from the data set this is what's going to happen in order to get that item back so the item is going to be self.data dot index location index fine however the common is going to be the item.com pretty straightforward the attributes are going to be the item itself dot attributes so that's going to index in and then what else do we need well so we've got the comment as a string at the minute that's just the raw text and we also have our attributes which is going to be just a list of zeros and ones what we're actually going to turn this into is a tensor of type float and so that's now going to turn that into a tensor so i just need to import torch up here as well right so we've got the string text but we actually also need the tokens so in order to do that we're going to well first of all we're going to call we're going to create a variable capitals tokens this is going to call the self.tokenizer and we're going to call the encode plus method this is going to pass in the comment in string form and then what we're going to want to do is just make sure that we have the correct format because by default the encode plus method is not going to do everything we want to do so we're going to make sure that we're going to add the special tokens and this is going to be the beginning of sentence and end the sentence tokens we're also going to want to return tensors and we're going to return pi torch tensors because we're working in pi tolerance today we're also going to truncate so truncation equals true truncate the comments uh to a maximum length and the max length is going to simply be the self.max token length that we passed in to the class we're also going to apply a padding token to all comments that are shorter than the maximum length and this is going to be equal to max length so that's going to take the maximum length of any comment in the data set which will most likely be 128 well it will be 128.
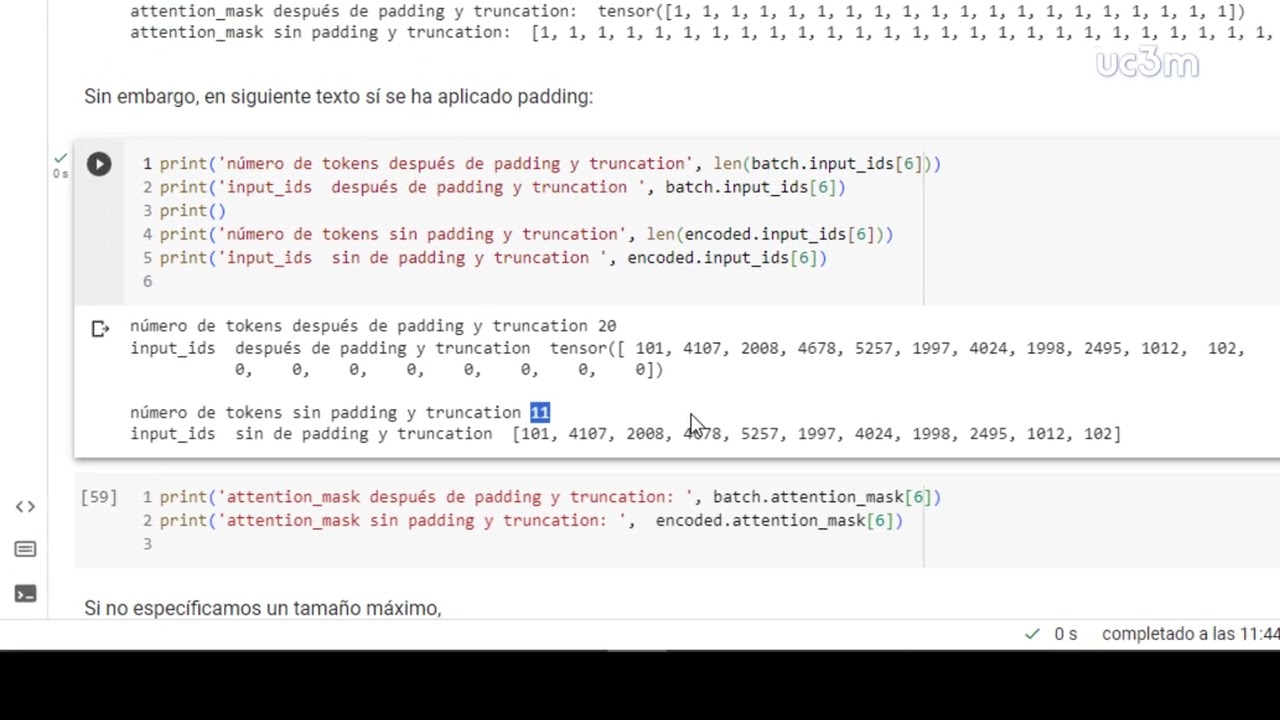
um and so that means that all of our comments are going to be the same size if they're shorter than the maximum length they're going to be padded with padding tokens otherwise they're going to be truncated and chopped off at the end we're also going to want to return the attention mask and this is going to be ones everywhere apart from padding tokens where it's going to be zero right so that's all the tokens that we're going to need so we actually have pretty much everything we need we have the tokens that are going to be returned as pi torch tensors and we have the attributes which is our ones and zeroes depending on whether it's true or false for each class and we've already returned that as a floating tensor so all i need to do now is return a dictionary and i'm going to return a dictionary called input ids and i'm going to go tokens.input ids and we're going to flatten those same for the attention mask we're going to do exactly the same except we are going to be calling the attention mask instead of input ids tension mask and then the last thing that we're going to do is return the labels and this is quite simply the attributes that we've already made up here okay amazing so let's run that that ran all okay what do we need to do well obviously let's just give this a little test so one of the things that we're going to need to do is pass in a tokenizer so i'm gonna from the transformers library that we've installed i'm going to create an auto tokenizer and i'm going to create a model name and today we're going to be working with roberta so i'm just going to pass on remember to base for now i'll show you something we can do later on to actually speed up trading because roberta is a gigantic model so but just for now just show you that it works so we're going to create a tokenizer and this is going to cool the auto tokenizer from pre-trained because we want a pre-trained model and we're going to pass in the model name we are then going to create an unhealthy common corpus data set with this class that we've created up here so let's just pass in that and let's just pass in the training path and the tokenizer we've just created and the attributes that we specified earlier right let's just do this exactly the same except we'll also make it for the validation data set just make sure that it's all working and we'll just pass in the vowel path there okay all right so i misspelled that from pre-trained okay so it's downloading the tokenizer right what have i missed here so i didn't put that in as an int so let's try that again unhealthy not in index uh yeah okay so this is to do with ah okay so i've spotted what's happening here this is simply because i put in train data but we're not working with train data we're working with data now right so let's give that another go and this is because for our validation data set we need to pass in sample is none because we don't want to sample the data right so now that we have fixed those little bugs let's have a look at our items so let's just get the first item of our training data set right so this is probably just down to my poor spelling there we go truncation what else we need to do right brilliant so what have we got returned here well we've got a attention mask which is ones for all the actual tokens and zeros for the padding tokens we have the input ids which is starts with the beginning of sentence token ends with the end of sentence token and uh yeah that's all fine and then it ones everywhere else which is the padding token and then we have our labels which seems to be zeros for everything so false for everything apart from one class which is probably unhealthy um [Music] so let's just have a look at how large our data set is so let's just make sure that our length function is working okay so we have a length of 9960 comments for for our training data set which we know was 35 000 originally but now that we've taken that sample of 5 000 healthy it means that we have five thousand healthy and around five thousand unhealthy comments so that's gonna do at least something to help balance the data set and it's gonna just massively speed up the training time so now let's move on to the data module so the data module is going to be quite simple um probably the simplest thing that we'll be doing it's literally going to be a standard pi torch lightning data module and all it's going to do is basically return us it's going to create our data sets for each of our training and validation data sets and it's also going to return the data loaders for each of the data sets so what do we need well we need the data loader from i torch from pytorch and let's just import those what have i misspelt here i'm just gonna use capital l i believe great great okay so we're going to create a new class and this is going to be called pi torch data module and this is going to subclass the lightning data module class right what do we need for our initialization function well we're going to need our training path and our validation path for both of our data sets we're going to need the attributes we're going to need our batch size that we're going to set for our our data loaders let's set that as a default 16 or something like that and we're going to have a max token length again because we need that for our data set class that we created above and then we also need a model name so let's just put that default as base just like we did before when we created our tokenizer so we're going to call the initialization function on the superclass so this is going to call the pi torch lightning data module superclass initialization function and then let's also just save all of our variables here okay cool so now that we've done that the other thing we're going to need is to create our tokenizer and we're going to do exactly like how we've done it above in fact i'm just going to steal this and that is going to create a tokenizer and it's going to automatically infer which take notes we need from the model name and our model name we've already passed in as robert base so what else do we need well for our pi torch lightning data module we're going to need a setup function and this is going to take a stage parameter which is going to be defaultly none and the setup method is basically just for the different stages of our model so if we're predicting or if we're training so what we need to do is if stage in none or fit which is the training stage then we're going to need to set up our training data set and this is going to be equal to basically what we've done up here exactly apart from now we need to make sure that we're passing in self.train path self.tokenizer and self.attributes so now that we've got that we're going to literally copy this for our validation set so val data set is going to be exactly the same but we're going to pass in our training path but everything else is going to be the same apart from i'm not going to make that same mistake i'm going to set our sample to none then what we're also going to do because i'm going to show you guys how to actually predict from this data from this model once we're done is we're going to say if the stage is equal equal to predict then we're going to create the val data set and that's it all we need to do now is just return our data loaders that and so our train data loader this is going to return a data loader so that pi torch data loader and we're going to pass in our training data set and remember our training data set is already of the pi torch dataset class and we're going to pass in the batch size that we want for the data loader and this is equal to self.batch size and we're also going to want to set the number of workers and we're going to set that to 4 and then we're also going to make sure that we're going to shuffle this right fantastic so we're gonna so that's all we need to do so this is almost done now except we're gonna need to create one for our validation and one for our uh um data loaders as well when we get to prediction time uh what i'm just going to do for now is so in practice what you'd actually do is you'd have a separate test data set and there's a test data set provided just to make this as simple as possible i'm going to keep this the validation set for um for prediction class however yeah it would literally be a couple more lines of code to put in the test data set we're going to keep this all the same except we're not going to shuffle the validation data loader or the prediction data loader because we don't want to put any randomness or stochasticism or whatever you call it into this uh process when we're actually validating the model but we can keep the number of workers equal before that's fine so now let's just see let's just have a little test so ucc data module is equal to ucc data module and what we're going to pass in well we're going to pass in our train path and our vowel path which are where our actual csvs are and then we're also going to pass in the attributes and let's see if that works okay so roberta bass is not found i've probably misspelled that yeah i've spelt it with an underscore but it's actually a hyphen let's give that another go okay so that's all fine so now if i call this data module and i call the setup function then that should create our data sets and now if i call train data loader then we should get back a pi torch data loader and this data loader can do many things um we can we can index into or iterate over it and get batches of data back we can also call length on it and this will actually return the number of batches in our in all of our training data sets so we have 623 batches we set the default batch size to 16 and we know we had 9960 so 9960 data samples if we divide that by 16 we get 622.5 so it's filled in that extra half with some other random comments to make 623.
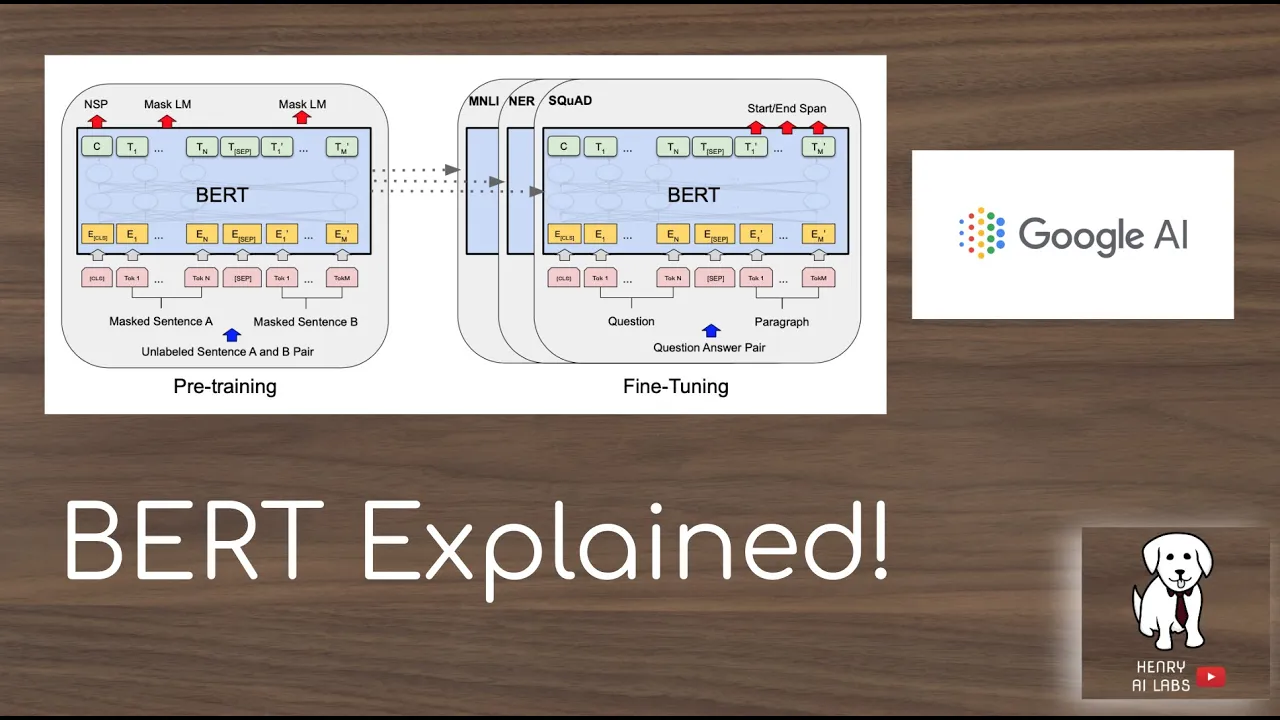
right so now we've done the data module let's actually get on to the model so the model is gonna be quite simple probably the most complex part um obviously this is gonna be where we're actually gonna be training the model so we're gonna need a few things so from transformers we're going to need to import the auto model the atom optimizer with weight decay and the get cosine schedule with warm up and this is going to be our learning rate scheduler for our atom optimizer so just to briefly explain what this is this is we have a learning rate for our optimizer um let's see if here they are we have a learning rate for our optimizer and if you have that fixed that is not always great because as you get further on in your training you actually want to decrease your learning rate as you hone in on the most optimal solution so what we're going to do with this gets cosine schedule with warm up is we're going to start from a learning rate of 0 and go up to our maximum learning rate we're then going to decrease in this sort of cosine little slope um all the way back down to zero and this is over our epoch so we're going to need to tell this scheduler how many epochs we have etcetera etcetera and this is going to give us a much better overall performance with our model this warm-up helps especially with adam as it can be quite badly behaved at the start so we don't want to jump around too much so what else do we need well we're going to import torch dot neural networks as neural networks what else we're going to import math i believe we're going to need that um oh yeah we're also going to import torch metrics functional classification import the rock score so the area under a curve for the rock score i won't go into this now but this is quite a good metric for understanding how well your model is doing um especially when you have well it's not the best metric to use especially for this imbalanced dataset class that we have um but it's much better than accuracy because we already know that you know like 95 of our comments are healthy rather than unhealthy so if we use accuracy we're going to quickly get a very high accuracy and it's not going to be very useful so this is actually going to plot the false positive rate plus the true positive rate at different thresholds um and this is going to give us the area under that curve and it's going to be quite a good metric and it's what more importantly is what the authors use in the original unhealthy comment corpus paper so we can actually compare our score versus their score for this metric um so we'll do that at the end when we actually predict against the validation data set we're also going to need to import the torch.nn functional as f and this is just going to allow us to call f to get access to some methods that we're going to need so let's import those we're then going to create a new class called the unhealthy common corpus classifier and we're gonna now have a lightning module which we're gonna index into so this is pi torch lightning lightning module just like uh the normal dot module and then dot module um but with some added benefits so we're now going to initialize this and what do we need well we're actually going to want a config file which we're going to have as a dictionary and this is going to include all of our hyper parameters and things it's going to make things a little bit neater when we're working so we are again going to call the super initialization method and what else we're going to do we're going to save the config and then we're going to start creating our architecture so we want a pre-trained model pre-trained model and this is going to be equal to the auto model auto model from pre-trained and then we're gonna index into our config and we're gonna take model name then we're gonna return right we are also so now literally we could pass in a batch of our comments into this model and we get back um we get back our batch after been passed through the roberta model however the reverse model to pre-train model that can be used for many downstream tasks here we're using it for classification and therefore we're going to want to append a classification head on to the end of the model to improve our performance even more we're actually going to add a two layer neural network onto the end so we're going to have a hidden layer before we pass it to our final layer so let's create our hidden layer which is going to be nn.linear and what are we going to have here well we have our pre-trained model and then we're going to index into that their config and take the hidden size and we are just going to copy this and we're going to copy this so we've created our hidden layer which has input which is the output of this and the it's going to go to the exactly same number of nodes here we are going to however index into our config and we are going to index into the number of labels that we passed in as our hyper parameter so here is going to be the number of our classes which is going to be i think eight right what else do we need to do well so we've created our hidden layer and our classification layer but we are going to still need to initialize these layers so we could leave them blank and the torch will automatically initialize them for us however if we we can either use xavier normal or xavier uniform to initialize the weight of these um neural network layers and it's going to slightly improve our performance again so self.justifier.weight and we're going to need to do exactly the same for our hidden layer okay so we're passing in the weights of our hidden layer and our classification layer into this xavier uniform initialization what else do we need well we're going to need a loss function and for our loss function we are going to use the binary cross entropy with logic's loss and this means that we can pass in our all of our output um our output labels so if we think it's healthy if we think it's sarcastic and this is going to create us a single loss that we can then back profit through our network and update our weights and we're going to take the mean of all of our predictions um so obviously we have eight classes so we're gonna get eight losses out or even more than that depending on how many are embedding size and things like that but we're going to reduce it down to a single number using mean other thing that we're going to want to do so this is lost function is create a dropout layer and this is just to make sure that we don't over fit our model to the trainer dataset so what dropout does is it randomly turns on or off uh several nodes in our neural networks every time a training loop so every batch uh every training iteration we're going to randomly turn off some of the nodes and let's make sure that the model doesn't heavily rely on particular nodes or particular tokens or something like that um so it's a form of regular regularization so we're gonna have dropout so that's all the initialization we need to do but now we need to create our forward pass which is going to be our most important thing really for our training loop so what we're going to need is our input ids and attention mask we're also going to need labels but we're not always going to need labels so we're going to fully set that to none so remember for our training we're going to need the labels so we can have our loss function however when we actually go to predict we want this set to none and then we're just going to pass back an empty loss and there's other ways you could do this you could have yeah there's other ways to do this but that's how we're going to do it so the first thing we're going to do is we're going to have our roberta model and the output from our roberta model is simply going to be self dot pre-trained model and we're going to set the input ids to input ids and the attention mask equal to attention mask right so that's passed through our roberta model and that's absolutely fine however the output from the roberta model um is actually is going to give us an output for every single token we pass in and our maximum length is going to be 128 so it's always going to pass us back 128 tokens of output one way we could um we could and this is not this is not really useful for us um because we're trying to classify the entire the entire sentence the entire comment so we're actually going to take the mean there is another thing called the pool output or the classification output where we take the first token but the hugging phase suggests that we should actually use the mean output because it's a better representation of the entire sentence a quick little break from the tutorial to have a look at the options you have when you're designing a classification model using the hugging face library and one of the pre-trained models in particular roberta or bert it also allows us to take a little step back and have a look at what our model is exactly doing overall look at the architecture from start to finish so side by side here i have two options that we can choose upon on the left i have the cls token and on the right i have an average or max pooling option so let's just have a look at the similarities between these two well firstly they take a sentence here i put they walked lazily this then gets split up by one of the tokenizers into tokens so here it's split up into they wart las ili this is then transformed into the input ids and the special tokens are appended to the star at the end here is the cls or beginning of sequence token and here is the end of sequence token which is two and in the next row with all ones is the attention mask now remember when we're actually doing this in practice we make sure that all of our tokens are the same size and we add padding tokens to the actual sequence so we'd add ones to the bottom row for any uh you know for to get up to the maximum length and then in the attention mask we'd have zeros for any of the padding tokens so once these input ids have been found the actual word embedding for each input id is inputted into the home phase model or for example the roberta model this is then passed through the 12 layers the millions of parameters the transformer base model from hugging face has been pre-trained then at the end we then pass our output of the model to a final classification layer however this is where the two options differ as i already mentioned we get output for each of our input tokens on the left we what we do is we discard all the tokens apart from the beginning of sequence or the cls token when we actually go to training time this cls token is then relied upon to learn a representation of the entire sentence and therefore we can actually get quite good output from a single token the other option is to use an average or a max pooling layer where you take the outputs of all of the roberta tokens for all of your sequence and then you just take the mean or you take the max and then you get you know another representation over the entire sentence this is the second option that we're going to go for today and this is what's recommended by hugging face however in practice i've tried them and they always seem to be quite similar but this has given us the opportunity to actually look at what we're doing and then obviously in this final classification layer as we've already looked at we've set up a hidden layer and a classification layer for each one of our output labels such as sarcasm or hostility so now let's go back to the tutorial and finish setting up the model so that's what we're going to do i'm going to call torch.mean and then we're going to call our output and we're going to take the last hidden state and the dimension that we're going to take the mean on is going to be the first dimension which is going to be um the tokens that we have so that's going to give us back um the pooled output um and then we are going to then pass this through into our neural network layer so neural network classification layers so what do we need here well let's just keep this pooled output and we're going to pass this first into our drop out so this is going to enforce the model to even with some of the tokens missing it's going to force the model to try and classify the sentence with only a few of the tokens left um although actually let's not do that yet let's instead um let's pass it through the hidden layer first so soft.hidden and then we're going to call the dropout layer so self.dropout and then we are going to pass this through an activation function so we've already passed in functional we're going to call the relu activation function which is the most popular activation function by far and so this has now gone through our first hidden layer um and some dropout so then what do we need to do well we're gonna pass it in to our final classification layer so we're gonna call self.classifier and then we're going to pass in this pool output right so now we've got our final output of the model so now we can calculate the loss so our loss is going to be initially zero but if the labels is not none then we're gonna create our loss and our loss is gonna be equal to the self dot loss function and then we're going to take our logits and we're going to make sure that they are the same shape so we are going to transform that to that shape and then we're going to do exactly the same [Music] with our [Music] labels that we know are have been passed in because we've got this if statement then we're then going to return the loss and the logics the logics is just a fancy name for the output of our model of our final model um except um of course this is classification challenge so we're actually going to be wanting to pass our output through a sigmoid function to make sure that it's between zero and one however we are going to have this we're going to be using this binary cross entropy with logits loss which is more stable so this loss combines the sigmoid layer and the binary cross entropy loss in a single one class this is more numerically stable than it plays sigmoid follicle body across entropy loss so we're actually going to be passing back these raw um logics without the sigmoid function applied um right now we need to create our training step and these and our validation step and our prediction step and this is going to be what the model does at each step of our training so our training our validation our prediction steps these are quite straightforward we're going to have a batch of data that's passed in from our data loaders and the batch index and that's quite right right so what's this going to do well it's we're going to get our loss and our logits and that is just equal to our self and then we're going to unpack the dictionary and remember we're going to get back this dictionary that we've created up here attention mask input ids and labels we're just going to unpack that directly into the self and because this is inheriting from the nn module from pi torch this is going to call forward pass so we're going to get our loss and our logic back we're then going to call self.log and we're going to save our train loss and this is and this is going to be equal to our loss and we're going to set the progress bar equals true and logar equal to true right and then we're going to return our loss our predictions and our labels okay amazing so now we're going to copy this and it's going to be very similar except it's going to be the validation step and the predict step and they're going to be almost identical except this is called validation loss and this is going to be vowel loss but apart from that everything else is the same for the prediction step it's going to be slightly different because we're not going to care about our loss our loss yeah that's correct we only care about our outputs because that's what we want returned so we're actually just going to return our logits and that is almost done so we've almost got our entire model the only thing we have left to do is to configure our optimizers and this is going to be quite straightforward it could be a little bit of work we're going to need to do but it's mainly just setting things up so we're going to call our adam.w from the transformer library this is going to work on our parameters of our model and then we're going to set the learning rate is equal to the self itself.config learning rate and we're going to have a weight decay and this is going to equal to self dot config w decay okay so that's our optimizer uh we're now going to need to set up our scheduler so our schedule is going to be pretty straightforward but we're going to need a few parameters first so we're going to need our total steps which is going to be equal to self.config train size because obviously this is going to be for training and this is going to be divided by our batch size batch size what else do we need well uh let me just close this parenthesis that's everything am i messing me up no right we're also going to need to calculate our warm-up steps because remember we have a warm-up period for our learning rate scheduler this is where we're going to have the math and we're just going to floor our total steps times by some percentage so we're going to pass that percentage in i'm just going to call that warm up so now we have the warm-up steps and the total amount of steps then we can now actually create our scheduler and this is just get cosine schedule with warm up what's this going to have well we're going to pass in our atom optimizer into this as well as our warm-up steps and our total steps and that is it and then we're just going to return a list of our optimizers and a list of our schedulers which we only have one of each right so and optimizer else i'm gonna spell warm-up steps okay right so i think that is good to go so let's just give it a go so let's pass in our config so we're almost there now we almost have everything we need to train so what do we need for our conflict well we need to pass in a model name and here's the thing i was going to mention earlier is that so although roberta is great um it is a very large model so the people at hugging face have also created a distilled version of the model with way less weights it's not as good so if you're really if you if inference time is not something you care about and you're only after performance then use the original model uh but just for this tutorial i thought i'd show you this so we're going to use distill roberta base which can be smaller faster to train and we're going to be using well we need to pass in our labels which is just going to be the length of our attributes that we'd already created uh what else do we need well we need our batch size and our batch size let's just create as 128 you may need to adjust this depending on which gpu you can get your hands on we're going to start off with a learning rate which is quite small so but this is within the standard range um that the people in the roberta paper recommend and then we're going to set our warm-up percentage so we know that this needs to be a percentage so let's just set this as 20 of the total number of steps we also need to pass in our training size and this is going to be equal to the length of our data module dot train data loader okay fantastic and then we have our weight decay and let's set this to something quite small as well something like zero zero one um getting some commas here and final thing is the number of epochs that we need to train for so [Music] let's just set this as 100.
and now that we've created our config and i prefer having this config outside we can sort of automatically adjust it lots of other ways we can optimize this especially if you're doing hyper parameter tuning this is you know you don't want this config hardwired into your model you want to be passing this config in um and if you guys are interested in hyper parameter tuning we can do another thing on that with something like ray tune maybe using a model like this so we have our model here and this is going to be equal to our classifier ucc what do we call it ucc classifier and all we need for that is our config let's see if that works and while waiting for that to load and hopefully it won't break but it does so it has no thing called hidden uh huh yeah because i didn't even put equal signs but minus signs because i'm a weirdo there we go give that a go okay has no thing called classifier okay i've got a classification so i probably called it classifier here yeah right let's give that another go okay so that seems like it's worked so in order to make sure that it's definitely working what we can do is we'd already created this dataset class so let's just pass in an item from [Music] our dataset so we're going to want the input ids [Music] we are going to want the attention mask touch mask and the labels so these are the three things that we need in order to get a prediction and a loss back from our model um so i'm just going to cool the model onto the cpu well let's just see does this work so loss output go to model that we've created up there and let's just pass in input ids and we're going to need to unsqueeze this because our model at the minute is expecting a batch of data but because we've called our i should have really called the data loader class but we are going to need to add an extra dimension on here because we're only getting one sample back um [Music] so we're going to need to do this for our attention mask as well mask and we're also going to need to do it for our labels i didn't call it tension mask i call it um okay so let's just see if okay so and this is why it's useful to do i've misspelled this to views but it's just view okay amazing so now let's just see what our loss and our output looks like amazing so we've got a loss back of 0.85 and we also have got back a list of tensors or yeah has eight values uh one two three four five six seven eight one for each of our classes so these are actually our raw predictions um for each of our classes so now we're actually we know that we can pass in some raw data into our model so now we're actually in a position to train so let's create our data module so let's just copy everything from up here we'd already done this but it's just nice to have it all in one place so we have our ucc data module but this time we're going to be passing in [Music] batch size valve size batch size is equal to config batch size um and we're going to call setup just like we've done previously and this is going to create the correct data sets that we're going to need uh we're then going to call model and [Music] we are just going to do exactly what we've done up here again just getting we're not doing anything new here we're just getting everything into the right uh frame into the right cell so we can look at it all in one so now we're gonna train so in order to train we're gonna be using a pie torch lightning trainer and the python lightning trainer is simply going to take the config number of epochs and it's also going to take the number of gpus that we want which is the one great thing about pytorch lighting is if you have multi gpus it will do it for you automatically you've not done it before but apparently it's rather good and then we're going to set the number of sanity validation steps and this is useful as well because when you let's say a training epoch takes a long time and you get all the way to your validation set and you go all the way through the validation step and then something breaks in the validation set um because you've set up your validation steps slightly wrong or something like that you don't want to get all the way through your training which is normally the majority of your data and then for a break at the end so this just makes sure there's a little sanity check at the beginning to make sure that you've got everything in the right order so let's just set that to 50.
uh and then we're just going to call trainer.fit and we are going to pass in our model and our data module and that is it so this will go off and so let's have a look some weights of the model checkpoint were not used when initializing the roberta model this is expected if you're initializing a rebirth model from a checkpoint of a model trained on another task which is exactly what we have we have a pre-trained model and now we're retraining it with our classification head so this is that's just a warning to make sure that we know that we then have gpu available true which is great because that that's what we want we want our model to be trained on the gpu it's being used and then we actually have our training so we have 82.1 million parameters for our pre-trained roberto model we then have two layers a hidden layer and a classification layer our classification layer has 590 000 weights our final layer has 6.2 000 weights and then we have our loss function and our dropout which obviously don't have any parameters um and we are actually going to get a loss and our training loss and it's going to go through our epochs and um and it's going to be training so obviously this is going to take a little while i've set it to 100 epochs you could set it to significantly less we'll have a look at how it does at the end so i'll come back when this is all trained and we can have a look at the model okay guys so i've come back and i've done a few things so i'm just going to run you through everything that i've done so firstly i've cooled in the tensorboard and i've loaded the lightning logs which is going to load the logs that we created in our training and our validation steps so you can have a little look here at our validation loss over the epochs and our training loss of the epoch so our training loss looks like it was constantly going down a validation loss on the other hand seems to have plateaued and seems to have slightly gone up again which would say to me that our model is slightly overfitting on the training data and it's not generalizing to unseen data however we have a model and it looks like it has learned at least something so let's have a look so i've also created a few other little things um and i'm predicting with the model that we've just created so i've created this really simple class called classify raw comments it takes a model and a data module and uh predicts the and predicts the um the prediction data set this is what uh yes the prediction step and the prediction data set that we passed in which remember we set to the validation data set um and again you'd use a test data set in reality i'm just doing it here for simplicity um and if we were fine tuning or something you definitely wouldn't want to do this because you could fine tune on your validation data set and that wouldn't generalize to other unseen data so all we're going to use here is numpy to stack these up and we're going to get these flattened predictions out we're then going to pass in our validation data set and we're going to get the true comments the true labels the ground truth data and then i'm just going to create a simple um so we're going to import sklearn and we're going to get the rock curve and the rock auc score and we're just going to plot the same graph that was seen in the um in the actual paper for the unhealthy comment corpus and let's just have a look at our results compared to theirs so here is the exact same graph that we have that we've created and as you can see so this paper they use the bert model um and i had a look at that implementation and there was a few things that would have changed um for example they're using statistics stochastic gradient descent instead of adam they're not using a learning rate scheduler a whole bunch of things that they could have changed but this paper wasn't about the model it was about the data set so it was always going to be improved upon but we can see that for pretty much all the labels we are actually getting better results so for example sarcastic which is a note in the paper as being particularly bad they get 58 here which is slightly better than chance we're now getting 75 for sarcastic which is great uh generalization so for unfair generalization we're getting 88 rock ac score here they get 67 so and things like hostile they get 82 i think we get something very similar 82 so you know and that sort of maybe makes sense that roberta is slightly it's it's gets better results on um all datasets it's better trained it maybe has been trained so much that it can pick up on slightly more nuanced attributes such as sarcasm and unhealthy conversation so yeah that's what we've done today guys we've created a model from scratch using a data set that has not got much uh online material for its newly released came out last year um and we've improved upon the baseline we've loaded it up as a python data set and uh pi torch lightning data module we've created our model um and we've got some good results out so this is these aren't perfect if you were to analyze these results even further you know that this is still a really really difficult task it's very subjective but we have got better results than the baseline which is quite exciting and hopefully you've learned some things along the way so let me know if you've enjoyed this tutorial and thanks for watching
Up Next

How to Fine-Tune Llama 3 on Custom Data with Unsloth
@fahdmirza
30.6K views•2024-04-18

Triumph of Orthodoxy Icon: Byzantine Art & History Explained
@BenCallan
2.1K views•2024-08-06

FastAPI vs Flask vs Django: Choosing the Right Python Web Framework
@TechWithTim
302.5K views•2024-05-26

Game of Thrones Opening Credits: A Cinematic Analysis
@gameofthrones
46.3M views•2011-04-18
Related Study Plans & Knowledge Roadmaps
Structured learning paths in General & Interdisciplinary Studies