

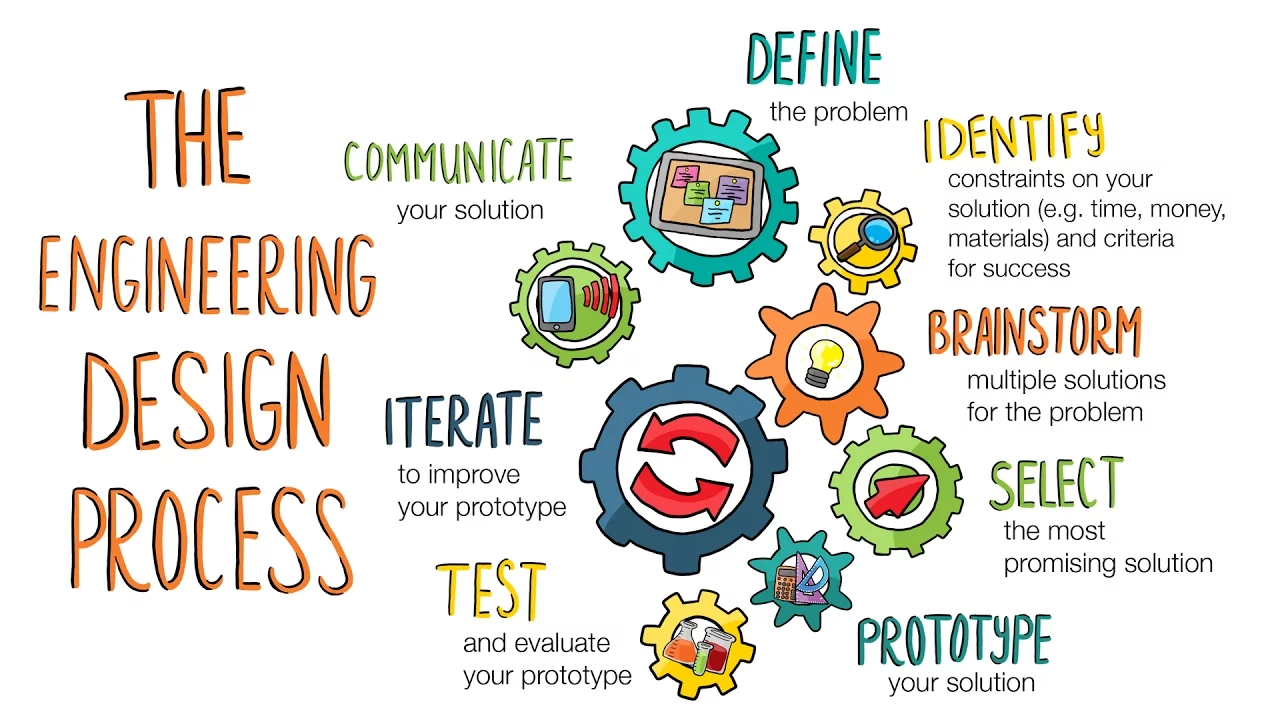
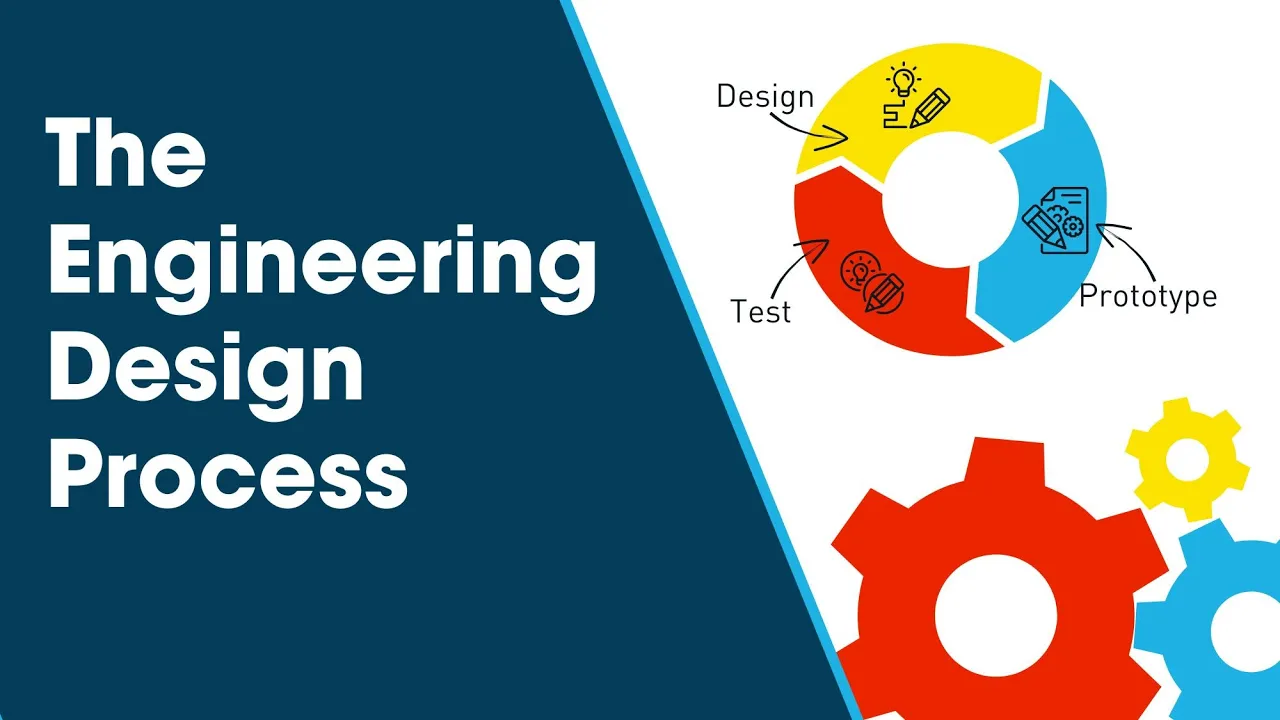















The engineering design process (Plan-Do-Check-Act) can be effectively taught using hands-on renewable energy experiments like wind turbine blade design, where students systematically test variables such as blade number, length, pitch, and shape to optimize power output while integrating state science and engineering standards including asking questions, planning investigations, analyzing data, and constructing explanations.
Engineering Design Process with KidWind: Wind Turbine Teacher Guide
Added:Basic principles of electromagnetism and energy conversion, specifically how kinetic energy from wind is converted into mechanical and then electrical energy.
Familiarity with the standard stages of the Engineering Design Process (EDP), such as identifying constraints, prototyping, testing, and iterating.
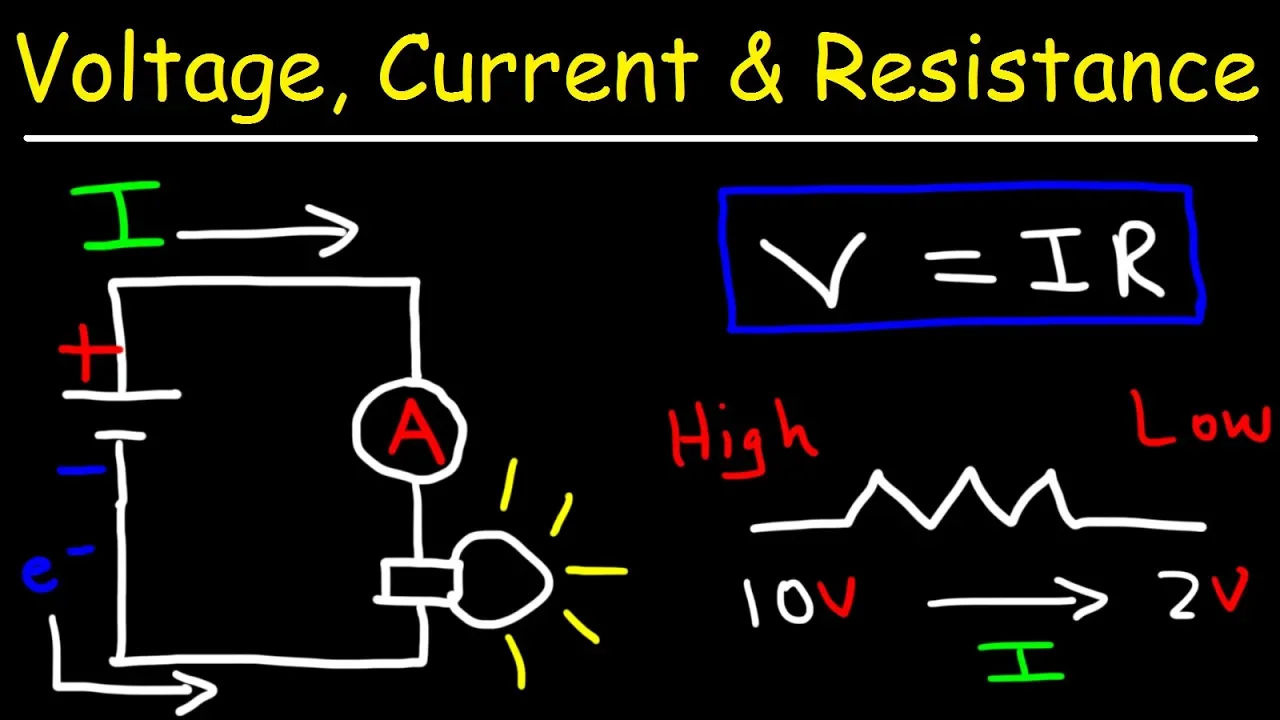
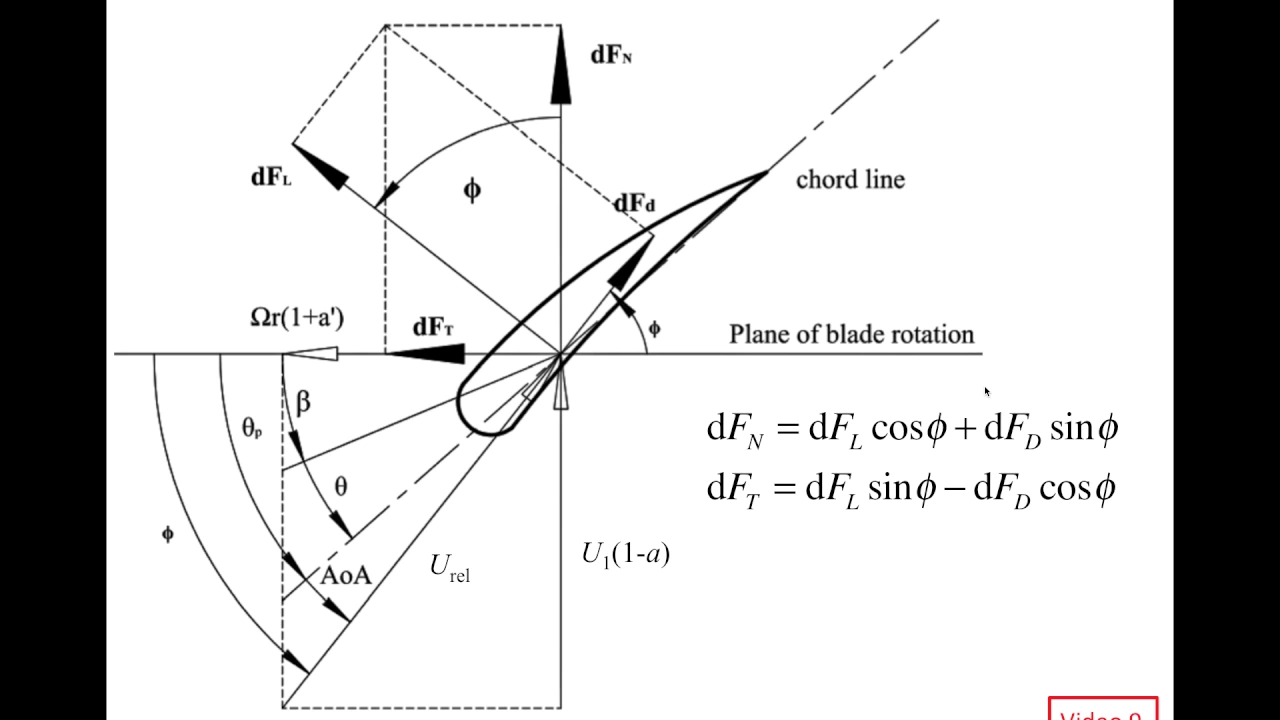
Elementary physics concepts of force, torque, fluid dynamics (basic lift and drag), and simple electrical circuits (voltage, current, and resistance).
Foundational pedagogy of Project-Based Learning (PBL) and inquiry-based science instruction to effectively guide student-led experimentation.
Quantitative optimization techniques for wind turbine blades, exploring how variables like blade pitch angle, surface area, twist, and aspect ratio affect aerodynamic efficiency.
Implementation of data-logging tools and sensors to analyze power output curves, calculate gear ratios, and measure electrical work mathematically.
Curriculum expansion into other renewable energy systems, such as solar photovoltaics, hydroelectric power, and hybrid microgrid designs using a similar engineering framework.
Investigation of real-world wind energy challenges, including grid integration, environmental impact mitigation, and offshore wind turbine engineering.
247 views4likes49:53Original Release: 2024-07-19
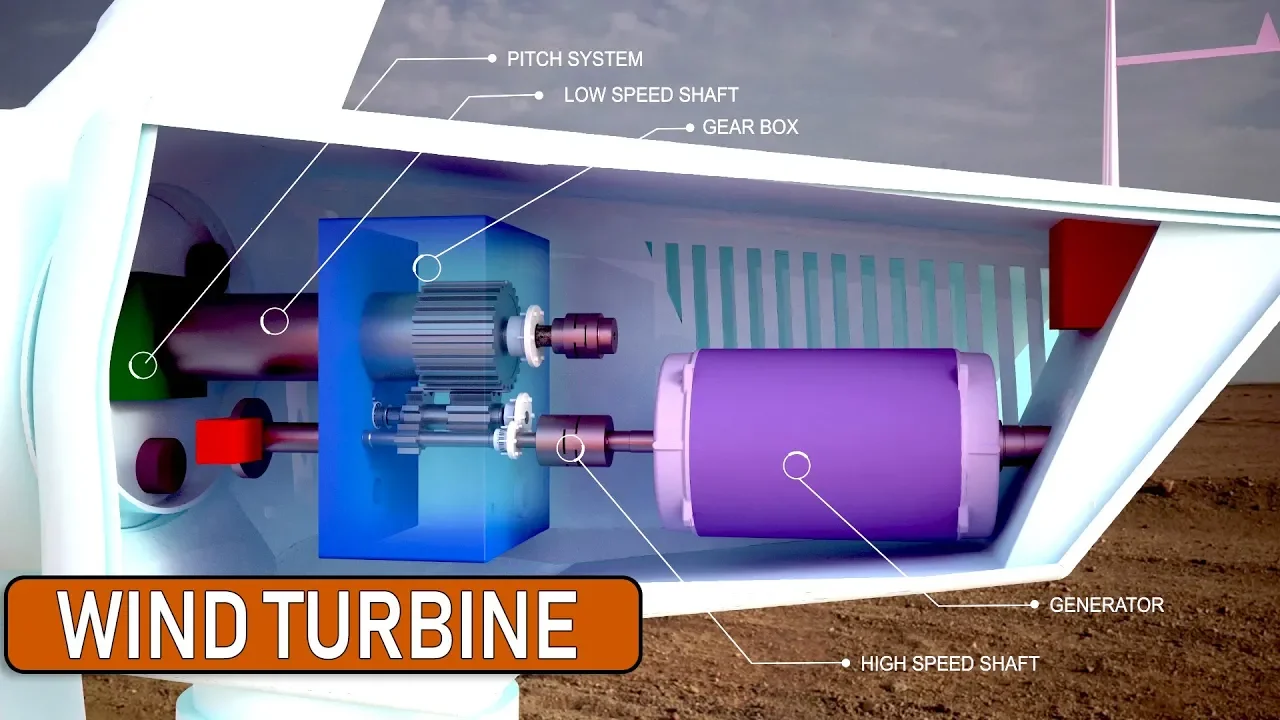
hey there everyone good morning happy Thursday we'll go ahead and let folks start filtering into the zoom room here uh thank you for joining us for our think like an engineer uh webinar we are going to go over a lot of exciting new information with you all as you get settled in um I wanted to encourage you to navigate to the bottom of your Zoom window and locate the chat button it will be right at the bottom it looks like a chat bubble um it says chat below it if you click that you'll be able to chat to everyone and I do mean everyone make sure in the little two section you click that you're chatting to everyone um we are going to be answering your questions during the webinar so if you send it to just us it's going to look like we're talking to ourselves and that's why I'm asking you to make sure that is set to everyone so that everyone knows what questions are being asked we can share the wealth um and and to get things started I would love to hear you uh let me know what the most exciting thing you have done or are doing this summer um let's see yesterday in yesterday's webinar um one of our presenters recently became a grandfather so that's very exciting um I know people have summer school going on there's some trips happening so please make sure um let me know drop in the chat what is the most exciting thing you have done or are doing this summer and make sure that chat bubble is set to everybody let's see very cool so we have uh one of our participant is taking the dogs to the lake I love that we uh Tom and I were just talking about a lake vacation so um it sounds like everyone's got awesome outdoorsy plans what else are you all up to this summer looks like folks are still typing oh cool one of our uh one of our attendees toward Biosphere 2 in Arizona and the Arizona State University solar Fab Lab that is so cool well you are you you are in the right place so very cool science museum in Oregon oh is that omy we love omy visited my son in Phoenix oh that's very cool for his couple shower exciting all right well it looks like we're two minutes past the hour so to make the most of our time together today I just wanted to share some housekeeping items uh first and foremost I do want to let you know that you will receive a recording of This webinar um it typically takes us about 3 to 5 five business days to have that ready and as soon as it's ready we will email it out to you so keep an eye on your inbox it will also be on our website and on our YouTube so you'll have lots of access to that um in that email with the recording you will also get a link to our resources folder it's going to have today's presentation um some uh experiments that you can do and I'm going to drop that into the chat as soon as I'm done talking as well um and the second piece of housekeeping I mentioned earlier we will be taking questions during today's webinar so please feel free to drop your questions in the chat uh our fantastic presenter FR is going to have an eye on the chat so um please let us know if anything is sticking out to you if you want some clarification we'd be happy to help if we happen to not get to your question today you can absolutely reach out to us at physics.com or give us a call chat with us online however you want to reach out we're here for you all that being said I will pass you off to our presenters and thank thank you so much for joining us thanks Dylan uh Tom Smith here let me catch up my slides Dylan's already gone over a lot of the housekeeping issues um just make sure that we didn't miss anything here Dylan looks like everything's good uh there is a email address for kidwind ver.com there it's good to note if you have specific questions about kidwind um and with that uh I'll will briefly introduce myself uh Tom Smith I'm part of the engineering education group here at verer and a recent uh uh ad e to the kidwind group um I've been a fan of kidwind for quite a while and now I get to play with it on a more frequent basis uh and as Dylan mentioned Fran's with us here today Fran do you want to introduce yourself sure first of all I love Tom that you said a fan of kidwind very nice um yeah so uh my name is Fran I am the director of physics here at verer and I'm also the technical lead on our kidwind line of products uh so you can also ask me anything kidwind uh and again that email address kidwind atr.com will get to the whole kidwind group whoever's the first one who is available to pick up your question will answer you and and you know you should get a quick response excellent okay uh with that let me uh just introduce kind of our general agenda so uh with kidwind it's a great platform for introducing the engineering design process which is our primary focus uh for today but I uh for myself as I was going through preparing for this webinar uh started to look at how the engineering design process uh meshes together with uh state science and engineering standards so I'm going to spend a bit of time talking about those um going to introduce the kidwind equipment uh that I'm focusing on for this uh the kidwind uh basic uh wind experiment kit as well as diving into the some of the details of the blade design activity this part of our renewable energy book that uh that activity is you'll find in the uh materials that Dylan's sharing with you in that shared folder um and then in addition to the to that activity I've basically taken it and modified it to focus on the engineering design principles and uh I put that in that shared folder as a Word document so that you can take it and modify it I will mention that this is a tom smith uh uh modification not uh you won't find that anywhere in any of our books or anything like that but I thought it was worthwhile going through the process of just highlighting where those engineering standards uh might fit into that particular activity and how you might modify that to do that um let's see we'll go ahead and jump ahead here uh so why are you here in the the middle of your summer vacation um I'm guessing that uh some of you might teach engineering either at the college or High School level and are seeking some relevant activity uh to uh uh kind of expand or put into practice the engineering design uh principles uh or you might teach science and need to figure out some way to integrate those engineering standards if you're a high school or middle school teacher have to uh to figure out how to integrate those uh engineering standards into your science curriculum whatever uh the the case is uh we think kidwind is a great platform for accomplishing this um it is a really tangible and relevant activity working with renewable energy something uh students are uh are eager to engage in and um you know it uh we we find it is applicable whether you're again in middle school or in high school or on up into the college uh introduction to engineering uh type courses we're seeing it used quite a bit there so um so we hope that's why you're here watching this today so I want to start off uh by talking a little bit about the engineering design process if you were to do an internet search for the engineering design process you'll come up with a a myriad of examples um typically it's presented as kind of a cyclical process where you uh you start in one place with uh understanding what your problem is and you go through a series of steps and then execute a solution and then check that solution to see how you did and then you might have to go back and do it all over again to make sure you're getting the results that you expect or your customer intends for uh has has placed that expectation on you you will find examples of this process ranging from as simple as four steps to as complex as 12 or 15 Steps um my my uh experience with this is that uh personally I can remember four things in a row so I've kind of committed the simplest version of this uh to memory plan do check act which I presented here but I acknowledge that the more complex uh uh uh systems that are out there they all kind of plug into this same uh criteria plan do check act just multiple steps in each one of those activities um as I mentioned most of these are presented in kind of a cyclical fashion uh some of them are much more like a computer flow diagram where you go through a few stages uh kind of in common and then you have feedback loops depending on uh the results that you're finding in your analysis stage in your checking stage I'm going to refer back to plan do check act uh several times during the uh webinar so you can just kind of keep that in mind as we're going through this um for those of you who uh teach high school or middle school students uh your state standards uh probably have engineering uh uh practices uh identified in them and I have outlined a few of these that we're going to be uh engaging with in this activity uh asking questions and defining problems planning and carrying out investigations analyzing and interpreting data and constructing explanations and designing Solutions now I have the activity that I've modified uh the blade design activity that I've modified for engineering design uh uh principles uh tries to attack each one of those uh practices um it may be more than you want to uh take on in a single activity uh that's why I gave you the word document so you can modify that as necessary for your particular needs um I when I first got started with this I expected the engineering design process over here to mesh very nicely with these engineering practices that are outlined in most of your state standards um what I found though instead of this type of a scenario was kind of like a mesh where the engineering uh practices overlap several parts of the design process so for example if you're looking at analyzing and interpreting data that might occur in the planning stages but it also might occur in that checking process where you're evaluating your results to see if you were in fact effective at accomplishing your goals for the engineering activity so it was kind of an interesting uh uh discovery on my part and uh you can bear that in mind as you're uh kind of teaching two things you're teaching that engineering design process on one hand and you're integrating those skills those practices on the other hand for engineering practices we will come back to these uh uh again uh to talk about specific elements of each of these that I've highlighted in the activity that I've created uh I want to turn to the kwi K kind kid wind turban uh just to identify kind of what those parts are I have one sitting on the desk here behind me it has a tower a key part of it it has an AEL which is just a fancy word for the gears and Generator that uh are used uh are housed in this portion of the um the wind turbine um and then we have of course uh this Hub and the blades that are attached to the hub our kidwind uh uh towers are designed to be driven by a box fan which you can see in the background here uh or we also have a a wind uh tunnel that is uh larger and has more uniform airflow than a a a basic box fan um typically when we are recommending this for a a classroom uh we have this set up with a u materials for Designing blades uh up to eight lab groups if you will uh but we only provide three towers and the reason for that is that if you get uh if you imagine a classroom full of eight towers and eight box fans all blowing at the same time you can imagine there's a bit of chaos the airflow is uh maybe not uniform at all and uh so it just seems to work better having uh three testing stations and then uh multiple uh lab groups can do their work at their at their lab stations and then take the take the Hub and uh blade blade material and take that to their uh lab station to uh modify the blades however they want to and then come back and test it on the at the at the station there we also uh and I'll point this out in second um include or would recommend uh some a sensor for data collection and in particular the the energy sensor that's really designed around the kidwind product um has a buil-in resistor but we also sell a variable load resistor uh which uh provides some additional flexibility and and testing uh criteria there so let me spend a few minutes talking about the basic uh blade design activity in our renewable energy book and I'll see if I can change my camera view here to give you a little bit better picture of that here by the way is our our energy sensor it has again a a switch you can either have an external resistance applied or you can use the internal uh resistor that's built into the energy sensor uh running a wind turbine without uh some sort of resistance or load uh is a tend to uh riding a bicycle in first gear down a hill you just don't uh uh uh you don't feel that resistance you're not generating any any energy into the system so uh the the blade design process is really uh uh as it's designed in our renewable energy activity um designed around uh this Hub and uh basic blade design materials this is just a chipboard uh it has uh wooden dowel that we've glued uh the chipboard to and the wooden dowel fits into this uh what I think of as a a tinker toy type of uh clamp um you can just untwist the screw here and adjust uh see if I can find the camera again adjust this you can uh have a different number of blades you can Orient the blades in different directions if you're going to do four blades you might uh put them all at 90 degrees to one another uh you can set the angle as well uh with that the blade design activity really focuses on uh a couple of uh prescribed uh sets of EX of experiments one would be uh the number of blades so you can again you can uh there's 12 holes in this Hub you can you can put 12 blades on it with some challenges for space I might add you can put as few as three or two um if you get into some odd numbers you'll find it difficult to make it symmetrical uh but you can do uh two three four uh six 8 and 12 without too much difficulty uh so you can go through quite a range of the number of blades that you're working with uh the next thing you might test is uh the length of the blades so we have you know blades that are going to be shorter again see if I can find my camera view there uh shorter or even longer me see that there um we have uh so we have the length of the blades the number of blades the angle at which the blades are set that which is called the pitch and I'll just demonstrate uh this tool if I can I have a protractor that uh a customer basically designed for us and his name is uh Neils Anderson on the back of the blade or back of the protractor we give credit to him every time we sell one of these and basically you uh just line that up onto the Hub and read down there we go down the angle here so you can set that protractor to or set the angle of the pitch of the blade according to the protractor so that you get a uniform uh angle for the various blades but you also get uh the chance to alter that pitch to see what the effect is of the pitch so then we have the number of blades the length of the blades the pitch and then uh you can experiment with different shapes so here we have something that looks like a feather uh we have a blade that is uh truncated at the close end to the center of the Hub we have another one here that's uh more uh again uh just a little rounded on the outside a square on the inside next to the hub and you would run all of those uh types of materials um with measuring the power output from the the wind turbine and that's pretty much just prescri cribed in that activity um we you we provide that uh you know there's not a discussion about what you're going to measure but rather just uh providing the students with that indication of that's the measure of efficiency uh that you're going to be looking at for energy production from a wind turbine if um and we're going to talk about how how this gets modified for an engineering design uh type of activity so where this is all kind of laid out for a students in a a science course or a renewable energy environmental science course um uh we're gonna we're going to poke at that a little bit for the engineering design aspects of this okay so if we revert back to the engineering design process these four uh practices that I've identified um I'm I pulled out specific elements from uh State Standards uh relative to each one of these so in asking questions and defining problems the particular element that we're going to look at is to clarify the problem we're looking to solve so our questions are going to be focused on you know what is it that we're trying to accomplish and how do we do that uh planning and carrying out investigations um uh clearly part of the planning stage but also uh looking at uh how much data do we need what types of data do we need uh is there a measure of accuracy we need to be concerned about with the measurements of of uh so these are the questions that the engineering students are going to be faced with answering rather than just being given as part of a science activity and under analyzing and interpreting data um making quantitative claims regarding the relationships between dependent dependent and independent variables so really looking at the data that they collect uh and uh understanding what that relationship is and then finally uh under constructing explanations and designing Solutions this shows up both in the planning stages and in the final uh the doing and checking uh portions of the uh plan du check act uh engineering design process where they're trying to explain the phenomena that they're observing in their testing and uh applying that uh explanation to design uh solution and then analyzing the data uh to determine what their optimal design solution is okay if you're thinking about doing this as a engineering activity um rather than you know just providing them a wind turbine and a a lab handout and letting them go to work you might start by just having a discussion about uh you know how has how have wind turbines evolved over time uh you know I throw these pictures up here as kind of a prompt for students to think about okay what are the purposes of these particular uh windmills um how are the these the you know similar or dissimilar what are the characteristics that are unique to each of them and just having a discussion about you know okay what's the purpose of each one of these activities rather than just jumping right into the uh blade design activity right away thinking about uh uh how how different uh parameters or characteristics of each of these turbines May uh be fitted to the particular purpose of the of the turbine so and then thinking about those clarifying questions you know what is the goal of uh of our particular wind turbine what are we trying to do with it well we're we're trying to produce energy um what is the right measurement of uh energy production um you know these uh this typical uh Dutch Windmill and this windmill that you might find in the Western United States are really designed for uh moving water for pulling water to the surface or pushing water over a dyke and uh they weren't concerned necessarily with just the volume of water but it was really the volume of water over time so this might be a way to introduce the idea of power versus just energy production so uh Power output being energy uh uh the rate of energy production uh is kind of the key measurement that we want to drive towards but to have that discussion with the students to kind of get them to understand the why we're measuring power versus just energy production uh is kind of a key part of this uh clarifying questioning and then uh using these as examples you know looking at the design factors that are going to affect efficiency um you know certainly the number of blades pop out here uh some other factors may be uh less obvious um you can look at the length of the blades here you can look at uh you know you can kind of get to angles of the pitch of the blades but um you know this is a point where you might uh send your your lab teams into separate groups to come up with uh what are the design factors that they need to consider maybe bring them back together to share as a class so they come up with a common set or maybe um you know leave that to the individual lab groups and have that be uh part of their challenge as to identify what they're going to evaluate to come up with their best design uh in the step of the engineering element for planning and carrying out investigations we have a plan and investigation for testing Solutions and determining uh the data types quantity Etc and I find that this is pretty intuitive for students to to figure out okay we're going to test the length of the blades or the number of blades but coming up with a strategic approach for that uh may be a little bit of a challenge if they have limited supplies uh they don't want to test the shape of the blade before they've tested some of the other factors so they'll need to think about that um um so again this may be uh something they design individually as lab groups you may need to reinforce the idea that they need to be cognizant of uh you know testing one parameter at a time and keeping the other uh elements of consideration uh uh constant through that testing rather than just kind of random changing things as I move along um one thing that they uh you know if they come up with or or more uh um characteristics of their blade design that they're going to test um one thing that they may not consider is just the complexity of that Matrix of testing that is available to them in that case um so when we do this activity um as a Outreach to Local Schools we typically have them do it in this order where they test the number of blades and then they uh take the optimum number of blades from that and they test the uh the pitch angle to see what gives them the optimum uh pitch angle and then move on to uh blade length or U those might be reversed I forget and then finally the shape of the blades um but if uh what I have noticed from my own personal testing is that um let's say that my optimum number of blades in this test is three based on this set of of constant parameters on the other factors if I come here to test pitch with uh three blades um I I will get a result that gives me an Optimum but I might also find that I get a slightly different result if I look at two blades or four blades so there there is uh if you have the time the luxury of being able to build a a longer uh activity out of this to have them do uh uh encourage them to do more testing than just finding the optimum of one moving on to the next and so forth but really exploring maybe bracketing what their Optimum was here going to the the pitch and then bracketing maybe two three and four at all these different angles to see if they actually get a you know a better solution coming out of uh two blades or four blades at a different angle so again uh this can get as complex uh as you have time for or keep it simple and just drive them through a a series of steps there uh under analyzing and interpreting data U so you're going to try to make quantitative claims regarding the relationship between dependent and independent variables uh and then analyzing those claims to make uh to drive that all optimal design some questions that they should be asking themselves at this stage are you know of all the data they collected do the data make sense have they identified gaps in the data that require additional testing that one's a little bit easier to identify do the data make sense they may have a case where there's like a an optimization where maybe the number of blades uh provides better uh values for a power output as you increase but at a certain point it drops off and if there's a scenario like that it may be very worthwhile uh having a prompt for them to try to understand why that's the case to come up with some hypothesis of well maybe at some point the weight of the blades uh provides more inertia than the wind can overcome for example or just having them kind of noodle a little bit about uh not only what the data are but why they suspect that might be the case and then we get to constructing explanations and designing Solutions you know this is really where the fun occurs so you know don't be a killjoy uh I can remember several times in my teaching career when uh we would have an activity like this where kids are really excited about doing something with it and I would be intent on driving home One technical point and in the process of doing that I would just suck all the life out of my class so I would encourage you to step back and allow the kids to have their their joyful moment of testing their turban uh blades and seeing uh how they how they do against their uh their uh lab uh other lab group groups in the class or whatever that is I'd also like to con have you consider um whether you want to encourage uh the competition model which is a valid Model A lot you know students love a good competition or you might also consider this collaboration where we've had uh a a college professor who did Outreach with a with a local school who instead of really reinforcing the competition mode they looked at how much energy can we create uh together so they would just continue to add uh all the energy together till at the end of the day they celebrated uh how much energy they created uh using a renewable resource of uh wind energy so uh depending on your scenario you might find either or both of those uh useful models to consider in the process process so that's that's kind of my take on on the uh incorporating engineering design principles into uh this uh kidwind activity again I'll encourage you to take a look at this resource that's in that shared folder uh which is my take on uh addressing those engineering standards uh throughout the activity and you'll see those just kind of bracketed uh the for example under planning I have uh in a bracket at the top of that that unit uh clarifying the problem you're trying to solve so uh modified the questions around that to try to drive uh drive those engineering practices um into the activity of it so I encourage you to take a look at that some other things to consider uh you know you're not you're not limited to using a chipboard you might have them if you have a 3D printer available look at 3 3D printing uh blades actually have a an example of that if you do that know that weight is going to be a consideration so you'll be considering fill patterns for you know can you make this strong enough without making it a solid piece of plastic um that reminds me there is a news uh a bit of uh information in the news today about uh wind turban offshore wind farm that lost a turban and uh the the blades ended up getting washed up on the shore uh somewhere in I think New England if I'm not mistaken Massachusetts or Rhode Island um so again making this a relevant uh uh topic for consideration uh kind of Designing the strength of the blades is an important aspect of this you might also uh have them just use recycled materials um there's a number of uh kind of design uh constraints that you can put on this to uh Drive their solution one way or the other we've had a number of colleges uh ask for uh Alternatives that kind of prevent uh sharing uh solutions from year to year so if uh if they use the same uh activity for an engineering design uh introduction to engineering design course uh they start to see a lot of duplication from year to year as students figure out how to how to share solutions from previous years so coming up with some different uh constraints uh to to uh modify that activity from year to year can be valuable uh you might have them experiment with uh different wind speeds or different gear ratios uh for the gear to the generator uh from the the wind turbine itself um this is adjustable so if you get a smaller gear up here you can move it up you might have them experiment with uh optimizing the gear ratio for given wind speeds so there's a lot of uh a lot of different variations we can we can work with there um some uh College activities have also included uh building a base to withstand high winds so they instead of giving them a tower they were given the Nel and the Hub and then they were told to design a a base for that particular uh activity whether it was uh just uh winds in uh you know our Central United States where we have uh can have some high wind patterns uh or S building a floating platform uh to uh to imitate you know some of the offshore uh wind farms that we uh have around uh the United States uh both on the East Coast Co and uh more recently some design efforts on the west coast which have their own particular uh uh challenges because the uh it's they're more typically going to be floating on the west coast due to the depth of the ocean in the where there's uh good wind patterns as opposed to being able to actually anchor uh uh a wind turbine off offshore on the East Coast you might also if you're if you have uh the resources actually have them build the Nel that's going to uh enclose the uh the generator and the uh the gear structure there so lots of opportunities for modification there and at that I will pause and see if there are any questions we need to address from chat or um see if there's anything else out there for that you're curious about so in the chat uh there was a question about um grants and I don't know if you know of any Tom I suggested uh the possibility of one school PTO and then also some states with a lot of wind energy industry Also may have some State money uh like New Jersey for example is one of those um and or the Energy company itself may have designated money for schools because some organizations do have designated uh money for that yeah absolutely um Fran I thought you said France and I was like scrambling desperately to figure out what France would have to do with this particular activity but grants absolutely so when I was teaching uh there there are a lot of uh technology companies that offer grants like Toshiba um uh is one that I was successful in getting a grant money for especially if I was teaching stem activities so you might research those um certainly uh uh investigating companies that are involved in uh in wind energy we have a local company vestus well it's not local but they have a local presence here uh in the Portland area um that are designed in or engaged enged in uh wind energy um trying to think of there's other you know uh it might be worth uh reaching out to uh in those areas where wind energy is uh is prevalent reaching out to like community colleges or colleges to see uh who they have partnered with for uh grant opportunities to see if there's a a potential connection with the either with the college itself or with the companies that they're able to partner with as well and then we had a and then we had another question about experiments that test wake effect and or just simply involve more than one turban uh to my knowledge we don't um you can certainly challenge students to create a wind farm and connect up multiple turbines to maybe store energy in capacitors or in batteries um but no we don't specifically have on about that one thing I have done is experiment with the the wind pattern from the from the box fan so I've taken our anomet from our weather sensor and just uh somewhat methodically track the from the distance and then also cross-sectional uh to understand how that wind uh is affected by distance um so there you may be able to optimize uh the location of your uh wind turbine based on some experimentation around that as well yeah I'm just going to stick a link for that in the chat awesome well those are all the those are all the questions that I see so far okay um there's a list of product links um that is included in the uh the slide deck that is also in the um uh the shared folder so that's a resource available to you um the renewable energy with verer lab book for those of you who don't win it today uh is a good uh resource for looking at additional uh criteria that you might uh consider uh when you're um uh creating an engineering design uh activity around this there's Tom yeah another question came in about does the kit have different gears or can we install more gears so I guess the answer to that question is yes to both of them the now Fran you're more familiar with the kit what actually comes with the the basic or Advanced kit for gearing so there's actually um a total of four gear pieces there's a 8 to pinion gear uh which is placed directly on the generator um that's a little tiny one and then there's um a 16 tooth gear a 32 tooth gear and 64 to gear and the 64 to gear is right there uh on the Nel that Tom has constructed uh and then the um the patterns for those gears are actually on thingy verse uh so if you go to thingy verse uh t h i n GI i v r s e um and search for BST that's uh or kidwind um you should find the pattern for the gears which will give you the the pattern that needs to like fit in our Hub Quick Connect um and you may be able to adjust those to different numbers of Gears besides those and certainly um students who participate in the kidwind challenges uh I've had the pleasure of of going to a number of the national challenges and kids make all kinds of Gears uh people do belt drives they do like giant gears that are you know 30 centimeters across or more um they do a whole variety of things they create elaborate gear boxes too sometimes uh so certainly uh if you give kids the the time and and the opportunity and the challenge they will they will come up with stuff absolutely so um oh and then a power output question uh this the so the typical range of outputs uh varies dramatically but it tends to be uh much less than one watt uh especially at the beginning um but the uh the typical so the the the sensor is measuring uh actually just straight up voltage and current and then it calculates the power and total energy produced um and for experimentally experimentally calculating the efficiency you're going to need to know the density of the air um and the wind speed and then there's a formula that you can just look up so that gives you the amount of energy that's present amount of power present in the wind for a given wind speed uh and air density and then you'll have to uh look at the power output and do the percentage but I think we're about done yeah Dylan did you want to say anything about the are we going to have the drawing now is that the next step here yes absolutely so everyone who is currently online I have entered your names into a random name generator and selected today's winner you'll be winning a renewable energy with verer ebook so we'll go ahead and email that to the uh the email account that is associated that you signed up for this webinar with um and the person who won is David B so congratulations David I'm going to go ahead and email you that information um so keep an eye on your inbox and and congratulations and I did want to say um Gary I see your question in the chat um we are giving a certificate of attendance um you know every district is different with what counts and what doesn't count but you will get what we can offer uh in the resources folder that are linked above so um yeah thank you all yeah thank you all for coming appreciate your attendance here in the middle of the summer and uh feel free to reach out to us at kidwind adder.com if you have further questions all right happy Thursday [Music]
Up Next

3:49
Measuring DC Motor Voltage Output for Wind Turbine Battery Charging
@wtam69
90.7K views•2013-04-24

30:32
Ultrasonic Transducers: Resonant Frequency Measurement and Horn Design
@imajeenyus42
229.9K views•2017-02-22

54:16
Polymer Environmental Degradation: Mechanisms & Stabilization
@iit
1.8K views•2012-07-10

33:39
How a Student's Question Saved a NYC Skyscraper from Collapse
@veritasium
22.8M views•2025-04-26
Related Study Plans & Knowledge Roadmaps
Structured learning paths in Engineering
engineering
Building Acoustic Levitators: Physics & Arduino
01The Physics of Sound and Standing Waves
02Piezoelectric Transducers and H-Bridge Drivers
03Arduino Programming: Generating 40 kHz Signals
+ 2 more learning modules
14h5 modules
Explore Roadmap
engineering
Building Peltier Cloud Chambers: Particle Tracks
01Cosmic Rays & Cloud Chamber Physics
02Thermoelectric Cooling (TEC) Fundamentals
03Custom Liquid-Cooling Loop Design
+ 2 more learning modules
18h5 modules
Explore Roadmap
engineering
Yagi-Uda Antennas: Modeling, Build & VNA Test
01Introduction to RF and Antenna Fundamentals
02Yagi-Uda Antenna Design Principles
03Antenna Modeling and Simulation in 4NEC2
+ 2 more learning modules
18h5 modules
Explore Roadmap
engineering
ECG Monitor Design: Op-Amps, Filters & Noise
01Electronics & Breadboard Basics
02Op-Amps and Instrumentation Amplifiers
03Bioelectricity and ECG Fundamentals
+ 2 more learning modules
18h5 modules
Explore Roadmap