



















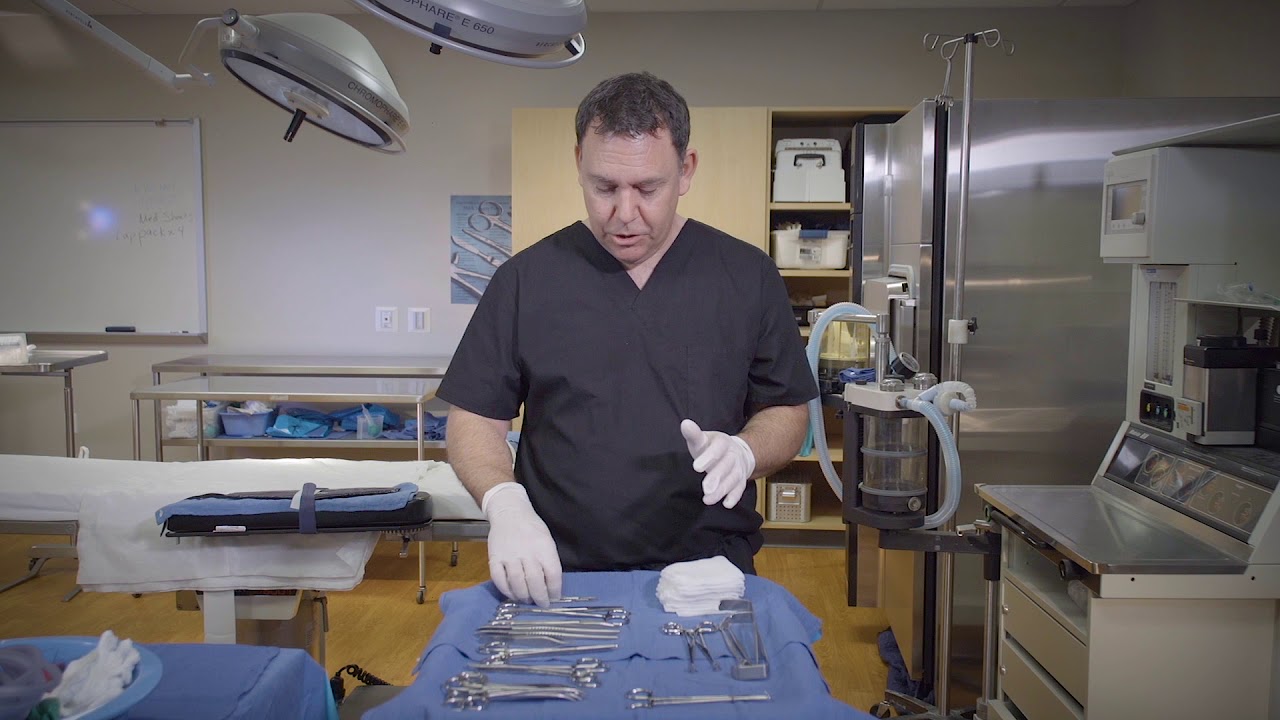




This video introduces approximately 50 essential surgical instruments used across various procedures, categorized into cutting instruments (scalpels, scissors), clamping devices (Mosquito, Kelly, Peen clamps), tissue handling tools (forceps, needle holders), and wound management equipment (retractors, suction tips). Key principles include understanding how electrosurgical units and harmonic scalpels cut and coagulate tissue through different mechanisms, recognizing the serration patterns that distinguish clamp sizes (Mosquito < Cryo < Kelly < Peen < Rochester Peen), and knowing when to use curved versus straight instruments based on surgical field visibility needs. The instructor emphasizes that memorizing these instruments takes significant time and practice, with a downloadable PowerPoint available for further study.
Basic Surgical Instruments | Surgical Technology Study Guide
Added:so one of the more challenging things that surgical technology students have to learn is all the instruments that go along with all the surgeries there are hundreds and hundreds of instruments that as a surgical technology student you're going to have to learn today I'm just going to cover the 50 or so most basic instruments those instruments that are going to be used in many different surgeries so these we consider these the basic instruments and we're just going to go very briefly through them give you a quick introduction to each of these instruments and how they're used thank you foreign ly one of the most commonly used items is going to be the bovey or the electro surgical unit now this is the hand piece that comes this is a disposable unit it is attached to a giant Contraption we call it the Bovi or the electrical surgical unit that actually Powers this now the electrosurgical unit is used to provide a little jolt of electricity to the tissue that we're working on now it can do one of two things one it can cut the tissue basically what it's going to do is that electricity is going to cause that tissue to get so hot it vaporizes away and it causes it to cut through that tissue and or it can cause it to coagulate now what this means is you're going to take that tissue heat it up a little bit in a specific way it's going to cause the proteins in that tissue to sort of liquefy a little bit and then come together to congeal together to coagulate and that's going to seal off any little blood vessels in that area it's going to cause the bleeding any bleeding that might be in that area to stop so we use the electrocautery unit in the Electro Pottery pencil in this case to touch where we want to either cut or coagulate to stop bleeding in the wound this is used in conjunction with a grounding pad that we're going to place Elsewhere on the patient this is going to complete the circuit so that we have an electrical circuit that runs from the tip of this ESU pencil through the grounding pad and then back to the power unit itself the electrodes itself the tips of these pencils are interchangeable so this is a standard one now with this one what will happen is as you're burning through or coagulating the tissue some of it can sort of stick to the end of it it gets kind of uh charred a little bit you have to brush it off or you can swap it out with a Teflon coated tip and this Teflon coated tip is nice and slippery so you can just sort of wipe you're using a ray tech you can wipe the any charred tissue that might be stuck on there off these also come in different sizes you can come with really long ones that'll help you get nice and deep into a deeper wound so these longer ESU tips are possible as well now another way of cutting and coagulating tissue is using a harmonic scalpel this guy's kind of fancy this thing plugs into a power source and what it does is it uses electricity to create a very high frequency ultrasonic vibration in this piece that runs down the length here so at this end we're not using electricity at this end at this end one of the pieces is vibrating very quickly against the other piece so it's sort of doing this it's vibrating very quickly it's creating a lot of friction that friction then creates heat and it cuts through and coagulates the tissue so when we close down on this you can see the one end is going to vibrate very very quickly the other end squeezes that and as it does it creates that friction in there that's going to cut and coagulate any tissue that we happen to clamp through this but when it comes to clamps there are many different types of clamps these are small clamps we call these mosquitoes the technical name is the Halstead clamp there is a curved and there is a straight version of the mosquito clamp so it's just a small hemostat now the curved version usually you're going to use curved versions of these instruments on tissue so if you have a very small bleeder or something like that you can clamp that and that's going to stop the bleeding now the straight versions are usually used on things like dressings or suture in fact these you can get these little suture boots we call them suture boots a little rubber covers that fit on top of the mosquito and that very delicately holds on to some very delicate suture so you can use the mosquito the curved mosquito here in this case to hold some delicate suture but the mosquitoes are one of the smallest clamps that we have the next size up is the cryol this is a very common instrument also called a hemostat or a snap now the cryo also comes in a curved version and a straight version the curved version again used on tissue in general usually to clamp down onto some blood vessels that might be bleeding the straight version used to maybe pick up some dressings or against suture other things like that is the curved version that will be mostly used on tissue and it's this version that you'll most often hand to your doctor now notice the size difference between the cryo and the mosquito the mosquito is just slightly smaller than the cryo but it's otherwise essentially it's the same instrument now very similar to the cryo is the Kelly Clamp it's just a little bit bigger than the cryo and there's one other difference here and if you look at the serrations inside there you can see that the cryo the serrations on the cryo go all the way down to the box lock whereas the serrations on the Kelly only go about halfway down that's the defining difference between a cryl and a Kelly is that the serrations only go halfway down on a Kelly foreign ly bigger than the Kelly we have the peen also a curved clamp this one has serrations that like the cryo goes all the way down to the box lock again the Kelly is the only one where it only goes halfway the peen is slightly larger on the East Coast east of the Mississippi we usually pronounce this peen p-e-a-n that's how it's spelled sort of like a bean like a can of beans okay this is a peen now on the West Coast or West of the Mississippi they'll often pronounce it as a peon so you might hear that as well but this is a peen at least on the east coast and then we have a slightly larger version of this this I've referred to as the Rochester peen this is a larger version of the peen this is the peen here so you can see compared to the Kelly the peen and then the Rochester peen they all sort of grow slightly in size so the Rochester is the larger version of the peen now two other clamping instruments that we have we have the schnit and the mixture now the schnit is like a very long handled cryl and this is usually used this is often called the tonsil schnet so it's used for tonsil uh procedures things like that because it can reach deeper into the mouth but it's a clamp it can clamp down on the tissue either to control bleeding or just to to grab the tissue and pull it out so this is the schnit now the schnit like all the other clamps that we've seen so far has a very gentle curve to it now the mixer has a sharper curve almost a right angle curve so this is often called the right angle clamp now scissors are important when it comes to surgery and one of the most popular scissors is the Mayo scissors this is a nice big heavy bulky scissors kind of like the kind you might find in your kitchen or in your you know your desk drawer or something like that now these scissors are straight so this is the straight mayo and this again we like those curves this is the curved Mayo scissor now why the two versions why a curved in a straight version well usually during surgery we're working in a very tiny opening and we sort of have to put the instrument in through that tiny opening and we're looking at whatever we're trying to cut or clamp vertically through that opening in the same direction as our hand so if we're doing that with a pair of straight scissors for example well our hand is in the way we can't see what's going on whereas if we have a curve to that now the curve sort of bends out a little bit and we can see past our hand exactly what it is that we're cutting or we're clamping so if we like the curved ones for cutting tissue well what do we have the straight ones for well the straight ones are actually used not often for tissue this is used for cutting dressings or suture something like that so we have the straight ones for cutting suture and dressings and the curved ones for cutting tissue now sometimes we want a slightly more delicate pair of scissors and that's where the Metson bomb scissors come in and this is a very delicate pair of scissors it's again got that curved sweep to the blades there as it goes in and cuts the tissue the Lister scissor or the bandage scissor is sometimes called the Lister scissor it has an interesting shape to it it's got a little tip that comes up and then a very softer rounded tip on this end now this is often used say for example during a C-section as we go in and try to cut the uterus what's going to happen is we're going to place this rounded tip in there into the uterus and we cut the uterus open this way so that we're not going to be damaging the baby's head which is going to be right underneath here so we're going to cut the uterus this way and open it up using this protected Lister scissor another important cutting device is the wire cutter this is sort of like a little pair of scissors but they're actually tough enough to cut wire sometimes we'll send patients back after having their teeth wired or their mouth wired shut but in case there's an issue we'll send a pair of wire cutters with them so the doctors can quickly cut that open if they need to intubate or get an airway created for that patient but these will cut wire These are nice tough scissors that can cut some nice thick wire now scissors aren't the only way to cut tissue one of the more common ways is to use a scalpel and we have a number of different scalpel or knife handles that we can load a scalpel blade onto now these knife handles come in a bunch of different varieties we have the number three which is a very common it's used just about everywhere we have a number three long which is just a number three with a very long handle on it we have the number seven which is very similar to a number three except it's got a long skinny handle this lets us get a little bit deeper into certain wounds we have a number four now the number four is actually very similar to the number three except for the tip at the end the difference is that the end of the number four is a larger tip which means we're going to put larger blades on to it and blades that are designed for the number four don't fit on the number three and vice versa so let's take a look at a few of the blades so we have a couple of the blades here we have a number 10 blade which is a very common blade that's sort of your standard scalpel blade and we have the number 20.
now notice the difference here if you look at the difference you can see that the 20 is larger and that the opening the fenestration the opening in that blade is larger which means the 20 is going to fit on a number four handle because it's designed for that larger tip whereas the number 10 is going to fit on the smaller number three handle I know in a lot of numbers they kind of get confusing so you're gonna have to remember the number three goes with the number 10 Blade the number four handle goes with the number 20 blade and in fact there's a whole series of blades that we see the different tips on here this one's a curve this is a number 12.
this is a number 11. it's got a pointed tip it's good for making punctures and then we have a small blade down here this is the number 15 and all of these the 10 the 11 the 12 and the 15 all of the 10 series numbers they're going to fit onto your number three knife handle or alternately they're going to fit onto the number three long or the number seven so the number three the three long and the Seven all have the same tip so they're all going to handle the 10 11 12 and 15 blades it's only the number four that has that larger tip that's going to handle the larger blades like the number 20 and there's a 22 and a 21 and a 25 so you have that 20 series which are the larger blades they're going to fit onto the larger tipped number four handle now for very delicate surgeries like say plastic surgeries you have what's called a beaver blade and a beaver handle this is a beaver handle it unscrews here and this is like some of the exacto knives if you do hobby work you can take this it's a very tiny very delicate blade which is a beaver blade inserted in there twist it up nice and tight and hold it onto there so you can do some very fine cutting with a beaver blade and a beaver blade handle so now we move into four steps now I have a couple of forceps laid out here now these are not tweezers we don't call these tweezers we use the high class term these are four steps sometimes you'll hear people call them pickups for you know picking stuff up but generally this is called a forcep that's the official term for it and there are a bunch of different designs to these these are the most basic ones that you're going to see so we have what I call a plain handled forcep it's just sort of a typical uh handle it's nothing fancy about that versus an adsin handle you can see the difference there the plane handle is just sort of a nice straight handle whereas the Asin handle is a little shorter and it's a little wider what this does is it gives the doctor a little bit finer control in very small delicate areas so one thing that defines different forceps is the shape of the handle it could be a plane handle or an AdSense shaped handle now the next thing that distinguishes different forceps from each other are the tips so the first type of ads in forcep has a very plain tip just a couple little serrations in there this is known as a dressing force that is usually used to pick up dressings or maybe some very delicate tissue using this very delicate tip down here but more commonly when we're picking up tissue such as Skin we're going to use the tissue at sin forcep now this forcep has a very tiny little tooth a set of teeth on the end kind of looks like rat teeth as they come together so we call this the rat tooth adds in or the tooth adds in and this is going to be used for picking up tissue that those little teeth sort of grab that tissue and hold on nice and tight and this here is an atson Brown Force up again it's got that adson shaped handle but the tips actually have a series of teeth that can really grab on to some tougher tissue compare again the ads and handles to the plane handle so I refer to these as plain forceps we have again the dressing forcep which just has a couple of serrations versus the tooth to forcep or the tissue forcep which has the nice little teeth at the end the little rat teeth often these are called the rat tooth forceps but of course different situations call for different forceps so we have a variety of other forceps that we can choose from one of the common ones is called the DeBakey this is a very thin narrow tipped forcep with a very long handle this is used usually for clamping blood vessels and things like that very delicate tissue so we can go in there and pick up that blood vessel or manipulate it in some way another Force up for delicate tissue would be the singly forcep this one has a wider rounded tip and it has a very small serration so this is good for this is an A traumatic forceps so it's good for picking up very delicate tissue we have two forceps here that look very similar they have these big rat teeth on them these are good for picking up very tough heavy tissue maybe bone or maybe some you know tougher fascia or tendons or something like that this one with the straighter handle is the Bonnie forcep versus this one which is a more rounded handle almost looks like an absent only a very heavy duty hats and this is the ferris Smith handle and this four step down here this is known as the Russian forcep it's got a ring of teeth around the outside and it's got a little cup instead of a hole like the singly has it has a little cup in there and sometimes that little cup can be used for hoarding specific tissue like say a bone graft or something like that here we have some towel clamps one of the more common is the back house towel clamp this one happens to have some very pointy tips on it so just be careful with this one this is used all these towel clamps are used for clamping the towels together as we drape around the incision site that we're going to make we usually do so with towels and then we will clamp these towels together now the back house being that it is sharp you can see how it is punctured all the way through that towel there so this is a penetrating towel clamp and once it's placed you're not going to remove it because you're moving from unsterile which is usually on the underside of the towel to the sterile which is on the top side of the towel so you don't want to remove that because you could be bringing contaminants back with it so once you place this one it's going to stay there in place this penetrating towel clamp now sometimes if you don't want it to penetrate quite so deeply and you want it to hold it in place you can use the rotor towel clip which is just like the back house only has these little balls on the end which prevent it from clipping too deeply into the towel it still penetrates but it doesn't push all the way through those balls sort of prevent it from pushing all the way through but sometimes you might not want to penetrate all the way through that towel so they have non-penetrating or atraumatic towel Clips as well and you can use that to clamp on to a towel without actually penetrating through that tap next we have a series of grasping forceps now these forceps here come in all different tips and in this case a different length as well this one is the Forester spun stick it's a nice long kind of has the singly tip to it but notice it has rings on the end so they sort of clamp together it latches together that can hold things nice and tight this one's also called a sponge stick they Forester sponge stick because we'll often wrap a ray tack a sponge around the end that gives the surgeon something to dissect with or maybe dab up some fluid or maybe apply some gentle pressure if there's something bleeding so we'll wrap this up with a little sponge and we call this a sponge stick now the next two instruments that we have are the Babcock and the Alice and these are often shown together because they do very similar things but for slightly different tissue now notice first that the handles are pretty much the same the handles are the ringed instrument with a little ratchet on it that lets you clamp down on the tissue now the tips of the pepcock has this nice sweeping curve and then this long gentle straight point where the two ends meet where the two ends come together that is an A traumatic clamp so what's happening is if you have some very delicate tissue say a blood vessel or maybe some bowel intestinal tissue you can delicately grasp that with the Babcock and retract it or pull it away without damaging the tissue as opposed to the Alice the Alice has a tougher tip to it it has teeth on it and it's able to grab onto tougher material say some fascia or maybe even some bone and really hold on nice and tight to that tissue this is known as a traumatic versus the a traumatic a traumatic is not going to damage the tissue very much traumatic yeah it's going to damage the tissue a little bit so imagine this is you're going to use on tissue that you're going to leave in the body this you might use on tissue that you're going to remove from the body so this is going to give you a good nice tight grip on it to allow you to remove it from the body so this is the Babcock the a traumatic clamp versus the Alice the traumatic clamp this is a much tougher clamp now if you really want to grab onto something you can use the Coker clamp or the Ochsner clamp as this is sometimes called this is like a straight cryo but it has a rat tooth at the end so you can really grab onto tissue this is often going to be used to pick up bone or like little pieces of bone or something like that you can get in there and pull those pieces of bone out with a Coker or an Ochsner clamp now there is a larger version a couple of different sizes again this is the regular Coker or the regular Ochsner and this one because it's the larger one just like the peen I call it the Rochester Bean this one is the Rochester Ochsner the Rochester Coker so the Rochester is the larger one and then the regular Coker is the regular sized one now the next set of instruments are known as retractors this these are going to be used to retract tissue out of the way say retract the skin out of the way hold that wound open so that the surgeon can see down inside and get to what the surge is actually working on so these retractors are known as handheld retractors the surgeon will insert it into the wound and place it where she wants it and then give them to you and you're going to hold them with your hands so handheld retractors you're going to use your hands to hold that wound open this first one has a long tip on one end and a shorter tip on the other and a little fenestration or a hole in the middle this is the Army Navy or U.S army retractor so you can think of it as Army Navy or Navy Army however you want to think about it and this Army Navy retractor is a very common retractor you're going to see in many surgical setups the next two retractors are very similar they each have a curve on the end one end are usually go into the wound and that's going to pull against say the skin or something like that and the other end you can use your hand to sort of hold on and apply traction to that wound this way this one here this is known as a Parker retractor it has a very simple retractor just a piece of metal with a curve on each end if you put it down it kind of looks like a park bench this is how I remember the name of this one so a Parker retractor looks like a park bench whereas this one is known as a Goulet retractor now this is French it's elegant it's got all these fancy curves to it so just like the Parker which is just kind of you know a piece of metal looks like a park bench this one's a Goulet this is French it's fancy so that's how I retail the difference between these two different types of retractors now the next couple of retractors are known as Sun retractors now notice the ends are slightly different one end has a claw one end sort of has this little bent tongue kind of thing coming down from it and the other ones looks the same way now notice the claws on these two retractors one is very sharp has very sharp tips and the other one's very dull and you want to make sure that you're aware of what you have and what you're passing to the surgeon because there is a significant difference the sharp one is indeed very very sharp it will almost invariably grab gloves or your gown or all kinds of things these things like to really grab onto a lot of stuff so you've got to be very careful with these these I don't pass very often and when the surgeon asks for a sin they're usually not going to specify whether they want the doll one or the sharp one 95 of the time they're going to want the doll sin and I'm going to assume when they ask for a sin they're going to want the doll sin because it's a lot safer only if the surgeon specifically says I want these sharp sen or when I pass the dolphin and they pass it back say no I want the sharp one will I pass the sharp scent because this sharp send will grab onto just about everything and it can cut you so we really want to use that very sparingly so whenever the surgeon asks for a send doesn't specify which I hand the doll sin another very sharp tipped retractor this is the Joseph skin hook this is used often say in plastic surgery or other very delicate tissue it's got a very fine tip on it it's a very sharp tip that very sharp tip will allow it to grab onto some delicate skin and hold it exactly where the surgeon wants it now all of these retractors so far are handheld retractors meaning you're going to hold them in your hand and you're going to sit there and hold them to hold that wound open as the surgeon's doing the procedure but sometimes in order to keep your hands free or to keep your hands out of the way of the surgeon you can use a self-retaining retractor and this one is a wheat Lander retractor and it's got a special little grip on it that allows you to go in place it into the wound the surgeon will place it into the wound retract it open and then it will lock into place it'll hold open so it's keeping itself open it's self-retaining so that's why it's called a self-retaining retractor and this one in particular is a wheat lanter style self-retaining retractor but if none of these retractors work for you or work for your surgeon sometimes you can just get a strip of metal this is known as a malleable retractor this is kind of cool because what you can do with this is you can just shape it to whatever shape you want so now I've got a nice big curve or maybe I want a nice tight curve or maybe I want it to be nice and shallow something like this so I can shape this malleable retractor to any shape that I want and these come in nice and wide like this or maybe some nice narrow strips kind of like your Parker and you can again shape them into whatever shape you want to retract whatever specific a wound you've created now oftentimes in the wound some fluid will gather in there it could be maybe some blood or maybe some irrigation that we put in there to sort of wash the wound out a little bit so we have a couple of different styles suction tips that we can place on the suction the tube that runs off to the canister and then onto the wall so the first style of suction tip this is known as a Fraser suction tip you're going to attach the suction tube to this end this one has a little stylet in here this is going to be used to clean it out sometimes some tissue or other stuff can get stuck inside of this so you can use this to clean it out it doesn't work very well but you can try to use that you can pull that out you attach the suction to this end and then use this tip to suck up any little areas of moisture or fluid that might be in that wound these sections have a little hole here that the surgeon can use to cover that up to control the strength of the suction with the whole open the suction's a little weaker cover that opening most of the air is now coming in through that tip makes it a little bit stronger suction now because of the stylet the Fraser suction is usually counted as two pieces so make sure you count both pieces When you're counting your instruments our next instruments are the yankauer suction yankauer is how you pronounce this we have the plastic version which is disposable you use it once and throw it away or you have the metal version which can be cleaned and re-sterilized and reused the metal version has a tip that unscrews this is done during the sterilization process and you want it because it has two pieces you're going to count this one again as two pieces it'll be two pieces in your count so this one will be two pieces in your account whereas the plastic one this is just one piece the metal tip doesn't come off because you don't have to clean it you just throw it away now these rounded tips on the yank hour suction are a little bit different from your Fraser in that if some tissue gets stuck in the one end there's some holes in the side that can take the suction away from that and not draw that and really damage that tissue into the suction too far so these rounded tips help protect the tissue now speaking of protecting the tissue we have this next set of suction which is the pool suction now this has a nice deep suction probe that has a lot of little holes in it this is going to be used for example inside the abdomen you create a nice big wound into the abdomen it starts to fill up with some fluid some irrigation most likely and you want to suck that up well you can do that by putting this suction tip into that pool of blood or pool of irrigation that's the pool suction that's how I remember the name but because there's so many little holes along the side it's not going to suck up and damage any tissue very delicate tissue like the intestines that might be in that area so it's going to be a nice delicate suction that you can place into the abdomen we have the Disposable version use it once and throw it away or the reusable metal version that can be re-sterilized again the metal version also comes in two pieces so you want to make sure you want to count these two pieces the last type of instruments we're going to talk about are going to be our needle holders these are going to be used for holding suture needle allowing us to pass that suture very carefully through the tissue where we want to do so and we have a couple of different styles here now the two most common types of needle drivers are going to be your Kyle wood driver which is going to have more of a fine tip to it it's going to be for more delicate suturing whereas the Mayo Hagar is a more heavy duty type of needle driver you can grab onto larger suture needles and really pull them through some tough tissues with these another type of needle driver is the rider needle driver this is a very fine tip it's a very narrow tip you can sort of see how narrow that tip is there that allows you to grab onto some smaller needles as you pull them through the tissue and down here at the end the smallest needle holder that I have this is known as the Webster needle holder it's a small delicate needle holder used for holding small and delicate needles so did you get all this there's a lot going on here about 50 or so instruments we covered in a very short period of time it's going to take a long time to memorize all of these and the many more that you're going to have to learn as you go through your surgical technology career if you want help I've got a PowerPoint of all of these instruments that I've just covered it's down in the link below you can download that and help study and review some of the instruments that I've just discussed
Up Next
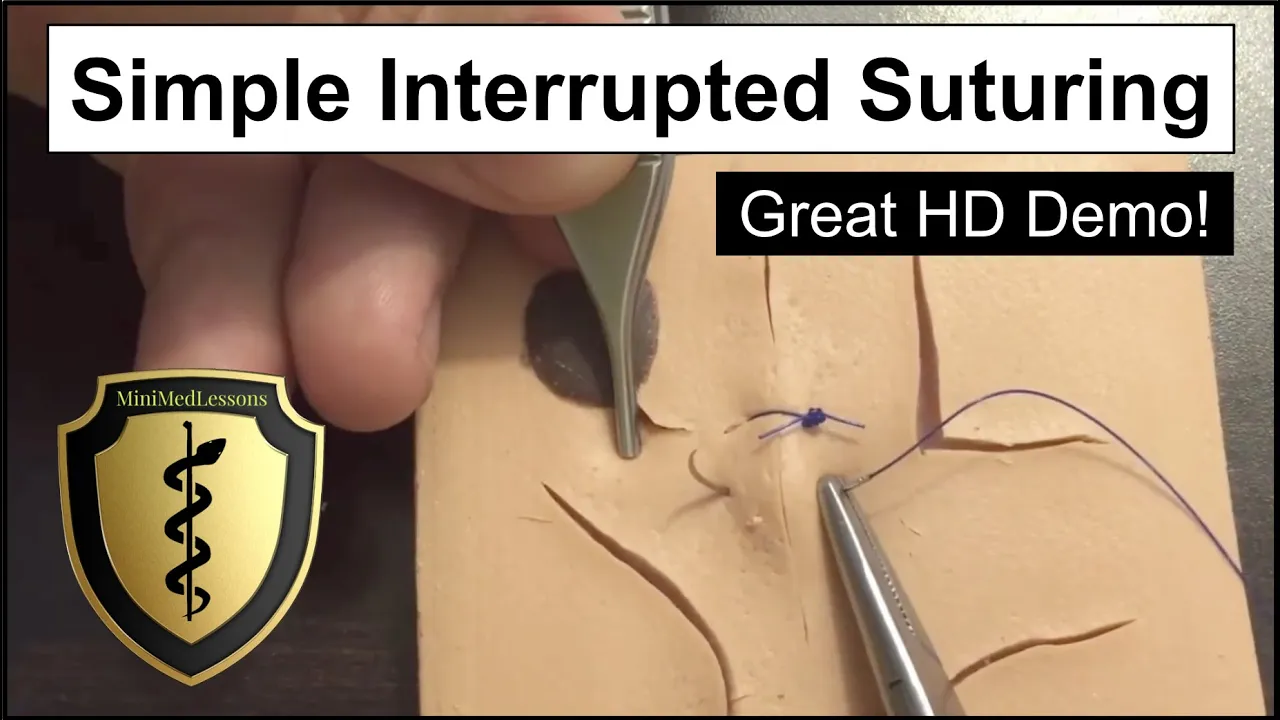
Simple Interrupted Suture Technique: Step-by-Step Surgical Guide
@minimedlessons
1.2M views•2016-07-19

Triumph of Orthodoxy Icon: Byzantine Art & History Explained
@BenCallan
2.1K views•2024-08-06

Surgical Suturing: How to Load and Pass a Needle Driver Safely
@SurgicalCounts
78.8K views•2023-01-23

Game of Thrones Opening Credits: A Cinematic Analysis
@gameofthrones
46.3M views•2011-04-18
Related Study Plans & Knowledge Roadmaps
Structured learning paths in General & Interdisciplinary Studies