





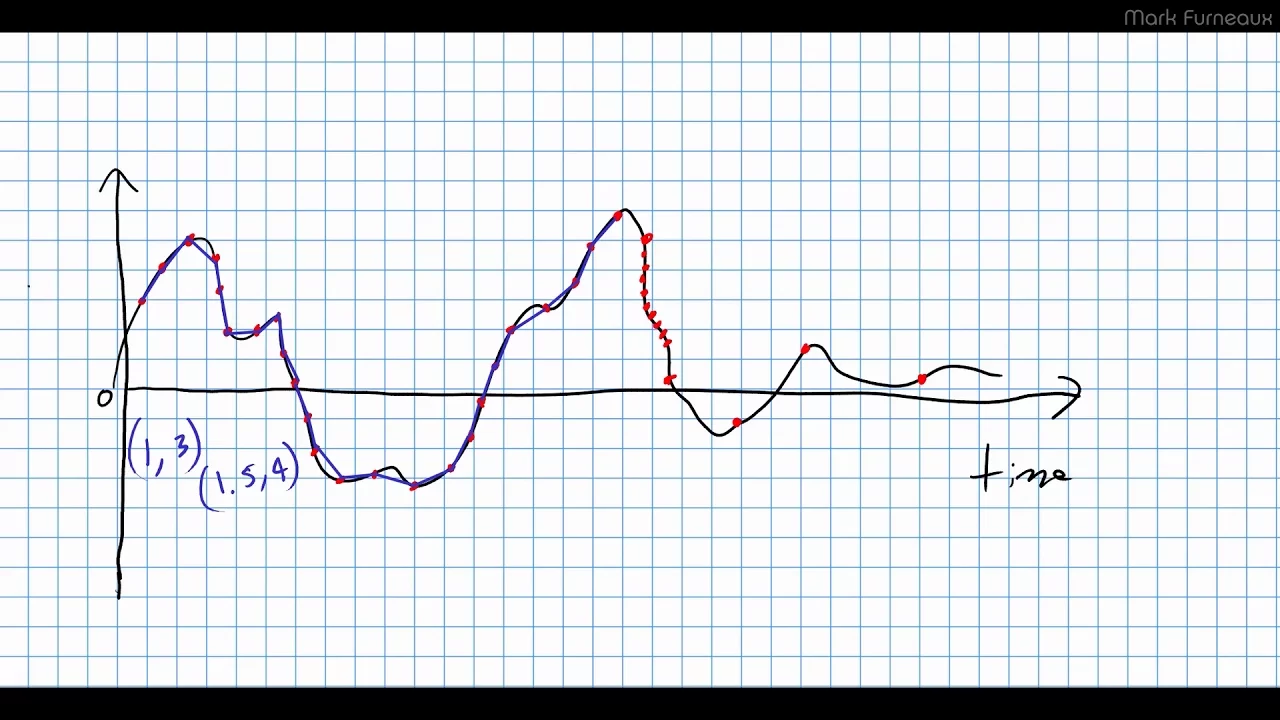






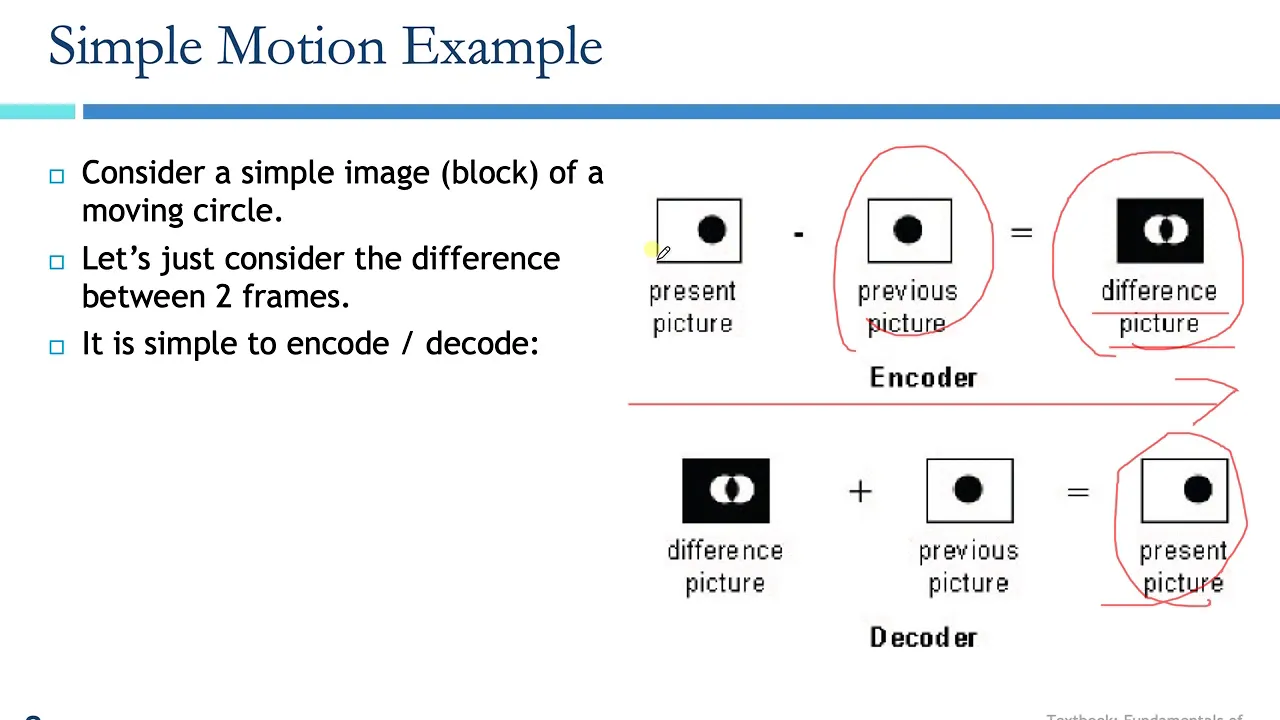





Multimedia combines multiple media types (graphics, audio, video) into integrated content. Graphics are represented as raster images (pixel grids with RGB color values) or vector graphics (mathematical equations for scalable shapes). Audio is digitized through sampling (measuring wave amplitude at regular intervals) and compression (MP3 uses psychoacoustics to remove imperceptible data). Video combines compressed frames with codecs (compression algorithms like H.264) and containers (file wrappers like MP4). Key concepts include color models (RGB for displays, CMYK for printing), image compression (lossless vs. lossy), and 3D graphics using wireframes and meshes.
Multimedia Fundamentals: Graphics, Audio, and Video | CS Lecture
Added:Basic understanding of binary representation, bits, and bytes, and how digital data is stored.
Elementary algebra and coordinate geometry, which are crucial for understanding vector graphics and coordinate systems.
Fundamental computer architecture, including the general roles of the CPU, RAM, and storage devices.
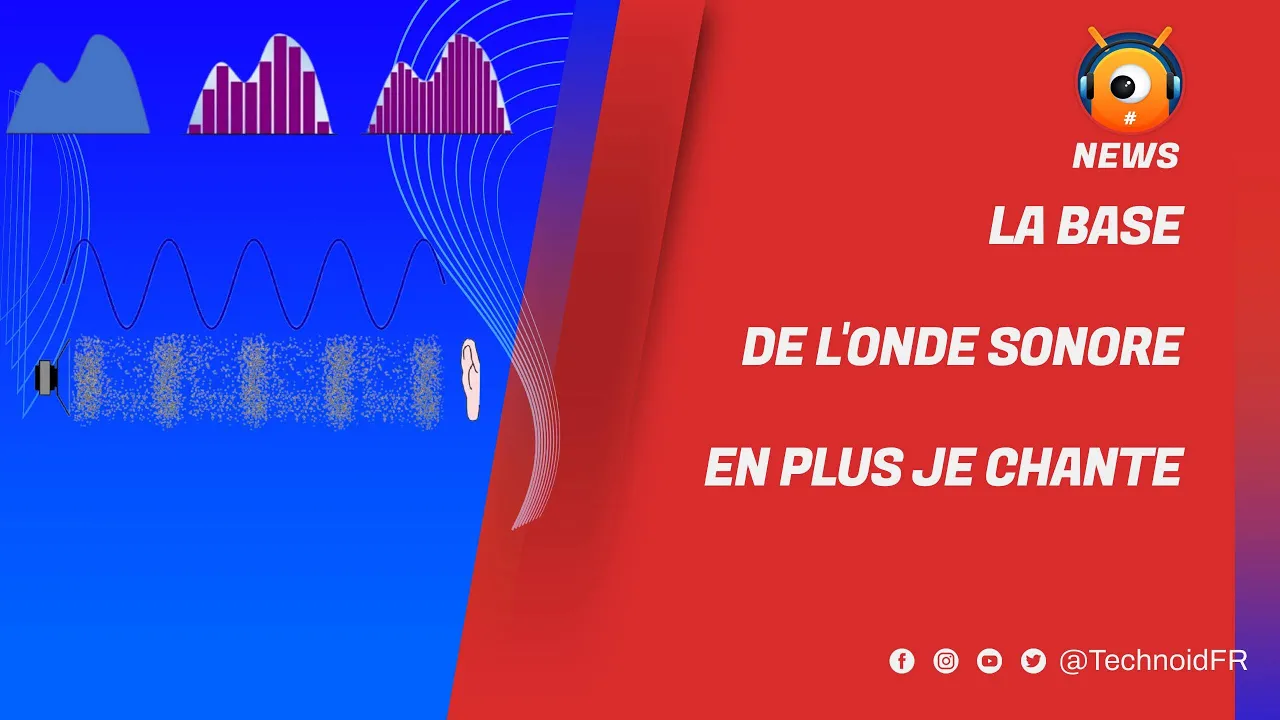
An introductory understanding of waves and frequency, which forms the basis for sound sampling and audio processing.
Advanced Computer Graphics and 3D Rendering, including ray tracing, shaders, and graphics APIs like OpenGL or Vulkan.
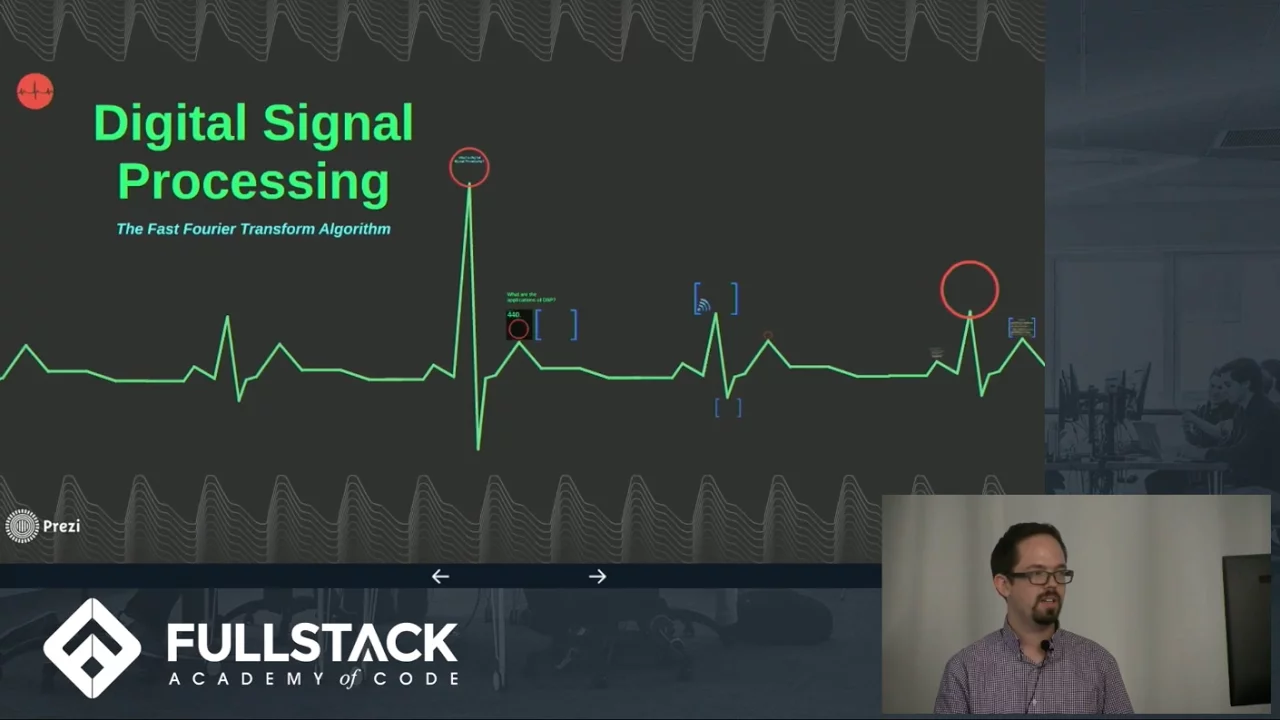
Digital Signal Processing (DSP), focusing on Fourier transforms, digital filters, and spectral analysis for audio and image processing.
Deep dive into Modern Video Codecs and Streaming Protocols, such as H.264/H.265 encoding details and adaptive bitrate streaming (DASH/HLS).
GPGPU Programming (General-Purpose computing on GPUs) using parallel computing platforms like CUDA or OpenCL.
1.6K views11likes1:44:10Original Release: 2013-03-26
all right everyone welcome to lecture five so this week we're going to be focusing on multimedia so before we get started uh just a quick note on the first exam so congratulations to everyone on finishing the first exam uh we'll get your scores back to you next week just because uh if you're taking the course at a distance we just got all of your exams today so we just want to make sure everyone gets them back all at the same time so look forward to that uh next week so the last question on the exam as you all know asked a question about my favorite meme I thought it was actually pretty interesting uh that we had a real world event in which my favorite meme made an appearance so there's a conference down in Texas called South by Southwest uh and they actually had Grumpy Cat making her first ever appearance and some people actually on the exam wrote that Grumpy Cat was so grumpy because people are taking pictures of her all day and doesn't really like that uh other people wrote grumpy cat so grumpy because she didn't have enough time on the exam and that's I'm sorry grumpy so just the the caption for this video is Grumpy Cat takes grumpy to a new level which I thought was great so that's grumpy cat so I figured since today is a lecture on multimedia that we could start off with a video so let me pull this up too many computers today advertisement all right so this is from our favorite the onion the internet is buzzing about the groundbreaking new YouTube contest calling for users to post a video that is good onion News Network Tech Trends reporter Jeff Tate has the story thanks Nicole YouTube presented the challenge at a press conference earlier today make a video that is actually worth watching the prize 100 $1,000 the only requirement for our winning video is that it be somewhat watchable or provide even a shred of enjoyment for people other than those who made the video because the idea of making a good video is new to so many of its users YouTube offered a list of suggestions including have some reason for making a video other than I own a camera make sure the subject of the video can be seen and shoot the video while sober hundreds of YouTube users have posted videos stating their intention to enter the contest including Tamila clebert of Grand Rapids Michigan well my dog farts is pretty funny maybe I'll just try to catch him doing that put lots of sound effects the contest also inspired John malcin who has already posted dozens of poorly lit pointless videos on the site I never thought of making a good video it's hard enough to remember to shout directly into the camera without worrying about what to say YouTube says the 10 person judging panel will be searching for a video that holds their attention but not because it is so utterly mystifying they can't stop watching when making their decision judges will not consider ratings and comments from the public we will not be affected by viewer consensus that the video is quote awesome LOL the greatest ever or for that matter that it quote totally gay sucks you suck [ __ ] [ __ ] if and when a winning video is chosen it will be placed in the new actually good tab on YouTube's website for now however the section remains empty there is a strong possibility that every entry will suck certainly to this point all information has pointed to that for the onion News Network I'm Jeff Tate YouTube says the contest has no deadline a rule meant to encourage applicants to take the time to edit or revise their entry rather than simply uploading their video to the site without watching it moving on now a new study is asking our teens becoming desensitized to the violence they commit so that video has released that last joke is probably funnier so what what comes to mind when we talk about multimedia so so far we've talked about Hardware we've talked about the internet but what what is multimedia what makes this this area special so we saw kind of an example of this we saw YouTube is kind of allowing people to create this multimedia but what what is multimedia either an example or what kind of separates it from what we've looked at so far yeah so music and movies so kind of those types of files so what else comes to mind when you think music uh multimedia photos yeah photo so that's another form so this is kind of graphics and visual things anything else come to mind kind ofu yeah yeah exactly so after we have this combination we have a movie with maybe some photos in it some audio tracks so lots of visual things or auditory things all coming together to create some something so we're going to look at the three different types of multimedia today we're going to start off with Graphics then we're going to move on to audio and sound and then finally we'll take a look at video so the first thing we should talk about though is different file formats so so far we've seen how we can use asky to write a text file but what's kind of the problem what's kind of the limitation with a aski like what's something we cannot do with just using asky in a text file yes we can hear it so that's one thing so we can't kind of you know embed any videos or anything like that what are some other basic things that we just can't do with asky yeah we can't customize icons yeah exactly We Can't customize it we can't change the font we can't change the color right asky is just kind of text so let's say you did want to do something like that you want to send someone a document and you want to have you know pink comic Sands font which I don't recommend let's say you want to do that what would you do yes so so that's yeah so so what is that what is a vector file as compared to ask you what are what are these two types of things Vector is more like it's more like points on Onex Vector is more like sure yeah so so really then this is just a different way of representing that information yeah so I could also you know open up Microsoft Word for example when I save a Microsoft Word file I'm going to save something like a doc file right so what is that Doc it's just a way of interpreting the bits of a file so inside of that doc doc file there's going to be some bits and some bytes just a lot of stuff and just looking at all that stuff it's not really clear what you do with it but what doc does is it standardizes how to interpret those bits so that means that if I know how to interpret these bits I can now read in and display a Word document that somebody sent to me so the specification uh for a Word document is 210 pages long so if you're really interested in exactly what goes into a Word document I guess you can read this but beware it's very technical so it contains statements like uh chic's are a gripple not a chip so this is an extremely extremely technical document but this is just to say that standards like Doc are really really complicated and a lot uh went into them but at the end of the day this is really just some set of rules for interpreting the bits of a file so just like before we had protocols that establish rules for communicating over TCP or HTTP a file's format is simply a way to interpret the bits of a file so let's take a look at a different file here so over here I have a text file so inside of this text file it's actually pretty boring I just have a bunch of numbers and how many numbers do I have roughly 187,000 of those numbers just one per line and so that means that this is just a text file and we have these bits and this collection of bits just represents some asky characters right so this is kind of boring so what would happen if I tried to open up this file in iTunes what would happen yeah exactly so iTunes has no idea what to do with all of these asky characters right if I open up notepad or even Microsoft Word those are programs that know how to interpret the bits of this file so now what happens if I open up this file with something like Photoshop what do you think will happen so we have display the numbers any other guesses if we open up this text file in Photoshop so we still won't open maybe we'll get the same message as iTunes unsupported file format or something like that any other guesses okay so let's do that so I don't have Photoshop so I'm going to use a free image editing program called the [ __ ] uh which you'll see later in the problem set and I'm going to open this file and this is what what I got so this file is called a PPM file or pixel map what this is is it's basically just a way of representing an image using aski so that means that this file on disk is just a collection of bits just a bunch of bits and bites and those are really meaningless until I know how to interpret them so I could interpret them one way as asky characters and if I interpret them as asky then I get that big boring text file or I could interpret them according to a different standard this PPM standard which tells us well these numbers actually represent an image and so when I give this file to something that knows how to interpret this PPM file I can actually get something that's entirely different even though I promise you these are the same exact file and and you can feel free to try this uh when you get home so any questions on what we mean when we say file format the numers yeah so what do the numbers actually mean so we'll actually see that really uh really soon um but they're basically specifying the color for each of the pixels in this image so does every picture have that so as we'll see there's actually a bunch of different ways that we can represent image data and this is just one of them but a really common way to do that is to actually yeah Define what does this pixel look like what's the next pixel look like and so on this is just one of many different ways to represent an image it turns out this is actually a pretty inefficient way to represent an image even though we do get a nice shot cat Okay so as we were just saying a really common way to represent an image is this thing called raster Graphics the process of rasterizing an image or representing something using a raster Graphics format is we essentially make a Big Grid out of our image so even if our image is a circle or a triangle we're basically going to put a big grid around it and so each of those grid with this grid we can define a bunch of small squares and in doing so we kind of divide this image up into little pixels each pixel is just one small square inside of an image and so really then we have something that looks like this so at the top left here we have a really tiny image of a smiley face but the way that we're defining what that smiley face looks like is we've created this grid of pixels and each pixel has only one color in it so we've blown this up really largely you can kind of see the actual pixels of the image especially down here for example you can kind of see the squares that are making up the curve of the smiley face and so each of these pixels now has one color associated with it but now if we kind of shrink this down you can no longer see those individual squares you kind of get something that looks more reasonable uh like an image so now how do we define the color for each of these pixels does anyone happen to know this kind of the bottom diagram gives you a little hint how do we how do we say this pixel is yellow anyone yeah so exactly so we say that we're going to get yellow by mixing together these three primary colors so back in grade school you know we I was I really loved arts art class we had all this paint you got to mix the paints together and I thought it was super cool when you had red paint and blue paint mixed together and you get purple paint so this is kind of the same exact thing here rather than red just red and blue we have these three primary colors and from these three primary colors if we mix different combinations of them we can actually get any color that we want so here you can see that we can get colors like yellow or brown or gray just by mixing different amounts of this red green and blue so let's talk about how that actually works so when we take these we kind of start from nothing and we start mixing colors together this is called additive color mixing because you're taking colors and you're adding them together so rather than think about paint let's actually think about different colors of light since your computer's display is basically just a bunch of small little lights that has a red light a green light and a blue light when each of them turn on the colors are going to add together something like this so imagine you're in a dark room and you're looking at kind of a a black wall if you turn on a red light all the way up and you shine it at the wall what color do you get dark room turn on a red light what color is the light yeah so it's just red okay so now according to this let's say you then turn on a green light and you point it at the same exact spot on the wall what happens yeah so kind of like this diagram here so what happens when the red and the green kind of overlap yeah so we get a yellow color so that's kind of in the top here so here we get a yellow so this is just only where red and green are mixing we get a purple only where red and blue are mixing and we get kind of a lighter blue over here where just the green and the blue are mixing so what happens if we turn all of the lights all the way up what color do we get yeah so we're going to get white so white then is kind of the combination of all three of these primary colors and so we happen to choose red green and blue as our primary colors and so we'll call this RGB so we're going to start expressing colors in terms of how much red do we have how much green do we have and how much blue do we have but we looked at that image before and we said it's 90% red well 90% of what right so we actually need to Define some values associated with the red the green and the blue and we call these values the color depth of an image so let's say um that I had a color depth of one so that means that each of those values could either be 0% red or 1% red so that would be a color depth of one that means how many bits am I using for each of those for each of red green and blue if it can be either zero or one how many bits do I need yeah so just one bit so let's say then I use more bits let's say I use eight bits that means that the that means that each of those channels red green and blue can be represented with eight bits so that means that what values can I use for red green and blue what's the range that those can take on yeah so 0 to 2 to the E right because that's kind of the the largest number that I can represent with eight bits so more technically we're going to be 2 to the 8 minus 1 which is going to be 255 so that means that if I have8 bits for red eight bits for green eight bits for blue what's my color depth how many bits is each pixel so eight for eight for three colors so how many total yeah so we're just going to be 24 so we have eight bits for red plus another eight bits for green plus another eight bits for blue means that we have a color depth of 24 bits so what happens as I increase my color depth what does that allow me to do yeah exactly so that means we have more choices right if I only have two bits that means I can have you know either zero red one red two red or three red but if I have 255 bits suddenly I can be a lot more precise with what I mean when I say 60% red so the color depth then tells us what colors I can actually represent inside of my image so to actually Express these values as we said we're going to give some values for each of these three channels red green and blue but we're frequently going to represent this with something like this so this is heximal notation so we've seen binary so far we've seen octal hexadecimal is just rather than being base 2 or base 8 this is just base 16 so that means each of these slots is 16 to the 0 16 the one and so on and all that does it conveniently allows us to represent those eight bits with just two slots so if this means if my largest heximal decimal digit is an F because we we're using base 16 so that means after nine we need to go to a b c d e and f so this is defining how much red I have how much green I have and how much blue I have so what color is this so if the first slot is how much red so it looks like I'm going to have two digits per each of these channels so how much red do I have a lot or a little yeah so we have a lot of red so that means FF is basically as high as we can go so we can't have any more red because FF is the highest number we can make with just two de two hexadecimal digits okay so we have a lot of red how much green do we have none and how much blue do we have none so what color is this exactly so this is pure red so let's try another one so first thing how much red do we have none how much green a little bit how much blue a lot so what color is this so what two colors we mixing together green and blue so what do we get yeah so we just got kind of a lighter blue so purple would be red and blue and it's super easy to forget what happens until you get actual paint which is fun so this then is a representation of kind of a sky blue or a lighter blue so any questions on how we're representing the values of these colors yeah oh sure so uh the actual reason blue and green mixes to be like sky blue that I'm not sure of but this just when you mix when you mix this much blue with this much green you get a color that's kind of a a cyan or a sky bluish the actual theory behind that I'm not too sure of so uh as computer scientists we of course went totally overboard and we picked a bunch of heximal combinations and we gave them names so if I flip back over here here so here we go this is HTML color names.com and if we scroll down they kind of get uh progressively more ridiculous so we get colors like papaya Whip and Peach puff there's also a blanched almond and a linen and so these are actual just really specific names for colors but behind each of these colors so let's choose Peach puff we can see that this is just an HTML heximal character code we have a lot of red we we got even we got a little less green and a little less blue and that's how we get Peach puff so these are the actual technical names for these colors in case you ever need to be specific so that's additive color mixing but if you've ever refilled the ink cartridges on your printer you probably didn't have red green and blue ink what color ink did you have yeah so we have this cmk the cyan magenta yellow and K for black or key so this works a little bit differently than additive color mixing so when we figured out how additive color mixing works we put ourselves in a really dark room and we turn some lights on now if I print something and put it on a piece of paper that's kind of not at all what's going to happen right instead I'm going to have some sunlight or some you know indoor lights that is something white and it's going to hit the paper so we kind of these two different situations one we're kind of turning lights on we're adding colors together and another one we're starting off well we're beginning with all of the lights on and we're looking at what happens when some white light hits some other colors so what's going to happen is something like this so over here on the left we have some white light and just a few minutes ago we decided that that white light was just a combination of blue red and green so now now when this white light hits a surface that is cyan for example so cyan is just this light blue here what's going to happen is this light blue is going to absorb all of the red light so that means that once it hits this color the only two colors left are this blue and this green and it just so happens that blue and green make cyan and so that means that when I put this cyan ink on the paper kind of logically we're going to get the color cyan but we're not really adding colors together anymore we're kind of starting off with some white light and we're subtracting some colors away so now let's let's try mixing some colors so again we have some white light over here on the left so that's just red green and blue so now when it hits a yellow this time it just so happens that when this light hits the yellow all of the blue is going to be absorbed this time so that means that I'm just left with some red and some green then if I put my cyan back in well it's going to do the same thing it did last time it's going to absorb all of the red so that means that when I mix yellow and cyan and then look at it with white light I'm going to see green which makes sense so as you said before this is called CM YK and this is just a different color model this is a different way of combining things to get color so typically we're going to use RGB when we're looking at you know dis plays or things with light and we're combining together light but once we start printing things and putting them on paper we're going to use the CMYK really this is just kind of abstract and different ways of representing colors but when you're at the printer store looking for an ink cartridge this is what that's referring to just the different colors of the ink that we can combine together to get any color we want so by the way we just saw that with c m and Y we can get any color so that means that if we combine uh cyan magenta and yellow we we should absorb all of the colors in the white light and so what should that do what color do I get when I mix all three of these we get black so then why do we have this K if all we need are these three letters to get anything including black yeah so really practical reason right so if you it's really common that we print black that's kind of the most common thing that comes out of your printer so it' be kind of silly to every time you wanted to print a black document to use up all of your cyan magenta and yellow ink so instead we just kind of tacked on this black since that's kind of a really common use case so another reason is that you know this this all works well in theory um but in practice you know it's going to take a lot of ink to get the black the the true black that you're looking for so again it's just going to be a real waste to go through and you know blow all your color ink on a a black and white document so that's where the K in cmy K comes from it's not cmyb for some reason because B was blue I guess so they shows K uh for key okay so any questions on how we're going to start mixing things together and representing color in images Okay so let's start talking about one format for representing an image so we saw before that we're going to be talking about raster graphics and that just means that we're going to take an image we're going to slap a grid on it and each of those squares in the grid is going to have a color and this is the basis for a format called a bit map and a bit map is really really similar to the PPM that we just looked at but a bit map the basic idea is it's going to be a big collection of bites all just one next to each other and each bite is going to describe the color of a pixel in the image so bit map starts off with this thing called a magic number and the magic number for a bit map is just these this sequence of bites 4 2 4D which happens to be the heximal representation of the number 66 followed by the number 77 they don't happen to remember what the asy value of 66 is so this is kind of random um but 66 is a capital B so for D then or 77 is just a capital m so that means that all we're saying with this magic number thing is that every big map is going to start off with these byes that are BM so does that mean that every time I have a file and I see BM at the very beginning does that mean I have a bit map so I get a random file it starts with 6677 can I say yep definitely a bit map so it has the bitmat magic number so yes so any so who votes yes so anyone who votes no all right so we're like 10% voted okay so let's let's go back so let's say I create a file I'm going to open up uh text edit I'm just create a plan old text file I'm going to make the text really big what are the bites of this file this is just plain old asky text and I'm just zooming in what are the bites of this text file yeah so the first bite is B the second bite is M so that means that this has starts off with the magic number for a bit map but this isn't necessarily a bit map so this magic number doesn't mean that I'm looking at a bit map so we can say that every bit map starts with this magic number but not every file that starts with this magic number is a bit map so the purpose of this thing is just to kind of you know provide some indicator to another program that hey here comes a bit map and why did we decide to do that well the bitmap file format told us to so end of story there so I hit the wrong button so that's our magic number so that means that's the first thing in every single bit map file and that's something the format tells me to do so up next we have this thing called metadata so has anyone heard this word before what is metadata whether there be what is it about data yeah exactly so it's it's meta it's some more it's some data about the file's data so what be what might be some metadata that we're associating with the bit map yeah so size what else yeah so there could be some you know maybe some additional information like a comment or something but what what's something really basic about the file what do we need to know so how about the file size right I think I heard that so we're saying not not just the size but the actual width and the height right so it's not enough to just say that there's 100 pixels in this image we need to know well is it like 50 by two is it 25 by4 I'm actually really impressed that I just did that right I hope so we're just we need to say okay Photoshop or okay [ __ ] this is how big the file should be across this is how big the file should be down and so that's just some of the things that we're going to include in the bit map's metadata so again without this metadata we really have no idea what to do with this collection of bits we don't know we just display them across do we do anything else so this tells the application what to do with these pixels so after that after the magic number followed by the metadata now we have the actual data of the file so that means that we're going to start defining colors for each pixel so here's a really simple bit map image we can see here really clearly each of the pixels in the image so here for example this is just one pixel so that means we're using 24 bits to represent for example his left eye or the corner of his mouth here so let's actually take a look at the individual bits inside of this file so I'm going to use a special program here called xxd and all xxd does is it just goes through the bites of a file and displays them so again I'm not interested in kind of making red pixels anymore I want to look at the actual bites of the file so here is what the actual bites of the file looks like so kind of ignore everything to the left and the right but here we can see that each of these pixels here is grouped as exactly six heximal digits so we can kind of see the outline of a smiley face right so we can kind of see well this we have two types of pixels F that's all white so that means that this thing must be this thing here must be red but what's kind of weird about this yeah so this is this is actually backwards so bitmap just happens to say you know we're still going to use RGB all of that is still going to be the same but I'm going to be difficult and just store backwards for you some other bit maps are actually really difficult and they store the image upside down because that's what they decided to do so somewhere inside of the metadata or somewhere in the file we need to say hey by the way this is upside down sorry so this one isn't so we can see here that we can kind of see a bit of a smiley face here where we're defining what the color of each pixel is so by the way when I when I ran this magic incantation all I'm saying up here is I want you to say I want you to group everything into kind of three channels each and I want the whole thing to be 24 bits and this thing here has just said I want you to skip over 54 bytes so what did I just skip over so what did we say is at the beginning of the file yeah so we had some metadata and we had that magic number so let's say we we don't skip it let's just get rid of this if we don't skip it then we see here the first bites of the file 42 4D just as we expected there's our magic number and the reason I skipped is just because kind of this additional info at the beginning makes it look a lot less like a smiley face so any questions on exactly what this is representing yeah yeah so this xxd thing this will work for any type of file so this is saying I don't really care how I'm supposed to interpret these bites I'm just going to tell you what those bites are so Photoshop in the other hand would say okay I know I have an image I kind of want to take this bite and make it red you know do whatever xxd says I have no idea what this file is I don't really care I'm just going to tell you what the byes are so this will work on kind of any file that you give it if you want to find out exactly what's contained within a file and kind of express it just using this nice hexadecimal notation other questions on how this on why this is a bit map okay so now let's talk about resolution can anyone describe what the resolution of an image is what does that what does the resolution of an image describe sure so what so a little more precise by percentage we're kind of saying you know how big are each of these squares inside of my image so kind of what P you can say you know what percentage of the Total Image is each of these squares so when I have a low resolution image that means that each of these squares is really really big so over to the left here we have a low resolution logo you can kind of see that you know it it kind of hard to see in the projector but it's kind of lame you can it's really pixelated it's not smooth it's just the quality is really really low but the reason that's happening is because we're only saying we have 16 pixels across and 16 pixels down to work with so on the other hand over on the right here we have another image and it's the same exact width and the height the only thing we've changed is the size of each one of those small squares inside of the grid so now that we have 52 little pixels to work with we can create a lot more detail right so that means that we can make this file larger and it just kind of looks a much higher quality because these dots are smaller we can create you know these nice looking curves and gradients and things like that so resolution then kind of describes how much information we can actually encode in one of these files so if we flip back over here so a really common thing um that you'll see on a lot of things like CSI or crime shows and someone will will be looking at it a video from the crime scene they'll say oh wait I I think I see something in a reflection or I want to see the license plate I want you to zoom in zoom in zoom in zoom in and enhance the image and so now we can kind of see that this makes no sense right so we can only zoom in so far because each image has to have a resolution associated with it so even if that resolution is really really high there's going to be a point where you can't zoom in anymore because youve kind of hit one of those individual squares on the grid so what we're about to see is is actually a nice compilation um from a variety of of crime scene TV shows and movies uh that make no sense okay now let's get a good look at you and by the way I'm sure that you know the writers for these kind of think they're super original like oh my God I'm the first person to do this like look how climactic this is and so it's really interesting that it's not hold it run that back wait a minute go right there free that full screen okay free tighten up on that Vector in on that guy by the back of whe zoom in right here on this spot with the right equipment the image could be larged and sharpened what's that is's an enhancement program can you clear that up any I don't know let's enhance it enhance section A6 I enhance the detail and I think there's enough to enhance release it to my screen enhance the reflection in her eye let's run this through video enhancement Edgar can you enhance this hang on I've been working on this reflection someone's reflection reflection there's a reflection of the man's face a reflection there's a reflection zoom in on the mirror you can see a reflection can you enhance the image from here can you enhance him right here can you enhance it can you enhance it can we enhance this can you enhance it hold on a second I'll enance zoom in on the door time 10 Zoom move in more wait stop stop pause it rotate us 75° on the ver pleas stop go back to the part about the door again got an image enhancer that can bit man maybe we can use the produ S method to see into the windows this software is state of the art the I can value with the right combination of algorithms he's taking elimination algorithms to the next level and I can use them to enhance this Photograph lock on and enlarge the cais enhance enhance enhance freeze and enhance I'm sorry for just ruining all of those movies um we could see kind of at the end there uh people were just kind of using words that didn't make any sense at all and so really then if if someone were to zoom in on the reflection they'd see something that looks a lot more like the this logo on the left which case it's really impressive they can still read the license plate uh not this thing all the way over to the right that they're claiming yeah sure of so there no enhancement software at all not to the Quality that they're claiming you could do so there's you know we can only zoom in to a point it's not like we can take this 2D image and then suddenly like rotate and get a 3D World or or see someone's reflection so there's there's just no way that you can actually achieve the quality that they're saying you can yeah so you know in Photoshop there's like effects like sharpen but you know all that's really doing is kind of making lines a little straighter you're not actually going to you know increase the detail yeah um my question is um when they zoom in oh how can they see anything when it's just like a yeah so they yeah right so they can't yeah so they're going to zoom in they're going to see a blob and then they run this I see a blob even in those shows I'm like what are they looking at I don't see exactly yeah would it also be that it depends on what you use to capture the image so for instance camera that can you know pick up XYZ a resolution as opposed to another you put that verion of phot they cannot maybe Zoom I'm just giving a generic example wouldn't it true that what to also yeah absolutely so the original you know the original video camera is going to have a resolution and if you start off at a low resolution and then try to blow it up then you're going to kind of run into trouble really fast you know but then if you have a larger resolution you know I could probably get away with taking this Vimeo logo over on the right and I can make it a little bigger and you might not notice any loss in quality whereas over here on the left I started off with kind of a low resolution camera or video camera if I blow it up even more then I'm going to run into trouble really fast so yeah it's definitely true um that different video cameras will have different resolutions and that'll give you different levels of detail yeah yeah so so the area that these pixels are distributed over so we basically just making a grid where everything is of equal size so we're saying we're just kind of saying how many across do we have and how many down do we have I me there's it looks like there's more than 16 pixels there yeah so this one over here on the left you know if if this this image has to have been enlarged right or else you know the 16 by 16 would just be this little tiny little thing so when we enlarged it we kind of ended up creating this effect that looked like there more pixels yeah but this is just kind of an example of a a low number versus a high number okay so so that's resolution but does anyone notice any problems with the bit map format is there anything that's kind of inefficient about it yeah so we're going to get a lot of data right so let's consider this bit map so the bit map for for this flag is going to say something like black black black black black it's going to keep going until we've hit all of the pixels in the first row of this image then we're going to get the second row of black pixels we're going to get the third row of black pixels and we're just going to keep storing the same thing over and over and over and over and over and over and over again and so that means that's really really inefficient right I mean when we're adding numbers together we could say something like 2 plus two plus two plus two plus two or we could just say 2 * 5 and this is kind of a big Improvement we can make now on the bitmap format and this type of compression is called lossless compression and that means we're taking some bitmap that has some data in it and we're simply changing how we're representing that data but we're not going to lose anything right when we say 2 * 5 it's the same exact way of expressing 2 plus 2 plus 2 plus 2 plus 2 and we haven't lost any information we've just come up with a more compact representation of it so here with this with this image here we can actually say all right if if I hit a black pixel and then there's a black pixel next to it I can say well rather than storing them twice say there are two black pixels and if there's a third I can say there are three black pixels and so on and so forth and so one format that uses this type of compression is called GIF by the way you might also have heard this pronounced GIF this is an internet holy war how you pronounce GIF if it's GIF or GIF uh word on the street is that the original developers wanted it to be pronounced like the peanut butter because they said like choose developers choose GIF and they weren't that funny but I think so I I am on the side of the ho war that says GIF um but according to both the American and Oxford dictionaries GIF is also okay um so if anyone corrects you you can tell them that so this is just one form of compression and we're going to take this bit map and we're going to store it way more efficiently right but what happens if we throw this one at it are we going to do the same better worse than the previous one so which of these files is going to be larger or if or are they the same is anyone going to compressed better than the other one yeah so that's a really good idea maybe we could so why do you want to rotate it though yeah exactly so if we just take the the format we just came up with just kind of repeated pixels across horizontally then ex exactly what you describe we're going to run into an issue because we need to pause for white and kind of restart for red and so just using that compression algorithm or technique for compressing we're going to get a much larger file so it would be a really good idea to just kind of rotate this compress it and rotate it back but unfortunately that's just not something GIF has you know allowed you to do in their compression and so exactly that exactly means that this will be a larger file because we can't kind of use that little trick that we came up with even though it's an awesome idea and other formats maybe could do something like that but because we've just chosen this kind of arbitrary way of compressing a file it is going to be the case that some files will just compress better than other ones but in both cases we haven't actually lost any data we're preserving all of the original data inside of our bit map so we just saw that you know that might be kind of limited right if maybe preserving all this data isn't that good of an idea because we're going to end up still with these really really big files so instead of lossless compression where we are not losing any data let's try ly compression which means that we are going to throw away some data but we're going to throw away Parts where you can kind of still tell what's going on so here's an example of lossy compression so can everyone kind of read what this says yeah so hey what are you doing tomorrow I wanted to go see Ben and so this is this is a pretty readable message you know you can still kind of interpret what's going on but the original message obviously looked something like this and we had commas we had vowels we didn't have digits but we've conveyed the same exact information with this compressed version where we threw away some data than as this original version and the reason we did that is we were just smart about the data we threw away right we didn't throw away the whole word Ben you know we just we let's say we took out the vowels and tomorrow because you know there aren't very many words in the English language that look like that we can just figure out that that word means tomorrow and so this is the basic idea behind lossy compression we're going to throw away some data that you aren't really going to miss if we throw it away so one image format that uses lossy compression is called jpeg so you've probably seen jpeg uh you've used digital cameras since they're really common for that and the basic idea here is that rather than representing every single Pixel or even a lossless representation of every single Pixel we're literally just going to throw some away and hopefully you're not going to notice so here we have the same image and it's using different levels of compression so on the left here we have a compression factor of 10 and on the right we have a compression factor of 50 so that means we're throwing away a ton of pixels but but it's still pretty clear what this image is so even though we've really really cut this thing down to size you can still very easily tell what the image is like the compared to the left you know the right one is a little more distorted and it's a little pixelated and lower quality U you can't see it as much on the projector here as you will when you look at it on your computer screens but it's still pretty obvious what's going on here and the reason this works is because digital photos typically have tons of pixels right if you have a digital if you have a digital camera on your smartphone and it's something like 3 megapixels or 5 megapixels that means that each one of these individual images three or five million pixels so if I throw one of them away you're probably not going to notice and if I throw a lot of them away if I'm smart about how I do it then you're probably not going to notice either so of course lossy compression doesn't always work so let's say I have this image here let's let's just say that each of these pixels is the same size as this white one in the middle here so really if we threw any of these away we're going to kind of run into some problems it's not going to be a box anymore as soon as I throw away any one of those green pixels so here losty compression might not be the best idea in the world right we can't really throw away or combine or do anything like that and this is just to say um that that's why lossy compression is used on jpegs just because it's it's a different use case right jpegs are typically digital photos uh where gifs are typically smaller images that aren't as detailed as a digital photo so any questions on compression okay so one other thing um that is really helpful for images to support is this thing called Alpha so what is Alpha in an image any guesses yeah yeah so kind of like quality so we can actually we can probably produce what might be perceived as higher quality images with this so Alpha refers to transparency so when we had bit Maps our choices were anything between white and black kind of all of the ranges between Z 00 ffffff what a transparency allows us to do is kind of adds on an additional channel so rather than just RGB we start having rgba so that means we can have images with transparent backgrounds so that means if we have a red web page we put the image on the red web page then suddenly that image has a red background so Alpha is something that jpegs do not support uh gifs do support it which means that you can have you know transparency in your GIF there's also another common image format that supports it called ping and ping has been really popular or PNG I don't know if it's actually ping I always say ping it's really popular on the internet today it's kind of a nice balance between all the formats we've looked at so far it has really nice color depth it supports transparent y it compresses nicely and the PNG acronym rumor has it that even though it officially stands for portable Network Graphics U that it actually stands for Ping is not GIF uh because the people who develop ping were a little upset about gif's licensing terms and so they wanted to create something that you know was just as good um but much nicer um but what nothing else can do uh or any of these other formats can do is have animation inside them and when you're really bored on a Monday morning that is something that you really want so animated gifs you may have seen on the internet look something like this so this is perhaps how you felt this morning a cat going down the stairs with his head and so the way this works is we're basically taking some individual GIF images and we're just combining them so each of those images is kind of a frame inside of this animation now when I display this GIF we're just going to show one frame for a little while then move on to the the next one and so we get something that looks like this another really famous animated gif is one that I could watch literally all day there's just something mesmerizing about how accurate it is so unfortunately you know we have jpegs or bit Maps we don't have the capability to keep replaying this animation over and over again so if you're really bored a really good source for animated gifs that are reactions to situations you might every day every day uh what should we call me uh we won't go there right now in the interest of time U but if you don't feel like listening to me I highly recommend that's where you go so here's just a summary of the different image formats we've looked at so far so feel free to refer to this so bit Maps we saw are not compressed at all gifs and pings have this lossless compression where jpeg uses loss e compression we have different color depth different supported color depth and all of these images so GIF because it's only eight bits means that we you know we can't represent the same depth of color the same range of colors we could represent the digital photo and so that's why if you take a really nice digital photo you probably don't want to save it as a gif and finally uh the transparency Channel self-explanatory so let's take a five minute break and then we'll come back and look at some different image formats and then move on to sound and video all right so welcome back so we just saw how we could use raster Graphics to represent images by kind of defining a grid of pixels and saying what color that pixel is but we kind of quickly ran into this problem of well once we have this one resolution we can't really scale it up so now let's take a look at vector graphics which are basically a different way of representing images that kind of came up a little bit earlier and what this is going to allow us to do is kind of scale up as much as we want so the basic idea behind vector graphics is that we're going to use the magic of math to represent images so we see here you know we have some shapes like a circle and some lines so rather than remembering okay this pixel here should be black this pixel here should be gray we're actually going to Define equations for each of these shapes and lines and curves so for example up here we have something like a circle so remember that the equation for a circle is something like x2+ y^2 equals some number that's the radius of the circle so that means that if we you know pick a radius for the circle then we're going to be able to create as big a circle as we could ever possibly imagine right because we're not limited by any single resolution so same thing here if we just Define these mathematical equations for each of these shapes then we can kind of plug in whatever values we want into those equations so we're just going to get kind of progressively bigger and bigger numbers which means that we can get bigger images without losing any quality so these are really commonly on Wikipedia as SVG files or scalable vector graphics you can see here down the bottom we can take this Vector graphic we can convert it into a r Graphics format like Ping and here it just gives us a bunch of different options for sizes and we're not going to have any quality loss now because all we're going to do is we're going to say I want an image that's 2,000 pixels large I have a bunch of equations describing stuff I'm just going to plug in 2,000 into some of those equations and I'm going to get a really big image you can see here that in this really big image I don't have you know this pixelation with the squares or anything even though this is much bigger than the original image was that we were just looking at and so this is just one advantage of vector graphics it's just a different way of representing images but now you know we don't create this grid of pixels we just use math and create equations for each of the shapes so one downside of vector graphics is it might not be easy to come up with an equation for a grumpycat right that's kind of a really complex shape and it might not give us the same picture as our original rasor Graphics image so uh pros and cons of vector graphics um but the big Advantage here is that we can kind of scale this to be whatever we want and we're not going to get any loss in quality because we're just plugging numbers into equations and it's no harder to plug in a 100 than it is to plug in a million to those equations make sense so we won't go into any of the math or anything question yeah yeah so the question is can we convert uh back and forth so we saw here we just did was we converted a vector to a raster that was really really easy all we did was we plugged in some numbers to the equations going the other way around though is more difficult because that's when we actually have to come up with these equations that kind of match the same shape so it's easy to go from Vector to raster but it's a little harder to go the other way around because you kind of have to fit everything exactly with math question okay so let's switch gears a little bit from graphics and start talking about audio so the first thing we want to go over is what sound actually is and how we represent sound in the real world so from high school physics we remember that sound is basically a wave and this wave is just a bunch of oscillating pressure changes eventually the pressure changes reaches your ear it vibrates something in your ear and you get some sound so if sound looks like a wave like this what are the two kind of knobs we can turn to get a different wave so they're labeled what are they yeah so frequency and amplitude so what what do each of those meanes yeah exactly so frequency is kind of the distance let's say the distance between you know this thing here this peak and this peak here so that's kind of one wavelength and so frequency just says how many wavelengths can we fit into some you know amount of time like a second or so and then what's uh amplitude basically yeah exactly so amplitude then is basically the distance from this zero here to the top of this peak or the bottom of this Valley so in terms of when you're perceiving sound what is amplitude what does that kind of correspond to yeah so amplitude is loudness so a bigger amplitude means a louder sound you have kind of a taller wave so what is frequency yeah frequency is pitch so that means that if we have a higher frequency you get a higher pitch like my voice so what happens now if two waves hit one another so as we're sitting here there's you know a whole bunch of sounds going on you know R.J is not paying attention he's typing on his laptop I'm talking so now these two sound waves are going to interact because they're in the same space so what happens is we get something called interference so waves can interfere in basically two ways if these waves are in phase so kind of these Peaks line up then when they hit each other they're going to get louder the amplitude of the result is just going to go up if they're out of phase meaning the every Peak lines up with the valley then we're going to get cancellation so we're going to get this straight line and it's going to result in no noise so if you have noise cancelling headphones by the way this is kind of how they work you know they're going to try to produce waves that will cancel out any waves coming into your ear so then if we have something kind of in the middle then we're going to get kind of something that looks like this some parts are going to get louder some parts are going to get quieter so even though you know we're just sitting here and there's you know one big sound there's lots of sounds going on around us at all times and they're going to interact or interfere to produce one larger sound or quieter so we would say that this kind of sound is analog right if we have a wave you know that can be described by some equation that's like sign something or whatever but that means it's going to be totally continuous so that means that for every point on the you know on this axis on the time we're going to have a corresponding value on this curve so the problem is is that curve is not zeros and ones so if we're going to have if we're going to hope to represent sound on our computer that we're going to need to go from this analog representation this continuous wave to something that is just zeros and ones and the way we're going to do that is with something called sampling so basically what this says is even though I have a continuous wave I'm just going to pick some parts of the wave and write down what that value is so maybe every half second I'm going to say What's the value of my sound now what's the value now what's the value now so if I keep doing that I'm basically going to get something that looks like this so each of these bars here represents a single sample so rather than remembering every single point between zero and one I'm just going to remember this one here and say at this time step I had a value of let's say n whatever that means so I can keep doing this you can see that the These Bars here kind of Trace out the shape of my wave you know if I were to kind of connect the dots on the bars you know I'd kind of get something that looks pretty close to this wave and again the reason we need to do this is because our computers can't store this infinite number of values right if this wave keeps going on forever or even if I just look at you know the interval between zero and one there's an infinite number of points just in that one interval so my computer can't store that we need something that's just zeros and ones so by basically looking at the values on this curve and getting some numbers that means I can take this analog continuous thing and convert it to something that's digital or zeros and ones so the sampling rate then is basically how many samples I'm going to take and so this is very similar to an image resolution right a resolution described how many boxes do we get to work with when we're drawing our image the sampling rate says how many bars are we going to draw inside of the wave so we can see here that this one here is a lower sampling rate it's kind of hard to see here but we're taking fewer samples so we have fewer bars to work with and the result is a shape that kind of resembles the curve a little bit less if we increase the number of samples kind of ask the curve what's your value at this point what's your value at this point if we do that more over this same interval then we get something that looks a lot more like the original curve so in this previous one uh so in this curve here we took about 30 samples or so at 30 different points on this curve here we wrote down what the value was so does anyone happen to know what the sampling rate on CD quality audio is any guesses how many samples do you think we take every second 128 other guesses how many how many times how many samples do we take in in one second for a CD so now are the guesses so the answer is actually about 44,000 so for every second of audio we're writing down 44,000 different values that occur inside of that second so related to the sampling rate then is the bit rate and this is kind of the same thing as the color depth so here you know before we we wrote down that you know we have 90% red and we said well what is that 90% of with the bit rate we're saying what number means loud right is 10 loud is a million loud what's the range of values that each sample can take on so if we have a higher bit rate then that means we're using more bits to represent each sample and that means again we can kind of have more PR uh more Precision we can have more information that we can represent right because you know just like we could you use a wider array of colors we can now have a wider array of sounds because we have more more precise intervals that we can look at so any guesses as to the bit rate of CDs how many bits is each sample 5,000 any other guesses so the bit rate for a CD is actually about 16 so that means that the range of values you can take on is from 0 to 2 to the 16 which is a pretty big or 2 16 minus one uh which is actually a pretty big number U we can also see 24-bit audio and kind of more professional settings um but that is now the bit rate and the sampling rate of CD quality audio so now that we have a bit rate and a sampling rate we can actually calculate how big our sound file is going to be right so if we have 44,000 uh technically 44,100 samples for every second and we need to actually sample twice one for the left uh one for your left ear one for your right ear so we're actually taking more like 88 sample uh 88,000 samples per second and each of those samples then is 16 bits long so for each second of audio you're probably looking at about2 megabytes so for a 3 minute song you're starting to push about 30 or 40 megabytes just for a single song and the reason for that is because we're taking so many samples and each one of those samples is so large that you know everything just kind of starts to add up so the point of other audio formats then like MP3 is to cut that down to size right if you're if every song on your iPod took up 30 megabytes of space you're going to be able to store an entire order of magnitude fewer songs right where we can actually multiply by 10 the number of songs that you can store if we take that 30 and we cut it down to three and so that's the goal of MP3 is to basically compress all of that data so by the way um that that CD quality audio it happens to be called PCM um so if you ever see that acronym that's what that means but the way that MP3 is going to cut down the amount of the amount of data in each file is with this really fancy thing called psycho Acoustics which is just a crazy combination of two words but what this is going to be is it's not some kind of fancy algorithm it's actually going to take advantage of some limitations in our hearing so for example the human ear is not capable of hearing every sound possible it's actually only capable of hearing frequencies from about 20 to 20 HZ to about 16 Kilz you know 20 khz if you're kind of younger and have fresher ears so then if I have some PCM audio file and a bunch of those samples are values that are outside of that range you know 21 khz or so if I can't ever hear them anyway then there's really no point in saving them and so this is something that the MP3 can do it can say oh here's a frequency that's just too high for a human I'm going to throw that away so similarly uh we also have something called frequency masking and this this the idea of masking is that if I have two sounds that occur at the same time in some cases I'm only going to hear one of them so for example if I have a really loud sound and I play it at the exact same time as a really quiet sound then I'm only going to hear the loud one just because it kind of overpowers the small sound so if I'm an MP3 and I see a loud sound and a a quiet sound at the same time there's really no point in Saving that smaller one since I'm not going to hear it anyway so similarly the the same kind of thing happens with frequencies if we have two similar frequencies at the same time we're only going to hear the higher one so that again the MP3 can just kind of throw that away and so that's kind of that a high level how the MP3 format is going to compress down that 30 megabytes of CD quality audio into a much more reasonable 3 megabyte song or so and so to do that uh it's going to have these two different tools the first of these tools is called the fast forier transform or fft you don't have to worry about how this works but it's just kind of this mathematical black box that a computer can figure out well where is masking going to occur what sounds am I allowed to just remove and this other tool that we have is this thing called A spectrogram and A spectrogram is kind of a visual representation of what a song looks like so this for example is a spectrogram of a sound file What's Happening Here is along the x-axis we have some time on the y- axis we have frequency and then the intensity of the light is basically the intensity of that frequency so again this is just a tool the MP3 compression uses in order to figure out kind of what's going on what's the best way to distribute these bits to encode the information on a file so a few bands actually take advantage of this so I was going to put this in the slideshow in the recap but every time I see it it gives me nightmares so you won't you won't find this anywhere else but the video um but there are some bands that will actually encode images into the spectrograms of their files so if you open up a program and you actually you know run this analysis on their song you get an image and that could look something like that so this is a spectogram of an actual uh song and it looks super crazy and what's going on at this point in the song is like this crazy dubstep thing with like lots of screeching and you know kind of what you might expect for a spectrogram that looks like this um but again this is just kind of one way of looking and analyzing at it kind of visually what an audio file looks like so that's just kind of a fun aside of some of the tools the MP3 uses in order to compress your file so now on to what an MP3 file actually looks like so an MP3 file is divided up into individual frames so each frame is kind of like a single image we're going to represent exactly what's going on at this point in time so frames then probably last fractions of a second and then inside of this Frame is we're going to start to write down what we got when we sampled the audio at that point so we got some frequencies we got some amplitude we got something that describes that wave and so here that's where actually going to write that down so at the beginning or the end of your MP3 file we also have some extra space for something called an ID3 tag has anyone ever seen this or you probably all used one but have does anyone know what this is so this ID3 is just some metadata associated with the MP3 so more so than images with your MP3s you want to know the artist the album The Year the album art and all of this information so basically MP3 allows you to Define that right inside of the MP3 file and again we just have this format called ID3 through which we're going to put some metadata into the MP3 file so usually this occurs after all of the audio data but it allows you to when you browse your songs in iTunes have multiple Columns of data and not just a file name so really just for organizational purposes uh metadata is super handy uh with sound files so what are some common formats for audio so we just saw MP3 and PCM but what are some other ones that you might have used yeah so wave so what's that give kind of an example of a w like when would you see a wave file just yeah so so wave is is technically uh like your little system dings and little beeps that occur in your system those tiny little sounds those are typically wave files so wave was originally developed by Windows um wave is also sometimes used for um uncompressed data so wave is not com it can be uncompressed and so this could be one wave storing you know PCM audio what you know that isn't super compressed any other formats you might have heard of yeah so EG is kind of the body that governs MP3 and MP4 it's kind of this broader set of Standards but yeah so that's definitely uh a format that's associated with audio did you sayp yeah so MP4 is actually video which we'll see next but it's kind of the same group that developed um this this body of Standards any other audio formats we've seen wave MP3 so the default on iTunes is this thing called AAC uh which might the file extension is usually m4a or something like that this is kind of developed as the Next Generation to MP3 um Apple developed it and it turns out that since Apple's iPods and iTunes caught on this thing kind of caught on um midi is another one that's typically associated with instruments you know if you've ever plugged in a digital piano you might have seen something about a midi input or something like that uh we saw MP3 and wave and we also have WMA which is kind of like Microsoft's version of AAC they want to develop their own audio format and they put it on the zoom and we all know how well that did um and so but that exists as well um so as we just said audacity is this really cool program that you can use to manipulate sound files and in the section videos this week all three of them are going to be focused on kind of manipulating your own multimedia so how to make graphics with Photoshop how to use audacity and garage band to remix songs or create your own and then finally how to use iMovie to create your own videos so there's just a plug for the section videos this week are super super cool and they're going to get you off uh off your feet and running if you want to start doing your own graphic design or multimedia manipulation uh which you'll also be doing in the problem set so now let's take an aside and talk about 3D Graphics now actually before we do is there any questions on the basics of sound and how MP3 files compress this huge amount of data okay so on to 3D Graphics uh which is something that I work a lot with and I think is really really cool so we saw before that we can basically represent 2D Graphics by making this grid of stuff and coloring every Square inside of that grid 3D Graphics doesn't really work that way so it's kind of Impractical to make this huge 3D grid just because it's going to get really really big so if you want to represent an object in 3D we're in instead going to use something called a wireframe you may have seen this before in video games or movies but a wireframe is basically this Bare Bones version of an object it basically just defines the edges of the object and then we kind of say here are some important points and here are how these points are connected and we get something that looks something like this so here we have this complicated 3D graphic here this Panda thing and now we've created a wireframe around it you see this wireframe we have a number of little points here basically making a Rd over this thing and this this wireframe just defines the shape of this object the edges of this object we're not worried about things like color or anything like that yet so a specific type of wireframe is called a mesh and the difference here is that you can see on this wireframe you know we have some curves around the panda with a mesh we're not allowed to use any curves we're only going to use polygons so they're usually triangles sometimes you'll see quadrilaterals or other kind of simple polygon shapes um but no curves and this is a really common way to actually represent 3D objects when you're working with you know creating a 3D game or a 3D movie or something like that so polygon mesh looks something like this so here's a mesh that represents dolphin you can see here that there's really no detail to the 3D Dolphin yet all this mesh is doing is it's defining the shape of the dolphin and every single one of these little polygons is a triangle so we can create these shap uh these quadrilaterals then or quads by simply kind of putting two triangles right next to each other so that means that you know by kind of arranging these polygons we can go from simple 2D shapes to this nice threedimensional shape so any questions on how we're kind of representing the shape of 3D images okay so the problem here is that we're going to need a whole lot of polygons if we want to start defining smooth curves so saw before when we looked at the low resolution Vimeo logo that it was kind of hard to make a curve when we didn't have that many pixels to work with so we're going to run into the same problem here at 3D if we're only allowed to draw lines and we need to somehow make a curve we're going to need a lot of really really small lines in order to get a curve but one way we can kind of get around this is with this thing called subdivision what subdivision is it's basically a process from going from a mesh that looks like this kind of this is a little nicer because you can kind of see curves but it's still kind of kind of you know jerky to something that's really really smooth but without needing to Define you know tens of thousands of polygons to get the curve and so this is best explained with a demo so here we go so I'm on a site here and this is a mesh for a diamond ring so you can see here that if I click this wireframe button then this is my wireframe you know I'm just kind of loosely defining the edges of this ring now if I uncheck this box all I'm doing is I'm coloring basically all of the area inside of this box all the area inside of that little trapezoid there and so I get something that looks like this but the problem is is that this looks absolutely nothing like a diamond ring right we want to get curves we don't want to actually you know get these straight lines so we want to go from this shape to something that's more curved so the process by which we can do that looks something like this so let's say up on the top left here we have a mesh and it's not that curv we just have these these four squares they're just kind of flat and angular and we want to start making them a little more curved so the way we can do that is by basically creating some new points so if we just focus on this face here right it has we did basically have a square with four corners now what we're going to do is we're going to divide this one square with four corners into four squares that are a fourth of the size so if we look from A to B if you focus on this face here you can see that right here that one square has become four and the way we did that was we said okay let's stick a point right in the middle of that face and now let's create edges that go from this point to the edges that already existed on the mesh right so this line here is pretty much exactly the same we haven't moved it around or anything all we've done is we've taken this new Point here split up this one face into four faces and suddenly they're a little bit smaller which means we can make it look a little smoother so when we go from B to C we're doing the exact same thing each of these smaller faces now gets chopped up again we put a little point in the middle and we basically take the square and we split it up into fours and if we keep doing that we can see with only kind of three runs of this we run from something that looks really slanty and and Jagged to a nice curved surface down in the bottom right corner with d so any questions on kind of how this process works just kind of splitting up faces into smaller ones which allows us to make smoother curves so let's see what happens when we do this to the diamond ring so I'm going to click this button here that says increase subdivision and what this is going to do is it's going to do that exactly that process we just saw for every face we're just going to kind of cut it up into smaller ones and connect it to things that already existed so if I click this once we go from this to this and so that's not bad it looks more like a diamond ring so I'm going to click it again and once more now suddenly with this same mesh we have something that's much much smoother and looks much more like a diamond ring but remember I didn't actually save the locations of all of these polygons so if I click on wire frame we can barely even see the individual polygons because there are so many of them but again these are just all straight lines there no no curves or anything but if I hit decrease subdivision again this is where we started so that means if I want to download this mesh and I want to use this ring in my video game I don't need to download a mesh that is really really huge and defines all these different polygons instead I can just download this simple mesh and then depending on how detailed I want to make my video game or my 3D World I can divide it even more times or even fewer times so if I want a really detailed video game I can keep increasing the subdivision which of course takes some time so you need a faster processor or if I want a not so detailed game then I just don't subdivide it as many times and I get something that looks like this so the goal here was really to take some really simple mesh that doesn't Define anything like curvature and make a really smooth surface just by kind of cutting things in half and dividing up every single one of its faces so any questions on this process okay so this is how we can represent a single object but how can we represent now an entire world well a scene then is really just composed of these individual objects so this is a super simple 3D scene I just have these two cubes so each of these cubes here is itself a mesh we've defined some triangles that make up the faces of these cubes and we just kind of colored over them with the crayon so now let's actually jump to this I shall zoom in so here's my 3D World let me move it over so now to create this after I've loaded these meshes I just wanted to find where in the world these things are so I basically have this big coordinate system where the center could be zero or really I can put the zero wherever I want it I'm going to say this Cube here is a little bit to the left of zero it's a little bit you know above the ground and this Cube here is a little bit to the right of zero and so on so because I'm just remembering where these things are in space it means that I can really easily do something like this now here all I've done was I've changed my perspective but the positions of these cubes didn't change at all and so this is kind of the what goes into creating 3D games and 3D Graphics we're going to Define meshes for these objects we're going to Define positions for those meshes in the world and then we're just going to say well I'm going to put my camera somewhere and figure out the angles that these things should be displayed at so there are a couple optimizations we can make to this so let's say that instead of that perspective I have something like this so right now the only thing in my view view is this 2D Cube cuz remember even though the scene is 3D I can only look at it when I look at it I kind of have a two-dimensional picture of the thing so that means that if I know I'm only looking at the blue cube it's kind of pointless for me to do two things one it's totally pointless for me to try to draw the Red Cube because I can't see it at all so this process is called clipping so we don't want to draw anything that we know we can't view the other thing that would be pointless would be to draw the back of this cube right looking at the front of it and there's no way I can see through it and kind of around it so there's no reason for me to draw those polygons either and so this process is called calling we want to say that if something is out of view it's obstructed by another object or I just can't see it from my perspective then there's no need to draw it you know your CPU is going to kind of waste time trying to draw it which isn't the best thing in the world so any questions on that really simple 3D Graphics primer okay just kind of a fun aside of you know how we can take these things in 2D and and blow them up into 3D so now let's talk about video so we've seen Graphics we've seen how we can represent still images we've seen how we can represent audio so now let's put the two things together into a video so a video now has two parts a codec and a container so you may have seen something like codecs if you've been Googling around for a file you you downloaded and you can't play or something like that but a codec is essentially a little program that's responsible for compressing and decompressing a video so with you know with audio we had like a 30 megabyte sound file and that was kind of the end of the world with a video we have huge files that are totally unrealistic uh to distribute you know something in the order of hundreds of gigabytes for just a one hour movie that's just not something that you could put on a DVD or a Blu-ray disc so it's really important that we can somehow compress this video and the role of the codec is to do exactly that so anyone happen to to know of any common video codecs different ways of encoding an encoding a video and compressing it down yeah soov is actually going to be a container just which we'll see in just a sec so codecs are a little bit uh less common but the most common one here is called h264 which again is just some standard that's kind of used by everything now but there do exist some other ones um that might be you might find on um videos online but h264 is a codec and it's basically a way of compressing a video so a container on the other hand is what's going to kind of package up a video so a video has an audio track it has a video track might also have something like a DVD menu or captions and the video container is exactly what it sounds like it's going to kind of capture all of that together so we just saw that uh one common container isov any other ones you might might have heard of so these are typically like video files so what what are some video files end in so VLC is actually a player uh for uh video files but they've also developed some codecs uh as well yeah so Avi is one so that's usually um more common on Windows and they put up by a company called DX um some other ones that you know we use ourselves MP4 um which is again just a container uh mov MKV webm these are all just different containers for videos so the idea of containers and codecs are separate so codec is what's used to actually take this big video and compress it and a container will contain that codec so each of these different containers has different support for different codecs in the real world you know h264 is just kind of this Universal standard now um but in addition to this video Codec you might also have an audio track associated with it you might have an audio codec and those are kind of the formats that we looked at before so the job of this container then is to kind of combine video and audio and subtitles into a file format that we can actually distribute and that isn't hundreds of gigabytes large so any questions on the vocabulary there codex versus containers yeah HD yeah so what determines if the video has HD audio and stuff so that would be something like the codec because or you know basically the resolution of the video which we'll see in just a sec um determines what the video looks like the container is just really using the data from the codec to give you something that I can watch so again we need to talk about compression so we can get those huge files into manageable ones so the compression happens by the codec so that means it's kind of the Codex decision how to compress the data but let's just look really quickly at kind of the the high level information here so let's look first at this bottom picture here so we have a scene uh divided into three frames so here we just kind of have a chair sitting there the chair doesn't move the ground doesn't move and then in the last frame here you know we just have some movement whatever that is over to the right side so the basic idea behind compressing this video is just like the idea we had when compressing images there's no need to store this redundant data right the chair isn't moving at all so why do we need to keep keep storing the information for the chair if it's staying the same so this top image here is what would actually be saved maybe inside of your video file so we there's no need to store any information over here because it's exactly the same as it was in the previous frame we only need to worry about kind of this new information that's coming in from the right and so this is just kind of a highlevel anal high level overview of what it means to compress a video so is this kind of technique make sense any question on what happened here yeah analogy example I'm not saying beit be just yeah so how are these things stored yeah it's exactly like that we're going to Define frames each of these frames could have like this Frame over here all the information or could have some of the information but effectively yeah we're going to need to represent some the still image in a frame in kind of exactly the same way there's also another standard called mjpeg which is motion jpeg which is basically saying that we're going to define a movie by kind of a series of jpeg images so that's exactly what happens we have these individual frames and we can compress these frames to get one big sequence or movie or one better necessarily yeah so so just like we had before we we can have both lossy and lossless compression so this one happens to be lossless because we're not losing any information we're just kind of not redundantly storing it but yeah so different codecs might choose lossy or a combination of losses and lossy you know at different points in the video um but we won't get too much into that um but yeah so that's up to the codec to decide how that's going to happen exactly okay so let's skip this because I want to talk about something awesome so really quickly uh the resolution of a video then is just like the resolution of an image it's going to Define how much information is actually in the video so what are some common video resolutions may you may have seen these actually in the little drop down on the lectur page if you ever watch a lecture online there are some resolutions there in that drop down menu do anyone remember any yeah 720p any other ones yeah so 1080ps that's like super high def so there's also 480p which is is lower and basically the idea of video resolution is exactly the same this is going to be how many pixels or or called scan lines now in a video how many pixels wide and tall is the video so that means that with my HD video there there's a lot more detail because I have more room to capture information it also means that there's going to be a larger file so if you want to watch a lecture in a lower quality you can kind of click on 48p you notice that it's you know not as high quality but it's going to download a lot faster uh because it's such a smaller file whereas if you go to 1080p you'll get much more detail but it might take you a little longer to actually get uh to download the file so if you want to slow internet connection you might see that buffering message every so often so the aspect ratio then is related to the resolution do anyone know the aspect ratio what that means kind of what it sounds like yeah exactly so it's the ratio of width to height so a really common widescreen aspect ratio is 16 by9 so when we say 1080P and 720p and we're looking at um those resolutions the aspect ratio for all of those is 16 by9 so that means even though we just say 1080p because we know the aspect ratio we can say okay well that means that if I have a height of 1080 that means my width must be 1920 because that's the number I need in order to get that aspect ratio so that's why we can get away by just saying 1080p that 1080 is just the height then we can infer what the width is because we're just using the same aspect ratio for everything so another common aspect ratio is 4x3 and that's kind of for lower resolutions or or smaller screen sizes back in the day so uh something we don't do on the lectures page but something that you know YouTube or Hulu or Netflix does do is this thing called adaptive bit rate streaming and all this says is that it's going to rather than asking you to pick 1080 or 480 it's going to say okay I'm just going to pick it for you based on your internet connection so if you have a fast connection you have no problem downloading the 1080p version I'm going to give it to you but if you're on kind of a slower internet connection if you have the choice between a high quality movie and a movie you're probably going to pick the one that you can actually watch and so Netflix can you know dynamically on the Fly change you from a 1080p version to a 480p version if it notices you're buffering or that you can't keep up keep up with the downloads so that's just a cool technology and that's that's kind of what that means uh so something that's really awesome are these things called gpus so we talked a little bit uh about the graphicss about the graphics card in your computer back when we talked about motherboards but we didn't really say you know what that did other than it draws stuff so one component of your video card is this thing called the GPU or Graphics Processing Unit the graphics processing unit is be uh is a really really powerful piece of Hardware that you know just kind of right now we're starting to really take advantage of so the idea behind a GPU is that rather than you know performing one computation we're going to start using par parallelism when I say parallelism I don't mean that we're going to have four people counting candy at once I mean we're going to have 10,000 people counting candy at once and this becomes really really powerful in a lot of Graphics applications right because if your screen has a bunch of pixels we need to figure out what's at each of these pixels if we figure out 10,000 of those pixels at once that's great and it's also totally workable because a pixel over here doesn't depend on a pixel over here right these are all totally independent problems and so this is what your GPU actually does it can run all of these computations at the same time and we mean a lot of computations at the same time so this is what a GPU looks like and it looks like super badass because it is has its own fin it's got its own everything it's so cool um so here is uh by far the best explanation of a GPU that I've seen so this is by The MythBusters uh at some conference for NVIDIA which is just a manufacturer uh for gpus and unfortunately they don't as MythBusters tend to do they don't really explain what they're doing they just kind of blow stuff up so it's happening here is we're going to illustrate two things they're going to have a painting and the first thing you're going to do is you're going to paint something with the CPU so kind of doing one thing at a time and then they're going to create a painting with a GPU where rather than having one process at a time they're going to do a whole bunch of stuff all at once but each of those individual stuffs is going to be really small and it's also going to be totally independent of all the other things so here we go Le I You Leon and he's going to paint the picture for you guys in the way that a CPU might do it as a series of discreet actions performed sequentially one after the other in three two one uh let me speed it up ladies and gentlemen Leonardo 10.0 when we hit this trigger on this thing 2100 gallons of air goes through these accumulators out these valves into all 1,100 of these tubes into these tubes with in which the bottom of is a paintball each of those paintballs will fly across 7 ft of space and in 80 milliseconds reach its Target hopefully when it's all said and done it's going to paint the Mona Lisa GPU painting demonstration Y in 109 9 8 7 6 5 4 3 2 1 ladies and gentlemen science class is now over thank you so that's the basic idea behind a GPU a big huge paintball gun with a bunch of cylinders so what we just did there is we had this we took this one small thing what color is this pixel we solved a bunch of those problems all at once so the result is these really huge performance gains so you know if something on your CPU looks like this you know it's super jittery and super boring if you do the same exact thing on the GPU it starts being screaming fast and so this is just a really really cool uh piece of Hardware that we're starting to use now for not just Graphics but you know scientific Computing and these other really hard problems so before we go uh one more super cool algorithm everything we do now is super cool so we saw before that if we wanted to take this raster graphic we wanted to make it bigger kind of our solution was to okay let's like vector graphic or something like that or just deal with the lower resolution so now let's take the opposite problem let's say we have this really really big image here and we want to make it smaller so by the way does anyone recognize what this is from automatic a if you do you gotta tell me you can't I can't just believe you yeah so this is this is from Wind Waker it's just an awesome video game okay so let's say we have this huge image it's kind of a widescreen image and we want to cut it down so if we just you know go into Photoshop and hit scale we're going to get something that looks like this and fcy this looks a little stupid right everything is deformed you know character here is really skinny this thing over here is not the right shape and that you know that didn't really work out so well but let's let's be a little smart about this over to the left of this image here there's a lot of nothing right there's really nothing over here that is important to the scene like we have this little island over here but between you know link over here and the island over here there's just a lot of empty space so rather than kind of scaling everything universally let's just cut out that empty space to get a smaller image so we have a nice program here that will do just that so here's my image and the way that I'm going to figure out what parts I can crop out without kind of damaging the point of the whole image is I'm going to compute a value for each of these pixels and I'm going to call this my energy and a pixel's energy is basically how different it is from the pixels around it so if we zoom in a little bit let's say on this Shield so we can see here that you know with this reflection and the little graphic that each of these pixels is pretty different than all the ones around it so there's kind of a lot of energy going on here there's a lot of stuff that's changing so this is probably pretty important to the image if there's a lot of stuff going on if on the other hand we come over here you know we just look at this blotch of ocean every pixel is just kind of the same so there's really not a whole lot going on inside of this this part of the picture so here's what the energy uh for this looks like what so it's super cool so here all of the white areas are areas with really high energy so you can see here there's a lot going on over here with this Tower there's a lot going on here but over here we see there's really not that much going on just kind of this black area so that means that we can cut it out so if we come back to our original image I'm going to come down here to the bottom right and rather than you know width of 960 I'm going to say I want a width of 800 and I click on resize we get something that's much much nicer so notice how you know the character now is the same width as he was before but if you kind of compare them side by side suddenly these two clouds these two clouds here are a lot closer together that's because we effectively cut out that part of the image rather than just scaling everything uniformly so when we compare them side by side we've basically gone from something like this to something like this notice there's a really big difference in the quality of these two images even though they're exactly the same size so we can try another one so here is perhaps a more identifiable video game so this is the first level of Mario and again we want to scale this and if we just kind of you know push the two sides closer together suddenly Mario is going to get a lot smist and it's just going to look silly but there's really nothing going on in here so we can just cut it out so if I change this 900 to 800 click on resize you know we get a pretty nice result we ended up cutting some stuff over here and we cut some stuff over here but this is just much nicer that kind of uniformly smooshing the image together and so this this technique for rescaling images uh is called seam carving it's also available um in like Photoshop and [ __ ] or you know we can this program here is free available to download um so you might also see it as called content aware scaling because it's kind of aware of what content at scaling rather than just kind of smooshing everything universally and so I thought this was just a really really cool graphics application to see that we can get you know from this wide image to this much smaller one you know by being kind of smart about how we compress it so this also works by the way to expand the image so if I rather than making it 960 I want to make it something like 1060 and I hit resize notice here we just kind of added some ocean and we added some of this cloud cover and actually that you know that looks pretty good it doesn't look like we really manipulated anything all too much all we did there is we kind of were smart about rather than removing pixels we were smart about duplicating pixels so it's kind of hard to see the seam that you where we duplicated along but now this image is even wider than it was before so one last one to end on uh to show this also works vertically anyone identify that Star Fox my all-time favorite so now rather than saying you know we want a smaller width notice here we have a whole lot of literally nothing because we're in outer space going on at the bottom there so if we change 450 to something like 300 we click prise all of the r Wings in the great Fox retain the original shape we just kind of cut out the bottom there because we were smart about how we were rescaling the image so this is just a a technique that I think is really really cool uh and totally random something we can do once we have this representation of multimedia so any questions on that all right so to end this problem set is going to ask you uh to create some multimedia of your own basically you know anything you want something about I survived E1 or something about cse1 some meme or something you enjoyed and we can take that graphic that you make and we can put it on whatever we want we can put it on a t-shirt you can put it on a mug you can put it on a dog with the towel or whatever and so basically once you submit uh your graphic you'll actually be able to buy your graphic or your classmates's graphics you can have a little souvenir uh from the course so that's something to look forward to in problem set five uh if you haven't used anything like Photoshop or [ __ ] before uh definitely start off with these section videos they're a great place to start and the problem stuff itself will also have some cool tutorials to get you started and if not if there are any questions I will hang around after lecture but if not then good luck creating your awesome custom stationary
Up Next

14:47
Automated Web Scraping with AI: Make.com and OpenAI
@Jake.Dawson
20.7K views•2024-11-19

87:26
Introduction to Secure Multiparty Computation with Yehuda Lindell
@fhe_org
7.7K views•2021-02-04

4:55
HTTP Requests Explained: GET, POST, PUT, DELETE
@codecademy
103.1K views•2021-10-07

19:25
Enigma Machine Mechanics: WWII Encryption Explained
@JaredOwen
13.2M views•2021-12-11
Related Study Plans & Knowledge Roadmaps
Structured learning paths in Computer Science
computer-science
Container Runtimes: Namespaces, Cgroups & Go
01Linux Systems & Go Programming Foundations
02The Core of Isolation: Chroot and Filesystems
03Linux Namespaces: Process Isolation
+ 3 more learning modules
32h6 modules
Explore Roadmap
computer-science
Building a CHIP-8 Emulator: Rust & CPU Basics
01Computer Architecture Foundations (Bits & Bytes)
02Rust Programming for Systems Development
03CHIP-8 Virtual Hardware Specifications
+ 2 more learning modules
32h5 modules
Explore Roadmap
computer-science
Building BitTorrent: Go, P2P & Concurrency
01Go Fundamentals & Concurrency
02Networking Foundations & P2P Architecture
03Bencode Parsing & Torrent Metadata
+ 3 more learning modules
26h6 modules
Explore Roadmap
computer-science
Actor Models (C++ Concurrency & Lock-Free)
01C++ Multi-Threading Foundations
02Thread Pools and Task Scheduling
03Atomics and Lock-Free Queue Design
+ 3 more learning modules
45h6 modules
Explore Roadmap